It is impossible to imagine a vegetable garden, a backyard or a summer cottage without beds, but for all that, the beds themselves must meet certain requirements, otherwise they will not be able to fulfill their intended purpose effectively and fully.
In particular, it should be noted: the beds themselves should not crumble, maintain their shape and fertilized soil, and also not allow water to drain when watering.

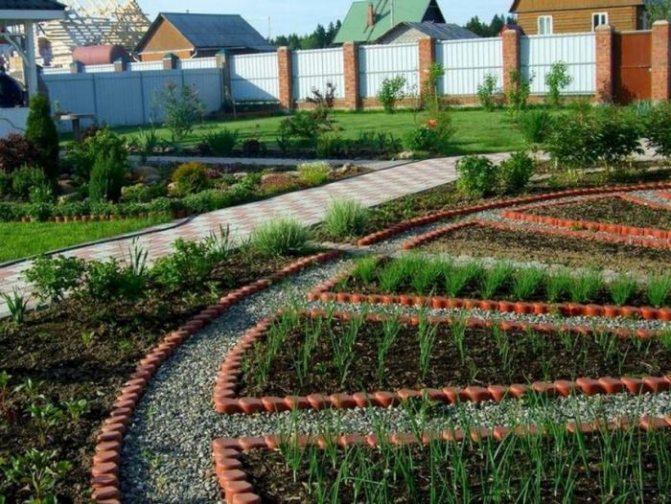
In addition, the perimeter of the garden bed should be clearly marked - this will allow you to effectively and competently divide the area of the entire site. It must be remembered that it is the fence of the beds that is a kind of obstacle for weeds and grass.
The fence is necessary to create artificial heating of the soil through the use of a layer of biofuel, and also allows you to easily strengthen the film to protect against hypothermia when growing especially heat-loving plants.
When browsing specialized sites or leafing through gardening magazines, pay attention to the photo of garden fences: the difference in their design and the materials used for the manufacture can cause many questions for beginners in gardening.
Let's try, in the most general form, to understand some aspects and nuances of this, at first glance, a fairly simple question.
Basic requirements for garden beds
First of all, we will determine the basic requirements for fences for the garden, which must include:
- The fence should not be too high, as a rule, no more than 30 cm. If the height is higher, the fence will shade the plants on the beds, but it should not be made less than 10 cm. It is also not recommended - the curb should hold the soil and the border of the bed;
- The fence must be sufficiently strong and dense, i.e., withstand the effects of rain, wind and restrain the penetration of weeds and grass into the garden;
- Have a neat appearance, meet certain aesthetic requirements.
It is important that the garden bed fence should harmoniously fit into the overall landscape design, and in some cases - emphasize the chosen stylistic direction.
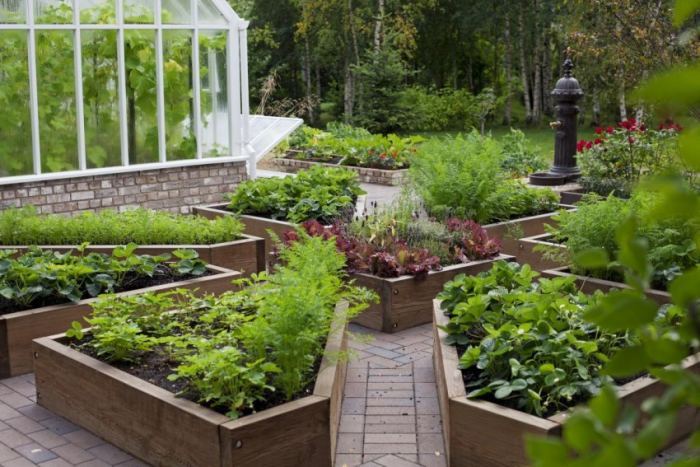
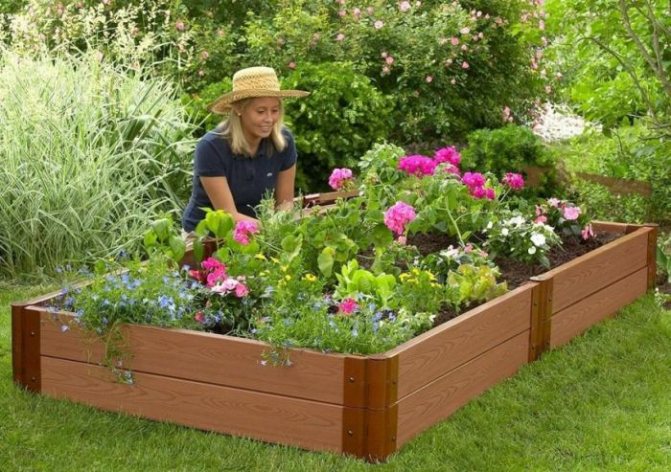
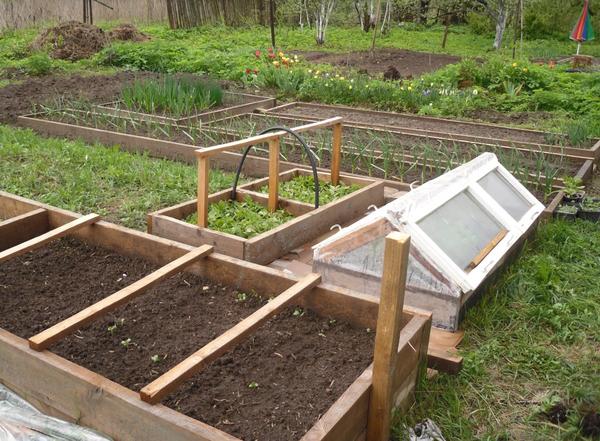
DIY border for wooden beds
This is also a very accessible and inexpensive material, it is not difficult to mount it. Watch the master class, which describes in detail how to make a fence for wooden beds, step by step photos are given.
Mow the grass in the selected area. Mark the future bed with pegs and ropes or sand.

To make such borders for the beds, take:
- wooden bars;
- boards;
- carton boxes;
- metal mesh with fine meshes;
- furniture stapler.
Drive pegs with grooves into the ground from four corners, which you can buy or make yourself. Planks are inserted here. The higher the bed is, the more they are needed. In this case, two on each side are used.
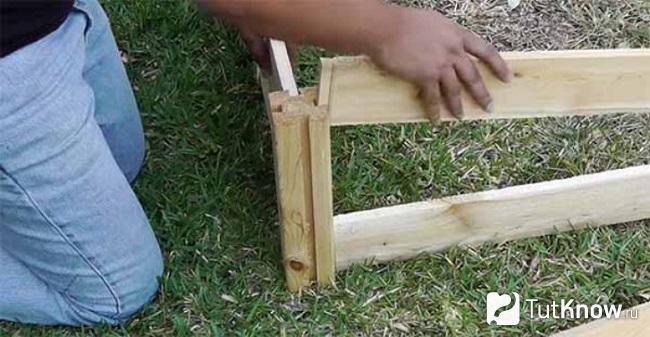
There are 4 recesses in such bars. Therefore, it is easy to lengthen or expand the structure, put additional boards on the side or behind.
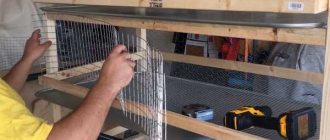
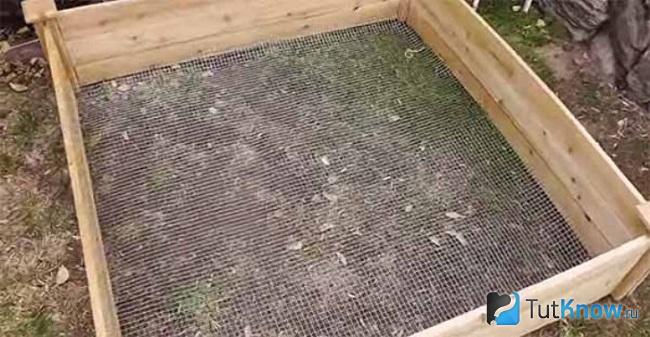
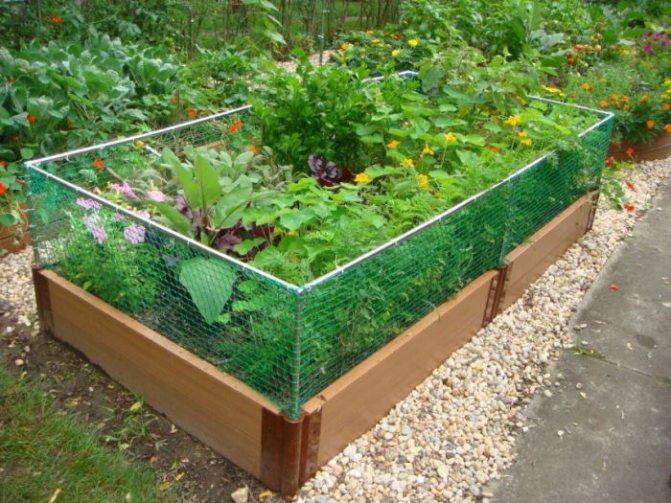
Similar boxes without a bottom.If rodents are bothering the crop, lay down a metal mesh with fine meshes. It is advisable to slightly raise its edges up to the sides, fix it here.
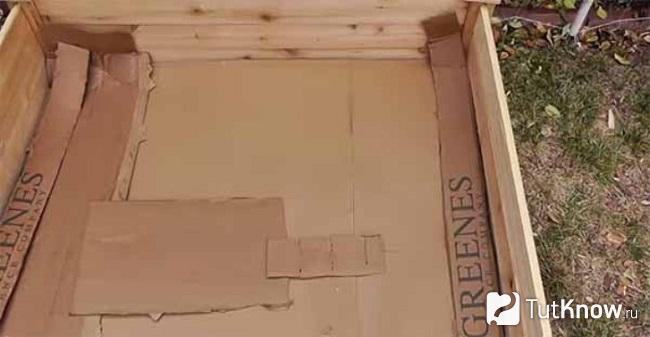
If you then pour fertile soil into the box-bed, you do not want it to mix with the existing one, then lay a dense cardboard box disassembled on the bottom. Such a device will also help protect plants from weeds, and excess water will flow out through the pores of the paper. To prevent the cardboard bottom from moving, secure it with a stapler.
Pour inside light soil mixed with compost or humus. You can immediately add some mineral fertilizers. It is necessary to shed the soil so that it sits down, only then plant greens, carrots or other vegetables.
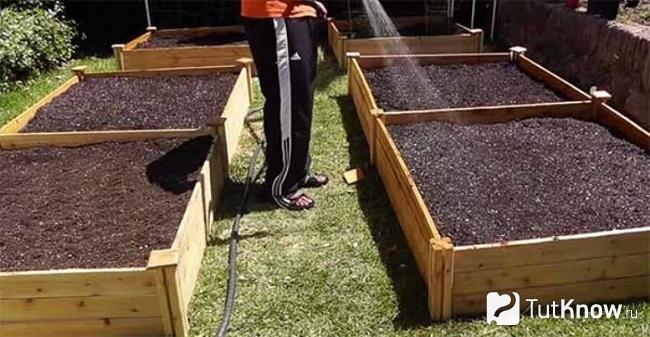
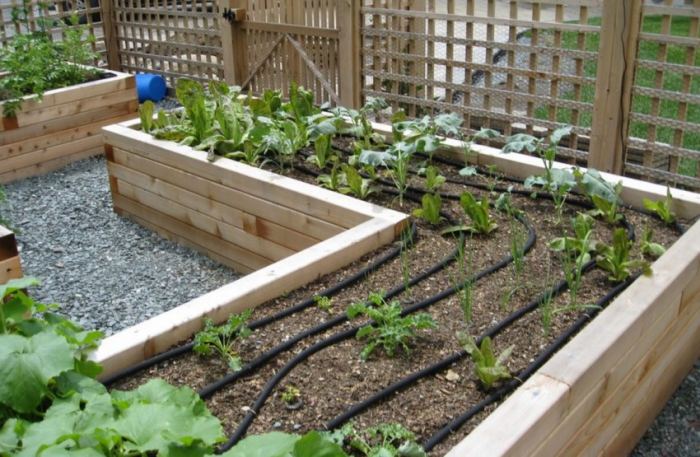
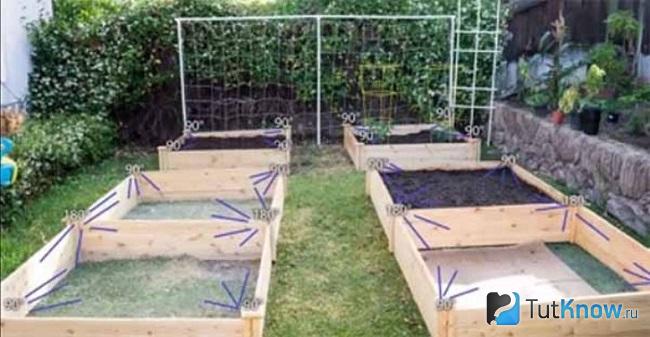
Take a look at the irrigation systems offered for such tall beds. As you can see, along the contour of the curbs, you need to fix the hose and irrigation nozzles, at angles of 180, 90 °.
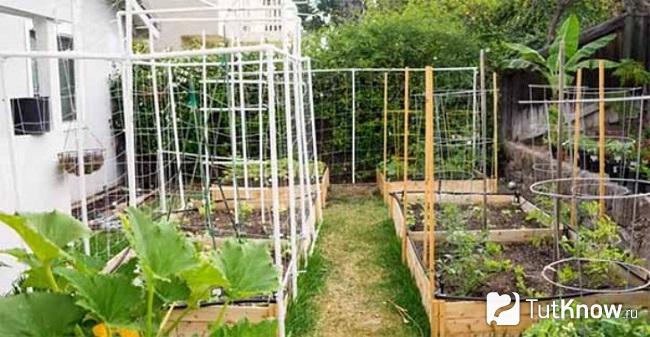
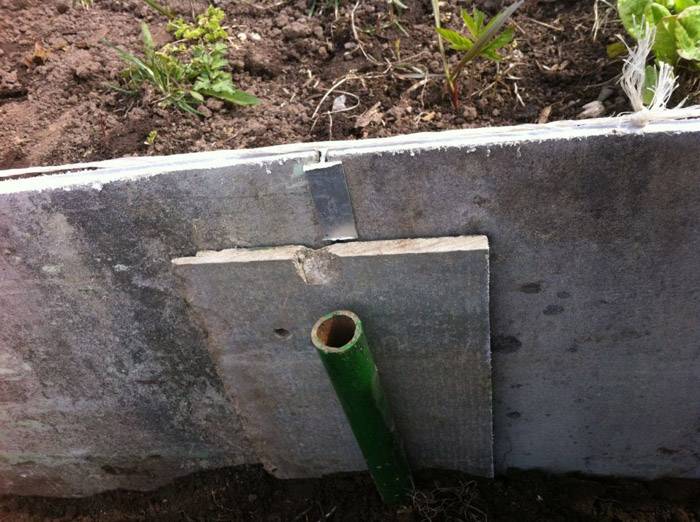
If you plan to plant cucumbers, beans, and other climbing plants here, then you need to install a trellis. Since the ground in such high beds is loose, the space is limited by metal mesh, cardboard, so PVC pipes must be fixed beyond the border of the curbs.
For you 3 useful tips on this topic:
- Use deciduous rather than coniferous trees to keep your vegetables organic. The latter can release resin, which can adversely affect the soil composition.
- Before treating fresh wood with paint or a protective agent for such material, make sure that the solution does not contain harmful substances.
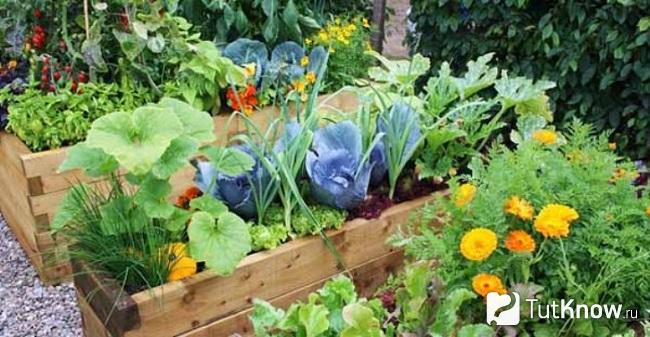
- Since the soil here dries up quickly, the density of planting on such high beds is twice that on ordinary ones. So the plants shade the soil, do not allow moisture to evaporate much. In such a close neighborhood, they are better at fighting weeds, and this is only on hand for gardeners - the harvest will be 2 times more.
Explore how different plants like or dislike the neighborhood of others. This table shows in green which crops grow well with each other, in red those that are not recommended to be planted next to each other.

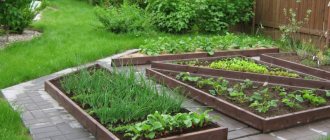
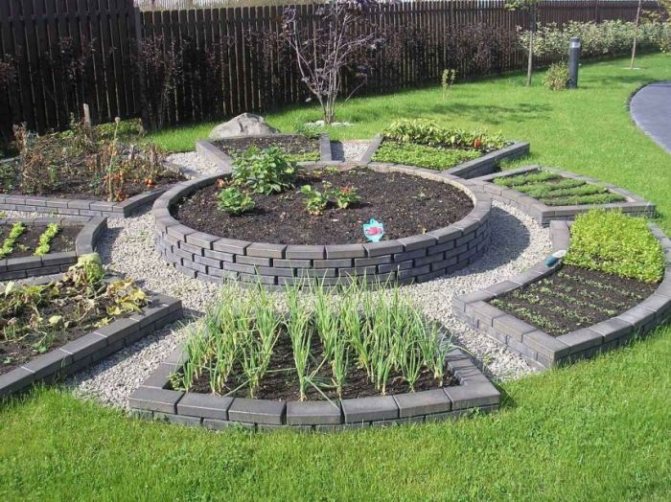
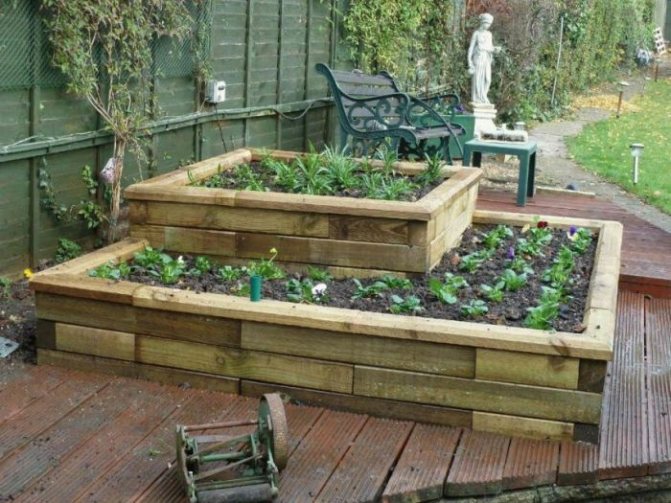
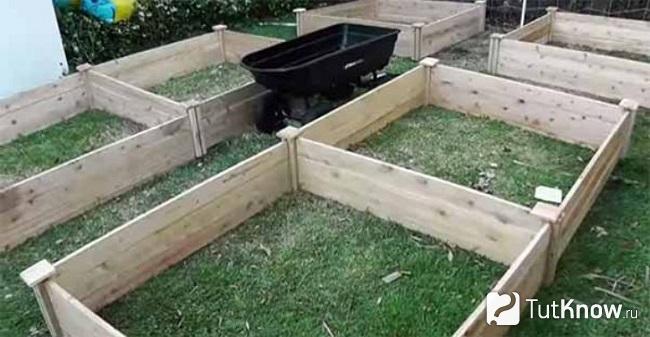
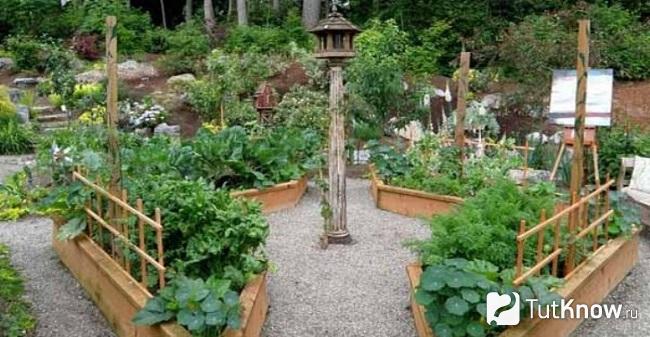
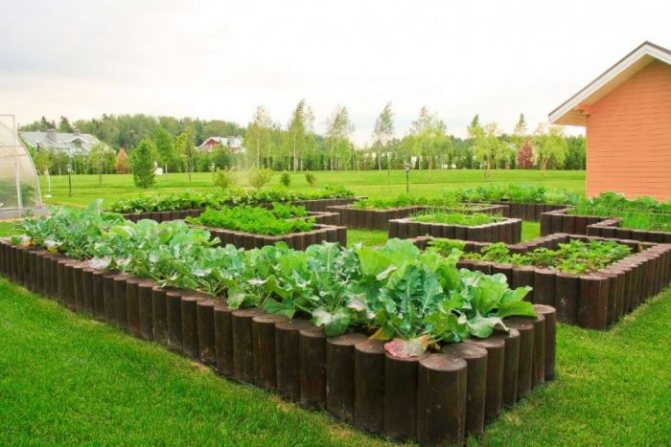
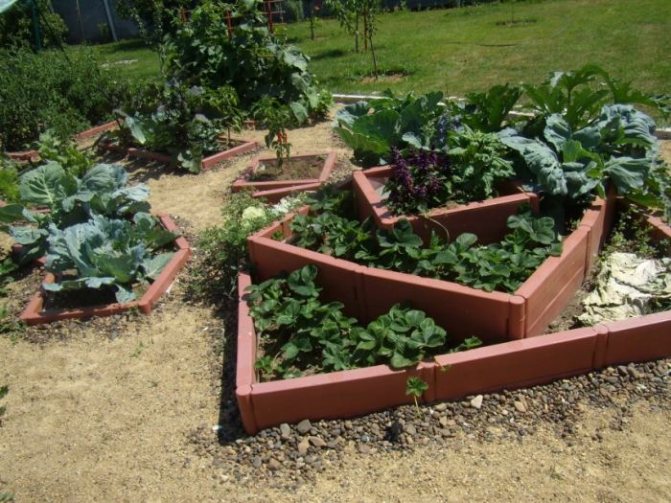
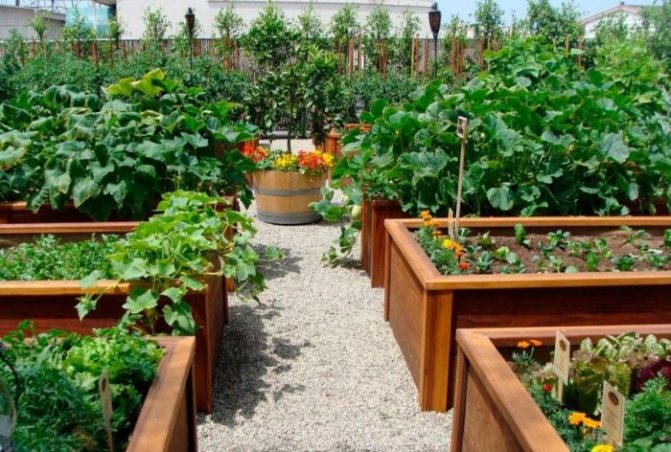
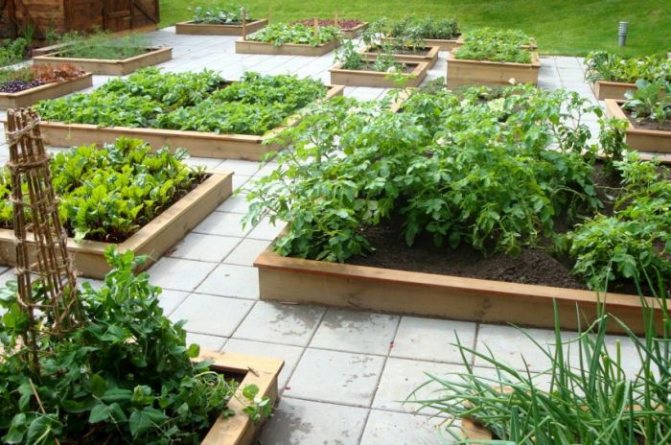
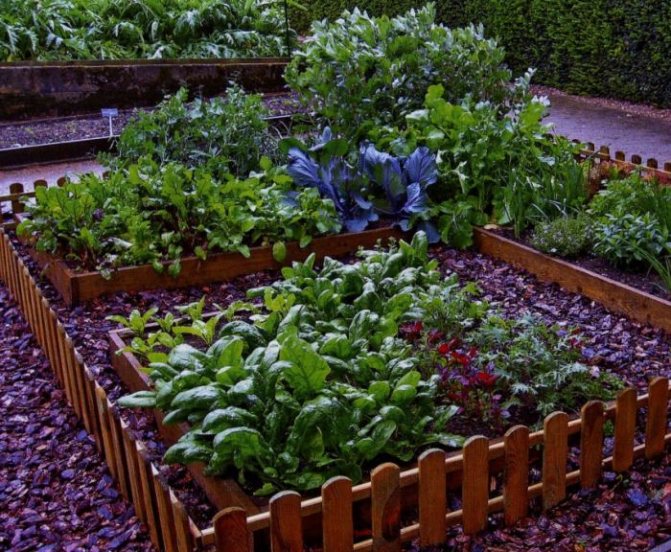
You can arrange wooden borders for the garden in a ring, make wide paths inside this structure so that it is convenient to walk here and take care of the plants. For curly ones - the supports are also made of wood. If you put a lantern in the center, you will achieve an interesting effect, moreover, it will light up this part of the cottage in the evenings, and you can pick vegetables that grow here, even in the dark.
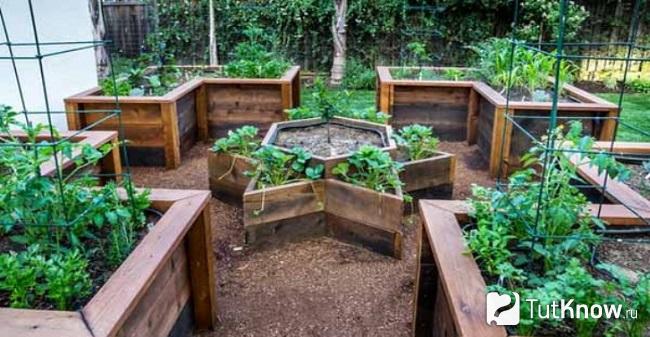
In the center, you can place rectangular beds, and in the middle you can make one in the shape of a five-pointed star. For each corner, you need to saw off two identical boards at an angle, fasten them with self-tapping screws. If this is a tall bed, then place two such blanks one on top of the other.
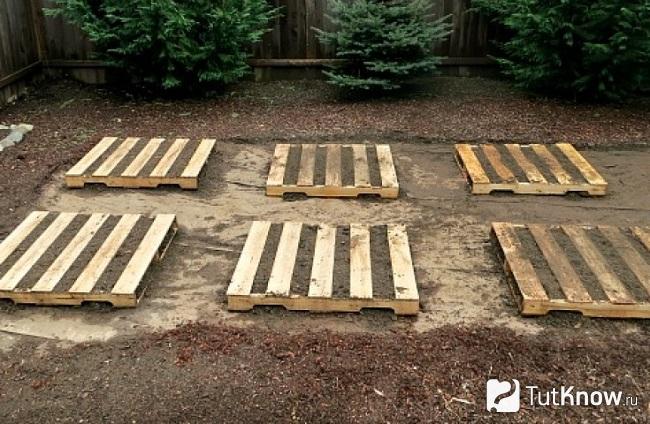
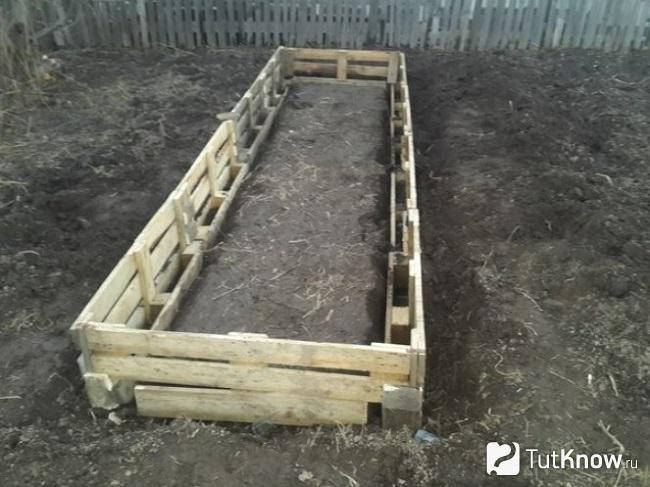
You can also make beds from pallets of different shapes. The simplest construction of this type is made by putting such a pallet on an excavated area, sowing plants between two adjacent boards.
You can cut one pallet in half, making large sides of the box out of these parts, and making small ones from the second pallet. It will turn out to be such a wonderful bed.
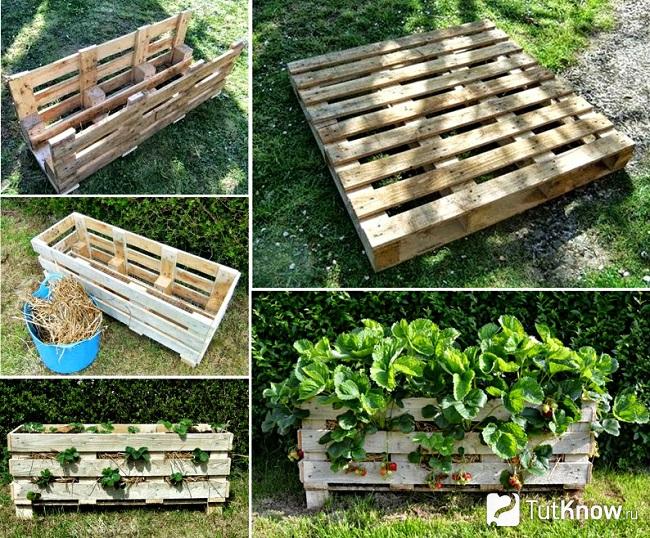
If you have multiple pallets, then you can make a long railing.
Solid beds are built from lining from bars. If you fill the boards on top, then you can go here while caring for the plants.
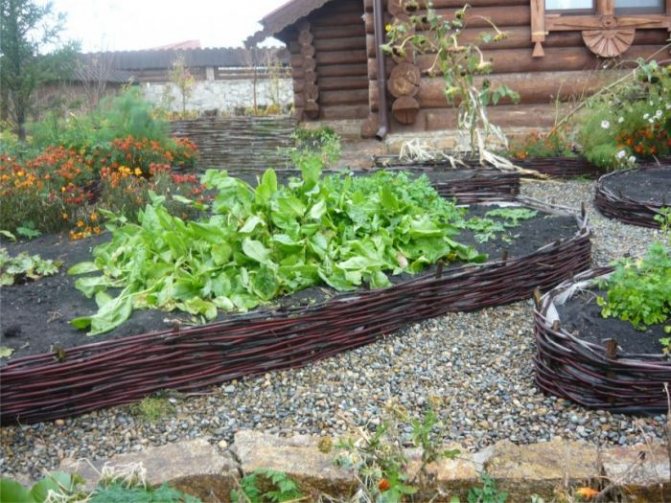
Vine fences also look great. This environmentally friendly material will not harm plantings.
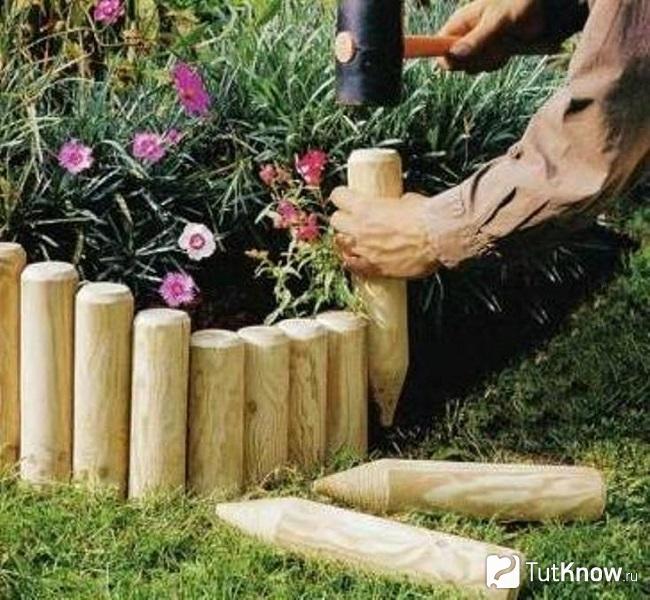
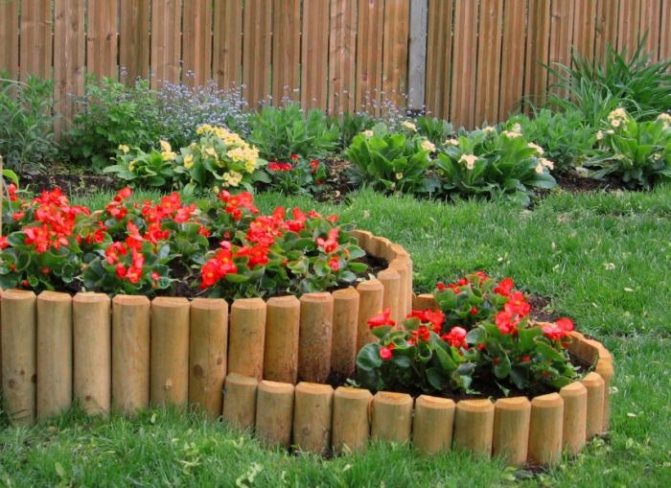
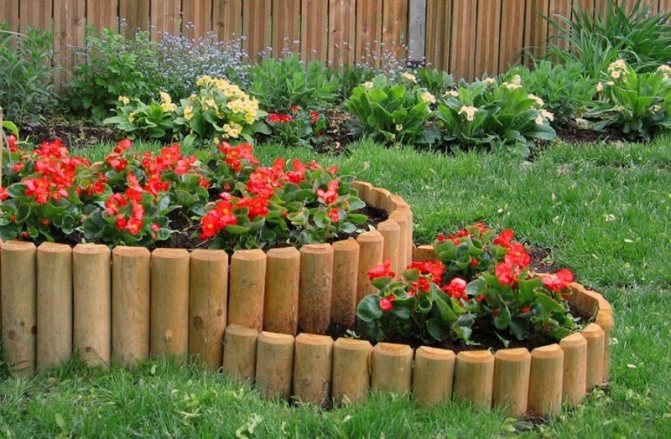
If you have rounded bars or old shovel cuttings, cut them into pieces of different or equal lengths, sharpen on one side, sand, cover with an antiseptic. Using a rubber mallet, hammer them into the dug-up ground, right around the perimeter of the garden bed or flower bed.

The choice of material for the fence
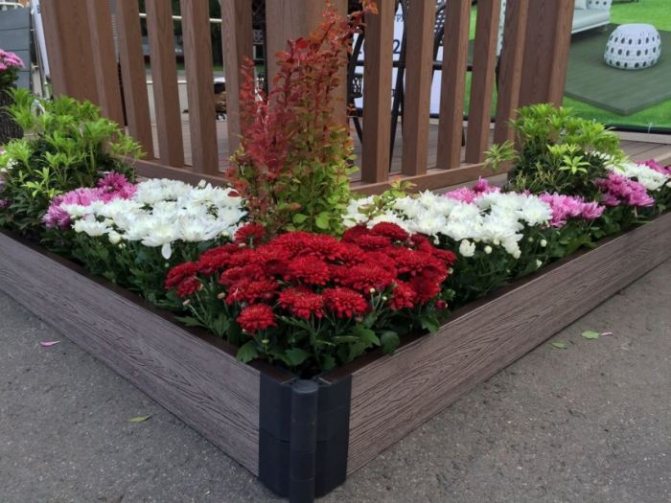
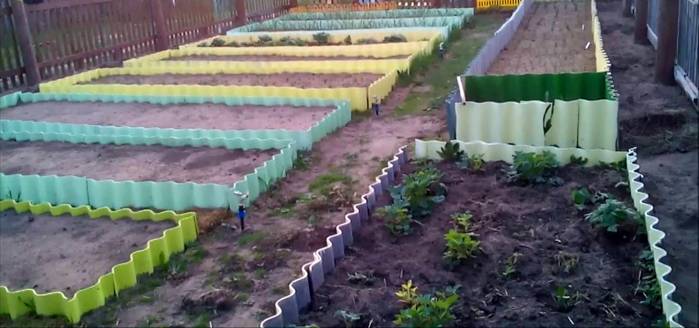
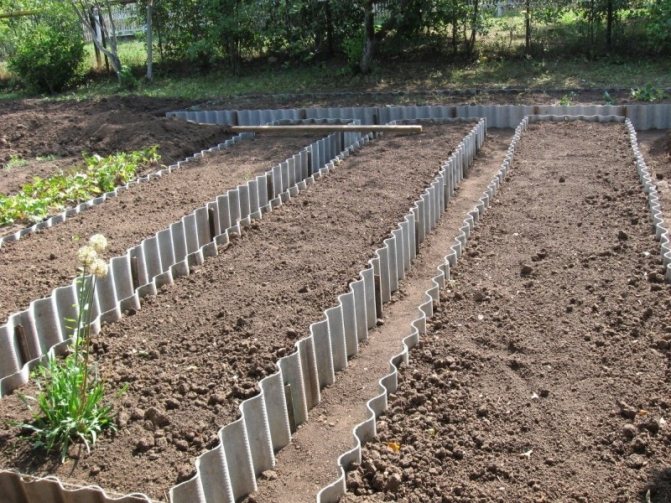
The border itself can be made of various materials: stone, wood, iron, etc. Recently, plastic fences for garden beds are gaining popularity among gardeners.

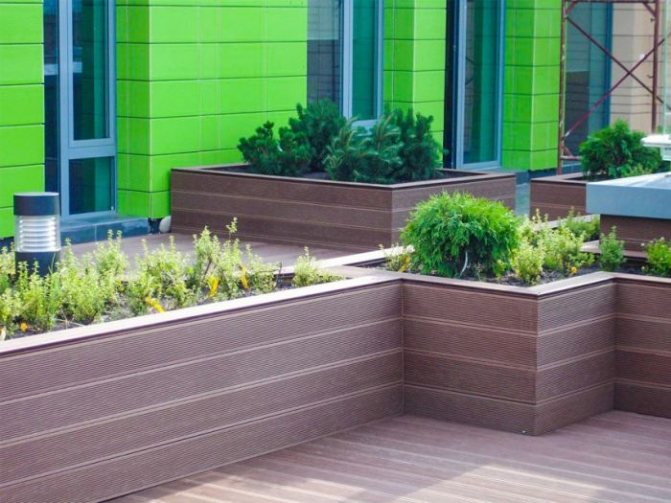
The main advantages of plastic as a material is that it allows you to create a perimeter of complex shapes: polygons, curved, rounded, etc. Among other things, multi-level beds are often made of plastic.
It is important that the plastic withstands temperature changes well, the effect of moisture, but in some cases its strength is not enough.


In general, when choosing a material, it is necessary to take into account the specific conditions of the landscape of the site, the shape of the garden bed, its height and many other factors.
Old furniture
If you are smart, you can use old furniture to create fences. Chair backs, headboards, tabletops and cabinet doors will all be great materials for creating upstands. Most importantly, such items are most often stored idle in every home, and therefore their use will be an excellent way to save the family budget.
Fences bring undeniable benefits. Thanks to them, the available area for weeds is reduced, and therefore the amount of weeding is also reduced. Also, the beds do not crumble, which is especially important for loose soils.
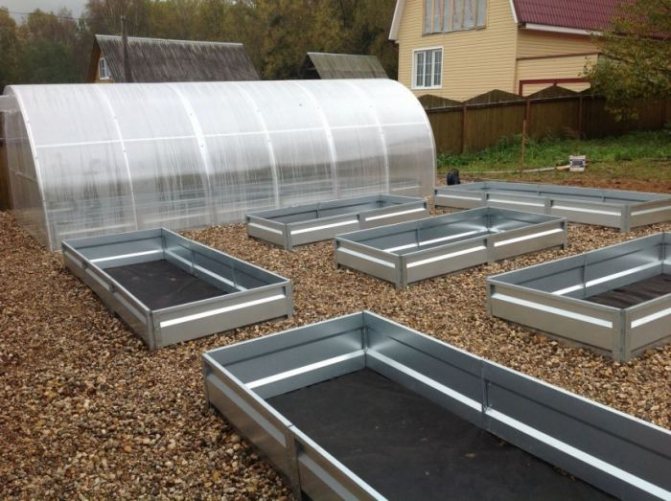
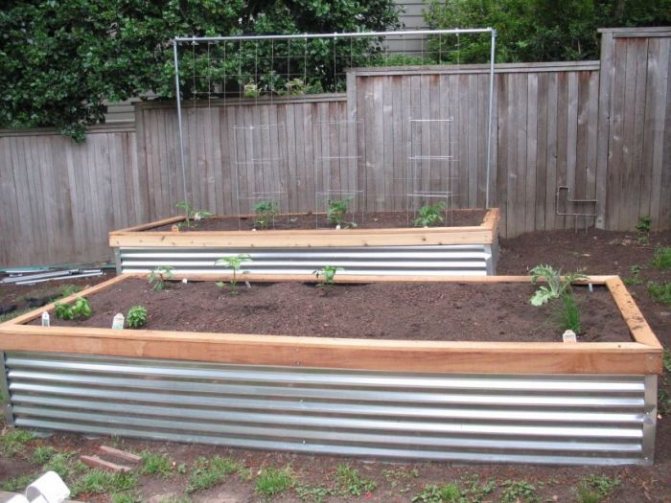
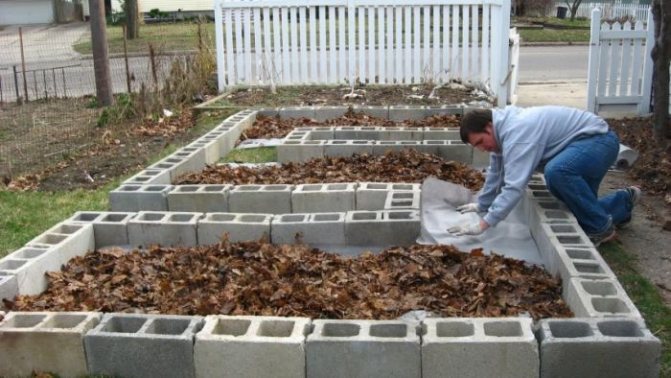
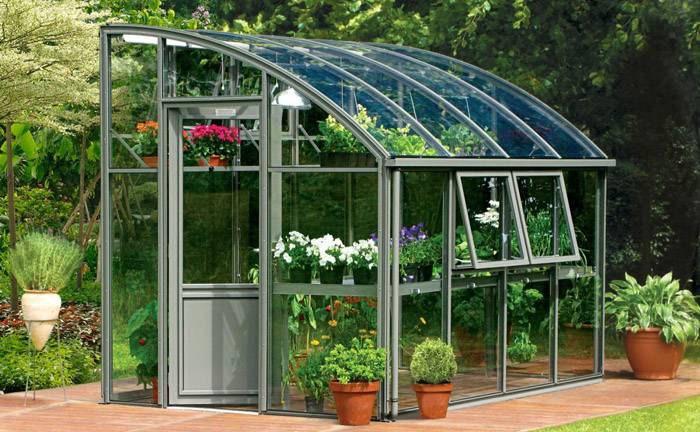
Fencing of high beds
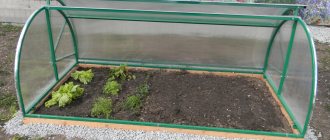
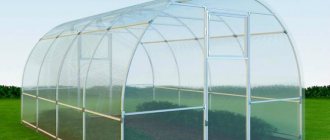
If it is required to make a sufficiently high fence, for example, in the case of a greenhouse, etc., metal is often used as a material.
Galvanized metal fences are durable, easy to assemble and have a number of specific advantages. With all its advantages, steel curbs have a high cost, and in some cases are not suitable due to the fact that on sunny days they can heat up to very high temperatures, and this can lead to a thermal "burn" of plants in the garden.
How to properly install the border tape for the beds
Installing the curb tape is easy. You will need a flat cutter or a crescent shovel. In the absence of such, you can get by with the usual.
Rigid dividing structures are driven into the ground. To do this, you need a rubber mallet, a tape measure and a building level, if you need installation in the horizon.
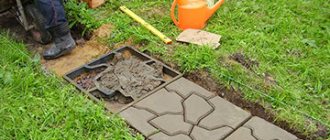
Step-by-step work with soft polymer tape:
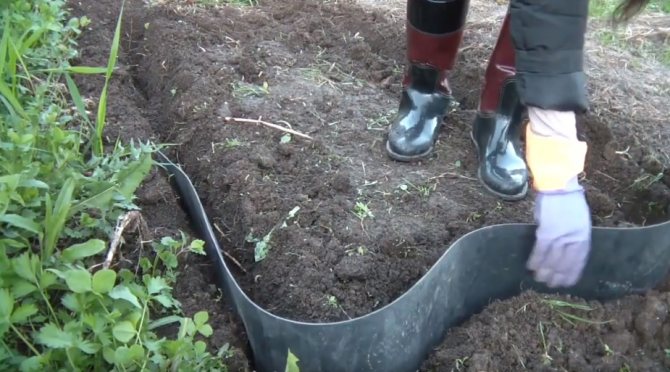
- The first step is to mark the contour of the flower bed. For this, any bulk material is used, for example, river sand.
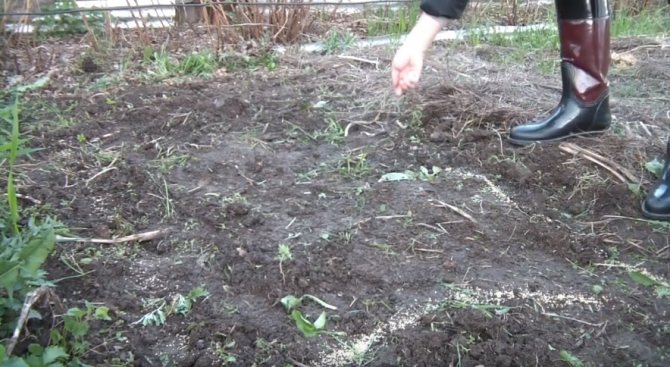
For marking, the summer resident uses old millet - Using a flat cutter, they dig a trench of the required depth along the entire perimeter. You will have to deepen the tape, focusing on its width. In any case, it is recessed to a depth of at least 5 cm, but better by all 10.
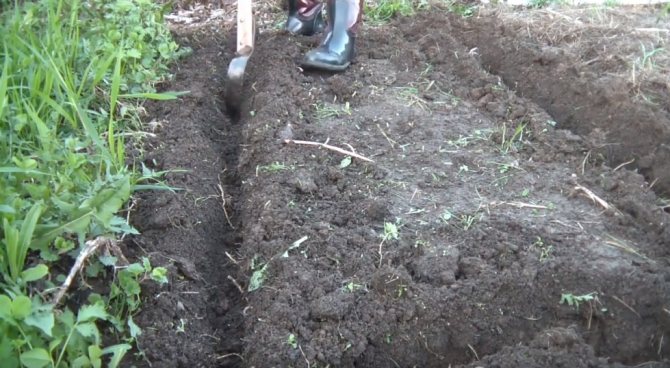
Digging a trench with a flat cutter - Laying the curb tape. In this case, a flexible polymer version is used. It simply unwinds as it dives into the trench. When looping the product, it must be cut off. Suitable with a sharp knife - the material is cut easily.
Installation of border tape for flower beds - The tape is sprinkled and compacted with earth on both sides. This can be done with your hands or with any convenient tool.
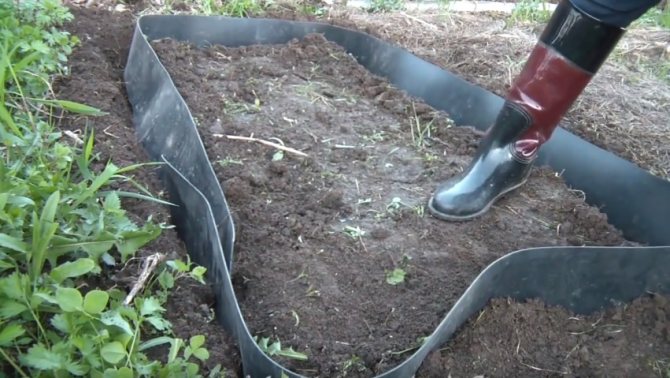
Sprinkling the tape with soil
Wooden fences
Very often, ordinary wood is used as the material for the borders. For example, using small stumps or creating short wicker fences can be a great idea.
The traditional solution is to use ordinary boards, but such a border for the beds will be short-lived, but it is easy to install and can be repaired, as well as dismantled.
Garden fountains for a summer residence - advice on selection and use in the design of a garden and a plot. 135 photos of the best options for placing modern fountains
DIY decorative flower beds: 165 photos of beautiful design ideas and rules for decorating a garden and a local area
Garden decor - 190 photos of the best DIY options. Basic rules of landscape design and an overview of fresh ideas from leading designers
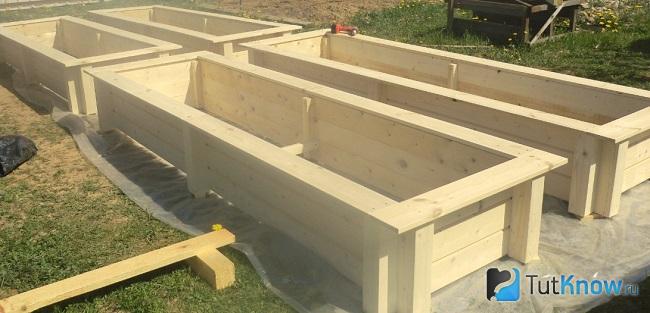
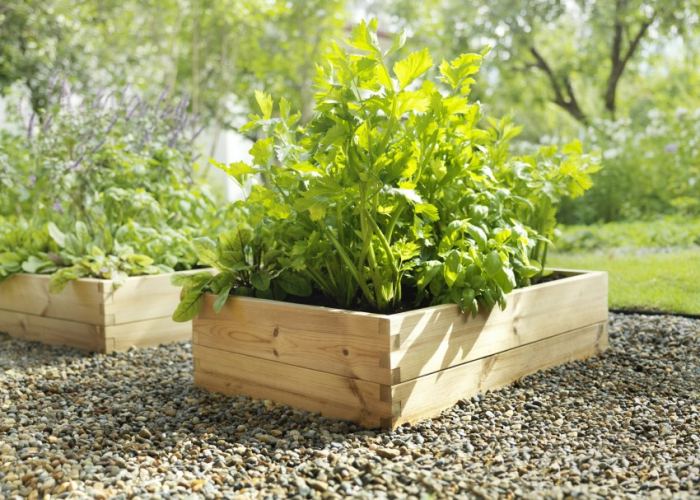
Wooden planks or slats
Wood is the most environmentally friendly material for decorating garden beds. You can use boards, slats, picket fence, timber and even wooden pallets - all this is exclusively a matter of the desire and financial capabilities of the owner of the garden. Wooden fences look beautiful and neat, you just have to additionally fix the component parts in the corners for greater strength, and install supports outside so that the walls do not bend under the pressure of the soil. A wood impregnation agent will help to increase the service life of wooden fences, preventing it from rotting when it comes into contact with the soil.
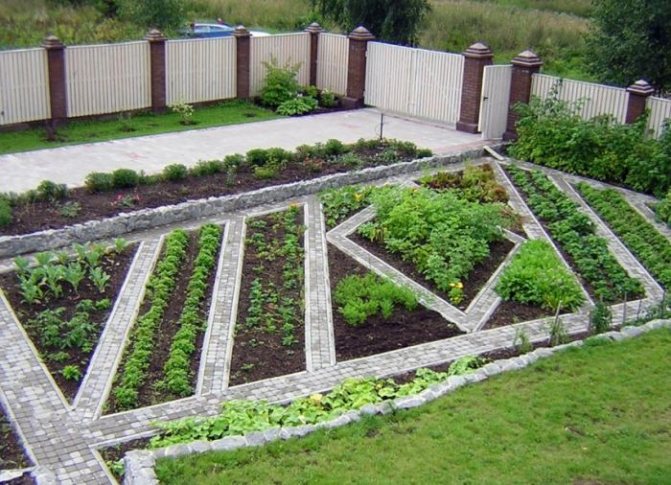
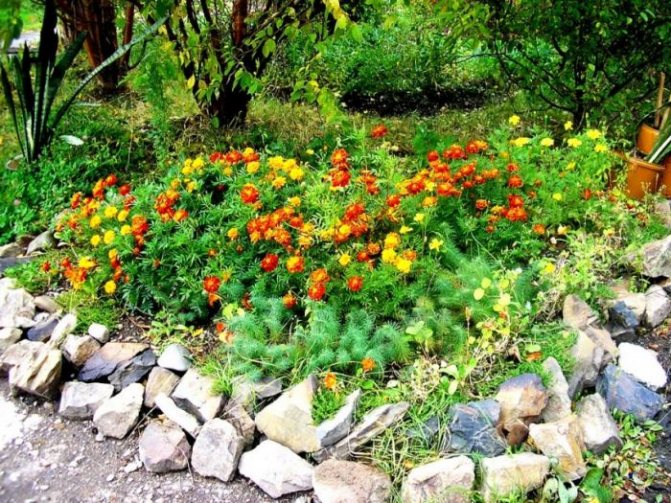
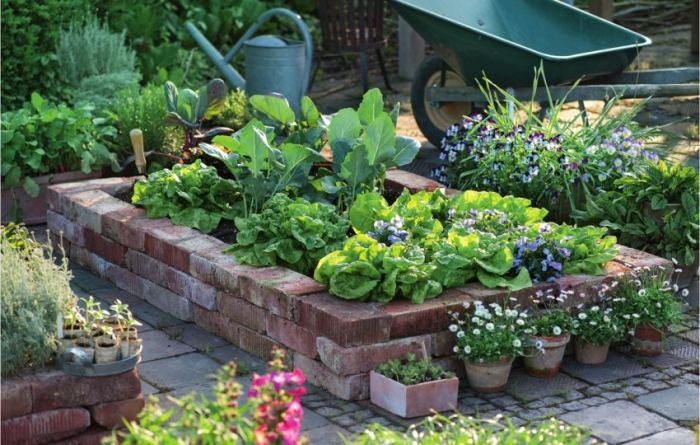
Stone curbs
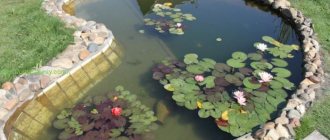
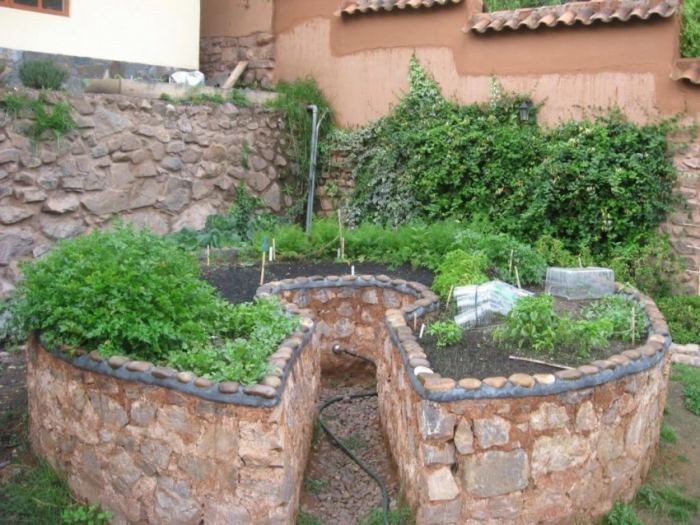
Stone borders for beds are rarely used, however, it is when using stone that you can create truly artistic fences that will serve for many years and not lose their attractiveness.
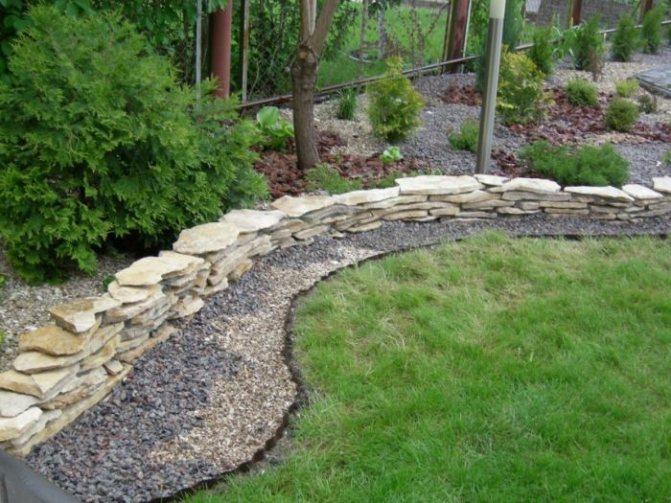
It is with the help of a stone that you can make the border not only truly beautiful, but in many ways predetermine, emphasize the main stylistic idea of the selected landscape design of the entire site. The main disadvantage is the complexity and laboriousness of manufacturing.
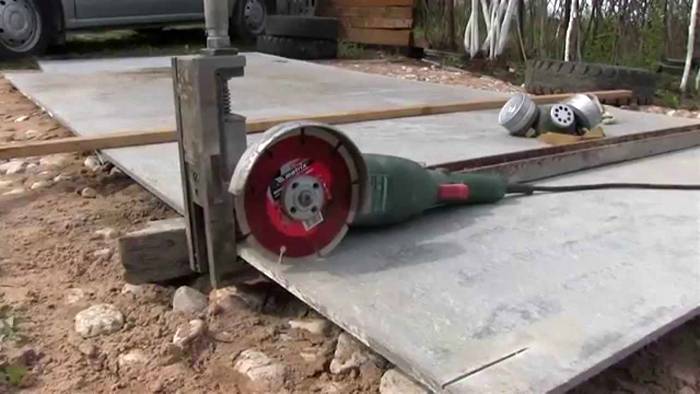
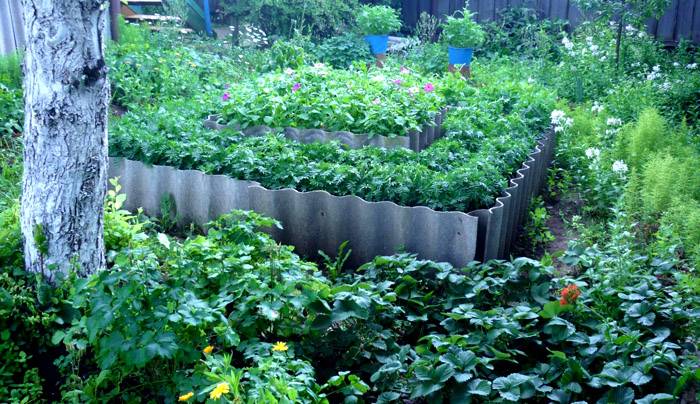
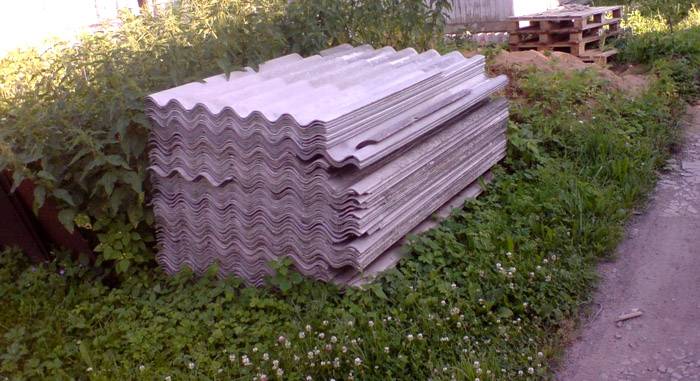
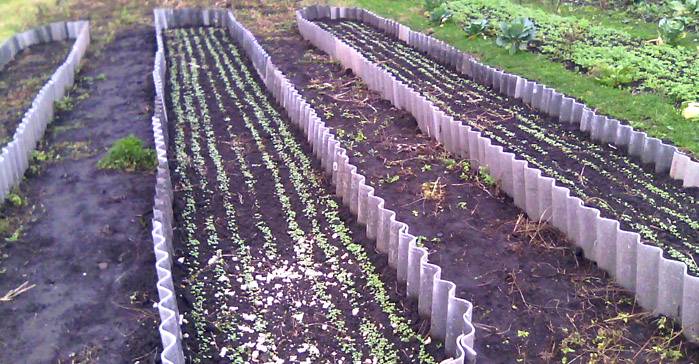
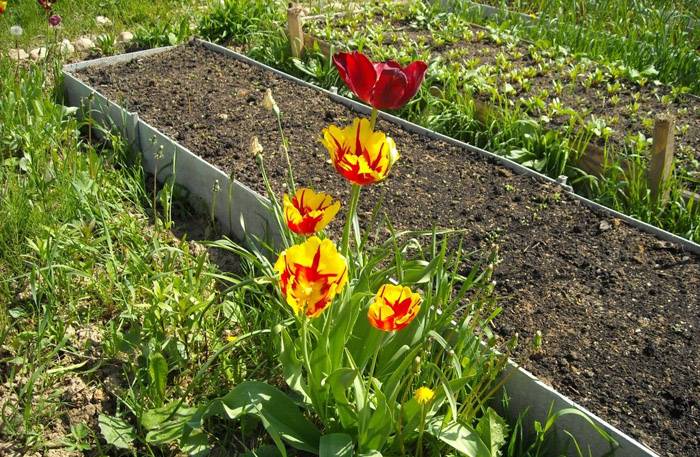
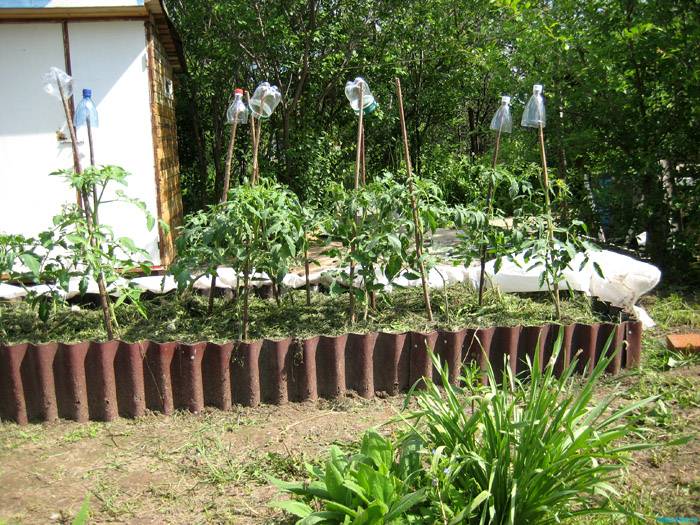
Slate
For a long time, slate was considered the most common material for decorating beds. Many gardeners still use it on their plots, since it has a number of indisputable advantages, the main one of which is accessibility. As a rule, everyone in the yard has the remains of the old roof, so that the arrangement of the beds does not require any financial costs. The main thing is to take care of reliable strengthening, so that the fence does not lurch under the influence of heavy rains and strong winds.
Other options and ideas for fencing garden beds
You can create fences from any available materials, for example, from plastic bottles, slate, and also combine various materials.
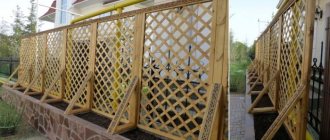
Among other things, you can use almost ready-made panels for fencing the beds - various kinds of gratings, PCB sheets and any other materials at hand of suitable shape and strength - it all depends on your imagination, available resources and capabilities.
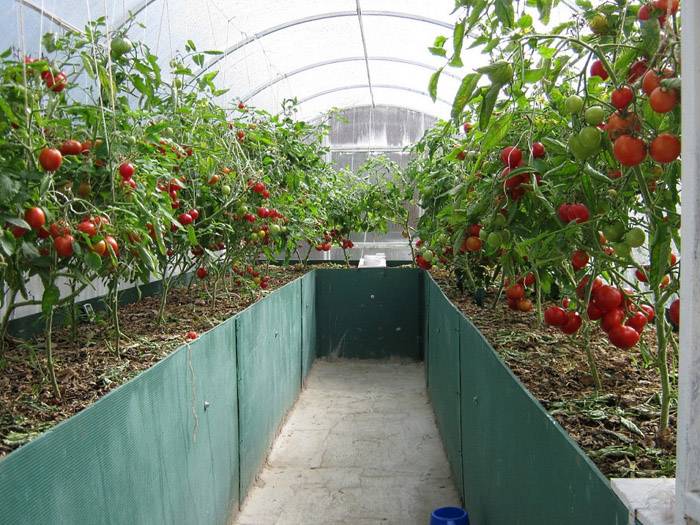
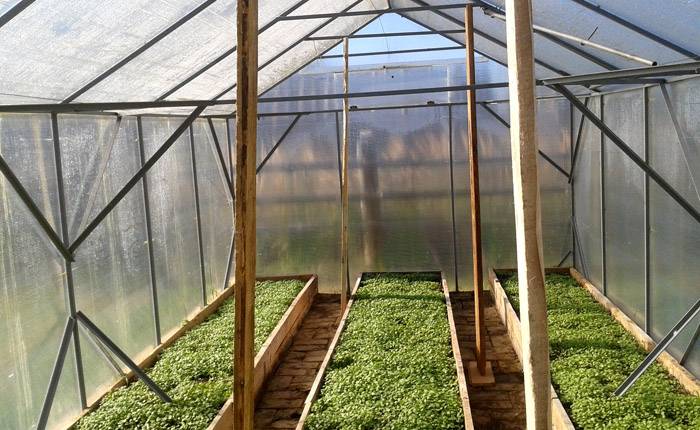
How to make beds in a greenhouse: photos of interesting works
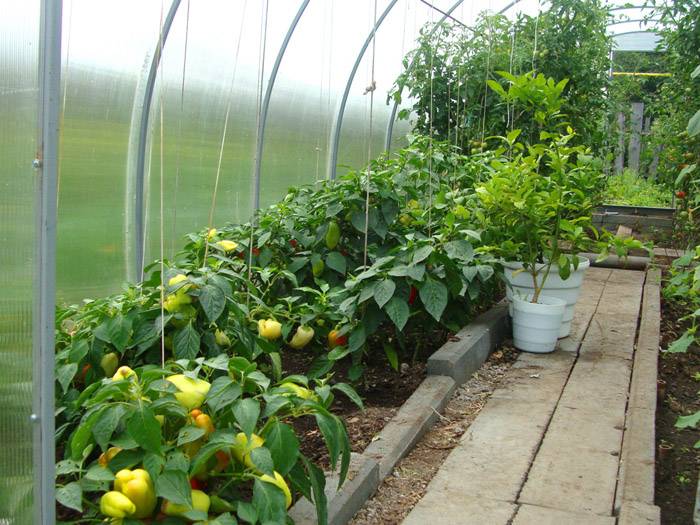
The greenhouse is the place where summer residents like to plant heat-loving fruit-bearing plants. You can see peppers, tomatoes, cucumbers and much more in them. Some equip the area for a greenhouse or insulate the structure so that they can harvest all year round.
Neat framing of wide beds
For whatever purpose the greenhouse is used, this is a small space, if you do not take into account the commercial options, where you need to arrange several beds.
Advice! Try to think in advance how many plants will be placed in the greenhouse in order to calculate the number and width of the beds.
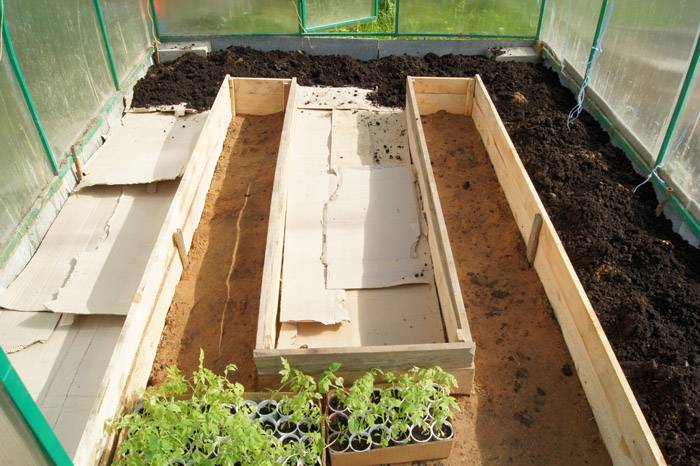
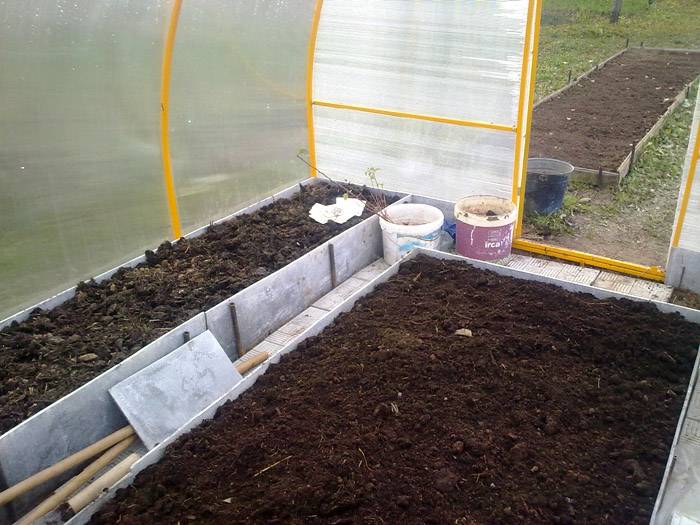
Filling with earth a structure with wood curbs
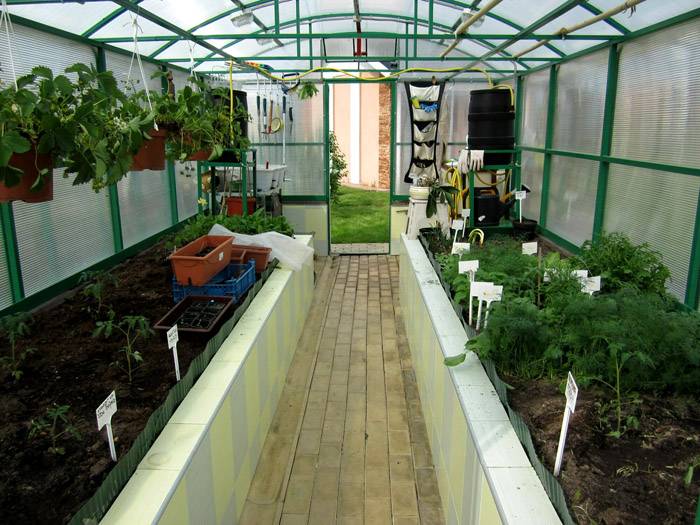
Curbs that protect fertile land from creeping are collected from a wide variety of materials. There are beautiful creations made of wood or neat metal structures, and curb tape and improvised means are also applicable. Here are several options for arranging a greenhouse:
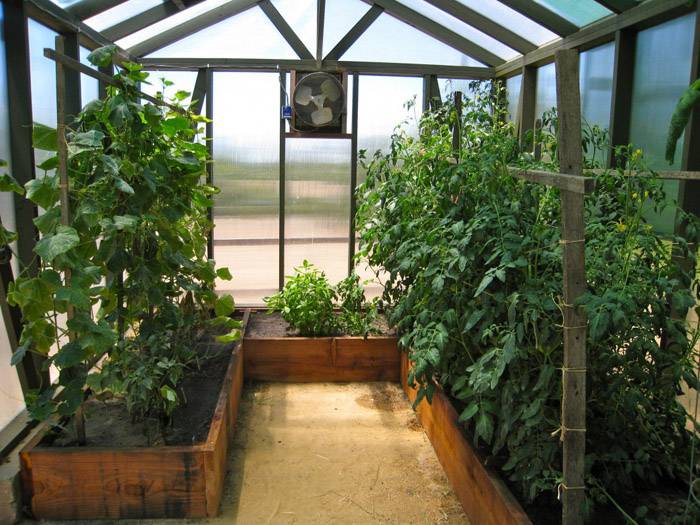
Wooden formwork
Combination of different beds depending on the plants
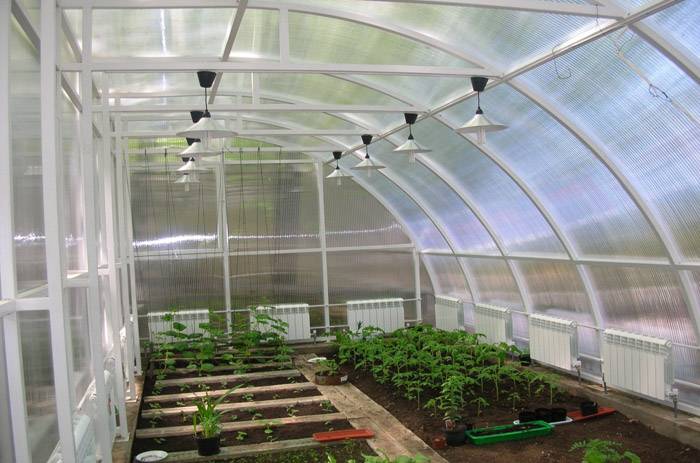
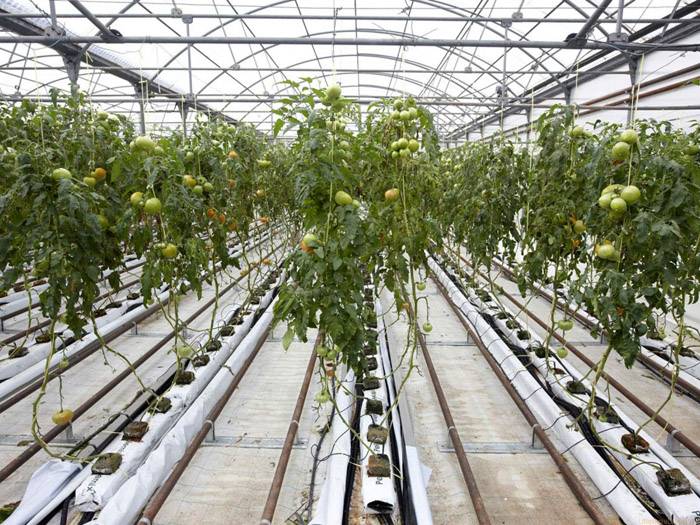
Classic version in three rows with metal railing
Option for a small but neat greenhouse
Related article:
DIY polycarbonate greenhouse. Drawings, types of structures, step-by-step construction and much more in a separate publication of our portal.
A variant of the successful arrangement of the beds in a 6x3 greenhouse with a photo
There are many design options, one of the most common is 3x6 greenhouses. How to arrange the beds in a long and narrow space is a question that worries many. There are several general options for the location of planting sites in a greenhouse:
- Two large ridges with longitudinal and transverse passages. Less drop off space but easy access for careful planting maintenance.
Two wide stripes
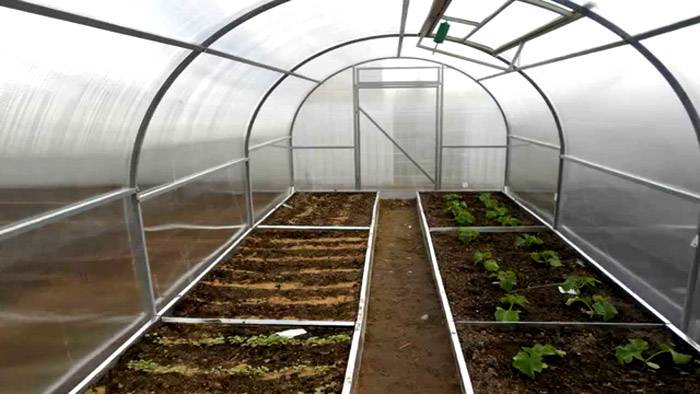
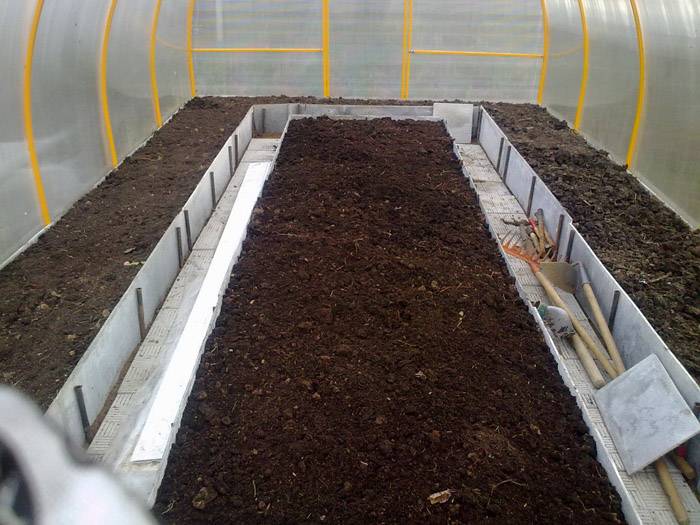
- Long wide two beds along the walls of the greenhouse. In the middle there is a passage with a width of 50-70 cm. This arrangement allows you to plant different crops, adjusting the distance between them, and take care of them calmly.
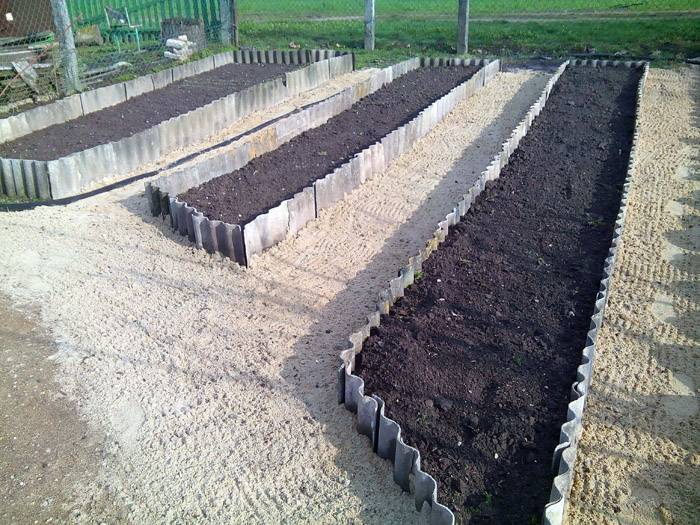
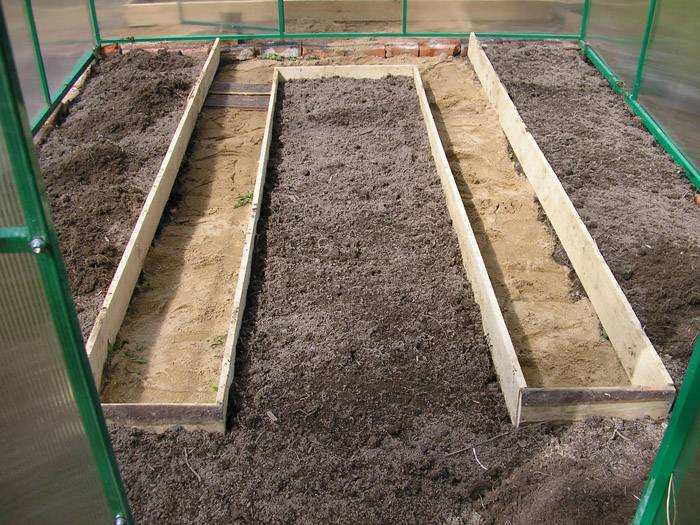
- Three identical parallel ridges. Usually the structures are narrow, making it easy to weed the entire area around the plants.
Option with three equal ridges
- There is a wide landing site in the center, and narrow along the walls. It is easy to maintain, but gives a little useful area for the plants.
Wider in the middle than on the sides
When choosing the location of planting sites in greenhouses, keep in mind that the beds near the walls should not be more than 1 m wide. And the dimensions of the central one cannot exceed 3 m. This is due to the need for free weeding and loosening of the soil.
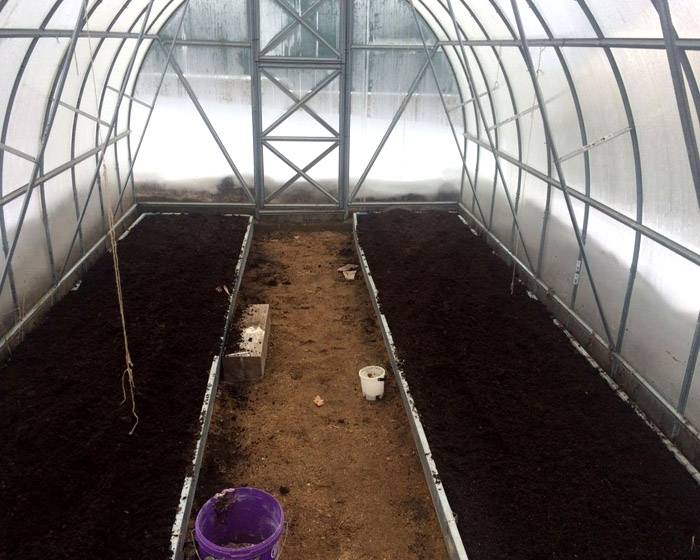
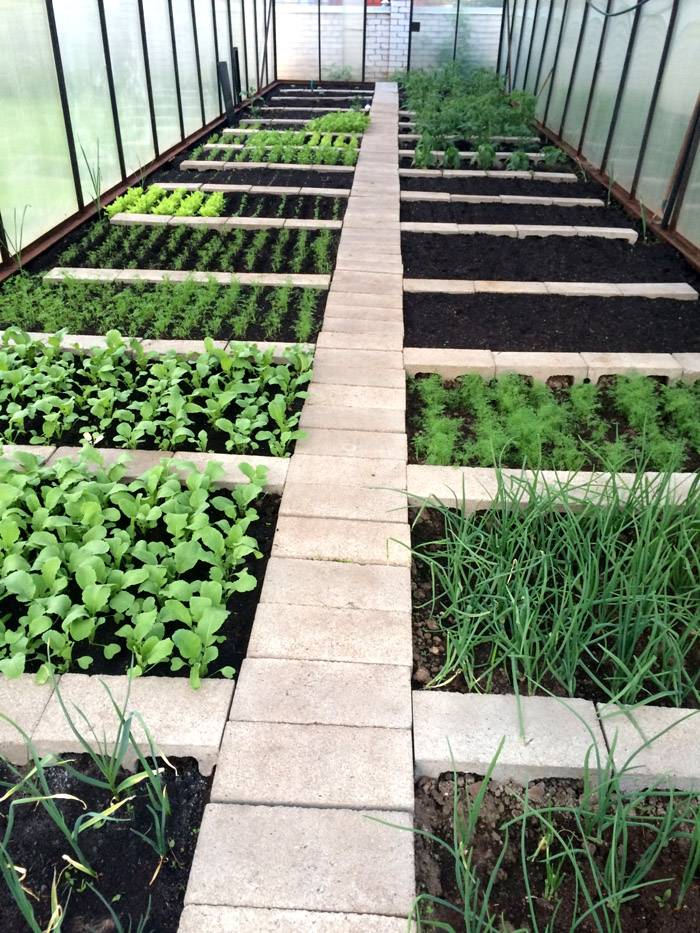
How to make a garden bed in a 3x6 greenhouse: photos of practical ways
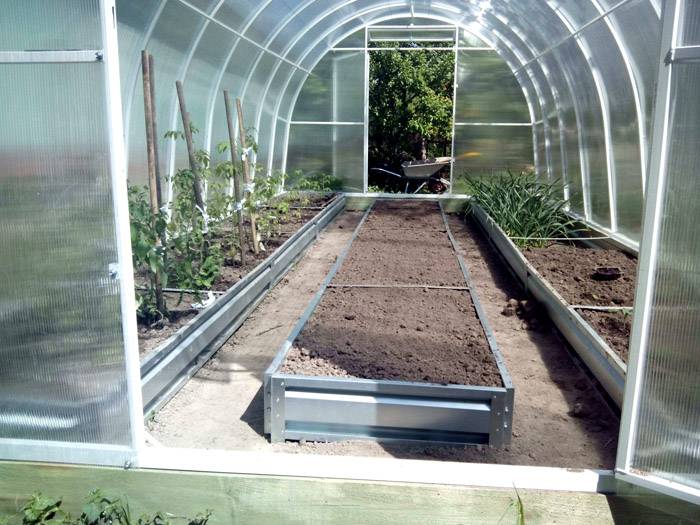
Most often, gardeners opt for a large ridge in the middle and small small ones on the sides. This is the best way to plant several varieties of plants in one greenhouse so that they do not interfere with each other's growth and fruiting.
An example of arrangement with a large ridge
If you opted for a 3-meter-wide bed in the greenhouse, then place it exactly in the center, leaving enough space for the passage. The path can be covered with small pebbles or covered with foil so that unnecessary weeds do not germinate.
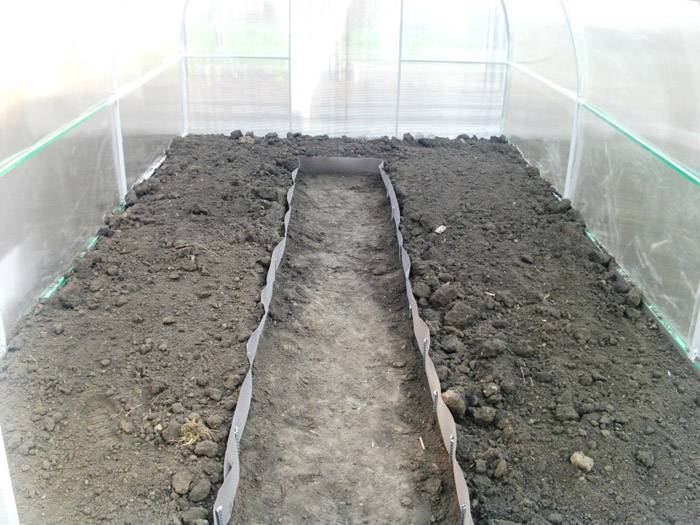
It is not difficult to make a bed with a width of 3 meters on your own. First, you need to decide on the material of manufacture. And then dig a small trench around the perimeter and deepen the structure of the tour. Be sure to tamp the soil from above.
You can arrange two wide ridges on the sides, but this is inconvenient for weeding
It is worth making a layer of organic fertilizers under the soil and laying drainage to prevent waterlogging of the soil. Here is a video example of how to redo the beds and make 3 narrow identical stripes:
Do-it-yourself non-standard garden beds in the greenhouse
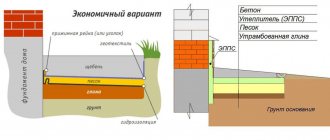
Traditional designs are not suitable for all regions. For example, in the northern regions, where snow can fall even at the beginning of summer, it is necessary to mount a warm bed in the greenhouse. It is not difficult to make it with your own hands, the main thing is to choose the appropriate option:
- Internal heating using an electric cable. The temperature inside the greenhouse and in the soil can be precisely controlled.

Heating circuit
- Water heating. Pipes are laid under the soil layer and connected to the heating system of the house or a separate boiler is installed.
For large areas
- Natural material. Components are selected depending on the type of soil and stacked on top for a natural greenhouse effect. Files, dense fabric, leaves collected from autumn, humus and much more are used.
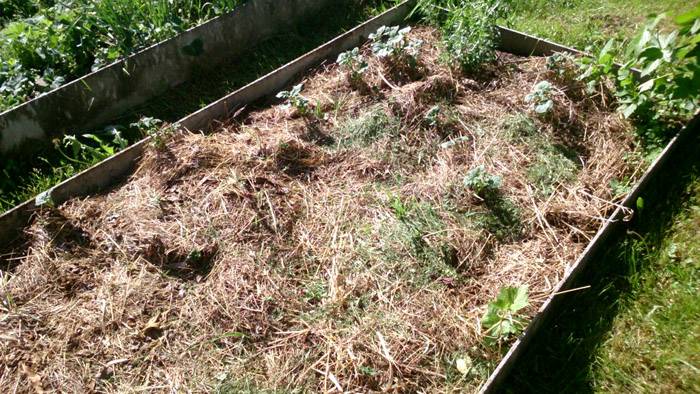
Natural warmth
When there is no need for heating, since the greenhouse is located in a warm or temperate climatic zone, other unusual options are used for planting plants. For example, you can arrange vertical placement of beds in a greenhouse. In this case, it all depends on the imagination of the author and the crops for planting.
Rational use of space
Below are beautiful photos of the beds in the greenhouse, which you can recreate on your own:
Unusual solution with paved paths
Border pieces and flower pots work well for homemade greenhouses

Flower garden in several tiers
Unusual form and content