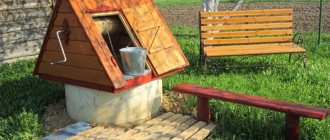
Choosing a place on the site
When choosing the location of the chicken coop, you should first of all pay attention to the landscape. It is not recommended to build shelter for birds in low areas, as they collect a lot of moisture and snow melts longer. This can adversely affect the health of the birds. It is best to start with a southward slope. Thus, water will not accumulate near the chicken coop - it will be dry and light.
The building must be positioned in such a way that the sun's rays fall inside. For example, place a rectangular structure in length from east to west. It is necessary that a sufficient amount of light enters the windows throughout the day, due to which the egg production of chickens will be increased.
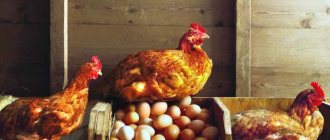
Did you know? One hen can lay 250 to 300 eggs per year.
Tips from experienced poultry farmers
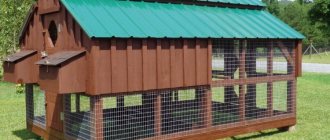
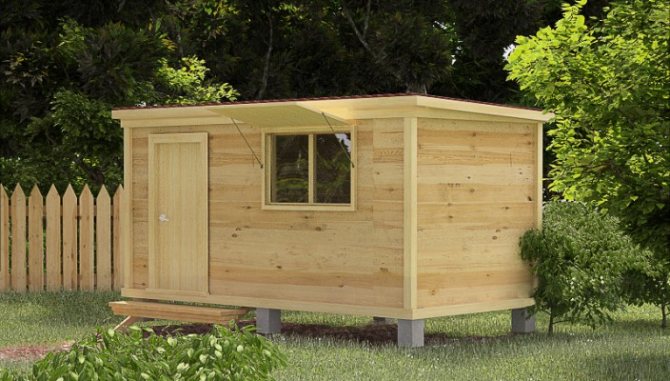
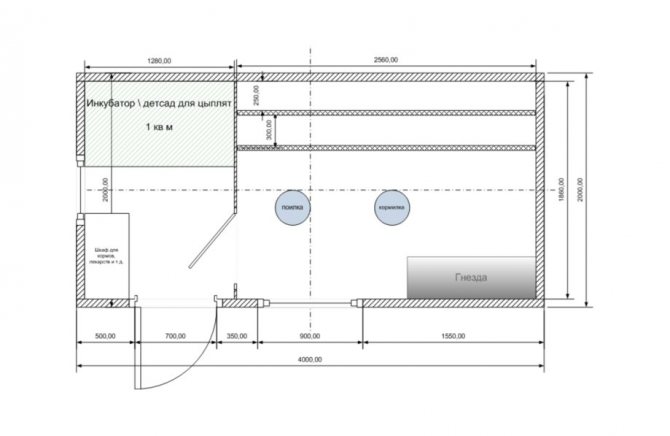
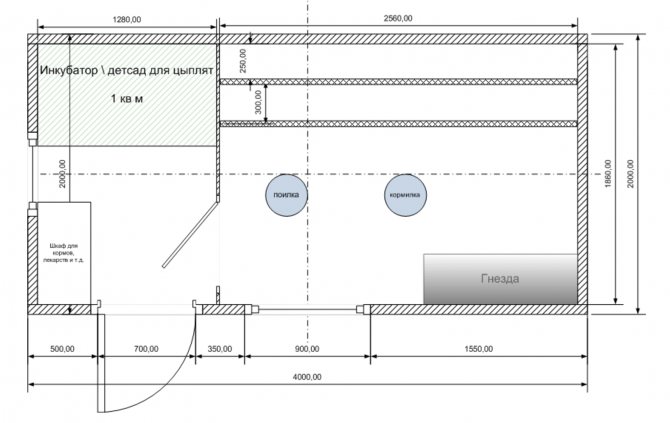
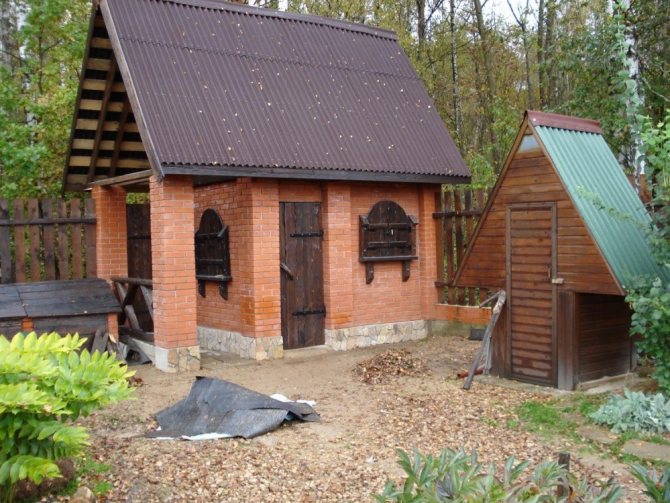
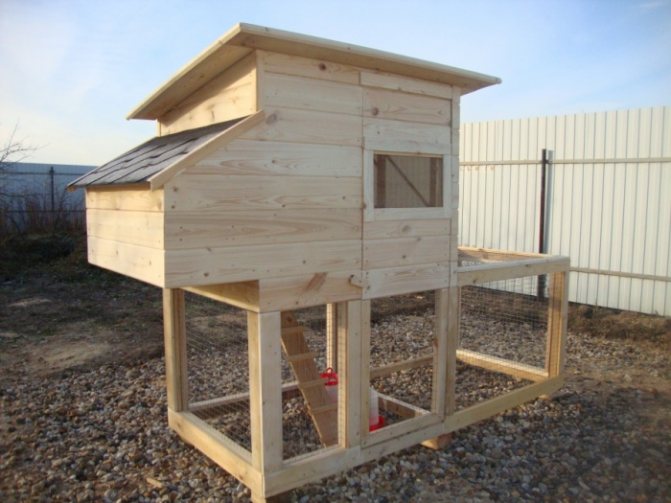
DIY chicken coop for 20 chickens (winter)
Since raising chickens in small poultry houses – specific occupation, some useful advice from experienced poultry farmers will be useful to many:
- In order to prevent drafts due to gusts of wind, the entire structure should be done without cracks. In this case, you should not forget to ventilate the chicken coop well from time to time. Alternatively, this can be done in the absence of chickens.
- If you place the chicken coop on a small hill, moisture (its excess) will not accumulate in it.
- For maximum protection of chickens, a mosquito net should be placed on the windows.
- If you put the chicken coop in close proximity to the fence, the wind will not disturb the birds.
- When moving the house around the site, make sure that the entrance and walk are located on the south side.
- If the area of the site allows, it is recommended to build a structure for 10 heads. It may contain fewer birds, but if it is necessary to increase the number of birds, no preparatory work will be required.
- When building a mini-chicken coop, it is imperative to use a drawing.
It makes sense to build a chicken coop with your own hands only if you have the appropriate experience (at least in a minimal amount). Otherwise, the result may not be as expected. Those who have not previously had to deal with construction work are advised to contact experienced specialists or consider buying a finished structure. Although this option will turn out to be more expensive from a financial point of view, it will allow you not to worry about the result.
Design and dimensions
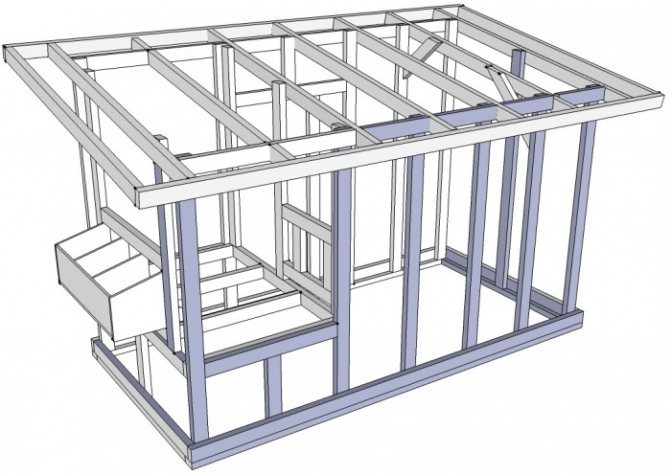
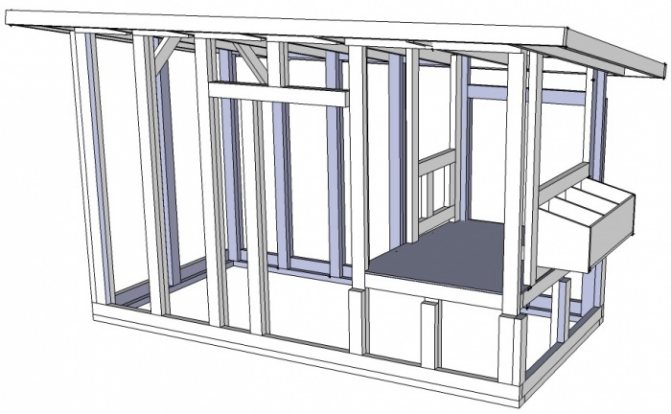
First of all, it is necessary to draw up a positional plan of the chicken coop in the courtyard of a house or summer cottage. After choosing a location for the construction of a chicken coop, it is necessary to develop a building project, measure the area, placement of windows and doors, the location of nests and perches and draw up a drawing.
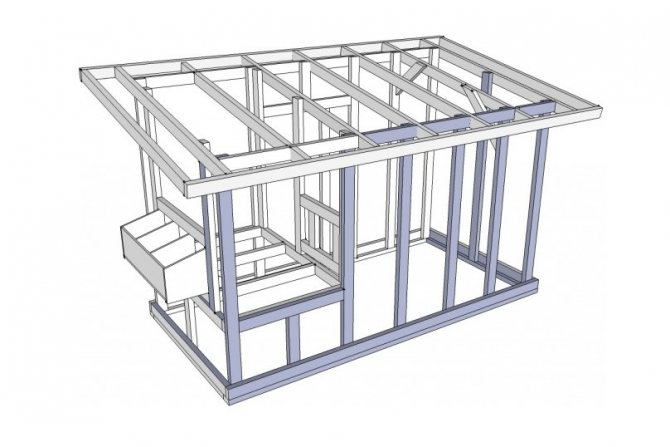
At the design stage, it is worth considering the location of the light, the installation of ventilation ducts and the heating system. This placement must be entered into the drawing for further work during the construction.
When designing a chicken coop, you can calculate the cost of the costs of the necessary materials, as well as avoid significant expenses.
The area for a room for 50 birds is normally about 10 square meters (2.5x4 m). The suitable height for a good microclimate and the comfort of birds is 180 cm.
Materials and tools
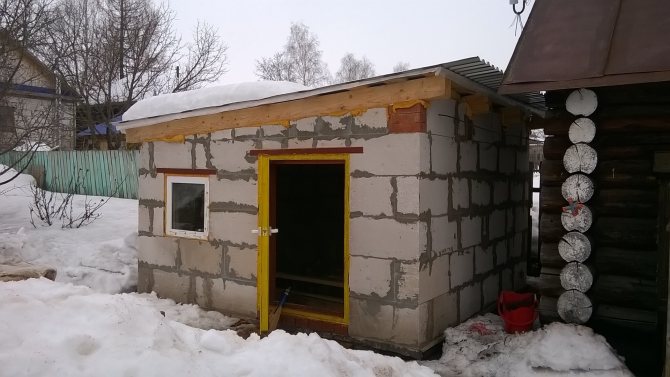
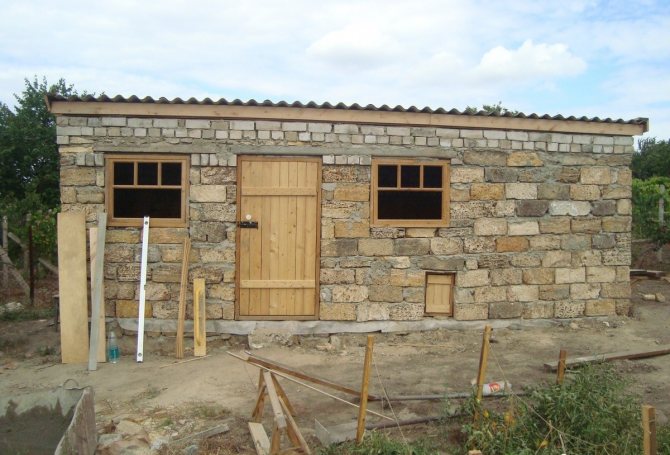
The reliability and durability of the building depends on quality materials. The most common raw material for building a chicken coop is wood. At the moment, OSB (oriented strand board) can be considered the most easily accessible, durable and in demand. It is easy to work with this material even without experience.
For construction, you can also use bricks, expanded clay-concrete blocks. It is not worth using sheet iron, since it does not retain heat, but, on the contrary, attracts dampness, moisture and cold, which will have a bad effect on the health of chickens.
You will need the following materials and tools for construction:
- cement - two bags;
- sand;
- concrete mixer or container for mixing cement mortar;
- nails, screws;
- hammer, drill, saw and cord;
- building level;
- insulation (expanded clay);
- slate and roofing material;
- light bulb, electrical wire, switch;
- glass;
- boards, beams, bars;
- concrete blocks;
- Rabitz;
- ventilation pipe;
- shovel, trowel;
- roulette;
- metal grid;
- crushed stone;
- spatula and grater.
We recommend that you read how to disinfect a chicken coop.
How to make a chicken coop for 50 chickens with your own hands
When you are convinced of the correct construction site, have acquired all the necessary materials and tools, and have drawn up a chicken coop project, you can proceed with the initial stages of building a chicken house.
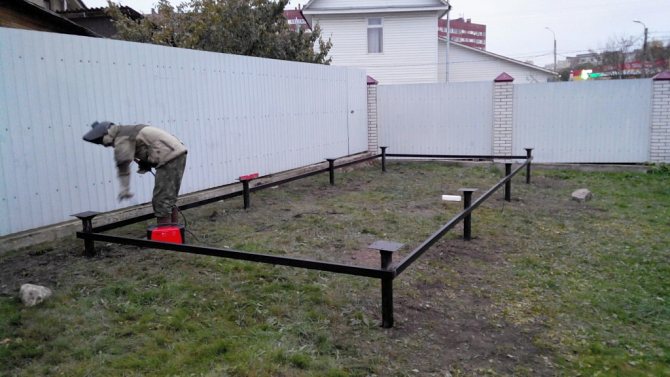
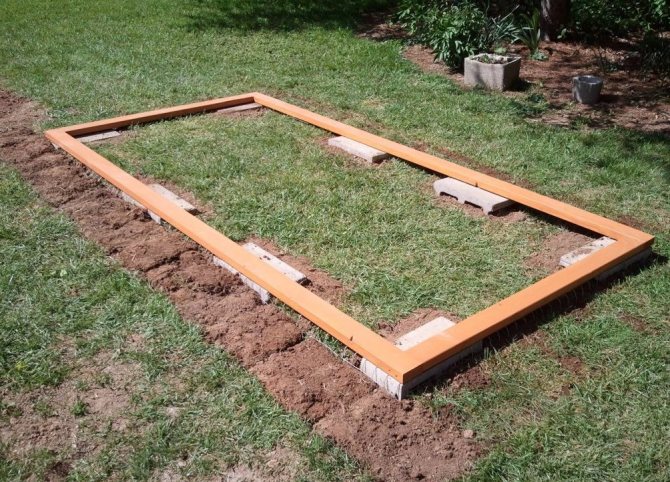
Foundation
The foundation provides dryness and protection of birds from predators. There are two types of foundations - slab and columnar. To lay the foundation, you need to follow the step-by-step instructions:
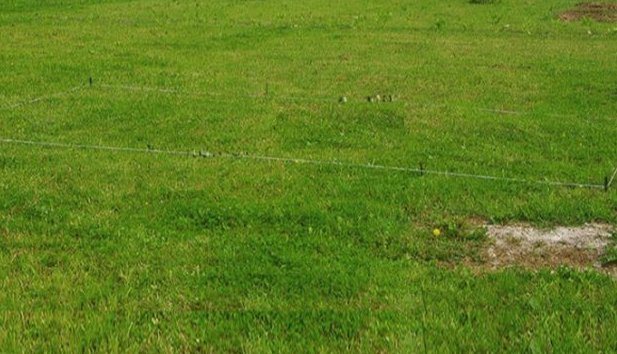
- Take a previously drawn drawing and markup on it. Next, drive the bars into the corners of the dwelling. Then pull the cord all the way around. The length is checked by measuring the tape. After checking the markings one after another, drive in the bars at a distance of one meter. They will be the center of the foundation pillars.
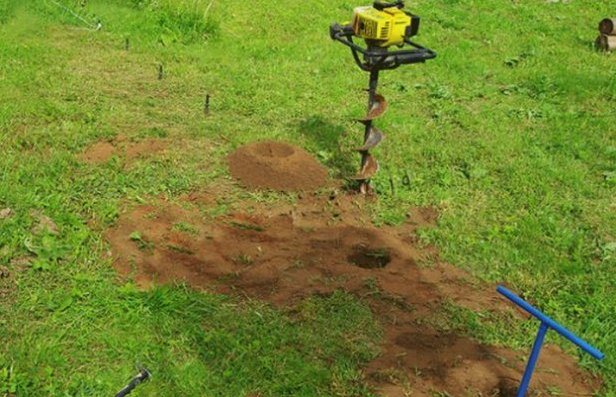
- Dig a hole with a volume of 1.5x1.5 meters. Dig a hole in the places where the bars were installed. Pay attention to the distance between the grooves, as well as their parallelism in relation to each other.
- Pour sand at the bottom of the hole to create a pillow. Then knead a solution of cement, crushed stone, water and sand. Fill the resulting mass of the hole to the base of the earth. When the solution is dry after two to three days, you can proceed to further work. It is necessary to shape the posts using bricks or blocks 20–30 cm high. Use a spirit level while working to avoid unevenness. Upon completion of the work, cover the foundation with roofing felt.
Floor
When building a floor, you need to decide what quality the coating should be. Wood and concrete floors are considered common. They provide protection, warmth, comfort and cleanliness to the chicken coop. Do not forget that a chicken is a heat-loving animal, so for the winter you need to additionally insulate the floor for it, especially if it is concrete.
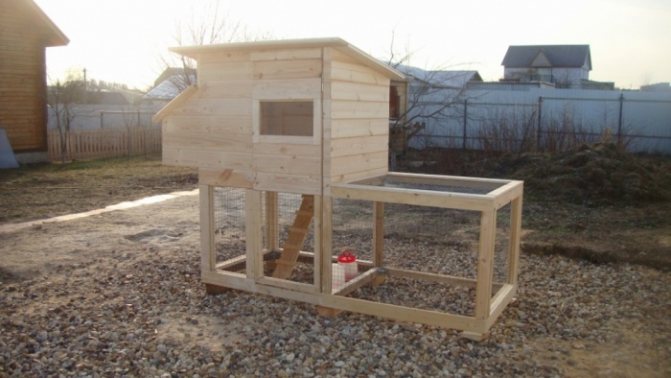
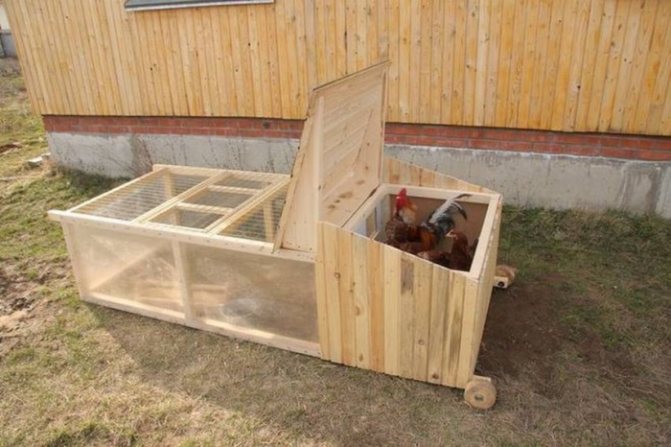
Making a mini chicken coop yourself
Broiler chicken coop
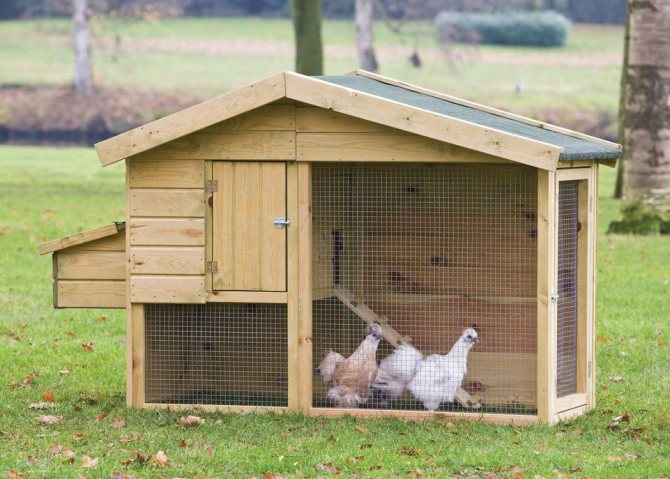
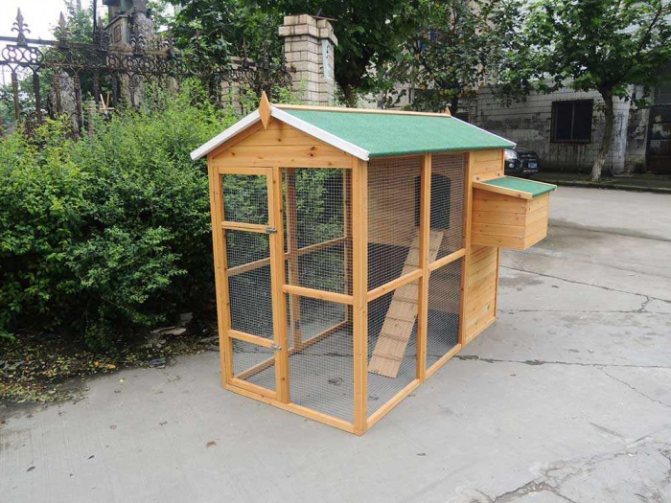
Many livestock breeders do not want to purchase ready-made structures and are looking for an answer to the question of how to build a chicken coop for five chickens with their own hands. Manufacturing technology is not particularly complex.
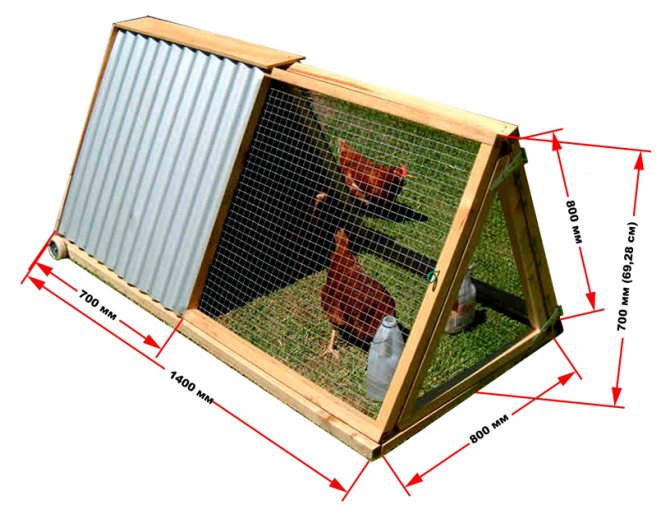
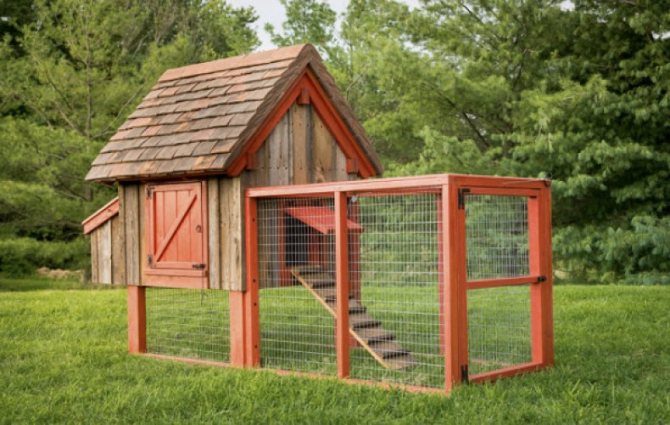
Coop for 5-6 chickens
The construction of a mobile version of the structure involves the implementation of the following list of works in a clearly defined sequence:
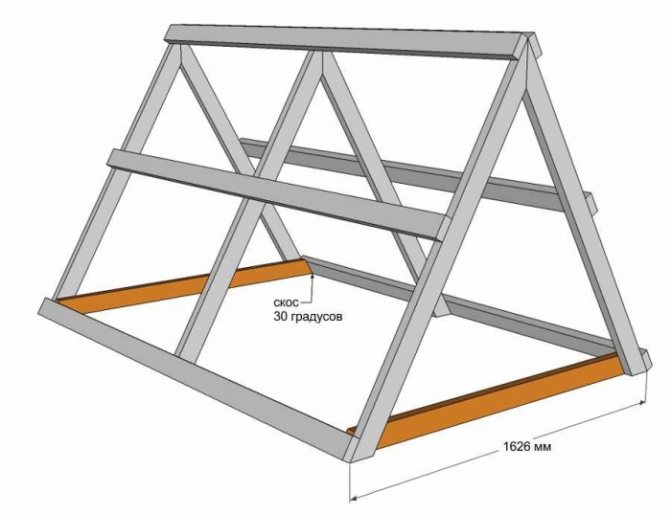
- The frame is being made. For work, two triangular frames are needed from a 2 x 4 cm bar. The frames are connected using ordinary boards, on which handles should subsequently be provided for moving the finished structure across the site.
- Two side walls (bottom) are formed. For them, you will need rails of 1.5 x 3 cm. A mesh with a mesh size of 2 x 2 cm is stretched between the walls (it is optimal).The overlap between the floors is made of an ordinary plywood sheet, in which an additional hole should be provided through which the chicken will move between different levels. A ladder will pass through this same hole.
- Any of the two side walls of the 1st tier must be made in a removable version. It will serve as an entrance.
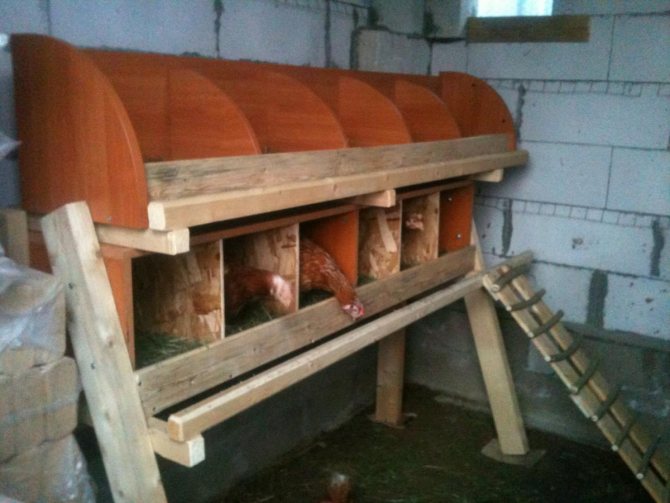
- The second tier of a mini chicken coop with your own hands for 5 chickens must be divided into two unequal parts. About 30% of the total space should be used for the organization of perches, where the chickens will lay eggs, in the remaining place the birds will rest.
Chicken coop - The roof is made of several plywood sheets, which are fastened to each other by means of hinges. This is necessary so that the lid can be lifted (eg in hot weather). One of the parts should be removable to facilitate the cleaning of the structure.
- The last stage of work is to carefully treat the house with a protective agent against moisture and insects. Alternatively, furniture varnish is suitable.
Despite the constructive simplicity that a do-it-yourself chicken coop for 5 chickens has, ventilation is vital in it. If you neglect her equipment, the birds will be damp and cold. High humidity and low temperatures can lead to disease in chickens. On the other hand, constant access to fresh air is very beneficial for chickens. In addition, a well-functioning ventilation will almost completely eliminate the persistent unpleasant odor of ammonia.
Remember! Chickens just need the sun. Its lack or complete absence will negatively affect the health of the bird.
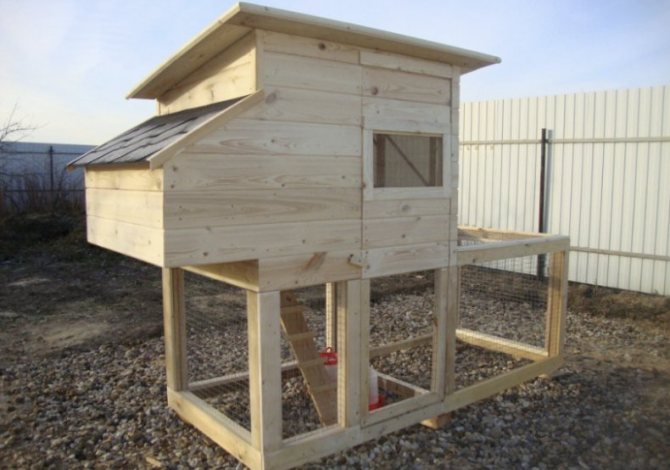
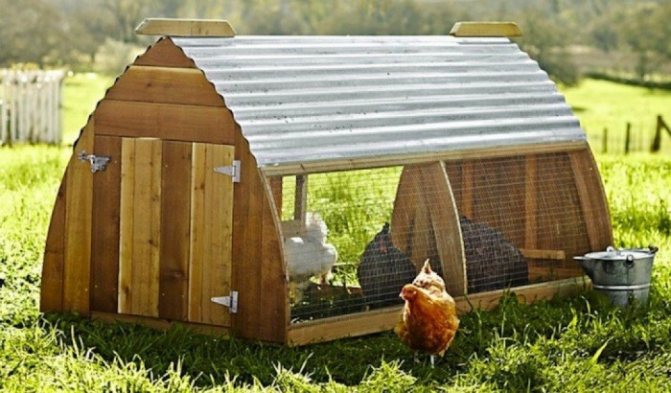
Coop for 3-4 hens
Do-it-yourself construction of a chicken coop for 3-4 chickens is not much different from similar work on a structure for 5-10 birds. Unless in the latter case, the poultry house has a reason to make it a little more spacious.
For a small room, two small ventilation holes in the walls located in opposite parts of the chicken coop will be enough. In this case, one should be at the top, the second at the bottom.
In the manufacture of the structure, the climatic conditions of the area where the dacha or suburban area is located, where the chicken breeding is planned, must be taken into account. For example, constant rain and strong winds are quite capable of destroying the house.
The structure is quite capable of serving for many years. It should only be remembered that the described design is summer, and when winter comes, the chicken coop should be moved to a warm room (shed or garage) or birds should be slaughtered.
Mini chicken coop
Winter insulation of the premises
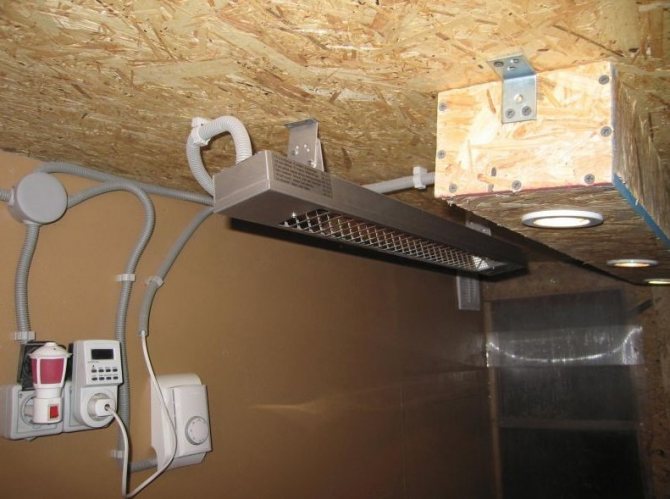
Winter insulation of the chicken coop must be taken care of in advance. Warm chicken coop - healthy chickens. Egg production and livelihoods of birds depend on the quality of insulation both outside and inside.
In cold weather, insulation is added to all walls, windows, doors, floor and roof in a chicken dwelling. Most often, only windows and doors are insulated. To make the walls comfortable for finding birds in winter, outside the chicken coop is sheathed with foam blocks. This material retains heat and prevents the wind from entering the room.
Find out how to insulate a chicken coop for the winter.
Sometimes the walls are covered with shingles, and plaster is applied on top. It is also an effective insulation method. Windows for the winter are tightened with plastic wrap. The doors are also insulated with a film, adding a woolen curtain to it. In the roof, an empty space between the ceiling and the attic is filled with expanded clay to preserve heat, and during construction, thermal insulation is provided.
Internal arrangement
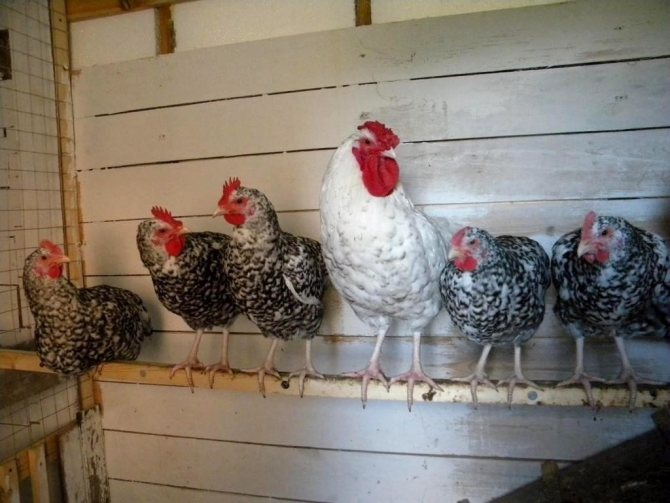
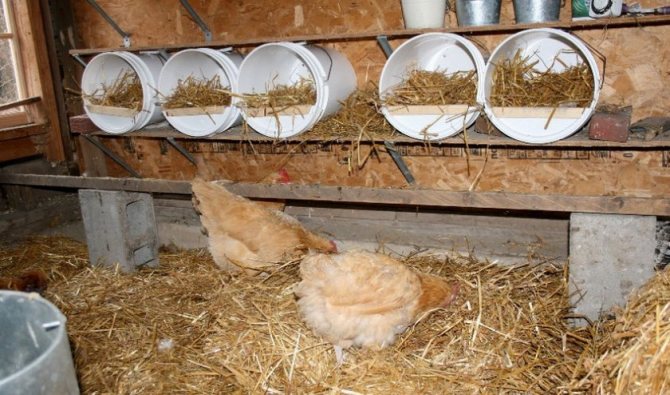
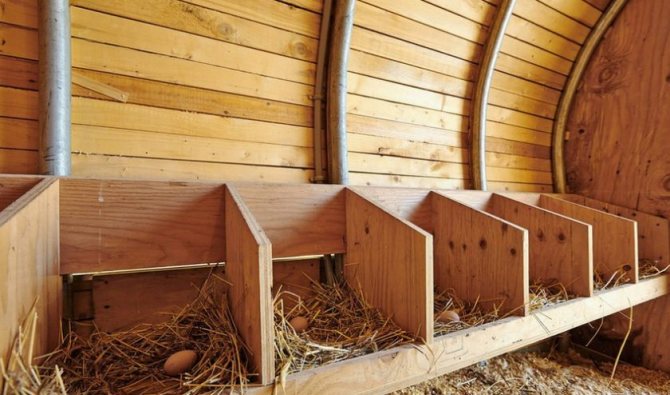
When creating a chicken coop, it is important to correctly position the perches and nests. During the arrangement, several recommendations should be followed:
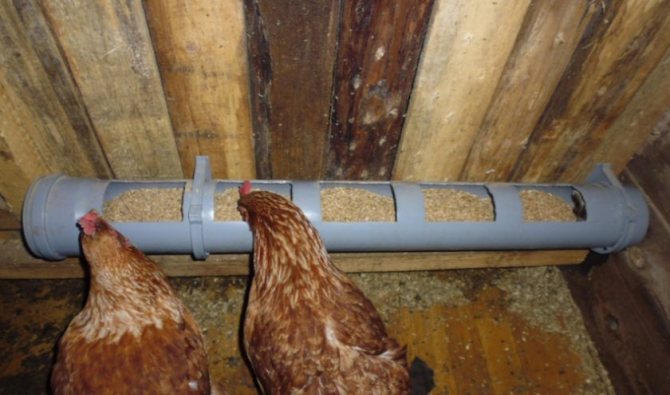
On the area intended for walking, it is necessary to arrange the dishes with food and water. Before you build a chicken coop, it is worthwhile to mark in advance on the drawing all the structural elements that will be inside. In this case, it is important to accurately indicate the size of each of them.
Do not place feeders in the center of the building, as this can lead to their rapid contamination.
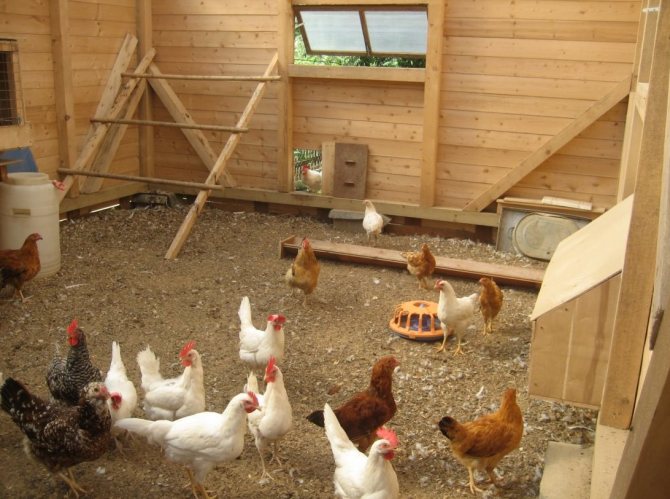
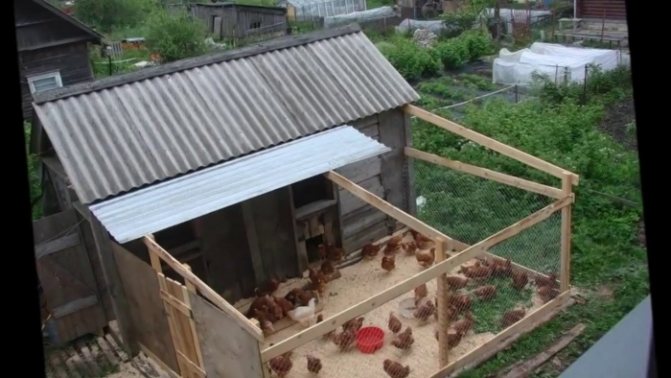
Walking yard
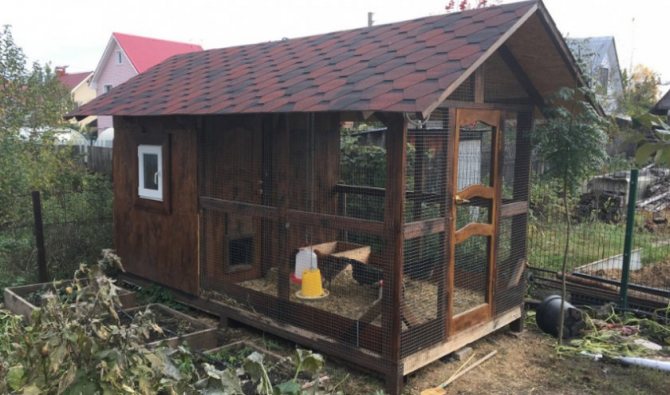
The walking yard is used to release chickens from the main room of the hen house so that they can graze freely. The size of the courtyard varies from 1.5 m to 1.8 m. It is fenced off with a metal mesh without defects so that predators cannot get into the chicken coop.
In the chicken coop itself there should be a separate door leading to the walking yard. A canopy is often made over it to protect the livestock. And on the very territory of the courtyard they put perches.
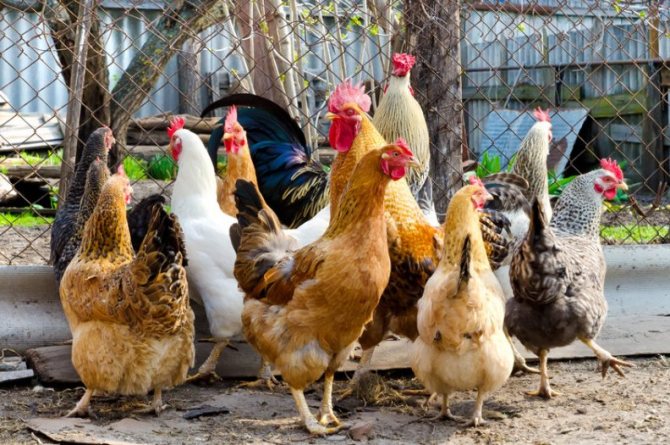
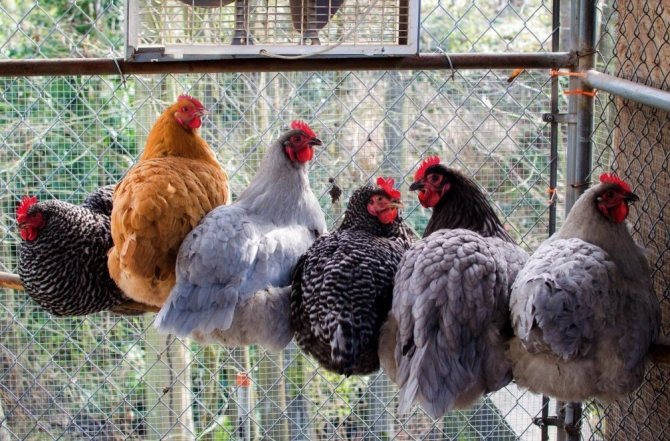
Chickens are the source of the most popular meat and fresh eggs. For poultry to be beneficial, the owner of the yard must take care of the comfort, health and safety of his poultry population.
What else do you need to take care of?
In addition to the internal arrangement, you need to take care of the basic elements of the chicken coop. These include a ventilation system, lighting fixtures and a patio for walking.
Ventilation
The easiest way to organize ventilation is through a small window. If possible, the pipes should be routed through the roof. The hood above the roof is brought out above the supply pipe. Ventilation ensures constant air circulation and elimination of pungent odors.
Lighting
Various types of lamps can be used as lighting fixtures. Lighting inside the coop should be moderate and evenly distributed over the entire area.
Place for walking
A yard for walking birds is being set up next to the poultry house. Mobility and outdoor activities are beneficial for laying hens' productivity. The courtyard is fenced off with a low fence and covered with a net to protect against birds of prey. If greens grow on the fenced area, there is no need to remove them, since the birds will be able to additionally provide themselves with natural food.