Growing plants
Anastasia Zemlyanichko 12/30/2018 no comments
1
(20 estimates, average: 4,30 out of 5)
The ease of manufacture and practicality of using trellises is liked by a large number of gardeners and decorators. Trellises for climbing plants, various vegetables and flowers, are increasingly appearing in vegetable gardens and garden plots.
Each of its materials available at hand is capable of making such a structure. It remains to read the article and follow the recommendations posted in it. Have a good creative mood.
Trellis
On the territory of our country, this design has been known for more than 1000 years thanks to the French and Dutch, who brought it. Modern trellis can be made from a wide variety of materials:
- branches;
- lumber;
- plastic pipes;
- metal pipes or rods;
- polyethylene mesh.
The shape can also be absolutely any, so everyone selects individual dimensions depending on their needs. It will be the best solution in the country, since it is here that there is not only a garden with a huge number of plants, but also a plot set aside for a vegetable garden where various crops grow.
Thanks to the trellis, the green stems of plants will not break, they will not be blocked from excess moisture in the soil, they will not be trampled into the ground. Caring for plants will be simplified several times, while everyone will be able to independently form the density, direction and growth. In modern landscape design, with the help of a support structure, you can skillfully disguise or hide areas that have imperfections, or hide an untreated wall of a building from prying eyes.
Note!
The support grid can be used to create any climbing hedge.


How to use a structure for zoning a territory
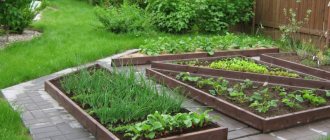
Using simple and uncomplicated trellis drawings, unusual designs are created with their own hands, used for design decoration of the territory and its effective zoning, with the allocation of areas for recreation or arrangement of a vegetable garden.
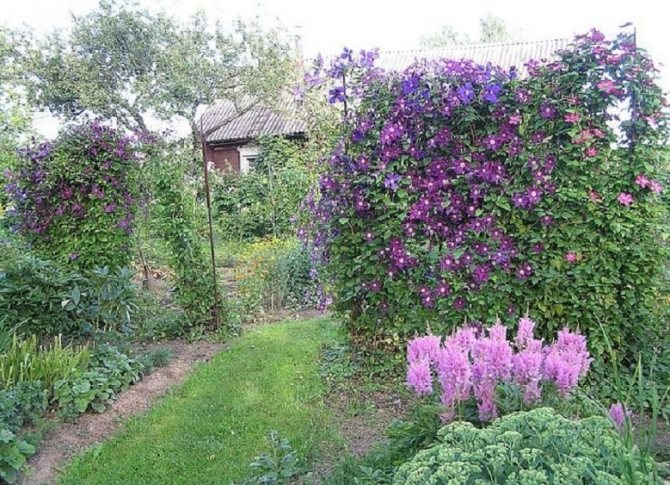
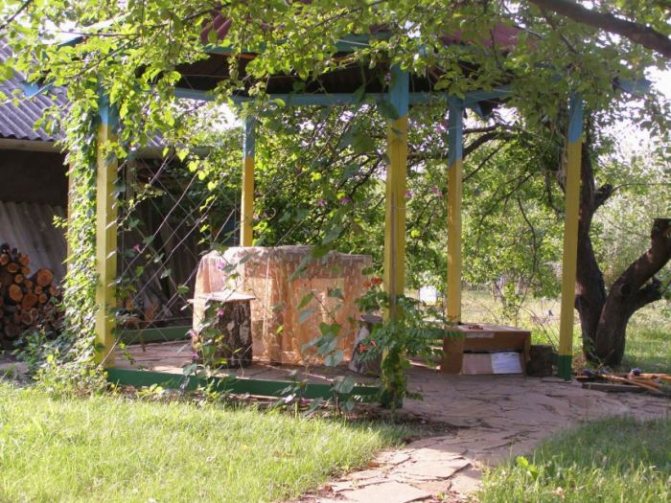
In a compact yard, where it is impossible to install a gazebo or break flower beds, it is the trellis that will help to equip an attractive flower garden, where climbing plants are planted, transforming the entire yard during the flowering period.
Wood trellis
The simplest and lightest design of a trellis is considered to be a rectangular one, made of wood. The sizes can be different, but it must be remembered that the support for the grapes and the support for the clematis are quite different. We will now consider how to make it.
A wooden trellis is a simple structure. The final cost of the tapestry depends on the materials you choose. A picket fence is best suited for these purposes. A special advantage of such a support is the original addition to the garden area at any time of the year.
Note!
If building materials remain after construction or repairs, then you should not throw them into the trash, they can be useful when creating trellises.
Preparation
To make a trellis you will need the following tools:
- screwdriver (or screwdriver);
- sandpaper;
- building level;
- brush.
From the materials it will be necessary to select:
- 46 picket strips;
- 100 screws;
- 1-2 cans of varnish.
The amount of the specified material will be enough to create a standard support, since the average height of the picket fence is 1.7 m.
Note!
Before starting work, the picket fence should be inspected: if the elements are poorly cut off, then they need to be additionally sanded with fine sandpaper.
Progress
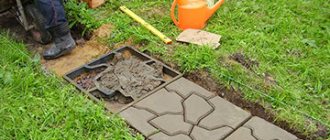
You can collect the trellis directly on the ground, but professionals recommend using a wooden or plastic stand with a flat and smooth surface. The algorithm of actions consists of the following stages:
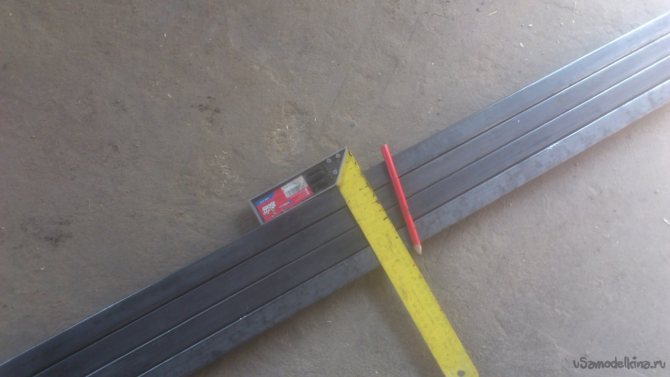
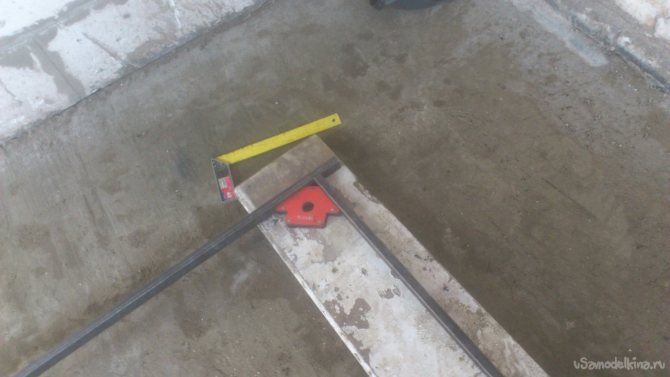
- A square is knocked out of 4 slats. The ends are fixed to each other with screws. It is important to measure and maintain a 90º angle. Each action is accompanied by a check with a building level, in order to obtain a high-quality support as a result.
- Then, moving from one rail to another, the words to the right or vice versa, fix the picket fence.
- We turn over the structure and perform the same actions again to get the lattice as a result.
To protect the resulting trellis from rain and snow, it is necessary to cover it with 1-2 layers of varnish or paint, depending on the landscape design. Only after complete drying, the support is installed in a permanent place. If we are talking about a wall of a house or an outbuilding, then it is not necessary to fasten it close to it. The resulting gap will be a better option for climbing plants, since the stems will be able to trail freely without encountering obstacles in their path.
The trellis can also be installed directly on the garden bed. To do this, a pair of wooden posts are dug into the ground next to the plants, to which the structure is attached with nails or self-tapping screws. If you want to fence off the recreation area, you can use structures that are placed along the garden path. This ingenious solution will look amazing.
Note!
The described design can be suitable not only for roses and climbing plants, it will be able to withstand the load and many vegetables, for example, cucumbers.
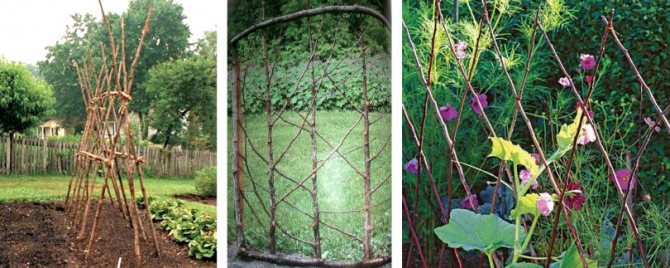
From the branches
In fact, you can make a trellis from a variety of, sometimes seemingly unnecessary materials. These include cut branches of trees 1 cm thick.Everyone can handle the assembly of such a trellis, moreover, it is suitable for both plants and cucumbers. So, in addition to the branches in the work, you will need:
- flexible wire for fastening rods;
- pliers;
- garden pruner.
Actions are performed in this order:
- The available tree branches are sorted according to the length.
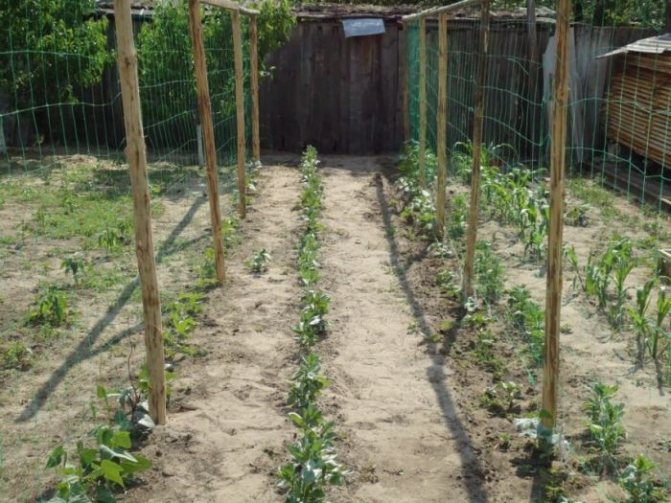
- The first to be used are the main rods - 2 pieces, which will become indicators of the beginning and end of the trellis. They are stuck into the ground to a depth of 15 cm.
- Near the first rod, at an angle of 60º towards the second, the third is fixed, and after 14 cm (on average) the next one. The process is repeated until the end of the span.
- The procedure is repeated only in the opposite direction: from the second to the first rod. The set angle is also saved.
- The intersections of the rods are fixed with pieces of wire.
- The protruding ends of the branches are cut with pruning shears to give the structure the correct shape.
The result is a trellis with diamond-shaped cells. Naturally, such a structure will not last long, but it will be quite enough for one season. If desired, for the winter, the branches are carefully removed from the ground and folded in the barn until spring.
Note!
A support from branches is the easiest and cheapest way to make a trellis and clear the area of unnecessary debris.
As you can see, making a tapestry is an absolutely simple matter. In addition, it is worth noting that very little money will be required to create it. In work and planning, it is important to adhere to just a couple of rules. First, the trellis must be strong, especially when it comes to grapes.The second is stability, since the load from bunches of grapes or cucumber fruits can be quite large and not every structure can cope with it.
Summarize
At the end of each article, we summarize and draw conclusions. However, this time, dear readers, we suggest you do it. Write in the comments: did you manage to build such a structure according to our recommendations, are there any gaps in your knowledge of how to make a trellis with your own hands? Detailed photos and videos will be a useful addition and help for installation.
For the arrangement of the garden and vegetable garden, many designs have been invented and developed. Thanks to them, plants receive everything they need for full development and rapid growth. These structures include a trellis, which, with its simplicity, but at the same time unusualness, can radically change the entire look of the site. Do-it-yourself tapestry is a completely feasible task for both male and female hands. It is enough to choose the desired shape, collect the material with the tools and spend half a day creating a support for curly flowers, vegetables or grapes.
Video
You can assemble such a wooden trellis yourself:
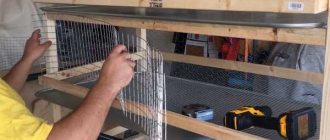
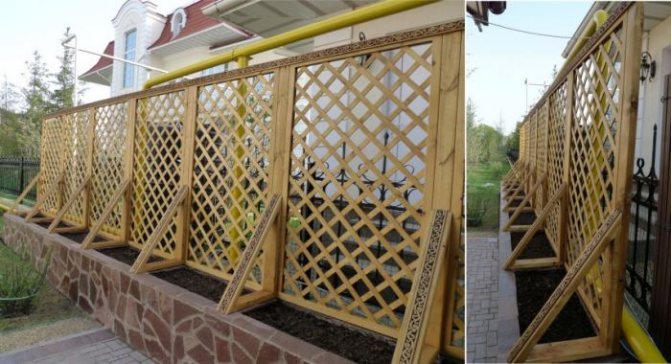
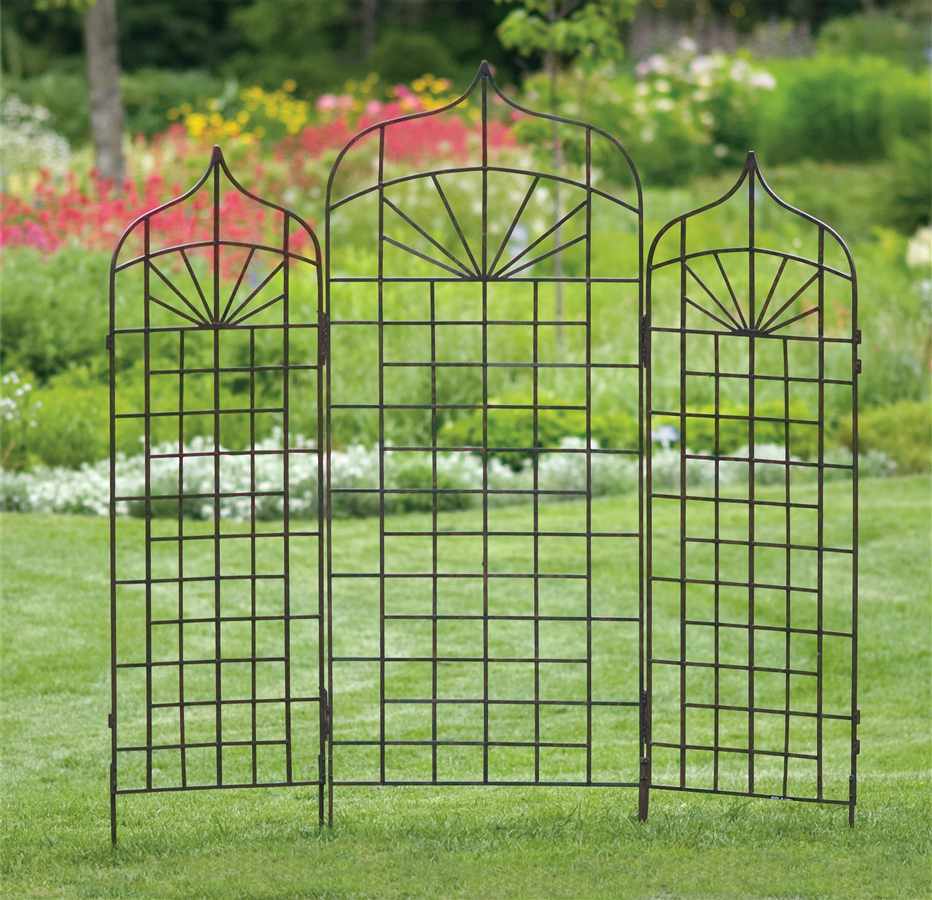
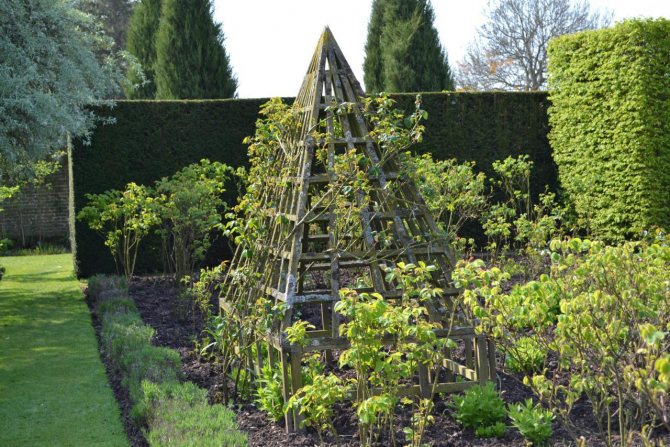
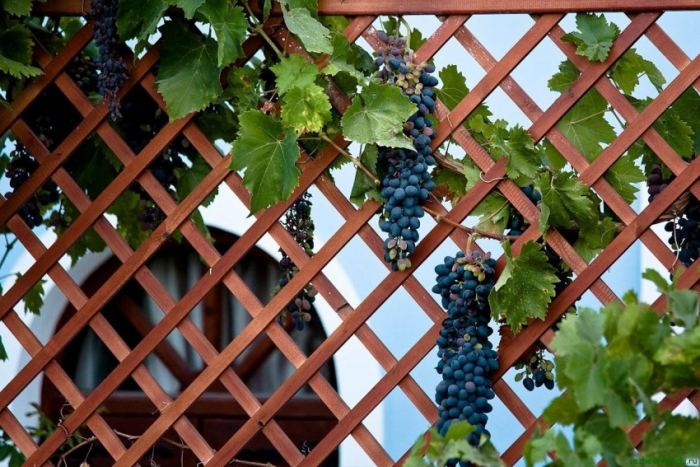
Such a wooden lattice can easily appear on your site - after all, for its manufacture you will need a minimum of hand and power tools and very little ubiquitous lumber! (see photo 1)
Such a trellis is mainly needed as a support for climbing garden plants - both annuals and perennials. Creeping up to the sun, flowering and greening plants will feel as good as possible in such an open space. And if you consider that time after time, year after year, you will no longer have to return to the issue of garters for your pets in the hot and busy spring time - everything will already be done in advance, then isn't it an excellent strategic decision to save your time and effort? ...
Well, besides, several such lattices entwined with plants will easily help create a shady, cozy corner on your site, and perhaps hide your life from prying eyes.
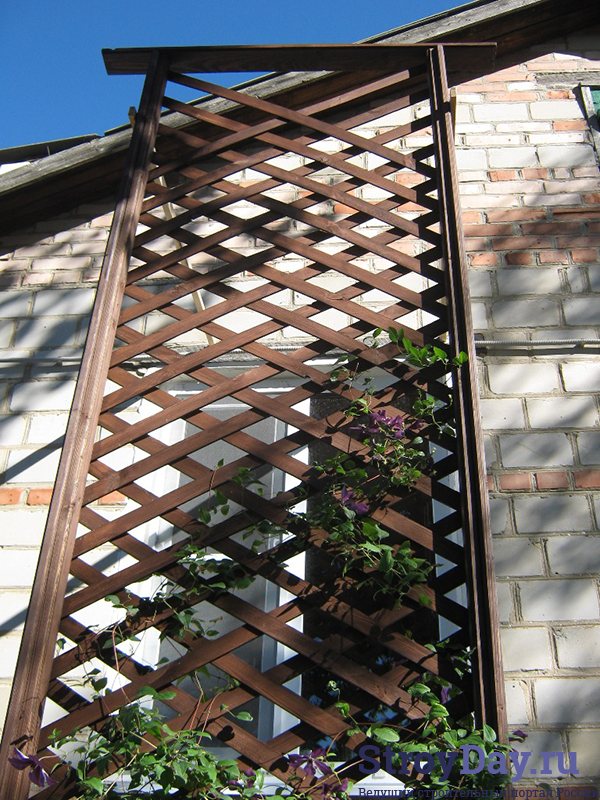
Photo 1. Wooden garden trellis
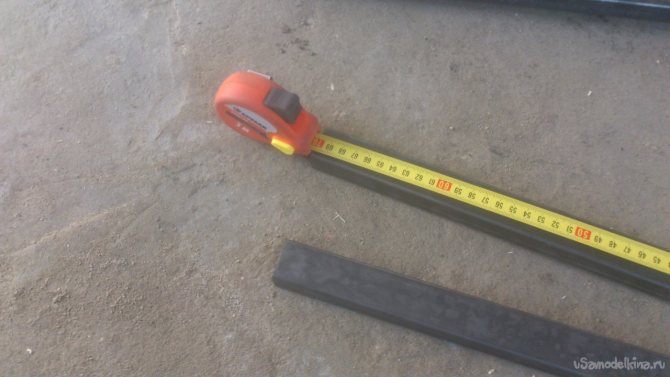
Let's start with the most important thing - decide on the dimensions. They will be determined based on the purpose - depending on which plants it is intended for, since they can be of different lengths. Well, an important factor, of course, is the need to fit into the existing exterior of your site.
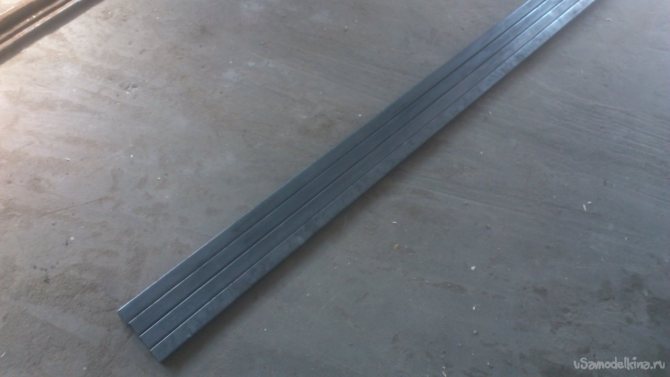
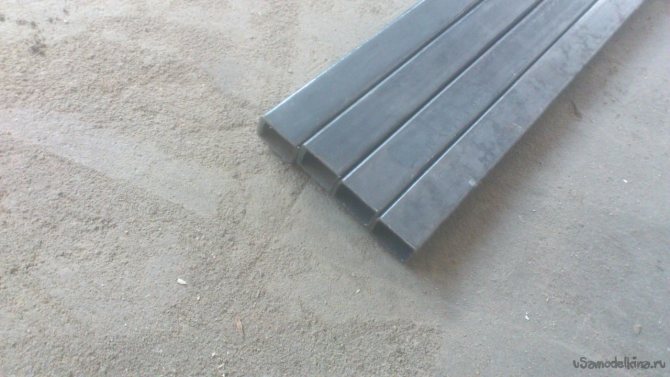
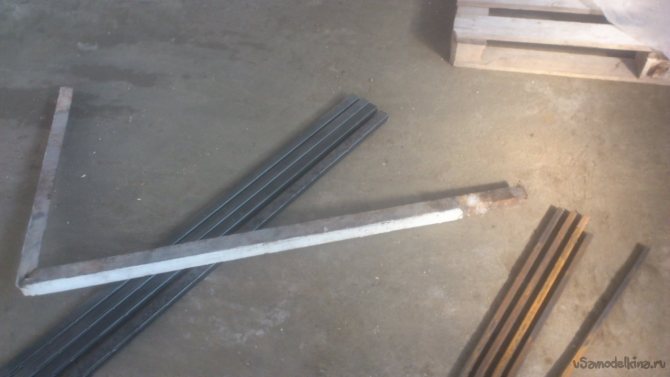
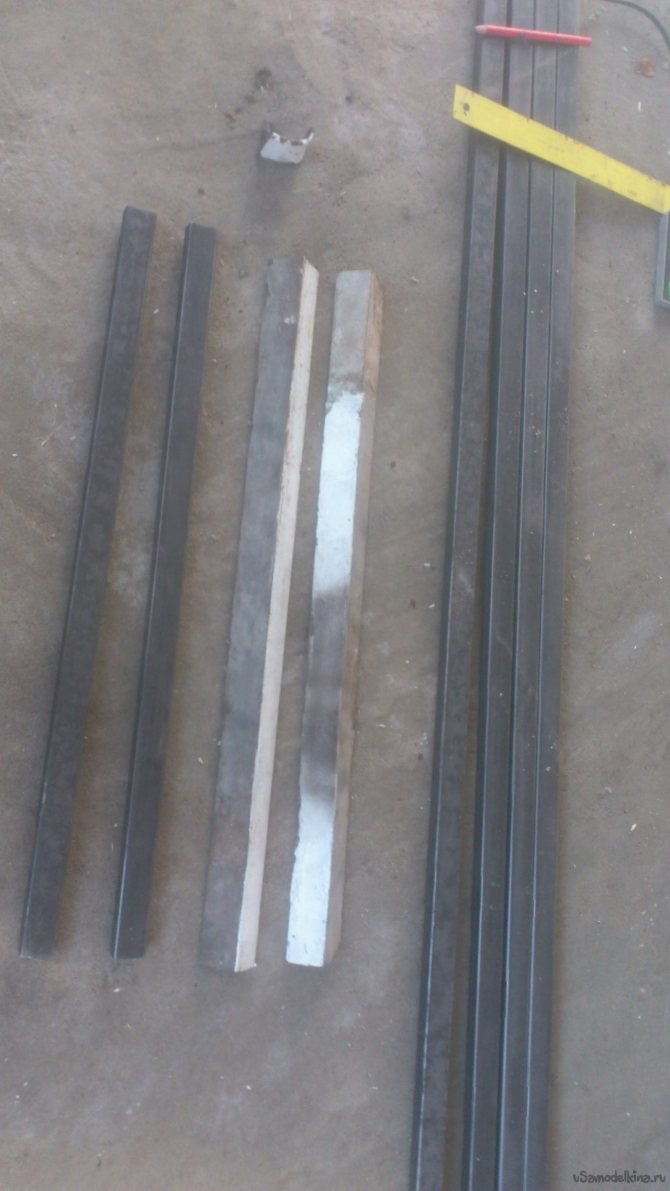
In the described variant, the height was three meters, and the width was about one meter. Based on this, three edged pine boards 3 meters long, 25 mm thick and 10 cm wide were selected, two crossbeams of the same section 1 and 1.3 meters long and thin slats of pine timber 50 mm thick and 1 length were sawn with a margin. 2 meters (see photo 2).
In this case, it is advisable to choose pine boards in such a way that they are as even as possible. You can ignore knots and small cracks - since the structure is located in outdoor conditions, which are quite aggressive for wood.
Varieties
There are several types of trellis designs that form reliable supports.
Made of wood
Wooden structures are reliable and safe. They fit beautifully into the design and are durable when properly manufactured and installed. The main advantages of wood trellises for climbing plants:
- natural, will look beautiful;
- easy to mount and position the structure;
- easy to process;
- organically fit into the design of the site.
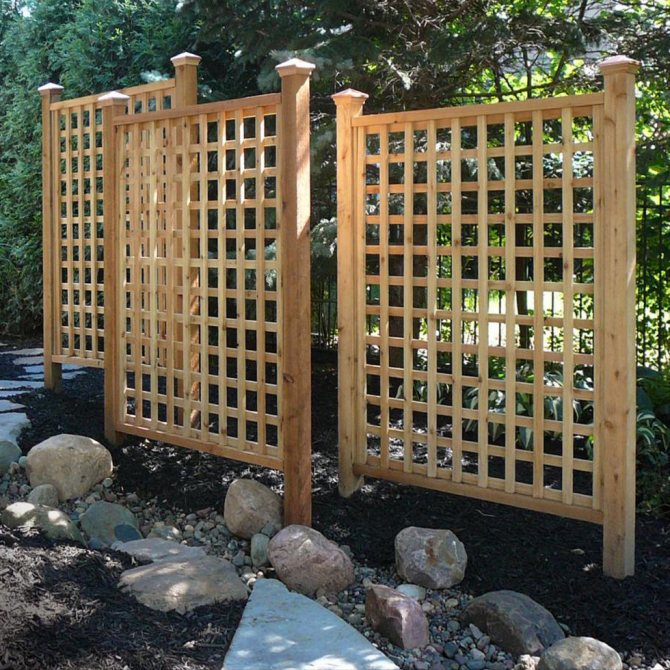
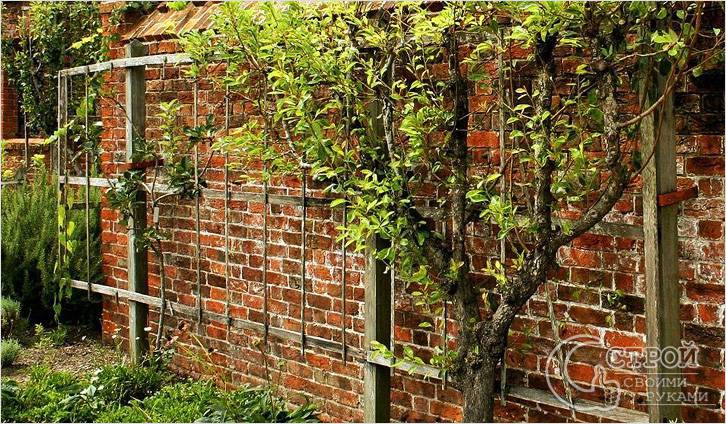
In order for the construction of a wooden trellis to be used for a long time, it is important to process the wooden trellis from moisture. Also consider the weight of the plant. It is better that trellises on a reliable wooden frame are used for climbing plants.It is better to fasten with nails, the supporting wooden posts are cemented.
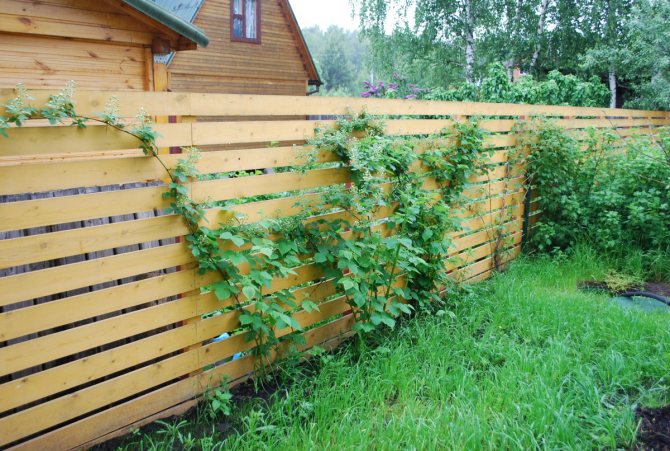
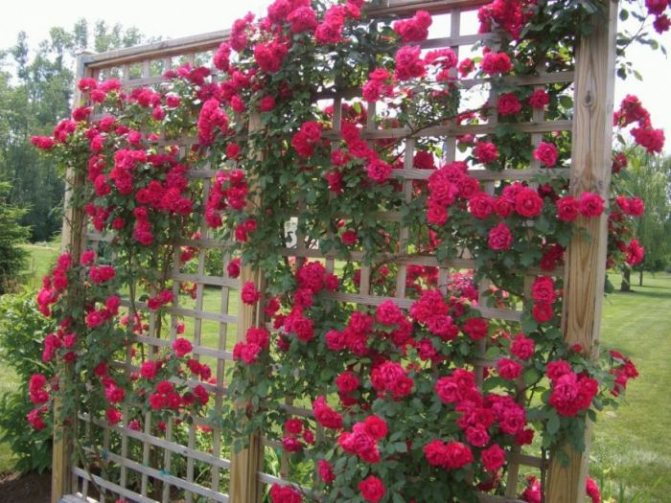
You can make and arrange a wall of branches with your own hands. Such a wooden trellis will not serve for long, but it will require a minimum of costs. Such a support can be attached to a climbing rose, raspberry, blackberry - they normally survive fruiting on such frames. The posts can be positioned in the ground.
From plastic pipes
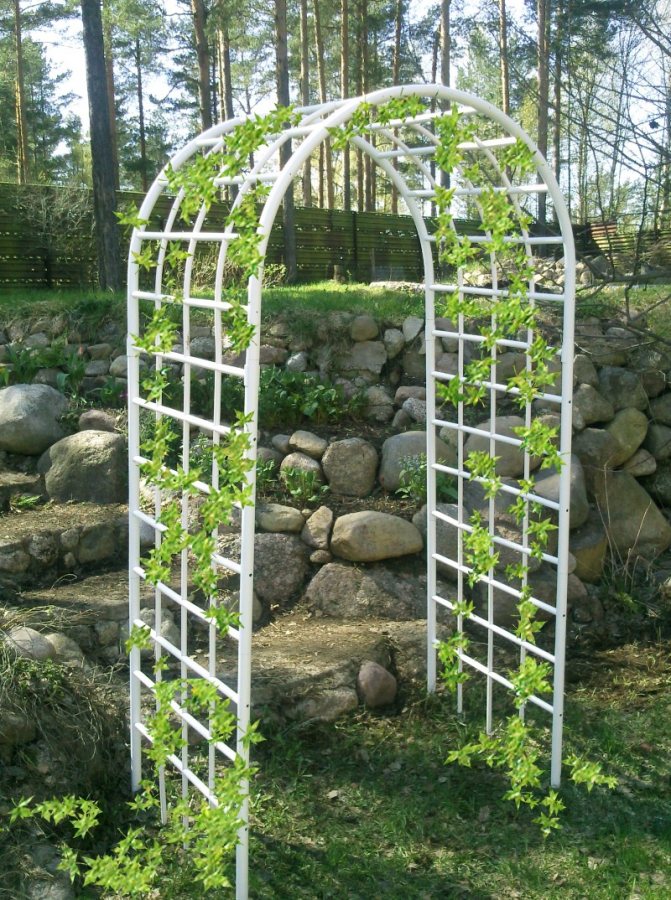
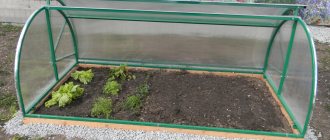
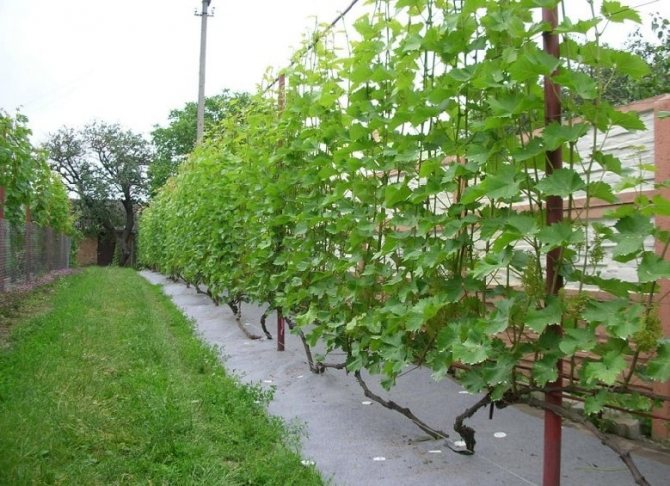
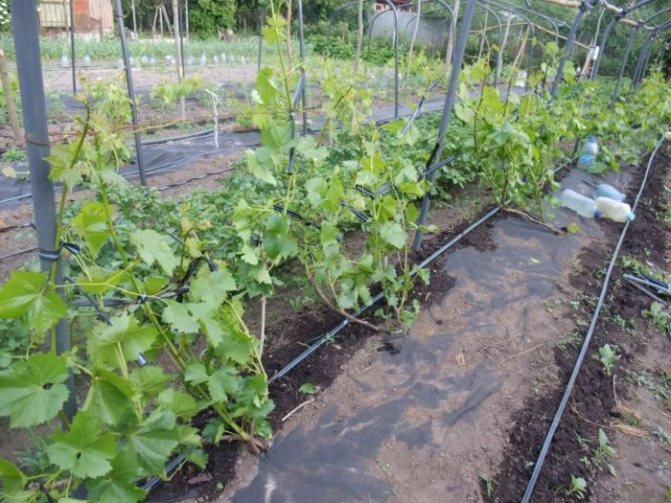
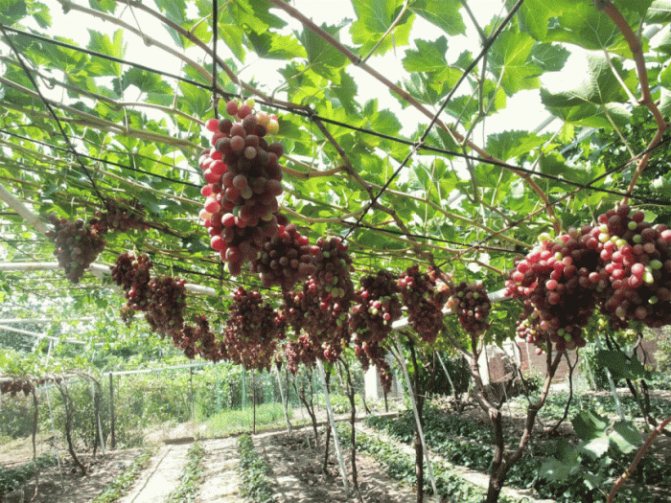
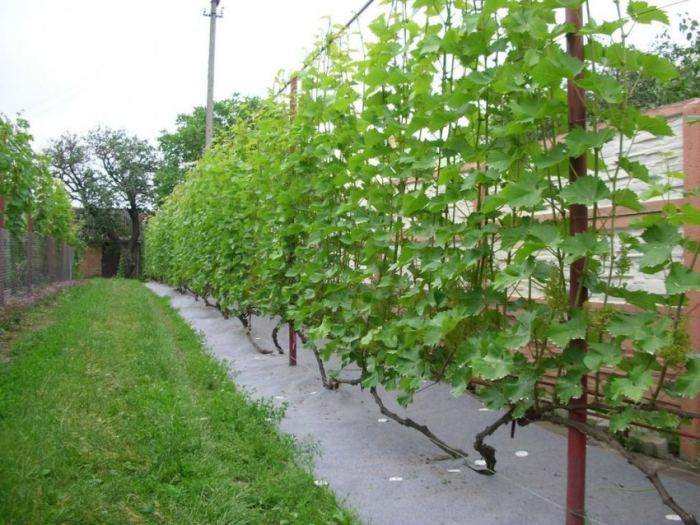
Everyone can make a trellis with their own hands from plastic pipes that have already been used. They are more often used for the manufacture of structures that form a reliable frame and allow large climbing plants to survive fruiting. Such a trellis for grapes is ideal for a summer residence.
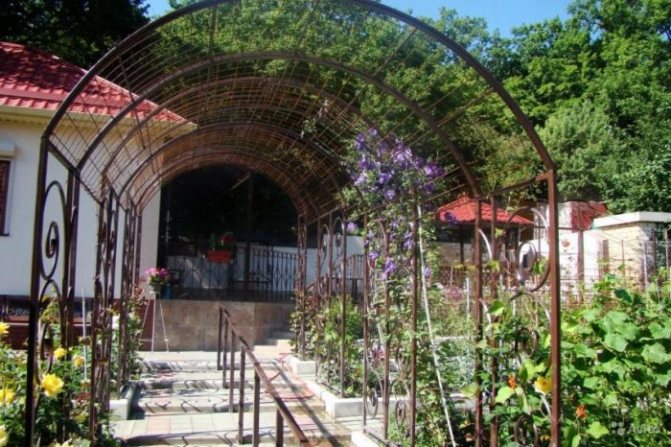
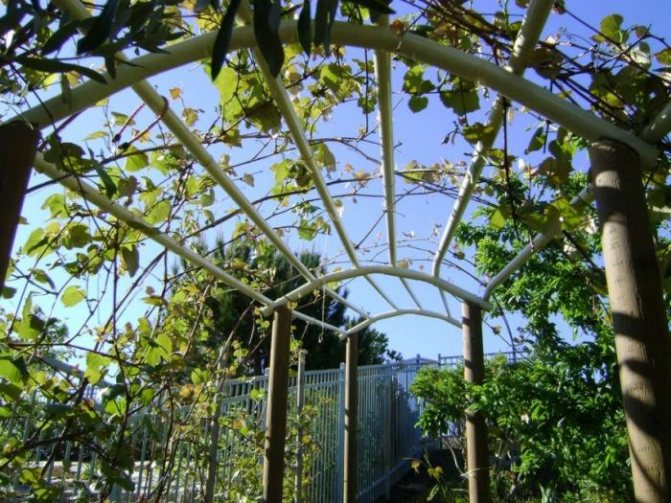
The advantages of the design are that you can form any beautiful shape with a support. Plastic pipes are flexible, so many people prefer to make trellises in the form of arches or build something like an extension of the roof against the wall.
For work, you will need clamps for connecting plastic pipes, a hacksaw, fittings to fasten the structure to the ground. First, a support project is made on the site, and then a structure is made according to the dimensions.
Plastic pipes are not afraid of temperature fluctuations, moisture and stress. It is better to use a long, small diameter material so that light can normally penetrate to the leaves through the trellis mesh.
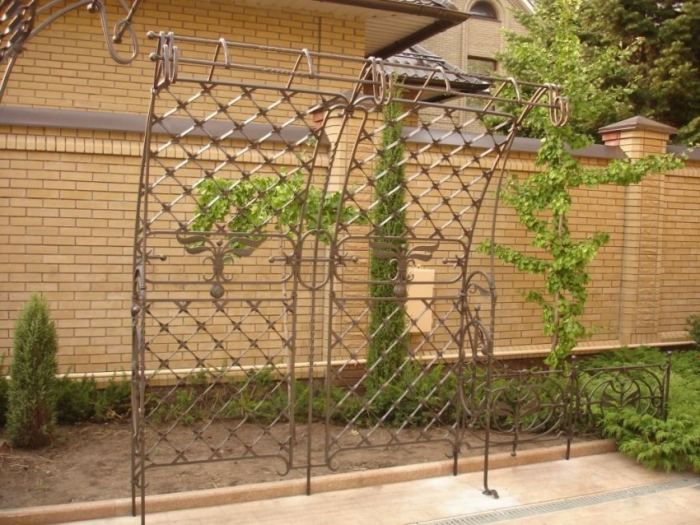
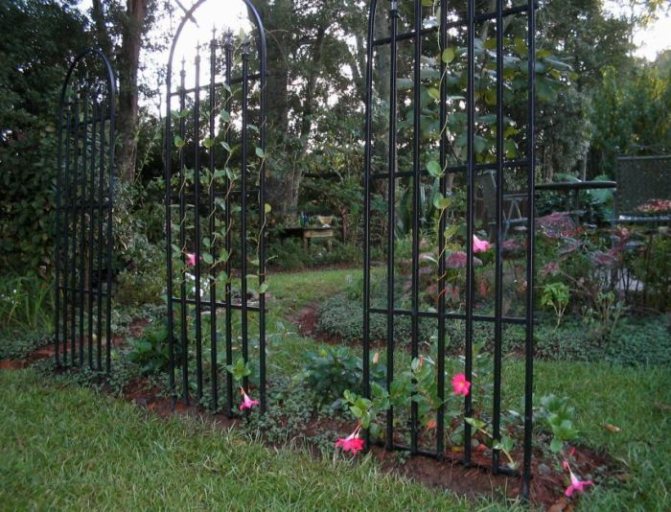
Of iron
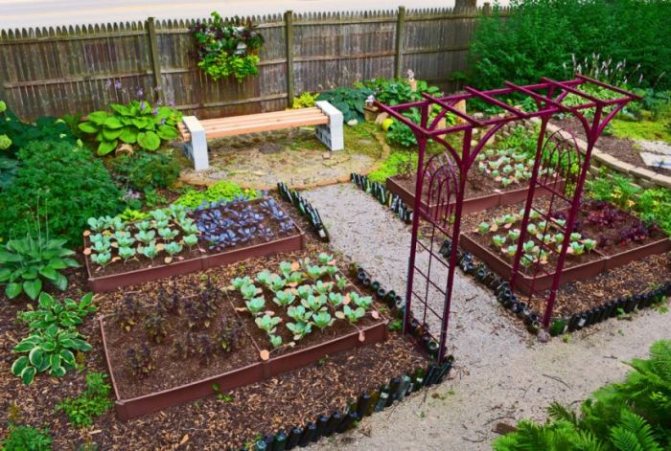
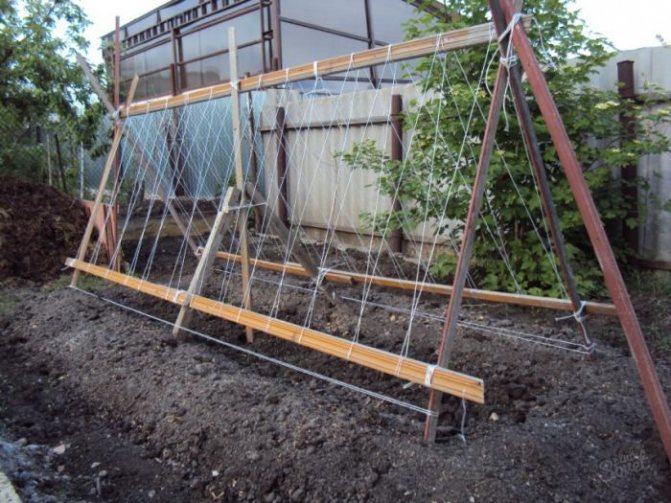
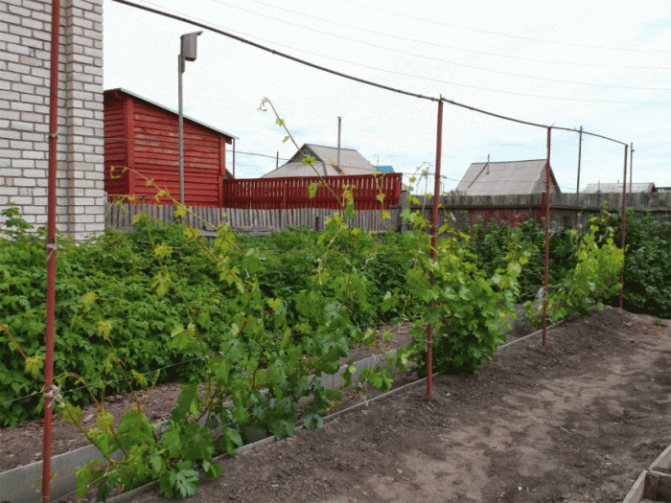
Beautiful metal supporting structures are suitable for any plants - both shrubs (blackberries, raspberries, currants) and weaving varieties (grapes, cucumbers, different types of flowers). It is also important here to correctly calculate the load and select the material. The larger the culture and its weight, the more durable and stable the reinforcement of the structure should be. For bush plants, blackberries and tomatoes on the site, a long thin lattice of metal reinforcement, which is connected to the posts, is suitable.
Parts of such a support are connected against a wall or a separate structure using a wire. For stability, welding is used to create long capital metal reinforcement meshes that form strong rectangles and arches in the garden.


Supports for home flowers
Well-groomed and properly placed vines are the highlight of any room. But providing support for large instances can be tricky.
For climbing plants with aerial roots (for example, monstera), you can make a support from which the vine will feed as from a tree trunk in natural conditions.
For this you will need:
- plastic tube with a diameter of 4-5 cm;
- a large nail or puncher;
- peat, nutrient soil or sphagnum moss;
- coconut fiber or tow for decoration.
Many holes are drilled in the tube at a distance of 3-4 cm from each other. If there is no puncher, then you can pierce the pipe with a heated nail of a suitable diameter (about 4-5 mm). For a low liana, you can use a plastic mesh folded in two layers with matching cells.
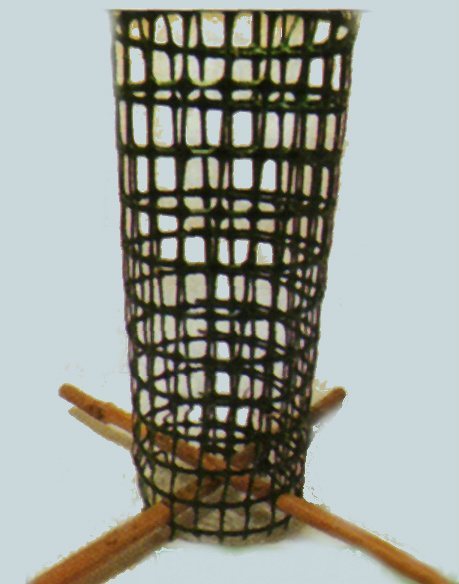
Then wet soil or moss is stuffed into the tube. From below, a cross is attached through the holes of such a size that the ends almost abut the walls of the pot.
Next, the drainage is filled up, the earth is planted and the plant is planted. In the final stage, the support is wrapped with tow or coconut fiber, but not too tightly so that the aerial roots can penetrate into the holes and feed the vine.
Alternatively: wrap a stick of a smaller diameter with moss, and fasten it with a synthetic mesh on top. The end result is an exotic sustainable tree.
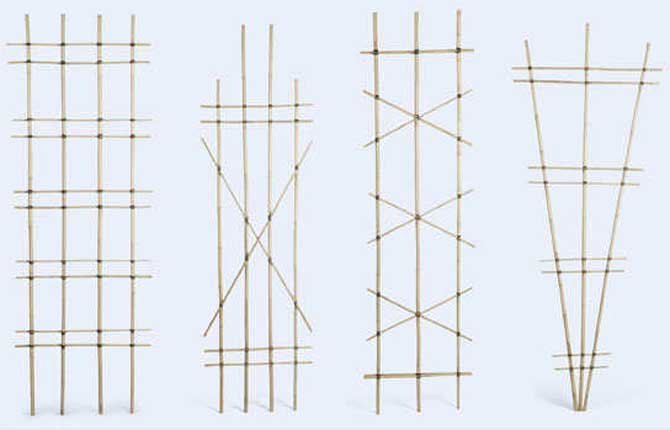
For small potted plants, you can build a variety of supports from bamboo sticks fastened with a cord, as well as from soft wire.
DIY making
You can independently make both a vertical and a horizontal support.It is possible to make a mixed trellis on a site where cucumbers and tomatoes survive the ripening period better. The correct mixed grape trellis is also suitable, as it allows you to do something like an extension of the roof and walls of the house. Almost any kind of trellis can be made by hand.
Regardless of what material you decide to make a support for plants from, you will need:
Additional nails are needed to create a durable wooden trellis. For a horizontal or vertical wall for plants made of reinforcement - wire. And for a trellis made of pipes - clamps.
Consider a general step-by-step instructions for making a trellis.
- Decide on the size of the trellis, choose the shape of the structure for the garden in the planning process. The shape depends on the plant: for grapes it is better to use vertical or combined supports, for tomatoes - long vertical ones, for cucumbers - vertical or mixed nets. And for shrubs, it is better to use trellises in the form of a round fence around the perimeter of the bush. For curly flowers in the garden, any form of construction is possible;
- Enter all measurements and the shape of the wall into the drawing;
- It is important to correctly calculate the weight of the trellis wall, which should be 2-3 times the weight of the plant with fruits. When planning, keep in mind that the plant will get larger;
- With the help of a solution, you need to fix the main posts in the ground for stability at the right distance. You can bury the posts if the trellis design is small. Next, start creating the lattice. Try to mount it evenly on the stand. Connect the trellis lattice wall parts.
When you are done with the wall stand, you can place a decorative climbing rose, raspberry, grape or other plant and flower branches on it at a distance. Branches can be fixed at a distance, which will look better.
Step-by-step instructions for creating a beautiful trellis in the country are feasible for everyone, if calculations are made in advance. A beautiful wall for the design of a decorative gazebo or plot of land will help climbing plants easily survive the period of fruiting or flowering.


The subtleties of growing blackberries
Not only tomatoes, cucumbers or raspberries, but blackberries can be successfully grown on a trellis. The blackberry option involves the use of tall varieties. Without constant and reliable support, they are unlikely to be able to grow. But varieties that have many branches are absolutely not suitable for you. They do not wrap around the trellis well, so they will seem untidy. When growing, seedlings must be placed at a distance of at least 1 meter.
By the time of binding, each individual bush should have at least four full-fledged branches. They are arranged in a shape that is somewhat reminiscent of a fan. Then each shoot is tied to the bar below. The central branches are shortened more strongly than the lateral ones. This will allow them to grow on par with their neighbors and keep up.
On each branch that is shortened, shoots should form. We always carry out basic pruning in the spring. It is at this time of the year that the buds begin to actively grow and bloom, forming new shoots. Climbing blackberries on a trellis look great, especially when the berries are ripening. To make maintenance even easier, you can do the following:
- Before planting the bushes, put the trellises on the garden plot 2 meters long.
- Tighten 4 wires. One of them will be located at a distance of 50 cm from the ground, the rest - 40 cm.
- Plant seedlings at a distance of two meters.
- Trim the ground part to twenty centimeters.