
Fruits and berries »Grapes
0
704
Article rating
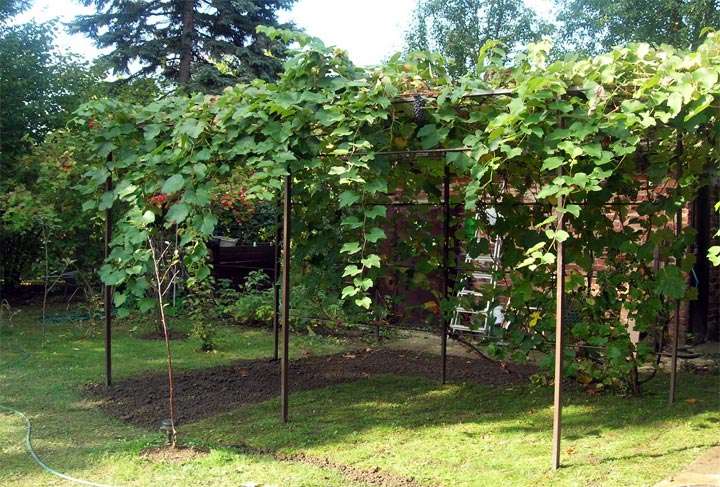
The grape pergola is a supporting structure designed for the cultivation of vigorous hybrid varieties. It allows you to create free space for powerful bushes, which are cramped on simple trellises. It is possible to build such a structure with your own hands from different materials.
Self-construction pergola for grapes
General information
Before making a pergola with your own hands, you should determine the purpose of this building. Based on this, follow-up activities need to be planned. First of all, you should determine the place on the site where the pergola will be erected with your own hands. The structure should not be bulky. For example, in a small garden, such a building will look inorganic. But on a large site, on the contrary, if you build a small structure, it will simply get lost on the ground. A built pergola in the country with your own hands should be strong. It should be borne in mind that a wobbly structure may not withstand the load from climbing plants. That is why it is necessary to take a responsible approach to the choice of the project.
Do-it-yourself green gazebo. Criteria for choosing trees for a living tent
The main difference between a living gazebo and a usual one is that it does not have walls and a ceiling made of wood or brick: all the functions of building materials in this structure are performed by trees. Therefore, you need to be wise when choosing a plant for a "green room", since not all trees are suitable for a summer cottage.
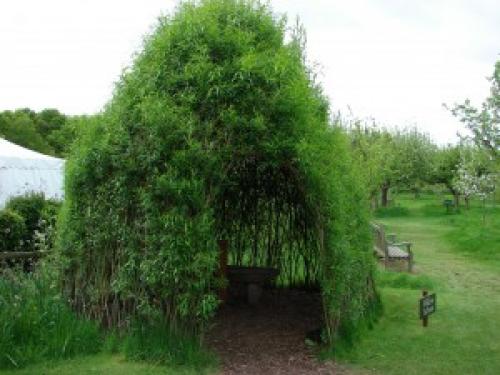
Willow gazebo in summer
Preference should be given to unpretentious trees with flexible branches that do not need to be cut frequently. Trees should be distinguished by dense vegetation, because it is the leaves that will serve as the ceiling and walls. If the plants are selected correctly, then after a few years in a living gazebo in the country it will be possible to safely wait out even a heavy downpour.
Check out the best trees that are often used for garden pavilions.
Chinese poplar is characterized by increased growth immediately after planting, and after the formation of the gazebo, its growth rate slows down, making it easier to care for it.
Poplar is suitable for quickly building hedges and gazebos
Linden is a plant that is characterized by excellent flexibility, thanks to this property, the formation of the tent is quite easy. But compared to poplar, a living linden gazebo takes longer to grow.
Using this tree, you can get a structure that will last for many years, while every year it will delight you with an extraordinary smell during the flowering period. Linden and poplar are suitable for tall arbors, it is recommended to plant them at a distance of about 1 m from each other.
For lower structures, up to 2.5-3 m in height, willow or mountain ash are suitable. Plant these trees to create a gazebo in 70 cm increments.
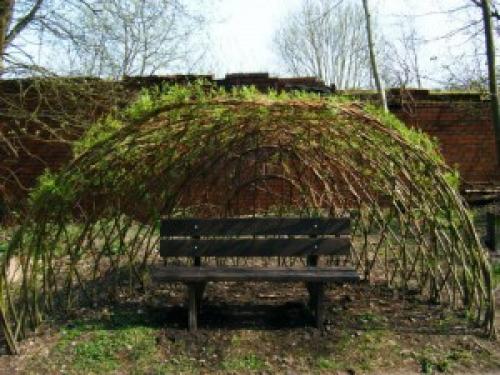
Young willows bend well and easily take the desired shape.
A green spruce gazebo at a summer cottage looks good, if you are not embarrassed by the twilight that will reign in the structure of spruce branches and the characteristic smell of the forest.It is because of the lack of proper lighting that the needles on the inside of the gazebo will quickly crumble. The spruce is not capricious, it develops well in partial shade, unlike its deciduous counterparts, and with the help of a haircut, the process of forming the crown is very simple.

Willow mini tent
Garden apple trees are well suited for creating a lively gazebo - after 3-4 years you can enjoy the taste of their fruits without leaving a cozy room.

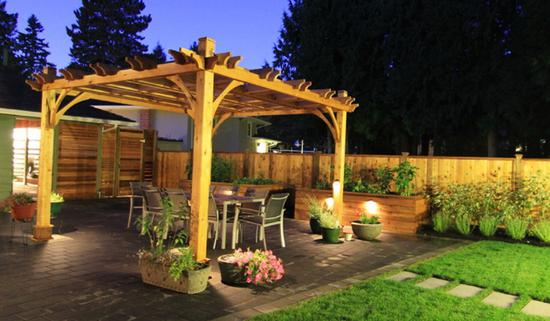
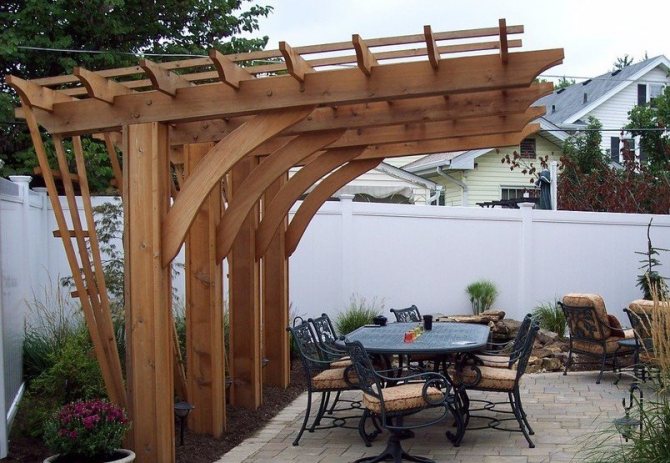
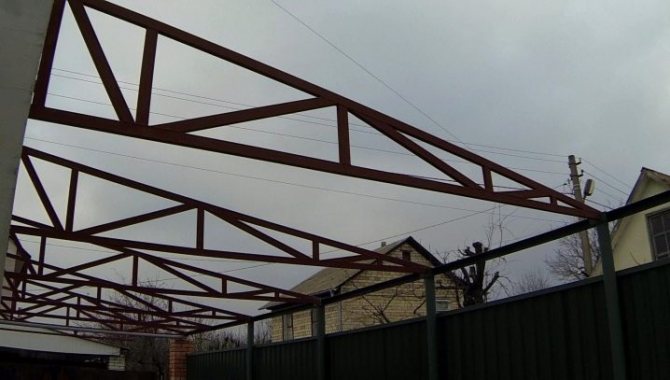
Awning construction
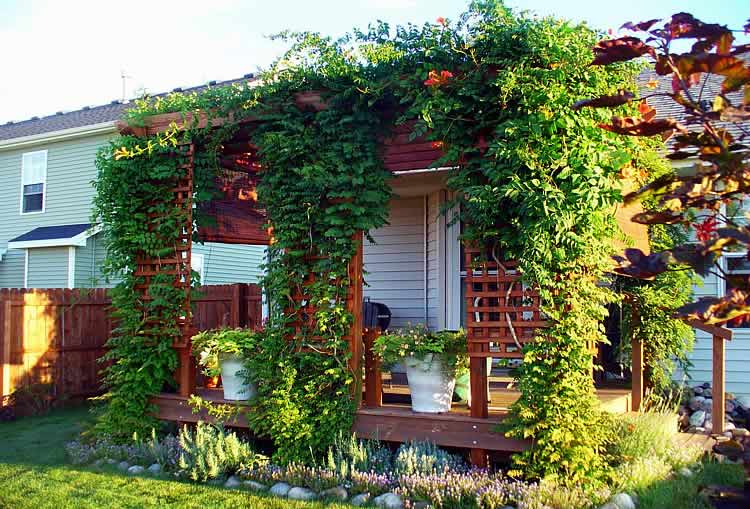
This type of pergola can be used as a gazebo. It accommodates a barbecue, chairs, and a small table. As a rule, the structure is entwined with climbing plants, such as grapes. The structure can be adjacent to the house close. In many cases, do-it-yourself pergolas for grapes built in the form of an awning create additional coziness on the plots, give them individuality. Often, such structures are used as effective protection against heat. The location of the structure near a pond or other body of water is considered very successful. Such structures are also being erected as an extension to the terrace. The erected pergola for the gazebo with your own hands looks very aesthetically pleasing.

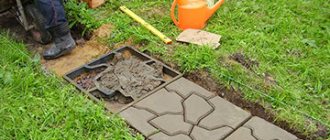
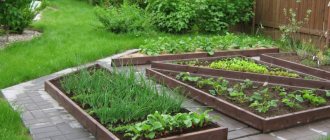
Correct organization of landings
For the full development of plants, seedlings are planted stepping back 20-30 centimeters from the canopy frame. Before planting, holes are dug 50-60 cm deep. The distance between the holes is 1 meter. At the bottom of the hole, 10 cm of sand or broken brick is poured as a drainage layer. A mixture of compost and good turf soil is taken as soil. Half of the hole is covered with soil, a stalk is placed, the rest of the hole is covered. The planted seedling is watered abundantly, its tip is tied to the canopy frame. Further care for the seedlings planted near the canopy is reduced to fertilization, timely watering, tying and pruning the vine.
The optimal choice
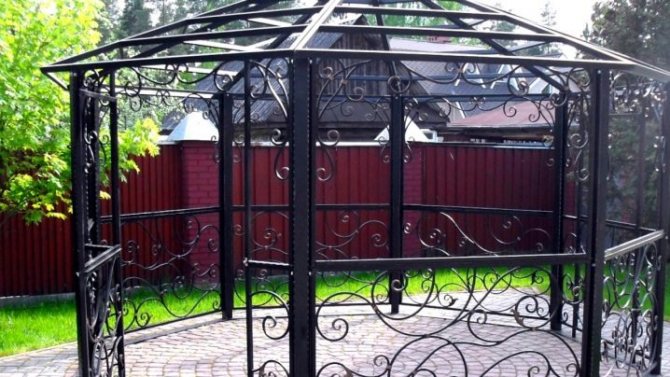
Each of the above materials has its own advantages and disadvantages. For example, a do-it-yourself pergola made of metal is a rather complicated structure. Not everyone is able to give the material the necessary shape at home. And ordering forged items costs a certain amount of money. Another thing is a wooden structure. With even a little experience in construction and certain knowledge, a novice master can also build such a structure. For the device of a pergola for grapes with your own hands, a pine, oak or spruce is perfect.
Varieties and methods of creation
Gazebos for summer cottages are very different: round, eight- or hexagonal, rectangular.
The metal frame is installed in one of two ways:
- Vertical pipes are concreted into the ground. After that, the structure is attached to these supports.
- A monolithic slab is poured, which is quite rare, or a columnar or strip foundation is being erected. The overall structure is created separately. The frame is fixed after the installation of the racks.
It's hard to say which way is better. The first method is more reliable fastenings, because the pillars are concreted. In this case, you also have to give less money, because the lower strapping and foundation will not be needed. However, a gazebo without a floor is an exclusively summer option. In the construction of a professional pipe on the foundation, the presence of a floor is provided initially.
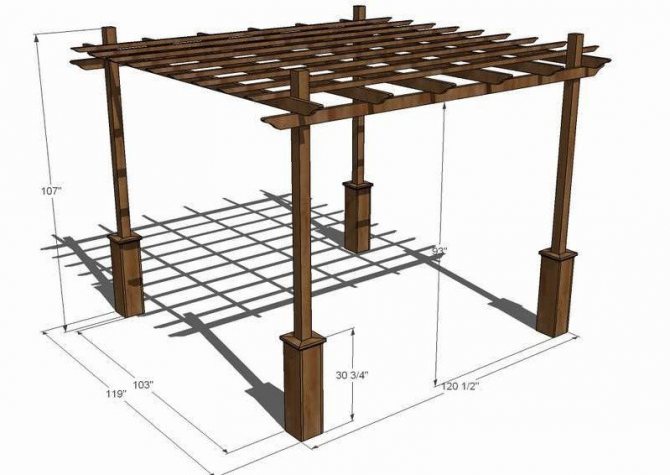
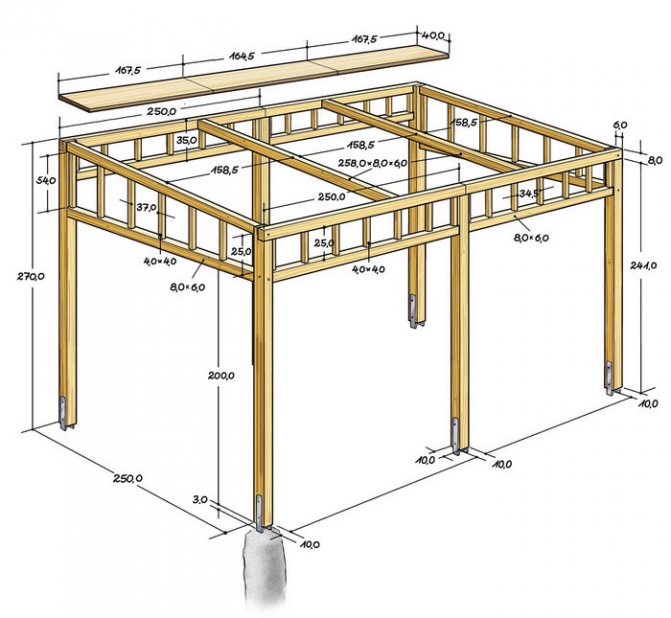
Preparation
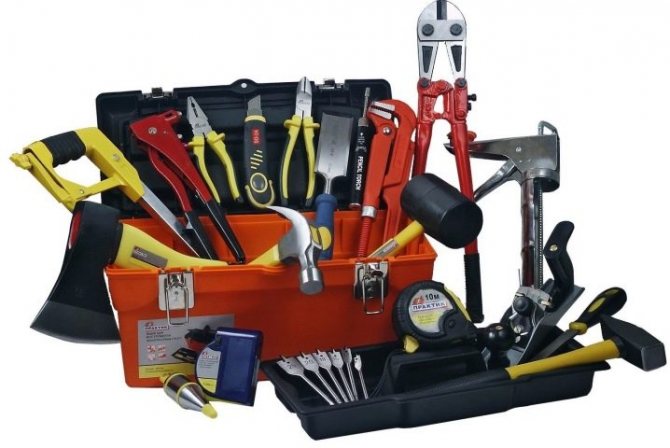
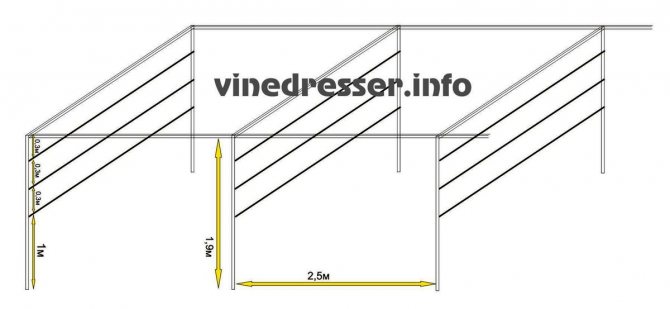
At this stage, the purchase of material and the preparation of the necessary tools are carried out. After the location has been determined, a project is drawn up. In accordance with it, the pergola will be erected with their own hands. The most popular constructions are considered to be 2.5 m high and 1.4 m wide. Other dimensions will depend on the owner's imagination. To work, you will need the following tools:
- shovel;
- a hammer;
- screwdriver.
In addition, brackets and brackets should be purchased. Nails can be used as fasteners. But wood screws will not interfere either.To process the material, you will need an antiseptic. In addition, brushes and paint will be needed. A bar is used for the construction of the structure. For support, its size is from 70 * 70 mm, for the device of cross beams - 50 * 50 mm, for side beams - 100 * 50 and 50 * 50. It is also necessary to purchase trellis panels and components for concrete mortar (or a ready-made mixture). These are the basic materials that are required for construction. Additional accessories are purchased according to an individual project.

Frame for maiden grapes. A hedge made of maiden grapes: its features and types
The maiden grape is a large deciduous vine. It is an unpretentious, frost-resistant and shade-tolerant plant that can grow on any soil. It grows well, reaching a height of 2-3 meters per year. There are 12 known types of maiden grapes, most of which are found in Asia and America. Several of these types are used for decorative purposes:
- The grape is girlish triangular. A relict species developed in the 19th century. Liana of triangular grapes reaches 20 meters and is very unpretentious. It branches well and does not require special soil conditions and location. Sensitive to frost, but resistant to air pollution. Leaves are dark green, 10–20 cm long, simple or triple-shaped with teeth. It blooms in spring, berries ripen in autumn. The berries are blue-black in color, collected in bunches and are inedible.
- Henry's maiden grape. Young stems have a tetrahedral shape, over time they lignify. Leaves - palmate-complex of 5 leaves on one leg of light green color, up to 7 cm in size.It blooms in spring with small greenish flowers. The fruits are also blue and inedible. The Henry grape hedge should be covered for the winter.
- Five-leafed maiden grapes. Reaches 15–20 meters in height. Like all species, it clings to the support with antennae. Resistant to frost and air pollution. Leaves are palmate-complex, green in color, only 2–4 cm long, which turn purple in autumn. Fruits in small, inedible, bluish-black berries.
- Attached grapes. This species reaches 3-4 meters in height. The leaves are large - 5–12 cm in length, palmate-compound of 5 leaflets. In summer, the leaves are dark green with edging, shiny on both sides, and in autumn they acquire red-purple tones. Fruits in blue berries that are not eaten.
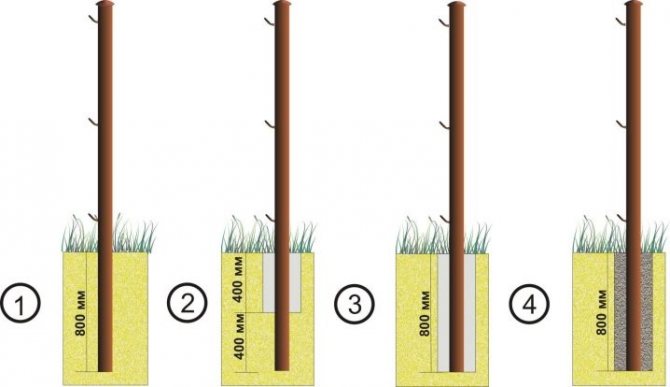
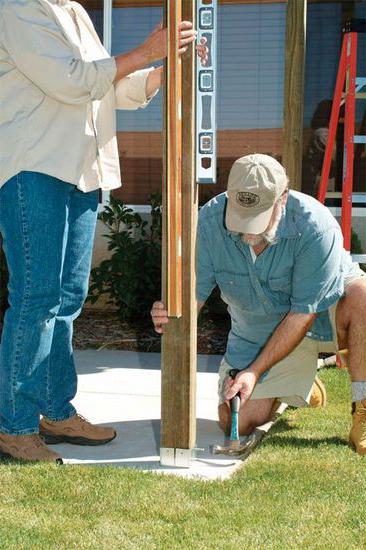
Installation of the structure: supporting elements
All wooden elements should be treated with a protective solution before assembly. After it dries, you can continue to work with the details. In accordance with the project, markings are made in the place where the structure will actually be located. If the structure is supposed to be erected on four supports, then it is necessary to dig holes for them. Their optimum depth is 0.6 m. Support bars are immersed in them. For stability, the elements are poured with concrete. Next, you need to wait a few days for the mixture to set.
Tools Needed for Construction
The choice of tool depends on the material of the future structure:
- marking will require a level, tape measure, square, hydrolevel, pegs, twine, pencil or crayon;
- a universal tool is a screwdriver, a set of drills, nuts, bolts, screws, a knife;
- for the manufacture of the foundation, you will need a drill, a concrete mixer, a shovel and a bayonet shovel, containers for sand and gravel;
- for the manufacture of metal structures, you will need an angle grinder (grinder), a drill and a welding machine;
- to work with wood you need a jigsaw, hacksaw, hammer, nails;
- for final painting, a brush or roller is required.
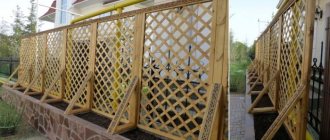
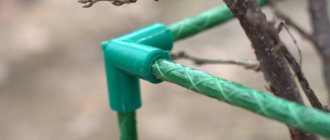
Trellis panels
These elements are also attached to horizontal beams. It must be borne in mind that contact of trellis panels with the ground is undesirable. Otherwise, the process of decay may begin.If it is supposed to cover the pergola with grapes, then the trellis panels are made of metal mesh or wire. So even in winter, the vine will remain on the gazebo, and the appearance of the structure will not suffer.
What materials to choose?
It is recommended to stop the choice on profiled pipes with a wall thickness of at least 2 mm. You should not choose overly thick products. In stores, they are most often offered by kilograms, so they are usually quite expensive.
Even if it is necessary to use round pipes, it is still recommended to focus on the wall thickness indicated above. Such products are more difficult to install, but it is still quite possible to cope with this work if you have certain skills and experience. Round pipes are less expensive than rectangular ones.
Some people prefer to use metal corners. However, such a product must be thicker than the pipe (the recommended thickness is from 25 to 30 mm), since the corners are less rigid. These structural elements are very well suited for cladding.
Profiled corners and pipes are not only steel, but also aluminum. Aluminum is lighter than steel - this advantage is very important when creating a collapsible structure. However, higher prices are usually set for such materials - not all owners of summer cottages can afford such a gazebo.
Most suitable plants
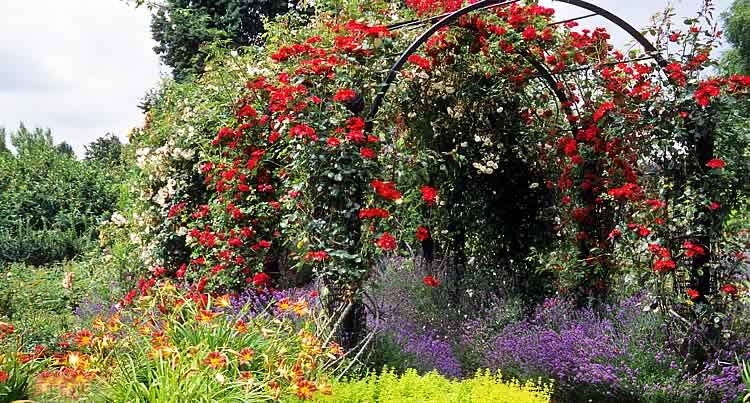
A self-created pergola (arch, tunnel or any other type of construction) fits perfectly into the general style of the garden and performs not only an aesthetic function. As mentioned above, such structures are an excellent support for climbing plants. It is thanks to the plantations that a saving shadow is formed on hot days. Most often, of course, pergolas are erected for grapes. Also, Chinese lemongrass, nasturtiums, bindweed, clematis, woodworm, honeysuckle look spectacular on designs. You can even hop over a building. However, you need to be careful with this plant, because without proper care it can develop too much and fill large areas on the site. Rose and wisteria remain popular. These ornamental plants are very popular in the southern regions. It should be remembered that any plantings require care, timely watering and feeding. It takes time for plants to grow and develop. Before the plantings have closed the structure, its elements can be stained and protected with varnish for outdoor use. In this case, a temporary shadow will be created by fabric canvases that can be placed on the frame. If the structure is built of stone, a small fountain made of the same material will look great next to it. A wooden pergola can be perfectly complemented by a small stream or well located nearby. In any case, the structure will be an excellent addition to the garden.
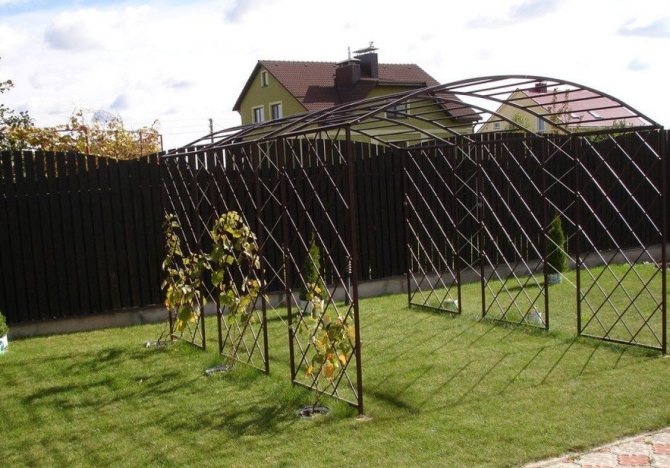
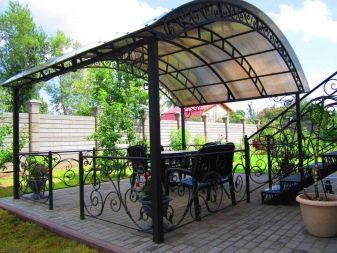
Arbor for grapes made of metal with your own hands. By form
Lightweight structures have different shapes:
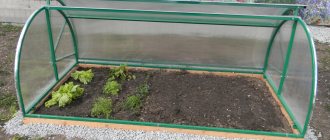
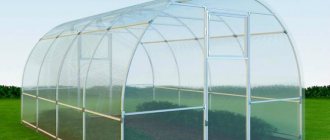
Arch
Such a grape gazebo looks like a greenhouse, but no film is required for it. In order to make such a gazebo, you will need metal fittings or plastic pipes, wire, cement, sand and gravel.
Stages of building a gazebo:
- Then the reinforcement rods are bent in a semicircle and the ends of the reinforcement are dug into the ground, and the holes are poured with a concrete mixture;
- Next, several guides are attached, this is necessary in order to increase the rigidity of the future gazebo;
- Wire or welding can be used to connect the joints.
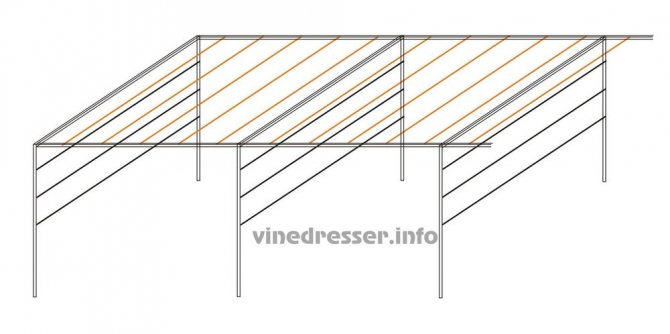
Tapestry of two planes
To create such a gazebo, you will need pipes, fittings or wood.
Stages of building a gazebo:
- Then they are poured with concrete;
- After the concrete has hardened, vertical and horizontal lintels are fixed;
- If the roof is not provided with a covering, then the top will be mounted in the same way as the side walls;
- The installation of racks must be controlled using plumb lines and a level, this is necessary so that the gazebo for grapes is not crooked;
- The top of the gazebo can be flat or slope towards the sunny side.

First, you need to dig in the required number of racks, which will form the basis of the structure;
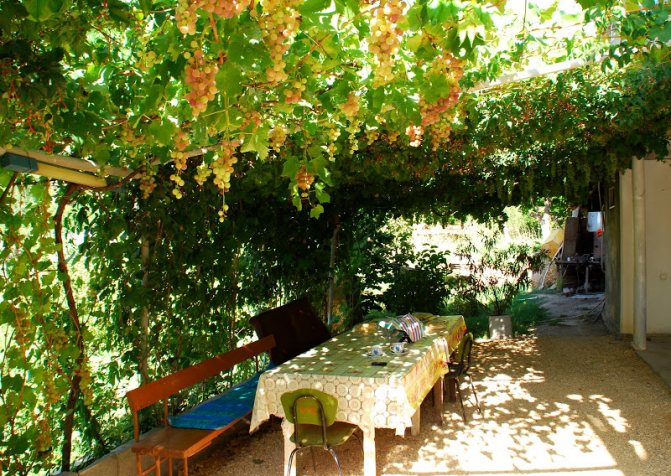
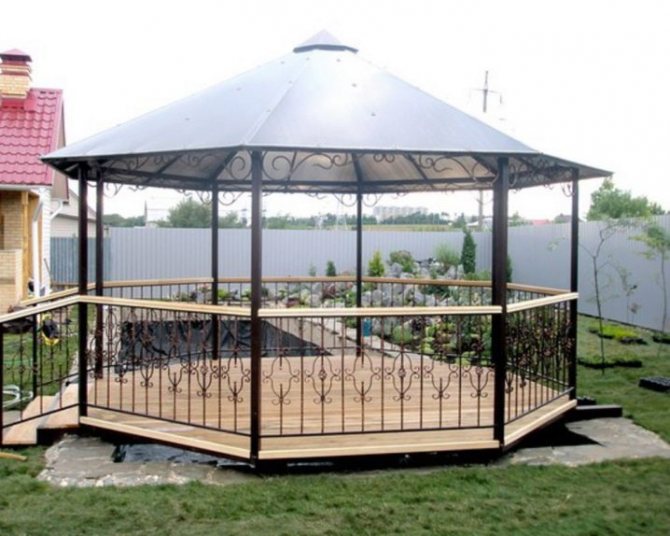
A gazebo attached to the house
This is a type of construction that is entwined with grapes, located above the terrace or porch near the house. Before making a grape gazebo, you need to step back from the wall, then it goes up at an angle to the roof.
For the construction of this gazebo, less materials will be required, because for it it is necessary to build only one plane and make a roofing slope. Accordingly, the price of this gazebo will be much lower;
Let's say the porch can be adapted to the living room, you can put a beautiful table and chairs in it. Also place flowers in flowerpots, put a swing and hang a hammock.
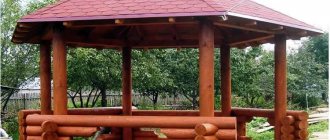
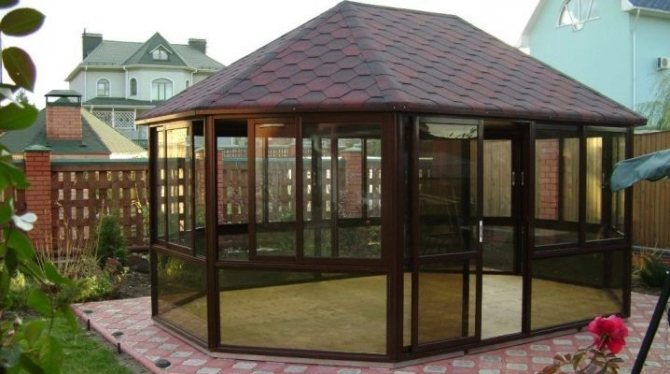
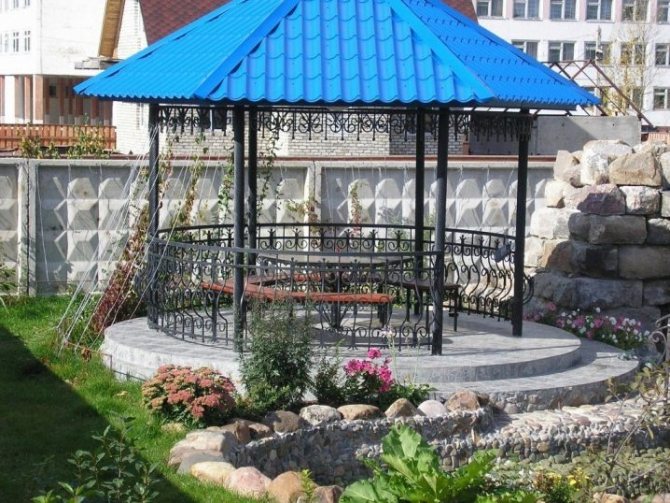
Round gazebo
Such a gazebo is able to decorate even the smallest area.
Before making a gazebo for grapes, you need the following:
- It is necessary to install bars or pipes around the perimeter of the building while placing the entrance from the desired side; Roofing bars are shaped like a fungus in a playground;
- The beams are joined in the center and they diverge at an angle downward to the uprights.
- After that, two vines are planted on both sides, let them up and guide them in a circle.
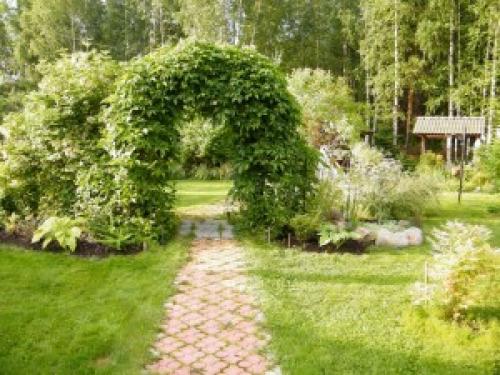
Arched awnings
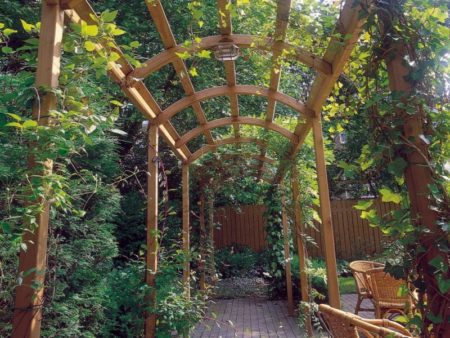
Vine-entwined arches look amazing on the backyard. Making them will not be difficult. The whole process can be divided into three stages.
- According to the markings, pillars are installed with support pads at the upper ends.
- Arched arcs are lowered onto the pillars from above. The fixation of the arcs is carried out using bolted connections or welding.
- After connecting, several arched arcs are interconnected with a square pipe to form a gazebo. Several single arches entwined with vine will look especially beautiful.
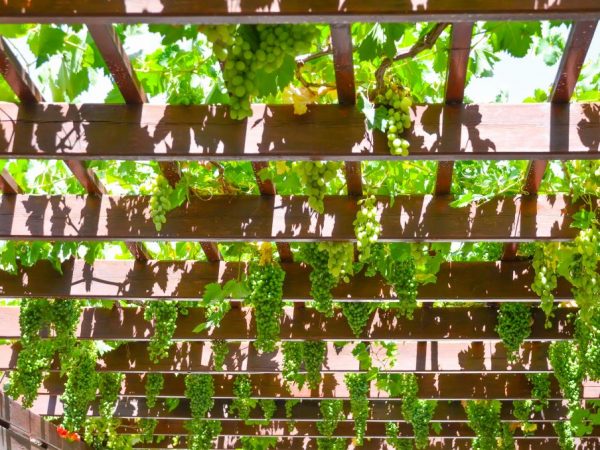
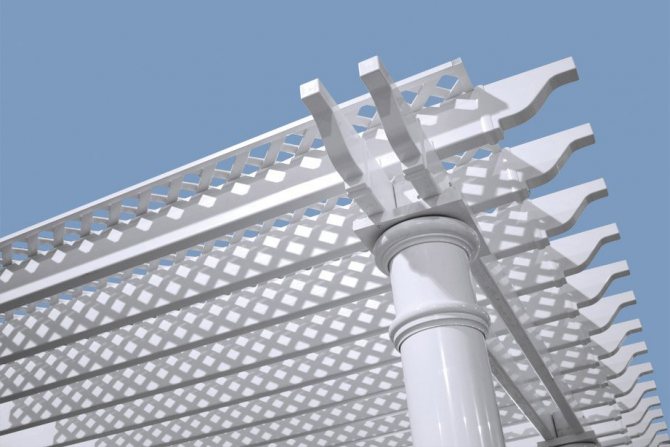
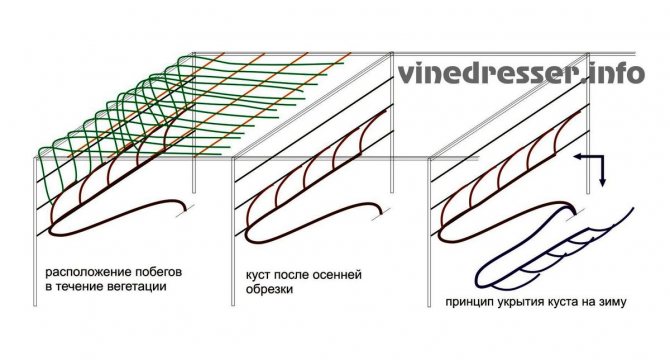
What is a grape pergola?
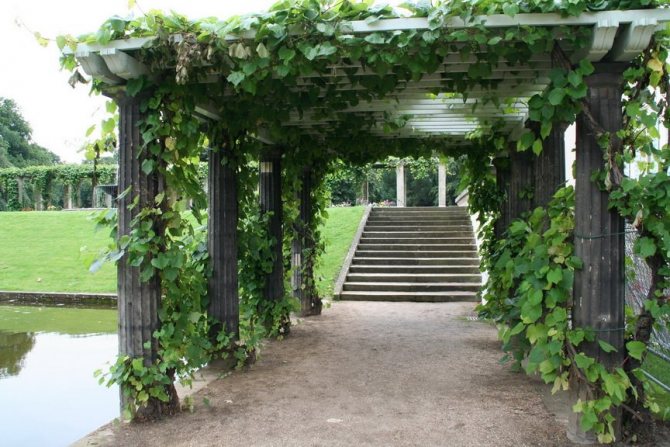
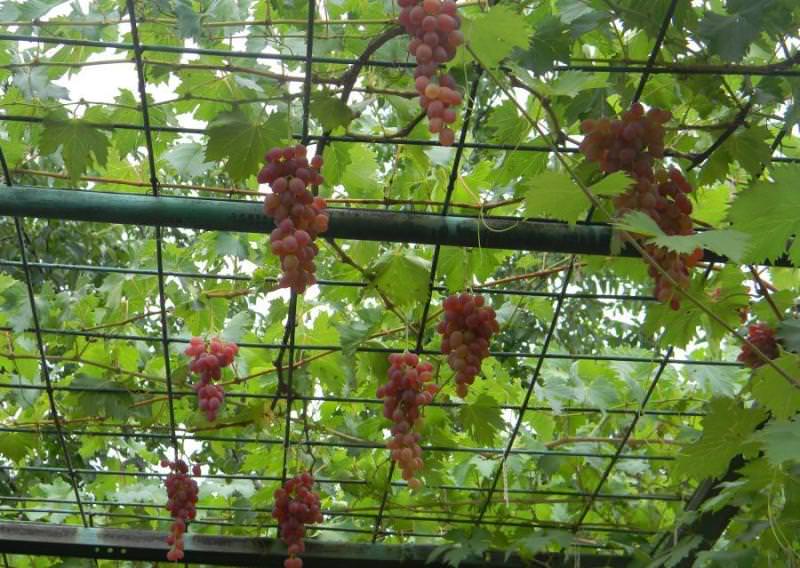
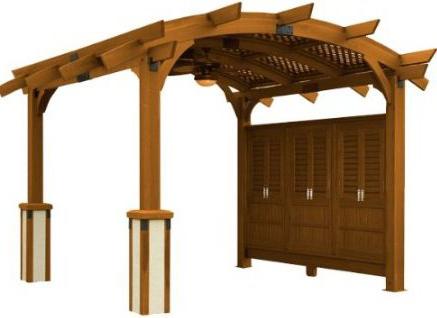
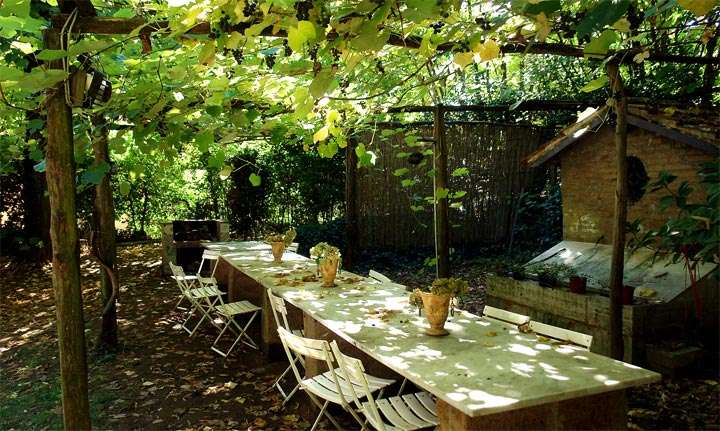
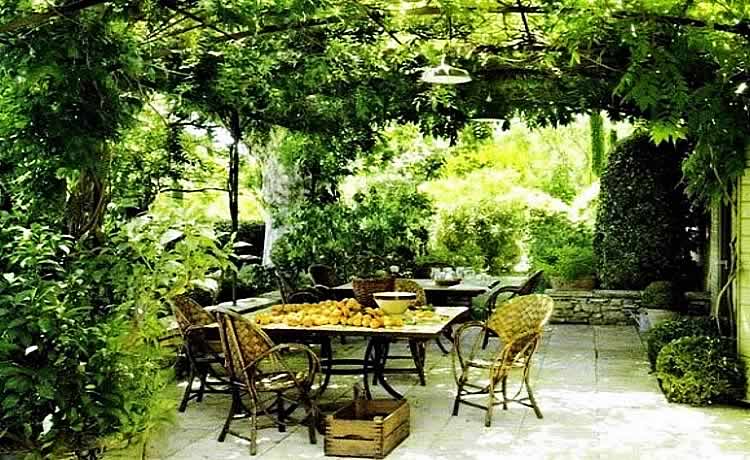
A pergola is a structure of a small architectural form, created from several arches, which are interconnected by a lattice ceiling. From the outside, the building is covered with thickets of climbing grapes, and it looks like a gazebo. To create "green roofs" grape bushes are ideal, because, being vines, they are not able to independently develop in a vertical direction.
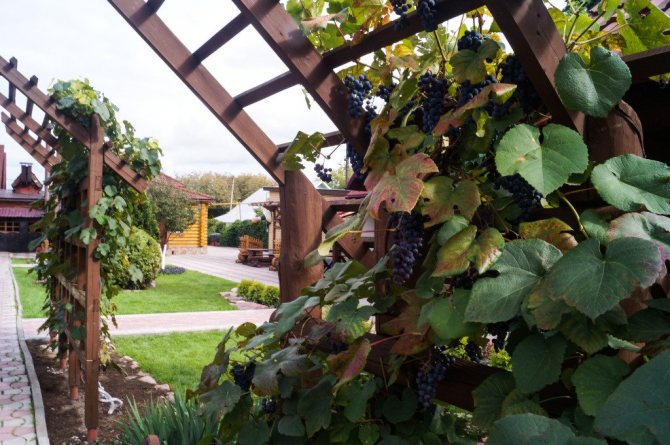
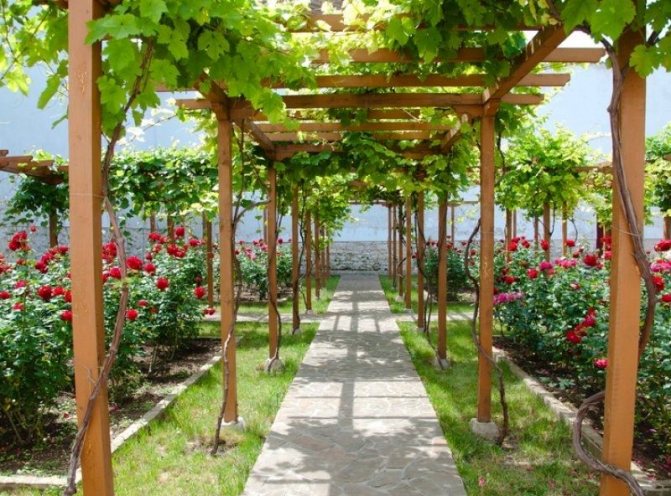
Such designs have long been used in southern countries for protection from the scorching sun rays. They were very fond of equipping grape pavilions in the 18th – 19th centuries. And in our time, the pergola is gaining popularity again - it is used to decorate private dachas, ennoble parks and squares, and decorate areas near houses. The structure fits well into any landscape, where it not only serves as a support for the vines, but also creates partial shade and separates recreation areas.
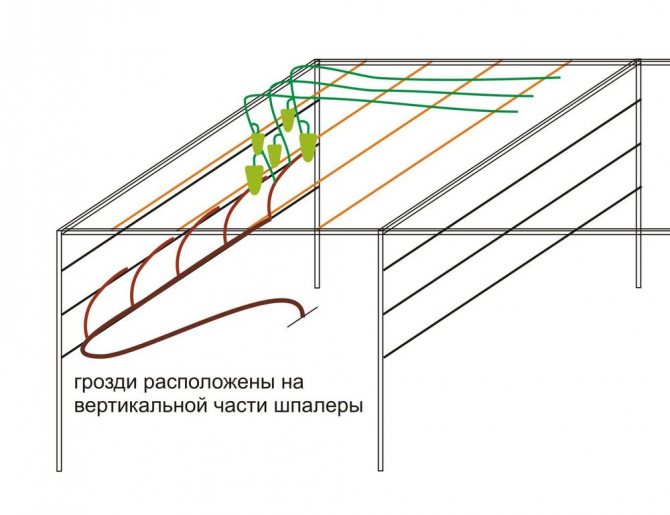
Due to the vertical tying of the grape branches, the planting area of the site is saved. The plant receives uniform illumination, which has a positive effect on fertility (the speed of maturation of the brushes and their quality increases).
Another plus is the provision of high-quality ventilation for the vineyard, and this significantly reduces the risk of various diseases affecting the berries. As a result, the need for the use of protective chemicals, which are often toxic to the plant, is reduced.