The more heat and light the plants receive, the better and richer your harvest will be in the fall. Greenhouses and greenhouses play a significant role in ensuring the correct growing conditions for certain types of crops. Especially the presence of the latter in the country is relevant for those regions where the summer is short and far from being the hottest. However, it is not always possible to build a large greenhouse on a summer cottage. Therefore, many decide to install a greenhouse, of which there are a huge number of species. One of the most popular and well-known is the breadbasket (or snail) greenhouse, which got its names from the special shape of the structure.
Greenhouse-breadbasket
Greenhouse types
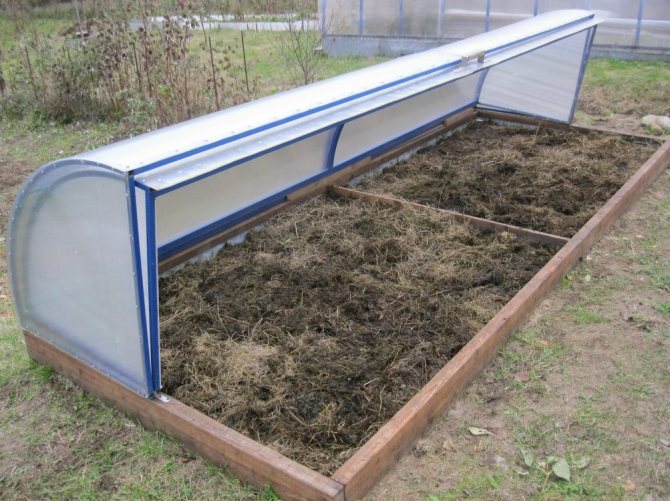
Before we get acquainted with the greenhouse-breadbasket, we need to find out what types of summer cottages exist in general and how they differ from the greenhouse. To begin with, let's give an answer to the second question: a greenhouse differs from its "older" relative - a greenhouse - in the way it is heated. If the latter can receive additional heat from heating systems or internal heat accumulators (in general, from artificial sources), then its greenhouses are heated only from natural sources. It can be not only sunlight, but also heat generated as a result of natural processing of biofuels (manure, compost), which are mandatory in the greenhouse bed.
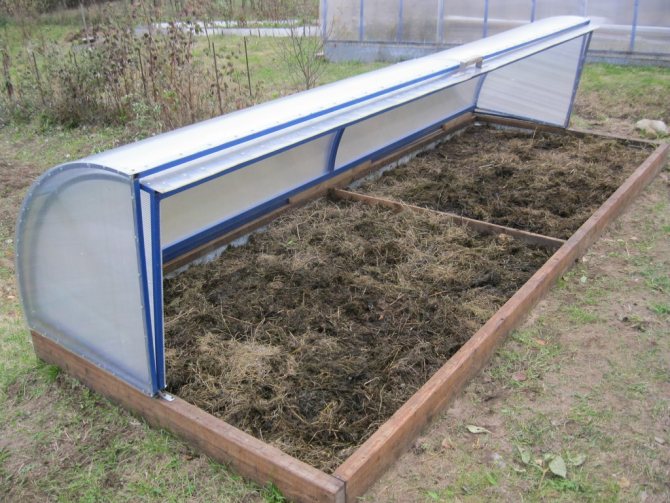
Greenhouse with a warm bed
Polycarbonate greenhouses
Despite the general principles of arrangement and a similar appearance, greenhouses are different both in the complexity of the design and in their appearance.
Table. Types of greenhouses.
| Greenhouse type | Main characteristics |
| Arched | The simplest and most familiar design. It has a neat semicircular shape, since the frame is made of several arcs dug in a row, covered with a covering material. It is popular due to its ease of assembly, because it is easy to do it yourself. In order to gain access to the plants, it is enough just to lift the covering material and fix it on the arches at the required height. |
| "Butterfly" | A greenhouse with two doors that open like the wings of an insect of the same name. Also, in order not to create excessive drafts, you can open only one sash. The main disadvantage is the need to equip props for the sash. Otherwise, the greenhouse will constantly close on its own. But on the other hand, it is very convenient to work with plants in it, since there is maximum access to them from all sides. |
| Terrestrial (French) | This is any greenhouse that settles on the surface of the ground. Ground greenhouse can be "Butterfly", "Snail", arched and any other. They can be easily carried from one place to another. |
| In-depth | Most of this structure will be in the ground. This ensures better conservation of thermal energy inside the greenhouse. Only the roof comes out to the surface, through which the light necessary for the plants penetrates. |
Also, greenhouses differ from each other and the materials from which they are made. Since it is arched greenhouses that are most popular because of the simplicity of their design, usually enough soft or bendable materials are still used to cover these structures. It can be polycarbonate, agrofibre or film.Each material has its own pros and cons.
- Polyethylene film - rather thin and fragile material, which is most often used to cover greenhouses due to its cheapness and ease of working with it. However, the film is easy to tear or cut, and for the winter it is imperative to remove and put away somewhere. The service life of the film is only 2-3 years, even with careful use, but it transmits sunlight well, even if it keeps heat worse than other covering materials.
PET film as a covering material
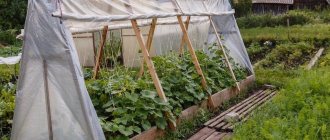
- Agrofiber - thin and light, but strong enough covering material. Also referred to as spunbond. This is a non-woven material that is now actively used for horticultural needs - for mulching, covering ridges, greenhouses and much more. The fabric perfectly permeates water and air, but at the same time does not release heat, due to which an optimal microclimate for garden plants is created inside a greenhouse covered with agrofibre.
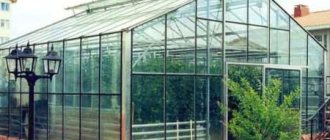
- Polycarbonate - a material that does not lose its first positions in the horticultural market. Strong, lightweight, good light transmission, but excellent heat retention, it is most often used for sheathing greenhouses and greenhouses. Polycarbonate serves for many years, with careful operation even more than 10 years, which allows you to significantly reduce the cost of gardening needs (after all, you will not have to buy a film every year). In addition, high-quality polycarbonate protects plants from harmful ultraviolet rays, copes well with strong winds. He will not be able to cope except with strong hail or intruders, but no one is immune from these scenarios.
- Glass - also a covering material that can be used for a greenhouse, but only if the structure has smooth, not arched sides. Glazed you can see a butterfly greenhouse or an in-depth greenhouse.

Spunbond greenhouse
Agricultural fiber prices
agrofibre

Cellular polycarbonate greenhouse
Cellular polycarbonate prices
cellular polycarbonate

Wooden greenhouse under glass
The frame of any greenhouse can be made of wood, plastic, metal. Arched structures are most often made of plastic or metal, while the latter is much stronger and does not need to be cleaned for the winter. But without constant touch-up, metal can be quickly destroyed by rust. But the plastic is not afraid of it, but rather fragile. Greenhouses with smooth walls are usually made of wood, covering them with glass or polycarbonate.
In the table above, where the types of greenhouses are indicated, we deliberately did not mention the greenhouse-bread bin. It is about the features of this design that we will now tell in more detail.
The greenhouse-breadbasket has many advantages
Features of the design of a greenhouse-bread bin
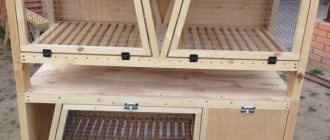
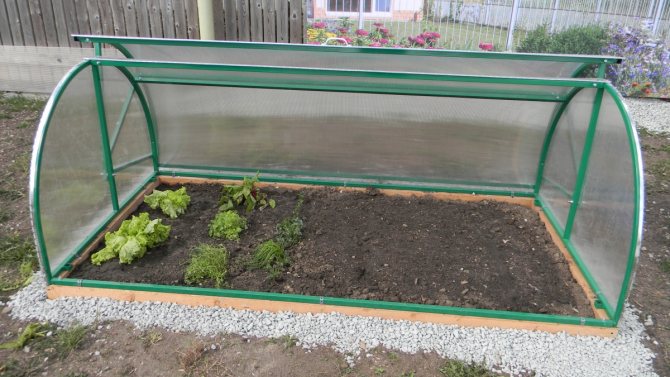
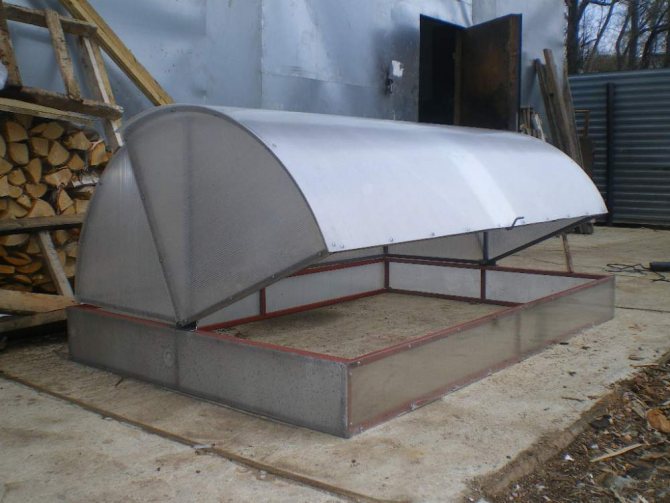
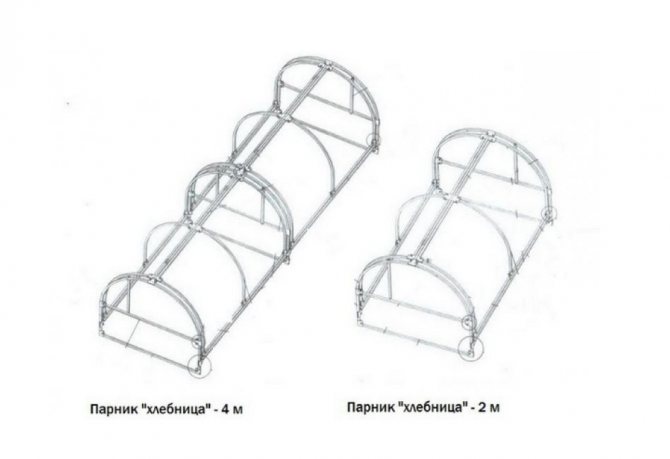
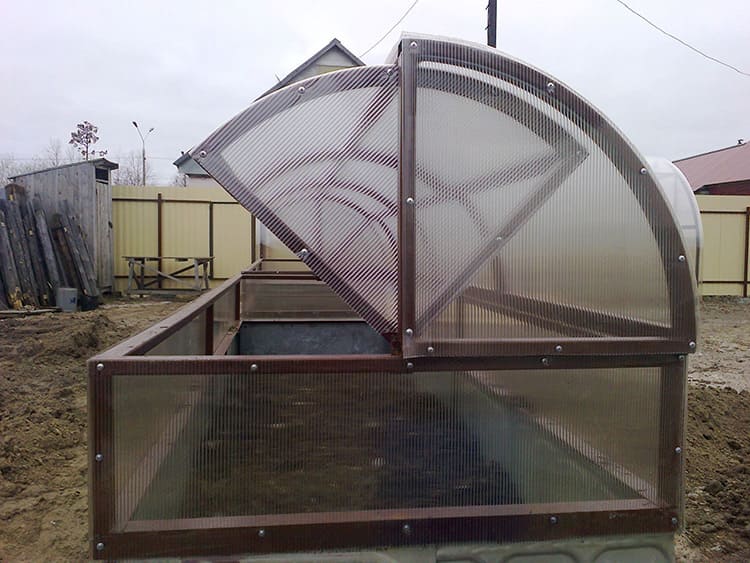
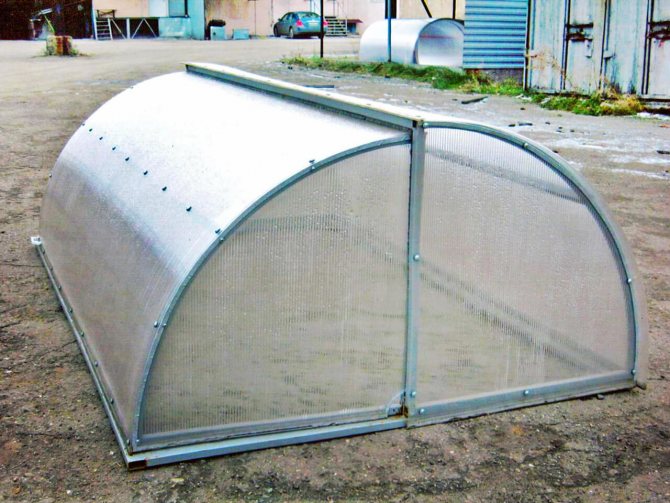
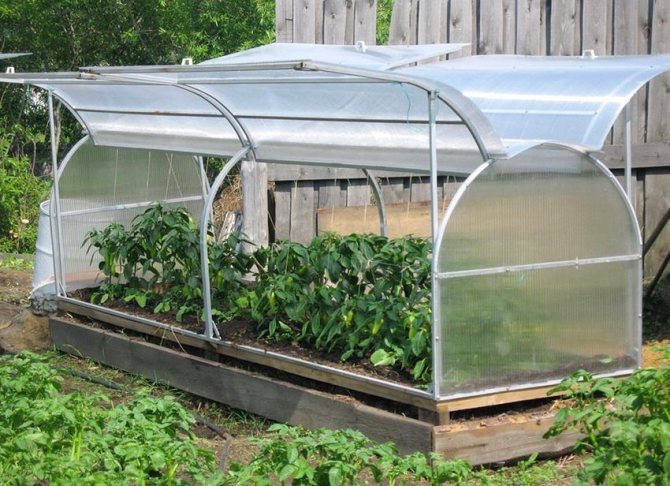
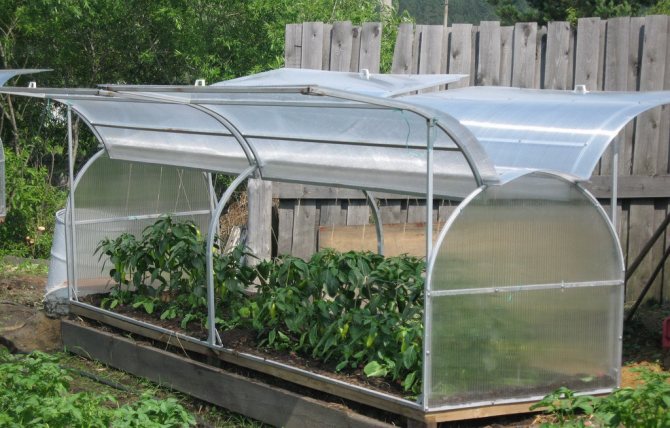
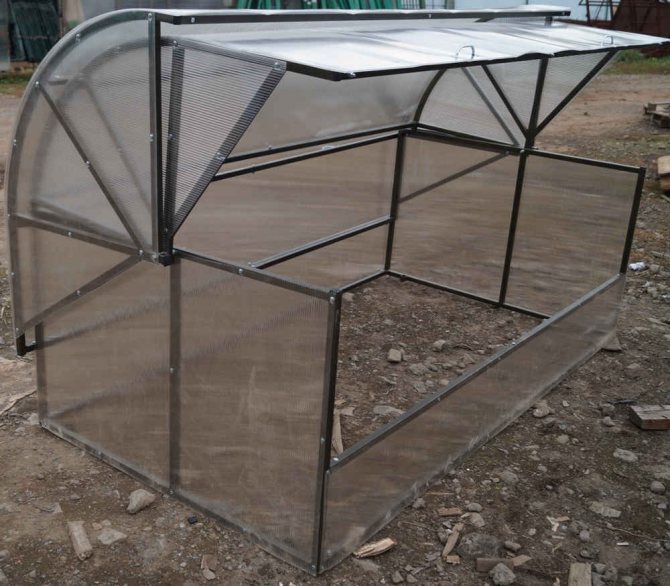
Greenhouse-breadbasket, it is a snail or a shell. Why he received such names is easy to guess just by looking at him from the side. This is a low and small structure, the doors of which open in the same way as a regular bread bin - a chest designed to store bread and is available in almost every kitchen (at least your grandmothers definitely have one). There are two flaps of such a greenhouse, they open, easily turning on a special connecting element such as a hinge. By the way, the "doors" of the structure are in the form of half arcs and when closed, they will form an arc. Each leaf of the greenhouse-bread bin has an individual design and coating.
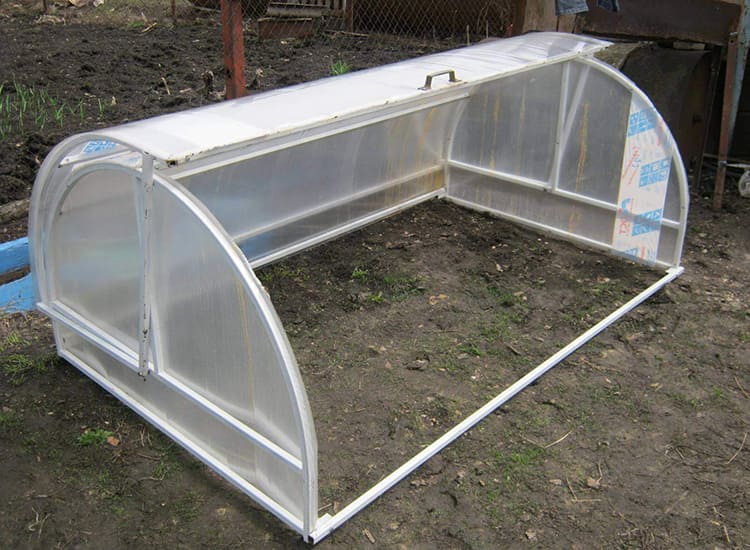
Greenhouse-bread bin made of polycarbonate
On a note! It is interesting that the flaps of the greenhouse-bread bin are somewhat different in size from each other. Due to this, the ventilation intensity inside the closed greenhouse can be influenced. And if the doors were of the same size, then the greenhouse would simply not open, because when opening one of them, as it were, goes under the other.Usually, the difference between the parameters of the flaps is small and is equal to the thickness of the profile from which the frame is made.
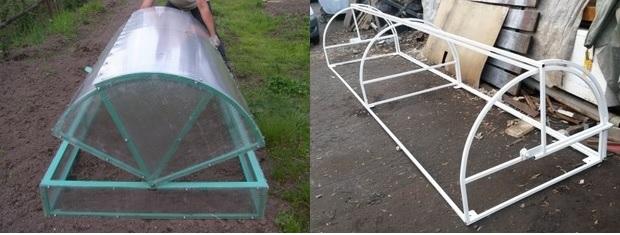
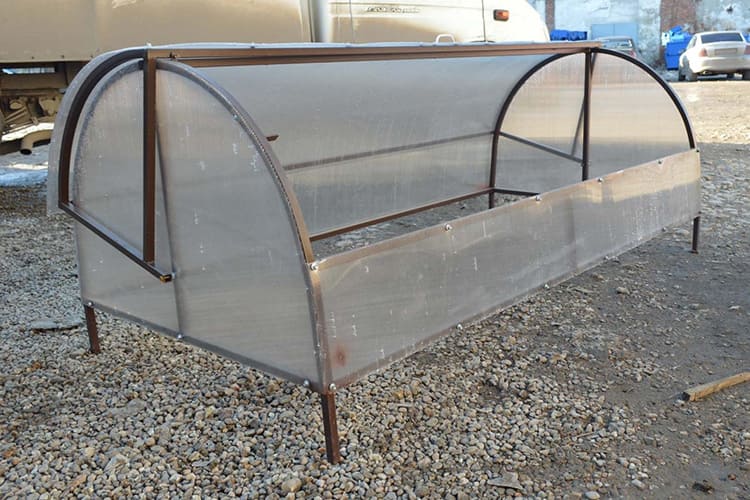
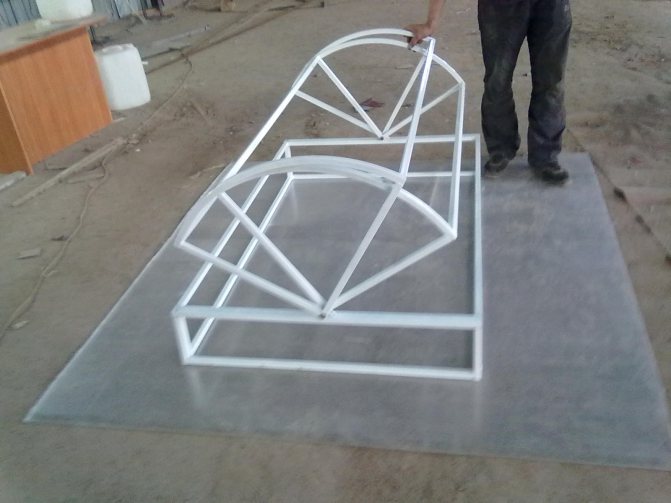
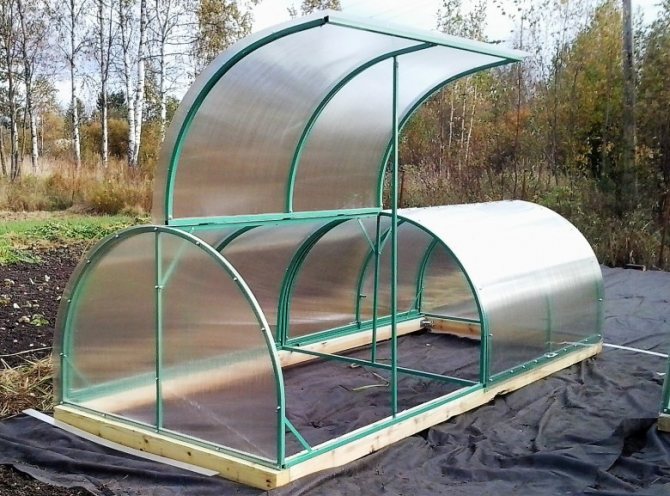
By the way, the frame of modern models is usually made of a galvanized metal or painted square profile. Such structures are almost never assembled from plastic due to the rapid wear of rotating parts, although there are such options.
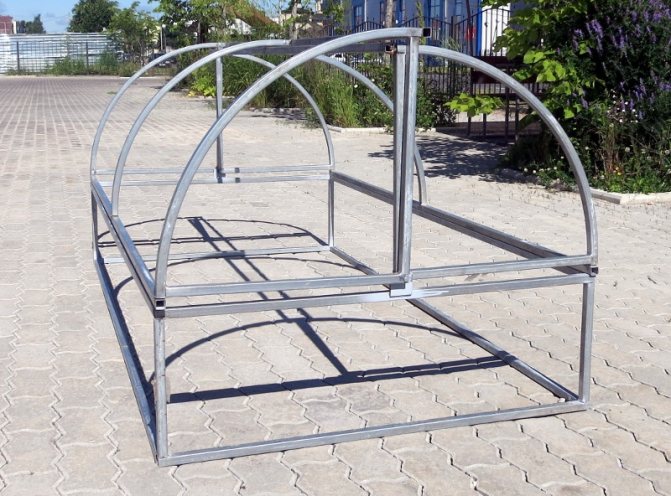
Greenhouse frame made of galvanized profile
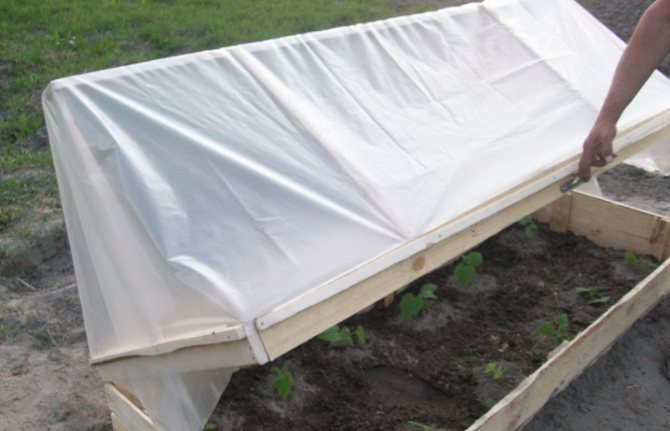
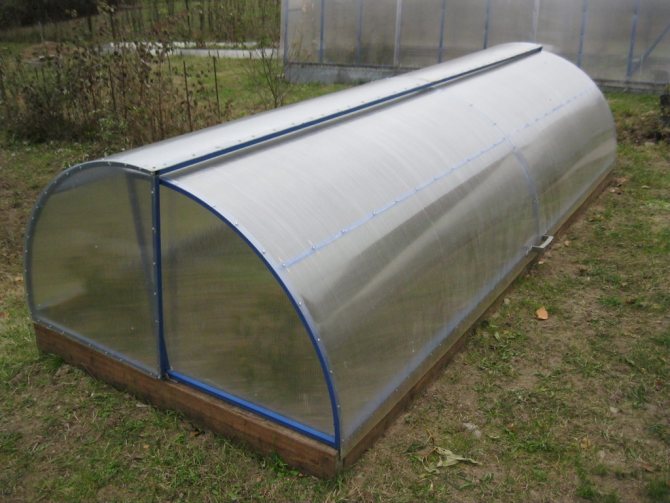
The bread bin is usually covered with polycarbonate, although there are also film options. However, as we said above, the film is fragile and not suitable for long-term use.
Greenhouse frame made of painted metal profile
On a note! There are two types of opening of the greenhouse-bread bin - one-sided or two-sided. It is the two-sided one that is often called, while the one-sided one is usually called “snail” or “shell”. They are essentially the same type of greenhouse.
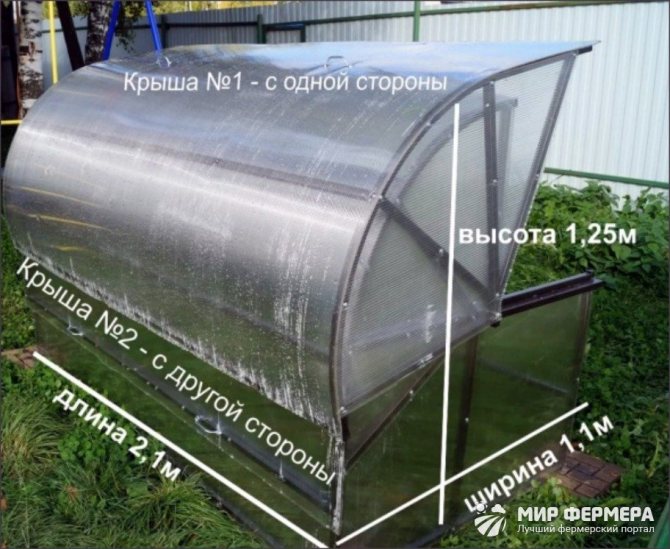
The greenhouse-bread bin rarely exceeds 4 m in length (usually it is 2 m long). The height, as a rule, is no more than a meter, and the width will depend on the opening method, although it is also unlikely to be huge (usually no more than 1.5 m). If you make the bread bin too wide, then you will have to step in with your feet in order to do the necessary work. In addition, a greenhouse that is too large will be very difficult to open - the lid is raised and lowered manually.
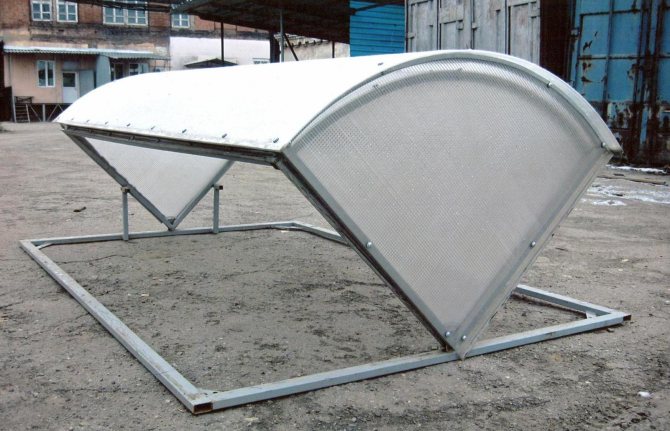
Closed greenhouse-bread bin


Choosing the best place for installation
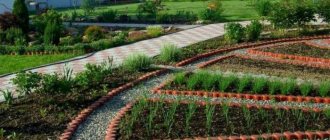
For a "bread box", like any other greenhouse, you should choose a flat place without shading, protected from gusts of the north wind. It is not advisable to install it near large trees, capital buildings, fences. In the summer, they will shade it in the morning or afternoon. In winter, snow falling from the roof or falling icicles can damage the greenhouse. You should also avoid close proximity to office buildings, which can negatively affect the microclimate inside the greenhouse - create an excess of moisture or unwanted substances in the adjacent soil.
Recommended distances to different categories of buildings:
- from one-story houses, sheds, fences - at least 2 m;
- from higher buildings - 5-7 m;
- from the pool, shower, bath or sauna - 8-10 m;
- from an outdoor toilet, drain pit or septic tank - at least 25 m.
It is advisable to arrange the structure in length from north to south, in order to avoid, when ventilating, a strong sharp drop in the internal air temperature when the weather changes.
Advantages and disadvantages
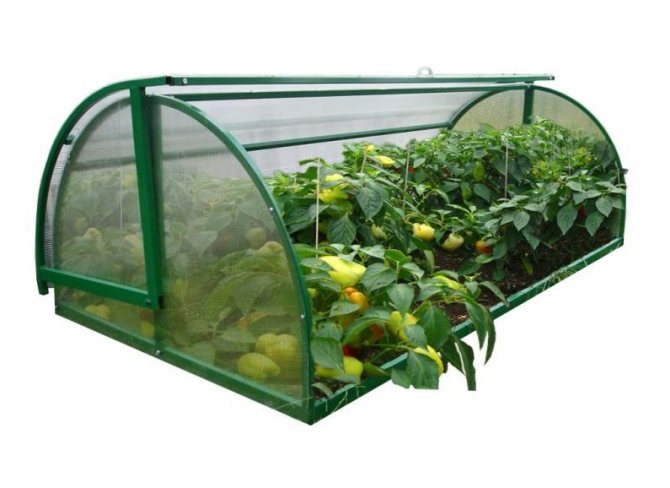
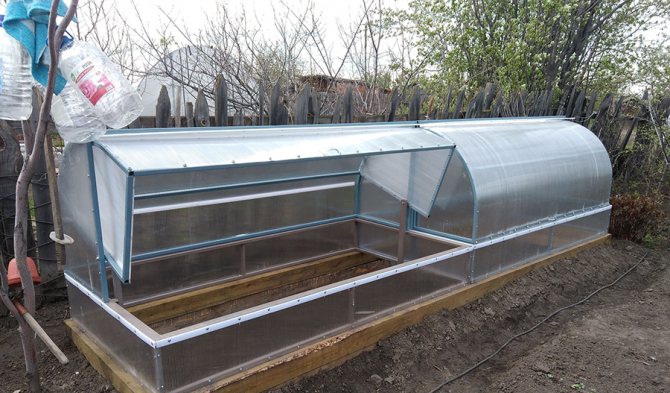
The greenhouse-breadbox can be used both for the gradual accustoming of seedlings to the street, and directly for growing (depending on the region of residence of the owner of the greenhouse), and is also perfect for the cultivation of various crops such as greens, root crops.
The advantages are as follows:
Greenhouse-breadbasket on the site
Disadvantages of a greenhouse-bread bin:
- the inability to grow tall crops;
- low-quality and cheap greenhouses quickly break down in the places of rotation of the shutters.
Greenhouse "Snowdrop"
One of the most demanded and popular among them, in the opinion of summer residents, is the "Snowdrop" greenhouse, which is produced by the Russian one. Read more about this greenhouse in this article.
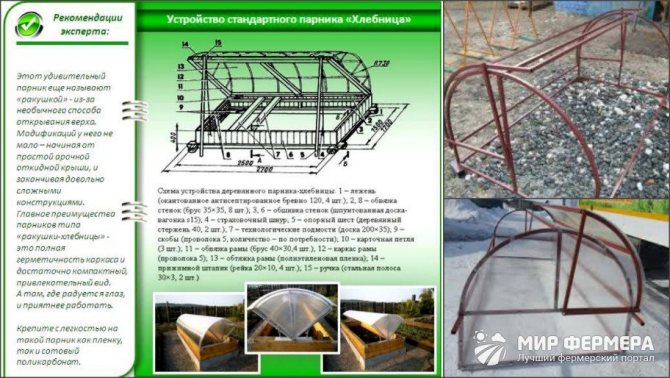
Photo
In the greenhouse "Khlebnitsa" grow seedlings, undersized fruit plants. Watering, fertilizing, soil cultivation and weeding is carried out with an open sash.
Before starting work, calculate the cost of the material, evaluate your capabilities and skills.Perhaps the price of a greenhouse in a store will not be higher than the cost of materials for a homemade greenhouse.
Comparison of greenhouses from different manufacturers
In general, the number of advantages exceeds the number of disadvantages of a greenhouse-breadbasket, and therefore more and more gardeners acquire designs of this particular type. Let's compare several popular models produced by different companies.
Table. Greenhouses-breadbaskets from various manufacturers.
| Name | Characteristic |
| Greenhouse "Novator-Mini" from LLC "TPF Innovation" | A greenhouse with one hinged "bread-box" lid. Ideal for use in small garden areas. Ergonomic and comfortable, suitable for growing melons and seedlings. Its height is 80 cm, depth - 1 m, width - 2 m. Since the greenhouse keeps heat well, you can manage to grow two crops per season in it. |
| Greenhouse "Novator-Maxi" from LLC "TPF Innovation" | The greenhouse has two covers and a "basement", due to which it becomes higher than the previous version. The frame is painted, polycarbonate cover is purchased separately. This is a very durable and reliable, and also an inexpensive option for a greenhouse-bread bin. Its height is 1.2 m, length - 2 m, depth - 1 m. |
| Greenhouse "Snail" from LLC ROiS | This design has the ability to open on both sides. Length - from 2 m, width varies from 1 to 2 m, height - from 50 cm to 1 m. The frame is made of a square shaped pipe with a section of 20 * 20 mm and a metal thickness of 1.5 mm. Inexpensive and quickly assembled model. |
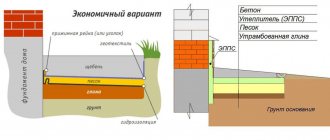
| Greenhouse "Khlebnitsa" from | The frame is made of a metal profile with a section of 20 * 20 mm. The dimensions of the structure are as follows - length 2 m, width 1.5 m, height 90 cm. The company is also engaged in the production of greenhouses to order according to the wishes of the customer. Covering - cellular polycarbonate. It is recommended to install the greenhouse on a timber foundation. |
Testimonials
Matvey
I wanted to build a greenhouse myself, but when I saw how much the finished one costs in the store, I decided to buy it. Everything is clear in the instructions, any man can assemble it. It has been standing for 3 years already. I grew greens in it.
Irina
And my husband built one. I asked him for a long time for seedlings. Now I don’t know the problem. Saplings quickly get used to open ground, do not deteriorate. And how convenient it is to ventilate and work. The time for processing the planted area takes 2 times less.
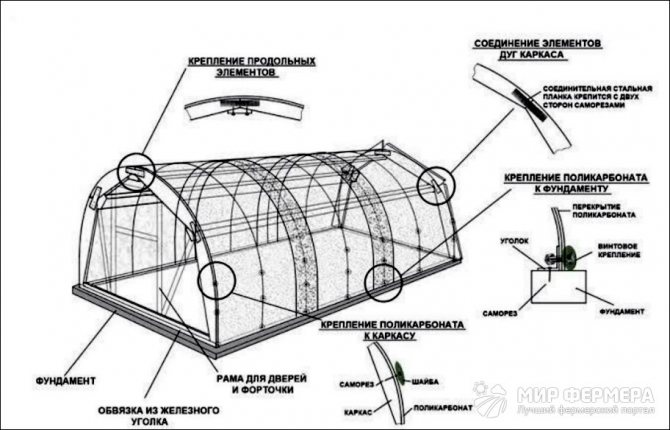
Assembling a greenhouse-bread bin
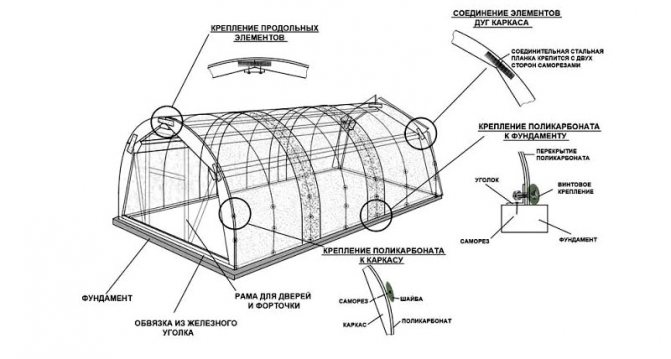
Since the structure rarely has large dimensions, such a greenhouse is often sold already assembled and it is easy to take it on a regular Gazelle to your site. But sometimes the buyer can purchase a disassembled greenhouse-bread bin, and then he will have to assemble the structure on the site on his own. Let's consider the process of assembling the structure using the example of the Novator-Maxi greenhouse.
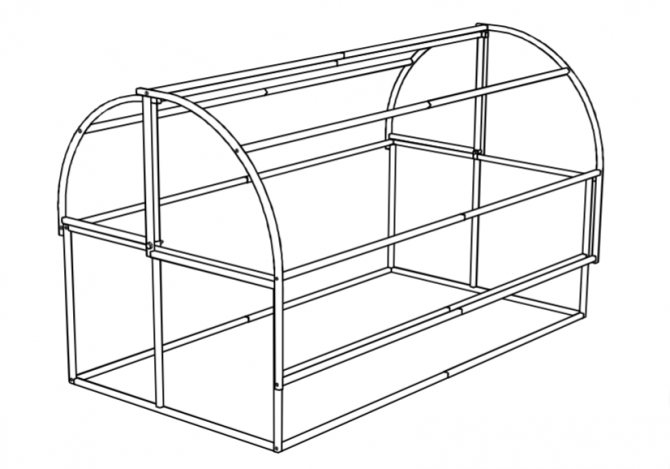
Greenhouse scheme "Novator-Maxi"
Step 1. Unpack all parts from the box. You will see a lot of metal flat ties, bolts, nuts, as well as side parts of the sash and side parts of the base / plinth structure.
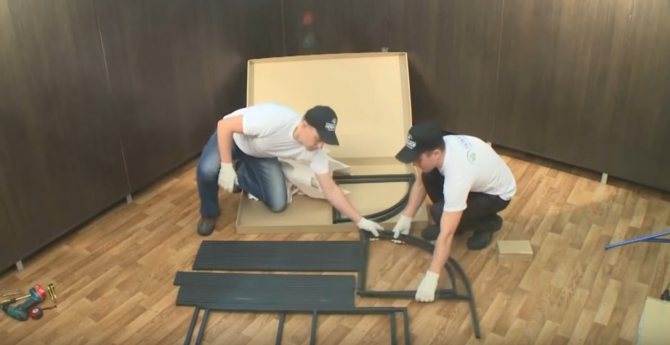
Unpacking structural parts
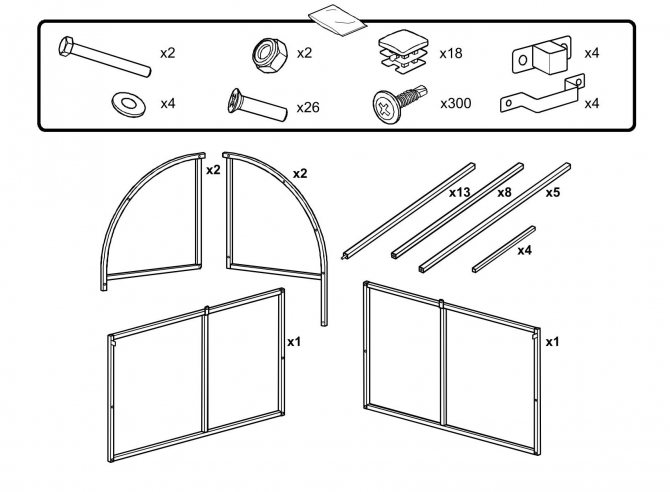
What is included
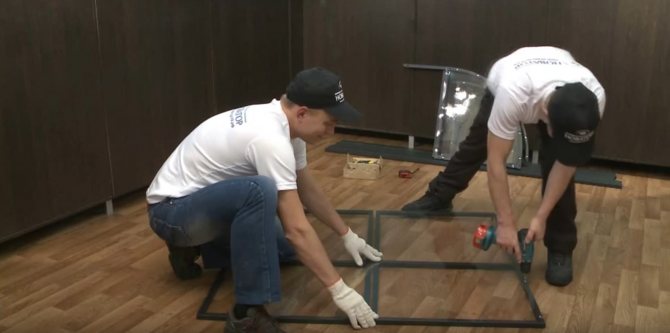
Step 2. Connect the horizontal ties together. They can be easily twisted without additional parts due to the threaded projections and holes provided at the ends.
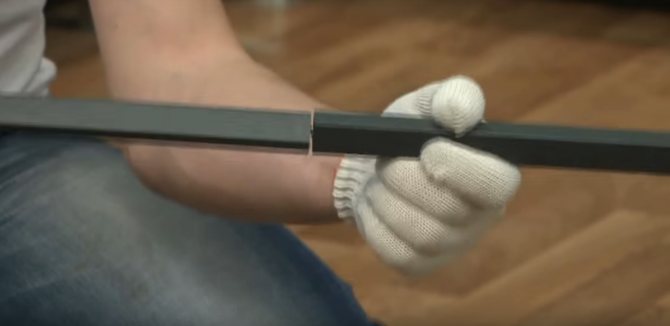
The horizontal screed is connected
Step 3. Take the details of the ends of the flaps (half arcs). Place them on the floor next to each other and, after removing the protective film from the polycarbonate, place it on the arched parts from above. Place the polycarbonate so that the edges of the flaps are flush with the edge of the sheet of material.
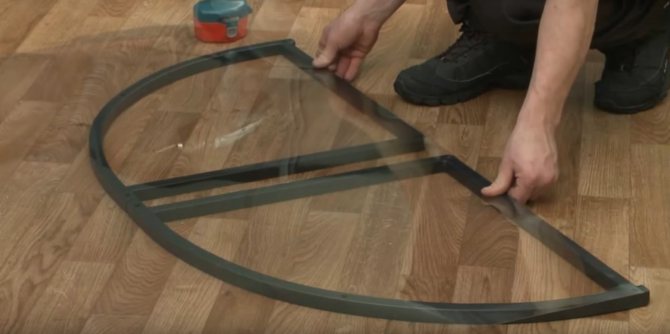
Polycarbonate stacks in half arcs
On a note! Do not forget to mark the side of the sheet that has UV protection before removing the film.
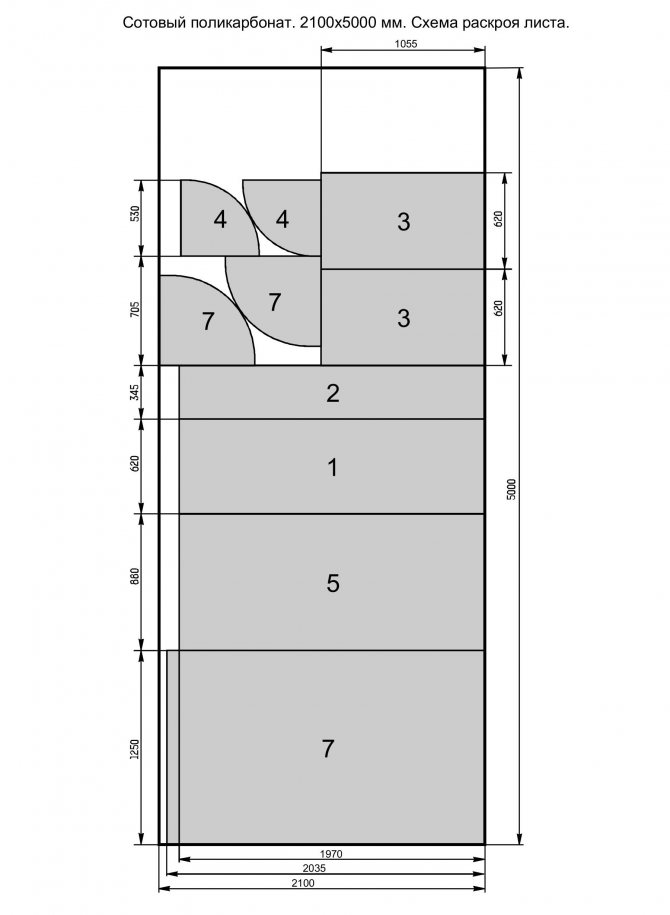
Cutting scheme for polycarbonate
Step 4. Screw on the polycarbonate with self-tapping screws.
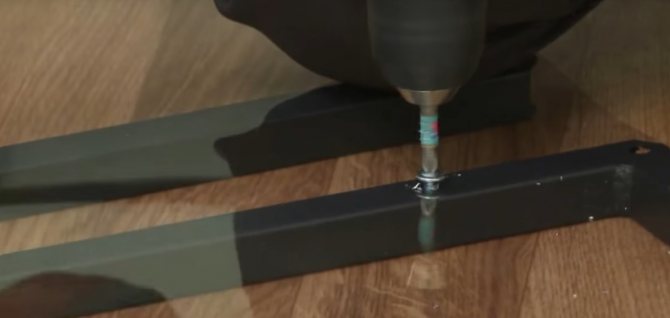
Fastening polycarbonate with self-tapping screws
Step 5. Cut off any excess polycarbonate around the edge of the sash parts. Prepare the other two side parts for assembly in the same way.
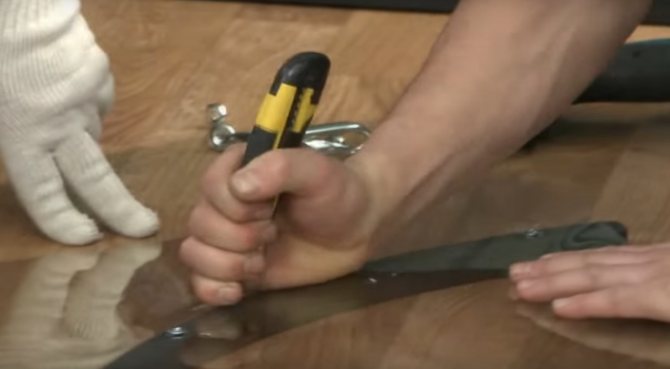
Excess polycarbonate is trimmed
Step 6. Also, having applied polycarbonate face up (the one that has UV protection), sew the side plinth parts.
Polycarbonate sheathing of the side plinths
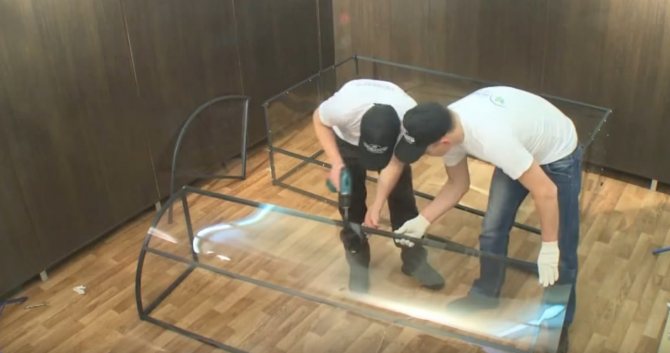
Step 7. Use long horizontal ties to connect the two side plinths. The connection should be in 5 places on each side.
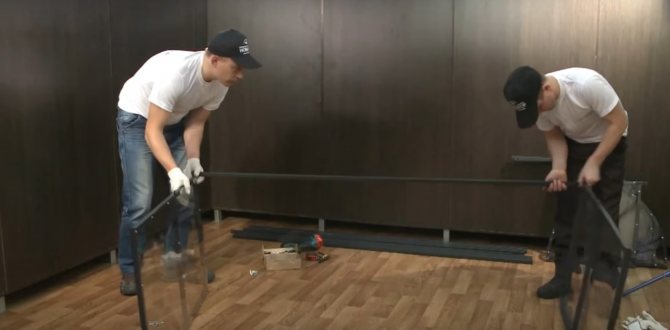
Connecting the side plinths with horizontal ties
Attention! On one side, not three, but two ties are installed!
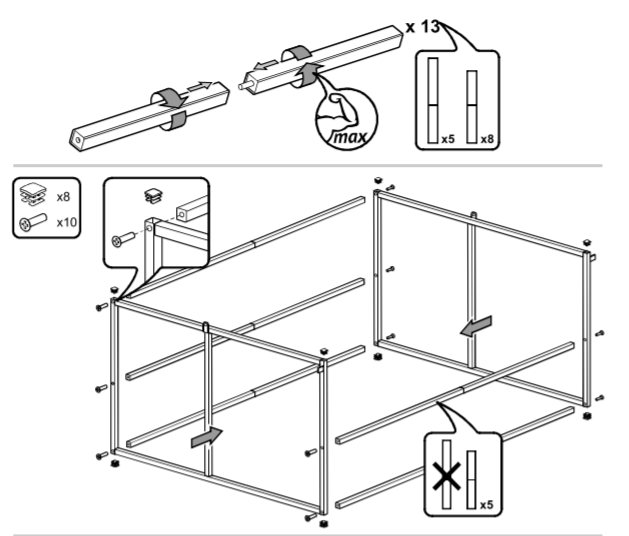
Frame assembly diagram
Step 8. Trim the sides obtained as a result of step 7 with polycarbonate.
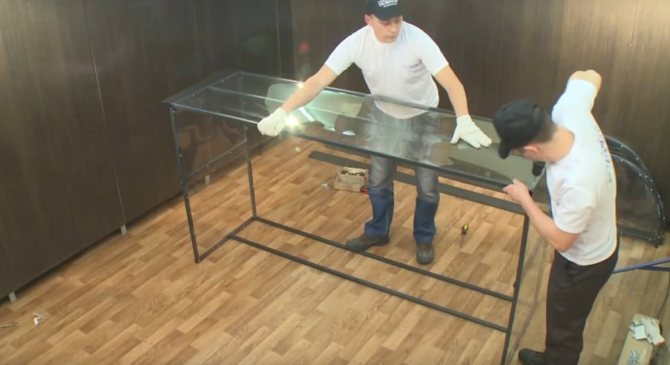
The resulting sides need to be sheathed with polycarbonate
Step 9. Using long ties, connect two opposite side sash elements in three places. Take the ones that don't have the extra metal protrusion.

Sash side elements connection
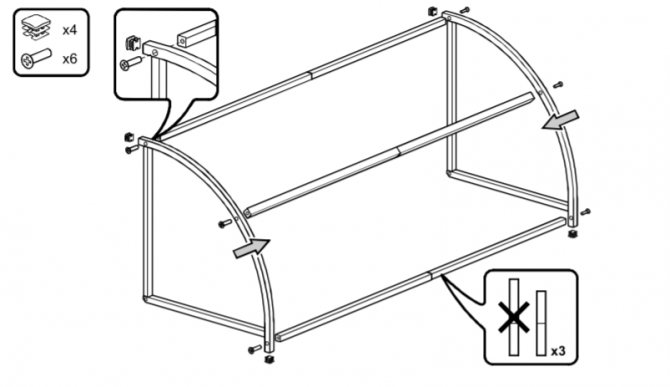
Assembly diagram of the smaller sash
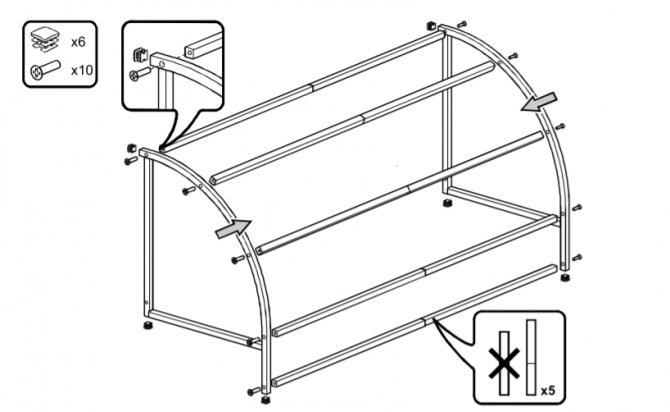
Larger sash assembly diagram
Step 10. Cover the sashes with polycarbonate.
Sash paneling with polycarbonate
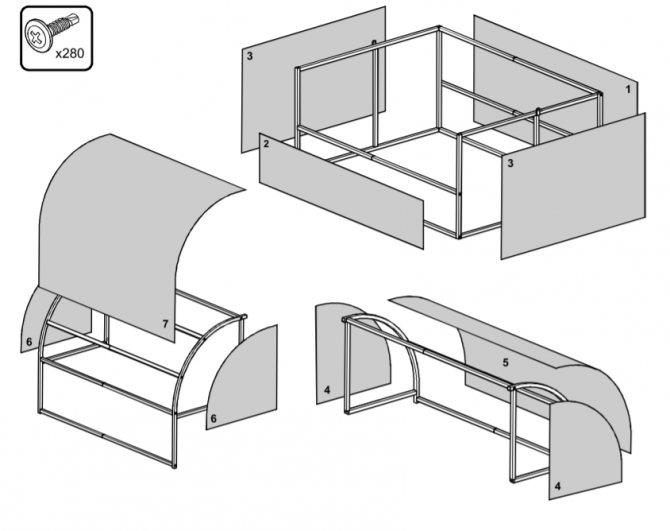
Greenhouse sheathing with polycarbonate (in accordance with the cutting pattern)
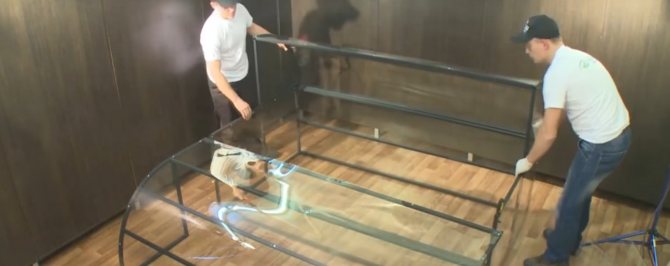
Step 11. Connect the other two side pieces of the sash. You should get a structure like in the picture. Also cover it with polycarbonate.

Connecting the other two sash parts
Step 12. Install a smaller flap on the greenhouse base. Pass a long bolt through the holes in it and the base.
Installing a smaller sash on the greenhouse base
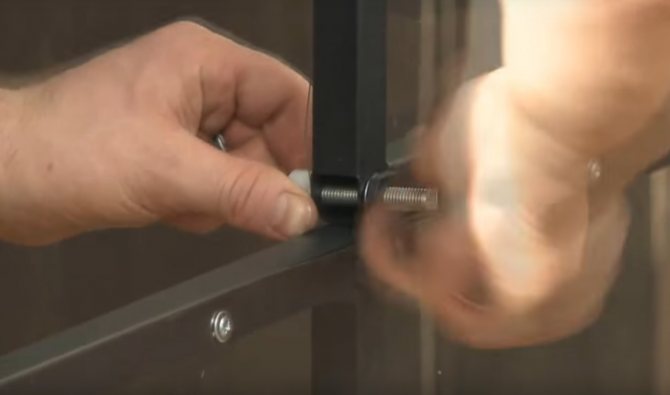
Sash fastening with a long bolt
Step 13. Install the second sash and secure it to the hinge bolt. Proceed as shown in the figure.
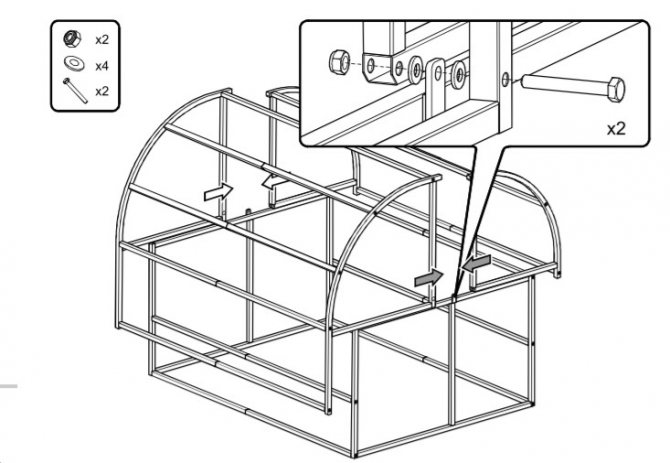
Sash installation diagram
Step 14. Install the plugs on the edges of the frame parts and screw the handles onto the sashes. The greenhouse is ready.
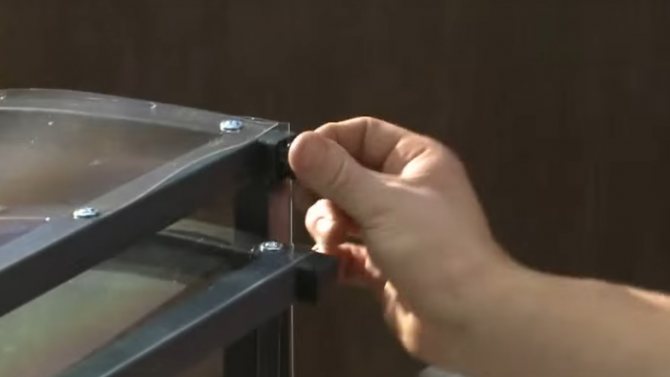
Plugs inserted
Assembly instructions for the Novator-Maxi greenhouse. Download file (click on the link to open the PDF file in a new window).
Assembly instructions
Greenhouse "Novator-Maxi"