Types of fountains
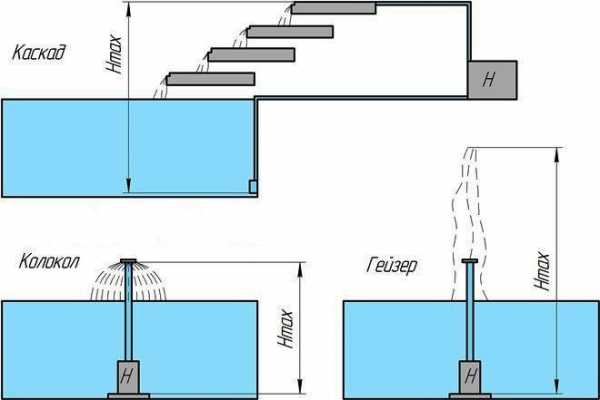
The appearance of the fountain is influenced by the number of nozzles, their location, the force of the water supply pressure. The jets can be sprayed to the sides, hit straight up, and smoothly flow down the walls of the structure. Depending on the method of water supply, all fountains are divided into several types.
Table. Types of fountains
| Type of construction | Main characteristics |
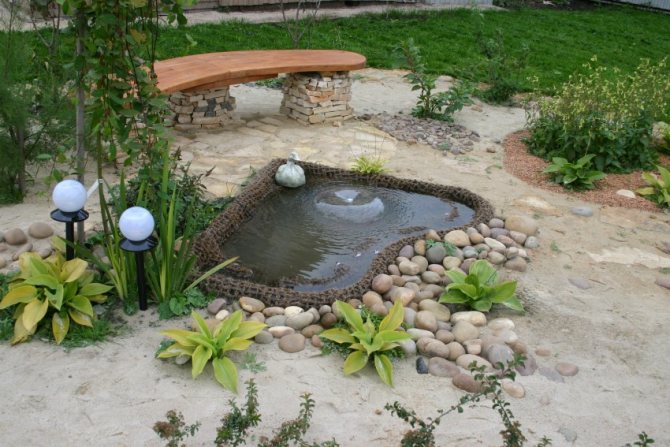
| Bell | The most common option for summer cottages. The water is supplied under low pressure, so the jet does not rise high, and the nozzle distributes it evenly around the circumference. Due to this, a hemisphere of a water film is formed, in which the sun's rays are beautifully refracted. |
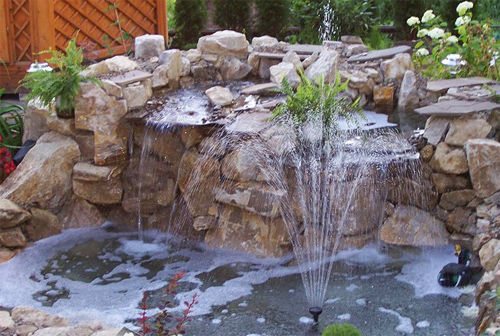
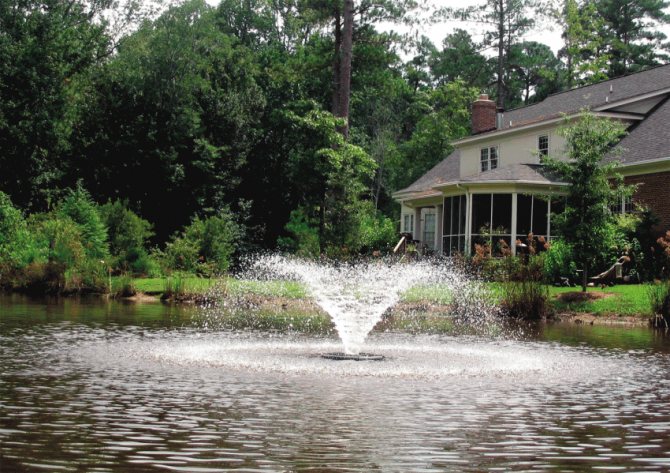
| In such a fountain, the water supply pressure is much stronger, the jets are thrown up or to the sides (this depends on the location of the nozzle). By adjusting the force of the head, you can change the height of the jets within a fairly wide range. |
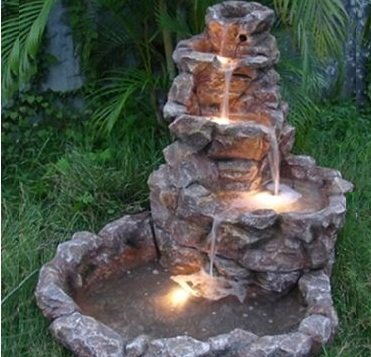
| The most effective option: the structure consists of several containers located at different levels, and the water, flowing down, forms a stepped mini-waterfall. |
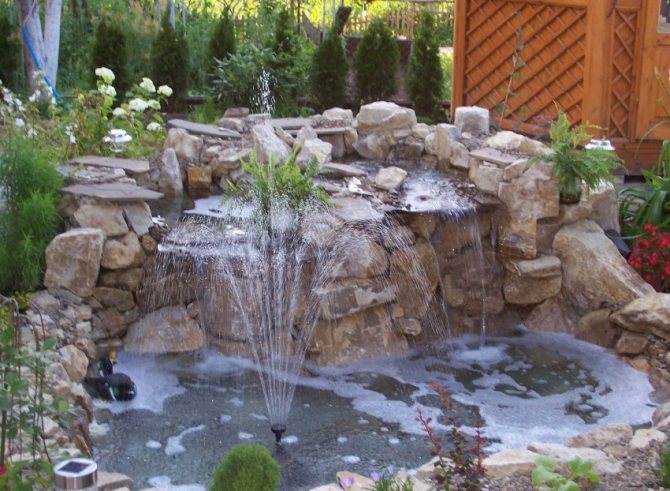
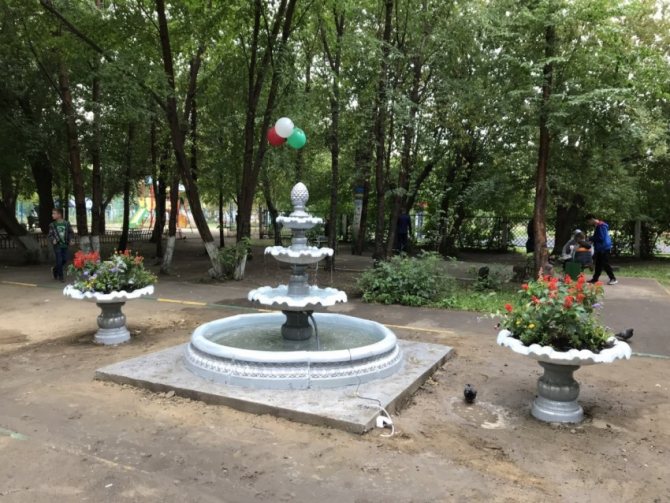
| A complex design in which the cascade option is combined with a geyser or a bell fountain. It looks very impressive, but it also requires more effort to build. |
When choosing the type of fountain, one must take into account not only its decorative qualities, but also the complexity of installation, the cost of all components, as well as the general design of the site and the size of the reservoir. For example, for a very small pond, a bell fountain is best, for a more spacious one, a geyser or a combination option. If the garden with a pond is decorated in an oriental style, a cascade fountain would be an ideal choice.
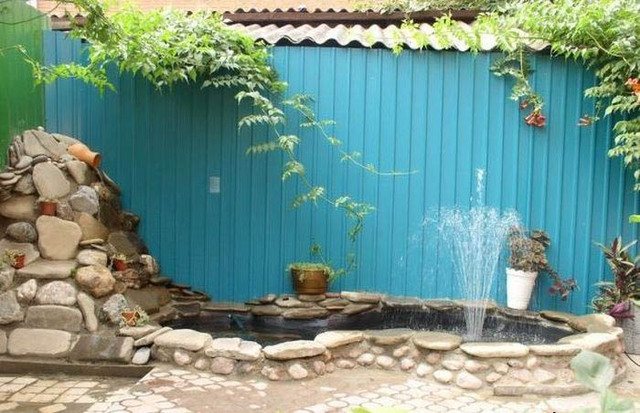

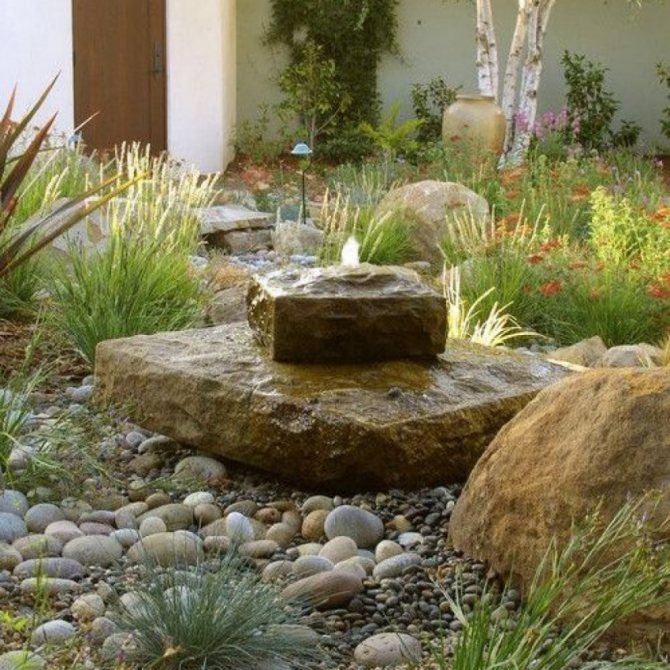
Such a fountain will not take up much space.
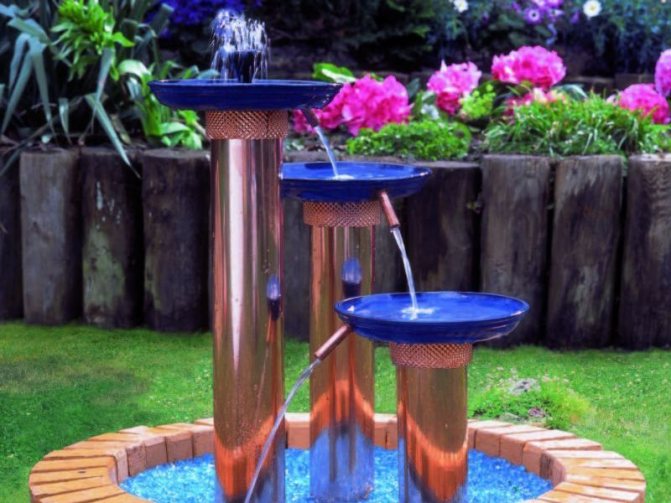

Combined fountain in modern style
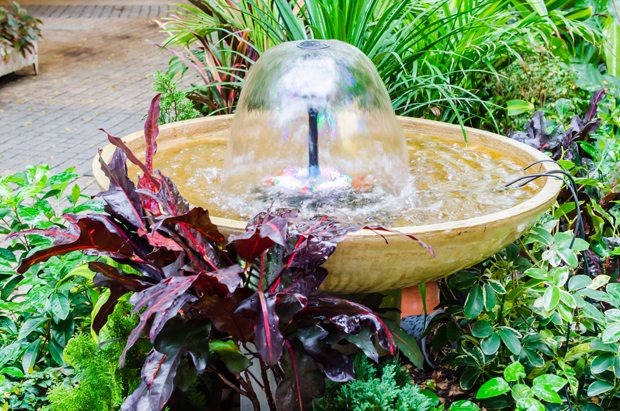

Compact bell fountain
Decoration
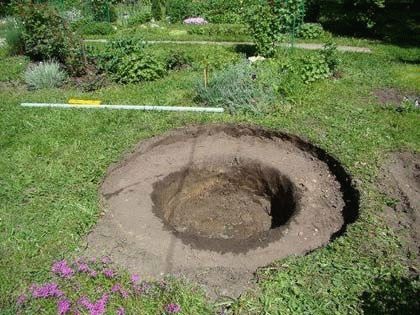
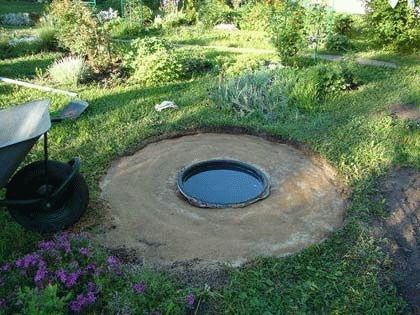
A country fountain should not only work, but also look beautiful. In its original form, it is quite unattractive, so you should immediately take care of its decoration. The first step is to make a deepening in the area where it is planned to install a non-pumping fountain. It will be enough 30 cm. The platform in the pit should be leveled so that the bottom 2 bottles can be installed on it. The recess itself can then be covered with pebbles or other material.
Did you know? In ancient Rome and Greece, fountains were not intended for landscape decoration, but played the role of sources with clean drinking water.
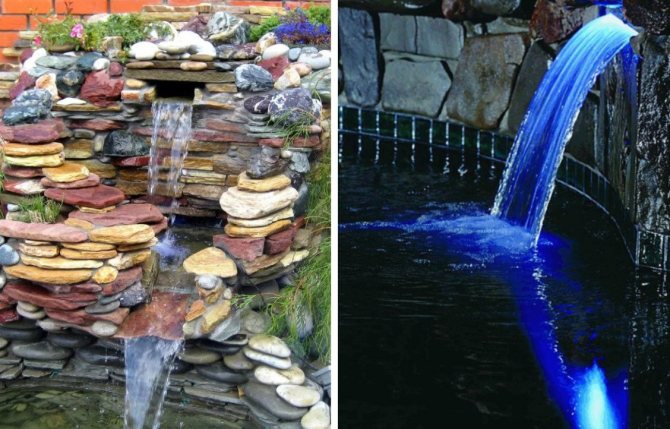
Above the dais, you can lay out a mountain of stone, and a decorative fountain bowl can be placed above it. If you manage to correctly direct the gravity of the jet so that it flows directly to the elevation, it will look very impressive. You can also arrange backlighting using small diode lamps. This is just one of the design options. You can go in a completely different way and immediately pick up decorative containers that will not need to be hidden. Otherwise, everything depends only on the flight of the author's imagination.

Choosing a location for the fountain
The correct location of the fountain not only ensures maximum decorative effect of the structure, but also makes it easier to care for it during operation. If the fountain is located in a completely open area, which is actively warmed up by the sun, the water will evaporate and bloom faster.
You cannot equip a pond with a fountain next to trees and deciduous shrubs. Firstly, this will damage the pond bowl with roots, and secondly, leaves, small twigs and other debris will get into the water. In such conditions, the filters quickly become clogged and fail, and the water becomes cloudy and takes on a putrid odor.
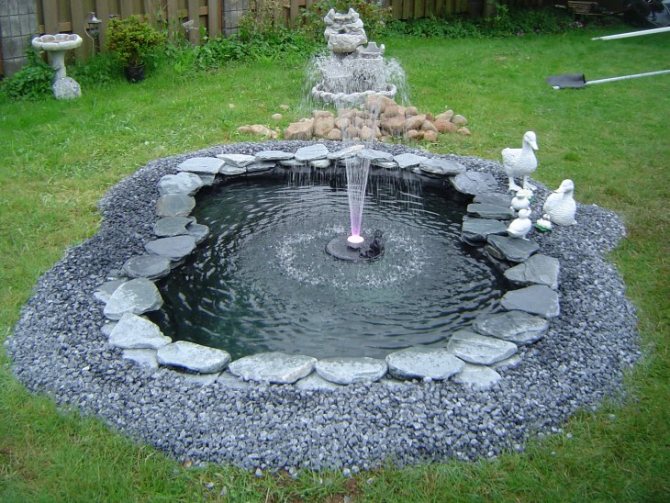

The choice of the location for the fountain is of great importance.
The fountain should be located on the leeward side and no closer than half a meter from buildings and garden furniture. Due to splashes and water dust, surfaces will be wet all the time, which will lead to the development of fungus and the gradual destruction of materials. But the fountain should not be placed too far from the house either. Electricity is required to connect the pump, and a cable that is too long causes additional inconvenience and costs. A backlit fountain looks very impressive, and for this it is also necessary that the energy source is at the optimal distance from the reservoir.
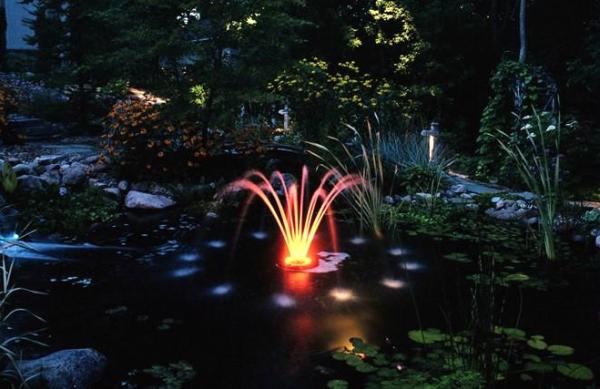

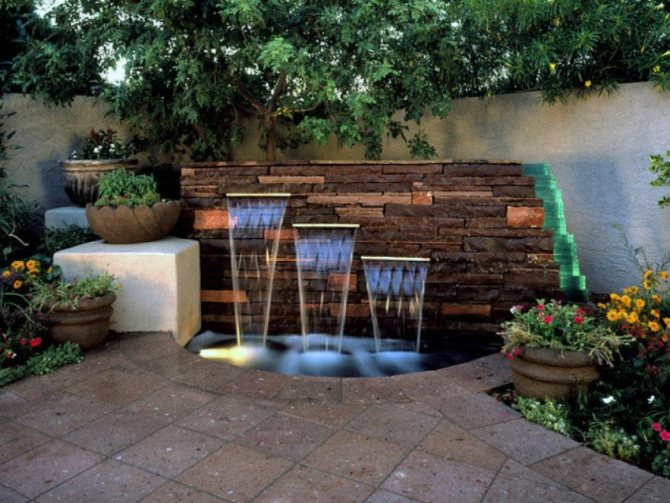
The backlit fountain looks very impressive
And last but not least, the fountain must have a decorative background and be clearly visible from different corners of the site. It makes no sense to install such a structure if there is no opportunity to admire it and show it to guests.
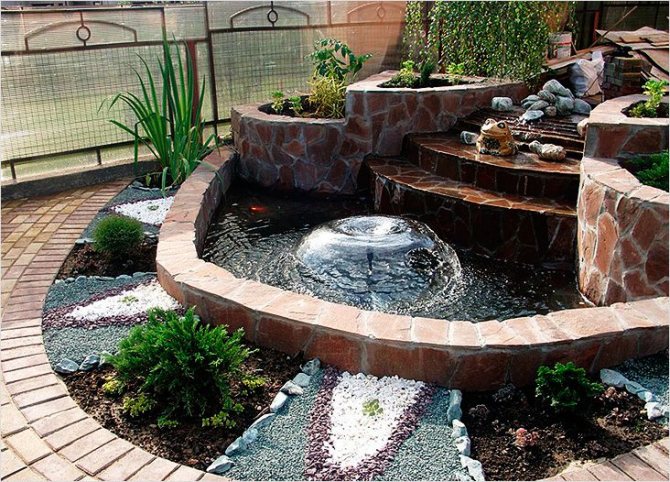

The decorative fountain should be located in a conspicuous place
Installing the pump
If you are making a tabletop fountain, then first you need to find a hose for work through which a stream of water will come out. To do this, cut off 10 cm from a regular aquarium hose and insert it into the pump. Check immediately if your system is in working order so that you do not come back to this question later. We install the pump to the bottom of the container and fill it with expanded clay. Do not forget to level the surface after backfilling.
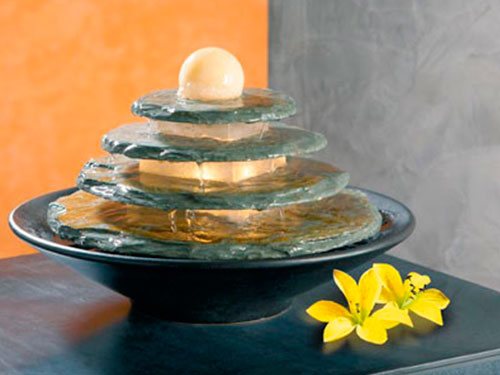

Pictured is a indoor fountain
Necessary equipment
There are three ways to supply water to the fountain:
- connection to the central water supply;
- due to the pressure of water in the tank;
- using a pump.
The first option is the most costly, since you will not only have to pay large water bills, but also provide for how to use such a volume of liquid that will be constantly replenished.
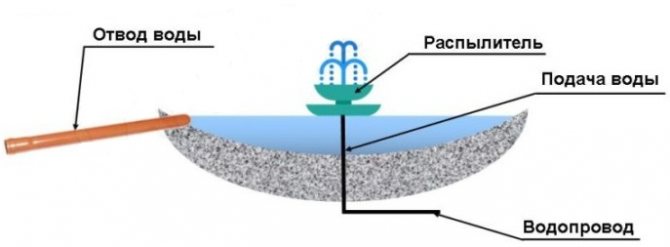

Connecting the fountain to the water supply
As for the second method, an additional container is needed here, which is installed above the nozzle. This provides a pressure sufficient to supply water, although the head will not be high. The disadvantage of this option is that the water quickly becomes cloudy, and you need to constantly monitor the water level in the tank.
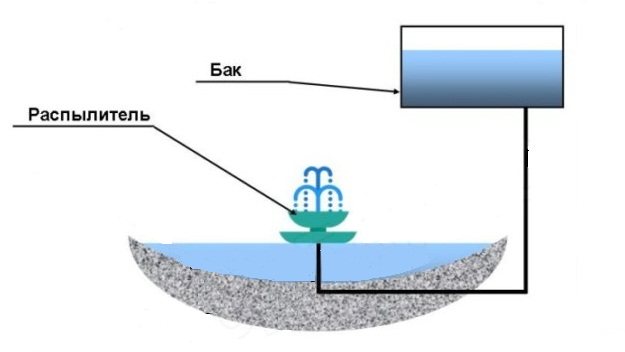

The pressure is provided by the water pressure in the tank
The supply of water by a pump makes it possible to regulate the force of the pressure and ensures constant circulation of water. This method is the most optimal, and therefore occurs most often.
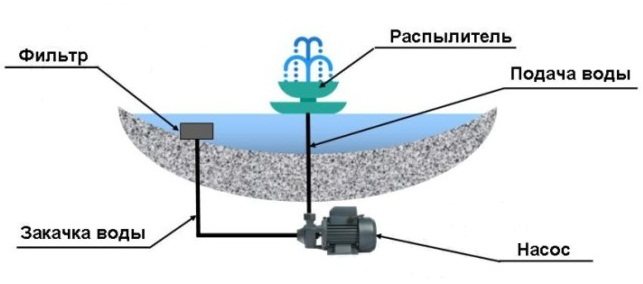

Fountain with pump
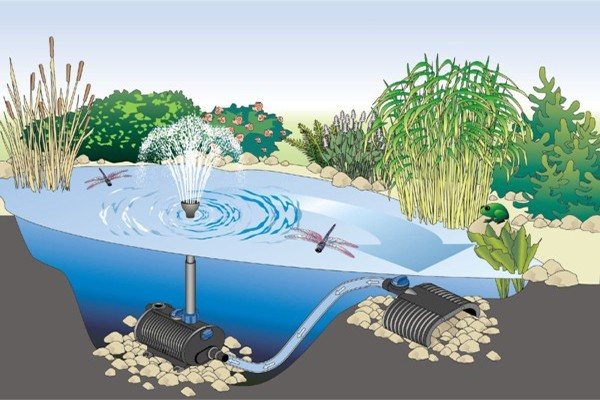
For the device of the fountain, two types of pumps are used - submersible and surface, and each type has its own advantages.
- Submersible pump. It is installed at the bottom of the pond bowl and is therefore almost invisible. It is completed with a pipeline and a nozzle that affects the shape of the water jets. Since the pump is located under the water column, the noise from its operation is minimal, which increases the comfort while relaxing by the fountain. Installation of equipment does not require much effort, moreover, submersible models have a budgetary cost.
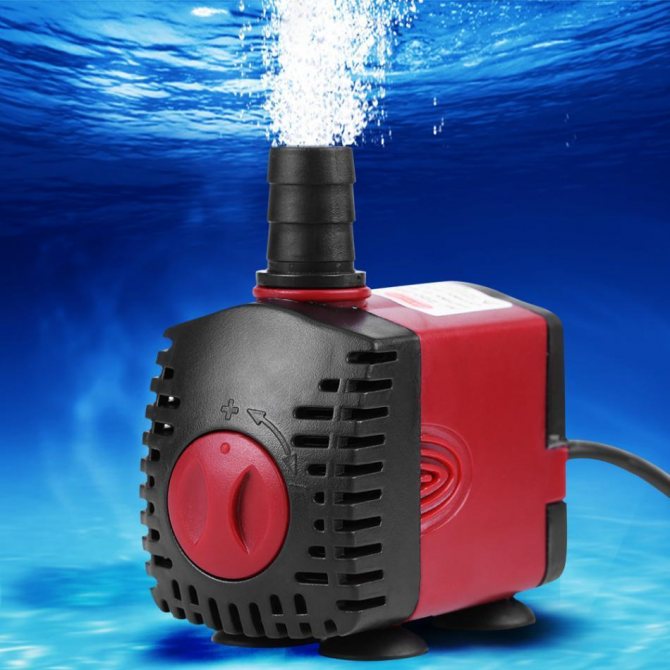

Submersible pump - Surface pump. Installed on a hill near a reservoir, it requires masking elements in the form of garden sculptures, compositions of stone, ceramics, flowerpots with plants. It makes noise during operation, which is quite annoying for some people. These fountains are better suited for large bodies of water and complex structures.
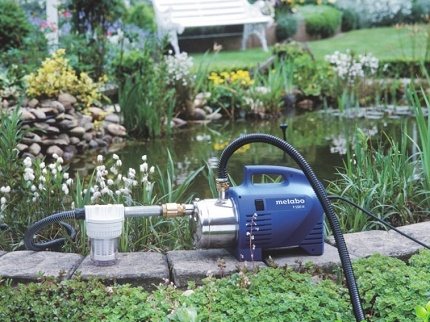

Surface pump
An important element of the fountain is the water tank.On sale there are plastic bowls of all shapes and sizes that do not require additional waterproofing, and therefore greatly simplify the arrangement of the fountain. For a large reservoir, you will have to dig a pit and, accordingly, make a reliable waterproofing. You will definitely need to buy a filter for the pump, since the water in the bowl cannot stay clean for a long time. The presence of fine debris, silt, sand in it will lead to the pump clogging up and completely failing.


Choosing a pump for a fountain
Materials and tools
So, if you still do not know how to make a mini-fountain in your apartment, then read our step-by-step instructions. Before starting this work, you need to purchase the necessary materials and tools.
- Capacity for the fountain. This can be a basin, a flower pot, or something else of your choice.
- The hose used to clean the aquarium is about 10 cm long.
- Polyethylene with dimensions slightly larger than the container.
- Waterproof glue, expanded clay.
- The pump used for the aquarium.
- Medium or large shell, and stones or pebbles to strengthen it.
- Small shells and colored soil used for decoration.
The bowl for the fountain, which we choose, needs to be checked for cracks and holes, in order to prevent, in the future, leaks.
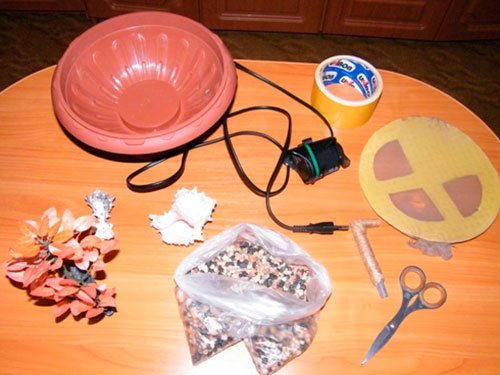

Fountain materials
It is interesting! Panoramic glazing of the balcony: choosing a finishing method, identifying installation possibilities and determining the pros and cons
Making a fountain with your own hands
There are a lot of options for homemade fountains - from the simplest and most compact to complex multi-level structures with lighting and curly interweaving of jets. Consider one of the available methods, which does not require large expenses and at the same time looks very decorative.
Bowl preparation
First, you need to think over the shape and size of the future reservoir, choose a suitable site for it on the site. Next, you should clear the place and carry out the markup, marking the contours of the bowl on the ground.
Step 1. Excavation is carried out inside the marking. The optimal depth is 40-50 cm, but everyone selects this parameter depending on their preferences.
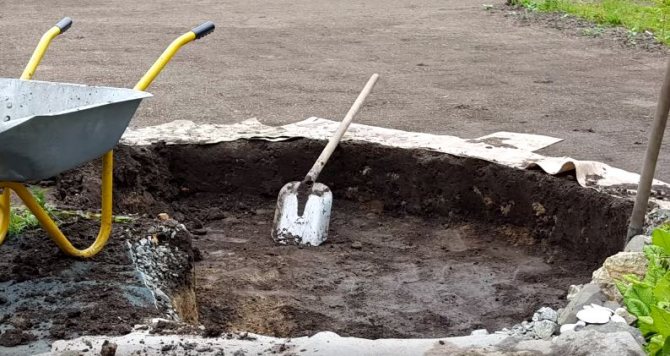

Excavation by marking
Step 2. It is recommended to carefully level the walls and the bottom of the pit so that the waterproofing will lay down more evenly.
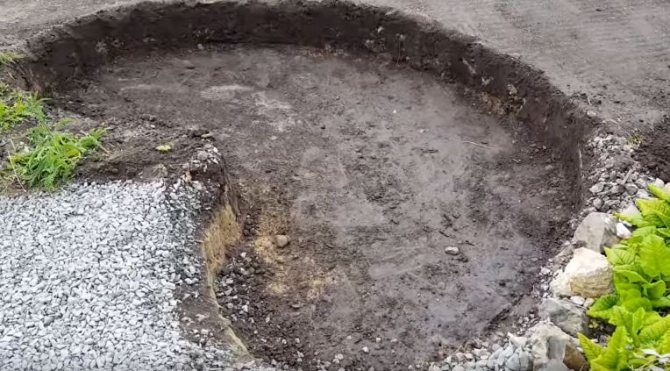

The bottom and walls of the pit must be flat
Step 3. A sand cushion with a thickness of at least 5 cm is poured onto the bottom. The sand must be leveled and tamped well.
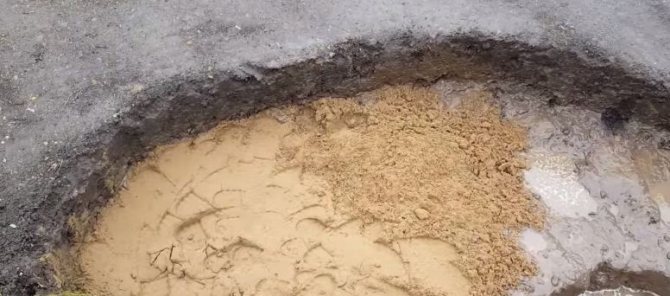

The bottom is covered with a layer of sand
Step 4. High density polyethylene film is laid on top of the sand. The edges of the film should go beyond the contours of the pit so that the walls are completely closed. If a solid piece of polyethylene is not enough, several strips are used, which are laid with an overlap of about 15 cm. It is better to lay a thin film in several layers for more reliable sealing of the reservoir. The waterproofing material is temporarily pressed to the ground with stones along the edges and along the walls.
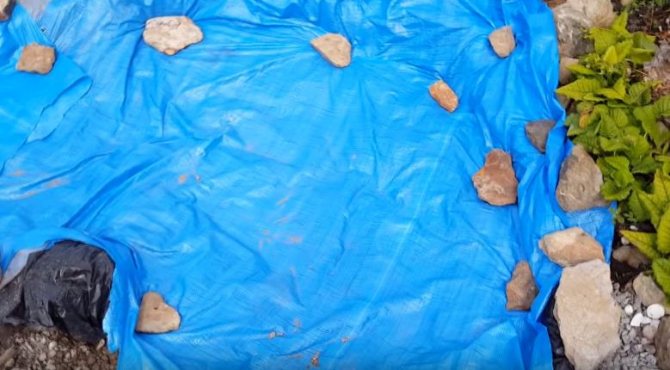

Pit waterproofing device
Step 5. On top of the film, you need to pour a layer of fine crushed stone or gravel, which must be clean, that is, without any admixtures of clay or earth. Otherwise, the water will have to be changed several times in order to achieve the transparency of the reservoir. There is no need to sprinkle the film in the place where the fountain is installed.
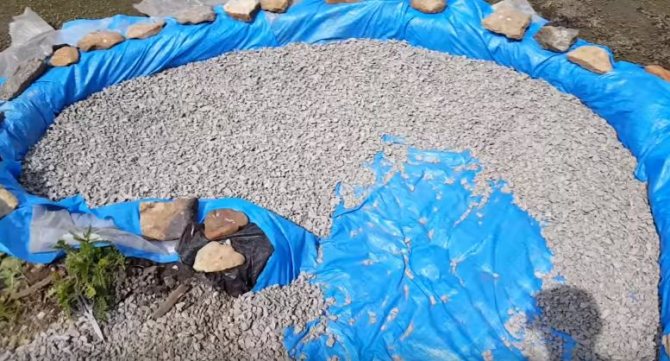

Backfilling the base with rubble
Step 6. An ordinary plastic bucket with a capacity of 10 liters can be used as a water collector and a base for the pump. To do this, holes must be drilled in its walls around the entire circumference with a feather drill.
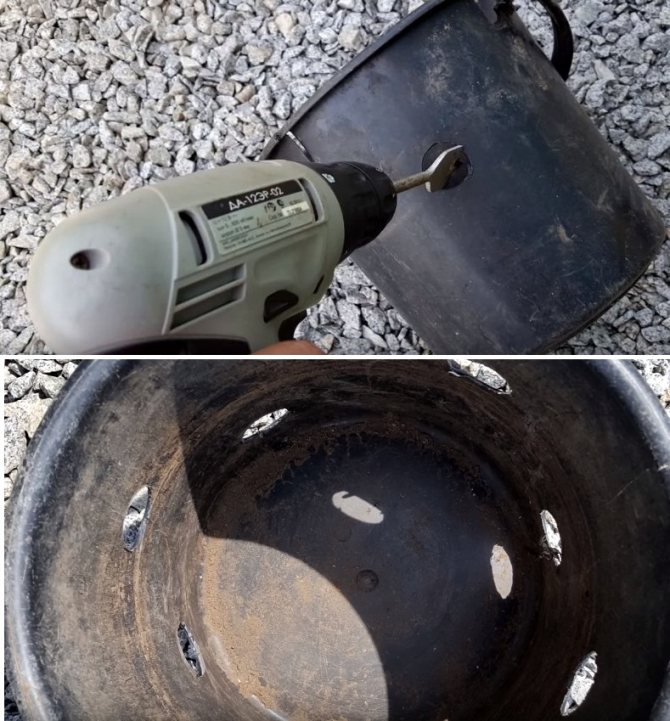

You need to drill holes in the bucket
Step 7. The prepared bucket is placed on the foil and aligned horizontally. If the base for the pump is skewed, this will negatively affect the decorative effect of the fountain, because the jets will also be directed at an angle.
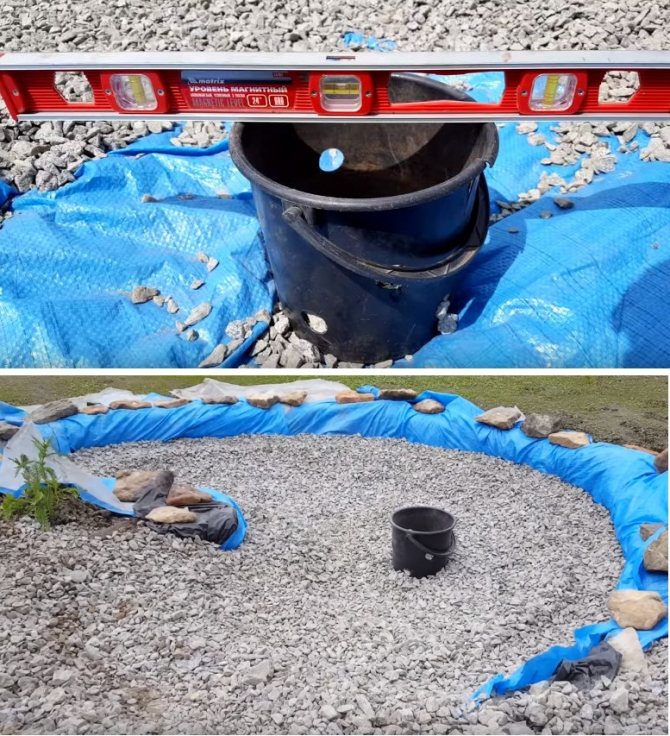

The bucket is level-adjusted
Step 8. It is recommended to lay large stones inside the bowl of the future reservoir around the perimeter. This will give the pond a more scenic look.
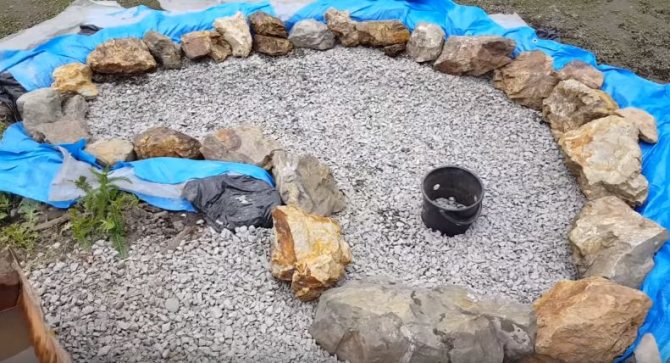

Stacking stones around the bowl
Important! Before laying stones, wash them well to remove adhering soil, clay and small debris. Otherwise, all this will fall into the water, and the pond will turn into a large puddle.
Step 9. The second row of stones is laid on top, and the film protruding from under them is carefully trimmed. The gaps between large boulders should be closed with smaller stones.
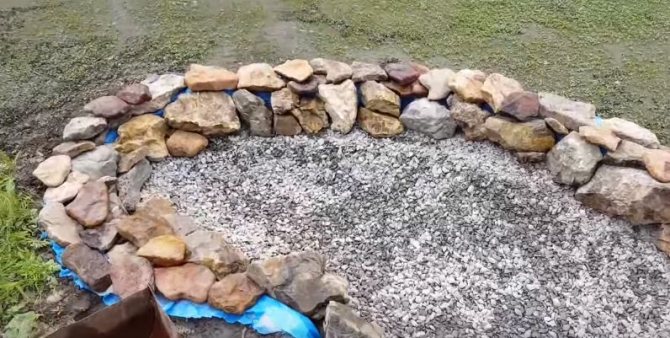

The film should not be visible from under the stones
Step 10. The remaining medium-sized stones can be laid out in random order on the bottom of the future pond. They will look attractive in clear water.
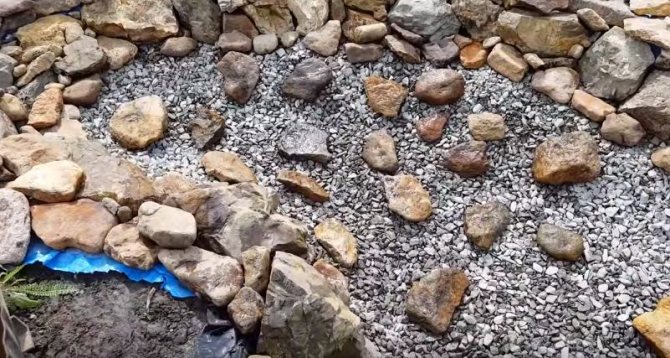

Decorating the bottom of the pond with stones
Fountain device
The preparation of the bowl is complete, and you can start decorating it only after installing the fountain. The installation of the equipment is quite simple.
Step 1. To increase the stability of a homemade water collector, you need to pour a little rubble inside to get a layer 5-7 cm thick.


For stability, rubble is poured into the bucket
Step 2. The pump is lowered into the bucket. It should easily turn in the container, and not enter with force, otherwise its maintenance will be difficult.
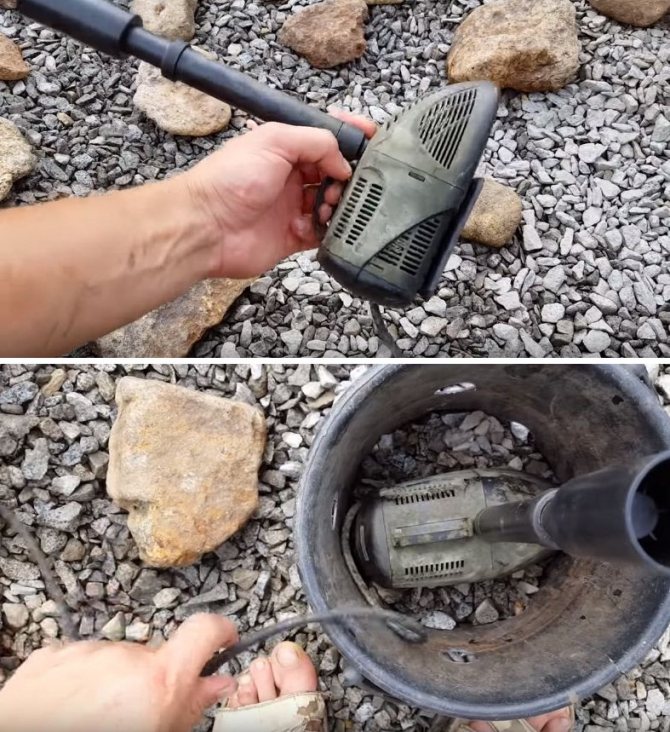

Installing the pump in a bucket
Step 3. The end of the wire from the pump must be brought out of the pond, while the wire itself must pass freely along the bottom, without tension.
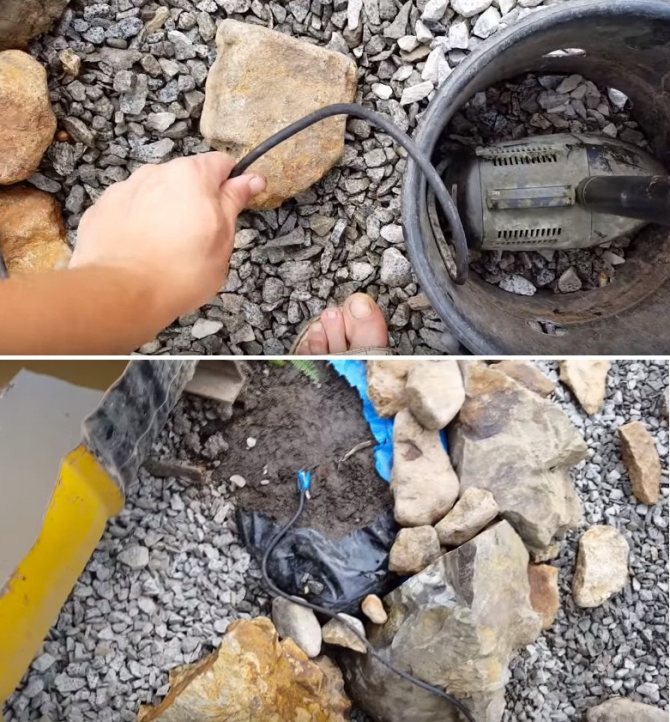

The wire is brought out of the pond
Important! The wire must have high-quality insulation, since it will be constantly under water. Before laying, carefully inspect it along its entire length and make sure there is no damage.
Step 4. The sump with the pump is laid on the outside with stones so that only the nozzle remains on the surface.
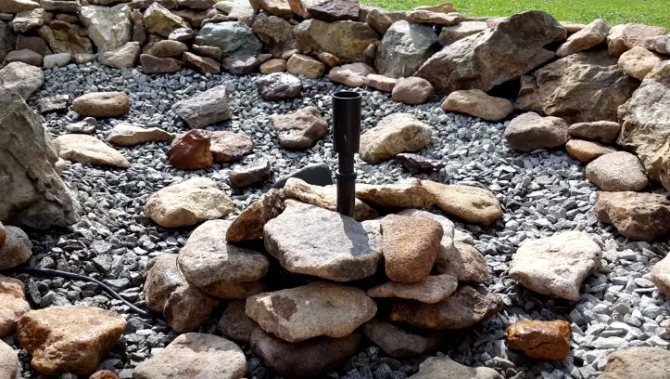

The sump is completely stonewashed
Step 5. Now it remains to connect the pump. From the building where the switchboard is located, to the reservoir, it is necessary to dig a trench for the cable. You do not need to dig deep - the main thing is to hide the wire so that it does not interfere with walking. It is advisable to thread the cable into the corrugation and only then lay it.
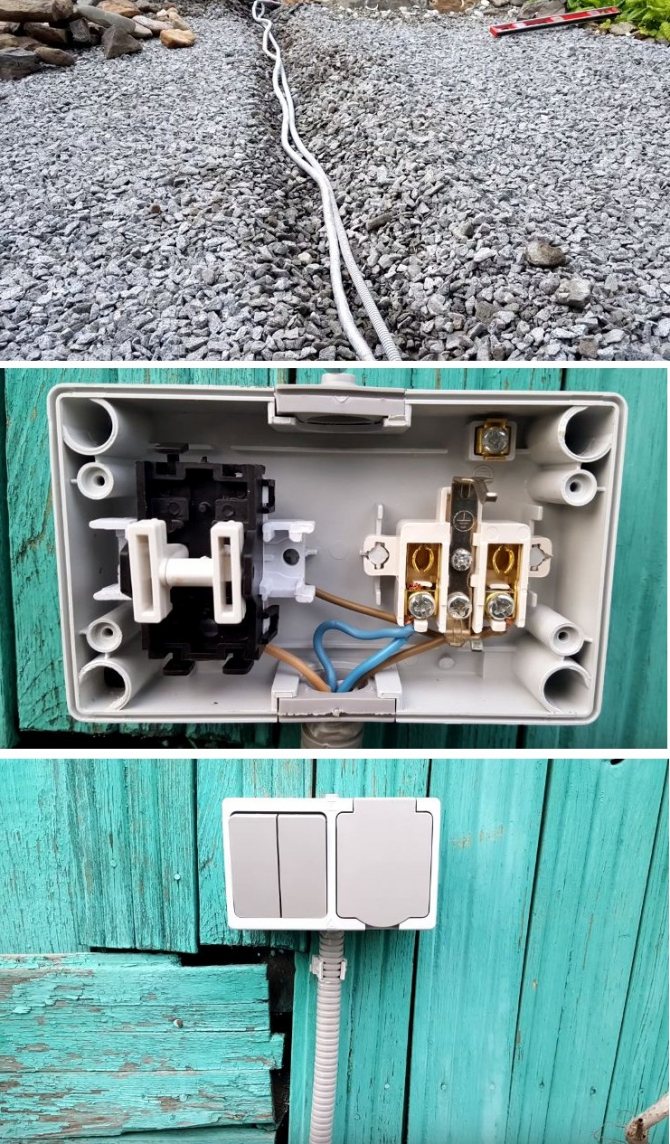

Pump connection
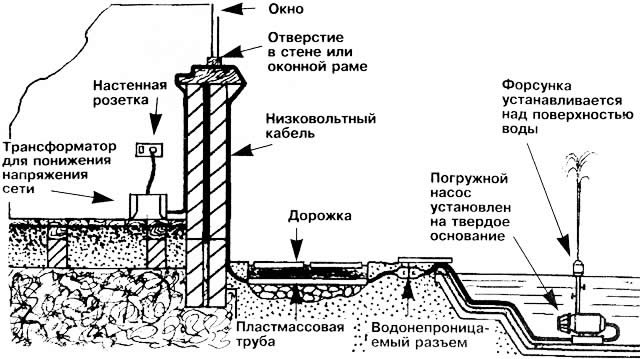

Scheme of connecting the pump to the network
Step 6. You can start filling the bowl with water. To prevent the jet from washing away small stones at the bottom, it is recommended to direct the water supply hose into a water collector.
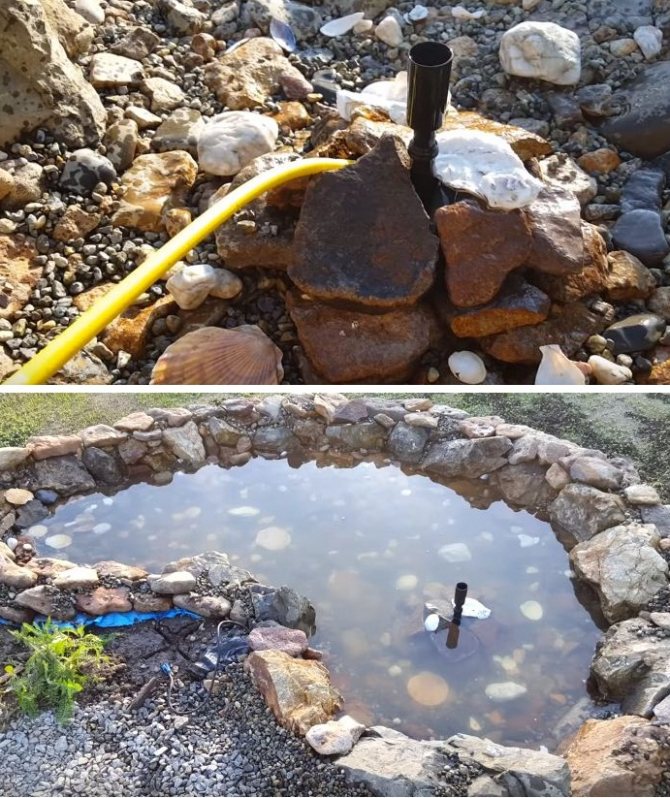

Filling the pond with water
After filling the reservoir, you can check the operation of the fountain. Many additionally install backlighting, which gives the reservoir a cozy look at night. In our case, a lantern is mounted on the bank of the pond, and the cable from it is laid along with the cable from the pump in one trench.


Ready pond with fountain
If it is necessary to adjust or replace the pump, it is enough to disassemble the upper row of stones covering the bucket. You can change the look of the fountain with the help of various nozzles, which are now available in a wide range.
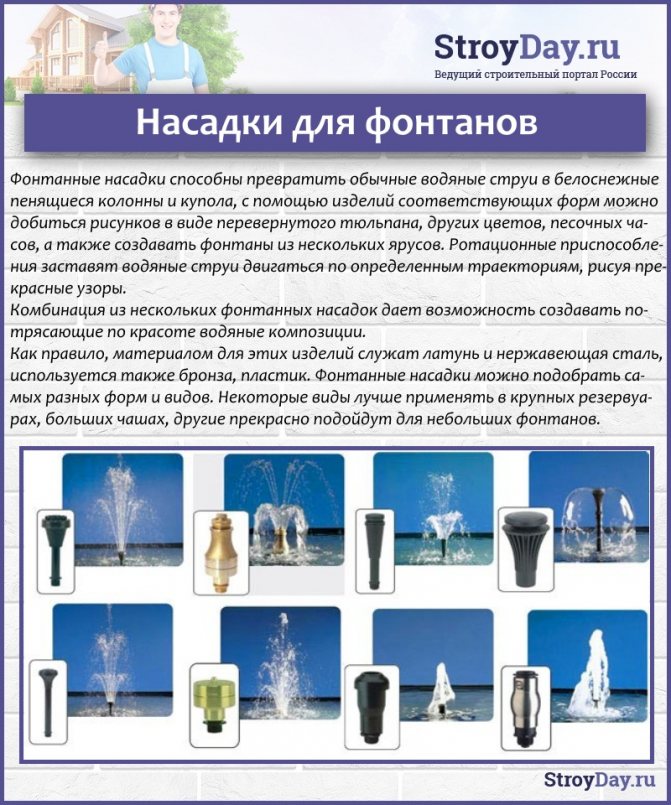

Fountain heads
Tips for keeping a fountain in the country
Any country pond and fountain, including, needs careful maintenance. To maintain order and transparency of the water, a pleasant external appearance of the structure, it is necessary to regularly clean the tank. With the help of special devices, it is required to remove leaves, seeds, fluff and other objects from the surface of the water that can not only spoil the appearance of the reservoir, but also lead to a malfunction of the fountain.
At the end of the summer cottage, it is necessary to drain all the water, transfer the removable parts of the structure to a closed room, and cover the remaining parts and the bowl with a film so that dirt does not get into them.
To build a fountain with your own hands in the country or even in an apartment will not be difficult and will not require large financial resources.Before building a decorative fountain, you need to decide on the shape, size and installation location. There are many options for the location of such structures - near the gazebo, on the lawn, in the garden. After the construction of the fountain, you need to carefully monitor the purity of the water, regularly remove debris and add water, as it will evaporate.
Such designs are widely used in the design of suburban areas. Fountains can decorate any abandoned area or become a highlight of a summer cottage. And by connecting imagination and decorative elements, you can make it even more beautiful and unusual.
Arrangement of a fountain without a reservoir
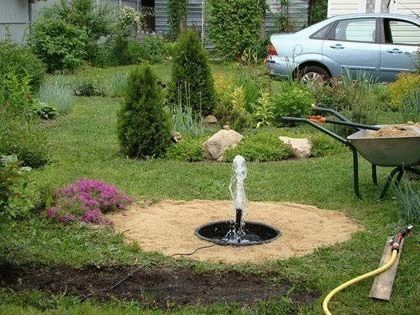
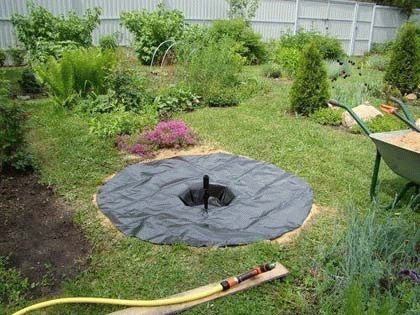
If it is not possible to make a reservoir, or you simply do not want to take care of it, the fountain can be installed without it. Correctly selected design will allow such a fountain to become a real decoration of the site. All work can be done in a day, it does not require any special skills.
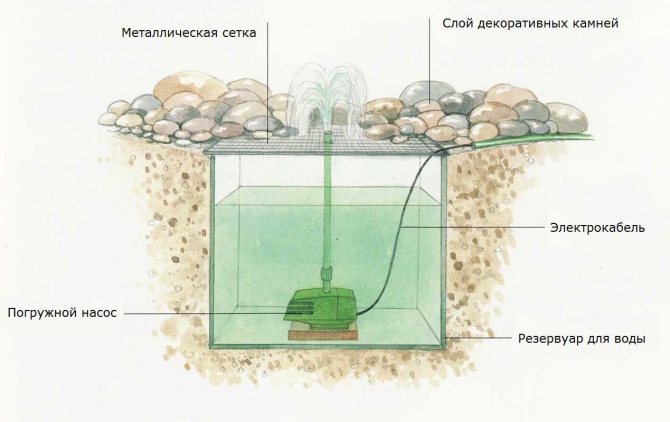

The scheme of a fountain without a reservoir
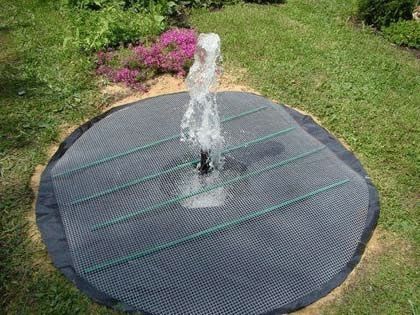
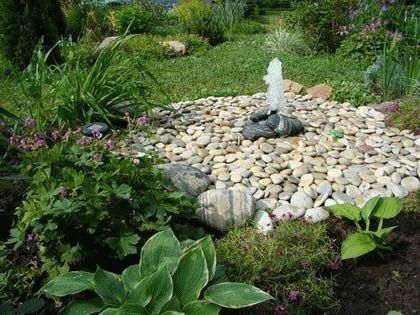
To make a fountain, you will need a plastic bowl, a submersible pump, a filter, a thick film, a metal mesh with fine cells, as well as sand and stones for decorating the structure.
Table. Making a fountain with your own hands
| Illustration | Description of work |
| On the selected site, a circle is marked with a diameter twice as large as the diameter of the bowl. The soil is selected to a depth of 10 cm, and then a hole is dug in the center of the circle according to the size of a plastic container. |
| In the pit, you need to make a sand pillow, on which the bowl is installed so that its edges rise above the surface by about 5 cm. The horizontal of the container must be controlled during installation. After that, water should be poured into the bowl, not topping up to the edges by 4-5 cm. |
| A submersible pump is inserted into a bowl of water, a nozzle is put on it and the water supply is checked. It is very important to adjust the flow so that all the water falls back into the container rather than splashing around. |
| A circle is cut out of the film along the diameter of the entire recess, cuts are made in the center so that the edges of the film sink into the bowl and completely cover its edges. |
| Several metal rods are laid on the film at some distance from each other, and a mesh with a slot for a nozzle is laid on the rods. |
| The fountain is being decorated: large and small stones, pebbles, shells are laid on the grid. The stones must completely hide the mesh. Plants can be planted around the perimeter. |
The wire from the pump is laid in a trench and also covered with pebbles or gravel from above. With the onset of cold weather, the water from the container must be drained, the pump must be disconnected from the cable and removed for the winter. It is also recommended to cover the area with a film or other material so that debris does not accumulate between the stones.
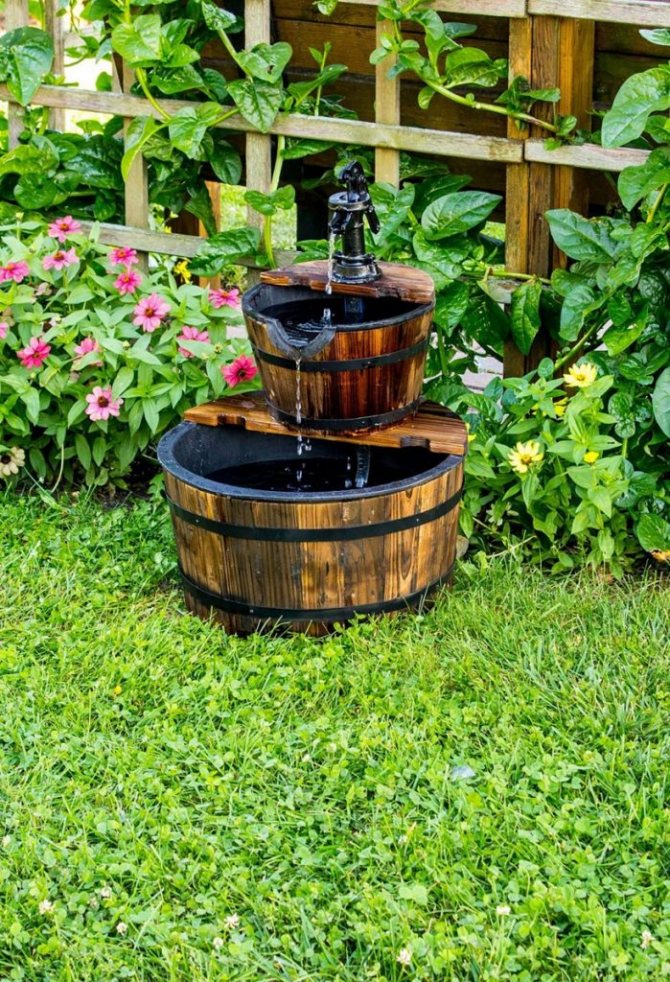
To make a fountain, you can use any containers: barrels, flowerpots, old unnecessary baths, and so on. Here ample opportunities open up to show your imagination and creative approach.
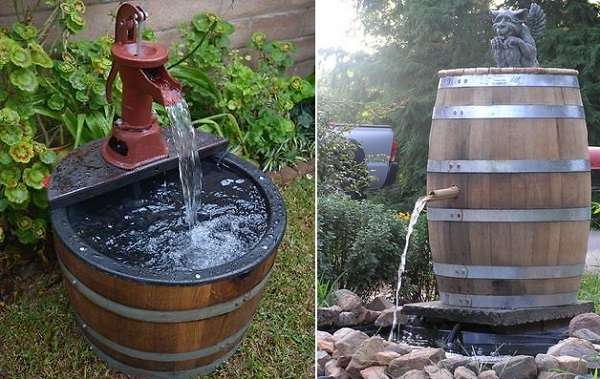

A barrel fountain is a great solution for a rustic garden
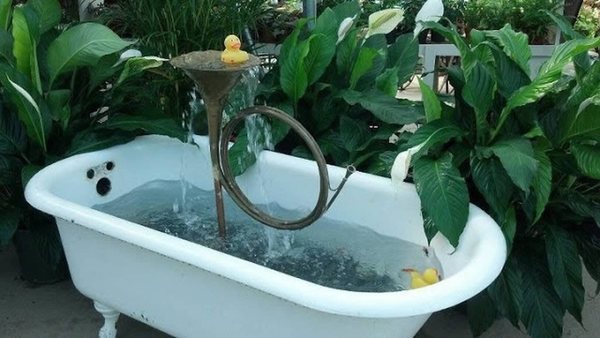

Successful use of an old bathtub
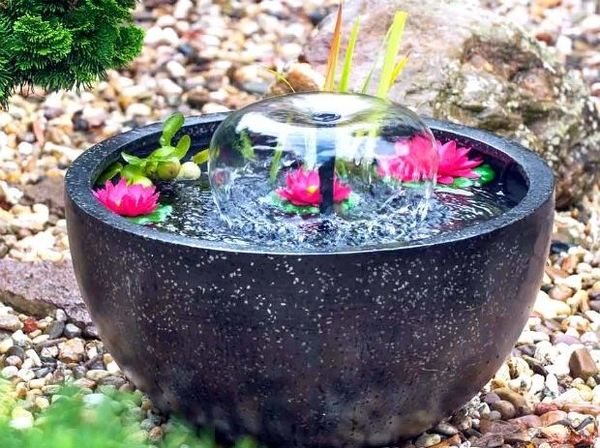

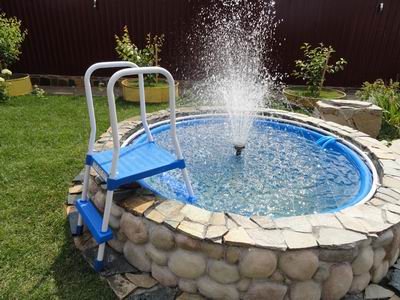
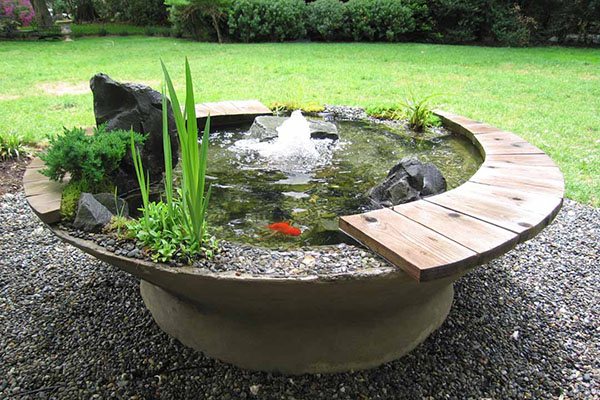
Small fountain in a concrete bowl
Care and maintenance rules
The same water, circulating in a circle, gradually evaporates. Refilling a new portion is the very first thing you will have to face when operating a fountain.
Periodically, the water must be completely replaced to avoid deterioration. Over time, dust settles in the liquid, polluting it. The water becomes cloudy and an unpleasant odor appears. To reduce the amount of dirt coming from outside, simple measures allow - it is enough to close the fountain from above with any available material after each use.
When draining the water, it is necessary to clean all the inner surfaces of the fountain. The filter, fixed at the pump nozzle, is rubbed with a brush.
Shading the fountain helps to delay the blooming of water.
Before the onset of the winter months, all the water is removed for good, and the fountain is dried. The pump is removed and transported indoors until spring. If the device is to be stored in a cold room, after drying it is cleaned of deposits. If the room is warm, then you can avoid the cleaning procedure by storing the pump in a bucket of water.
If the size allows and the fountain is mobile, it is moved entirely under the shelter. If not, the structure is covered with a film.
In a pond equipped with a hydraulic structure, it is often difficult to change the water. Large debris floating on the surface is caught with long-handled nets. Planting algae and populating it with mollusks allows you to start the process of purifying the reservoir. The more the pump nozzle sprays the jet, the more oxygen the pond will receive - this also has a positive effect on the freshness of the water.
A correctly selected pump and a creative touch in the design are all that is required for the completeness of summer cottage happiness. They say that a person is able to look at fire and water endlessly. However, even five minutes spent at the bubbling fountain can give you the feeling of infinity.
Rate the article:
- 5
- 4
- 3
- 2
- 1
(1 vote, average: 5 out of 5)
Share with your friends!
Process of creation
Start by determining a suitable location.
How to choose a seat
When choosing the right place to install a fountain, you need to consider a number of important points:
- The fountain should be in partial shade. Direct sunlight causes the water to heat up quickly and bloom.
- Do not place the structure under trees. The roots of mature trees can damage the waterproofing system. In addition, the water will constantly be clogged with leaves, branches, fruits that have fallen from the tree.
- The location of the water decorative device near the house is undesirable. Excessive moisture and splashing on the wall can negatively affect the condition of the walls of the house.
- It is better if the structure is protected from drafts, otherwise the water jets will be blown away by the wind.
See also
Ideas for the design of a white kitchen in different styles, interior design rules and color combinations
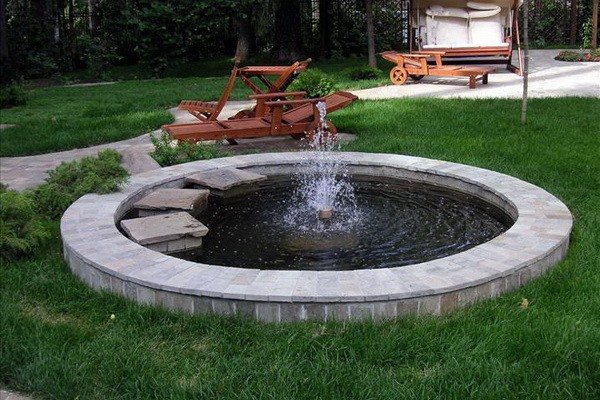

The place where the fountain is located should be clearly visible from any part of the site.
The water structure, surrounded by a flower garden and low bushes, looks beautiful.
Bowl selection
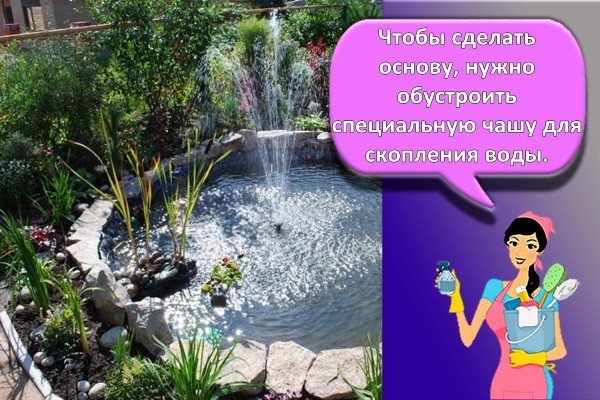
To make a solid structure, you need to equip a special bowl for collecting water and a place to store the hydraulic system. The bottom of the pit is lined with a film or a container of a suitable volume is chosen.

Pump requirements
The fountain drives the pump. It provides continuous movement of water:
- water from the bowl rises through a special device;
- having reached the set point, it is thrown out through the nozzle again into the bowl;
- then the water enters the pipe, is cleaned and returns back to the nozzle.
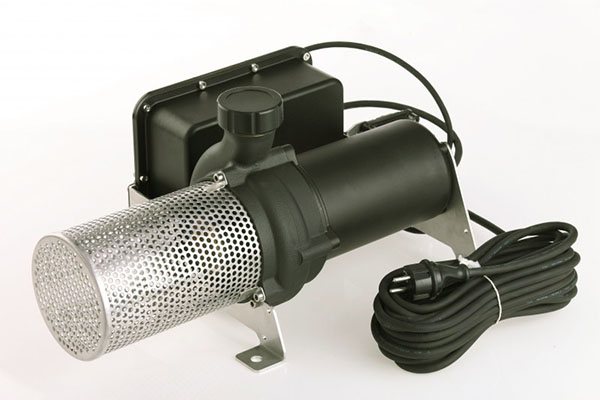

For fountains, you need to buy special pumps. They differ in the presence of a built-in filter. It is enough to buy such a unit, fix it in a container, pour in water and connect it to the mains.
Before buying a pump, you should decide how high the fountain would like to see the summer resident in his area.

50 cm
This height of the fountain requires a unit capable of pumping up to 850 liters of water per hour.

100 cm
The productivity of this model of equipment is up to 2000 l / h.
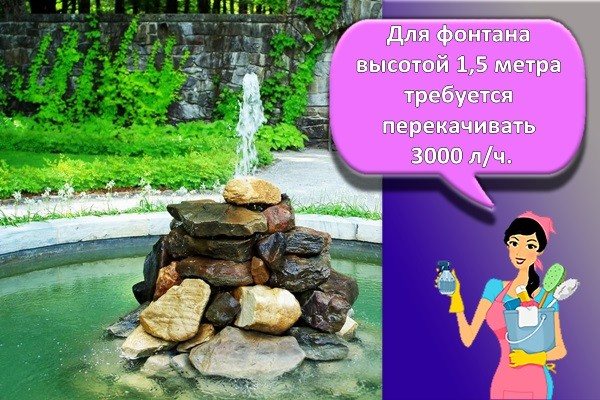
150 cm
The 1.5 meter high fountain requires equipment capable of pumping 3000 l / h.

200 cm
If the height of the water stream reaches 200 cm, then it is necessary to purchase a pump with a capacity of 5000 l / h.
300 cm and more
For high fountains, a unit with a capacity of 8000 l / h is selected.

How to assemble
The work involves the implementation of such sequential actions:
- First, you should dig a pit with the recommended depth and width in the scheme. The depth of the bowl is made below ground level so that the ground around the structure is not washed by water.
- The bottom of the pit is covered with a layer of sand.
- The side walls of the pit are lined with bricks.
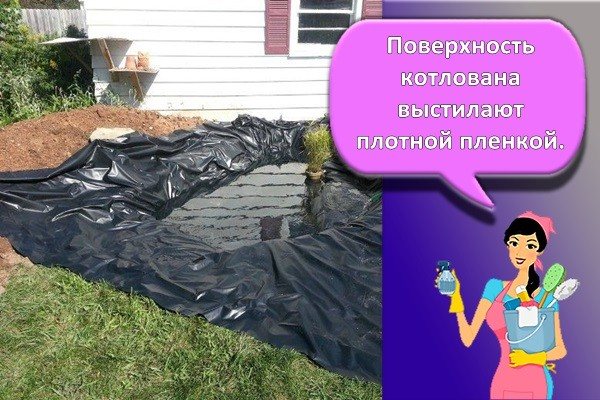
- The surface of the pit is lined with a dense film that will not allow water to escape from the bowl.
- All formed seams are treated with a sealant.
- Stones with a smooth surface are laid out on the bottom.

To prevent an increase in the water level in the pit, they think over a small emergency drain.

Decorating
As soon as all the main elements responsible for high-quality work are installed, proceed to the installation of the upper part of the fountain and its decoration.
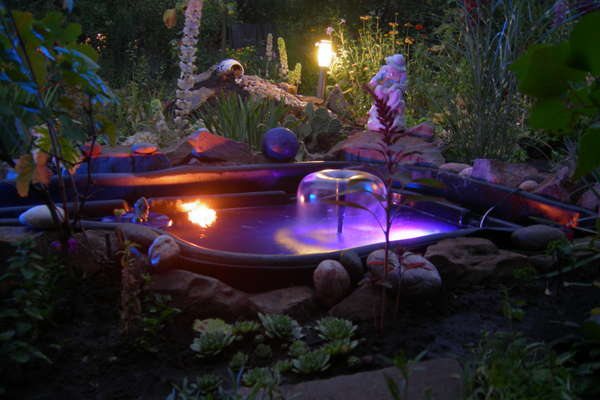
The fountain is decorated with plants, stones of different shapes and sizes, clay figurines, and small sculptures. It is important to provide the fountain with lighting. Waterproof lamps, light strips are chosen as lighting devices, floating lanterns look beautiful. Ground lamps are placed around the fountain.
See also
Children's room zoning rules for children of different sexes and ideas for interior design

The cost of the fountain in the store
If there is no opportunity, time or skill to build a device, you can purchase a decorative fountain in the store. Its cost directly depends on the size and complexity of the design. You can get by with a small, unpretentious structure for a couple of thousand, or buy a full-fledged and beautiful decoration for the garden. There are also floating fountains on sale. In order to install them, you will need a water surface and a fountain. And it will simply float on the surface, bringing variety and beauty to the garden.
3,6
181
Author of the publication
offline 2 years
Nika
30,8
Comments: 0Publics: 19Registration: 24-04-2018
The main types of garden fountains
The main purpose of a self-built stone fountain is to supply liquid under pressure to a certain height with further spraying in the air or transforming water into a waterfall stream.
For all types of fountains, two important components can be distinguished: a source (creates a flow of water) and a receiver (a place where water enters). Material for construction can be anything: from a simple fountain made of plastic bottles to a capital structure made of concrete (Figure 2).
The flows of water for each type of fountain are different, and for arranging a cozy recreation area in the garden, the following are most often chosen:
- Geyser: is a structure that can eject water under pressure upward or at an angle. When you change the height of the jet stream, you can create a bubbling fountain or multi-meter noisy jets of water.
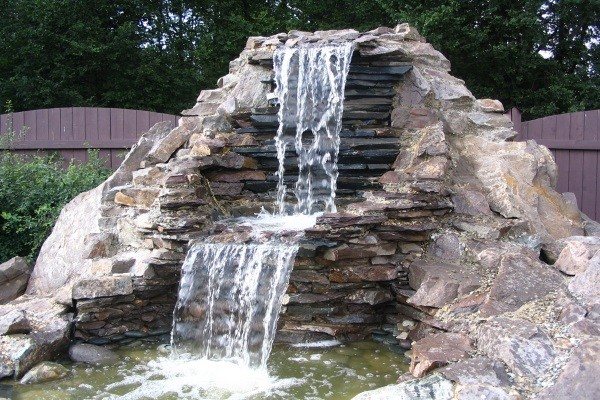
- Cascading: suitable for areas with elevation differences or for large areas. Setting the drops at different heights allows you to achieve the effect of a fast flow of water like a waterfall or a slow roll of water from container to container.
- Bell: is the simplest solution for arranging a comfort zone on your site. However, the height of the water column, as a rule, is not great, but at the same time, due to a special nozzle, a continuous water hemisphere is formed in the tank.
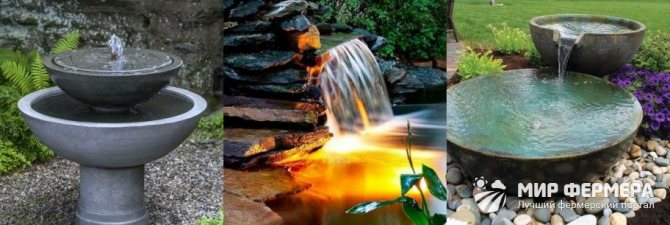

Figure 2. Design options for garden fountains
The atomizer is worth a separate mention. This type includes a group of hydraulic structures that differ in the nature of the jet: single (small vertical jets of the same specified height), tiered (small vertical fountains of a given height), water jet (water flow comes out of a hole in a decoratively decorated wall and at a given distance from the wall ), a spinner (jets of liquid rotate to form a spiral flow), a tulip (the jet forms a funnel expanding upward and falls in a thin dome).
Finishing and decor
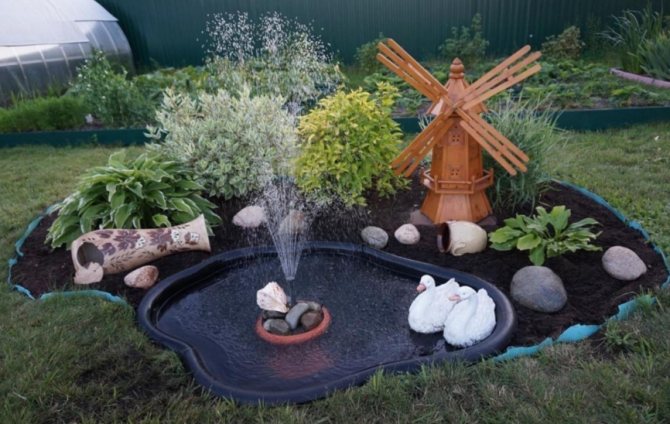
Decorating a fountain is an extreme step in the construction of an artificial reservoir. You can add uniqueness to a decorative reservoir with the help of sculptures and plaster figures, a lighting device or multi-colored stones and rubble (Figure 6).
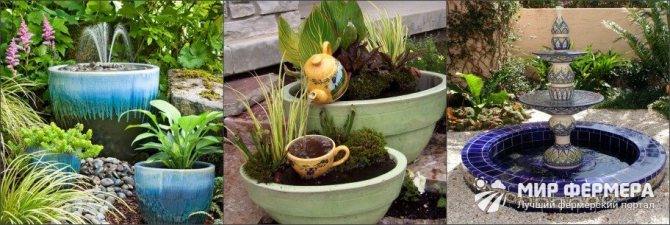

Figure 6. You can decorate the finished structure in any way possible
You can also use potted flowers or animal figurines that can be placed around the perimeter of the area near the fountain. Colored illumination, which can be placed in a pond or installed around the perimeter of lamps, gives a particularly beautiful uniqueness to any fountain.

