Do you want to decorate the site with original garden beds, but do not know where to get ideas from? Here you will find the best examples of flower arrangements that will transform your garden in a matter of moments! We will tell you how to make a beautiful flower bed with your own hands, we will give examples and several master classes with photos.
How to make a beautiful flower bed with your own hands
DIY flower beds
Beautiful flower beds for the garden
A handmade flower bed is one of the best ways to decorate a site, add originality and expressiveness to it. A beautiful flower bed will become the most attractive corner of your yard and, perhaps, even a kind of connecting link that unites the house, garden, plants and outbuildings into a single harmonious composition. You can use absolutely any materials for making flower beds, even the most unusual ones.
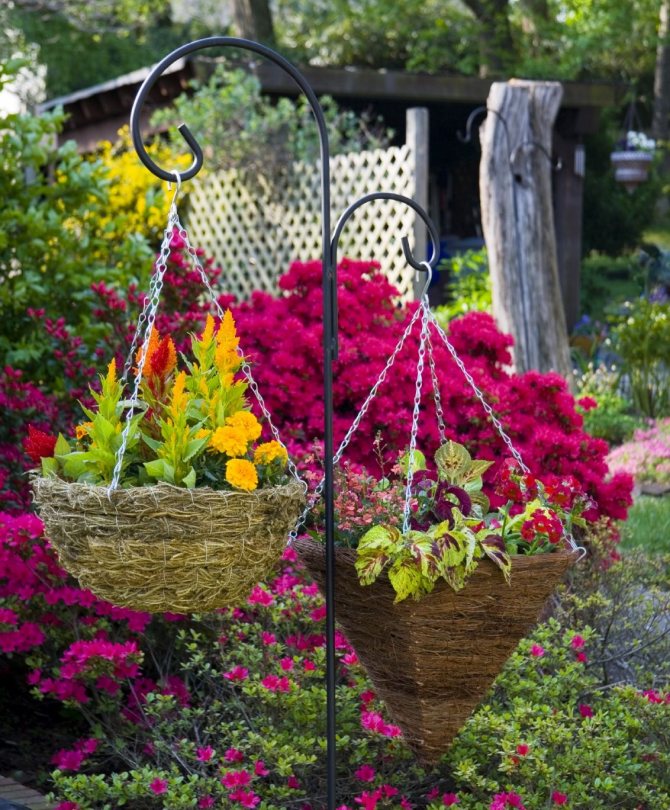
Beautiful flower bed with your own hands
Original flower bed
Regardless of the attractiveness of the flowers, a flower bed without a fence will look unfinished. The fenced flower bed will immediately be transformed, it will become more accurate. Such fences, by the way, are necessary not only to mark boundaries, but also for many other purposes - for example, they prevent the spread of plants (especially ground cover) over the site. In addition, the bumpers protect fragile shoots from pets walking around the site.
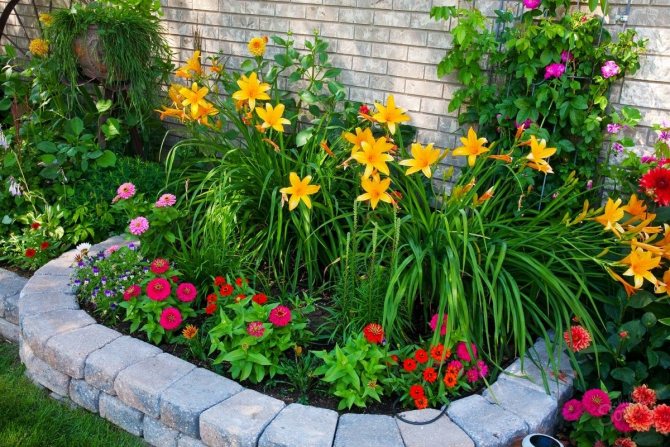
Fencing for a flower bed made of stones
A flower bed from an old car
Of course, today ready-made forms and fences for flower beds are sold, made of wood, stone, plastic and even metal, but after construction / repair work there are always surplus building materials, trimming pipes, wood, pieces of bricks - in a word, everything that is, if desired can be used to make lovely flower beds. For example, the remains of linoleum or metal tiles can serve as fences.
Composition of flowers on the site
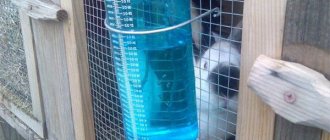
Plastic containers are a real problem for a responsible summer resident. The solution may be to use plastic bottles to create flower beds. This solution is recommended for areas where there are many moles - the bottles from which the flower fence is made will become a serious obstacle for pests. You can even alternate bottles of different colors to make the composition look more colorful.
Note! Before digging in, it is advisable to fill the bottles with sand or soil - this way they will not deform and become more stable.
The idea of using an ownerless bathtub
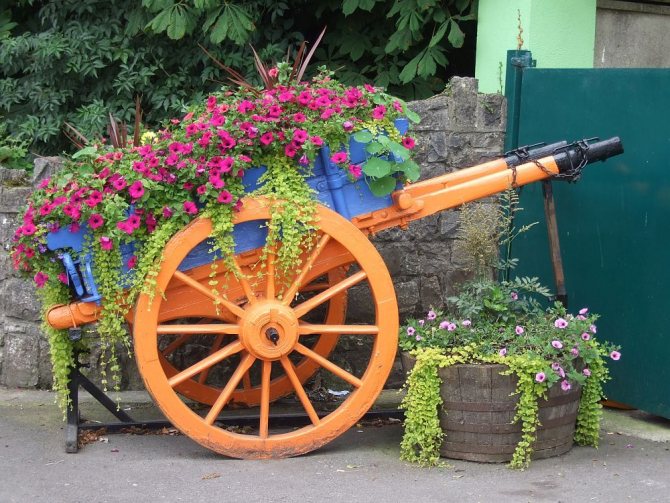
Luxurious flower bed in a cart
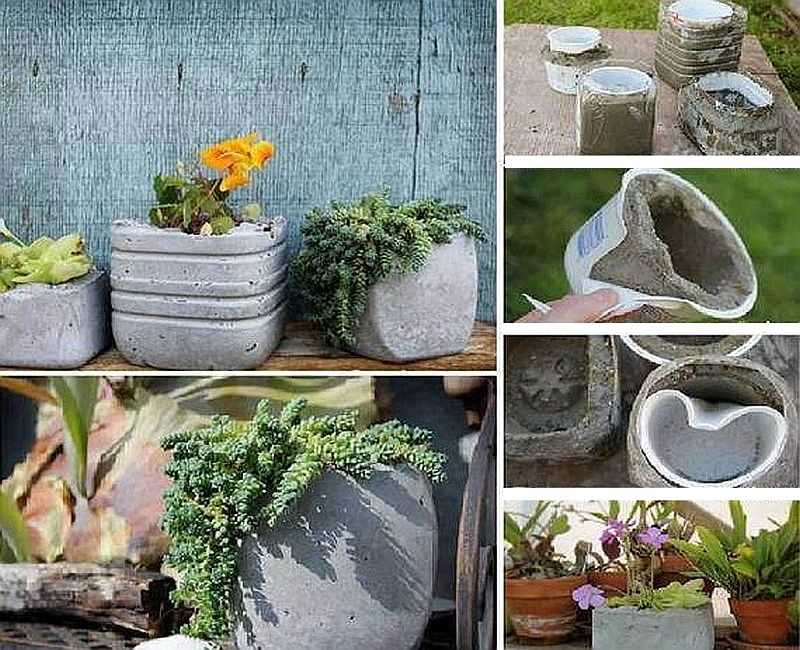
Concrete mix
In order to have a general idea of how to make a pot of concrete with your own hands, you need to take into account many different factors and recommendations. For example, what kind of concrete to use to create a floral product.
If we are talking about outdoor flowerpots, then to create them, you can use ordinary concrete mortar, which includes cement and sand. This is an ideal solution in this case, since the outside of the stone vase will look monotonous and have a gray tint. In general, it will look quite stylish, discreet and not distract attention from the flower arrangement.
Although such flowerpots look good enough, nevertheless, more attractive are products made of decorative concrete, which is also called artistic, architectural or acrylic, polymer etc. The main feature of this material is that it includes not only the main components (sand and cement), but also polymer additives, crushed particles of natural stone, some of which have coloring components. Products from such raw materials are smoother, more interesting, with elements of various minerals. The appearance of the vase will directly depend on the composition chosen.
Master class: how to make an unusual flowerpot (video)
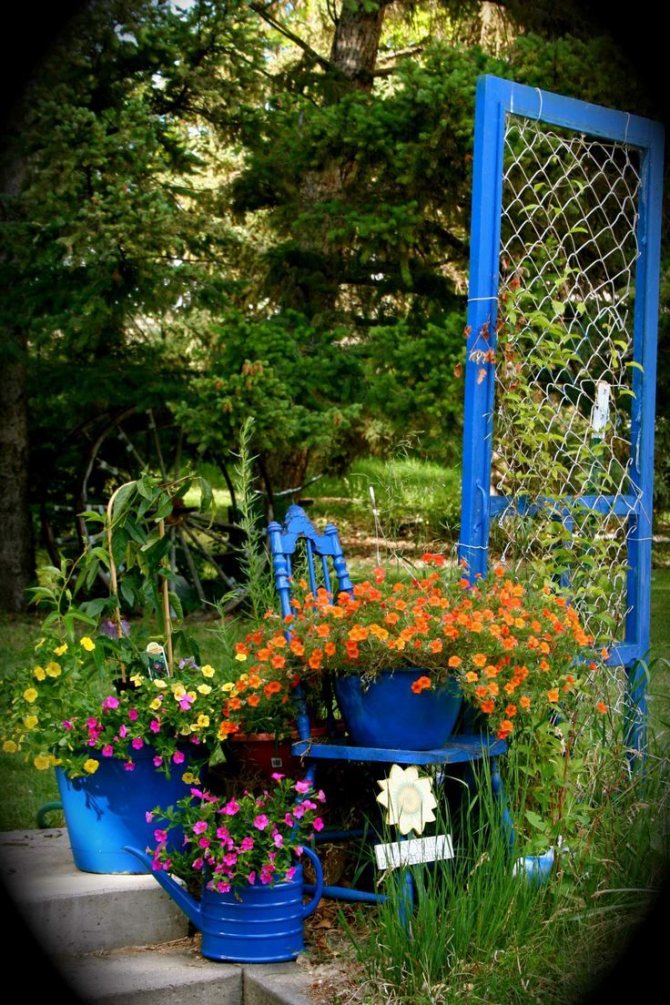
New life of old things - we use the means at hand!
People often transport unnecessary things to the country. Various chests, boxes, chairs, shoes and clothes - all this is living here its last days, to finally dry up or burn in the fire. But you can also make beautiful and original flower beds from old things!
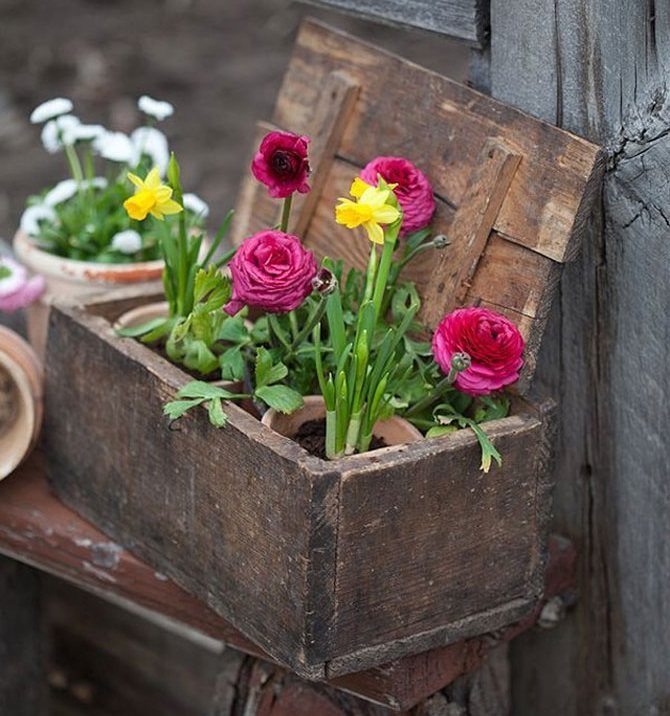
How to make a beautiful original flower bed from scrap materials
Some flowers spend the winter in the apartment, and they are transported to the site only in the summer. But they don't have to be planted in the ground - you can leave them directly in the box, and then, when autumn comes, move them back to the house.
Boxes can also be used to create vertical flower beds. These conditions are ideal for hanging crops and succulents. You can hang these structures on a wall, fence, or other vertical surface.
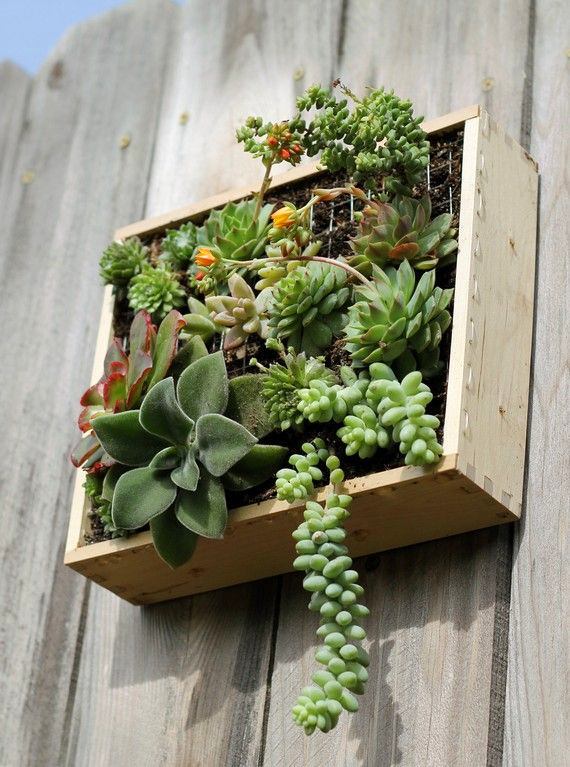
The plant box can be used as a vertical gardening bed
If you have drawers from old dressers or nightstands lying around, do not rush to send them to the landfill - instead, use them to organize a compact flower bed. The color and shape of the boxes may vary, as well as the general style. But they will all be harmoniously combined with colors.
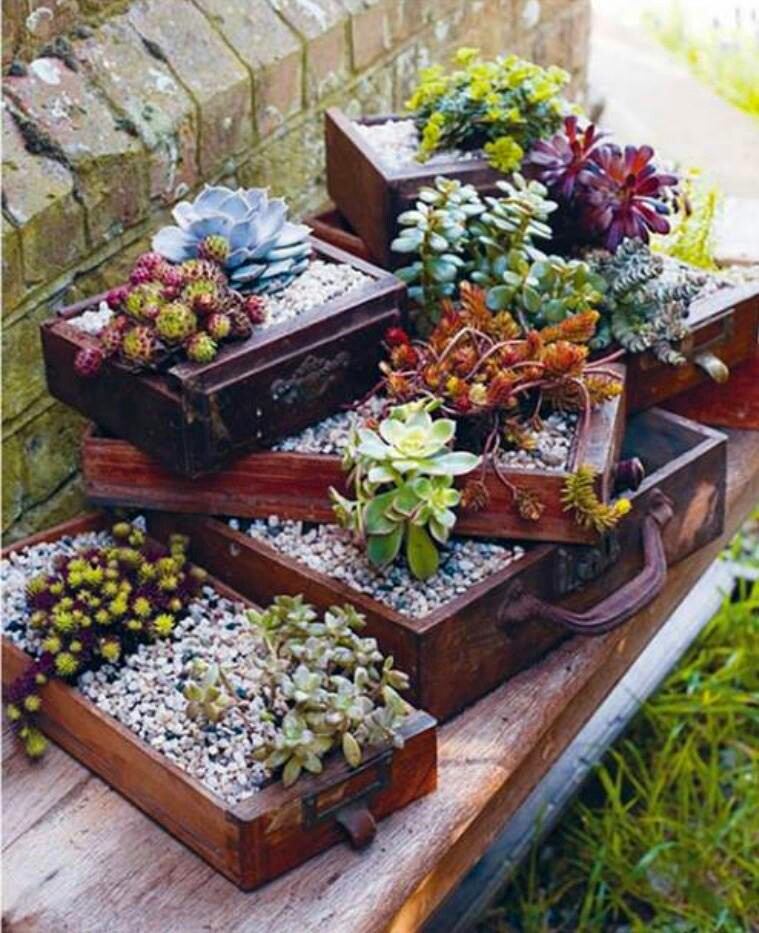
Use of drawers from old bedside tables, tables, dressers
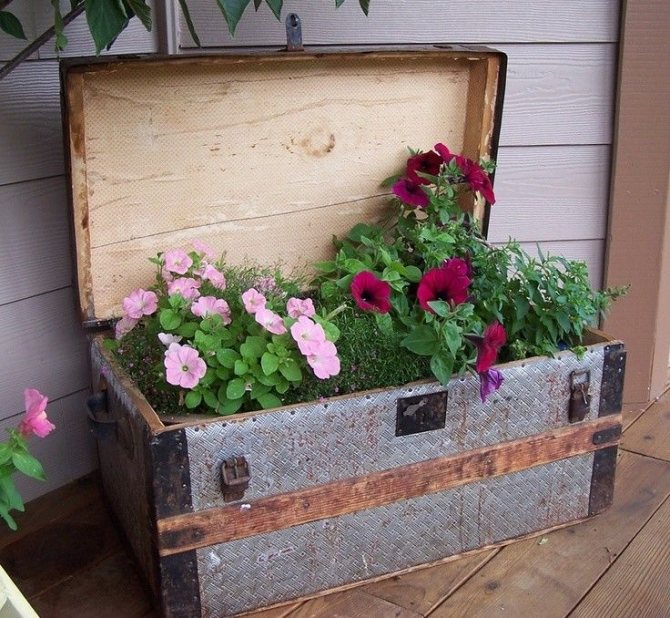
Flower Treasure Chest
Sometimes even such seemingly useless things as old shoes can find a new life. You can plant flowers there, and then hang your shoes somewhere (even by the laces). At the same time, the older the shoes, the better - there will certainly be no stagnation of water in leaky shoes.
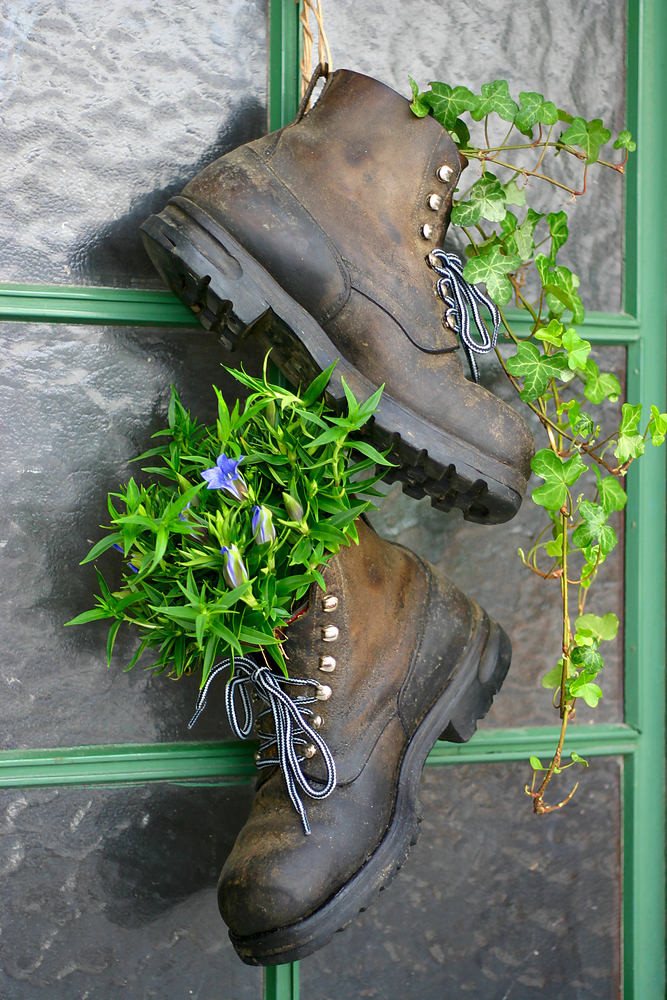
Old shoes as a flower bed
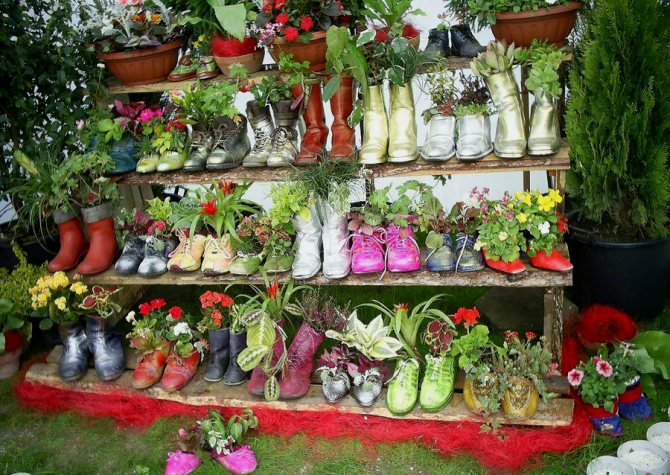
Bright flower garden from old shoes
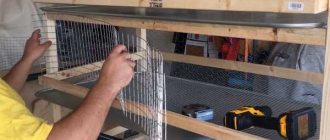
Another option for creating an original flower bed is to use an old iron cage. Plant climbing crops in it and hang it on a tree or inside a gazebo.
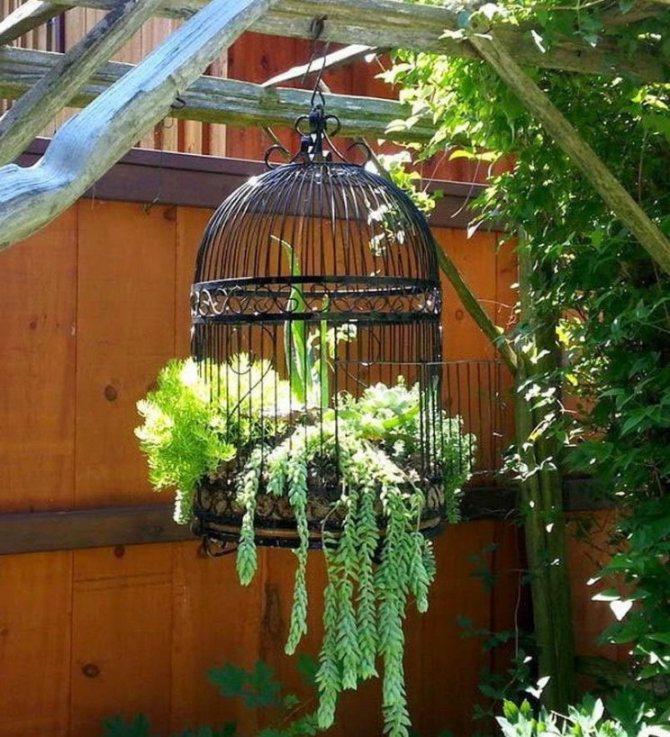
A flower bed from an old metal mesh
Very unusual flower beds are also made from glass wine bottles. This is guaranteed to surprise your guests! But be careful to remove the bottom or you may cut yourself.
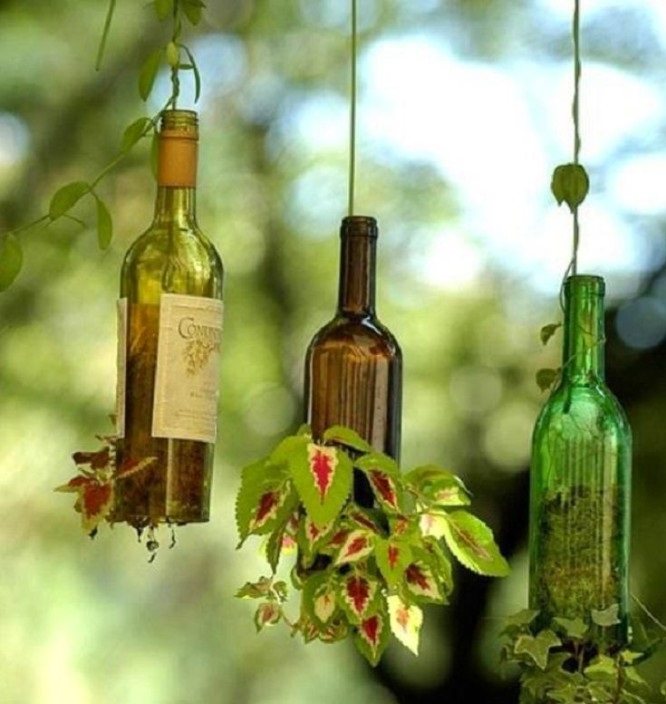
Mini flower beds - a small garden right in a glass bottle
A small but very functional flower bed can be made from a piece of burlap. Make a bag out of the material, hang it, for example, on some kind of post. Tellingly, it is suitable both for flowering crops and for scented herbs (you can add the latter to tea directly from the "garden").
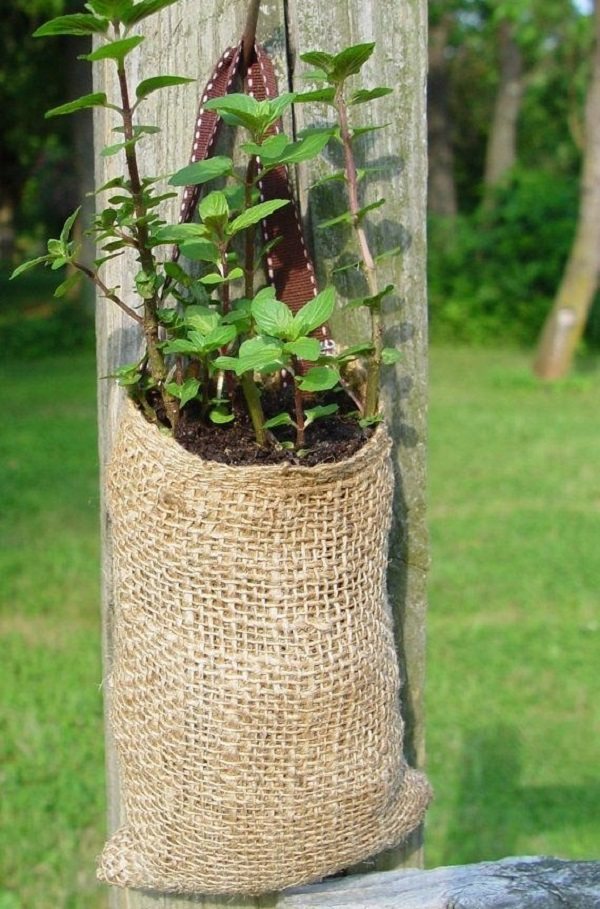
Old burlap bag as a flower bed
To create flower beds, those things that just lie on the street can also be used. A vivid example of this is a dilapidated log. Take it, cut out a longitudinal groove and plant flowers there (this option will be described in more detail below).
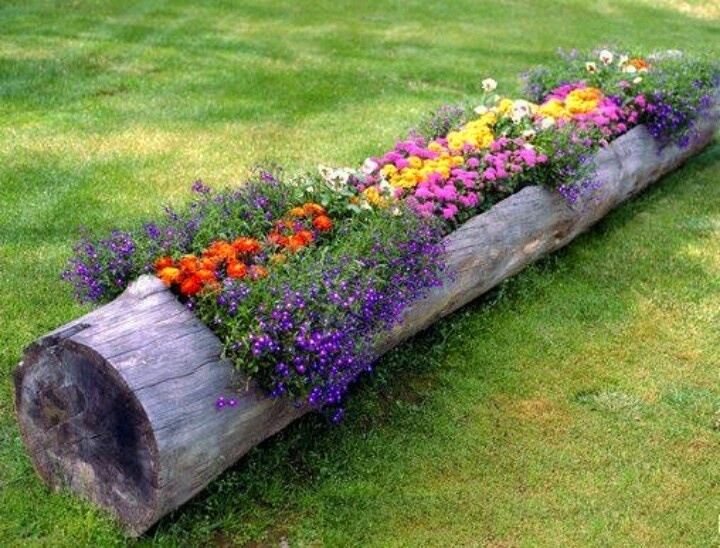
A flower bed from an old log
A stump that has not been removed can also turn into a flower bed. Tie pots to it with wire, plant spectacular falling flowers there.
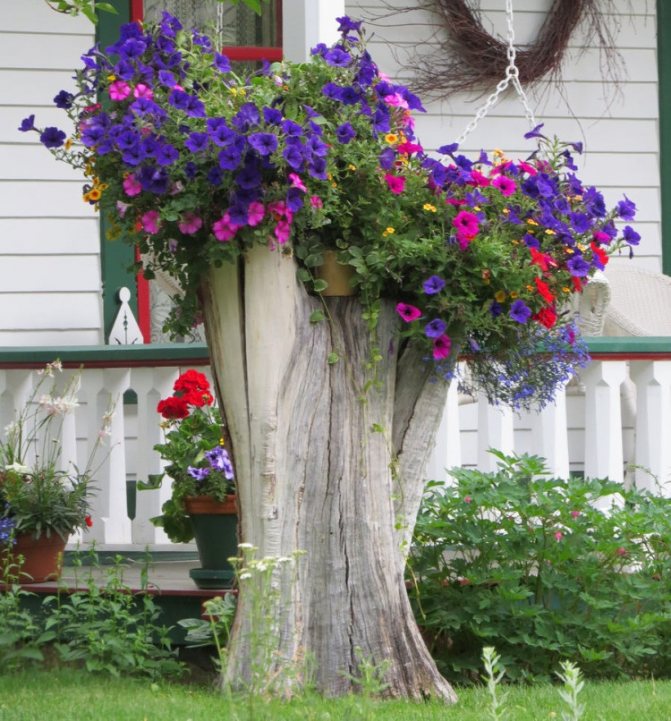
If a stump remains from a felled tree, which you did not dare to uproot, you can arrange an excellent flower bed on it
Curly tree stump
But another option is a milk river, as if pouring out of a can.But in this case, it is very important that the green background is monochromatic.
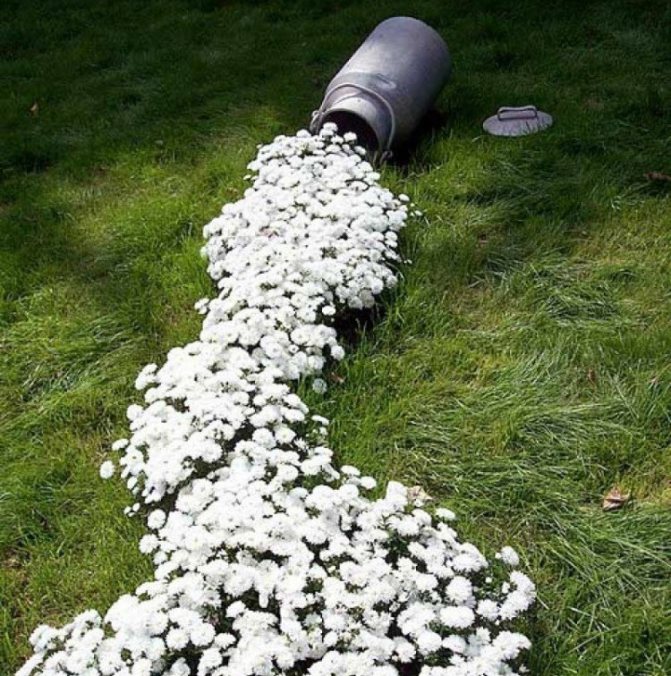
Flowerbed in the form of a milk river
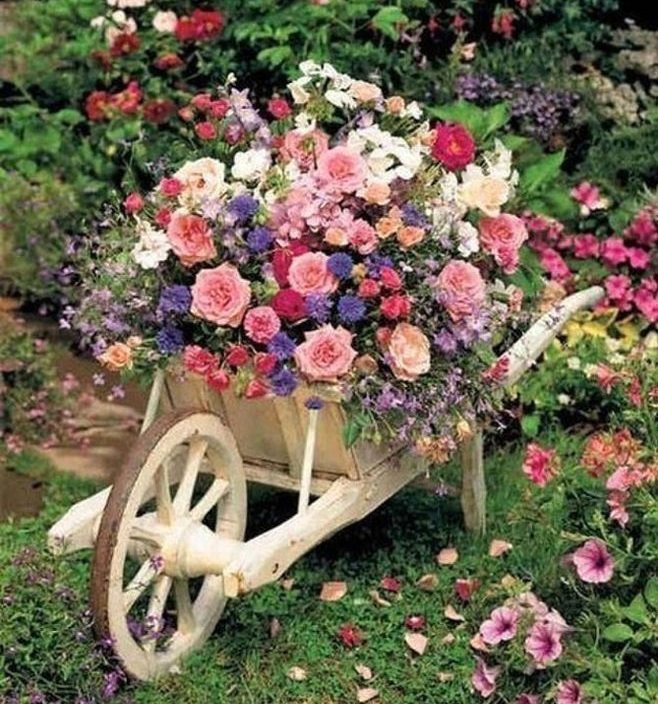
Flower bed-cart
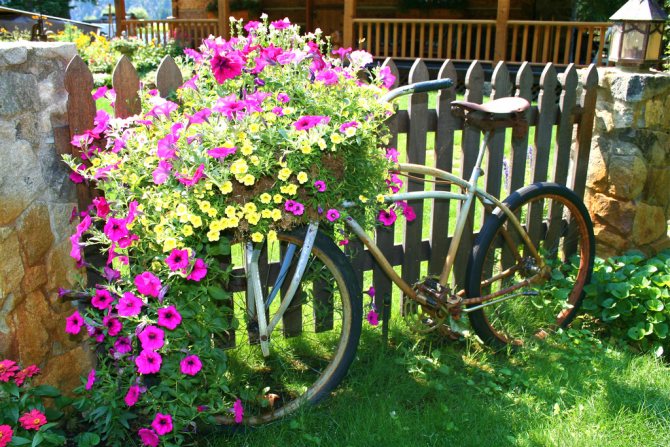
Is your old bike no longer a means of transportation? But you can turn it into a highlight of your garden! Paint it, and instead of the trunk, install such a container with flowers.
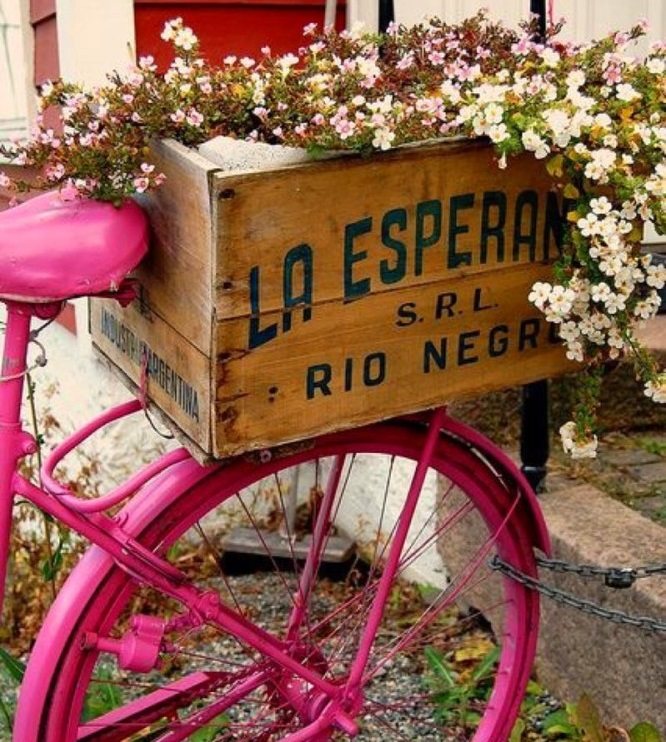
Old bike as a flower bed
Custom solution for a mobile flower garden
The next example is a complete composition. Combine old garden tools with flowers, experiment.
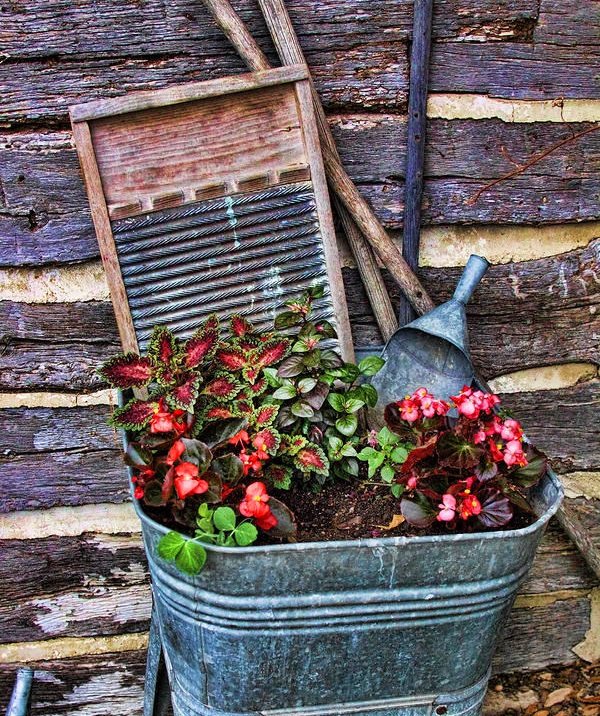
Composition with garden tools
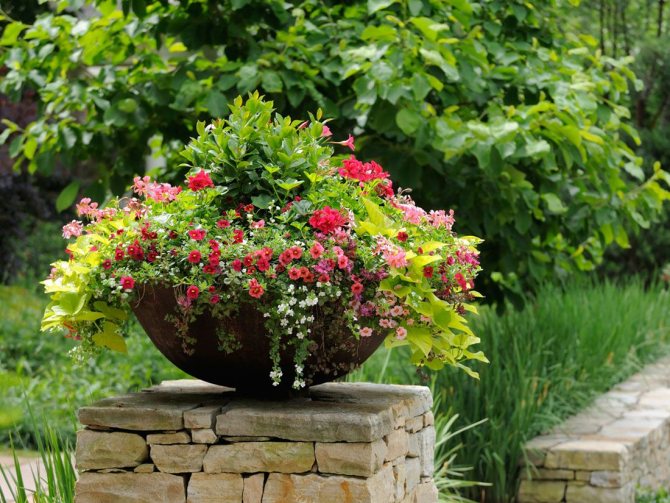
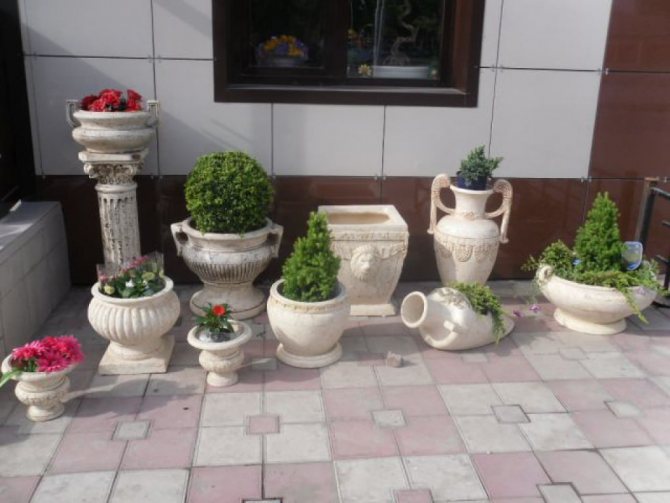
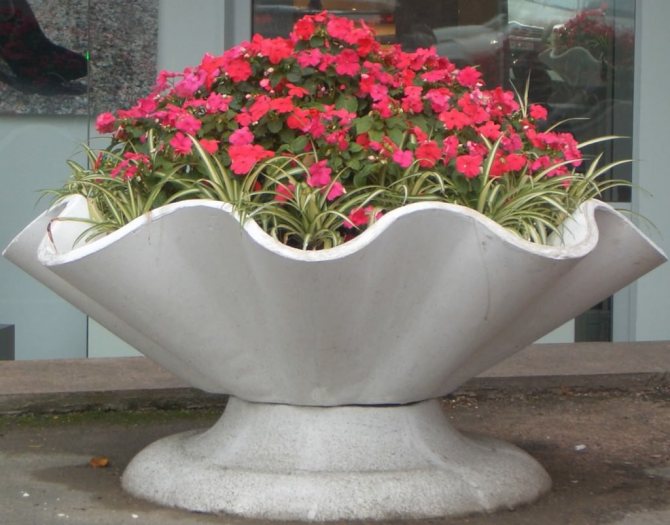
A massive stone vase will also look good in the form of a flower bed. Alternatively, you can use a large clay pot for this purpose (this can stand in the open air for several seasons).
Old huge stone vases will look great as a flower bed.
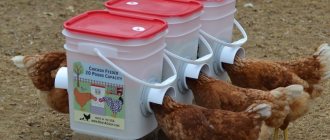
Today, mailboxes are almost never used, but you shouldn't throw your own! Make such a compact flower bed out of it and hang it on the gate.
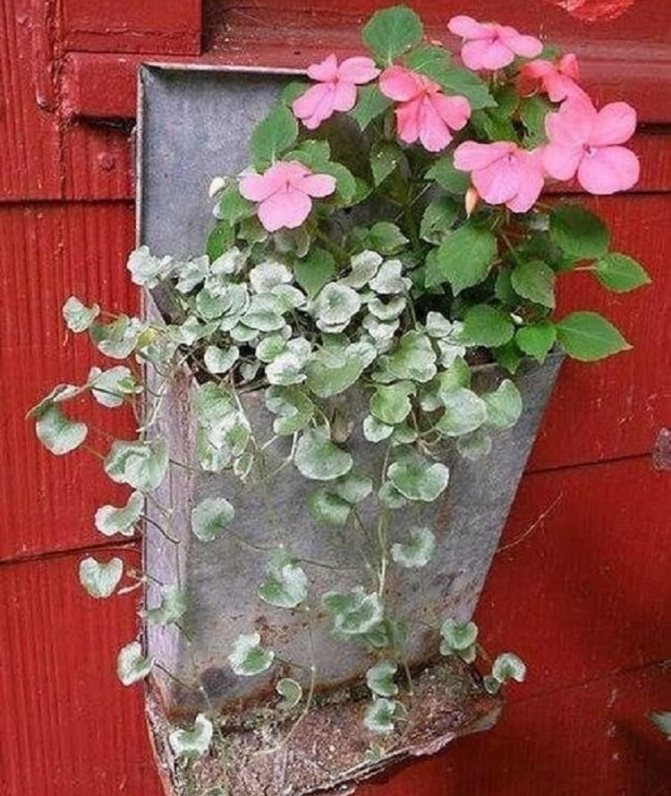
Flowerbed from mailbox
The bed in the image below can be considered a complete flower garden. The composition is complemented by a mosaic floor and a chest of drawers.
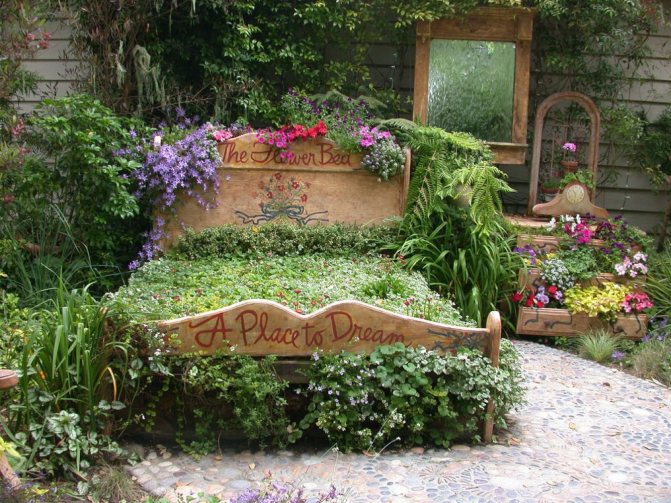
Flower arrangement with bed

An old iron bed is a great basis for a chic flower garden
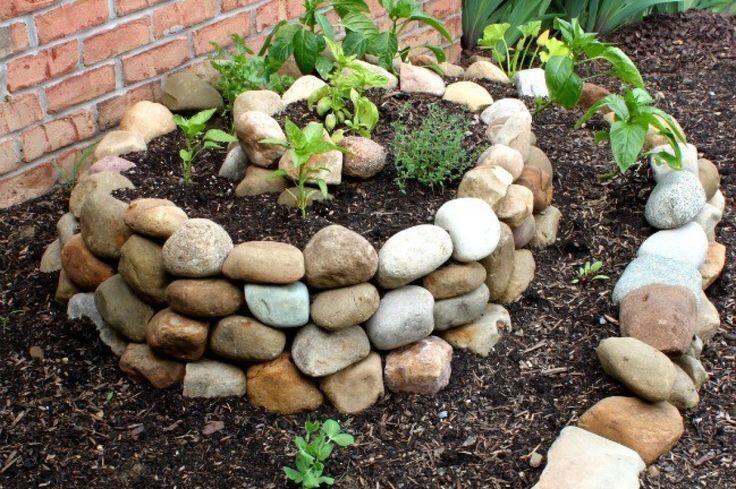
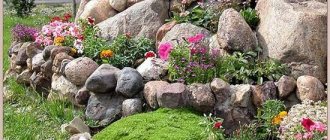
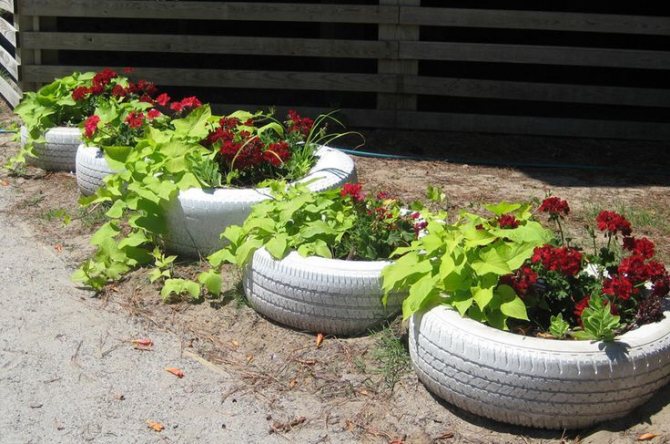
Multi-tiered flower bed of large stones
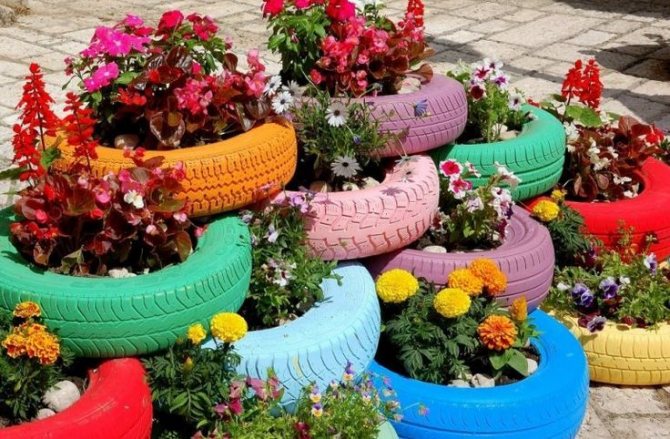
Tire flower garden multi-tiered
Video - Making flower beds from old things
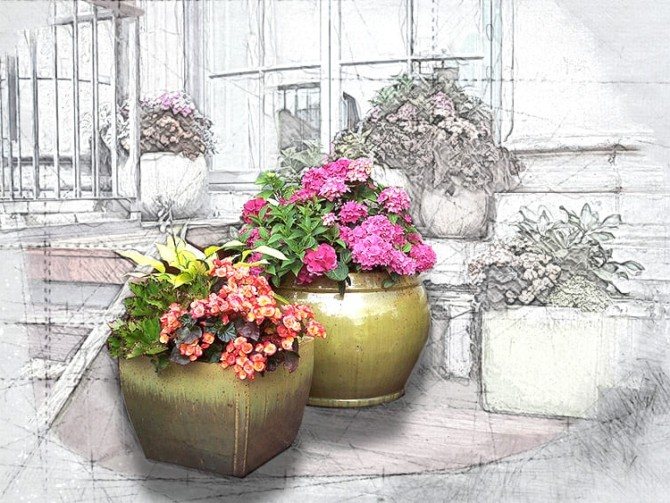
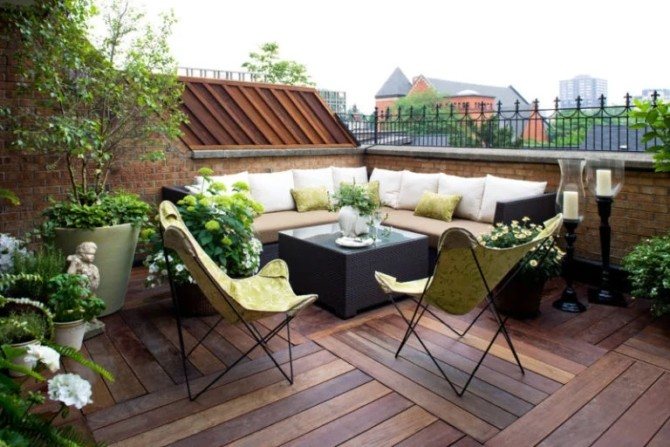
Flowerpots and general design
Of course, if concrete flower beds or flower beds are considered to be an element of decor aimed at transforming a personal plot, then this is exactly the role they should perform. In view of this, when designing the landscape design of any site, it is important to take into account the size of the territory itself, the parameters of the concrete product, the presence and quality characteristics of vegetation. Everything should be in harmony and correspond to the general direction and design. Concrete vases will bring satisfaction to the residents of the house only if they are correctly made and placed accordingly on the site.
For example, it would not be entirely appropriate to place bulky structures in secluded places intended for rest; at the same time, a miniature product at the end of a long alley would look unsuccessful (or rather, imperceptibly). To achieve the desired result, it is important to think over and maintain the necessary correspondence between the proportions of the future product and the territory in which it will be located.
The stylistic direction of flower containers can range from unchanging classics to controversial modern. These concrete vases can be painted in various shades to match the overall design. Regularly they can be refreshed by tint, without harm to the product itself. It is advisable to give preference to such shades that would not be brighter than the flowers themselves growing in the flower bed. The most optimal option would be restrained soft colors and shades: beige, brown, white, gray, brick, etc.
Master Class. Diy vertical flower bed
Vertical flower beds have become increasingly popular in recent years. Consider a small step-by-step instruction for making such a flower bed using multi-colored flowers. The best option for composition is, of course, petunias.
Vertical flower bed from a pot
For work, you will need the following consumables:
- wire mesh;
- seedlings of flowers;
- plastic ties;
- soil mixture for flowering crops;
- large flower pot;
- strong cellophane.
After preparing everything you need, get to work. For the convenience of visitors, the information is given in the form of a table.
Table No1. Instructions for creating a vertical garden flower bed.
| Steps, photo | Description of actions |
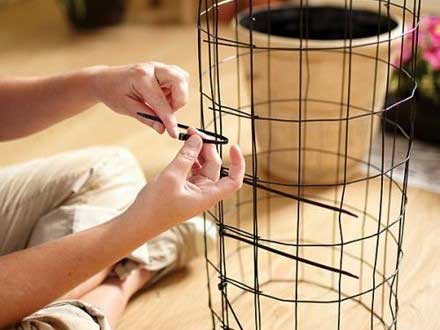
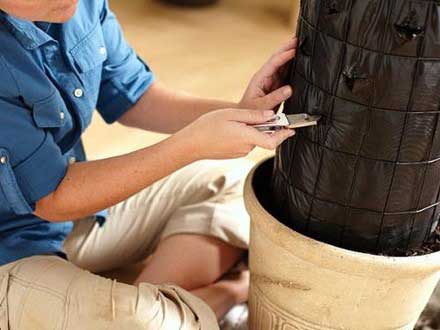
Step one | Take a wire mesh and make a cylinder out of it to serve as a vertical base.Use plastic ties to secure the edges of the mesh. Place the resulting cylinder in the flower pot. |
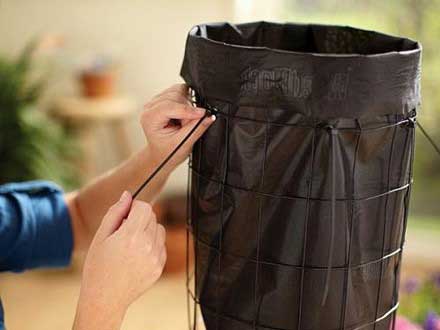
| Step two | Take strong cellophane and wrap wire mesh with it. |
Step three | Using the same plastic ties, secure the edges of the film to the vertical base. |
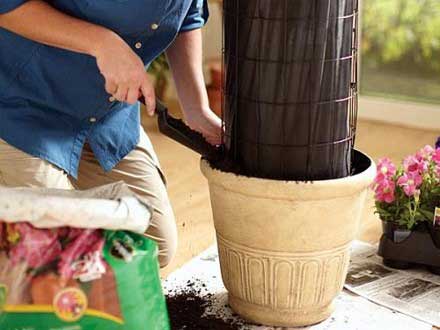
Step four | Fill the resulting form with a pre-prepared soil mixture for flowering crops. |
Step five | Also cover the pot with soil (this will make the wire mesh more stable). |
Step six | Cut holes in the foil for planting flowers. Be sure to do this in a checkerboard pattern. |
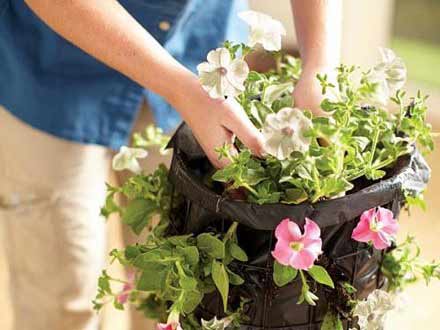
| Step seven | Plant flowers in the holes, then water gently. |
Step eight | Plant a few more plants on top (also watering them after that) to make the composition look complete. |
| Step nine | Water the finished vertical flower bed regularly, apply fertilizers in a timely manner. In this case, it will look the same as in the photo (or even better!). |

Wire mesh prices
wire mesh
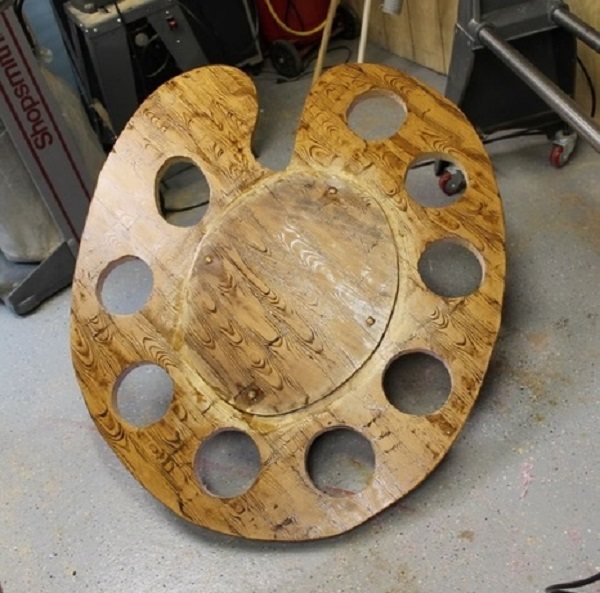
Master Class. Flowerbed "Palette" with your own hands
We are all artists at heart, and therefore it is imperative to be creative in creating something beautiful (including an ordinary garden flower bed).
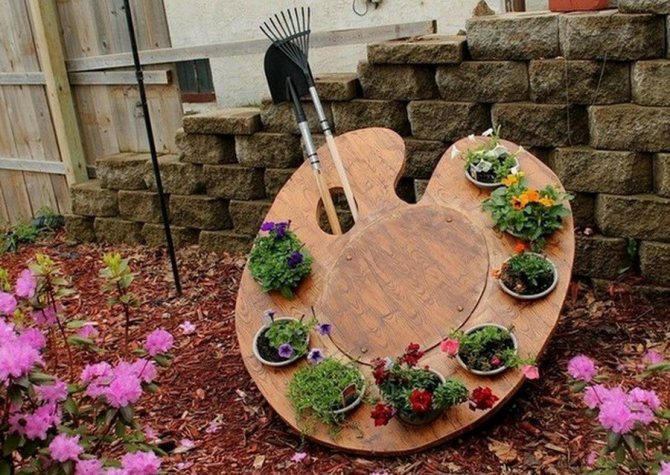
Flowerbed "Palette" with your own hands
To make such a flower bed yourself, first decide on the flowers that will decorate it.
First you need to decide on the colors
In addition, you will need pots in which the seedlings will be transplanted and where they will bloom throughout the summer.
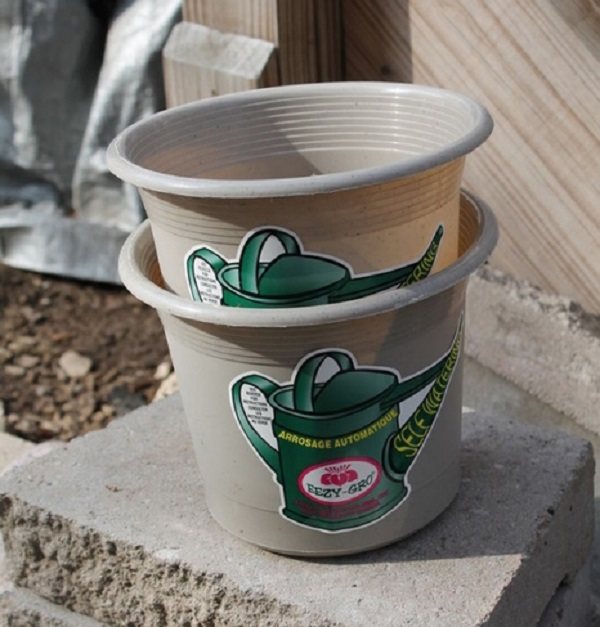
Flower pots
Also prepare a rake and a shovel - they will also be required.
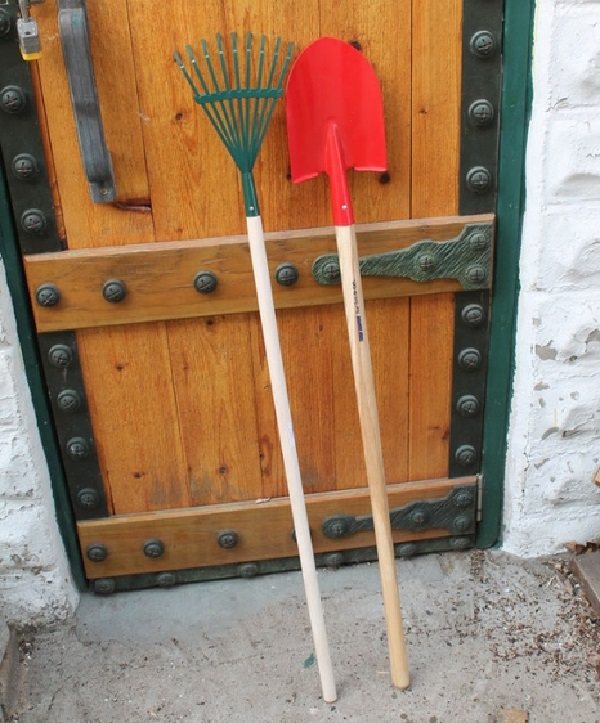
Rake and shovel
As a base, you can use a sheet of plywood, polystyrene (not recommended, since the material is light, it can be blown away by the wind) or a furniture board.
The basis for the future flower bed
Prepare the clamps in advance to secure the base.
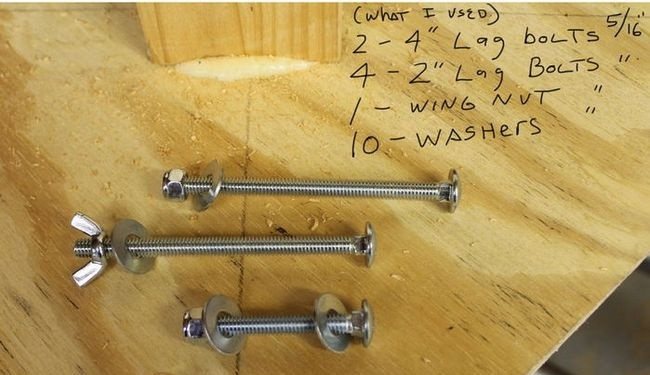
Fasteners
You also need paint or stain, varnish.
Materials for painting
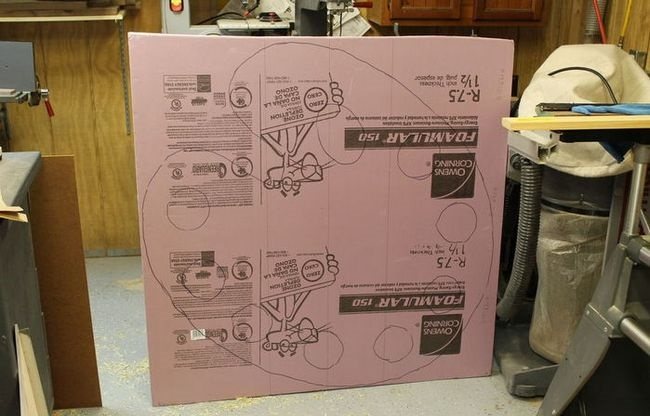
So, first, take a base and draw a palette on it with a marker.
Painted palette
Then cut out the shape with a jigsaw.
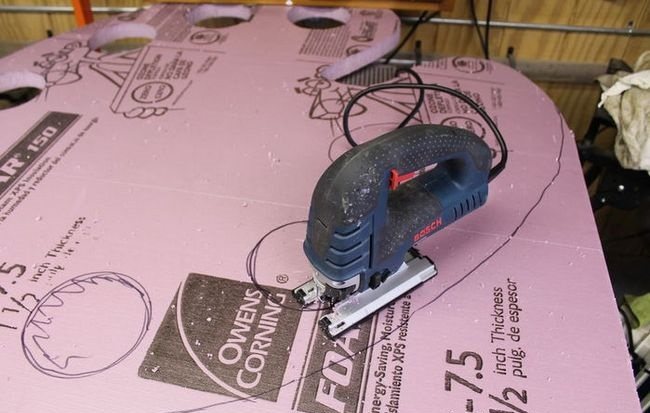
The palette is cut out
The finished base should look something like this.
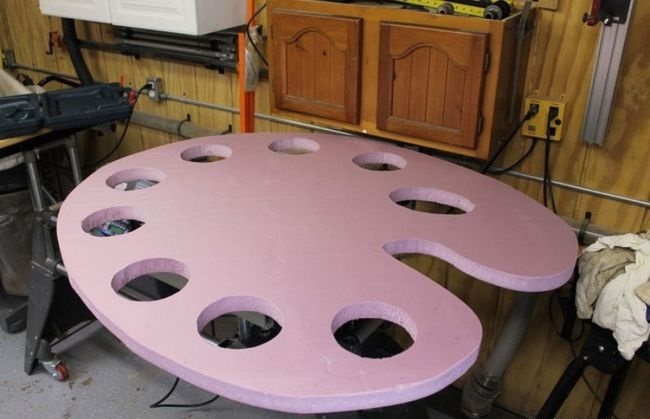
Ready base
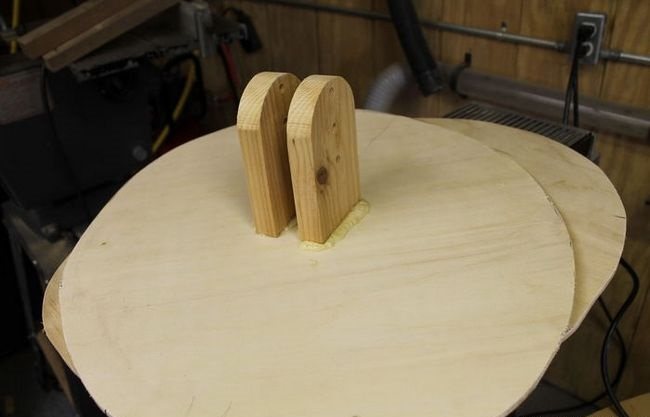
After that, make the attachments. The example drawing below shows how they should look.
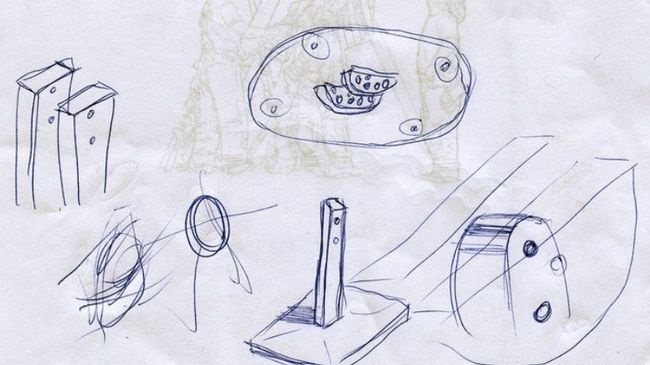
Approximate drawing of fasteners
For the manufacture of flower bed fasteners, use bars.
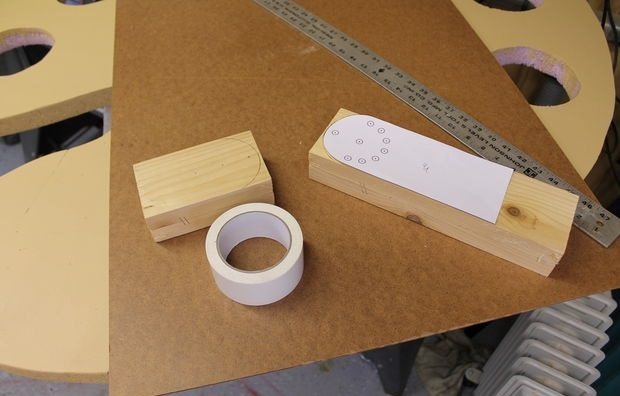
Materials for the manufacture of fasteners
Markup
The bars are fixed
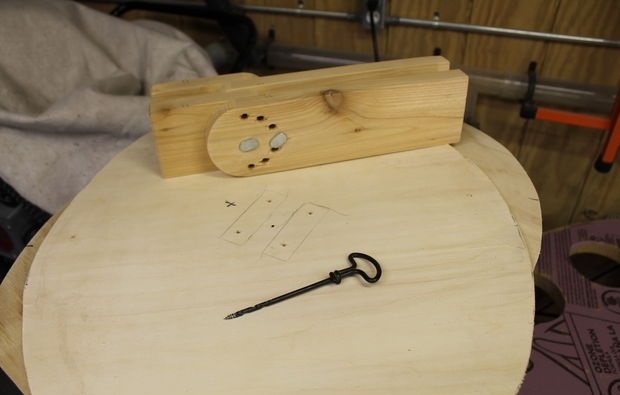
Making a second mount
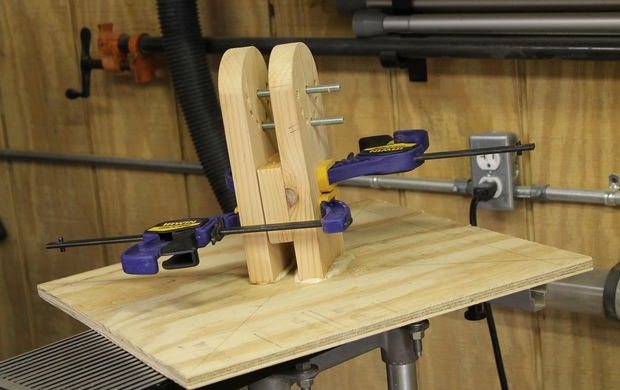
Using clamps, attach the fasteners to the base of the future flower bed.
The mount is installed on the base
Using pipe cuttings, you can make rake and shovel stands.
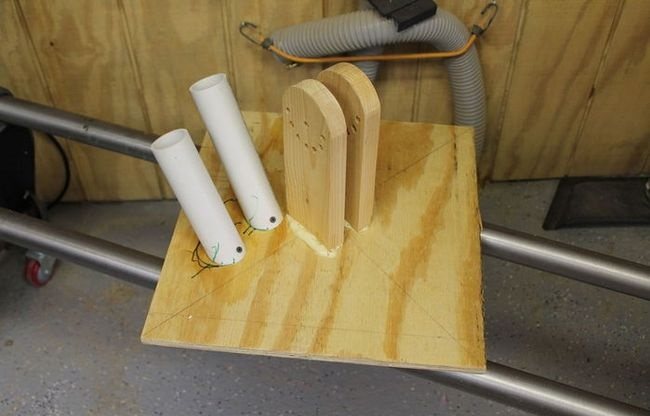
Shovel and rake stands
Another photo of the coasters
Then decorate your gardening tools - for example, paint them with polka dots or paint them in one color.

The shovel and rake need to be decorated
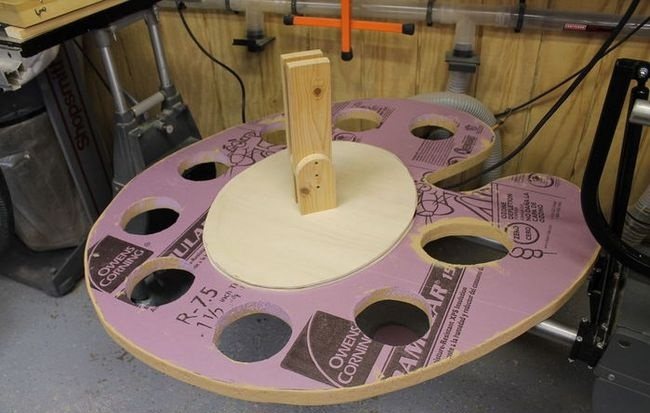
Then take the base of the flower bed and, if furniture board or plywood was used in the manufacture, cover it with wood stain, and then varnish.
The main part of the flower bed, if it is made of plywood or furniture board, is covered with stain and then varnish
Wait for the cover to dry and set up the flower pots. Everything, a beautiful flowerbed "Palette" with your own hands is ready!
Video - Making a flower bed from a wheel
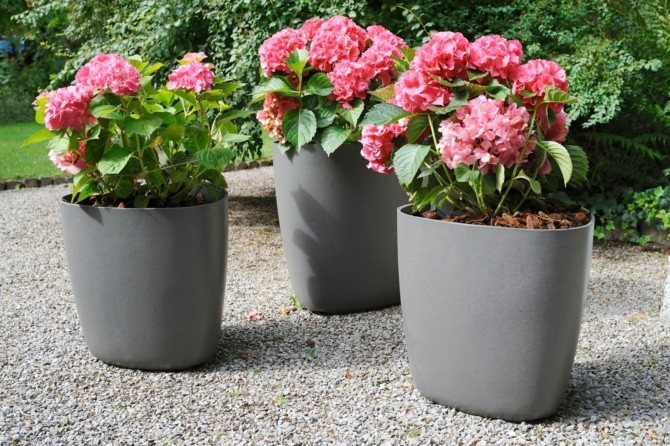
Benefits of outdoor flowerpots
It is impossible to talk about the advantages of outdoor flowerpots without reference to the personal preferences and tastes of a particular person engaged in ennobling his personal or suburban area. After all, each individual conforms to some of his own considerations, choosing the style of interior or landscape design, not to mention the fact that he may simply inexplicably like or, conversely, not like some element of decor, even if it fits perfectly according to all laws and the rules of design art.

In the case of outdoor flowerpots, there are objective advantages, with the practicality of which it is difficult to argue. One of these advantages can be attributed to their mobility: even very heavy flowerpots can be moved, rearranged, rearranged in a different way if there have been some changes in the environment or just tired of the monotony.With a stationary flower bed, such a number will not work. But moving, say, plastic flowerpots is easy!
Continuing the comparison with a traditional flower bed, we also note such an advantage of flowerpots as the ability to place green spaces almost anywhere (even on the balcony, even on the roof of the house), without thinking about access to the ground and further possible rearrangements. This advantage has something in common with the previous one, but there they discussed “the ability to move”, and here - “the ability to arrange”.
A street flowerpot as an important element of decor is another advantage and tool for creating fashionable landscape design. Many types of flowerpots have the ability to redecorate them due to changes in the style of decoration of the territory, while the objects themselves can serve their owners! In addition, in various photo examples one can see not quite ordinary combinations such as "flowerpot-lamp", etc.

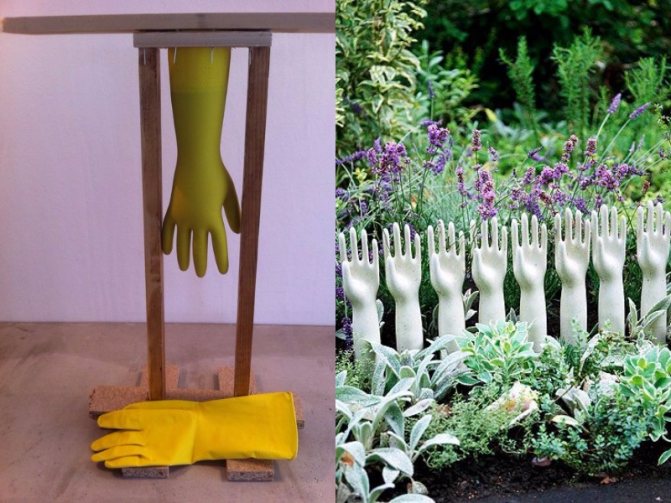
Well, since our site pays a lot of attention to various homemade products, among the advantages of outdoor flowerpots we will include the possibility of their own production, incl. hanging flowerpots that can be made from anything, even rubber boots!
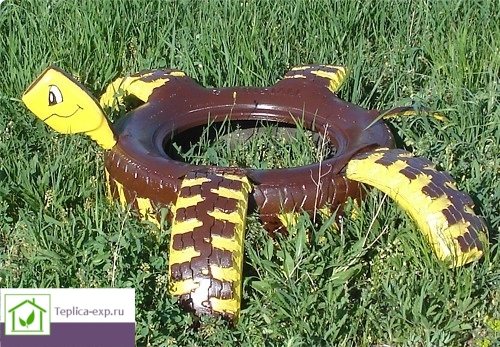
Master Class. Flowerbed "Turtle" from car tires with your own hands
We offer another interesting option for creating a beautiful garden flower bed. The step-by-step instructions are given below.
Table 2. Instructions for making a flower bed "Turtle".
| Steps, photo | Description of actions |
Step one | The finished tire bed will look something like this. |
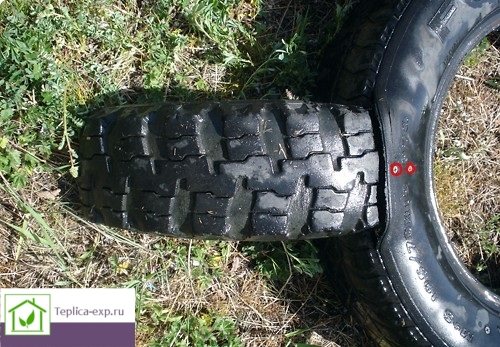
| Step two | To get started, prepare: - tires with spikes (2 pcs.), Always one without a steel cord; - a screwdriver; - paint for external work, brush; - self-tapping screws 3.5x55 mm (15 pcs.); - a big knife. |
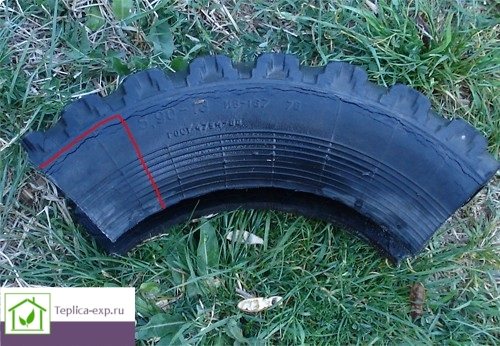
Step three | In a tire that does not have a steel cord, cut the bead on both sides and cut into four identical pieces. |
Step four | As a result, you should have such elements from which the paws will be made. |
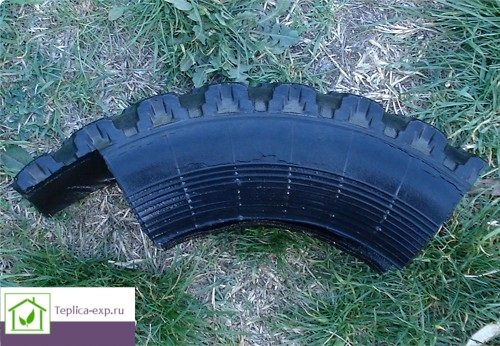
Step five | Cut a pair of rectangular sections on each of the blanks. |
Step six | As a result, the workpiece should look like this. |
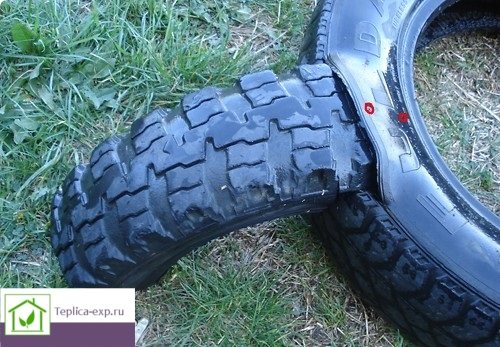
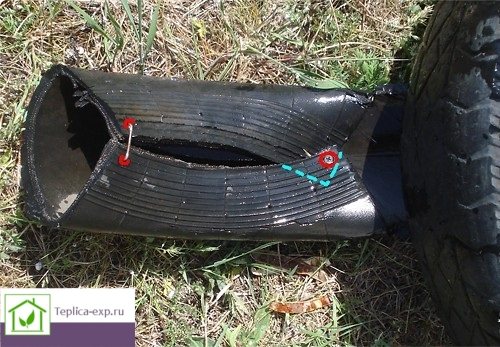
| Step seven | The second tire, from which the torso will be made, may be slightly larger. Mark it into six equal parts, make slots on the border of the sidewall and the tread - one narrow (for the tail), one round (for the head) and four wide (for the paws). |
Step eight | Insert the pre-made paws into the corresponding slots, fix each with two self-tapping screws. |
Step nine | Here is another photo from a different angle. |
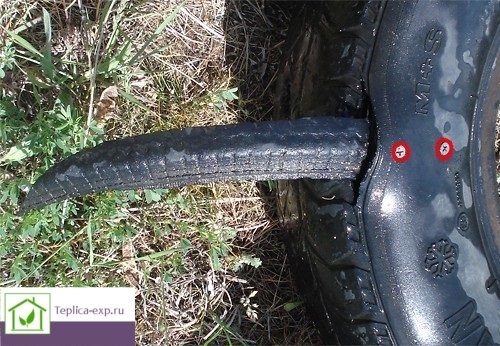
Step ten | Connect the edges of each paw as shown in the image: on one side with a self-tapping screw, and on the other with a wire staple (by analogy with a stapler). As a result, the paw near the body will be narrow, and on the other side - voluminous. |
Step eleven | Take a piece of tire, make a tail out of it and attach it all with the same screws. |
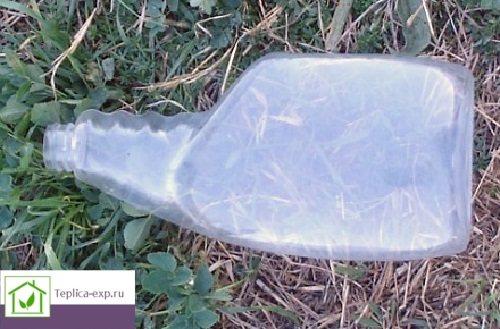
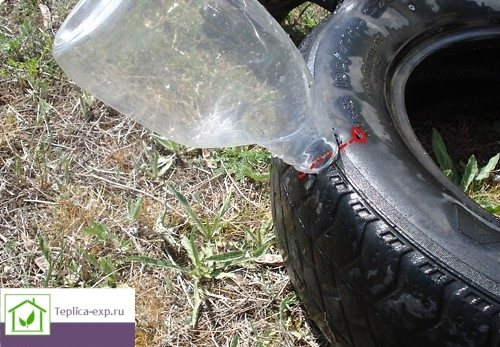
Step twelve | You can use a spray bottle to make the head. |
Step thirteen | The hole for the head you made earlier should be such that the head itself is at a 45 degree angle. Secure the bottle with a self-tapping screw (it should go through, as in the image). |
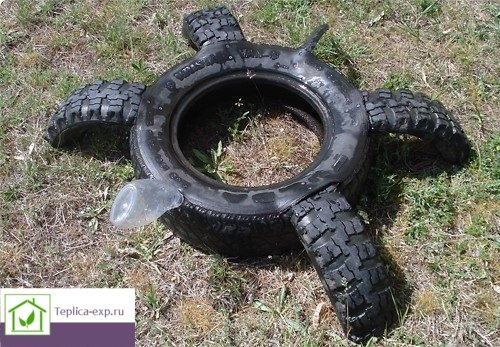
Step fourteen | The assembled flower bed should look like this. |
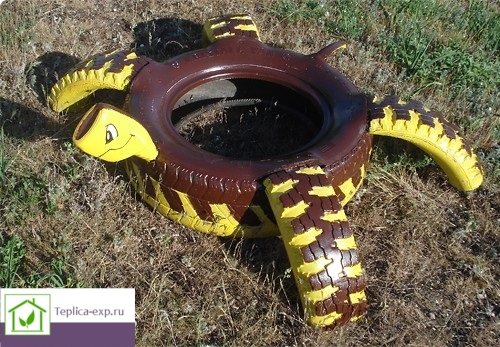
Step fifteen | Paint the flower bed (you can use two colors, as in the example). Tread elements can be used to highlight the texture of the turtle. If the tires are "bald", come up with your own pattern. |
Step sixteen | Color the head too. The turtle, as you can see, is smiling pretty. That's it, the flower bed is ready (just wait for the paint to dry)! |


Beds of annuals - schemes
Flowers for flower beds are selected according to color, varieties and many other factors.And to make flower beds of annuals, the schemes of which you will find in the article, on your own, you do not need to have the skills of a landscape designer. The main thing is that everything is correct.
Master Class. Diy log bed
To make such a composition, you will need the following consumables:
- log (diameter - 40-50 cm, length - about 200 cm);
- flower seedlings;
- gravel;
- primer;
- film.
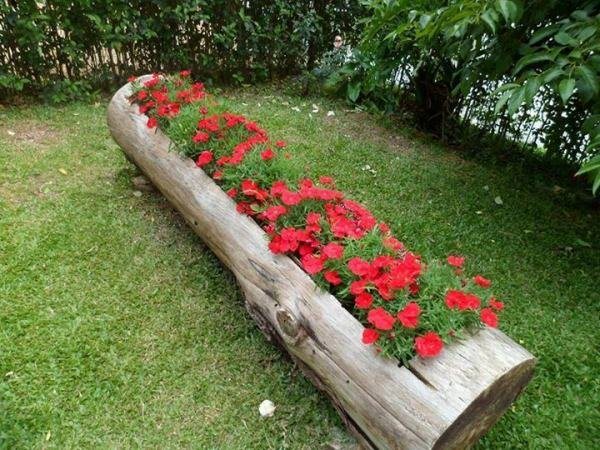
A flower bed from a log
Original flower bed made of logs do it yourself photo
In addition, the work will need:
- simple scissors;
- chainsaw (electric);
- wooden hammer;
- bit.
So, everything is ready, you can start directly to work.
Table 3. Instructions for creating a flower bed from an old log.
| Steps, photo | Description of actions |
| Step one | First, clean one side of the log from the bark (this is where the chisel comes in handy). |
| Step two | Make cross cuts on one side of the log in 50 cm increments and a depth of about ¼ of its diameter. |
| Step three | Cut off a portion of the log from the side where the cuts were made to create a longitudinal surface there. |
| Step four | Make cuts on this surface as shown in the image. |
| Step five | Use a chisel to remove the sawn pieces of wood and make a kind of "trough". |
| Step six | Use scissors to cut the film in the shape of the resulting "trough", and then lay it. |
| Step seven | Pour gravel on top of the film, and a thin layer of fertile soil on top. |
| Step eight | Plant flower seedlings and enjoy the beauty you get! |
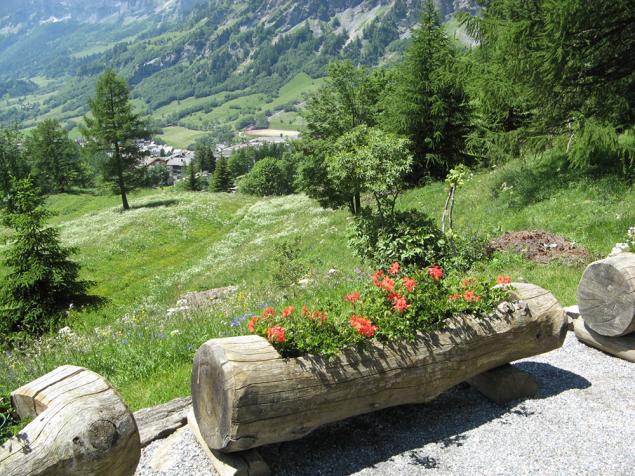
Log flower garden
Wood primer prices
wood primer
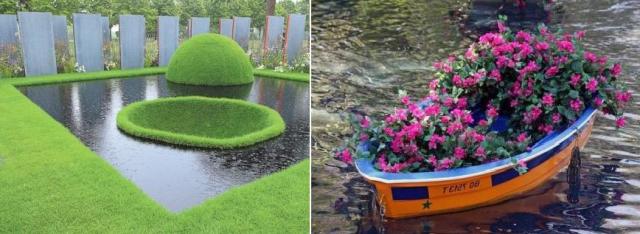
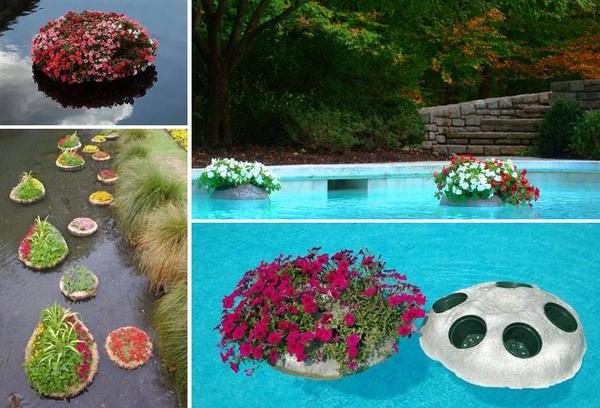
Master Class. Do-it-yourself floating flower bed
A floating flower bed is a kind of vegetation island that moves through a body of water. It looks amazing, and making such a flower bed at home is quite simple. Basically, it is a plastic or wooden base with a sealing net and soil for planting flowers laid on top. You can even use pebbles or a hydrogel instead of soil, but it is important that there are already aquatic inhabitants and other plants in the reservoir (they indicate the presence of nutrients).
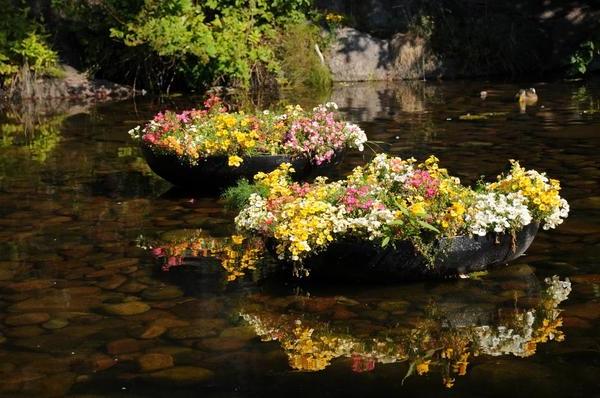
Floating flower bed
Do-it-yourself floating flower bed
What plants are suitable for this? In principle, any, but be sure to take into account the swimming ability of the structure, because too large plants can easily flood the island. Also note that it is better to give preference to crops that love moisture (sedge, lilies, papyrus, variegated potted flowers or ornamental grass).
Another example of a floating flower bed
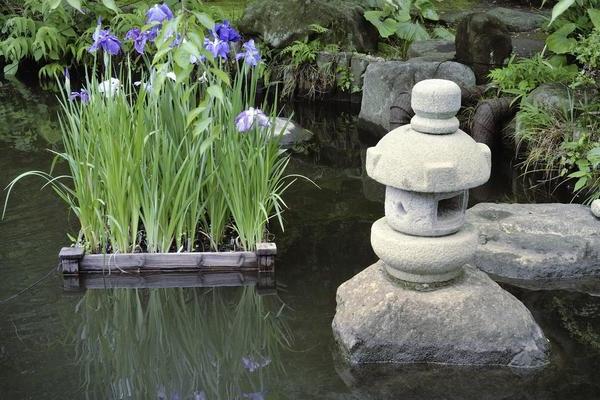
How to decorate a pond with a floating flower bed
A floating flower bed is sold today in many specialized stores, but if you wish, you can make it yourself.
Do-it-yourself flower bed afloat
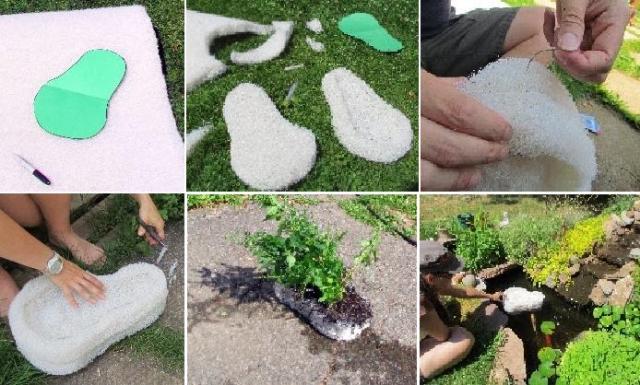
First, decide what material you will use in the manufacture of the island. Determine the dimensions yourself, as well as the immersion depth (preferably somewhere 7 cm from the bottom). Please note that the soil should not be eroded with water. Use gravel to adjust the dive depth.
- A ready-made pallet (or, alternatively, a mesh pot) can be bought at a store.
- Also, the container can be made of boards (you get a small box with holes) treated with impregnation to protect it from moisture. Such a box must be covered with spunbond or geotextile, and then covered with a drainage layer and soil.
- The third option is to use plastic bottles. They must be cut off, holes made in the base, and then covered with the same geotextile.
It is quite obvious that a container filled with soil will not float by itself - this requires:
- cut out rectangular frames from packaging foam (this remains after the purchase of household appliances) that will hold the island on the surface (they are attached to the top of the flower bed, and not to the base);
- foam the perimeter of the flower bed and its upper part with polyurethane foam;
- make a pontoon from plastic bottles along the edges of the island;
- use an inflated car camera.
Making a floating flower bed
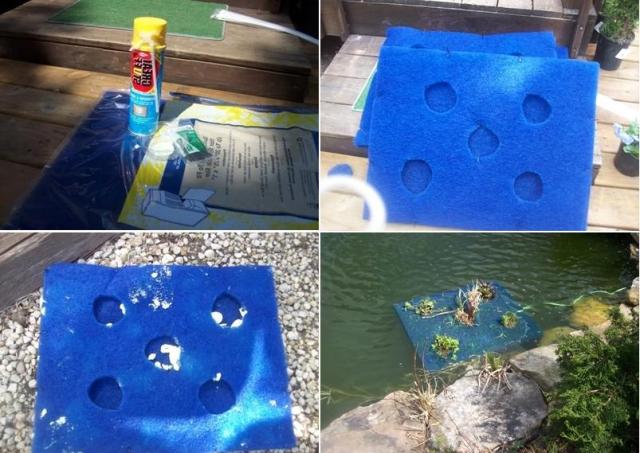
What about floating flower pots?
They can also be lowered into the water, but the reservoir must be small and necessarily without aquatic inhabitants. For example, you can cut out a foam base for flower pots, like the image below, to be water-stable. However, these floating pots will need to be watered regularly.

Floating flower pots
How to decorate a floating structure?
- You can mask the unattractive edges of the island with earth, moss or branches.
- Even on such a flower bed, you can install LEDs, the operation of which is controlled by a remote control.
- Finally, you can put there figurines of animals or birds (for example, a ceramic stork).
Note! Before starting a floating flower bed, it must be tested without fail! If it is unstable, then it should be improved. Also keep in mind that the flowers will grow, which will change the balance of the island.
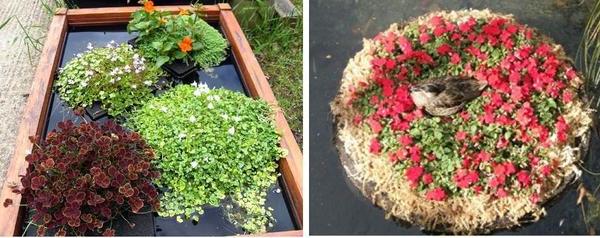
How to decorate a floating flower bed

Photo of beautiful flower beds on the water
A few more options for floating flower beds
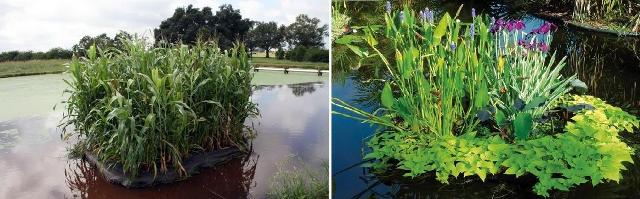
Also, the floating structure can not be lowered freely into the water, but fixed in a certain place, that is, anchored with a heavy stone or cable
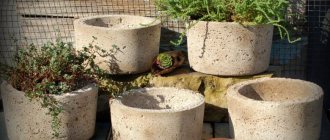
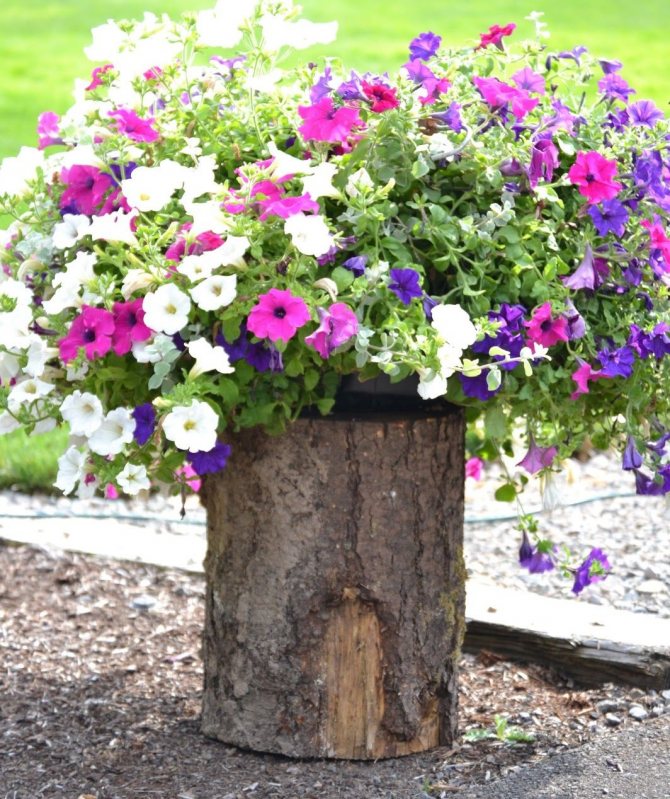
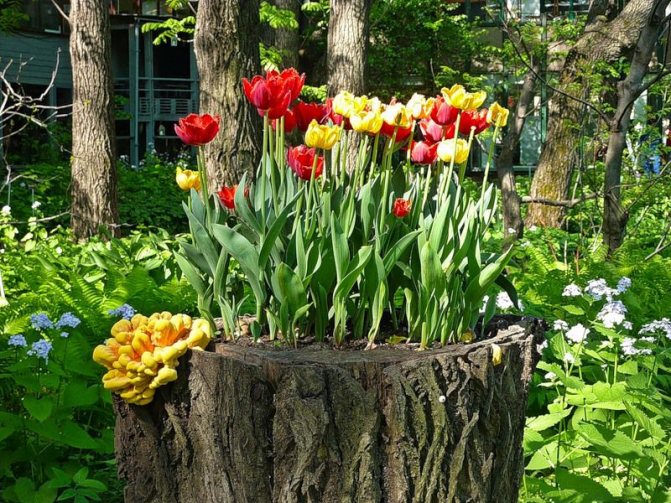
Stump pots
These flowerpots look very natural and harmonious in any garden. Smooth stumps or cuts with a diameter of up to 40 cm are best suited for their manufacture. Birch stumps are considered the most decorative.
Stump pots
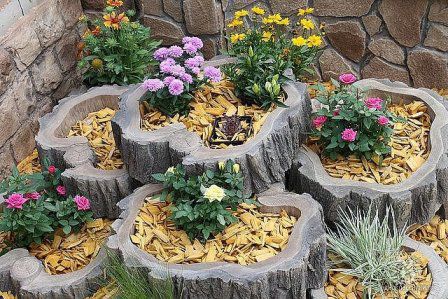
Stump pots
In the process of work, you will need:
- Circular Saw;
- pencil;
- drill;
- chisel;
- antiseptic mixture for wood.
Step 1. Processing the stump
The top of the stump is cut with a saw to create a clean, smooth surface. The bark should remain in place, so the flowerpot will look more natural. A circle is marked on the cut, stepping back from the edges about 7-8 cm. Holes up to 10 cm deep are drilled along the perimeter of the marking, and then the core of the stump is knocked out with a chisel.
Grubbing stumps
Step 2. Preparing the base
The walls of the stump are leveled vertically, all the chips are selected, and the bottom is compacted. Then several drainage holes are drilled at the base.
Step 3. Filling the flowerpot

Stump pot
Fertile soil is poured inside a homemade flowerpot, slightly compacted and left for several days. During this time, the earth will settle a little more, so you will have to add it. After adding flowers, you can plant flowers. To extend the life of such a flowerpot, it is recommended to fill with soil not the stump itself, but any suitable container that can be installed there.
Stump pot
Master Class. Do-it-yourself flower bed of old chairs
To make such an original flower bed, prepare:
- old chairs;
- spray paint;
- sandpaper.
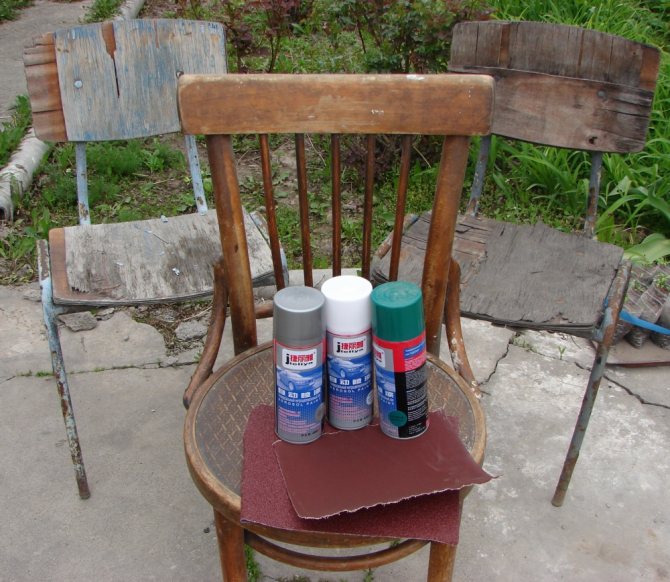
What is required to make a flower bed
All other materials depend solely on your imagination. You can, for example, use a wooden box instead of a pot. In any case, first remove the old paint from the chairs and sand them thoroughly.
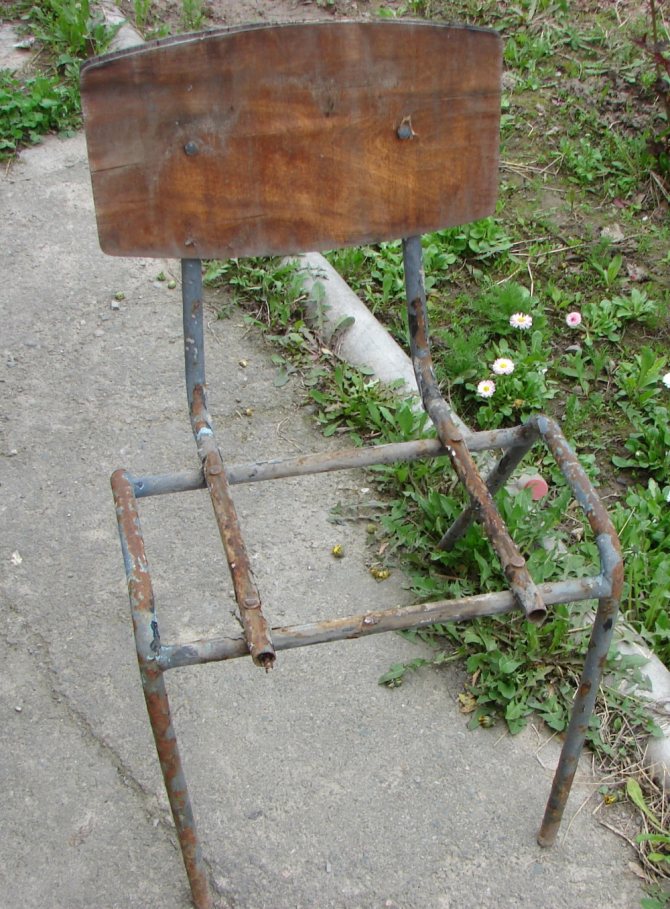
The chair is cleaned of paint and sanded
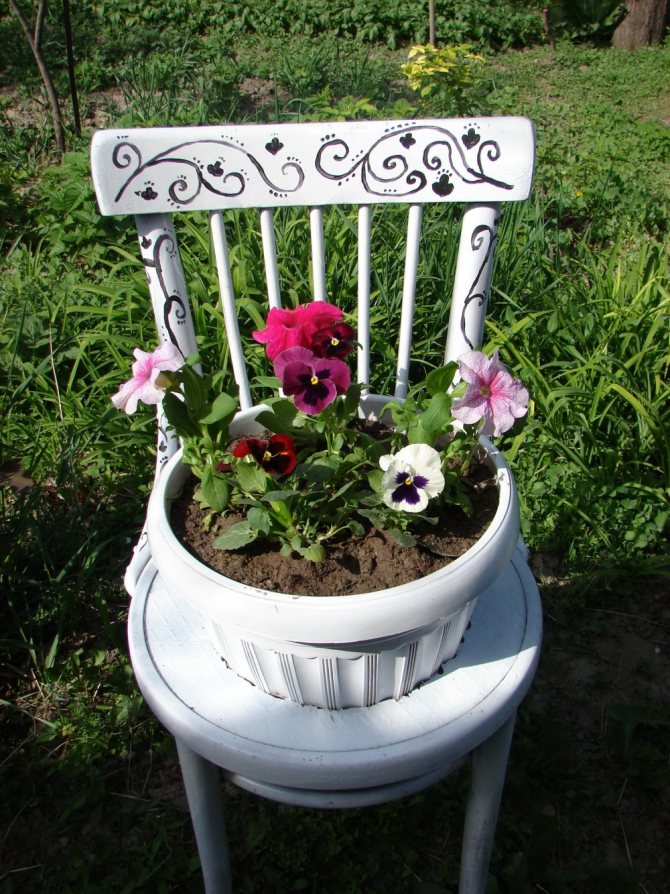
Clean the chairs from dirt and dust, and then paint. It is quite obvious that it is better to do this on the street, because there is no doubt about the toxicity of the paint.
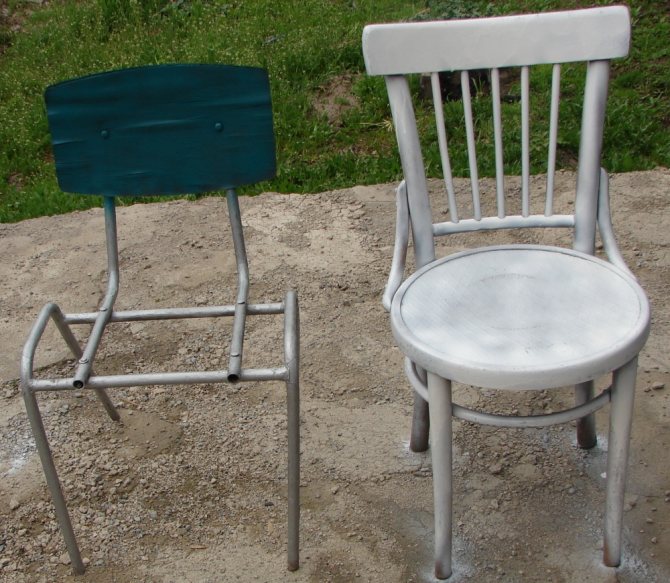
Painted chairs
You can also paint the flower pot if needed.
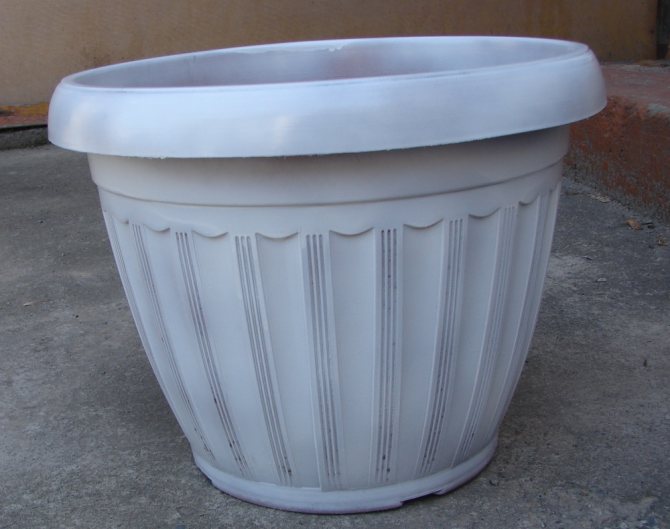
Flower pot
Once the paint is dry, you can paint the chairs. We advise you to use the acrylic paints that come with the paint by number kit for this. These are not washed off, and they do not require varnishing.
Chairs can be painted if desired
When the painting is dry, set up flower pots, fill them with potting soil, plant flowers and have fun!
A pot of flowers is set on a chair
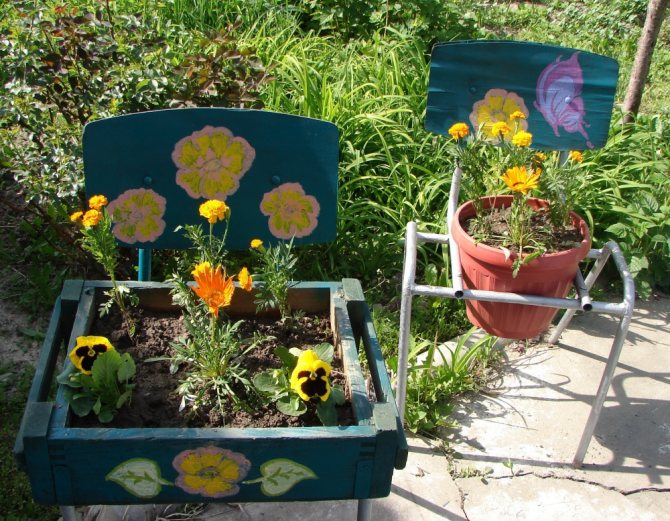
Chairs as flower beds
Another example of a flower bed
Thanks to such original flower beds, it is quite possible to compose whole compositions.
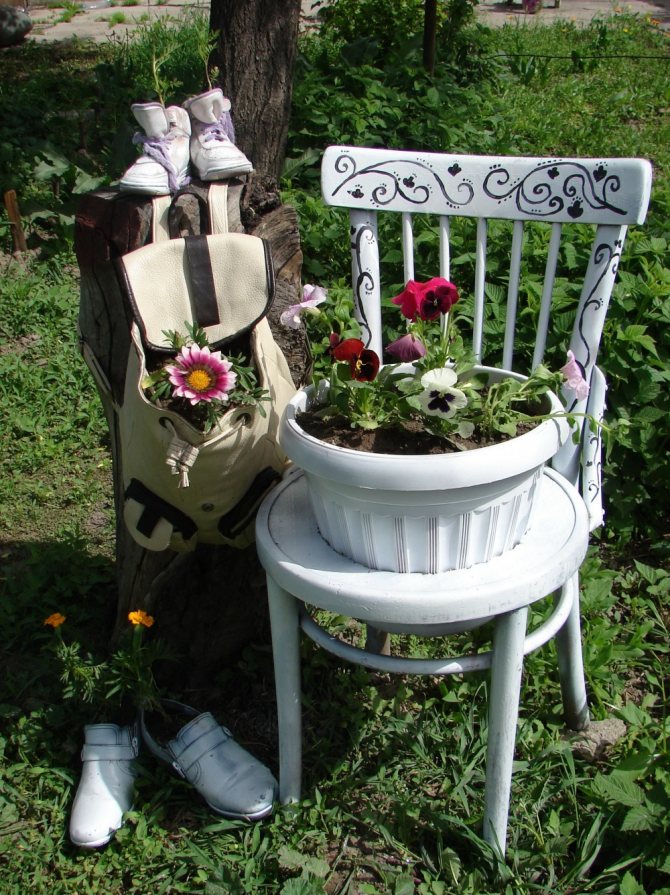
Composition of a chair, backpack and old shoes
This one, for example, is made from old shoes and children's sneakers that no one has worn for a long time.
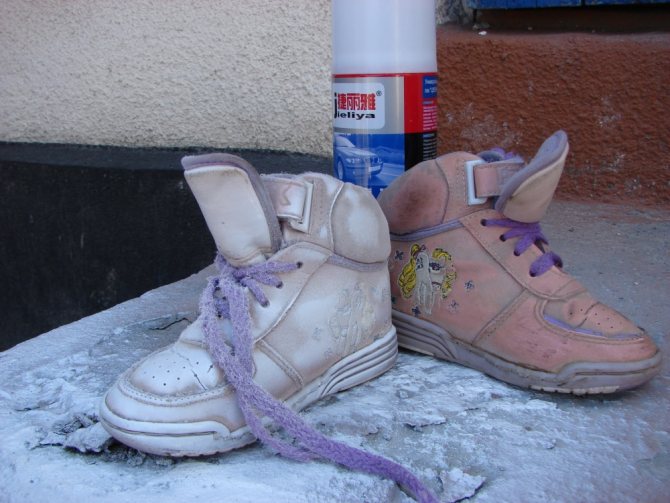
Children's sneakers used for this composition
And in conclusion - a few more photos of original and beautiful flower beds.
Small flower bed in the form of a bag on a hanger

A flower bed from an old bicycle
Composition of teapot and cups
As you can see, you can make a beautiful flower bed with your own hands, and there are really many options. We hope that the master classes offered here will help you with this!