
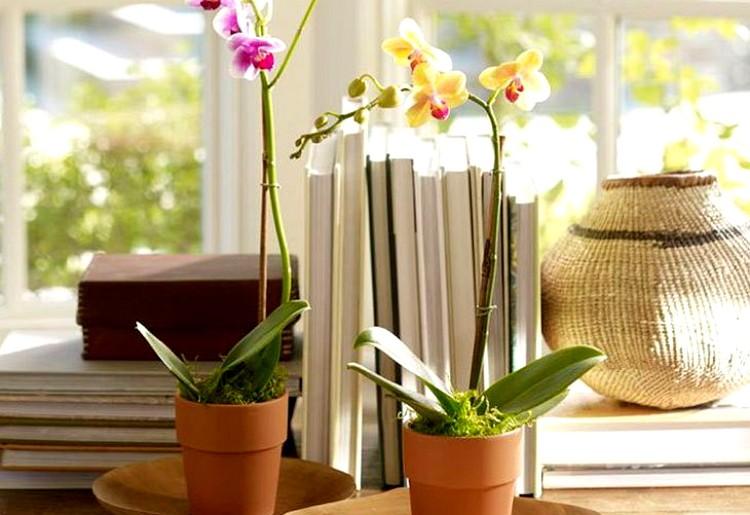
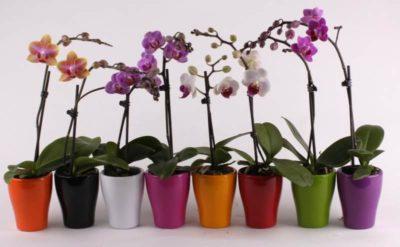
What is the best way to grow?
An orchid needs a lot of soil, so a small pot will not work. (about the ideal substrate for orchids - seramis, as well as about the features of growing flowers in it, read our article). When buying a pot, you must adhere to the following recommendations:
- there should be drainage holes at the bottom of the tank and its lower part of the walls;
- the height of the container should be equal to the width of the neck;
- the volume of the container should correspond to the size of the root system.
Conditions for growing phalaenopsis
In order to grow this beautiful flower under artificial conditions, it is necessary to create conditions for it that are similar to natural ones:
- clean air of high humidity;
- a well-chosen vessel;
- the use of a special substrate;
- no dust;
- cultivation on eastern and western windowsills.
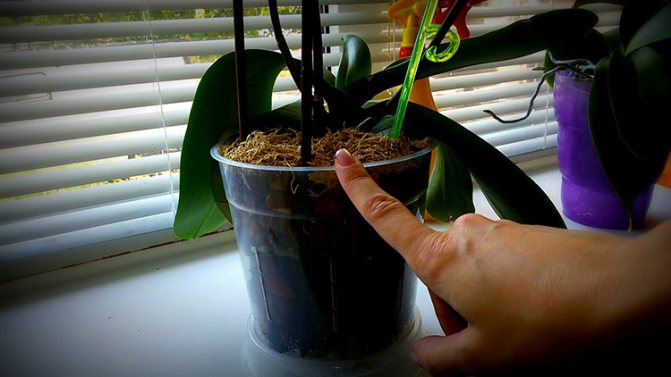
After purchasing a phalaenopsis seedling, caring for the plant consists in maintaining the required temperature, room humidity and watering. Novice florists, eager to plant this flower, are tormented, basically, by 2 questions: is it possible to plant an orchid in an opaque pot and is it necessary to plant an orchid in a transparent pot?
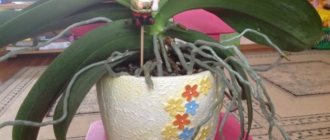
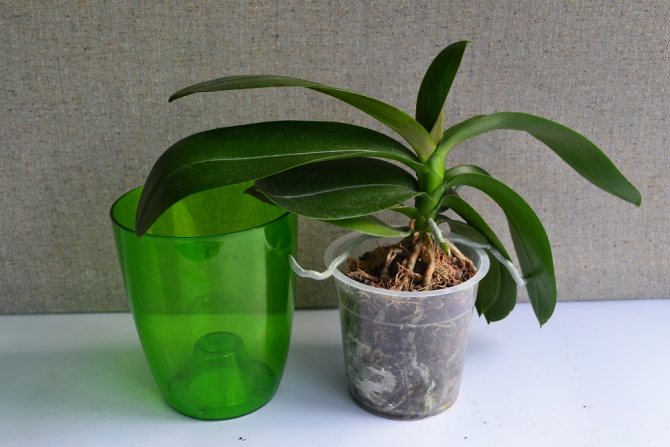
The answer here is ambiguous. It is advisable to plant the orchid in a transparent pot, but if this is not possible, you can use an opaque one, but with side holes to saturate the roots with oxygen. Through the transparent walls of the vessel, the owner observes the condition of the plant's root system. 2 years after planting, the grown flower is transplanted into a selected vessel for permanent cultivation. In order not to be tormented by doubts about how to choose the right pot for orchids, you need to know the features of the plant.
Phalaenopsis and baby pots
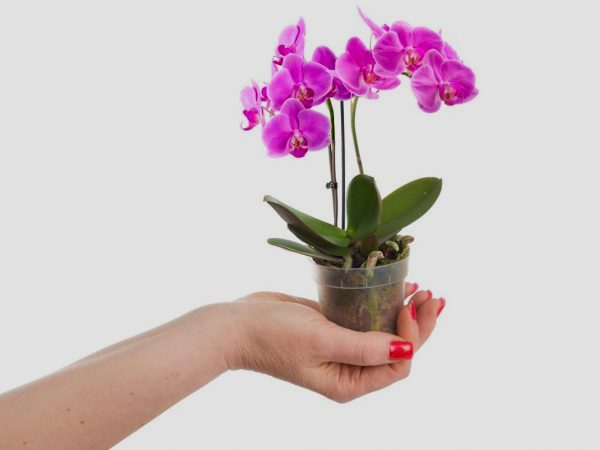
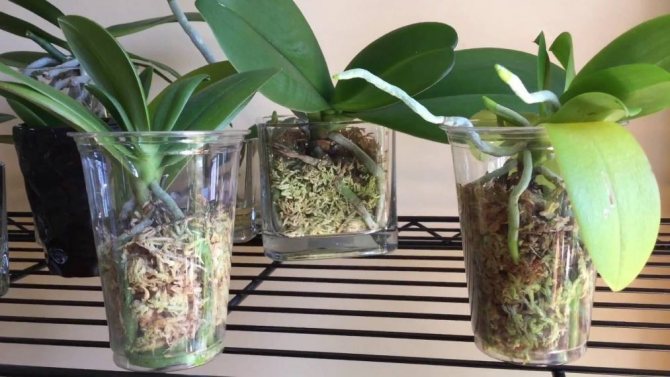
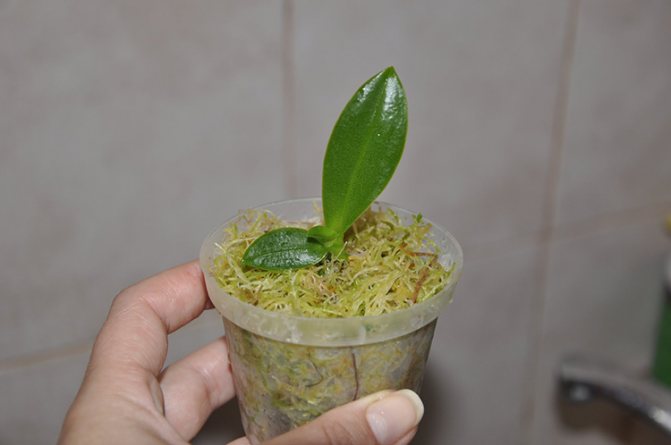
Mini phalaenopsis prefers to grow in high humidity conditions, so this type of orchid should grow in mini glass pots. The moisture in them lasts a long time, the roots are quite comfortable in a small container.
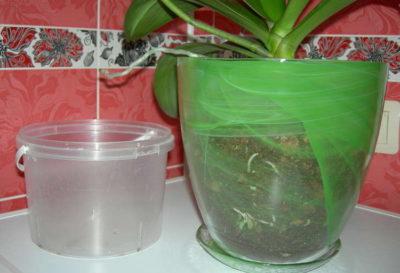
Before transplantation, children grow up in a transparent small pot, which are:
- disposable plastic cup;
- transparent yogurt cup;
- a plastic jar from under cotton swabs.
Phalaenopsis substrate
Regular soil for the cultivation of this plant is not needed. It is better to grow the plant in a prepared mixture, which should be:
- breathable;
- easy;
- loose;
- moisture-absorbing.
Choose as a nutrient substrate:
- sphagnum moss;
- pine and oak bark;
- charcoal;
- peat;
- expanded clay;
- vermiculite;
- coconut fiber;
- Pine cones.
Bad options
For growing orchids, glass containers are not the best option. The reason is that the holes cannot be drilled, therefore, the ventilation of the root system will be insufficient.
The flower will feel even worse in a ceramic container.... K will begin to grow to the walls, therefore, there is a high risk of injury during transplantation.
If the container for the orchid was selected incorrectly, then this is fraught with the following problems:
- decay of roots - if you choose a pot without holes, then the water will start to stagnate, which is fraught with decay;
- lack of flowering - this is the result of an incorrectly selected pot size;
- wilting and yellowing of leaves - This is a common problem with improperly selected pot material.
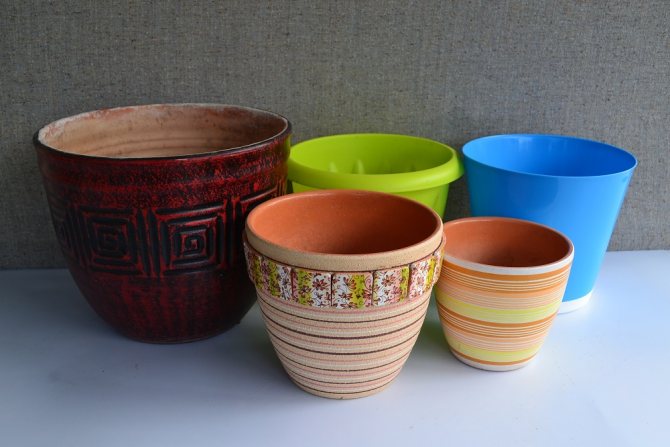
Clay and ceramic pots
Soil for Dracena - what is needed and how to choose
Unlike plastic, ceramic and clay containers for orchids look very prestigious and highlight the beauty of the flower. Their weight will allow you to get rid of the risk of overturning the pot with the plant.
Important! Ceramics and clay provide excellent drainage and ventilation conditions: these materials contain many pores.
However, root hairs of orchids easily grow into the pores, so you need to take exclusively glazed pots, they are smooth. Over time, from numerous waterings, the pores are filled with salts. In such a container, the orchid begins to hurt.
Clay and ceramic pots lack the transparency that most orchids need.
What to look for when choosing an orchid pot?
As mentioned above, for the root system of the orchid, it is necessary to choose a spacious container. But too big is not acceptable. Otherwise, the growth of the flower will stop, as will the flowering. Pick up a pot only a little larger than the one that was before. Then the adaptation will take place quickly and painlessly.
When choosing a pot for an orchid, it doesn't matter whether it is transparent or not.... Just a container with transparent walls allows the grower to monitor the condition of the flower all the time. There are situations that due to improper watering, the plant is affected by rot. Then it will be easier for the florist to identify the disease in time and eliminate it at an early stage of development. We talked about the pros and cons of a transparent container for growing an orchid, about the choice of material, as well as about the rules for planting a flower in such a vessel, we talked about here.
In most cases, plastic containers are chosen for orchids. But for some types of flower, there are features of buying a container. For example, for cymbidium, you can choose a container from any material, the main thing is that it is cramped.
But a glass container is not suitable for all crops.... Such containers are used for growing on a balcony, with an open root system. You can use the following varieties:
- Wanda;
- Ascocenda;
- Filenopsis.
Due to stagnant water, the root system can rot, and the flower itself can die. So for those types of orchids that lack photosynthesis in the roots, they do not require additional input of light, therefore, holes in the container are not necessary. For everyone else, this moment is a must.
Watch a video about the features of an orchid pot:
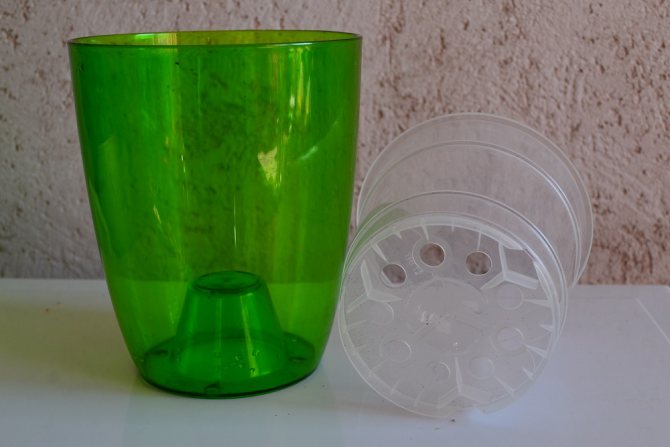
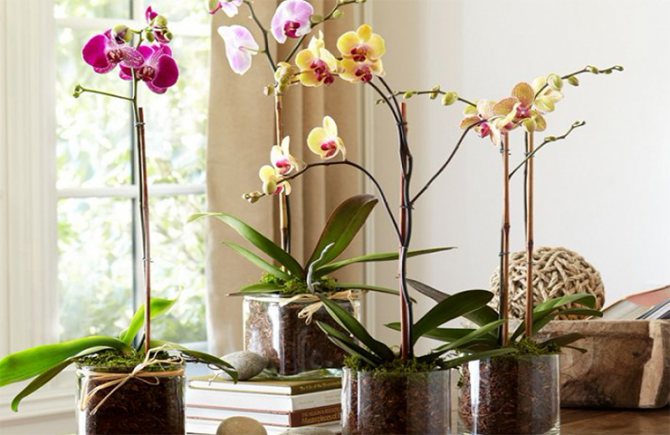
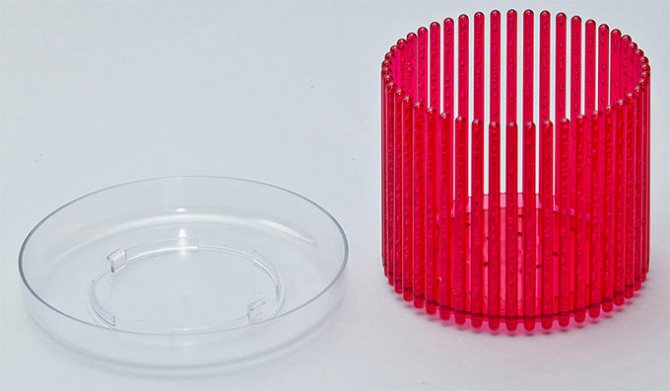
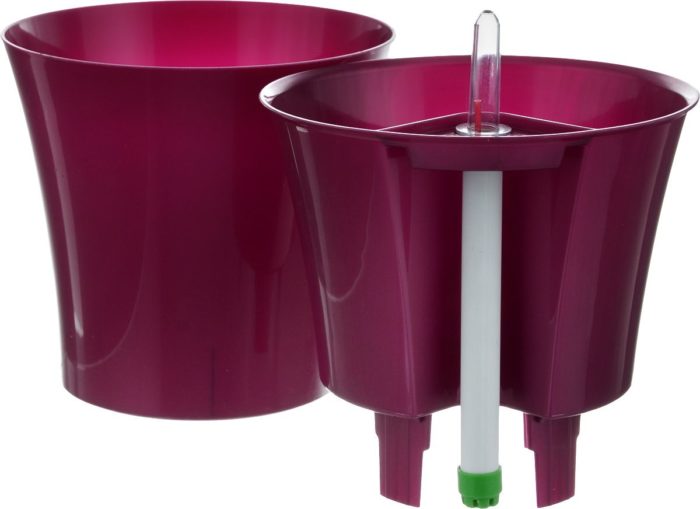
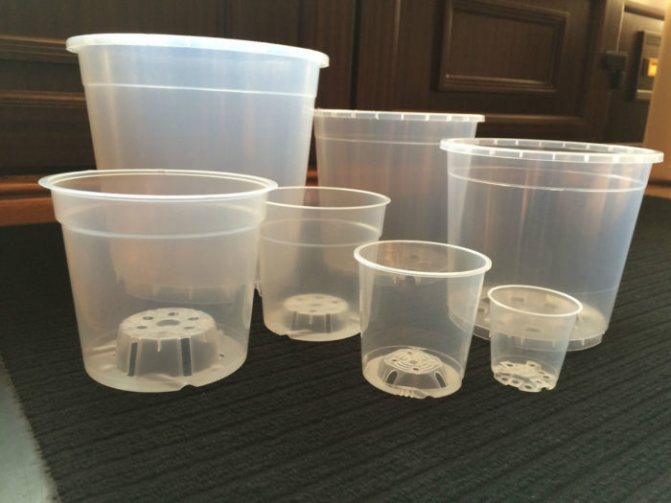
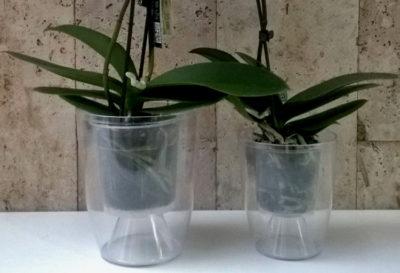
Transparent plastic pots
Orchid substrate - which is better for growing
Plastic containers are most suitable for novice orchid lovers. Thanks to a good view, it is easy to control the condition of the roots, the amount of water for irrigation. The transparency does not interfere with the course of photosynthesis in the roots of the plant. If the roots remain green, water early, the white roots signal the need for moisture.
Important! It is easy to make additional holes in the plastic to enhance drainage and ventilation.
Finally, the smooth walls of such containers do not allow them to become a substrate for ingrowing root hairs.
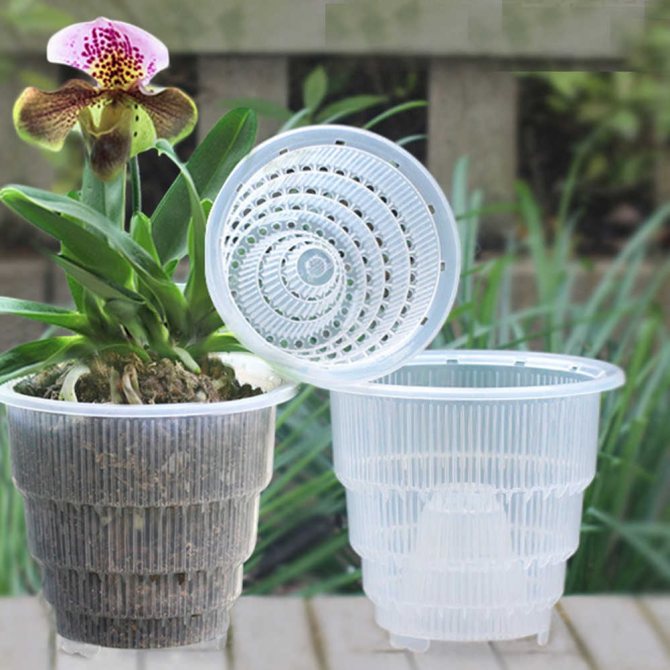
Tropical beauties feel great in plastic pots
There is only one drawback of plastic pots - their lightness. A growing orchid makes such a structure easy to tilt, so before planting it, you need to strengthen the position of the plastic pot. For example, fix it with technical devices, bury it in an additional wide container with soil or stones, or equip it with a heavy planter.
Description and photo of materials
Below you can see a photo of pots made of different materials suitable for growing orchids.
Glass
Growing an orchid in a glass container can only be done by an experienced florist., which feels the need of the culture for moisture. The reason is that in such flowerpots there is no way to apply additional drainage holes, and they also do not have a drain of excess water.
ATTENTION: Planting a flower in a glass container requires careful preparation of the substrate and a large layer of drainage. If this condition is not met, then air exchange in the vessel will be disrupted, and the walls will be covered with algae.
You can purchase a glass pot at a specialty store. The price varies from 190 to 350 rubles.
Plastic
A plastic container without holes is not suitable for an orchid... The fact is that before landing, they need additional preparation. Its essence is that you will have to apply additional side holes. This will add a full flow of air to the root system.
Today, more and more often, a plastic Crown pot is chosen for an orchid. Its peculiarity is in air permeability. Any kind of orchid in such a vessel will feel at home: in the humid tropics, in the branches of trees, where air penetrates to the root system from all sides. In addition, the Crown pot will fit into any interior, and light will easily penetrate inside. You can buy a plastic pot at a price of 50-120 rubles.
Ceramic
When choosing a pot made of ceramic, it is necessary to ensure that they are covered with glaze, and there should be holes on the sides. Such containers have several features:
- Moisture permeability and excellent permeability. This allows moisture to be evenly distributed throughout the volume.
- Ceramic containers are heavy, which prevents the plant from falling under the weight of its weight.
Ceramic pots should be chosen in a light color.... This will prevent the root system from overheating during high summer temperatures. The cost of ceramic containers is 1300-2500 rubles.
Clay
These containers can also be suitable for growing orchids. But only you need to choose products designed specifically for these colors. It contains a large number of side openings made in the form of wicker baskets.
A rough surface inside the pot will lead to ingrowth of roots into the walls and quickly dry out the earth. You can avoid this by buying a glazed clay pot. The peculiarity of clay is the ability to maintain temperature for a long time, so overheating or hypothermia of the root system of the flower is unacceptable.
The cost of a clay pot will be 400-1500 rubles.
Metal
A metal basket is the best option for growing such flowers as close to natural conditions as possible. In a metal pot, plants will grow freely, do not overheat... In addition, moisture will not stagnate, and excellent conditions for aeration are created.
The cost of metal containers is 100-700 rubles.
Bamboo
The bamboo pot is an environmentally friendly and well-draining container.... In addition, it will fit well into the overall interior. But bamboo containers will have to be changed more often than plastic or ceramic ones. And if the care technology is violated on the surface, rot, dangerous for orchids, can develop.
The price of such a pot is 400-1000 rubles.


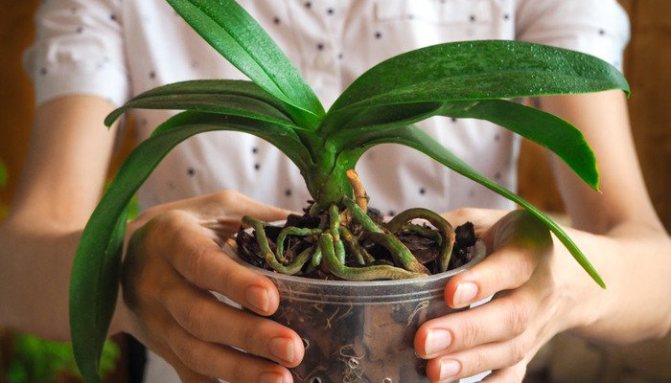
We transplant the orchid correctly
When the pot and substrate are selected, we can proceed with the transplant. For convenience, I use a clean household plastic bowl for 5-8 liters. Repotting should be done when the flower requires watering and the substrate is dry.
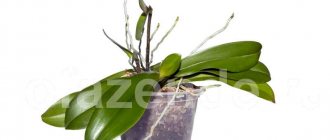
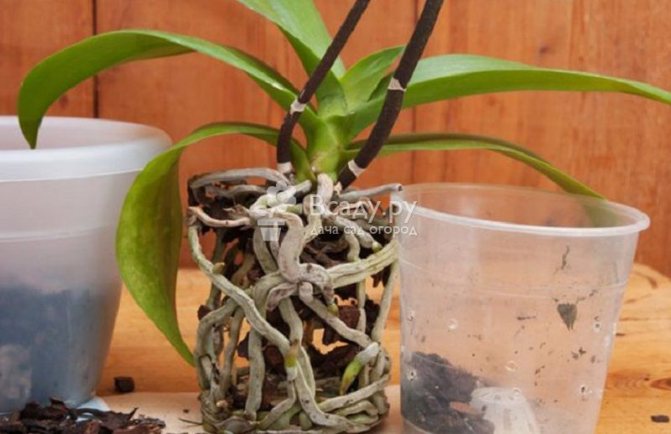
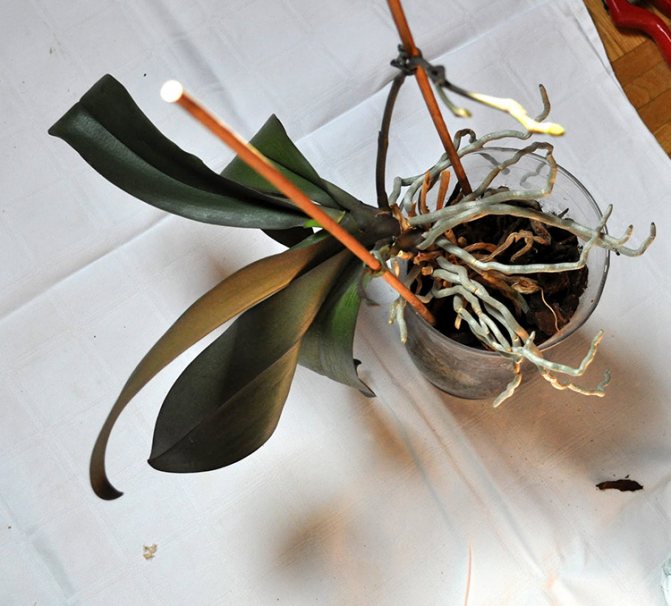
Extracting Phalaenopsis from an old pot
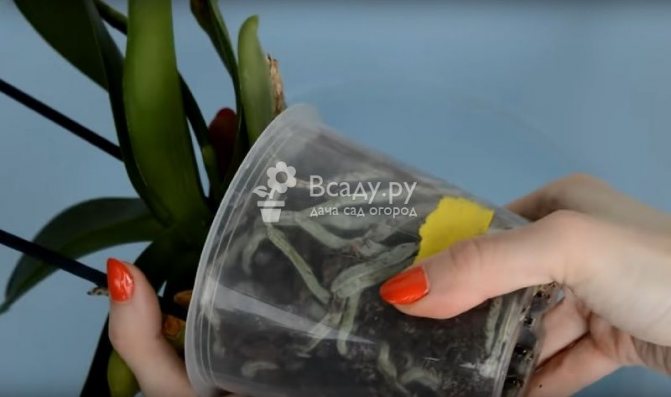
Removing an orchid from an old pot
- Check the bottom of the pot and make sure no roots are growing out of the drainage holes. If they grow, then try to gently wiggle them so that they peel off the plastic, if possible.
- If the roots have grown into the bottom, then they will have to be cut off, or they themselves will break off during transplantation.
- Slightly remember the side walls of the pot in your hands, so that the bark begins to "walk".
- Tilt the pot over the basin so that the substrate begins to spill out. If the roots are stuck, help to gently separate them from the walls with your hands.
- Tap the bottom of the pot to separate the bottom roots and manually push those that have grown into the holes.
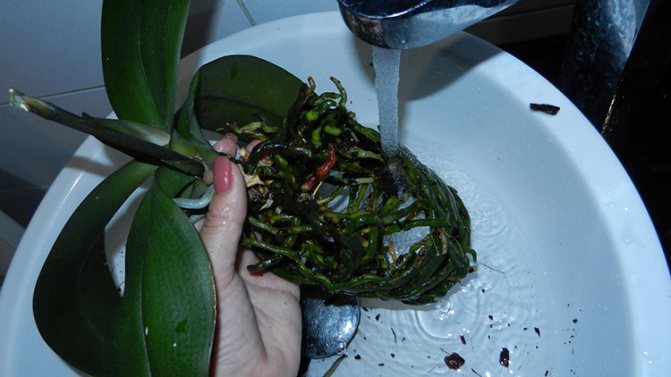
- After removing the flower, free all the roots from pieces of adhered bark, moss and peat cup, if any. Pieces of bark that do not separate, do not need to be torn by force, you can damage the root. Then they can be soaked, or plant a plant with them.
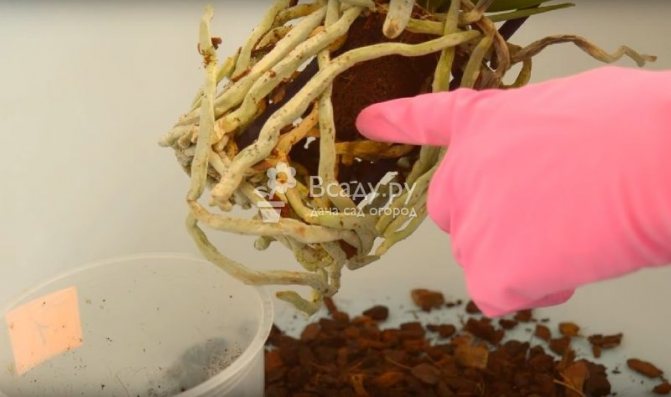
Orchid in a peat cup
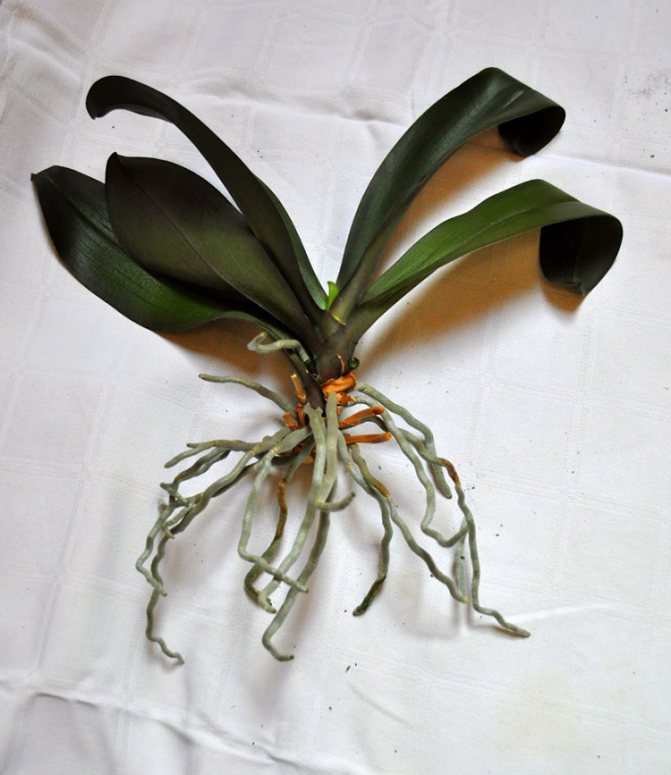
Leave the old bark in a basin and inspect the root system and phalaenopsis neck. It should be green. Roots that grew in the substrate without access to light will be light brown. They must all be solid.
Rotten and completely dried roots must be removed with scissors. Be sure to disinfect the blades. All cuts and damage to healthy roots should be sprinkled with cinnamon or crushed activated carbon. You can also cover it with brilliant green.
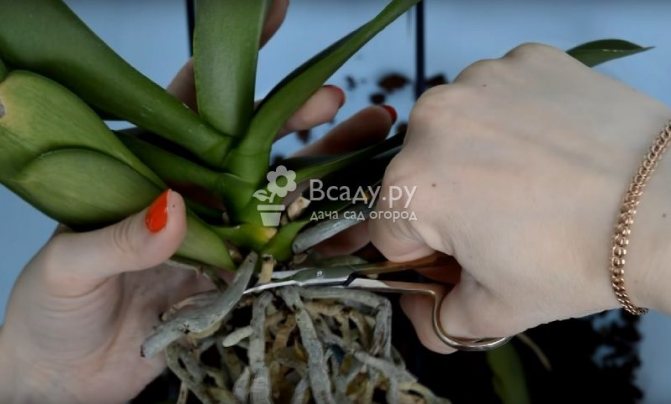
Removal of diseased and rotten Phalaenopsis roots
The lower yellow leaves, which the plant dries off, do not need to be peeled off. They themselves will disappear when the moment comes. Otherwise, you can injure the orchid. An exception is when there is a black coating on the neck. Then the leaves are removed, and the neck is cleaned.
Rot damage can be identified by the following symptoms:
- there are black fragments on the neck;
- there are black rings at the base of the roots on the neck;
- there are soft brown or black roots with wet rot.
If the disease is confirmed, then the old bark from the basin should be thrown away and washed with a disinfectant, and the orchid should be treated with one of the above fungicides.
A pair of removed dried roots without obvious blackness does not indicate disease. The orchid periodically dries out the roots and lower leaves. If no rot is found, and the plant is healthy, then the roots can be rinsed in a warm shower, finally clearing away the dried substrate.
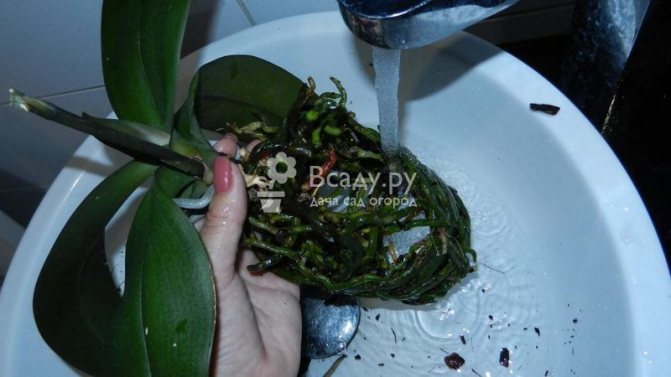
Washing the orchid roots
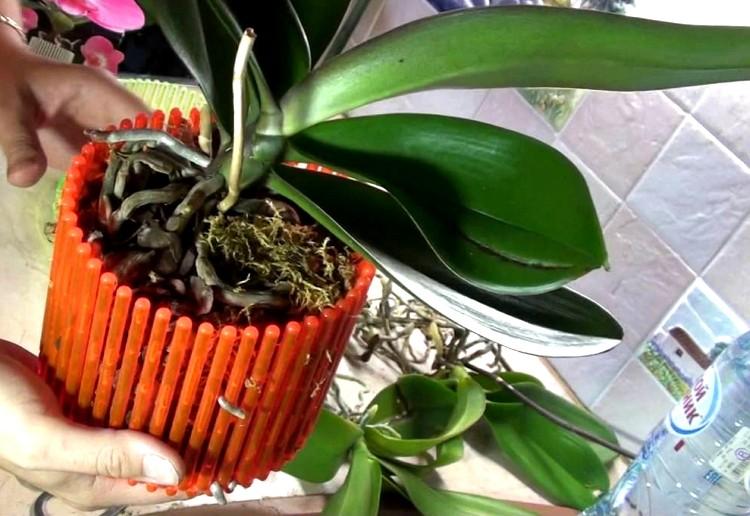
Then you can start planting. Basin bark can also be used, but it is better to add some new material to it. The favorable microflora formed for this particular plant will transfer to a new substrate from the old one and will help Phalaenopsis to adapt faster after transplantation.
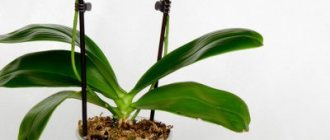
Planting an orchid in a new pot
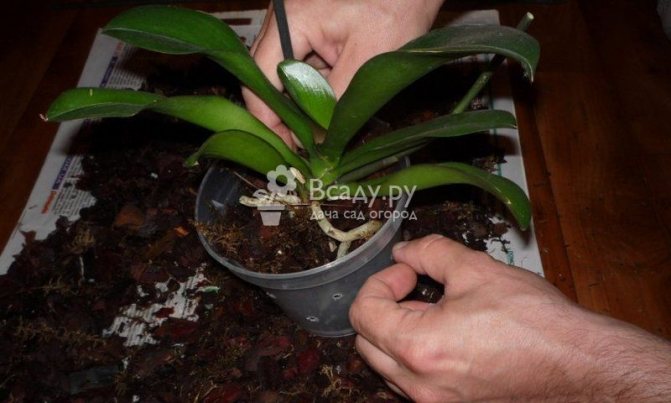
Transplanting an orchid into a new substrate
- Prepare the bark substrate in a bowl and mix it.
- Place the largest pieces of bark in a clean, dry pot on the bottom so that they cover the drainage holes. I do this so that small pieces of bark and moss do not fall out of the pot, and the roots do not crawl out of the holes so quickly.
- Dip the roots of the plant into the pot and distribute them along the walls. The top roots should be below the edge of the pot.
- Hold the plant with one hand in the desired position, and start filling the substrate with the other. Try to put the largest pieces in the center and plant the Phalaenopsis neck on them.
- Tap the sides of the pot periodically to spread the bark into the voids. You should constantly hold the plant with one hand in the desired position inside the pot, otherwise, when tapped, the orchid will pop up.
- With the correct planting depth, when the upper roots are directed into the pot, the flower sits steadily and does not wobble in different directions. It is advisable to attach the bark from above with long moss fibers. It will retain moisture in the upper crust for longer.
- When the transplant is over, water the plant.
I have been growing orchids for many years, replanting them periodically, bathing and watering them is an essential part of crop care.Use my recommendations, and you will be able to determine when phalaenopsis needs to be transplanted by choosing the right container and substrate, and this magnificent plant will thank you for its lush flowering care.
Anastasia Evgenievna Putova, florist and florist
Homemade
A DIY Orchid Pot Has Its Benefits:
- environmental friendliness;
- original design and shape;
- saving money.
The disadvantages of this design include the waste of personal time and the preparation of material for the pot. Otherwise, the design is no worse than the purchased version.
Of course, a homemade pot is much better than a purchased one.... The fact is that with self-production, the florist will be able to obtain a container that is ideal for the growth and development of a particular orchid variety.
In addition, you can save a lot, since today the pots are not so cheap, especially if you need more than one container. And also the homemade roller coaster wins in design. A florist can make it in any version that fits perfectly into the overall concept of the interior.
How to do it yourself?
There are several ways to make an orchid pot.... The simplest is the option obtained from plastic bottles. You need to prepare 2 containers - 1 liter and 2 liters. They will be used to obtain the pot itself and automatic watering. Procedure:
- To make a container for irrigation, take a 2 liter bottle and cut it to a height of 20 cm from the bottom. Further, the lower part is used in the work.
- Make 8 cuts on top, the depth of which is 4 cm.This will form the racks for the pot.
- Bend the resulting segments inward through one.
- To fill the container with water, cut off the neck from the remaining top of the bottle.
- In the lower part of the resulting drinker, mark the hole so that you can fix the spout.
- The neck is fixed in the cut hole with thermal glue.
- To get a pot, take a 1 liter bottle, cut it to a height of 15 cm.
- Along the edge of the upper part, make an outer bend of 1 cm. Place the racks of the autowatering container in it, which will hold the pot.
- At the bottom, make 8-9 holes into which to thread dense fabric cords. Through them, water from the irrigation container will flow into the pot.
- The length of the cord should be such that it reaches until the day of the drinker.
- Pour soil into the pot and arrange the plant. Fill the watering container with water and place the flower pot on it.
- Liquid will be topped up through the spout as needed.
What should I provide?
What kind of pot is needed to plant phalaenopsis? An orchid pot should be chosen based on several conditions:
The size of the pot should match the size of the roots A free pot is not suitable for an orchid, therefore, when transplanting a plant, you should buy a container 1 cm larger in diameter than the previous one.- Phalaenopsis roots are very bad for waterlogging, so containers with a large number of drainage holes are suitable for growing this plant.
- The development of the root system is adversely affected by the drying out of the soil (read about what the soil should be for growing the Phalaenopsis orchid, read here). Based on this, drainage holes can be made in the pot not only from the bottom, but also on the sides for better ventilation of the roots.
- It is better to choose a pot transparent to provide access to light. This condition is explained by the participation of phalaenopsis roots in the process of photosynthesis, it is they who receive the necessary nutrients from light and air.
How should a plant be planted?
Per block
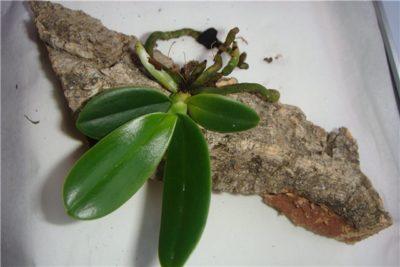
To grow an orchid in conditions as close as possible to its natural, it is worth choosing the option of planting on a block. A block is a piece of bark that is sized to fit the plant's root system. While the flower is small, you can use foam instead of bark.
You can grow an orchid on a block with and without a substrate.... If the latter option is chosen, then the orchid is grown on a suspended wire or on a fishing line. A tree variety that does not rot (mango tree) is suitable for growing. You can find it in pet stores and in the departments with accessories for aquariums. How to make a block for an orchid with your own hands, as well as the rules for growing a flower, read here.
Growing an orchid on a block allows you to water the plant less often, since the moisture will not go away so slowly, it lingers in the substrate.
Sphagnum moss, which grows in swamps, is perfect as a substrate.... The disadvantage of this method is that the root ball will dry out quickly - in the summer, a few hours are enough. So it is worth using block planting for orchids grown in a greenhouse.
Watch a video about planting an orchid on a block:
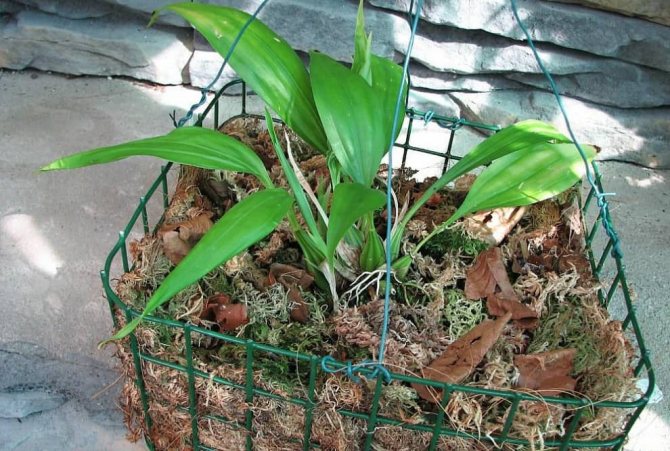
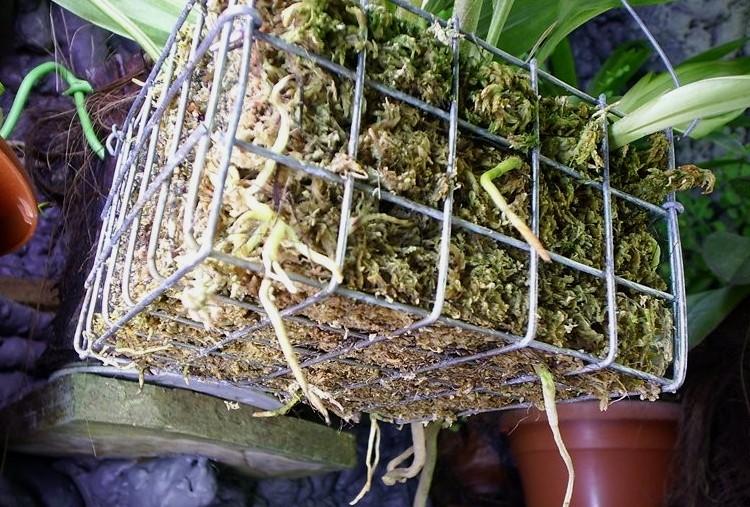
In garbage
A basket is the best option for those who want to recreate the natural conditions for an orchid, but do not want to plant it on a block. Various materials can be used to make the basket:
- bamboo;
- wood;
- steel;
- plastic;
- metal mesh.
TIP: The basket made of bamboo and wood looks quite original. But the wooden structure has one drawback: the root system grows strongly to it, which is traumatic during transplantation.
Bamboo is most beneficial... To make a basket you need:
- lay out the planks or a piece of bamboo;
- make a hole in them and stretch the fishing line;
- all that remains is to hang a homemade basket and plant a plant in it.
Plastic baskets remain quite practical, but less decorative.
Growing orchids in homemade pots
Orchid lovers are quite inventive people and instead of boring plastic pots they often use homemade containers. As a rule, these are plastic containers for yogurt, mayonnaise and other food products. With the help of sharp scissors or a drill, holes are drilled in them and the phalaenopsis pot is ready!

Another material used for planting epiphytes is pine baskets. Although they are more suitable for Vandam and Coriantes, Phalaenopsis can also be planted in these pots. They look quite decorative, and instead of a substrate, you can use a pine block and sphagnum moss.
To make such a container yourself, you need to make a little effort:
- Identical pieces are cut out of pine, polished and fastened in any way possible.
- A pine block with a plant fixed on it is laid at the bottom of the basket.
It is important to remember that this method of growing phalaenopsis requires frequent moisture and plant adaptation. It is not recommended for inexperienced growers to use it.
Orchid care after transplant
The period after the transplant is called the recovery period for a reason. Any fundamental intervention in the life of a plant creates stress for it. So, a few rules about what to do after transplant:
- the pot is placed in a shaded place, closer to the east window;
- the air temperature is maintained within + 21 ° С;
- watering after transplantation is done after 5 days;
- leaves can be sprayed daily with warm water;
- after a month, they begin to apply fertilizers.
Primary requirements
Epiphytes and lithophytes, which are orchids, do not tolerate excessive moisture at the roots. This should be taken into account when choosing a pot in which you are going to plant phalaenopsis.
The capacity should provide:
- good moisture outflow;
- active aeration of the substrate and root system;
- acceptable temperature conditions;
- access of light for photosynthesis of roots;
- later, during transplantation, it is possible to safely extract large, fragile and easily growing roots.
What capacity does a plant need?
A properly selected orchid pot is important: it helps it adapt to the microclimate in the apartment.
At home, it is difficult to create conditions similar to those in which phalaenopsis grows in nature. Phalaenopsis pot must:
- Be a support.
- Retain moisture at the roots.
- Protect roots from overheating, but do not interfere with photosynthesis.
If the pot does not fulfill the functions assigned to it, the phalaenopsis will not be able to grow normally.