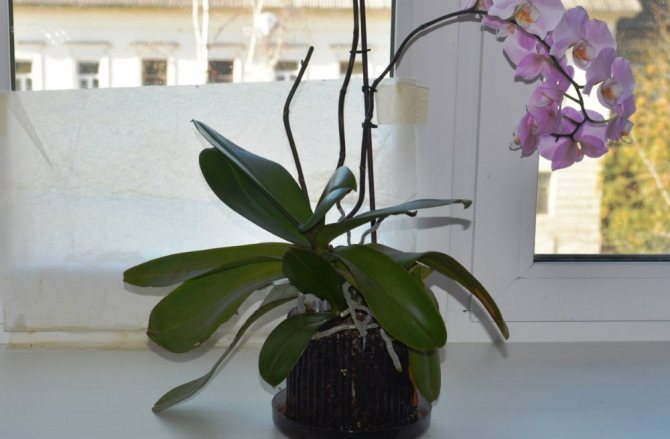
If the roots of the orchid have crawled out of the pot, do not be afraid of this. This is not an anomalous phenomenon and is quite common. In order to understand why this is happening, and whether it is necessary to take any measures, it is important to understand how the air root system of an orchid works, what functions it performs, and why orchids sometimes grow roots, and sometimes not.
You will read about all this in this article, and also learn what to do if your orchid starts growing roots outside the pot.
Features of the orchid root system
The root system of orchids goes through three stages in its development:
- growth period - young roots are introduced between the components of the substrate, ensuring the stability of the plant;
- branching period - division increases the absorption area of nutrients and water, providing nutrition to the orchid;
- the period of withering away - the elements of the root system that have served their time die, their place is taken by young roots, which are actively penetrating into the substrate.
Important! The development of the root system is closely related to the conditions for the growth and development of the aboveground part of the plant.
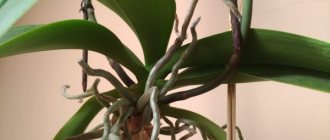
What are aerial roots?
The appearance of aerial roots, resembling the tentacles of a fantastic monster, is due to the lack of one of three components in the development of an orchid:
Recovery care
Root pruning becomes stressful for the plant. Therefore, after such a procedure, the plant is not temporarily moved until it is fully restored. The minimum period for a travel ban is 2 months. During this period, the plant is left far from heating appliances. To prevent direct sunlight, the window is covered with a matte transparent film to create diffused lighting.
The epiphyte is regularly moistened with a little water. To increase the humidity, the air around the plant is regularly sprayed from a spray bottle. Fertilizers are contraindicated during this period. The flower should recover naturally without the use of stimulants. During the day, the plant is provided with an air temperature of about +24 degrees. At night, this figure is reduced to +16 degrees.
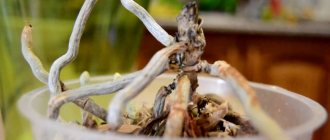
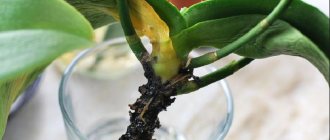
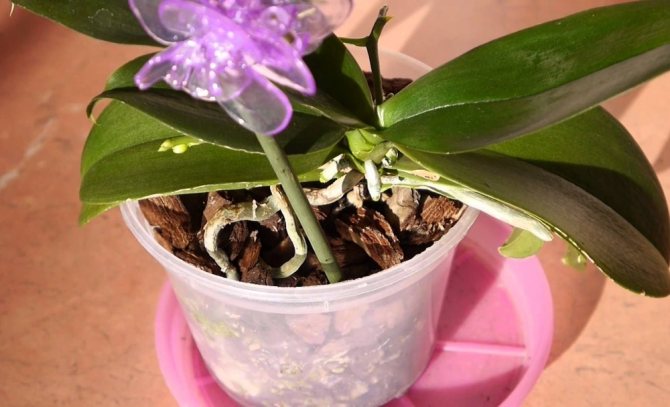
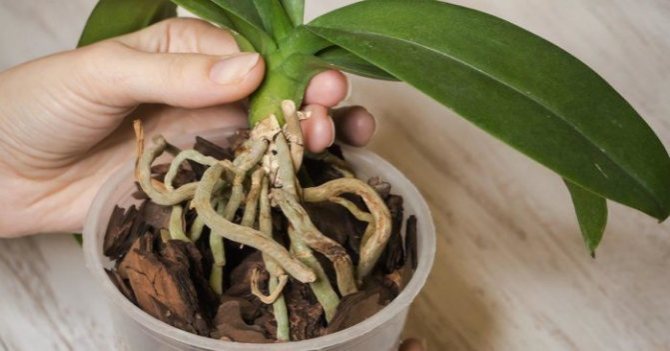
Why are the roots coming out of the pot?
The roots crawling out of the flowerpot are the result of improper care of the plant. The reasons can be:
- rare watering;
- frequent watering;
- lack of light;
- low temperature;
- change in the acid-base medium of the substrate.
Important! Lignified aerial shoots are a sign of natural aging of the plant organism.
Drying
The natural process of self-preservation is the receipt of nutrients from the air if the earthy clod has become too hard and dry. Drying out of the substrate is one of the common reasons for the abundance of aerial roots. In order for the plant to return to normal, it is enough to revise the moisture regime, the frequency of watering and the amount of water poured out.
Drying can lead to other problems:
- injury during transportation;
- chemical burns when fertilizing;
- as a result, to create favorable conditions for the development of pathogenic bacteria and molds in the wound.
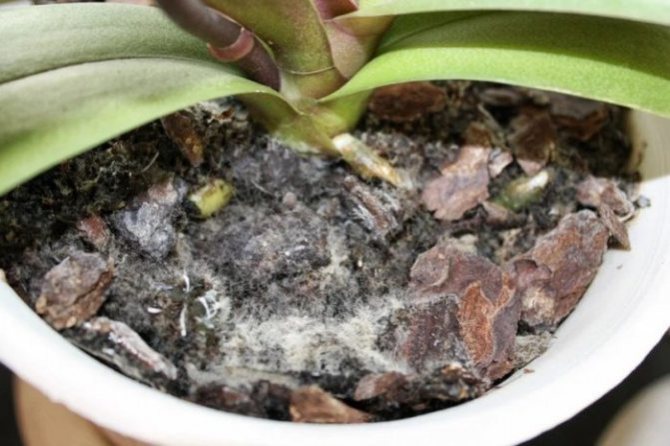
Mold growth
An excess of moisture in the substrate disrupts the aeration regime. To provide itself with oxygen, the plant starts the process of forming aerial roots.It is quite easy to distinguish them from those looking for moisture: waterlogged soil is a favorable environment for the development of molds. The root system of such plants will show signs of infection and decay.
Moldy shoots protruding from the ground are a sign of such problems:
- excess moisture;
- lack of light;
- low ambient temperature.
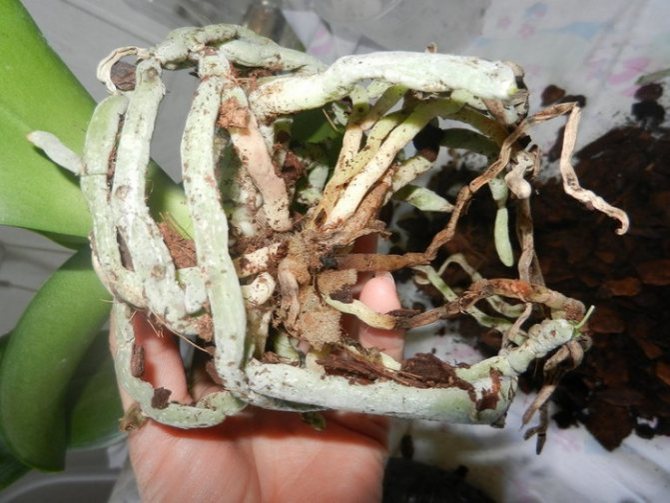
Stiffening
Dense woody aerial roots indicate aging of the houseplant. During the next transplant, you should do the following:
- carefully examine the rhizomes;
- check for living tissue by immersing in a container of water;
- trim off dead parts.
Color change
Orchid roots are actively involved in the process of photosynthesis. Their color is an important marker of normal functioning:
- bright emerald color - living elements that work optimally;
- gray, faded or light shade - functioning is impaired, but can be restored with proper care;
- soft, slimy, not absorbing water when immersed - these appendages have become useless, they can only be removed. This must be done in order to stimulate the growth of new viable elements. The substrate and the plant itself must be treated for infection.
The first reason is waterlogging
If watering is plentiful and a lot of moisture accumulates in the pot, the orchid begins to abundantly grow outward roots. In this case, their task is to increase the evaporation area, remove excess liquid in order to prevent the onset of decay.
Excessive humidification is especially dangerous at low room temperatures.
To stop the growth of aerial roots in this case, you need to reduce watering and place the flower pot in a warm, well-lit place. It should be borne in mind that the orchid does not tolerate direct sunlight.
What if this happens?
There are several ways to restore an attractive appearance to the plant:
- trim non-viable elements;
- replace the substrate;
- heal the plant;
- transplant into a container of larger volume.
Attention! The choice of the method and their combination directly depend on the reason that stimulates the growth and development of additional elements of the root system. So, it is useless to cut off dying roots if the orchid grows in an unsuitable substrate.
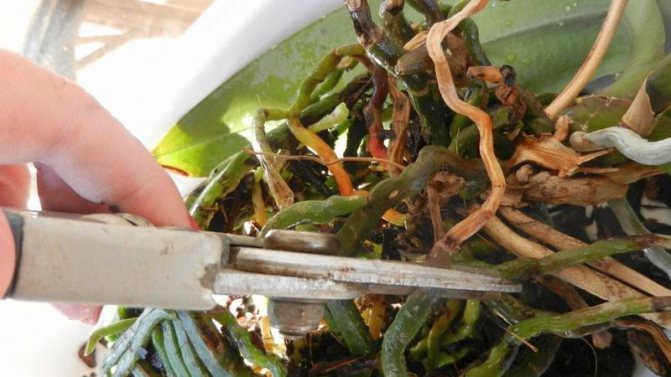
Pruning
Moldy, woody or discolored roots can and should be removed. The pruning procedure consists of several stages:
- Preparation of tools. A pruner or a sharp knife is treated with an alcohol solution so as not to infect the wound. Small or nail clippers are not used for pruning, as they increase the risk of causing unnecessary injury to the plant.
- Search for objects to be deleted. The root ball is freed from substrate residues and moistened, marking the elements for trimming:
- stopped growing;
- retained a gray color after contact with water;
- with signs of decay and mold.
- Pruning problem areas.
- Treatment of the cut site with one of the antiseptics:
- greenery;
- activated carbon;
- cinnamon powder;
- solution of potassium permanganate or fungicide.
- Planting in a pot according to the traditional scheme.
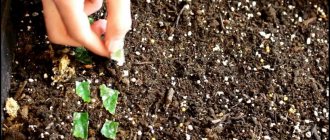
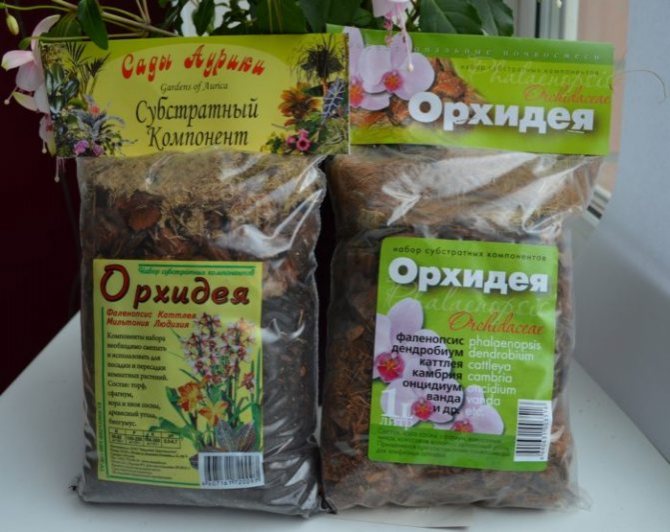
Choosing the right substrate
For any transplant, the orchid should only be placed in a special potting soil mixture. This is the key to the normal development of the plant without increased formation of aerial roots.
A mixture of the following components maximally mimics the natural conditions for the growth of epiphytes:
- charcoal - 1 part;
- peat moss - 2 parts;
- bark of coniferous trees - 5 parts.
Treatment
If the overgrown soil and air roots rot or mold, then the following manipulations must be carried out with them:
- Remove the plant from the substrate.
- Cut off diseased parts of the root system.
- Treat the remaining roots with a fungicide.
- Transplant after complete drying into a new disinfected substrate.
Feature! If more than half of the root system had to be removed, then the plant is sent "to intensive care." Once every two days, the lower part of the flower is immersed in a basin with a solution. For its preparation, 4 tablets of succinic acid or 1 ampoule of vitamins B1, B6 and B12 are diluted in 1 liter of water. As soon as the newly grown roots reach a length of 50 mm (on average, after 10 weeks of immersion), the reanimated plant is planted in the substrate.
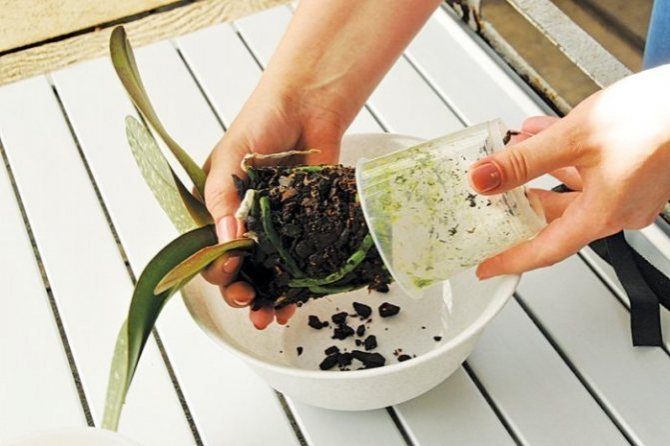
Transferring to a new pot
If the reason for the "escape" of the roots from the pot is the tightness of the container, then a decision is made to transplant. The procedure is as follows:
- Grab the outlet and carefully remove the root ball from the pot along with the rest of the substrate.
- Rinse thoroughly under running warm water, removing the remnants of the old bark.
- A visual inspection of the root system is carried out. If necessary, dead and rotten areas (to living tissue) are cut off with a sharp disinfected knife. The cut sites are treated with activated carbon or cinnamon powder.
- Organize preventive immersion in a solution of potassium permanganate or other broad-spectrum antiseptic.
- Leave the plant to dry for 8-12 hours.
- Prepare a new container:
- its diameter should be 2-3 cm wider than the root volume;
- with the required number of drainage holes;
- treated with soapy water (for prophylaxis).
- Planting exotic plants in a new substrate according to the traditional scheme.
Attention! In case of emergency transplant, peduncles should be cut 2-3 days before the procedure. This will help the plant accumulate strength for subsequent adaptation to new conditions.
Step-by-step instructions for pruning

Orchid root pruning is a healing procedure, which is carried out when it is at rest, i.e. faded. After spending it, the florist redirects nutrients from putrefactive areas to healthy ones.
Rotting is the process of destruction of organic nitrogen-containing compounds under the action of microbial enzymes. If one of the roots of an orchid is affected by rot, other areas will soon become infected. Refusing recreational activities, he pushes her to a quick death.
Before cutting off a suspicious-looking part of the plant, cut off a small piece from it with a pruner. They are examining him. If its color is white, do nothing with it. Only shriveled, brown and decaying processes are cut off.
Instrument preparation
When pruning, the grower uses a knife or pruner... He must prepare the instrument before use. Without doing this, they are not surprised to get an infection. For disinfection, wipe the cutting part of the tool with alcohol. Manicure scissors are not the best choice when you need to cut a green pet. Often, delicate leaves are damaged by them.
Find items to shorten
Before proceeding with the procedure, the roots are examined. Remove those that have dried up or started to rot. They differ from healthy ones in that they do not change their color as the substrate dries in the pot: they are always brown.
Fundamental rules
The basic rules for pruning must be known in order to minimize injury to the plant. First you need to pay attention to the selection of devices, which you cannot do without. These include:
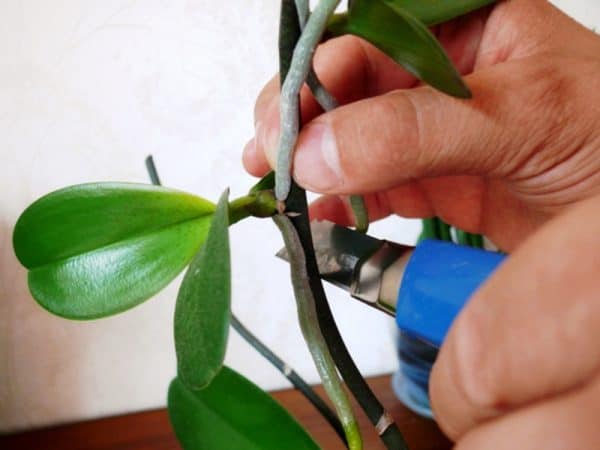
- A garden pruner is the best option as it will not injure the stem when pruning. Can be replaced with sharp scissors or a knife, but you need to act carefully.
- Alcohol or other disinfectant (you can use bleach or the boiling method). They need to process the tool before trimming.
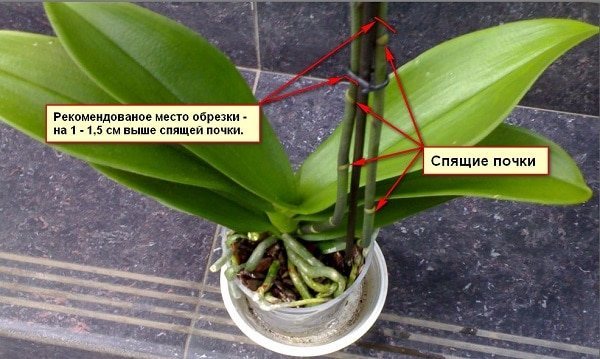
Next, you need to determine the cut point:
- If this is a peduncle (peduncle), then you need to prune over the sleeping bud at a height of one or two centimeters. Moreover, the closer the bud is to the leaf outlet, the more flowers will be formed on the lateral shoot formed in the future.However, re-flowering should be expected no earlier than two to three months after pruning.
- If it is an aerial root (rotten or completely rotten, frozen, dry, dying), then pruning is performed with a capture of one to two centimeters of healthy tissue. Remember that in this case you will also need to transplant the plant into a suitable pot with fresh substrate.

- If it is a leaf (dry, diseased, frozen, yellowed, swollen, etc.), then trimming is done so as to capture about two centimeters of healthy tissue.
Next, it is imperative to process the cut site. For this, crushed activated carbon, ground cinnamon, brilliant green or iodine are suitable. Any of these products is an excellent antiseptic that disinfects. Then the processed cut must be dried for at least twenty minutes.
Note! Sometimes after pruning, a hollow stem may appear, which is commonly called a hemp. During watering, water will accumulate in it, which, as a result, will lead to rotting of the outlet and disease of the plant. Ordinary beeswax, which is used to cover the hole, will help to avoid such a problem.
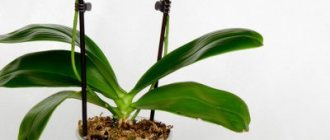
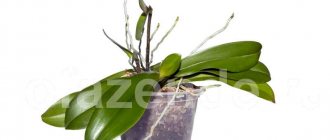
What if the roots grow up and crawl out?
Roots on top of the substrate, growing vertically on the surface, are normal for members of the orchid family. However, if this spoils the aesthetic appearance of the specimen, then they do not grab the knife, but revise the conditions of agricultural technology.
Enhanced growth of air processes - evidence:
- incorrectly selected components of the substrate;
- alkalization of the soil;
- salting the contents of the pot;
- seals of individual components.
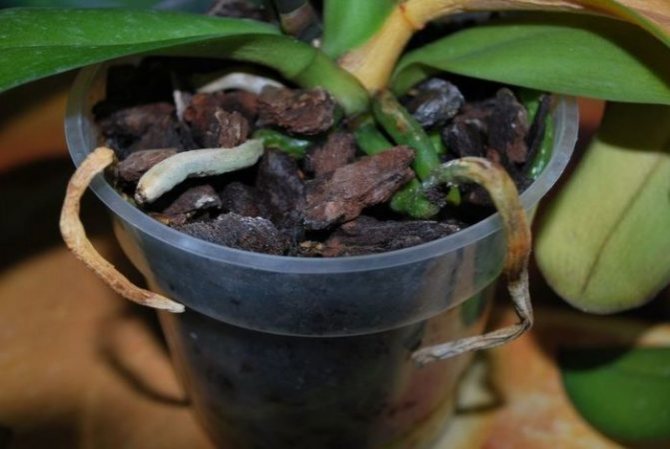
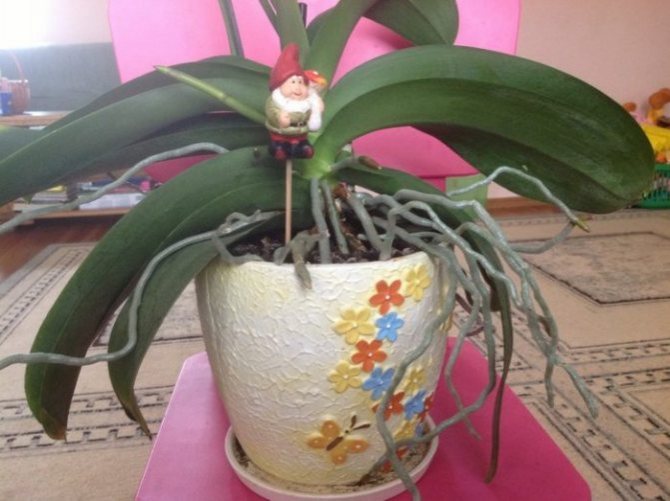
Interesting! Roots crawling out of the drainage holes indicate the tightness of the flowerpot and eloquently require a transplant.
Do I need to trim if there are a lot of them?
Aerial roots are an indispensable attribute of any orchid. They perform a supporting function, provide the plant with nutrients and water. Therefore, only worn-out or clearly diseased elements should be removed. Healthy people do not prune, but adjust the frequency of watering:
- little or no aerial roots - the frequency of watering is increased;
- 4-5 air shoots - watering is left at the same level;
- a lot (more than 7-8 in one pot) - reduce the frequency of watering.
If too many aerial roots appear, the right measures should be taken immediately to ensure that the plant is properly cared for.
5 / 5 ( 1 voice)