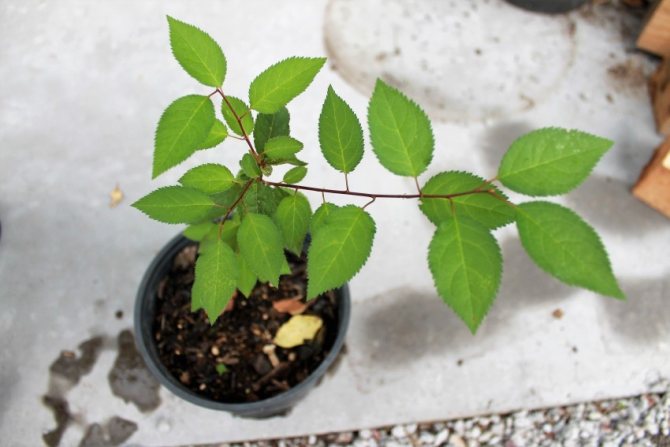
Description
“Is it possible to grow a stone plum at home? Which variety to choose for planting? How to care for a seed? " - these questions are of interest to enthusiastic amateur gardeners. It is possible to grow a healthy and sturdy tree that will bear fruit, but it is a very laborious process. Germination from a seed cannot be called a quick way, as a rule, it takes a lot of time (only the stratification process can last six months). And in order to get fruits from such a tree, sometimes you have to wait five to six years.
But you can succeed. The main thing is to choose the right planting material, prepare it and take care of proper care, and the seed will do the rest by itself.

Preparatory stage
In order for the process of plum seed germination to be carried out successfully, it is necessary to acquire correctly selected fruits. When purchasing a plum, it is recommended to pay full attention to the country in which the plant was grown. The imported plant origin will interfere with the germination of the seed. This is due to the fact that the unusual climate for plums will impede their adaptation to the new environment. The plant will most likely die.
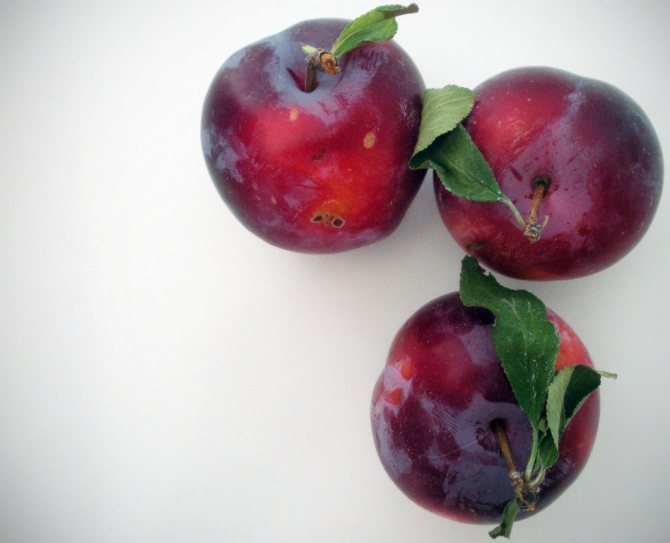
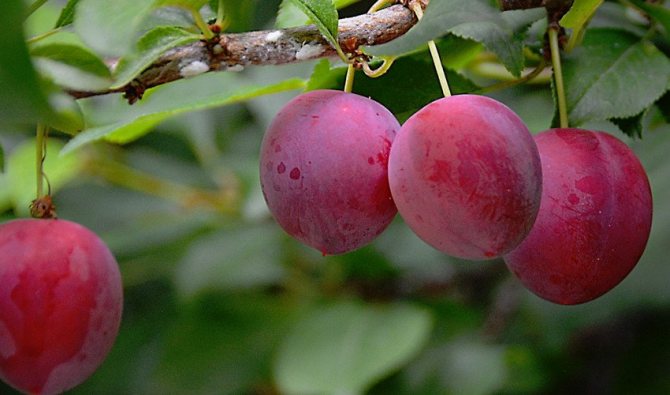
It is recommended to purchase the ripe and soft fruit from the local market. Thus, the likelihood that the variety will take root will increase several times.
Seed collection
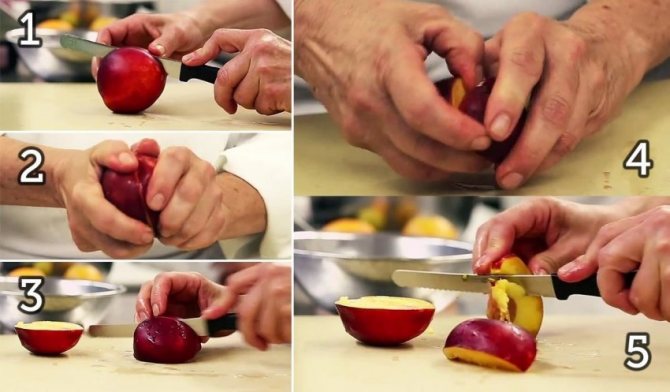
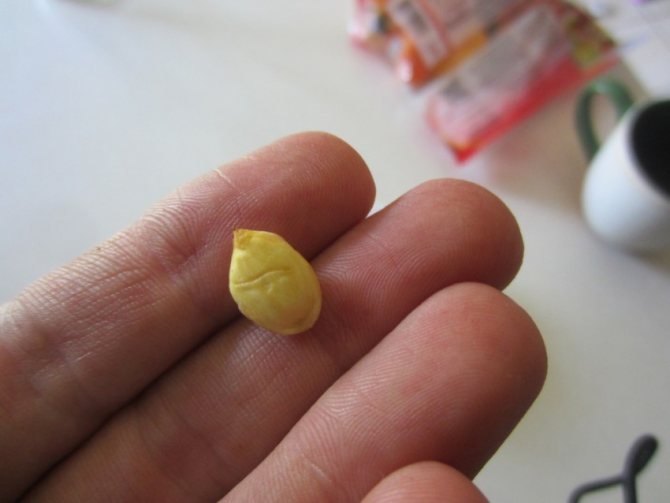
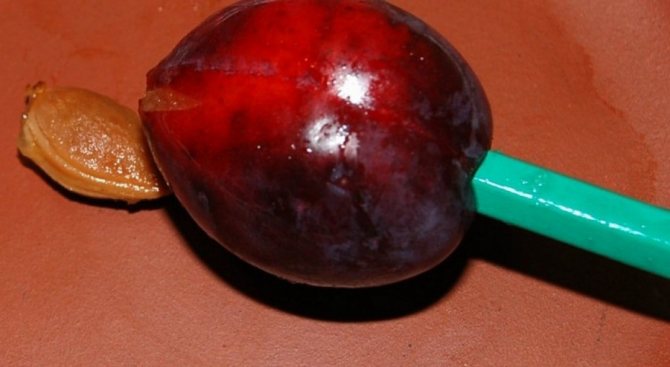
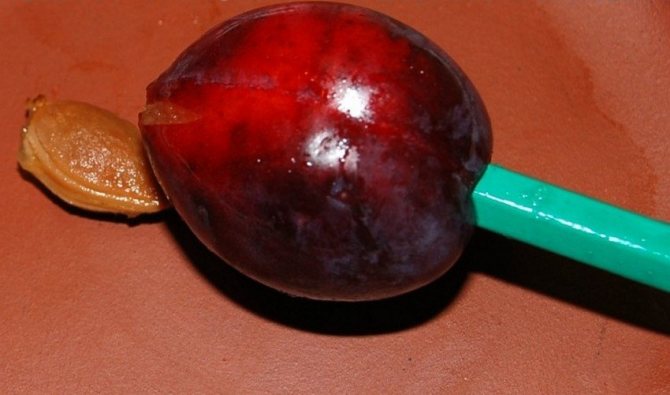
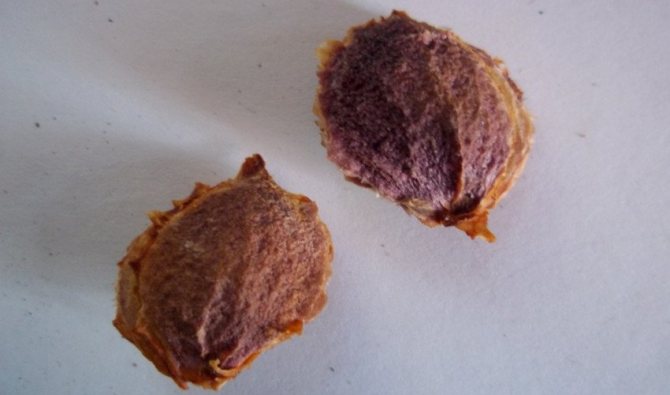
After removing the seed from the fruit, you will need to rinse it thoroughly in water and remove the pulp fibers. Then transfer it to a dry and warm place. It is necessary to let it dry thoroughly. This may take several days.
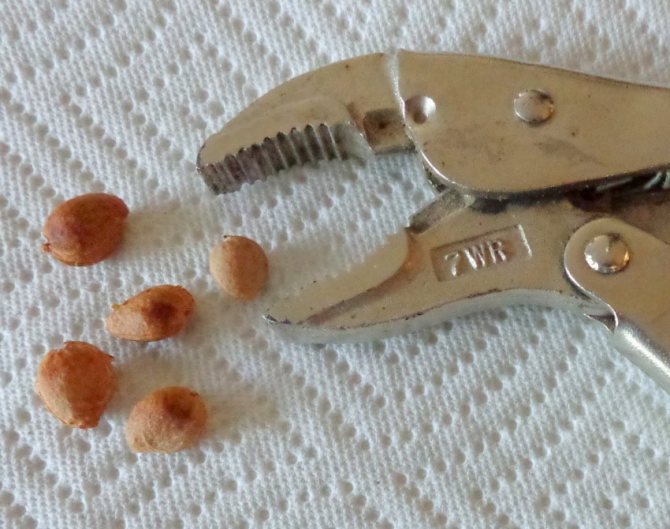
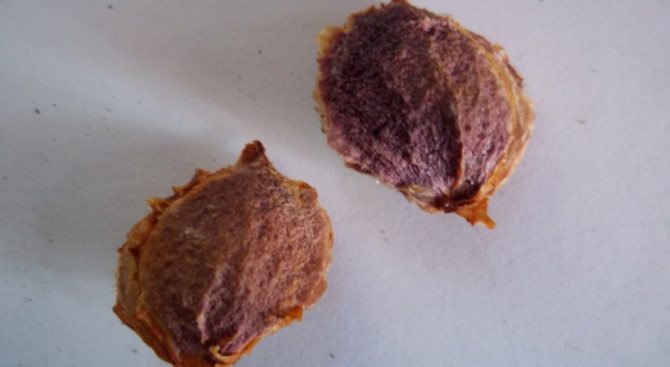
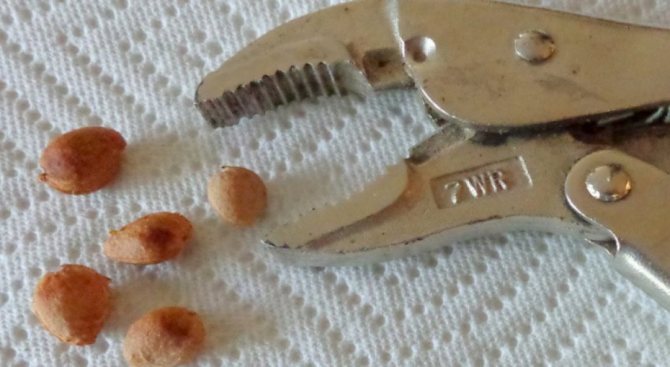
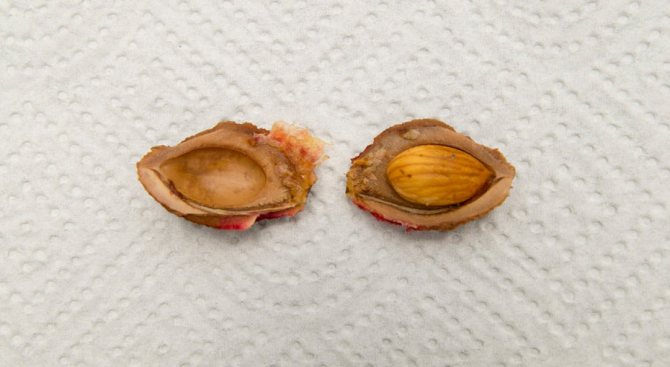
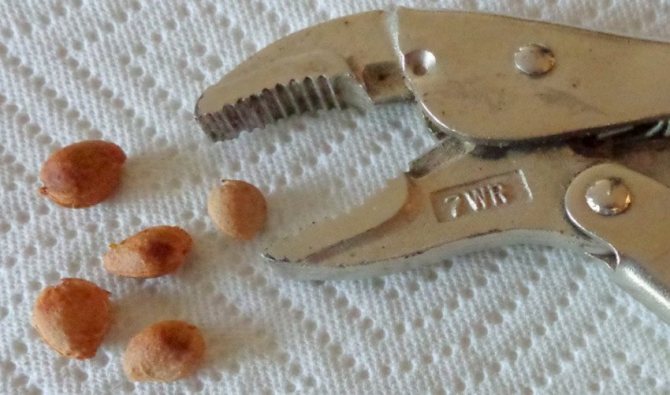
After the plum seed is completely dry, you will need to pull out its core. Special tongs for nuts or ordinary pliers can help in this. Pulling out the core must be extremely careful so as not to damage it.
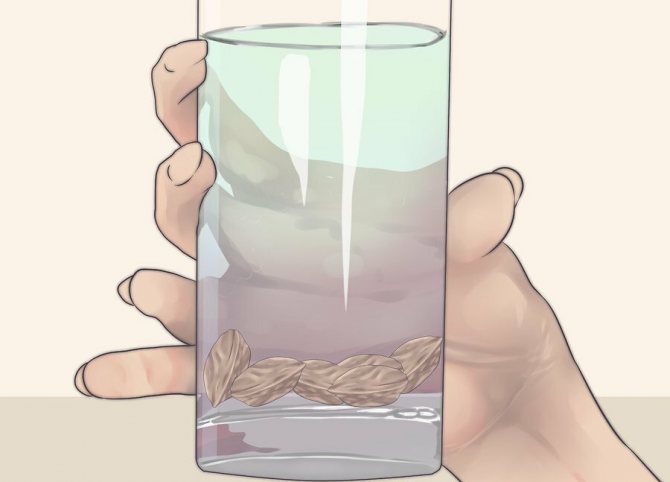
There is a little trick to make sure the seed sprouts. To test for suitability, you need a mug of warm water. A fertile seed placed in a mug will settle to its bottom. While the empty bone floats to the surface.
Seed germination
The removed nucleolus from the plum seed is placed in a pre-moistened piece of tissue. It is advisable to use natural fabric, not synthetics. After that, the well-wrapped seed is placed in the refrigerator compartment, or in any other cold place. The cold is the guarantee that a fertile seed will sprout.
Kuso fabrics should be checked regularly for moisture. When dry, you will need to re-moisten it. It will take at least 6 months for a plum seed to germinate. For example, if seed germination began in November, it is most likely to sprout in early April.
Growing seeds
A biostimulator will help speed up the germination process. You can buy it at any garden store. Not only the seed, but also a piece of tissue is regularly treated with a biostimulant. Mold is normal. But it is advisable to get rid of it immediately. In this case, a piece of cloth and a seed will need to be thoroughly rinsed in water.
In order for a healthy and fruiting plant to subsequently grow from the seed, it is advisable to prepare in advance for the subsequent planting. You will definitely need a flower pot.It should be made of clay or ceramic and should be of medium size. It will not be superfluous to acquire a substrate made from ingredients such as garden soil, peat and sand.
Which variety to choose for planting?
It is important to understand that not every plum is suitable for bone propagation. Sometimes the main factor in choosing a variety for planting is the area where the tree will grow. It is better to give preference to "local" plums, as they are more likely to germinate. The most popular varieties are:
- "Ussuriyskaya";
- "Canadian";
- "Chinese".
Often there are situations when a seed was planted, it sprouted, the seedling was planted in open ground, the fruits were waited for, and they are sour, although the original variety is sweet and juicy. The reason for this was cross-pollination. Insects, pollinating the flowers, added pollen of other varieties, which suppressed the weak maternal traits of the original tree, and a wild game with sour and tasteless fruits grew.
For growing plums from stone in central Russia, the following varieties are more suitable:
- "Belarusian";
- "Minsk";
- "Volga beauty".
These varieties not only have strong maternal traits, but also good resistance to low temperatures.
For those places where spring and summer are warm, the following varieties are suitable:
- "Victoria";
- "Kuban comet";
- "Croman".
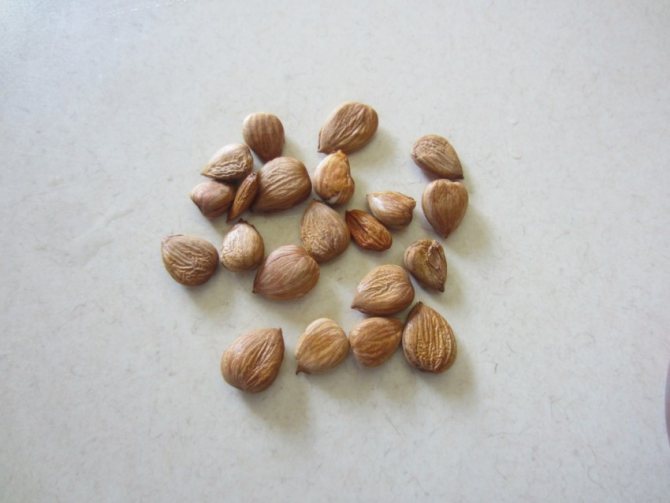
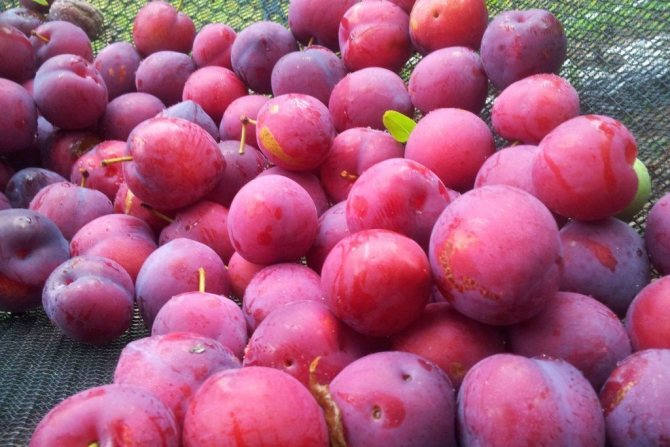
Important! For growing plums from stone, only ripe fruits are suitable, since it is they who form a full-fledged, strong embryo from which a good tree can grow. It is also better to prepare several seeds at once, since there is too much chance that the seed will not germinate.

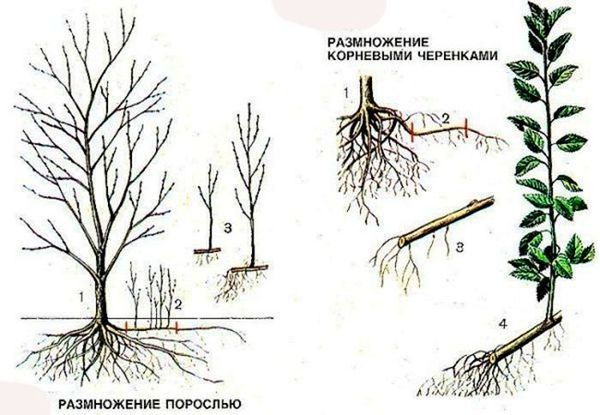
Reproduction by root shoots
Novice gardeners often do not know whether the plum shoot will bear fruit. Interestingly, plum propagation by root shoots is considered the easiest way. However, here you should know that those shoots that are located near the mother plant are unsuitable for reproduction. It is best to use the growth that is farthest from the tree.
When to breed
In the fall, a root cut is performed, which connects the shoots to the main tree. In the spring, a separate seedling is dug up and planted in a new place.
You can also chop the root in early spring (before bud break) or late August / early September. After that, sprinkle the main root with ash or cover it with garden var. A seedling is taken from the ground in 2 weeks.
How to plant a shoot
Since the main root was cut in advance, you need to carefully dig out a separate plant and just transplant the seedling.
Planting a young plant
The seedling is planted in the hole. In the process of planting, the distribution of roots is carried out throughout the fossa. It is best to transplant with an earthen clod. The new site must meet the requirements of the variety and correspond to the parameters of the previous site where the seedling in the form of a root shoot was formed.
If done correctly, young trees grown in this way will bear fruit well after a few years.
As you can see, it is not so difficult to propagate a plum with your own hands. The main thing is to know the peculiarities of performing each method.
Stratification
Stratification is the first and most important preparatory stage, which determines whether the planted seed will germinate. The essence of the process is that the planting material must be kept in cool and humid conditions.
When sprouting a plum from a stone, it is important to follow the step-by-step instructions and follow all the rules:
- Having chosen a variety, free the bone from the pulp. Next, you need to prepare the cotton fabric. It needs to be cut into small pieces, into which the seed should fit. Each selected bone must be wrapped in a cloth separately, folded into one container and moistened.
- The container with the wrapped bones should be placed in the cellar, refrigerator or summer kitchen.The lower the air temperature, the better.
- The bones and fabric must always be damp. To do this, they must be regularly watered with a pipette.
Now we have to wait for the seed to sprout. The process usually takes 6 months, but it can be expedited. For example, the bone and the tissue in which it will be wrapped can be treated with growth stimulants (Epin or Ecosil).
If mold appears on the cloth, then the bone must be immediately removed and rinsed under running water, and then rewound in cotton cloth.
There is another variant of stratification. The seed can grow not only in the tissue. You can use crushed moss, sawdust, sand, peat.
The process of germination in the substrate is a little different:
- First, you need to put the seeds in water for three days. The planting material must be completely submerged in the liquid. Soaking softens the shell of the seed, and also flushes out inhibitors that prevent the seed from germinating.
- While the bone is in the water, you can prepare the container and soil. The soil must be moistened and treated with a solution of potassium and water (in a proportion of 5 grams per 1 liter, respectively). In the pot where the bone will grow, you need to make side holes. They are needed for good air circulation.
- The bones must be placed in the ground in such a way that they do not come into contact with each other.
- The containers should be covered with transparent polyethylene or glass.
Now we need to provide the seeds with optimal conditions for germination. The most important thing is the right temperature, and there are certain stages here:
- Heating. For the first 15 days, the seeds should be stored at a temperature of + 15 ... + 20 degrees.
- Cooling. On the 16th day, the temperature should be reduced to + 1 ... + 5 degrees. In such conditions, the bone is stored for 60 to 80 days.
- Presowing. Before planting the seeds in open ground, the temperature is reduced to 0 or -1.
Monitor soil moisture. It shouldn't dry out. But if mold appears on the substrate, then the soil should be sprayed with a 3% potassium solution.
Germination in the substrate is a more time-consuming procedure, but it is considered to be more successful. If everything is done correctly, then the chances of a healthy and strong tree will grow several times. The first sign that a bone is cooking for planting will be a cracked shell.
Germination of kernels
In the autumn, fill the dense container with fertile, moist compost. Before planting, you should loosen the soil well and distribute the prepared plum seeds in it.
After that, the seeds need to be refrigerated.
Please note that the temperature regime must be up to + 4 ° C. This process is called stratification - keeping seeds at a specific temperature to speed up their germination.
In this state, they should stay up to half a year. Some gardeners in February place the seeds in a container of wet sand and place them in the lower sections of the refrigerator.
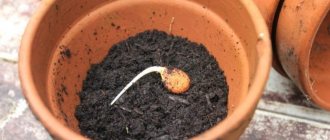
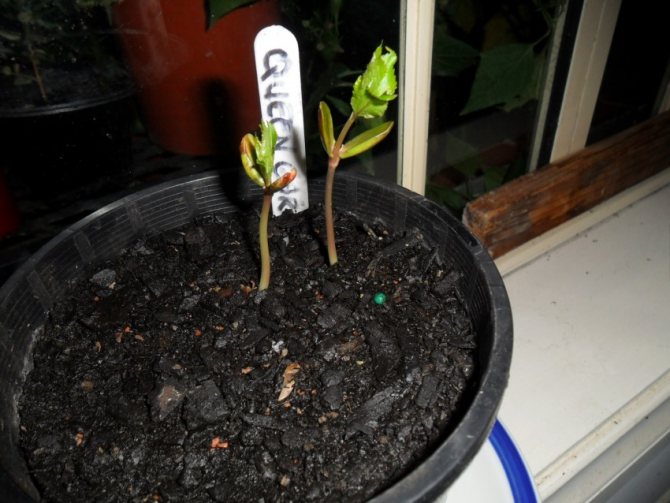
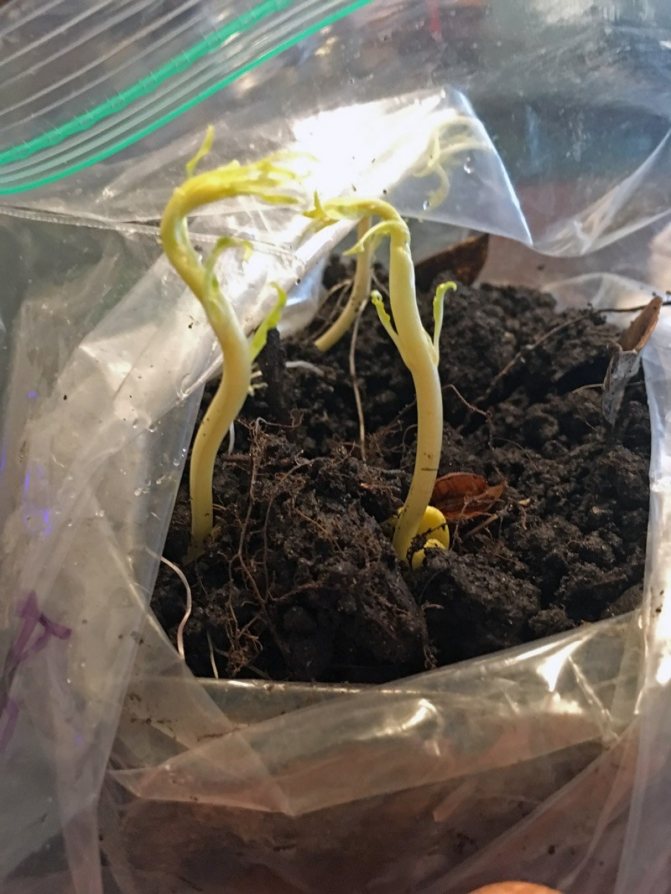
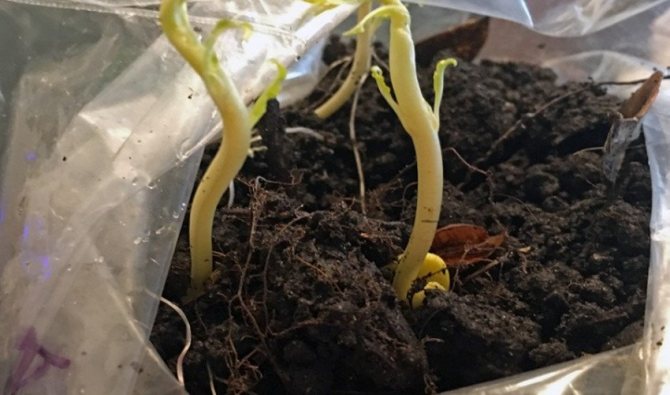
When the nucleoli from the seeds of the plum begin to hatch, they are planted in a pot of soil and put on the windowsill. The seed thus prepared is planted in May.
How to grow young seedlings?
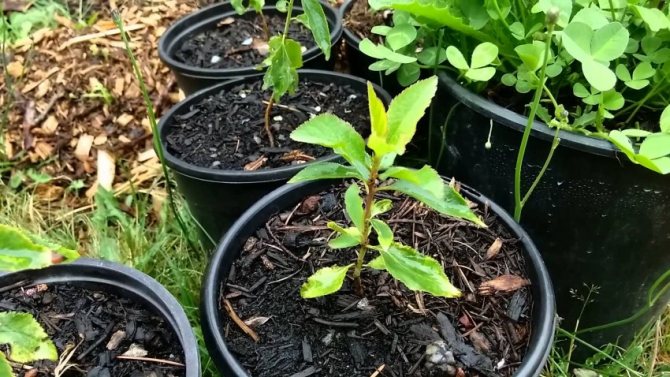
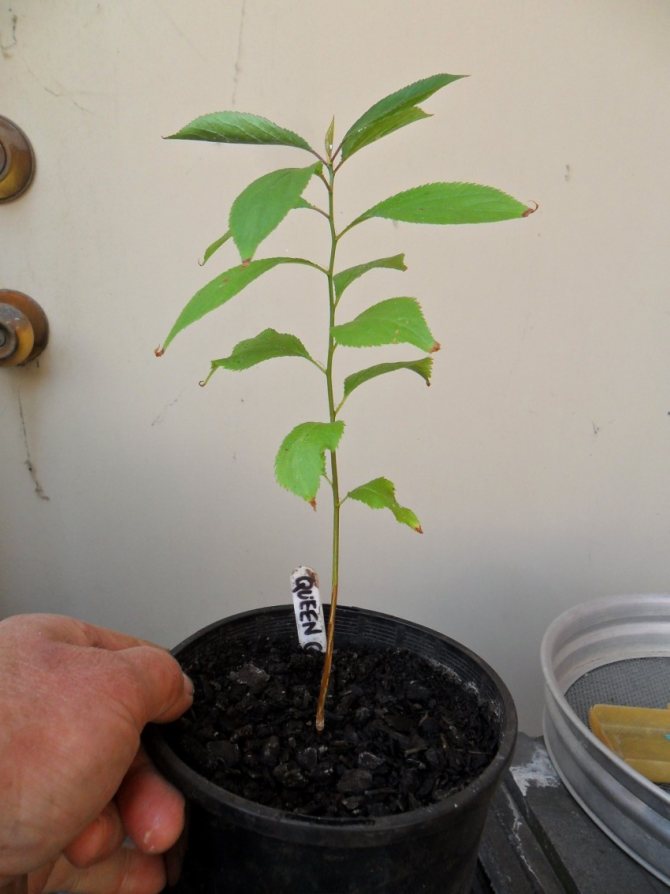
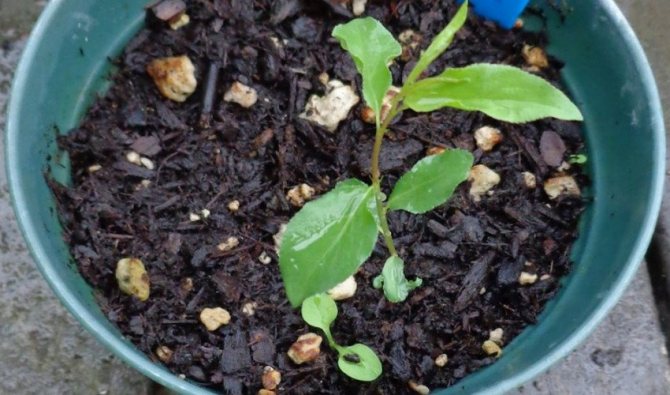
After successful stratification, the next stage begins - the cultivation of young seedlings. Where to plant young seedlings: in the open ground or in a pot? It all depends on the climate. If it is already warm outside and the soil has warmed up well, then you can go to the dacha and plant the seedling immediately in its usual place. But it should be borne in mind that such a sharp change in climate can be detrimental to the seedling. Therefore, it is better to plant the seed in a pot and germinate at home, and when the tree gets stronger, it can be transplanted into open ground.
Germinating seeds in a pot
To germinate a plum seed at home, you need to pick up a container.The diameter of the pot should be at least 20 centimeters so that the sprout is not cramped in it. You also need to make sure that there are drainage holes at the bottom that will remove excess moisture. The container must be disinfected with a weak manganese solution, and a layer of expanded clay should be laid on the bottom. Now we need to prepare the substrate. The plum stone loves light soil that allows moisture and air to pass through well. You can mix humus, leafy earth and vermiculite in equal proportions. It also does not hurt to add perlite (0.5 part of the total mass of the substrate) - a natural volcanic rock that promotes the rapid germination of seeds.
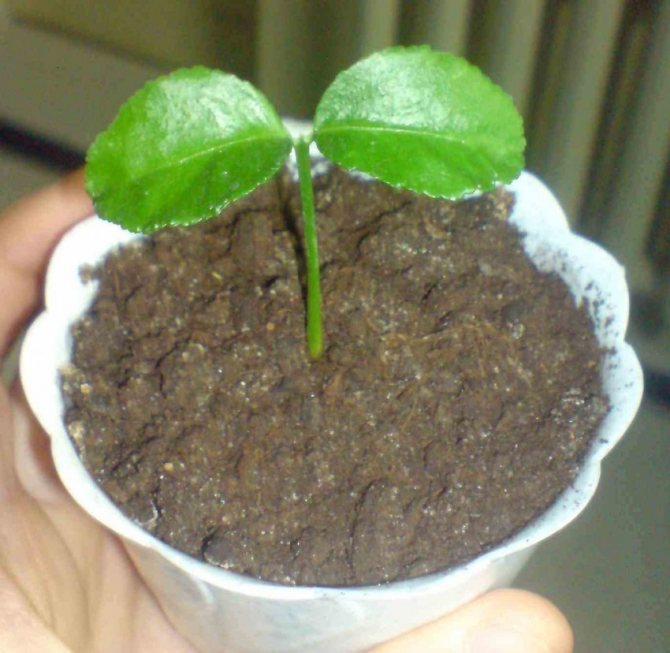
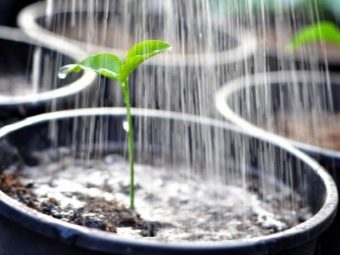
Fill the pot with the prepared mixture. The substrate should be well moistened. The seed is planted in the center of the container and buried 5 centimeters into the ground. Now you need to cover the pot with clear plastic or glass to create a greenhouse effect. The container is placed on a windowsill where there is enough sunlight. Now all that remains is to wait for the sprout to appear. The seed usually sprouts in 30-40 days. Throughout the entire time, the greenhouse must be ventilated daily, since condensation must not be allowed to form. In addition, regular air baths will help the plant get used to the environment.
Creating optimal conditions will help you achieve good results. Try to control:
- Watering. Water the plant abundantly, but infrequently. Enough 1-2 times a week. You cannot water the bone in the usual way; it is better to use a spray bottle or syringe. The water should be warm and settled.
- Lighting and temperature. There should be enough light. If the room where the seedlings are standing is dark, then you need to use special fluorescent lamps. For a seedling to germinate, a temperature of +25 degrees is needed.
- Fertilizer. The first feeding can be done only after the sprouts appear. While the seedling grows, it is necessary to add two more fertilizing with nitrogen fertilizers. One seedling takes 100 milliliters of solution.
When the first two leaves appear, pinch the plant by 1/3. This procedure activates the growth of the root system. If several seeds were planted in one container, then after the appearance of the leaves, a pick should be carried out. Seedlings are planted in separate containers, watered abundantly and placed in a dark place for several days.
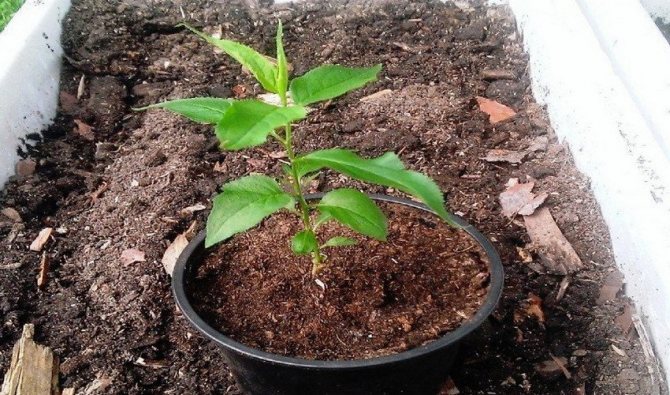
In order not to get a wild tree, the fruits of which will be dry and tasteless, the seedlings must be planted in new soil every three months. At the same time, it is important to change the container itself, increasing its size each time. You can plant a young tree in open ground no earlier than in one year.
Transplanting a seedling into open ground
To transplant a seedling into open ground, you need to prepare the soil. If planting seedlings is planned in the spring, then the soil must be dug up in the fall. During the winter, the soil will rest, settle and be saturated with melt water. In the event that there will be an autumn planting, it is necessary to prepare the soil at the beginning of summer. Fertilizers must be applied to the soil:
- compost (6 kilograms per meter);
- superphosphate (60 grams per meter);
- potassium salt (30 grams per 1 meter).
Now you need to dig a hole, the depth of which should be 60 centimeters, and the width - 100 centimeters. Since the young seedling is still weak and cannot withstand strong wind or rain, a stick should be placed at a distance of 30 centimeters from the center of the groove, to which the young tree should then be tied.
To fill the pit, you will need two buckets of manure, 2 buckets of sand, 30 grams of superphosphate, and 20 grams of potassium sulfate. All components are mixed and poured onto the prepared area. It is necessary to form a hill from the soil mixture, on which the seedling should be placed. The roots of a young tree must be leveled over the entire surface. When adjusting the planting height, you must try to keep the root collar 5 centimeters above the soil level. When filling a hole, it is important to avoid voids, since the plum does not like them.The soil around the tree must be tamped, watered, and the tree itself must be tied to a stick. The trunk circle should be sprinkled with sawdust.
Transplanting into a vegetable garden or garden

If a seedling is obtained from a seed, it can be temporarily placed for the winter in a quiet, sheltered from the winds.
It is important that in winter the tree is completely covered with snow and does not freeze. Plant several specimens at once at a distance of at least 30 cm from one to the other
The soil should be well dug up and fertilized with humus.
Get ready for the fact that not all seedlings will survive until spring. But this is a critical test: the most tenacious samples can be safely transferred to a permanent place. The transplant is carried out in early May, when the soil has warmed up enough to a depth. The first months of life, the plant needs abundant watering. The earth is moistened in the morning, at noon and in the evening. This regime lasts 21 days until the seedlings take root.
The depth of planting a seedling into the soil is determined by the level of the first leaf. At first, a mini-greenhouse can be organized above the tree, protecting it from direct rays and preventing too rapid evaporation of moisture from the soil. The trunk of a young plum is fragile, do not be too lazy to tie it to a peg driven in next to it. After about 1.5 months, the greenhouse film is removed from the top.
A little trick: plant several shoots at once for the experiment. If a self-infertile seedling is caught among the plantings, then being close to fruiting neighbors will definitely benefit him. This will allow pollen to be transferred more quickly from active ovaries to pacifiers.
The plum tree takes root better in deep holes - 30x50 cm (width and depth). The substrate is dug up and mixed with mullein and ash. The soil is spilled with a potassium solution and left to rise for a couple of days.
What is important to consider:
- The seedling is transplanted to a permanent place "fresh", that is, immediately after being removed from the previous hole. If he still had to stand and the root system dried up, soak him for a couple of hours in water;
- The stalk should be straight. Do not use forked or twisted specimens;
- Do not bury the root collar in the ground. If you ignore this rule, the trunk will settle into the soil some time after planting, which will slow down its growth. It is useful to dig in the trunk along the perimeter, pouring a small soil mound around it.
Planted on an open drainage area, every three years it is abundantly fertilized with humus, superphosphates and peat. The basic rule of care is to regularly water it as the trunk circle dries up. Try not to flood the ground, as a rotten root system can destroy the entire tree as a whole.
Plum care after planting
Now that the seedlings are grown and planted in the open ground, you can relax a little. Plum care after planting is not as painstaking as during the seed germination stage. For the first two years, the tree does not need any fertilizers. Quite enough those that were added at landing. The soil around the tree must be periodically loosened. But this must be done very carefully, since the roots can be injured. You should also be careful with the bark. If damaged, the young plum may die. When the first growth appears near the root, it should be removed, as it will take away strength and nutrients from the tree. At this stage, it is important to first strengthen the root system.
Water the tree as the soil dries up. The frequency of watering largely depends on the climatic conditions. If it is hot and dry, then water the tree more often, and if it is cool and humid, then less often.
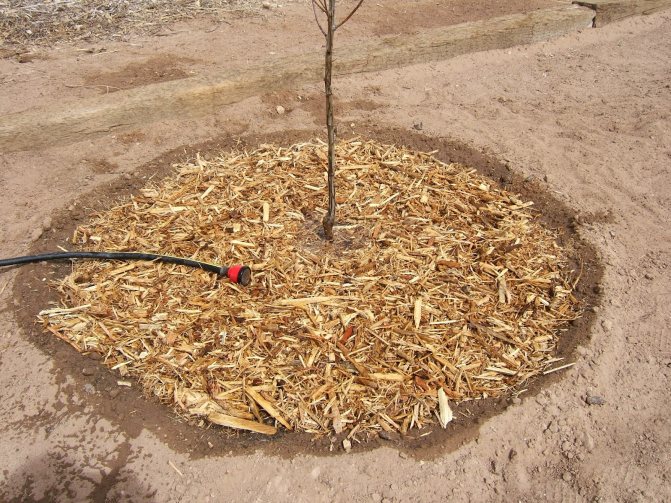
The first wintering for a tree is a test. After all the leaves have fallen off, you need to collect the plum branches and fix them. The ground around the tree must be insulated with mulch and covered with spruce branches. This will not only keep warm, but also save the tree from the attack of rodents that attack young trees in the first frosts.
Don't count on harvesting in a year. First, the tree should root well and survive several winters. In the best case, it will be possible to harvest the crop only in 5-6 years. The number of fruits and their quality will depend on how well the plum is cared for.
Growing a plum from a stone is difficult, but possible. To achieve good results, you must strictly follow all the recommendations. If the first landings were unsuccessful, do not be upset. You should stock up on planting material and try again. Persistence and proper care will help you achieve the desired result.
Is it possible to grow a plum from a stone and will it bear fruit
The answer to this question is unambiguous: a plum can be grown from a seed. This will take a lot of effort in caring for the crop, but the end result can exceed all expectations, or at least repeat the qualities of the mother plant.
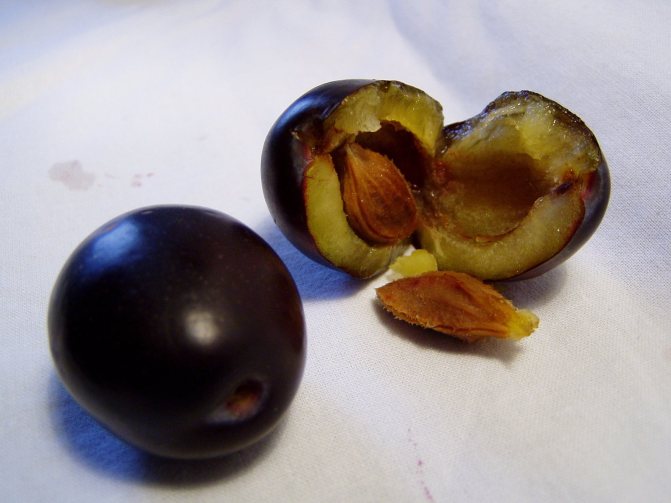
Did you know? Plum seeds contain the glycoside amygladin. This compound is capable of decomposition to form hydrocyanic acid, which is a strong cyanide. You should not use raw plum pits for food, and whole plum canned plums should be used during the winter months.
All operations necessary for growing a seedling from a seed are described in this article. An adult plum can be grown even by buying a few of your favorite fruits in a store or on the market.
Selection
The first step in the process is the selection of the variety. This stage is fundamental, because the result will depend on it. It is important to choose varieties that are resistant to crossing with others, so that you get a plant of a certain breed with edible fruits. Otherwise, the species can mix during pollination, and this will bring unexpected results, including the unsuitability of the fruit for human consumption.
The most favorable cultivars for cultivation, which have genes quite resistant to mixing, are:
It is important that the fruit, the seed of which is taken for planting, is ripe, and the tree on which it grew is adapted to the peculiarities of the climate of the territory.
The ripeness of the fruit is important because in immature plums the embryo has not yet been fully formed in the seed, which determines the physical qualities of the future plant. Only from fully formed seeds can a strong and fruitful tree be grown.
But also don't limit yourself to picking just one seed. It is better to germinate several at once, so that later there will be an opportunity to choose the most successful option.
Seedling
To ensure the same comfortable conditions, you should choose a suitable pot that is at least 20 cm in diameter. It is also important to pay attention to the composition of the soil layers.
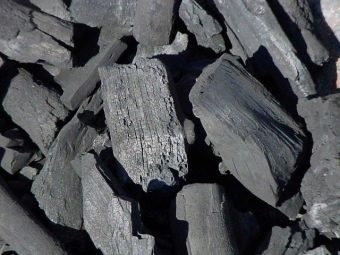
From 3 to 5 cm should be taken with broken brick or expanded clay. This will be the bottommost layer. This is followed by a layer of coarse sand, alternatively charcoal can also be used. The two lower layers not only ensure optimal air exchange, but also prevent excess moisture from accumulating at the roots. But also remember that the pot itself should be disinfected with a 3% formalin solution before adding all the necessary components.
The following components must be used as the main layer, mixed with each other in equal proportions:
- vermiculite;
- humus;
- peat (can be used as an alternative to leafy soil).
After you have placed all the potting soil in the pot, it should be watered thoroughly. The bone itself is placed in the central part of the vessel, pressing in about 5 cm deep. Then wrap the entire pot with plastic wrap, which will create a favorable microclimate. A sprout should appear within 45 days. But in order to grow it, it is necessary to regularly follow a number of procedures and comply with certain conditions.
- Airing. It is done by lifting the film and using a spray bottle.
- Good lighting. The pot should not be in a dark place. If the windows face the west or south side, then it is optimal to place the future drain on the windowsill. But if there is not enough light in the room, install additional fixtures such as fluorescent lamps or amplifiers that reflect the rays of the sun.
- Temperature and humidity. The first indicator should be between 20 and 25 degrees Celsius. If the air in the apartment is rather dry, you need to turn on a humidifier or spray moisture around the pot using a spray bottle.
- Watering. It should be carried out infrequently, but in large quantities - it is enough to water the soil abundantly twice a week. In this case, the water itself must first settle. To pour the optimal amount of liquid, place a special tray under the pot and pour until moisture begins to flow into it. The water temperature should be at room temperature.
- As soon as a sprout appears, it is necessary to introduce fertilizing. For this, nitrogenous fertilizers are used, which are introduced in three stages. Ammonium nitrate is also suitable, 30 grams of which should be dissolved in 10 liters of water. To feed one sprout, you will need about 100 ml of solution.
An important step is picking. It is carried out when two true leaves have not yet appeared, and is the pinching of 1/3 of the root. After pinching, the sprout is transplanted into a new soil with nutrients. This procedure is necessary for the plant to have strong roots in the future.
Remember that cultivated, and not wild, plums can only be obtained if the plant is transplanted into a larger container every 90 days. In the open ground, it is permissible to move the plum only a year after planting the seed.
At the same time, before planting, the plant undergoes a hardening procedure for a week. It is kept outdoors every day for three to five hours.