Growing flowers at home is not the most difficult task. However, some plants always feel great, while others have to throw another green pet that died after an unsuccessful transplant into the trash bin. So that after this procedure the plants do not die and bloom, it is necessary to follow the technology, take into account the peculiarities of soils, pots and avoid common mistakes.
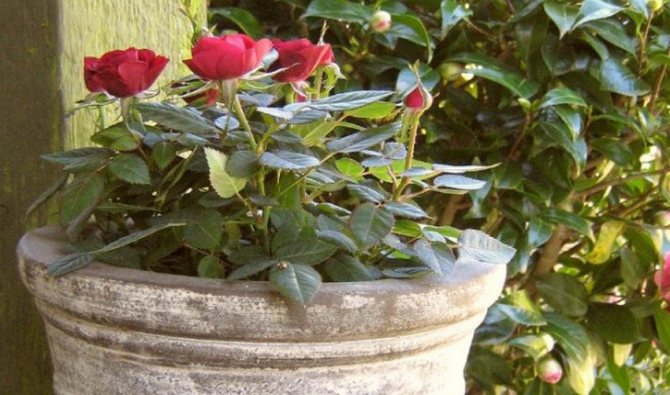
You can plant not only indoor plants in pots, but also outdoor plants. In the latter case, containers are installed on loggias, balconies, terraces, summer cottages and flower beds. Roses, tuberous begonias, petunias and viola grow well in pots. These colors require not only a lot of light, but also fresh air, which is usually not enough in the apartment.
If you plan to grow a plant in the house, then you need to pay attention to which side the windows face. In the north, unpretentious species such as cacti and succulents are grown. It is better to use the southern window only in winter, placing pots with thermophilic and light-loving subtropical plants on it. It's too hot on this side in summer for any flowers other than cacti.
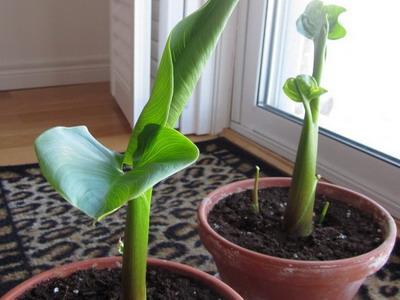
The best options for potted plants are west and east windows.
Potted flowers can be planted at any time of the year. The best time to divide and transplant most plants is in early spring.
A novice florist who decides to transplant his plants does not have to make his own soil mixture. Soil preparation is a rather difficult task that only experienced specialists can solve.
In the retail network, you can now find ready-made soil mixtures for almost any indoor and outdoor plants. They are inexpensive and are quite suitable for the amateur growing of home flowers. The most unpretentious ones can be planted even in universal and seedling soils.
Store mixes are usually already disinfected. They do not need to be watered with potassium permanganate, heated or otherwise freed from parasites and sources of infection: bacteria and spores of microscopic fungi. Also, you do not need to add fertilizers to them.
The trade network contains many pots and pots for indoor and outdoor plants. If you do not take into account the exclusive vessels made of materials atypical for growing (metal, wood, stone), then you have to choose between plastic and ceramics.
Plastic pots are inexpensive and lightweight. Growing indoor krupnomers - dracaena, ficus, zamioculcas, dieffenbachia - have to reckon with their size and weight. Therefore, for large indoor plants, it is better to purchase light plastic containers that can be moved around while caring for green pets. Sturdy pots made from this material are indispensable for creating vertical compositions.
Such vessels are not used when growing very tall plants, as they can tip over in a light container. An important disadvantage of plastic is that the material does not breathe, and the lack of air has a bad effect on the development of roots.
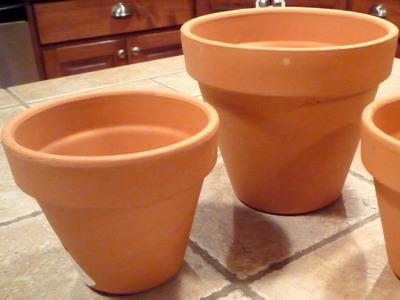

Clay and ceramic pots are suitable for growing all kinds of flowers. Clay is a porous material, if it is not covered with glaze, nothing prevents moisture from evaporating through the walls of the vessel.In the same way, air enters the pot through the pores, as a result of which the soil is saturated with oxygen, which is useful for the roots of the plant.
In the trade, you can find a fake - pseudo-clay containers made of gypsum. Such vessels are impervious to air and therefore lack the advantages of ceramic pots. You can distinguish gypsum upon impact, since it makes a more dull sound.
The disadvantage of a clay pot is fragility. If handled carelessly, it can easily crack. Many plants grow into its porous walls, which is why their roots have to be torn off during transplantation, causing injury.
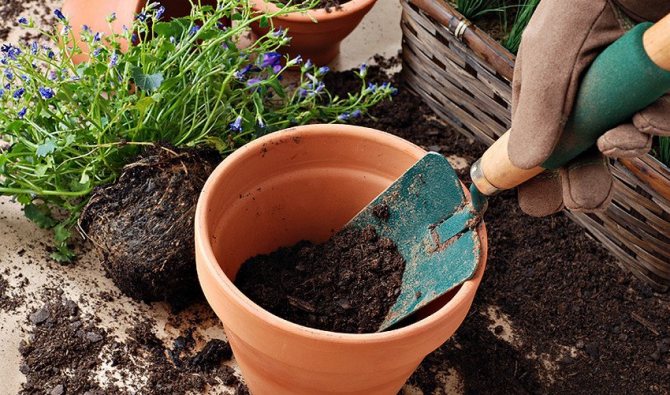
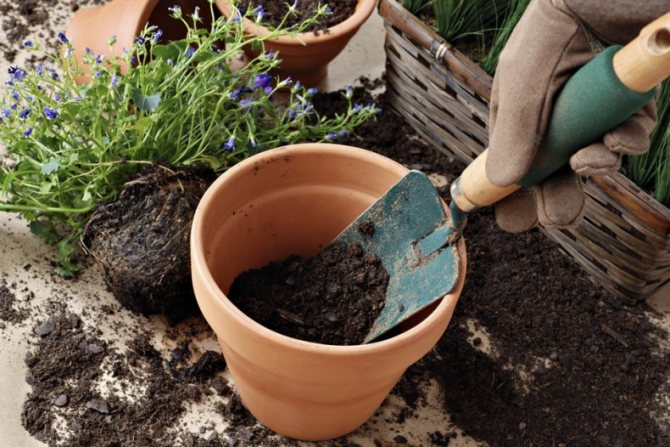
You can correctly transplant a green pet so that it feels no worse in the new pot than in the old one, as follows:
- 1. It is advisable to wash the container and let it dry.
- 2. Drainage is poured into the bottom of the vessel - ready-made expanded clay from a flower shop or small pebbles collected on their own. A layer on the bottom of the pot prevents stagnant water and root rot. The thickness of the drain depends on the type of plant and on the type of container. If the vessel has a hole at the bottom, then it is enough to fill in 1 cm of stones. If it is not there, it is better to make the layer thicker - 3-4 cm. The more the plant loves moisture, the thinner the drainage should be.
- 3. A little soil is poured on top of this layer and tamped. If you have to transplant a plant with a developed root system, then a mound is made in the center of the pot, on which the flower is placed so that the ends of the roots are below the stem and are evenly spaced. After that, they are finally covered with earth, making sure that the trunk is at the desired height.
Drainage is not used for very moisture-loving plants - cyperus, calla lilies. They like it when their roots are in excessively moist soil.
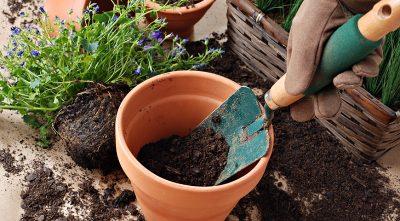

In order for the flower to take root quickly, it must be watered after transplanting. Water should be warm, separated from chlorine, preferably rainwater or distilled. The plant is gently humidified from a room watering can with a spray bottle. If the soil settles after watering, it is poured again to the desired level.
Most flowers feel better when the soil is sprinkled with expanded clay on top. It prevents moisture from evaporating and prevents the formation of a soil crust.
A freshly transplanted plant should not be exposed directly to a sunny window. It will be correct to place it for two to three days (until the roots take root and begin to actively absorb moisture) in a slightly shaded place where direct sunlight does not fall.
Despite the fact that the technology of transplanting indoor plants is simple, no one is immune from mistakes:
- Unsuitable soil. For capricious plants, the purchased soil must be adjusted. Also, soil mixtures produced with violations of technology need this. Such soils can be too dense or too loose. River or lake sand, perlite or vermiculite are added to dense mixtures. Too peaty light soil should be compacted by adding sod land.
- Partial transplant. Many people believe that a flower purchased in a store is already growing in an optimal substrate for it, and they try to preserve the maximum amount of "native" soil on the roots. This is a gross mistake. Plants sold in stores are in a substrate that is not intended for their full development. Its purpose is to provide transportation. Therefore, having purchased a plant in a store and delivering it home, you need to clean its roots from the substrate in which it arrived from a foreign or domestic greenhouse. To do this, take it out of the transport container and place the roots in a basin of warm water. After soaking, they are washed under a tap, finally freeing even from small particles of the substrate.
It will not be superfluous to treat the washed roots with a growth stimulant, for example, Kornevin or Gumat, but this operation is not necessary.
Read also: Home flowers bringing misfortune to the house photos
While the plant is soaking, a pot is prepared (drainage and substrate are poured into it), and then transferred to a new container. When transplanting your own flowers, you can use the same technology, but with one addition - in this case, the soil is not washed off from the roots, it is enough to shake it off and then plant it in a new vessel.
Planting a flower in a pot is easy. It is enough to try to injure the roots as little as possible, choose a container that is suitable in size and purchase ready-made soil in the store.
Indoor plants can be strikingly different from each other in appearance and in biological characteristics, but the rules for planting them are approximately the same. A properly performed procedure helps not only to increase the productivity of plants, but also protects them from the development of diseases, and also prolongs their life. What house flowers are best for your interior and how to plant them correctly, read below.
Basic rules for planting indoor plants
The basic rule applies to high-quality disinfection:
- soil;
- landing capacity;
- plant roots or seeds.
Planting should be carried out in accordance with the biological rhythms of the plants. Most often, the period favorable for the procedure falls in early spring, when the flowers gradually begin to come out of their dormant state. This applies to both planting cuttings and sowing seeds.

How to grow a flower from a cut flower
There are several ways to get a flowering houseplant. One of them is to germinate it in water. Cut the cuttings off the flower as described earlier. Then leave it in water for two weeks, changing the liquid once a day. As soon as the roots appear, the plant can be transplanted into the ground. When the first buds sprout, they need to be removed in order for the plant to grow stronger.
Did you like the article? Subscribe to the news and keep abreast of the most interesting and useful news.
Thank you.
We have sent a confirmation email to your email.
How to plant indoor flowers in a pot
Before planting a home plant, you need to familiarize yourself with the basic rules for choosing containers, preparing a soil substrate, and organizing microclimatic conditions.
Having received healthy cuttings or separated the children, you need to give them a two-hour bath in Fitosporin solution (10 g / 5 l of water). Cacti are planted immediately in the ground, and the cuttings are placed in water and await the formation of the root system.
What pots are best to plant
When planting, first of all, you need to choose a suitable container. Regardless of the type of plant, a new pot should always be 2 cm larger than the previous one in height and diameter. You should also focus on the size of the root system: a distance of 2-3 cm should be maintained from the root to the wall and bottom of the pot. soil, and in too large ones - they will redirect all forces to entwine the roots of an earthen coma and the development of a green mass. And in the first and second case, it is very difficult to wait for flowering. For young seedlings, small containers 5-10 cm high and 5 cm in diameter are suitable. For sowing seeds, it is better to take common oblong containers 10 cm high and 15 to 30 cm long.
The material from which the container is made must protect the root system well, be flexible in order to ensure the possibility of free removal of the flower. Containers made of plastic are best suited. Clay pots look nice, but they get very overheated in summer and overcooled in winter. Regarding the shape, you need to focus on the place of cultivation:
- for open terraces and balconies, it is better to take a pots;
- for an apartment / house, it is better to give preference to standard pots and containers.
There should be a sufficient number of drainage holes in the bottom of the pot - this will allow you to fully drain excess moisture and protect the root system from decay. In addition, drainage holes provide air access to the roots, which is very important in confined indoor conditions.
Soil preparation
The soil for plants should be:
- nutritious;
- breathable;
- loose;
- moisture-absorbing.
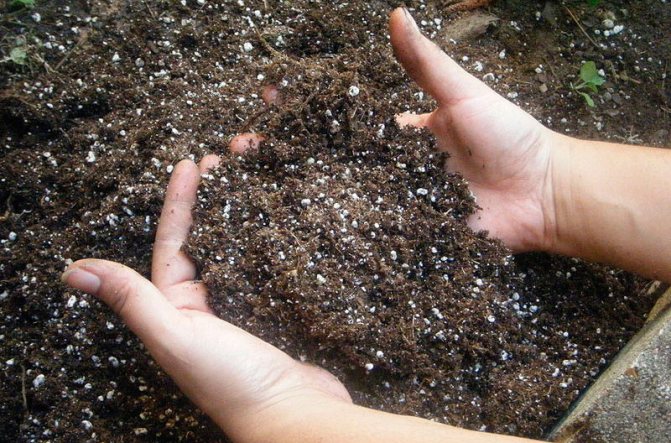
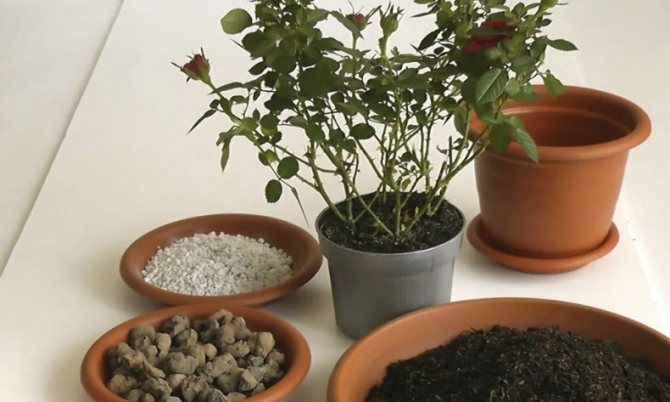
The easiest option is to buy the appropriate soil, adapted to the specific type of plant, in the store. When preparing the soil yourself, you should take into account the type of plants and the conditions of their natural growth. Epiphytes need substrates consisting mainly of tree bark with the addition of charcoal and sphagnum moss. For all others, soils are most often made up of:
- leafy sod soil - it can be taken in the nearest forest;
- peat;
- coarse sand.
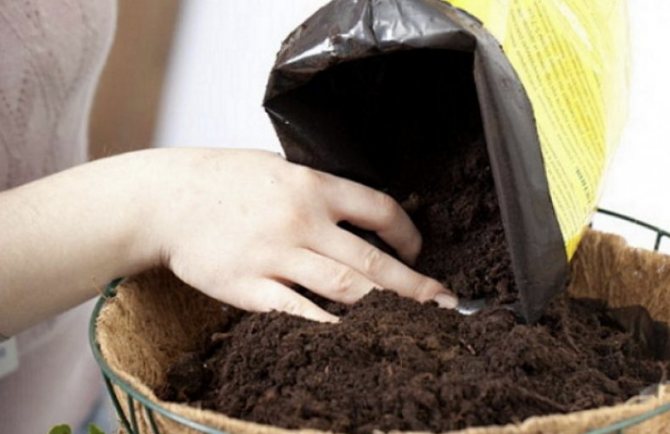

These are 3 main elements that are mixed in a 1: 1: 1 ratio. You can add 5-10% to them:
- perlite;
- vermiculite;
- sphagnum moss;
- wood ash;
- shredded foam.
You can combine all of these elements or choose one of them.
Video: How to choose a primer for indoor flowers There are several ways to disinfect the soil:
- Ignite in an oven at a temperature of + 100 ° C.
- Spill with hot ash solution. Add 400 g of ash to 10 liters of water, boil for 15 minutes, pour it hot into the soil and mix it.
- Spill it with a hot solution of "Furacilin" - put 1 tablet on 100 ml of boiling water. The same composition can be used to process a pot.
- Use a hot solution of potassium permanganate - 1 g of the substance is taken for 1 liter of boiling water.
- Fertilize the soil with "Fitosporin" - dissolve 5 g of powder in 10 liters of water, water the soil a week before planting.
Soil moisture before planting should be in the range of 50-60%. If the soil is dry, then a few hours before planting it must be watered with clean water, the temperature of which is + 30 ° C.
Ensuring optimal conditions
An optimal microclimate is very important for the plants after transplanting. They need to adapt to the new soil, and low or high temperatures, combined with inappropriate humidity, can provoke root rot and the development of fungal diseases.

Temperature
The optimum temperature for any color is from +18 to + 25 ° C. If you plan to germinate seeds, then the optimal indicator varies within +25. + 30 ° C.
Humidity
At the time of planting, the humidity should vary within 75%.
Lighting
After transplanting, the plants need diffused light and high-quality protection from direct sunlight. The optimal daylight hours for indoor plants is 10-14 hours, depending on their origin. If the seeds are sown, then lighting during the germination stage is not necessary.
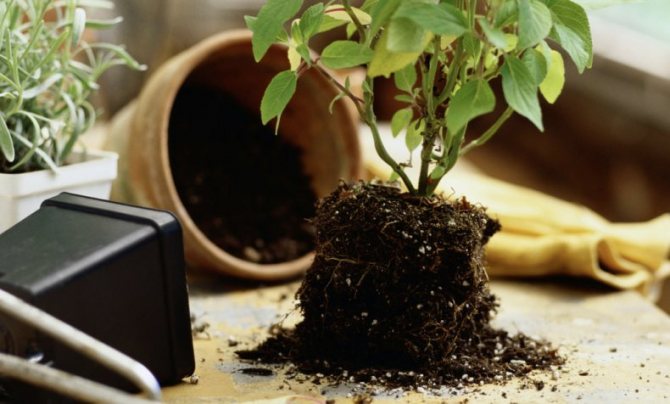

Planting a plant
The main stages of planting cuttings:
- Treat the roots of the resulting planting material with a mixture of Fundazole and wood ash (1: 1).
- Place a layer of expanded clay (1 cm) on the bottom of the pot.
- Lay nutritious soil on top of the drain, filling a third of the pot with it.
- In the central part, form a small mound and place the root system of the seedling on it.
- Sprinkle soil over the voids while leveling the plant along the root collar. The soil should cover the root itself and a distance of about 0.5–1 cm above it.
- Slightly compact the soil, place the pot in a shaded area and cover it with a transparent cap that can be made from a plastic bottle. Be sure to remove the cap from the neck to provide air access to the ground part of the plant.
- After a week, remove the cap and move the plant to its permanent location.
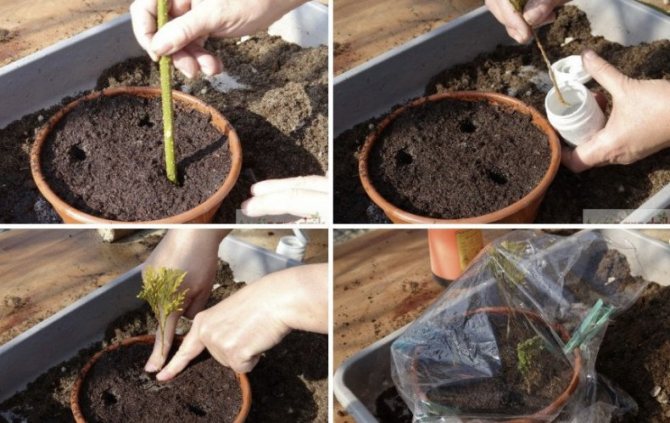

When planting seeds, you need to do the following:
- Prepare the container, lay the drainage layer.
- Then fill the entire container with soil and spread the seeds on its surface at a distance of 5 cm from each other.
- After that, the planting material is covered with a layer (1 cm) of soil or sand.
- The surface of the pot is covered with a transparent film or polyethylene.
- The container is set aside in a room with diffused light or completely darkened and the seeds are expected to germinate.
- Before germination, the plantings are aired daily for 15 minutes and, if necessary, moisten the soil from a spray bottle.
- After the sprouts appear, the shelter must be removed and the container installed in a well-lit place.
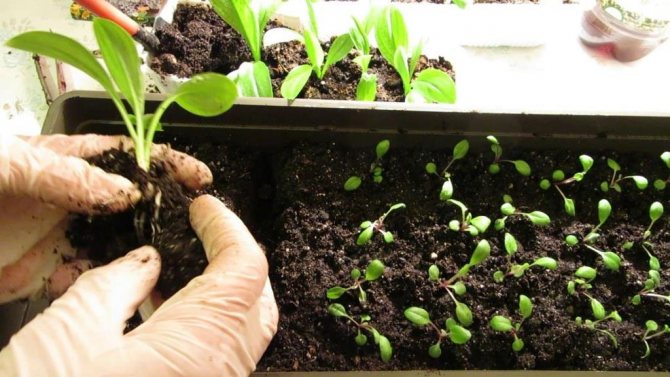
- Transplanting into separate containers begins with the appearance of 3-4 full-fledged sheets and when the sprouts reach a height of 7-10 cm.
Read also: Is it possible to dry mushrooms in the microwave
How to properly plant aquarium plants?
Priming
Aquarium soil is neutral, with a nutritious substrate, granular, earthy. This product can be natural, such as crushed stone, sand, pebbles and stones. Also on sale you can see the soil obtained after processing natural raw materials with chemicals. And one more group is artificially produced materials.
Most of the plants are attached to the ground, only a few are buoyant. The top layer should be fine gravel or sand. The substrate is selected based on the wishes of the breeder. For an aquarium, gravel with fractions of 3-4 mm and river sand with fractions of 1.5-2 mm are optimal. Fine sand such as sea sand or quartz is inappropriate.
The soil should have normal porosity, an appropriate nutrient medium and as little limestone as possible. Dark color and absence of harmful impurities are welcomed.
Before placing the soil in the tank, it is washed and boiled for about 15 cans with stirring. Alternatively, for preparation, you can use a warm solution with 25% hydrochloric acid, this allows you to fill the material with potassium useful for plants. After such treatment, a triple rinsing is required.
There are plants that can only be found in soft water. The soil is suitable for them, cleared of magnesium and potassium salts. This is done with sulfuric acid. When the aquarium vegetation requires an anaerobic environment, then planting is done in clay pots. A good primer is usually unpainted. Most plants are comfortable with a soil thickness of 5-7 cm.
The soil collects bryozoans, fungi and bacteria on its surface. It promotes the processing of fish waste products, filters water.
For planting plants, it is preferable to use natural soil, for example, small stones, quartz and quartz sand, lava, volcanic sand, pebbles. Application without treatment is possible. This material lacks nutrients. Plants planted in such soil give flowering after six months. At this time, enough silt will appear.
It is undesirable to use glass, expanded clay, layered soil, garden soil for planting plants. Artificial multi-colored shop material made of plastic and glass is appropriate.
Fertilizer
Aquatic plants will not do well with regular garden flower food. Against the background of nitrogen deficiency, aquarium plants suffer - their leaves collapse and fall off. When there is not enough potassium, brown spots and holes appear on the foliage.
With iron deficiency, intense yellowing of the leaves is observed. For plants, calcium and boron are also important, without these elements, deformation of plants occurs, small leaves that turn white along the edges appear.
Fertilizers are applied to the water in strict accordance with the attached instructions. The most significant factors are the volume and types of vegetation, carbon dioxide nutrition, the nature of lighting, and the properties of water. Novice aquarium enthusiasts will not be mistaken if they start with ready-made fertilizers.
Modern nutrients are available in liquid form, as well as in the form of tablets or capsules. The liquid is poured into water, this fertilizer is useful for floating plants.Tablets and capsules are placed in the aquarium soil, they feed the roots well. There are also clay balls on sale, they contain trace elements, birch coal, sapropel, peat.
Before starting the aquarium, until the vegetation has adapted, usually no additional feeding is added, only potassium is used. It is also obvious that it is useless to add additives to an unbalanced aquatic environment. Therefore, you must first set all parameters correctly. Care should be taken when adding different products together, it is worth checking the compatibility in advance, and in the worst case, a precipitate is formed that does not dissolve.
At the beginning, the dosage of the new top dressing should be small, it is reasonable to add a third of the usual dose. So you can observe the changes. In case of an overdose, algae begin to multiply actively, which is undesirable.
As a rule, macronutrients are added in the dark, and micronutrients in the morning. Nutrients have a delayed effect, after about a month, changes appear.
Examples of well-known manufacturers of aquarium food for the growth of beautiful and healthy plants:
- Tetra;
- Aqua Medic;
- Florastim;
- Sera;
- Aquarium Pharmaceuticals;
- Tropical;
- AquaPlants;
- Zooworld;
- Dennerle.
Lamps and light
Daylight hours in the aquarium should be close to the natural environment where the plants live. For example, for a tropical aquarium it is 12 hours. With a lack of light, plants grow slowly, their leaves fall off. Due to the excess of light, aquatic vegetation can also suffer and blue-green and green algae will begin to grow.
Today, fluorescent, LED, metal-halogen, mercury-organic lamps are popular. When choosing lighting, you should build on the depth and volume of the tank, plant varieties.
For aquariums high up to 50-70 cm, it is advisable to use mercury-organic lamps. There are 80 and 125 watts of power. The light from the lamp reaches the bottom.
For an aquarium with a depth of 1 metric, metal-halogen lamps are needed, they are not cheap and give good light output, color rendering and intensity.
It should be borne in mind that individual plants do not like bright light. And some of them can change their appearance under the influence of light. Most species thrive at 0.5-0.8 watts per liter. When buying an aquarium with built-in lighting, you need to match the plants to the existing environment.
Aquariums with dense vegetation require at least 0.8 watts of light per liter. The best choice for a home herbalist (a water reservoir inhabited by plants) is a special phyto-lamp.
Water parameters
The total hardness (GH) of the water should be 6-8 degrees. Plants do not need a too soft environment, and the maximum show is 15 degrees.
The temporary hardness (KH) of the water is also important. The indicator of RN and KN are interrelated. If the KN is equal to 2-4 units, then the PH should be equal to 6.6-7.5 units. This environment is good for vegetation growth.
You will also have to monitor the pH level, the best range is 6.6-7.5. In such conditions, plants grow well and absorb CO2 as much as possible.
There must be an optimal concentration of nutrients in the water, therefore, all fertilizers should be applied in a timely manner. The average temperature is 24-25 degrees. If it drops below 24 degrees, then the plants may grow sluggishly, less algae appears. When the temperature exceeds 25 degrees, algae grow intensively. In the first week of a herbal tank's life, it is recommended to start at 22 degrees and gradually increase the degree.
Houseplant care
After planting, you need to provide plants with optimal care. Usually it is not particularly difficult and implies:
- applying dressings in accordance with the stages of the growing season and the type of plants;
- moistening the soil;
- timely transplant;
- formative and sanitary pruning.
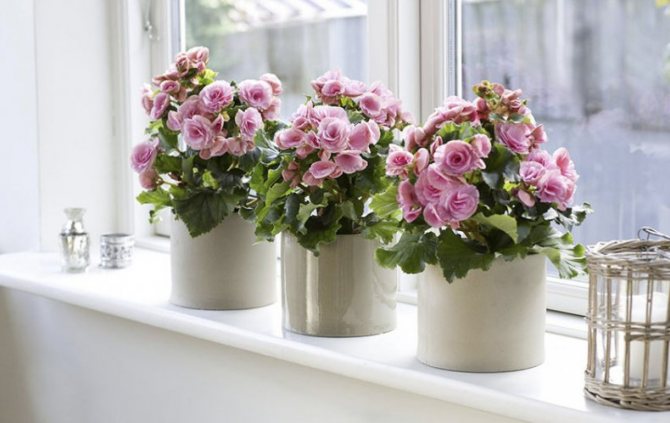

Fertilizer
Top dressing is applied throughout the entire phase of the active growing season, starting from the exit from the dormant stage. When planting cuttings, it is meant to carry out the first feeding after the appearance of new leaves. Plants obtained from seeds are fertilized for the first time after the disclosure of 2 full leaves (not cotyledons).
At first, plants are fertilized with compositions containing growth accelerators - for example, "Epinom": 2-3 drops of the drug per 1 liter of water are enough. The solution is sprayed on the ground part of the plants and the surface of the soil. The assimilation of the drug by the plant organism takes 2-3 days. It will be effective not only at the initial stage of growth, but also in situations where plants have experienced stress (freezing, sunburn, treatment of diseases of the root system, etc.). You can add the drug every 10-14 days.
In the future, it is better to use products specially adapted for specific plants. At first, the dosage is reduced by half of that indicated in the instructions, each time increasing it gradually so as not to burn the roots.
Video: Effective dressing for indoor flowers From organic matter, wood ash is a universal fertilizer - it not only enriches the soil with nutrients, but also serves as a quality protection against the development of fungal diseases and the spread of pests. It can be used in powder form, dusting the soil, or in solution (400 g / 10 l of water). The solution can be sprayed on the ground part of the plants and for watering.
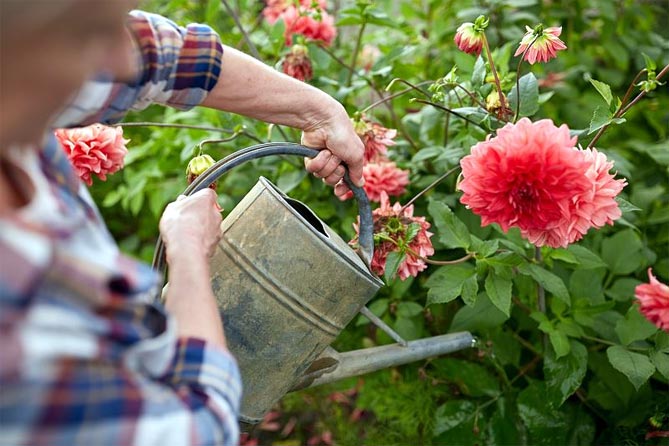
Watering
Watering any representatives of the flora is carried out after the top layer of the soil dries up. The only exceptions are succulents and cacti - they can be watered, even in hot weather, once a month.
Watering can be done by bringing in moisture along the edge of the pot so that the water does not get on the plants, or you can pour it into the pan. If moisture is introduced through the pan, then after 15 minutes, the excess water must be drained.
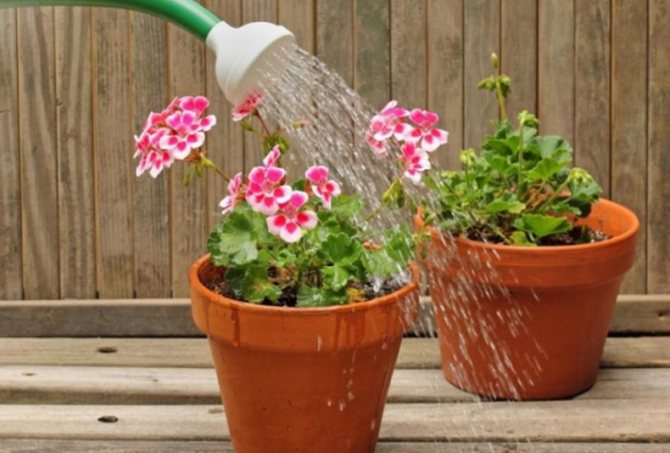

Moisture-loving specimens in the summer need spraying every 2-3 days. After carrying out the manipulation, it is imperative to make sure that moisture has not entered the leaf outlet, otherwise the risk of developing leaf rot increases.
The temperature of the water for irrigation and spraying should correspond to the ambient temperature.
Pruning
Pruning should be done in early spring. Specimens with a lush green mass form into 2 stems, pinching the growing point in the first year. They also do the next year, pinching the growth points on 2 formed shoots.
Also, plants periodically need sanitary pruning, which is carried out as needed at any time of the year. It involves removing:
- faded buds;
- extra shoots;
- dried or mechanically damaged shoots;
- dead leaves;
- daughter specimens for further reproduction (cacti, succulents, epiphytes).
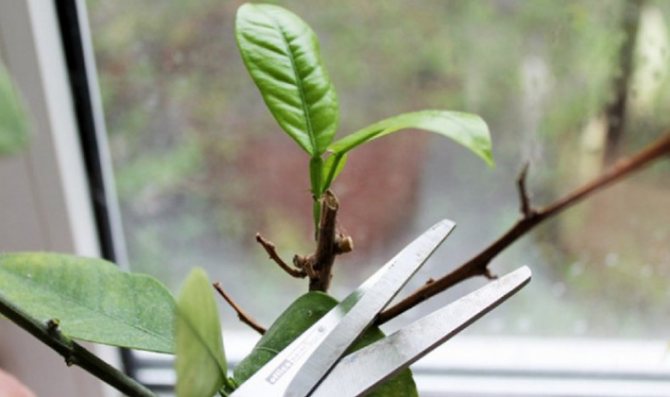

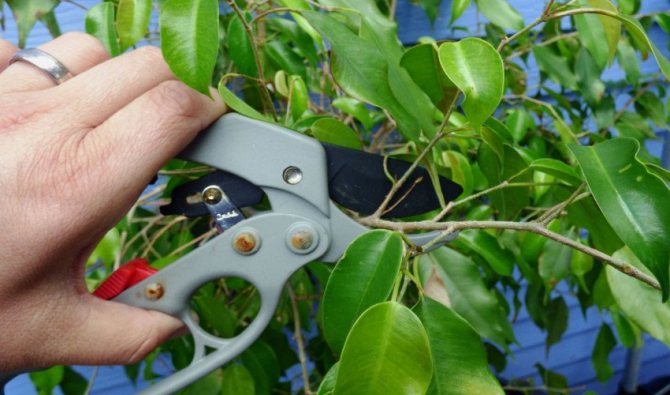
All manipulations should be carried out with gloves using a clean, disinfected instrument. For trimming, you can use sharpened scissors or an appropriately sized pruner.
Transfer
First, you need to figure out exactly when the flower needs to be transplanted. There are 2 types of transplant work, which are carried out depending on the condition of the plants and the growing season:
- urgent - such works include transplanting after purchase, in the presence of diseases, rotting roots, an excess of moisture in the soil, as well as in case of severe depletion of the soil;
- planned - is carried out most often 2–3 weeks before coming out of dormancy in early spring.
The planned picking is carried out depending on the age. Young specimens are transplanted annually, preferably at the same time. For specimens that have reached the age of 3-5 years, this procedure can be performed every 2-3 years. During periods when transplanting is not carried out, you need to remove the top 2–5 cm of soil, depending on the type of root system, and replace it with a new nutrient substrate.
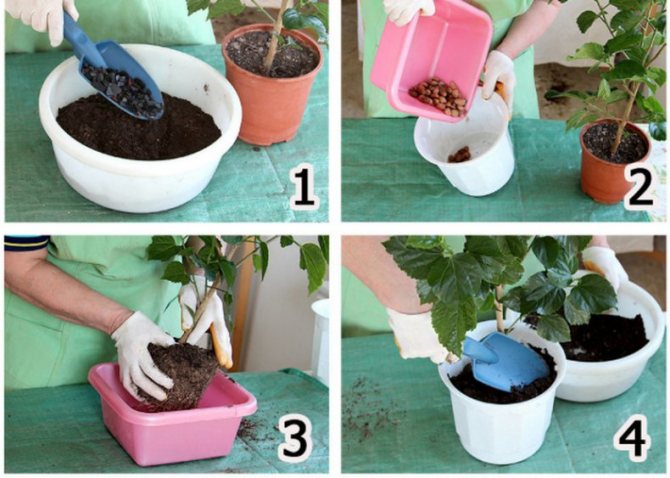

The transplant is carried out by the transshipment method with the preservation of the earthen coma. To simplify the task, you can water the plants a few hours before transplanting, if necessary. After removing the plant from the pot, the root system is examined. The dried ends are removed, and the cuts are treated with a mixture of Fundazole and wood ash.
If there are lesions of the root system or the soil is too depleted, then the earthen lump must be removed. First, the soil is carefully separated by hand, then the roots are washed under running water. The damaged parts of the root system are removed and treated with "Fundazol" with ash.
Medium and background decoration
Select plants for the middle and background plan based on the volume of the aquarium, because plants suitable for small aquariums in large tanks are suitable for decorating the center.
Stem plants are recommended for filling the center and back wall.... The voluminous fluffy vegetation planted with separate bushes looks very impressive.
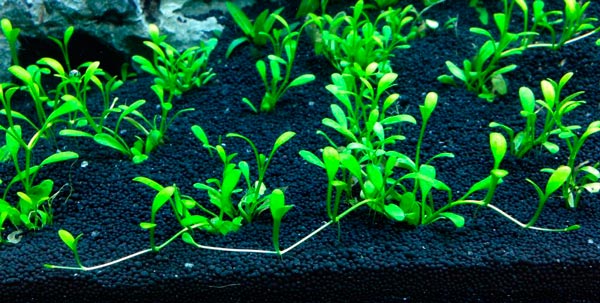

Give preference to the following plants: Hemianthus micrantemoides, Reineck's alternantera, Hemianthus micrantemoides, Caroline Bacopa, Ammania graceful, Bacopa Monier, polyseminal hygrophilia, Shady micrantemum, dimorphic hygrophila.
Various types of tall Echinodorus and Vallisneria can be placed in the background of the aquarium.
Attention! Plants should be planted after installing aquarium equipment (aerators or pumps, etc.). This way you will preserve the integrity of the root system and will not harm the plant stems.
It should be borne in mind that many plants do not get along side by side, so when buying, you need to consult with the seller... Of all the splendor, lovers of the underwater tropics distinguish several species: echinodorus, vallisneria, tonina, ambulia, aponogeton and ludwigia. Javanese moss, bolbitis, and Thai fern are also used.
They are used to create visual deepening. They are hung on the back wall using a fishing line that is attached to suction cups. Growing plants form dense thickets, giving mystery and special charm to the underwater world.
Another important point is the placement of large-leaved and tall plants. They create a large shadow around themselves and slow down the vital processes of neighboring plants.... They are seated in the corners along the back wall. If necessary, the stems of some species are pruned. This is done in accordance with the recommendations of specialists.
An unexpected but effective solution to the design of the central part is paths from plants of the same species. This is another way of visual deepening, which gives a special grace to the underwater tropics.
The sprouts are planted diagonally (45 degree angle) from the front wall to the back, creating a sloping slope with the help of an embankment from the soil. Looks especially impressive in aquariums over 300-400 liters. No more than 2-3 tracks are allowed, depending on the volume of the container.
So that they do not merge, it is advised to use different vegetation or one type of different colors. The classic version is the purple lobelia path, a low-growing, slow-growing plant.
Common mistakes
Major mistakes when planting / replanting and leaving:
- landing too deep;
- attempts to pull out or pick out a plant from an earthen coma with a sharp object;
- poor-quality soil and pot processing before planting;
- incorrect selection of the size of the container;
- non-compliance with the rules regarding the adaptation period after transplant;
- abundant watering immediately after planting - it is permissible to spray the soil from a spray bottle, and full watering should be started only after a week in small portions;
- neglect of the rules regarding the organization of the drainage system - an insufficient number of drainage holes in the bottom, too small a layer of expanded clay.
Errors when feeding flower seedlings
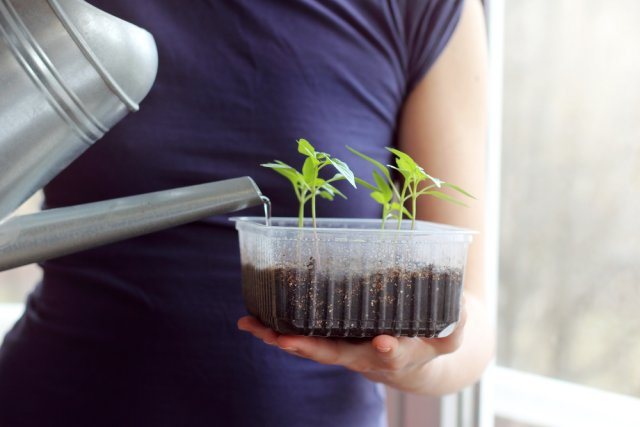

Most often, growers make several basic mistakes when feeding:
- Top dressing in the evening. Plants respond best to feeding made in the morning, when the seedlings "rest" after an active nighttime growth.
- Incorrect technique. When applying fertilizers, do not allow them to fall on the leaves or stems of the plant, as this can cause burns. That is why fertilizers are applied strictly at the root.
- Early application of potash fertilizers. Fertilizers containing a large amount of this substance can destroy the plant, which is in the phase of the emergence of the first shoots and the active formation of the root system.
- Using the "wrong" water. Water is best suited for the cultivation of fertilizers, which in its composition is as close as possible to natural conditions, i.e. rain or melt, but only if it was taken in an ecologically clean area. Alternatively, you can use tap water that has settled for several days (of course, if you are sure of its quality). If in doubt, it makes sense to use a filter. Please note that during the boiling process, the liquid loses oxygen and this negatively affects the seedlings.
Growing flower seedlings is a responsible business and requires a serious approach. And additional feeding will be a real help for getting healthy plants. Follow the rules of fertilization, and the result will not be long in coming!
What flowers can not be planted at home
When choosing flowers for home growing, it is worth approaching this issue from a scientific point of view. Some of the flora can be poisonous, allergens, and emit a suffocating aroma.
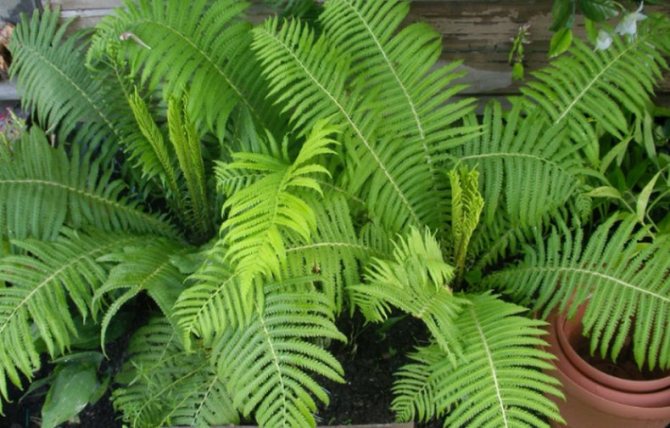

All types of Euphorbia are poisonous. When the stems or leaves break, they secrete a white "milk", which, when it gets on open skin areas, causes an allergic reaction, accompanied by hyperemia, itching, and tingling.
You should also be careful with cacti, which have many sharp thorns - they need to be kept out of the reach of children.
Allergen plants include:
Helpful Tips for Beginners
Here are some useful recommendations for novice florists:
- Consider your choice of colors for your home, especially if you have children or pets. Explore all the features of a particular specimen, its pros and cons. Also evaluate the possibility of organizing optimal microclimate conditions.
- For planting, use fresh nutrient soil, formulated in accordance with the biological characteristics of the plants.
- Having brought a new representative of the flora home, do not put it right next to the already existing specimens - in the substrate and on the plant itself, there may be spores of fungi and pests that are invisible to the naked eye.
- When the first symptoms of disease and pest damage are detected, the infected specimen should be removed to another room, appropriate manipulations should be carried out to eliminate the problem and all healthy flowers should be treated with prophylactic agents.
The correct planting of domestic representatives of the flora is a determining factor in maintaining a consistently high resistance of the plant organism to diseases and pests. The main task of the grower is to adhere to the elementary rules of agricultural technology.
Indoor plants are divided into 4 large groups and numerous species, each of which requires certain conditions of maintenance and care (temperature, humidity and lighting, watering regime, soil and pot size, frequency of fertilization, and so on).
But, despite such a variety of plants, it is quite possible to single out the basic rules for the care and maintenance of home flowers, relating to all or at least most species and groups. This applies to the choice of soil, pots, drainage and the very process of planting / transplanting / handling flowers. We will consider how to plant a home flower correctly in this article.
Read also: How to close the inspection pit in the garage photo
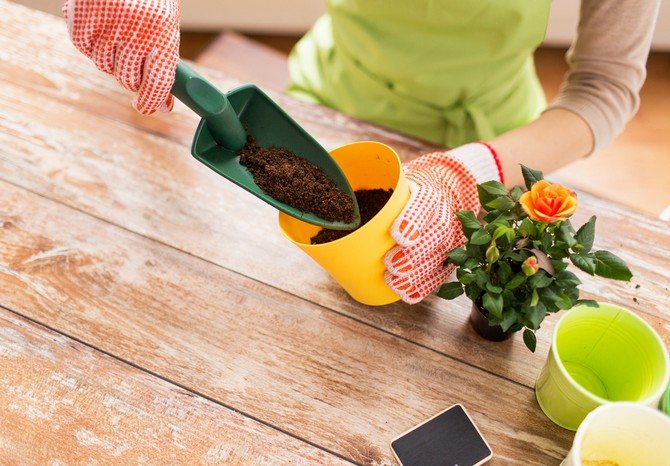

Features and rules for planting indoor plants
Correctly carried out planting of indoor flowers can provide them with the best possible start for further growth, development, flowering and even fruiting. It includes:
- Selection of a suitable store soil in composition or independent preparation of a soil mixture from individual components.
- Selection of the volume of the pot, corresponding to the size and degree of development of the root system of the flower, taking into account its future parameters and requirements for active growth.
- Selection of drainage material, which must be placed at the bottom of the pot before planting the plant.
- Compliance with the correct technology for planting, transplanting or transshipment of plants at home.
Let us now consider in a little more detail each of the above points.
Soil selection
Each potted crop may require a different soil composition, so the soil for planting flowers should be selected depending on the plant being transplanted. In flower shops, either specialized soils are sold (for ficuses, palms, violets, cacti, begonias, etc.), or universal (for decorative leafy, decorative flowering, cacti and succulents, etc.).
Knowing the peculiarities of growth and soil preferences of the flower, you can not only choose the right ready-made soil, but also improve the quality of the universal one - add various rippers (peat, coconut, perlite, vermiculite) and vermiculite to the composition.
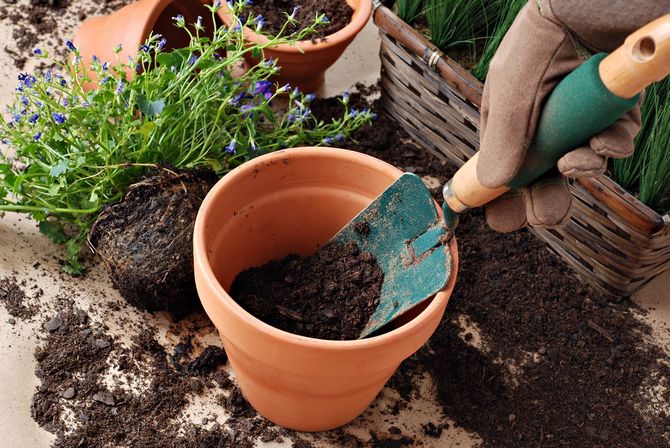

Choosing a pot / planter
In flower shops today there is a huge variety of pots and planters. What is the difference between a pot and a pots? The flowerpot has one or more drainage holes on the bottom, which are designed to drain excess water when watering the plant.
The planter does not have holes at the bottom and is used not for planting flowers, but for decorating the interior. It can be completely carved, woven from a vine, carved from stone, made from wood, metal, plastic, glass, etc.
Also, a pots of a certain shape can be hung on the wall, and if there are special holes / hooks / ears, they can be hung with a cord from the ceiling (window, terrace beam, etc.) and a pot with a flowering ampelous plant can be placed in it.
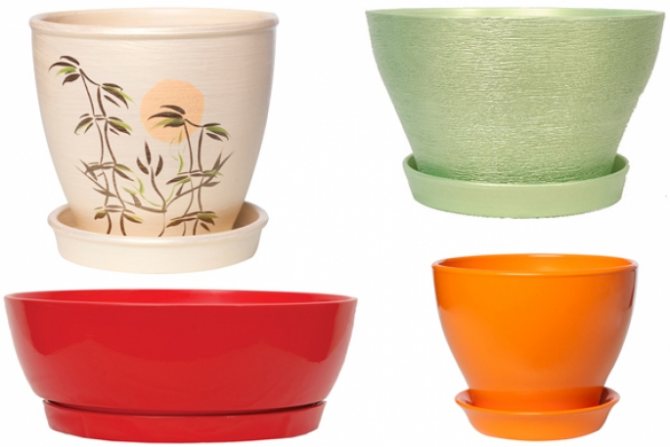

The assortment of flower pots is no less wide and numerous. It includes products from:
- Clays. The finished product can be fired, painted, glazed or without any decoration on the outer surface. Clay pots are usually made in standard shapes and proportions, with a height to diameter ratio of 3: 1. A simple clay pot is the most environmentally friendly, has a porous structure and allows air to flow well to the root system. Of the minuses, one can note the very rapid drying of the earthen coma in hot conditions, as well as a quick loss of the appearance of the clay pot (the appearance of streaks and stains, the absorption and deposition of salts).
- Ceramics. The main advantage of ceramic pots is beauty and grace. Despite the fact that they are made of natural natural material, the glazed coating inside and outside does not allow the roots of the flower to breathe, and the walls - to evaporate excess moisture during watering. In addition, the glaze releases components harmful to the growth of flowers into the soil, and the pots themselves are quite expensive, heavy and fragile to use.
- Plastics... Plastic products are easy to use and care for.Plastic walls do not allow air to flow to the roots, but this disadvantage is more than compensated for by the presence of numerous drainage holes. An earthen lump braided with roots can be easily removed from a plastic container for transplanting a plant, for this it is enough just to wrinkle the walls of the pot with your hands. The palette of colors from standard black to bright and multi-colored can decorate any window sill with flowers.
- Glass / plexiglass. Glass and transparent plexiglass pots are used by indoor growers mainly for growing orchids. They let in the sunlight necessary for the orchid roots, and also allow you to visually monitor the state of the substrate and the root system of the flower. The pots are environmentally friendly, relatively durable, do not react to fertilizers. The downside can be the lack of drainage holes, the need for exclusively top watering and the likelihood of flooding the plant, if you do not remove excess water from the substrate.
- Metal... Metal pots heat up quickly and cool down just as quickly, which can lead to overheating or hypothermia of the root system. It is better to use them as an original planter for a high-tech interior.
- Wood. Wooden pots are environmentally friendly and aesthetic, they can be of any shape - from polygonal to spherical. It is best to use large floor pots made of wood for planting large decorative leafy plants.
- Stone. In a pot made of natural stone, the plant will be uncomfortable - the stone will either overheat or cool the roots of the flower too much. The stone can be used as a decorative element (stand / vase / flowerpot) or in the form of large flowerpots for planting large-sized plants.
- Pressed peat... Peat pots are indispensable for planting seeds of plants with a fragile and vulnerable root system. A young sprout can be planted in another container without removing it from the peat pot. This minimizes the risk of damaging fragile roots.
Perennial flowers for sowing in July
What flowers can be planted with seeds in open ground before winter
If the sowing falls in July or August, then, first of all, you need to remember that during this period there is very hot weather, therefore, the soil where the seeds are sown should not be allowed to dry out. For flowers growing in a flower bed, even drip irrigation will be enough to keep them fresh and pleasing to the eye.
Perennial garden flowers in July have a significant advantage over annuals. First of all, it is that they have been growing in the same place for several years. Secondly, they have the ability to tolerate frost well, therefore they easily tolerate winter. Thirdly, such plants throughout the entire period of their life fully retain the qualities of ornamental plants.
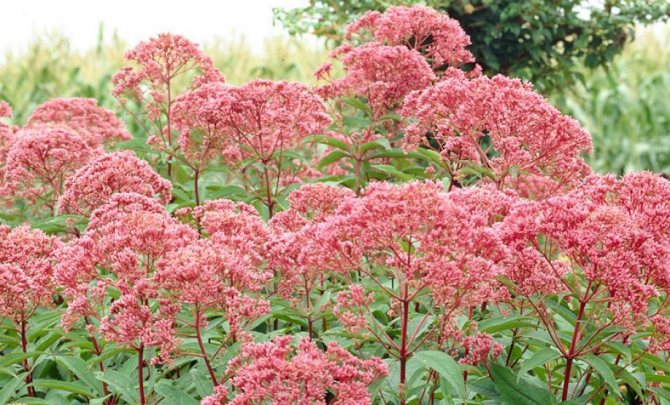

Perennial flowers for sowing
If gardeners want to decorate their flower beds as early as possible, then perennial flowers are perfect for this, which have not only beautiful July flowers in the garden, but also decorative leaves. So what perennial flowers can you plant in July?
These plants include the stock-rose, it is also called mallow. This flower takes many people back to childhood and evokes the memories of a small house in the village, decorated with these flowers. Modern flowers have a large number of varieties with double flowers that have a huge assortment of different colors and shades. Mallow blooms from early summer to late autumn.
Those who prefer orchids can plant tricyrtis in their beds. This flower looks very much like an orchid. You should know that this plant is very demanding to care for. But, nevertheless, it is gaining more and more popularity in regions with a harsh climate. The first flowering occurs already in the second year after sowing.The only condition for growing a tricyrtis flower is the absence of drafts and stagnant water in the root zone. For good and comfortable growth, partial shade is suitable for this plant. It begins to bloom from the first days of July until late autumn.
On a note! The garden will become even more beautiful if you plant a steep in it. The plant grows two meters in height. Its uniqueness is that it blooms especially. Its life period is durable, while the shrub does not grow throughout the territory. He feels great near water bodies.
If you are interested in what flower seeds can be sown in July, then, in addition to the steep, it is recommended to plant from tall plants in the garden:
- basilist,
- helenium hybrid,
- veronica long-leaved.
What is drainage and what is it for?
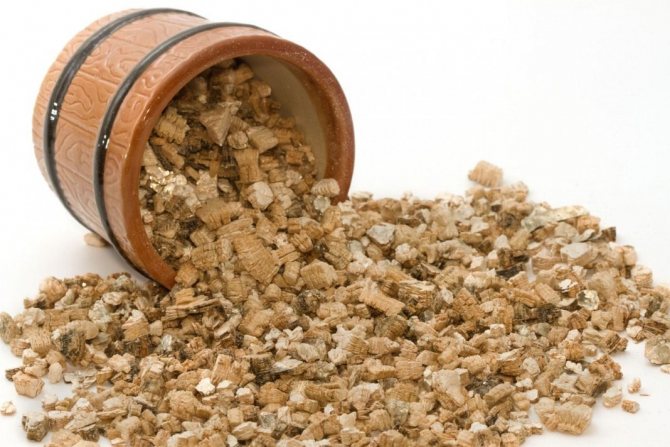

Drainage is an inert material that is placed at the bottom of the pot when planting. It is necessary to drain excess water from the earthen coma and plant roots when watering. As drainage, they mainly use small pebbles, clay shards, pieces of broken brick, coarse sand, expanded clay of various fractions, crushed foam, and in some cases sphagnum moss.
Types of aquarium plants
The following types of vegetation in the aquarium can be distinguished:
- mosses and ferns - there are no full-fledged roots and leaves, there is no flowering, no care is needed, they grow in different conditions, are unpretentious, they perfectly decorate the aquarium (azolla, bolbitis, cladofora);
- stem plants - are distinguished by the presence of a trunk (alternantera, tradescantia, rotala);
- rosette plants - do not have a stem, foliage grows from one point, forming a rosette (Cryptocoryne, Echinodorus, Vallisneria);
- ground plants - planted in the ground (hygrophila, kabomba, echinodorus);
- unpretentious plants - require a minimum of attention (nayas, hornwort, elodea);
- floating plants - float freely on the surface (duckweed, salvinia, bog flower);
- ground cover plants - very undersized up to 10 cm, their shoots and roots beautifully envelop driftwood and stones, decorate the facade (riccia, sitnyag, hemiantus cuba);
- fast-growing plants - they grow rapidly, absorb organic and inorganic substances, enliven the landscape (ludwigia, lemongrass, ambulia);
- meristemic plants - they are obtained through microcloning, they are identical to each other, not susceptible to snails, algae and fungi.
Planting and caring for indoor flowers in a pot
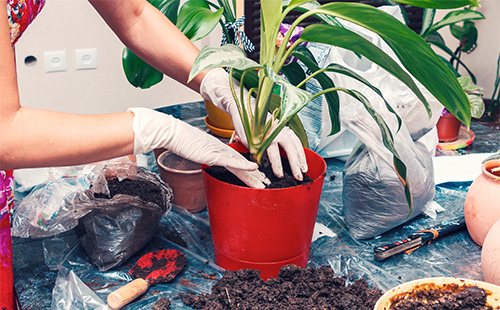

When should a plant be planted in a new pot?
1. The shop flower is often in a pot with shipping soil. It is transplanted 1-2 weeks after adaptation to home conditions in fresh and nutritious soil.
2. House flowers are transplanted when the root system has fully mastered the volume of soil in the pot. It is easy to notice by the rapid drying of the soil after watering, as well as by the roots peeking out of their drainage holes.
As a rule, it is better to transplant plants in the spring, when they wake up after a period of dormancy and start growing. At this time, for active growth, they need soil rich in nutrients and trace elements. Ornamental flowering plants can also be replanted after flowering ends. Flowers with buds are not transplanted, but transferred into a larger pot with the addition of fresh earth, without destroying the earthen lump braided by the roots.
How to properly plant a plant in a new pot?
At the bottom of the pot, place a drainage layer about 1/3 or 1/4 of the pot. Next, a layer of fresh earth is poured and a mound is formed. On the mound, the roots are carefully spread and the earth is poured up to the root collar of the plant. The earth must be lightly tamped, watered a little and put the pot in a permanent place. Fertilizer at this moment is not applied, and the care is carried out as usual. For better adaptation, it is possible to spray the plant with a biostimulant Epin or Zircon.
Seed selection and preparation for sowing
How does growing healthy and strong seedlings begin? With a selection of quality seeds! Purchase seeds from large and time-tested producers.
To test the seeds for germination, place them in a container of water. If the seed drowned, then it is viable. However, this method does not give a 100% guarantee of success.
When choosing plant species, be guided not only by your taste, but also by experience. If you are a novice florist, choose flowers that are not difficult to care for, such as Drummond's phlox, ornamental sunflower, snapdragon, datura or gazania. More experienced can handle eustoma, kobeya or aster.


Consider how many boxes of seedlings or cups will fit on the windowsill. Don't plant seeds too thickly. The seedlings will stretch out, the plants will be weak. When choosing types and varieties of flowers, carefully read the growing conditions on the package with seeds.
Valentina Kravchenko, expert
To prevent diseases and harden the seeds of annual carnations, asters, levkoy and other plants, carry out such a treatment. In the afternoon for 12 hours, soak them in a weak solution of potassium permanganate with a small amount of boric acid. And in the evening for another 12 hours, place the container with the solution and seeds in the refrigerator. This procedure can be carried out several times - until the moment when the seeds increase in size and begin to germinate.
Some seeds, for example, lavender or peony, require preliminary scarification - about a month in the refrigerator, or even up to a whole year. There are also hard-shelled seeds that need to be filed. Sometimes the seeds are treated with growth stimulants.
Some growers, immediately before sowing, dust the seeds with a fungicide, pouring a pinch of the drug into a bag with seeds. Observe precautions - gauze bandage on the face and rubber gloves on the hands.
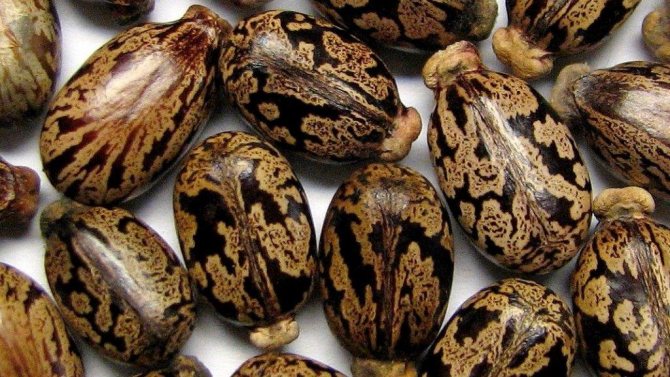

Sowing dates of seedlings
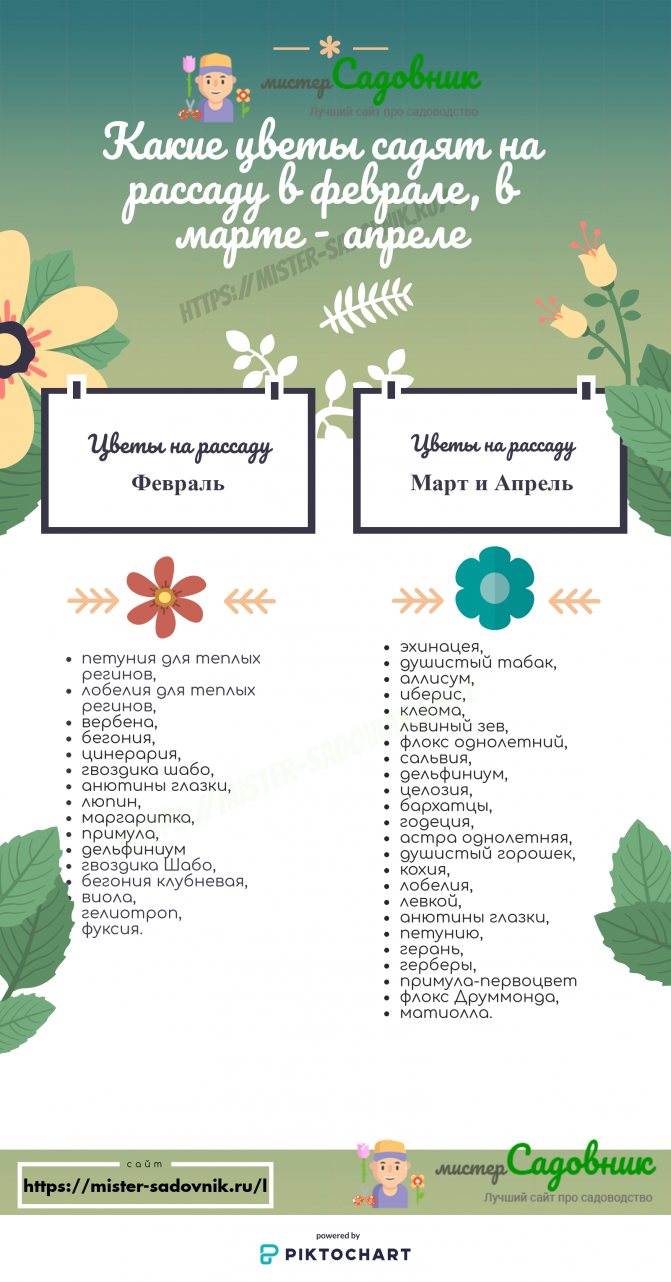
In order for flower seedlings to grow at home and get stronger by the time they are planted in open ground or balcony boxes, the seeds should be sown at the end of winter - early spring. Experienced growers know that already in February or even January it is time to plant some types of plants (with a long growing period).
On the other hand, there is always a danger of overgrowing the seedlings, and in this case they do not take root well in the open field. On most plant seed bags, growers indicate the desired sowing time from February to April. What to do? When to start growing seedlings? Experienced growers recommend one of two strategies:
- Intensive: Sowing late enough + optimal conditions for fast growing. The first crops are in mid-March, and most of them are in April.
- Extensive: early (often winter) sowing + inhibition of seedling growth. The first crops are in late February, and the next ones are in early or mid-March.
The first method gives advantages in the quality of the sprouts, as well as in terms of time, since the total growing time is shortened. Growing up in favorable conditions, young bushes have greater endurance.
Do not forget that the first months of a plant's life is the time that determines the abundance and duration of flowering, disease resistance and the overall life of the bush. The only drawback of the intensive method is that in case of gloomy days, additional expenses are required for artificial lighting.
In the second method, slow growth is achieved by limiting watering: the grower waits for the soil to dry out, and the sprouts are slightly tilted, and only then water the plants. In addition, winter sowing often leads to excessive stretching of seedlings - it's all to blame for the short daylight hours and cloudy weather.
Where to grow seedlings at home
It will take a lot of space to accommodate numerous containers with seedlings. Most summer residents place seedlings on windowsills and furniture in an apartment. Some gardeners arrange tiers on the window.In this case, make sure that the upper plants do not shade the lower ones too much.
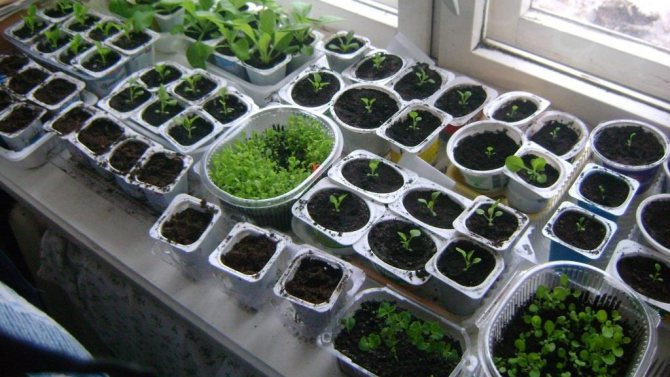

If you have the opportunity to build a stationary greenhouse on your plot of land, this will be the best option. It's a good idea to grow seedlings in a cold greenhouse. Both the greenhouse and the greenhouse must be airtight and regularly ventilated. You can also cultivate garden plants on an insulated balcony or in a winter garden.
Sowing preparation
Growing flower seedlings at home requires a lot of containers, land and labor.
Sowing utensils can be purchased (special containers or greenhouses) or improvised (well-washed bowls, glasses or boxes from under any products). The most important condition is the presence of drainage holes at the bottom and a sump for collecting excess water during irrigation. A dish lid or a deep dish can serve as a tray.
At the first stage, seeds are sown in common bowls or boxes. When the sprouts get stronger (1-2 weeks after germination), they are dived into separate cups or more freely into the same boxes.
There is another option, very popular among flower growers, - sowing seeds in peat tablets or cups. In this case, the seed goes through all stages from germination to a strong seedling without picks. Most often, this method is used to grow plants that cannot tolerate a transplant.
Land for seedlings can be purchased ready-made (universal or special soil mixtures of proven manufacturers) or collected on your own site. At the same time, observe the optimal soil composition for capricious crops.
Disinfect the soil to avoid the development of mold or other diseases. To do this, ignite it in the oven, spill it with a solution of potassium permanganate or freeze it. Add crushed charcoal to the soil.

