

Do-it-yourself beautiful and productive beds
Home ›Bushes and trees› Rules for harvesting cuttings in the fall and ways of storing them in winter
Everyone's favorite grape culture has long migrated from the south to more northern regions. Today, many varieties of berries have been bred, which are quite easy to propagate on your site.
You can buy seedlings at a flower shop, or you can prepare and save the shanks yourself.
Harvesting grape cuttings in the fall and storing them in the winter is not such a difficult process. It can be handled not only by an experienced gardener, but also by a beginner in viticulture.
To do this, you just need to read carefully this article, in which you will find answers to all your questions.
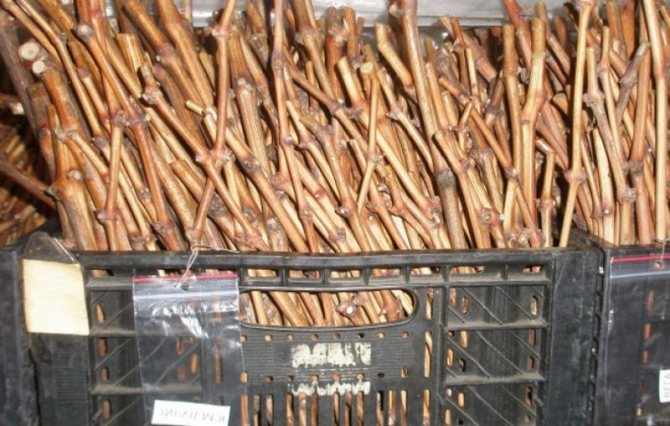
Harvesting cuttings
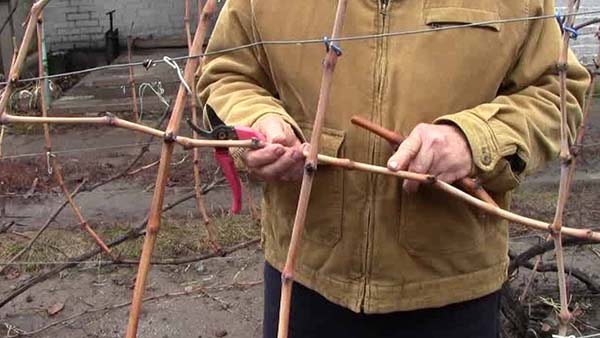
Properly harvested cuttings are a fundamental link in this process. Grape cuttings are carried out in the fall during the planned pruning of the bushes before the onset of frost.
Cuttings in the language of professionals are called shanks. Healthy shanks can only be obtained from healthy plants. It is necessary to carefully examine the bush itself and those adjacent to it. The plant must bear fruit. A fattening vine without berries is a very poor genetic material, since there will be few fruits in the future from its descendants.

There are several fundamental points that must be taken into account when harvesting cuttings:
The shanks are cut only from a well-ripened, lignified vine. Young immature twigs simply will not take root and will not survive until spring. From old branches, you can not breed seedlings at all. Ripe vines are brown in color and crackle when carefully bent.
There should be no damage to the bark. All kidneys must be intact.
There should be no signs of infectious diseases either on the bush itself or on those growing in the immediate vicinity. The diseased vine has spots of gray-brown shades and smells unpleasant.
The branch should be green when cut. Frozen shoots turn brown.
The optimum diameter of the vine is 8-10 mm.
Grape cuttings are cut from the middle of the shoots. The lower part is considered to be prone to damage and less fertile. The upper one simply does not have time to mature enough.
In order for the cultivation of grapes with cuttings to be successful, the planting material must meet the following requirements:
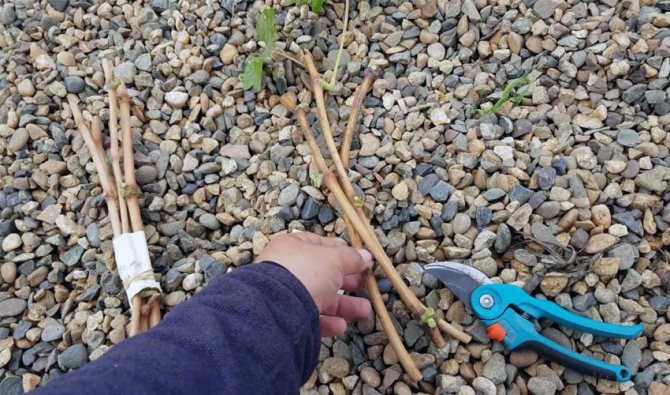
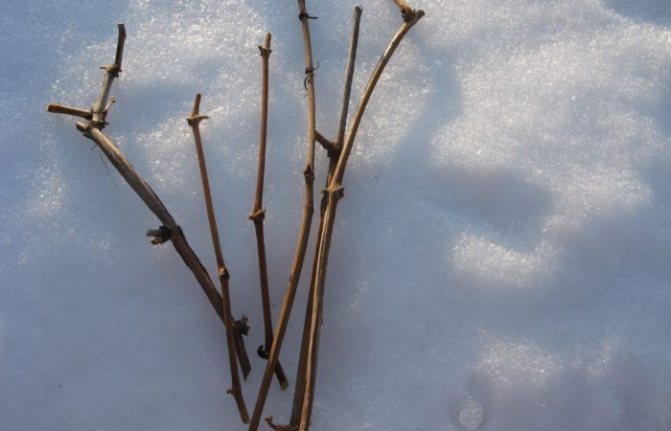
shanks are cut with a length of 30-45 cm;
thickness not less than 8 mm;
it is desirable that the branches are straight, without strong curvatures;
cuttings should be freed from leaves, whiskers, etc.;
the bark should be firm and brown in color.
Each stalk that goes for seedlings should have at least 3-4 buds. Two types of shoots grow from each eye. One will grow into the soil, release roots and form a root system, and from the other a vine will form, on which bunches of berries will ripen in the future. The future seedling must be treated with a solution of potassium permanganate or ferrous sulfate.
Let's consider further how to grow grapes from properly prepared cuttings.
How to care and store?
To ensure a good and rapid development of the grape plant, you will need to take care of the planting material even before they are planted. The chopped shanks are prepared as follows:
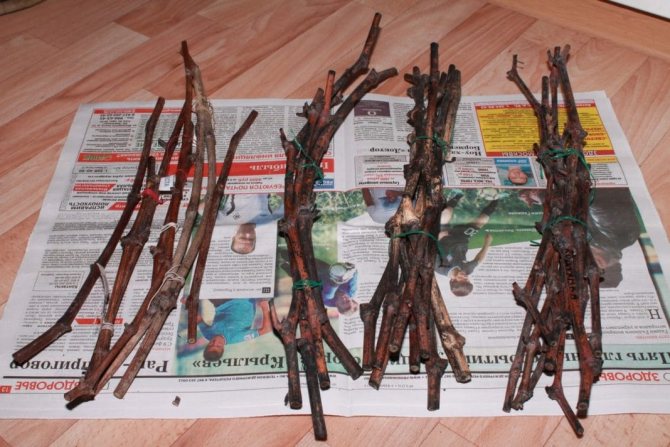
- First of all, stepchildren and antennae are removed from each cutting.
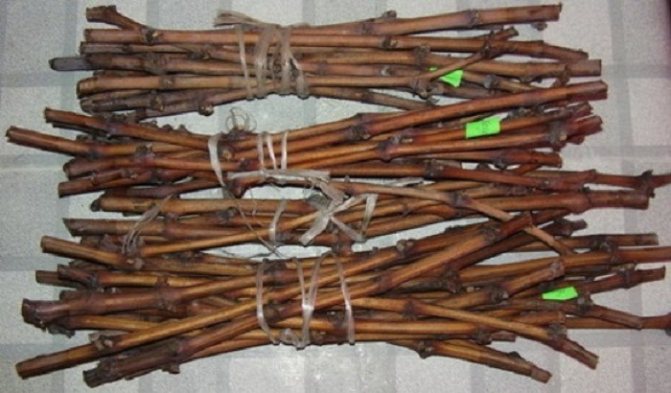
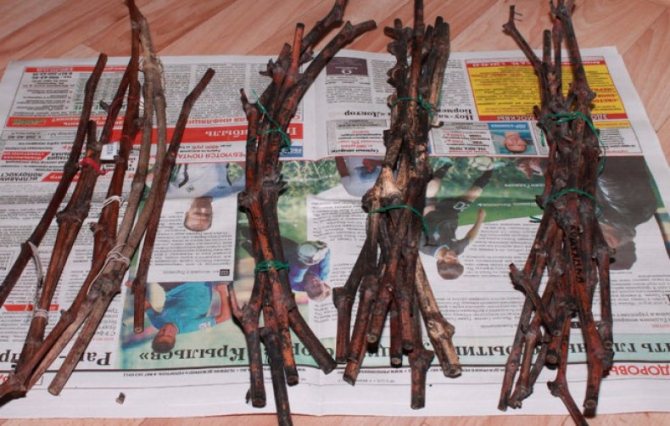
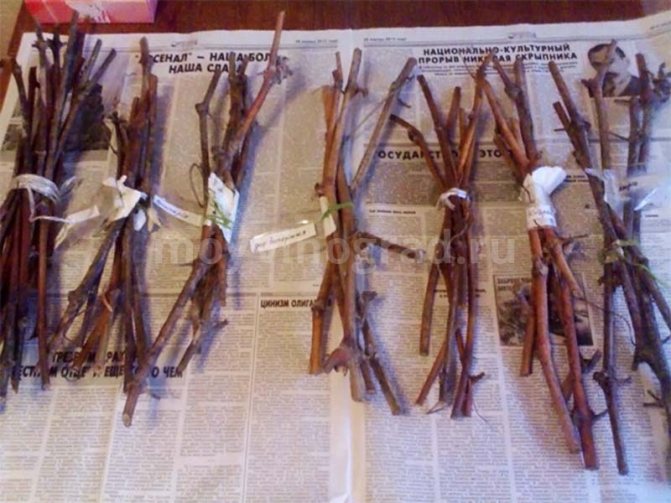
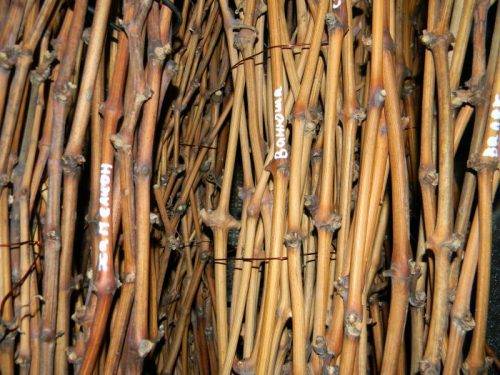
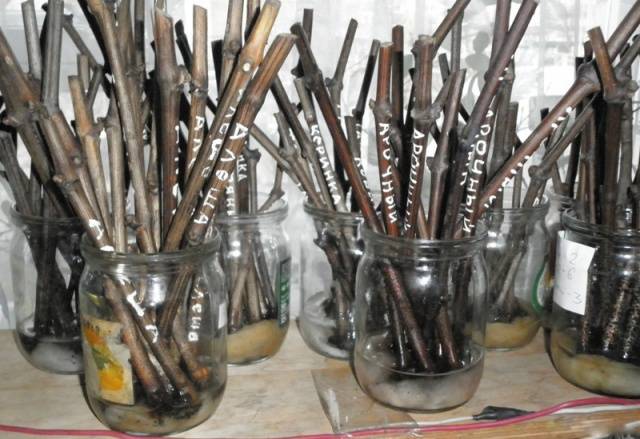
- Tied in bundles. For convenience, it is recommended to attach a label to each bunch indicating the crop variety.
- As a preventive measure, the bundles are sprayed with a fungicidal solution. A 3-5% solution of copper and iron sulfate or Azophos is suitable.
Landing in the ground
Careful attention must be paid to the choice of a growing site, since grapes will not grow and bear fruit successfully everywhere. Successful reproduction of grapes with shanks primarily depends on the correctly chosen planting site. The plot of land should be well lit at any time of the year. It is very important that it is protected from the winds. The culture will grow well on chernozems, as well as in clay and sandy soils, which need to be fertilized ahead of time with humus, phosphate and potassium mineral complexes. They are applied evenly over the entire plot, then the soil is dug up or plowed over.
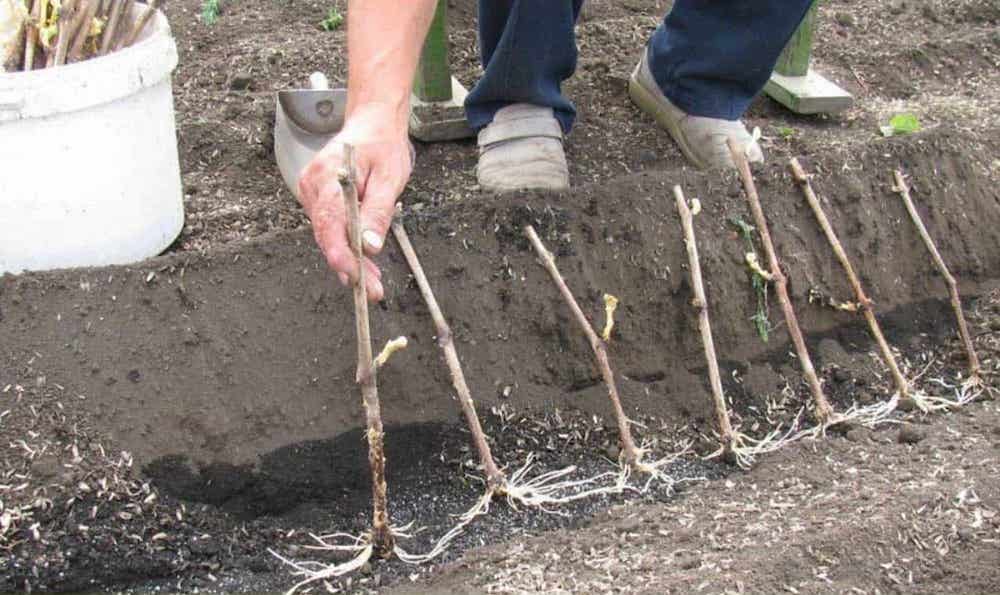
Planting cuttings in open ground
The place where the seedlings take root is called a shkolka. Grapes from cuttings should be planted in the ground using the following technology:
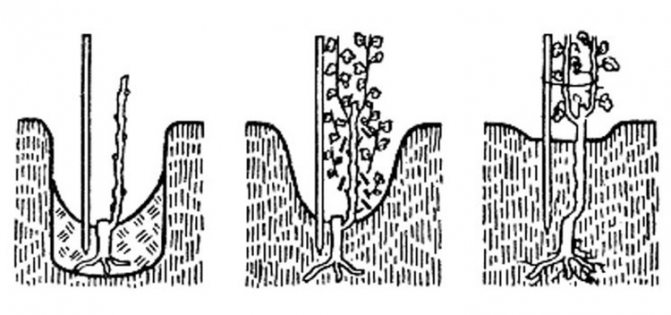
On the prepared site, a trench 25 cm wide and 35-40 cm deep is being dug.
The rows should be located at a distance of at least 0.5 m from each other, so that in the future it is convenient to water the seedlings, weed out weeds and carry out other care measures.
Humus is introduced at the bottom of the ditch at the rate of 1 bucket per 1 m.
The trench is well spilled with water. Planting is carried out in damp, but not too wet ground.
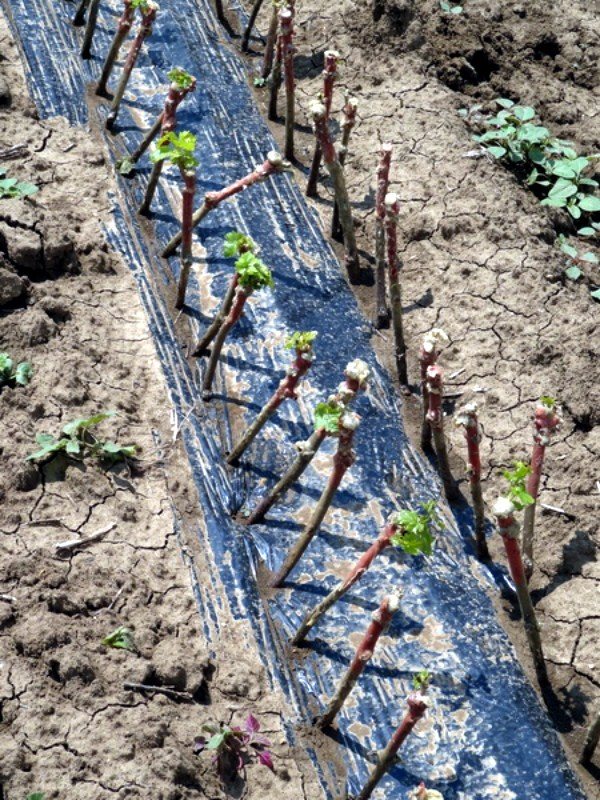
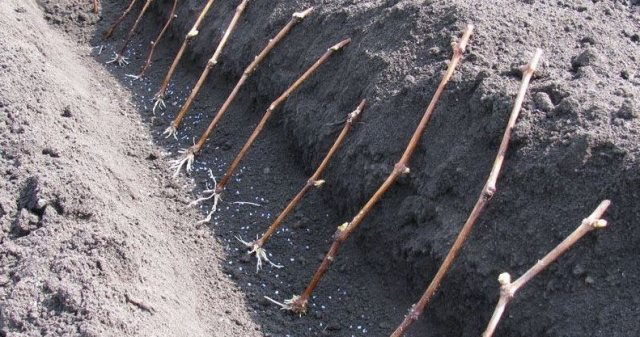
Chubuki are laid out at an angle of 45-50 ° with a slope to the south.
The distance between the cuttings is about 6-9 cm.
The shank should be positioned so that two buds are in the ground, and at least one remains above the surface.
The earth is filled up to 3 or 4 buds.
Landings are spilled with warm water again.
The school must be insulated for the winter so that the seedlings do not freeze. To do this, they are covered from above with a slide of earth, then with a thick layer of foliage (at least 10 cm). The next layer is again made earthen, but already at 35-40 cm. Cover the top with polyethylene or other covering material to protect against severe frosts.
Cuttings planted immediately after autumn pruning take root much better and sprout earlier in the spring. Planting does not take much time, but there is no hassle with storing them in the winter. Grapes grown in this way are able to bring a decent harvest in a couple of years, and the yield will be much higher than that planted in spring.
The time when to plant cuttings should be determined by the appropriate weather. The day should be dry and warm, but not too hot.

Planting and storage at home
Planting cuttings at home will be more time consuming than planting in the ground. Chubuki are prepared in the same way.

Planting cuttings in the ground
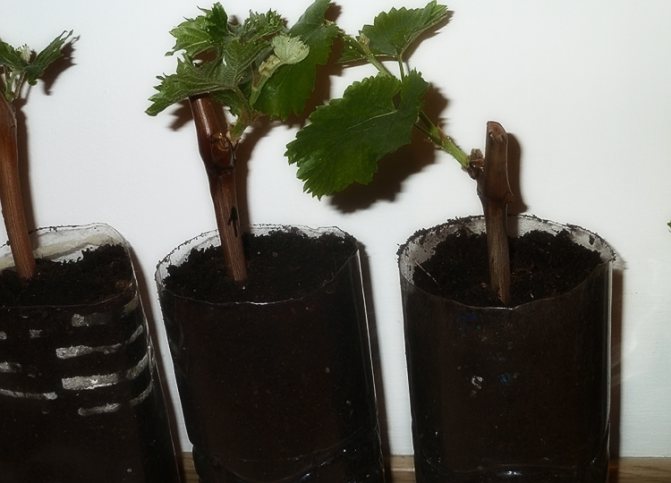
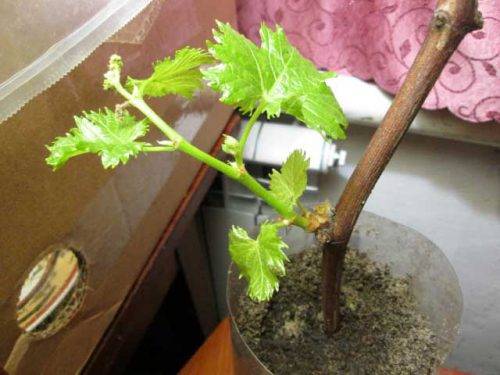
Plastic bottles are taken, their necks are cut off. The finished shafts are placed in cut-off bottles and filled with water so that only the lower peephole is in the water. Then the containers are exposed in a lighted warm place for 6-8 weeks. There is no need to add water. At the very end of autumn, roots appear at the chubuk, but there will not be any sprouts yet. At this point, you need to plant the plants in a bowl filled with earth. The soil needs to be very fertile and loose. It is prepared from a mixture of humus, garden soil and complex mineral fertilizers. The bottles are then filled up to a third with this substrate. Cuttings can be planted after the soil has been slightly watered with water.The seedlings are laid flat in containers, which are then filled to the brim with earth. The planted plants are watered and then placed in a dark place. Plant care will include regular watering. The ground should be constantly moist, but not wet.
Read also: Do-it-yourself green gazebo
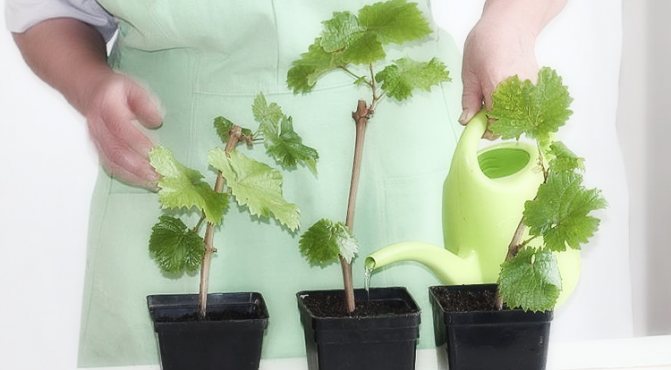
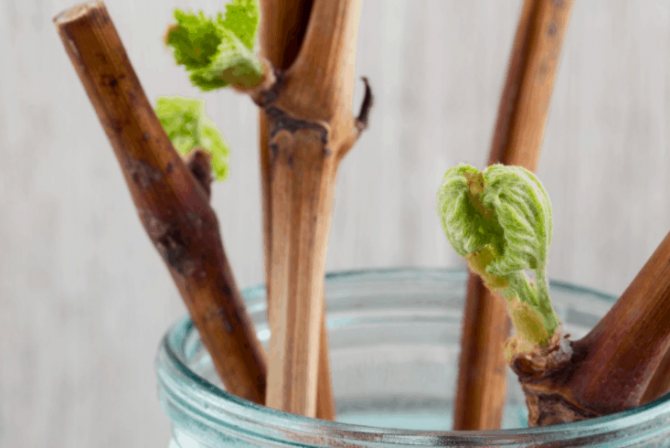
Towards the end of winter, sprouts will appear on the seedlings. At this time, they need to be transferred to a lighted place. The shoots will immediately grow vigorously. If they become too long, they must be pinned, leaving no more than 30 cm.
A seedling grown in this way is planted in open ground in the spring after the end of the frost.
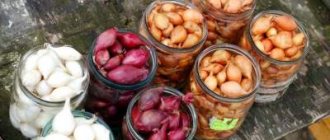
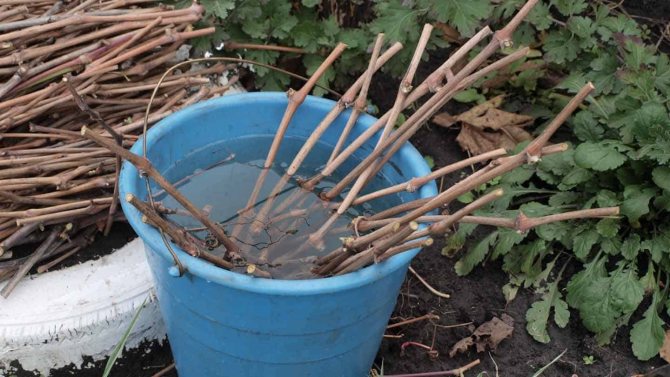
Cuttings harvested in the fall can not be planted, but saved until spring. This is usually done in the following ways:
In a refrigerator... This way you can save a fairly small number of cuttings. The prepared planting material is marked and tied into bundles. After wrapping in plastic, the bundles are placed on the bottom shelf of the refrigerator.
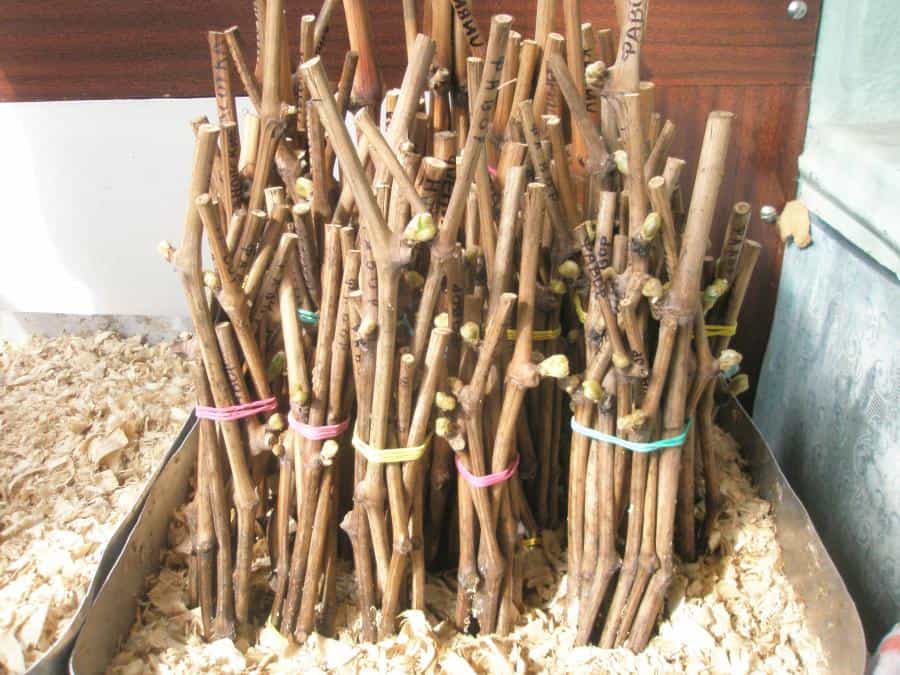
In the basement or cellar... Bunches of shanks are placed in a box and covered with wet sand. Or you can put them in a bag of damp sawdust and store them on a shelf. The bag should not be tied tightly so that the cuttings do not suffocate. It is also necessary to periodically moisten the sawdust.
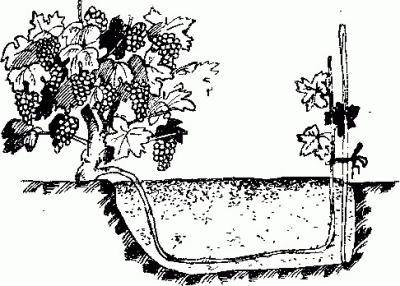
Buried in the ground... The cuttings are laid horizontally in a trench and covered with a layer of earth of at least 40 cm.
Growing grapes from cuttings that are harvested in the fall, you save time and effort. Observing all the technologies, you can enjoy the taste of berries from the new bushes of your vineyard in a year.
Cutting grapes in the fall is the simplest and most effective way to propagate a culture. From the harvested shoot, it is possible to grow a full-fledged bush that has retained all the maternal qualities of the old vineyard. For a novice gardener, the first experience may not be crowned with success, but do not despair. Simple instructions will help you maintain and propagate your favorite variety.


How to prepare grape cuttings in autumn
To obtain a positive result, the correct harvesting of grape cuttings in the fall and storage until spring is important. Growing a new strong seedling will come from a mature vine.
Procurement terms
Breeding cuttings can be cut in the fall and spring. However, the best results can only be obtained from autumn harvesting material. In winter, under the shelter, part of the kidneys freezes, melts, rodents love to feast on them. In the spring, a bad seedling will grow from a cut twig.
Autumn is still convenient for harvesting cuttings because of the massive pruning of the vine. Before the beginning of winter, the movement of juice stops at the vineyard. Pruning is painless.
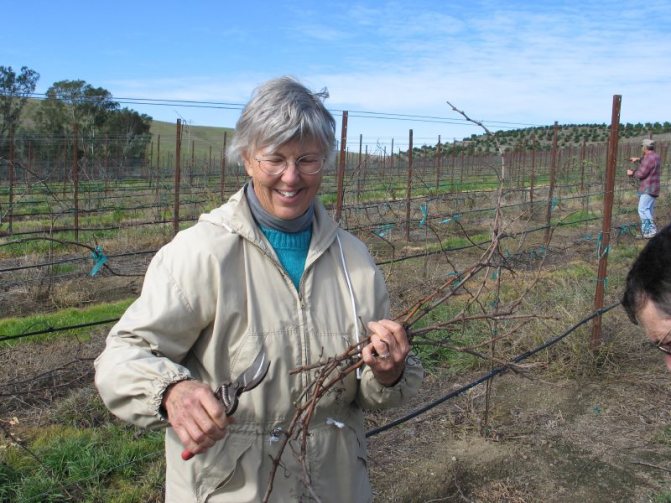
Choosing the right vine
Engaging in grape cuttings in the fall at home, you need to learn how to choose a good vine. After all, a weak bush will grow out of bad shanks and a bush. Only a young, ripe vine is suitable for reproduction. It can be identified by its smooth golden brown bark. A ripe vine, when bent, emits a faint crackle. The twig seems slightly warm to the sensation in the hand. An unripe vine can break when bent, juice will come out from under the bark. Such a twig is usually soft and cold to the touch when wrapped in the palm of your hand.
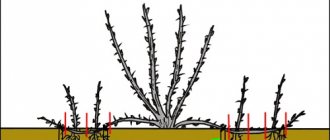
Slicing
The branch cut off from the bush in the fall is not all used for reproduction. The area from the bottom to the middle is optimal. The upper part is thrown away, since this area never fully matures. Growers determine the maturity of the lash empirically. The cut site is immersed in 1% iodine solution. If the wood quickly turns purple, then the branch is considered mature. The presence of a green tint on the cut indicates the immature shoot.
For cuttings, shanks with a thickness of 7 to 10 mm are considered productive. The top thickness is allowed up to 6 mm. A thin vine is cut from grapes when such a characteristic is a varietal feature of the culture.
It is optimal to cut shafts with five or more internodes in the fall. In the spring, the workpiece is shortened, leaving a healthier part. If there are not enough vines for pruning, you can cut short shafts with three or four internodes.
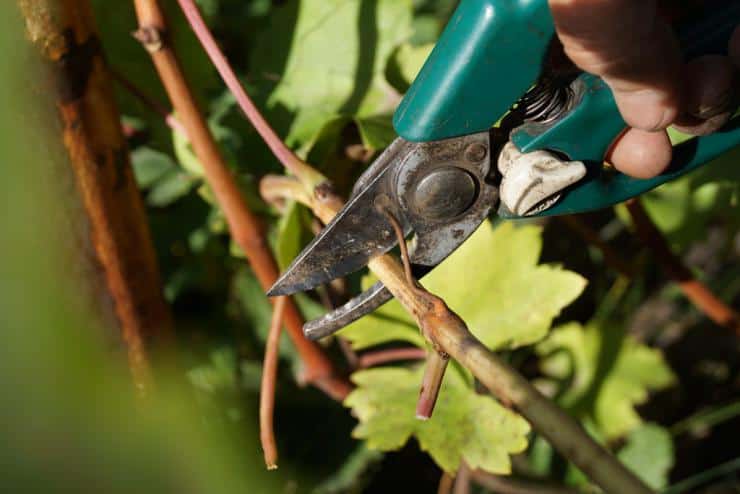
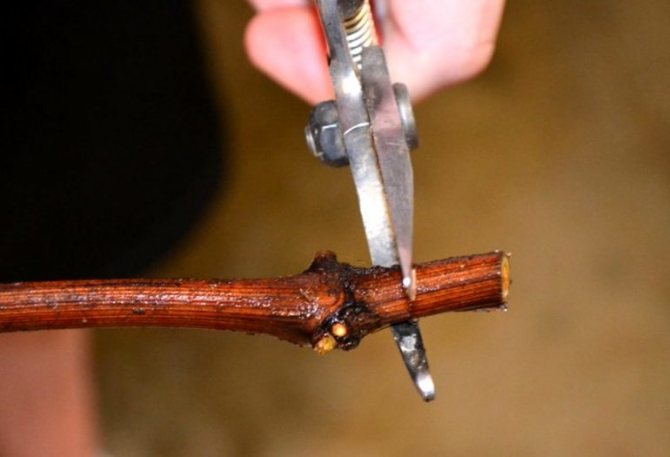
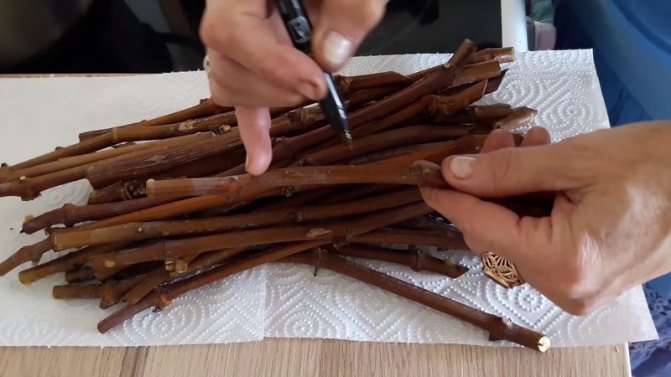
A sharp pruner is used for grafting. The cut should be straight, without crushed wood. The foliage left over from the fall, lignified whiskers, side shoots are removed from the branch. The lash is placed in front of them, the direction of growth is determined. The upper cut with a pruner is made in the middle between the pairs of internodes. The lower cut is made just below the kidney. The shanks cut in the fall are signed with a marker directly on the bark or a tag is attached.
Disinfection
After grafting, the shanks are disinfected. The twigs are treated with a 3% solution of copper sulfate, dried, tied with a wire or rope, and sent for storage. You can soak the twigs for a day in clean water before disinfection so that the wood is saturated with moisture before storage.
In the video, harvesting grape cuttings in the fall:

Useful video
In this video, the author shares his experience in storing seedlings before planting.
Since biblical times, interest in the fruit of grapes, its most diverse types and varieties, has not waned. To get enough of the best varietal planting material, put your hands on grafting! This is a very real way to propagate your favorite variety, as well as acquire a completely new high-quality grape seedling. The advantages of autumn grape cuttings, the timing of harvesting cuttings, the intricacies of proper cuttings, as well as several effective ways of storing shanks in winter will be discussed in our article.
Storage
Twigs prepared for reproduction in the fall are stored in a cold place. A basement, cellar, refrigerator will do. The optimum storage temperature is from 0 to +4 o C. Winegrowers sometimes practice the trench storage method. The shanks cut from the vine in the fall are buried for the winter in grooves 50 cm deep. In this state, they are stored until spring.
If you exclude the trench method, then it is better to store the twigs in boxes. Sand 10 cm thick is poured at the bottom of the container, the shanks are laid out, sand is poured on top again and this continues until the box is filled. The material prepared for reproduction in the fall is sent to a cold room. The moisture content of the sand is checked periodically. If it is dry, slightly moisten with water.
At least once a winter, the branches of the grapes are shifted. The upper shanks are sent to the bottom of the box, and the lower ones are sent to the top. At the same time, an inspection of the propagation material is carried out. Cuttings of grapes with severe rot are discarded. If mold has just begun to appear on the bark, the branches are washed with a solution of potassium permanganate, dried and sent back to the box.
The easiest way to store breeding material prepared in the fall is to store it in a trench. Chubuki grapes do not need to be shifted in winter. The optimum temperature and humidity are maintained under a layer of earth and snow. The storage technology is simple. After grafting in the fall, the grape shanks are disinfected. In the garden, they dig a trench 50 cm deep, cover the bottom with a film so that its edges extend beyond the walls. Twigs of grapes are laid along the groove, covered with free edges of the film. A board or any other shield is laid on top, which is covered with a layer of earth 25 cm thick. The grape twigs buried in the fall are taken out only in the spring after the snow melts.
Comfortable conditions
Obtaining full-fledged seedlings during the spring rooting of harvested grape cuttings depends on compliance with the conditions under which the vine is in a state of biological dormancy.
- Exchange processes practically freeze at temperatures of + 1 ... + 4 ° C.
- Maintaining an ambient relative humidity of 90-100% will keep the buds and wood from naturally dehydrating.
- As far as absolute darkness is concerned, no such requirement is made. But, given that sunlight activates all life processes, it is better to store cuttings in a dark place.
High humidity during storage of cuttings should be combined with ventilation - with stagnant air, the development of gray rot, mold and other fungi is possible.
Failure to comply with a constant storage temperature in the specified range of + 1 ... + 4 ° C leads to a loss of material quality:
- excess temperature contributes to the consumption of nutrients during storage and the weakening of cuttings;
- storage at subzero temperatures causes kidney death and capillary damage.
And further. A very important point, which is usually remembered too late: the storage place for cuttings should be inaccessible to rodents.
Preparing grape cuttings for planting
At the end of February and beginning of March, the process of grape cuttings is resumed. If in the fall the breeding material was properly harvested, then in the spring it will make good seedlings. However, first, the shanks must be awakened after hibernation:
- The material stored in the fall is removed from the sand and tested for viability. Since it was carried out during grafting, a transverse cut is made on each twig of grapes with a pruner. Drops of juice should come out of the wood. Such material is suitable for reproduction. If the drops did not come out of the cut, then such a twig of grapes is considered dried up. For further reproduction, it will not go. When squeezing the twig with the pruner, water droplets can protrude from the bark. This happens in rotten grapes. The material for further breeding will not go.
Read also: Photo of do-it-yourself amulets dolls
The further process of grape cuttings is reduced to the germination of the material. You can get a seedling in the following ways:
- Take two plastic cups of different sizes. Three drainage holes are punctured in the bottom of the larger glass. The bottom of the smaller glass is cut off with scissors. A layer of soil 2 cm thick is poured inside a large glass, then a smaller glass without a bottom is placed. The void between the walls of the two containers is covered with soil, moistened with water. Sand is poured inside a small glass. Water abundantly. The small glass is carefully removed. A grape stalk is immersed in the center of the wet sand to a depth of about 4 cm. The container with the future grape seedling is covered with a piece of a plastic bottle with the neck and bottom cut off. Water the seedling as it dries. The bottle is removed after 4 leaves have grown.
- In a plastic bottle, the neck is cut with scissors, drainage holes are drilled at the bottom. A drainage layer of stones is poured inside the container, 7 tbsp. l. black soil. A branch of grapes is placed on top of the ground at an angle, and the remaining space is filled with steamed sawdust. The upper peephole should be at the same height as the cut of the bottle. Cover the top with a plastic cup. The bottle is placed on the windowsill with the peephole turned away from the window. When the emerging sprout of grapes ceases to fit inside the glass, the shelter is removed. Watering a grape seedling is carried out through a deep tray. Water is collected in the container and the bottom of the bottle is immersed for 15 minutes. Moisture penetrates through the drain holes.
In addition to the considered cuttings, there are other options for propagating grapes in the fall using green cuttings and layering.
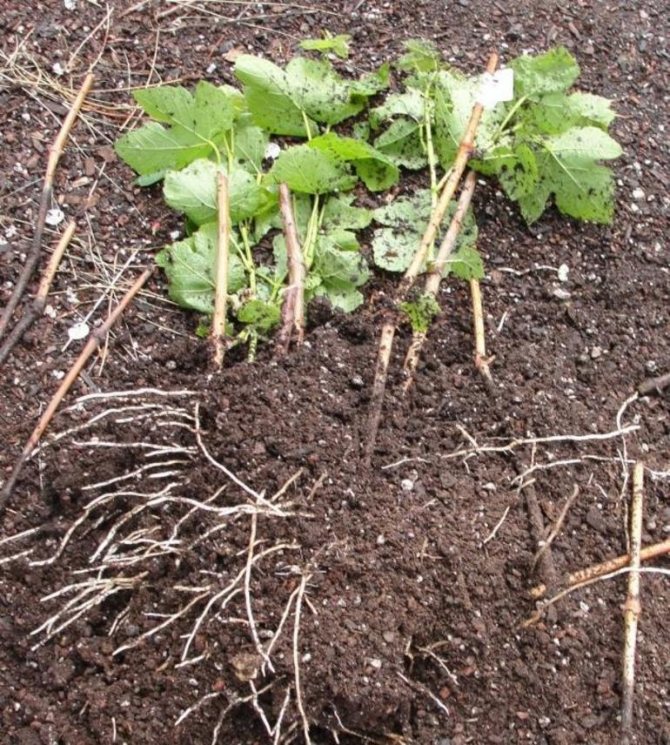
In the fall, a grape seedling can be obtained by cuttings from a green twig. The method of propagation of grapes by green cuttings in autumn is based on the use of young, immature vines. Cuttings are cut in mid-June into two buds. The cut angle is made sharp. The twigs prepared for reproduction are placed in a glass of rainwater.Plastic containers are prepared for planting. You can take a cut 5 liter bottle. The containers are filled with a mixture of black soil and compost, taken in equal amounts. The lower part of the green twig of grapes is cut so that there is a 4 cm protrusion from the bud. All leaves are removed except for the top one. 4 branches of grapes are planted in one container, a film greenhouse shelter is equipped. The grape seedling is aired and watered once a week. After a month and a half, the stalk should take root, take root. The shelter is removed. At the end of August, the grapes are planted outside. By the middle of autumn, a full-fledged seedling about 40 cm high grows
The safest and easiest way is to propagate grapes by layering in the fall from a mature vine. The lashes, without cutting off from the bush, about 1.5 m long, are laid on the bottom of the dug groove. The top with 2-4 eyes is brought out to the surface of the trench, vertically tied to a peg. From that part of the lash, which will be covered with earth, all the buds and leaves are broken off. For reliability, the grape vine is pinned with wire. Half-fill the trench with soil, watered abundantly. After absorbing water, the groove is completely covered with earth. When the cuttings take root, and the upper part grows, the lash is cut off from the mother bush. It turns out an independent grape seedling.
The video tells about grape cuttings:
Cutting grapes in the fall is an easy way to get seedlings for novice gardeners. There are other ways to propagate a crop, for example, grafting, but it is difficult for a beginner to make it. It is easier to give preference to cuttings or layering.
In order to decorate your garden with green vines and get a good harvest of grapes, it is not enough to grow one plant. Of course, you can buy several grown seedlings for cultivating a crop, but they are by no means cheap, and problems may arise with the variety of plants. It is much cheaper and more reliable to propagate grapes on your own by cuttings. Further, in the proposed article, we will talk in detail about how to prepare cuttings in the fall, how to properly store and germinate them. This information will surely be useful for both beginners and experienced winegrowers.

Harvesting cuttings
To carry out the propagation of grapes by cuttings only, at first glance, is quite difficult. Under certain conditions, the roots of grapes begin to actively develop both on green and ripe pieces of the vine. Cuttings can be carried out in spring or autumn. Autumn cuttings are preferable, because with proper storage and rooting, by spring the cuttings (shanks) will be planted in a permanent place of growth. The probability that it will take root, in this case, is close to 100%. The planting material harvested in the fall is stronger and healthier. Such a vine is capable of rapidly growing root and greenery, and developing fruiting arrows.

Cuttings are harvested in the fall during the main pruning of grapes. This must be done no earlier than 2 weeks after the plant has thrown off the foliage and before the onset of severe frosts. The selection of planting material must be carried out especially qualitatively, focusing on the following criteria:
- It is preferable to choose shafts with a diameter of up to 6 mm. Thicker shoots are considered fattening and are not able to take root.
- Propagation of grapes by cuttings in the autumn season should be carried out only with the use of fruiting, ripe shoots.
- A good quality stalk must be firm. When bending it, you can hear a slight crackle.
- The bark of the vine should be a uniform light to dark brown color.
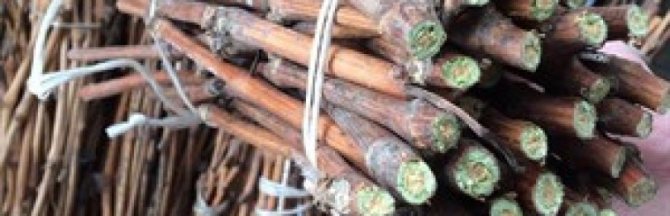
- On a cut of a healthy cutting, you can see a green color. Brown blotches indicate the development of a disease or freezing of the shoot.
- During visual inspection, attention should be paid to the absence of mechanical damage, signs of diseases and other defects on the surface of the bark.
Such general rules will make it possible to prepare only the highest quality planting material for the next year. Having chosen shoots suitable in all respects, you can start cutting cuttings. Their length should be at least 30 cm. 2-4 eyes should be left on each shank.
What and when to do with sprouted cuttings
The sprouted stems are planted in the spring, when 2-3 true leaves are formed on the seedling. Previously, the container with grapes is watered with water and the shoot is taken out. The roots are immersed in a clay mash before being buried. Also, honey water is used for processing, which is prepared from 1 liter of water and 1 spoonful of honey. The planting process is completed by burying the cutting and placing the peg as a support. It is recommended to mulch the soil around the bush.

After germination, the shanks are planted in the ground and then transplanted to a permanent place of residence.
There are many ways of harvesting and storing cuttings, of which you can easily choose the most suitable one. Then you will not need to worry about the loss of the variety as a result of freezing of the vine. The seedling will gain strength and strength during the warm period, which will help it survive the harsh winter under reliable shelter. And then it can be germinated and propagated.
In order to plant grapes in the summer cottage at the onset of spring, you need to start preparing young plants in the fall. Anyone who decides to grow grapes on their site, it is important to know how to preserve grape seedlings before planting. There are many ways to store grapes, and each gardener will be able to choose the most convenient one for himself.
Storage of shanks in winter
Cutting grapes in the fall presupposes long-term winter storage of planting material under certain conditions with a temperature not higher than +4 0 C. Before laying for storage, the shanks are cleaned of the remnants of foliage, mustaches and stepsons. Sections of the vine are twisted with a soft elastic band or rope into a bundle, if necessary, a tag is imposed with the indication of the variety.
Among the most affordable ways to store grape shanks are the following:
- Storing grape cuttings in a cellar or basement will not be difficult. Planting material just needs to be dug in a container with wet sand and left in a cool cellar until early February.
- Storage in the garden involves digging a trench 50 cm deep. Its length should correspond to the length of the grape cuttings. A layer of sand 10 cm thick is poured at the bottom of the trench. Ligaments of shanks are laid on the sand and sprinkled with the remaining soil, fallen leaves, sawdust, and straw. On top of such a bookmark, you need to lay a flap of polyethylene.
- The optimum temperature for storing planting material can be found in the refrigerator door. Before storage in the refrigerator, the grape shanks are soaked in cold water for 1-2 days, and then wrapped in a plastic bag. This method is good when grape cuttings are harvested in small quantities.
Read also: New Year's figures made of wire for the street

Of course, the most convenient way is to store the vine in the cellar, but in the absence of such a room, it is preferable to use a refrigerator. When laying the shanks for storage, you need to remember that in January they will have to be obtained for germination at home.
Start to use
Immediately after removing the cuttings and seedlings from the cellar, they are examined. When stored successfully, the vine has a bright green cut, and also does not look withered and overdried. If necessary, remove mold by wiping it down with a cloth or soft brush.
View of the cutting after cutting.
If the bark of the vine wrinkles and falls off, soak it first. You can use both regular soft water (for example, spring or thawed water), and special stimulating solutions. Soaking is carried out within 24-48 hours. Longer soaking is not only useless, but also dangerous, as it can lead to rot. After you get the vine out of the water, you must immediately cut it and start grafting or planting.
Thus, the successful storage of cuttings and seedlings of grapes requires preliminary preparation, compulsory observance of the temperature regime and correct extraction. Compliance with these rules guarantees minimal loss of nutrients and successful engraftment.
Rooting methods for grape cuttings
It is recommended to start rooting grape cuttings in late January - early February. At this time, the shanks are taken out of storage and treated with a solution of potassium permanganate. After processing, the cuttings should be soaked in water for 1-2 days. Immediately before rooting, the slices on the cuttings are refreshed. Two oblique cuts are made on each handle. In this case, it is important that the inner part of the cuttings on the cut has a green color, and at least 2 eyes remain on the cuttings itself. Scratches (grooves) are made in the lower part of the shank with a needle or a thin knife blade. This part of the vine is dipped in Kornevin. Further, you can choose one of the rooting methods:
Rooting in sawdust
To do this, pour slightly moistened sawdust into a small container and put bundles of cuttings in them. Place the container with planting material on a heating radiator or other heating device. Moisten the sawdust every 5 days. After 3 weeks, small roots will appear on the grape cuttings.
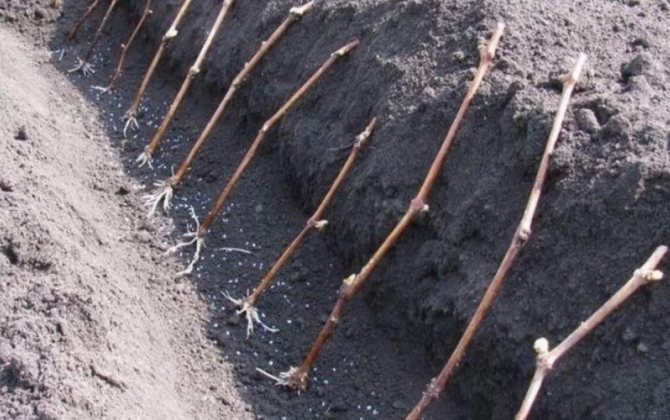
Rooting in the ground
For growing roots on grape cuttings, you can use a nutrient soil of low acidity. It should include light peat, sand, humus and fertile soil. Pour the nutrient medium into plastic pots or halved bottles. It is imperative to make drainage holes in the bottom of the container. When filling the pots, it is necessary to provide for a drainage layer of pebbles, expanded clay or broken brick. Cuttings are planted in nutrient soil at a slight slope, leaving 1-2 buds above the soil surface.
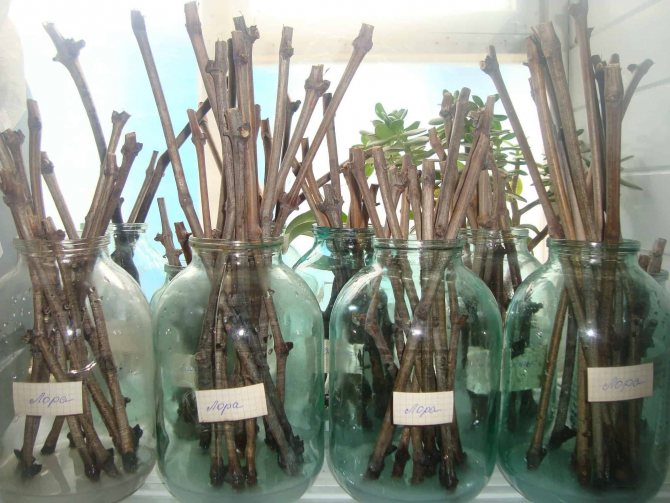
Rooting in water
This method of rooting grape shanks is the least laborious. For its implementation, it is necessary to pour a little water into a glass jar and put the shafts inside the container. An example of such rooting is shown in the video:
This method is great for home growing grapes.
Proper rooting begins with building up the root system. Premature formation of greenery will indicate a violation of this process.
As soon as the root system begins to develop in the lower part of the shanks, and the length of the small roots has reached 1.5-2 cm, you can start planting grape shafts in separate containers. For cultivation, you can use all the same fertile soil. Containers must be selected with a diameter of at least 10 cm and a depth of 20-25 cm. It is imperative to pour a drainage layer on the bottom of the containers.

A week after planting the shanks in separate containers, they should be fed with potassium or wood ash. It is necessary to introduce a trace element at the rate of 30 g per plant. It is worth noting that nitrogen-containing fertilizers are not used for grape cuttings at an early stage of cultivation.
How to choose a vine to get a seedling
How to prepare grape cuttings in the fall? First of all, in order to get good planting material, you need to choose branches of grapes that have high yields.At the same time, keep in mind that if you have a vineyard large in area, it is better to mark in advance the branches from which the cuttings will be cut in the future.
Important! The branches from which the shanks will be cut should be strong and healthy, as well as not tainted by frost and at the same time well ripened.
When a suitable vine will be chosen for obtaining grape seedlings at home, they begin to harvest them.
Planting seedlings in the ground
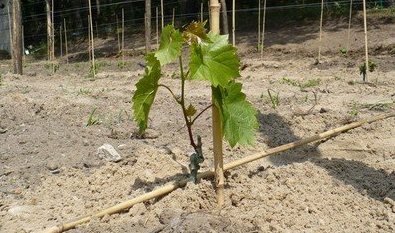
Home-rooted cuttings are planted in open ground in early May. By this time, leaves and small roots should appear on the stems of the grapes. The planting process can be described in the following stages:
- Initially, you need to choose a sunlit area with well-drained soil.
- Dig a plot of land deeply with the addition of humus, nitroammofoska and coarse sand.
- Form a groove to the required depth.
- Place the seedlings in the groove at a distance of 30-40 cm from each other.
- Close up grape seedlings to such a depth that the upper peephole is at a height of 7-10 cm from ground level.
- Sprinkle the lower part of the seedlings with fertile soil, which must subsequently be compacted.
- Water each seedling abundantly after planting, mulch the soil.
When all these rules of storage, rooting and planting are fulfilled, it is very easy to propagate grapes by cuttings. By the next fall, you can get healthy seedlings with a sufficiently developed root system. After overwintering in the open field, with the arrival of heat, the grapes will begin to grow actively.
Germination
The next stage after storage is germination. To do this, grape shanks need to create an optimal temperature regime: 24 degrees of soil and 8-13 degrees in the atmosphere. Germination can be carried out in several ways, namely:
In more detail, such an important procedure is written in a separate article.
Each of the methods has its own advantages and disadvantages, which are recommended to be familiarized with in advance. Many gardeners (including myself) use special preparations for plant rooting to speed up the process of root formation.
Can grape cuttings be planted in the fall directly into the ground
The above method for propagating grapes by cuttings in the fall is quite laborious and painstaking. It is necessary to prepare cuttings, take care of their safety in winter and carefully root them at home closer to spring. A complex of such measures allows you to get a lot of healthy and strong seedlings at the output. But grapes also multiply in a simpler way, which involves planting the shanks immediately after harvesting into the ground. This method of growing is quite simple and is similar to propagation of grapes through layering. To implement this method, you must:
- Prepare healthy cuttings, make oblique cuts at the ends of the vine.
- In a prepared hole, 50-60 cm deep, place the cutting at an angle of 45 0.
- One peephole should be left above the ground.
- Dig up the stems of grapes with fertile soil, compact it and water it.
- Before frost, the shanks should be watered regularly.
- For the winter, cover the grape cuttings with foliage, straw, burlap.
- With the arrival of spring heat, the shelter should be removed and the appearance of green leaves of young grapes should be expected.
This method, of course, is much easier than propagating grapes by cuttings with storage and rooting at home. The only significant drawback of this propagation method is the low survival rate of seedlings. So, of the total number of cuttings, only 60-70% wake up in the spring. Such a low viability of the shanks must be taken into account even during planting of plants in the ground: 2 grape cuttings should be planted in one hole at once. If both of them take root, then the weakest stalk will have to be removed.
Thus, the above information allows you to understand how to harvest grape cuttings in the fall, how to save the prepared harvesting and root them.
The video clip will also allow you to answer some of the remaining questions and see with your own eyes the whole process of grape propagation by cuttings.
This simple method makes it possible to breed a whole plantation from young seedlings from cut, ripe shoots of one shrub. Of course, this will require a certain amount of time and effort, but it will save money for the purchase of already grown seedlings.
Methods and rules for propagating grapes
Grapes, like most plants, propagate in several ways: by seeds, cuttings, layering, by dropping and grafting. During vegetative propagation, a new bush takes over all the properties and qualities of the plant from which the donor material was taken. At home, seed culture is rarely used, because this method is quite laborious and requires certain skills. Propagation of grapes by cuttings or layering in autumn is the best solution for beginner gardeners.
How grapes multiply
Harvesting lignified cuttings is the most common way to increase grape plantings. It is quite simple to perform it, although it will take some work. For propagation by cuttings, you need to get the blanks. Petioles can be bought at the market or asked from a neighbor.
Propagation of grapes by dropping (layering) is chosen if you want to propagate varieties that are difficult to take root. Future seedlings receive nutrients from an adult plant, therefore they develop well and form a powerful root system.
There are also ways of growing grapes by dropping lignified or green shoots. But they are performed in spring and summer, respectively. The buried branches have time to take root and develop well during the season.
Reproduction by layering is the complete laying of the lignified shoot in the ground. The method is used for poorly rooted grape varieties. The process begins in early spring. To do this, choose a long shoot at the base of the bush and drop it all the way into a ditch up to 20 cm deep, pinning it with wire. The soil should be well fertilized. The ditch is filled up, but not completely. A layer of no more than 5 cm is made above the shoot. The earth is added as new shoots appear and grow and are always moistened. With the onset of autumn, the vine is dug up and cut into several parts.
Grapes can be grafted, but remember that not all varieties are compatible with each other. Therefore, before the breeding procedure, you need to study the features of the selected species in order to understand whether they will make friends or not.