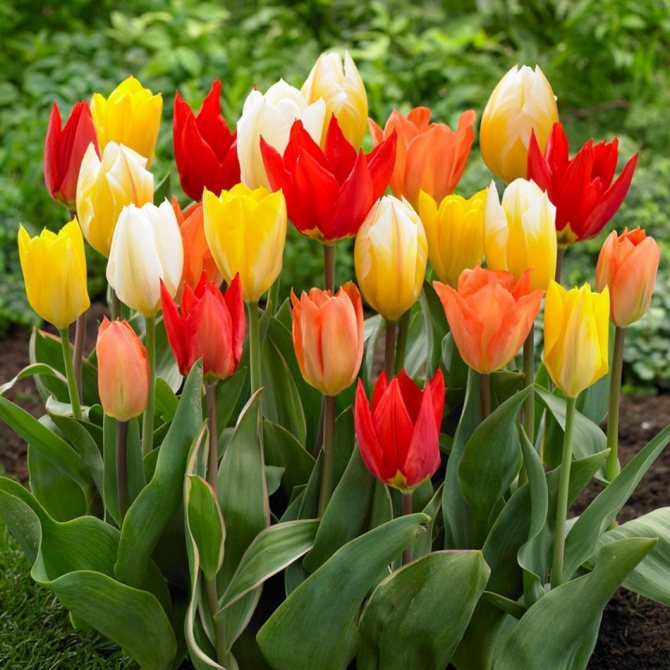
Tulips are one of the earliest flowers in spring. Every novice gardener can grow them, they are not difficult to care for. They can be planted both in a small area, densely both in a flower bed, and in large long rows. For this, special trenches are dug. For their full development, their bulbs must be removed from the ground, dried and planted further. The features of the process and the stages of cultivation and storage of flowers will be discussed below. The article is devoted to working with certain species of this plant, when and how to dig up tulip and daffodil bulbs for transplanting.
Why do they dig up tulips
Many people ask the question: is it necessary to dig up tulips? Most bulbs need to be dug up every year and then replanted. This is because the old bulb dies off and a new one appears in its place, almost always there can be several of them. Breeders have even developed varieties that can reproduce quickly, with more than 2-3 bulbs. If you do not dig them out annually, then they will stop blooming, since there will be too many tubers and a struggle for space and tightness in the soil will begin. A tight fit can also be dangerous for disease.
What it is?
Tulip bulbs are an important plant organ, at the same time it is a root and a modified shoot. It is he who is considered and in fact is the most important part of the plant. It contains all the essential nutrients and minerals that are needed for the normal growth and development of the flower.
The roots of tulips are called tubers, and it is from their state of health, integrity and proper care of them that how, when and how much the plant will bloom.
Proper care of the bulbs, or rather, their timely digging, correct planting and disembarkation determine whether a particular variety of this flower will be modified. Without proper care, it can degenerate, and a few years after planting the bulbs, there will be no trace of the former tulip.
In addition, tulip bulbs have such a structure that after flowering, division occurs in them, that is, daughter tubers appear. Therefore, digging them out allows not only to quickly multiply the variety of flowers you like, but also to preserve their health and original appearance.
The tulip tuber is their most important organ, so it requires a particularly attentive and careful attitude towards itself.
What varieties of tulips do not need to be dug
When to dig tulips after flowering
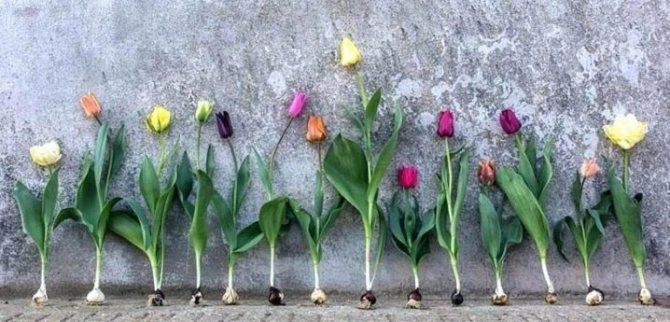
Botanical species do not require transplanting. They multiply very slowly, so they do not tend to have a high stocking density. These include the Kaufman, Foster and Greig tulips. They are not popular as they mainly plant the tulips that need to be dug up.
The Kaufman class is represented by low-growing flowers, which grow to a maximum of 30 cm, but mostly 17 cm. They have small but decorative flowers. Especially popular varieties: Giuseppe Verdi, Glack, Fashion, Herts Delight, Johann Strauss.
Foster's tulips
Foster's tulips are dwarf species, the height of which is up to 15 cm, although there are also those that reach 40 cm.They have cupped and goblet buds, they do not bloom for a long time.Most common varieties and hybrids: Sylvia van Lennep, Honorose, Passion, Sweetheart.
Greig's species are as low as the tulips listed above. They have cupped flowers with sharp petals. Popular varieties: Pinoccio, Echo, Ali Baba, Cape Cod, Plaiser, Princesse Charmante. The latter has very large flowers up to 10 cm.
However, these species can also be dug out, but not annually, but once every several years, in order to also prevent dense plantings.
When to dig up tulip bulbs for transplanting
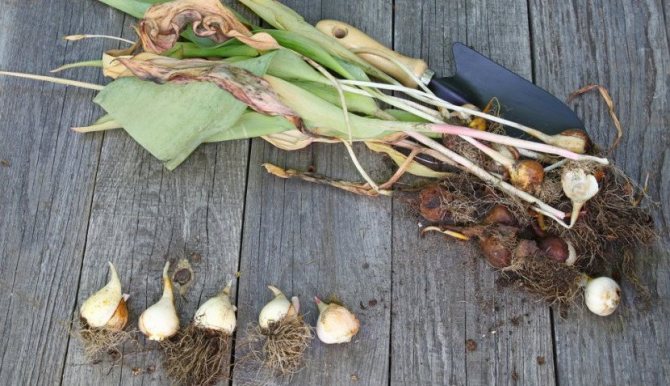
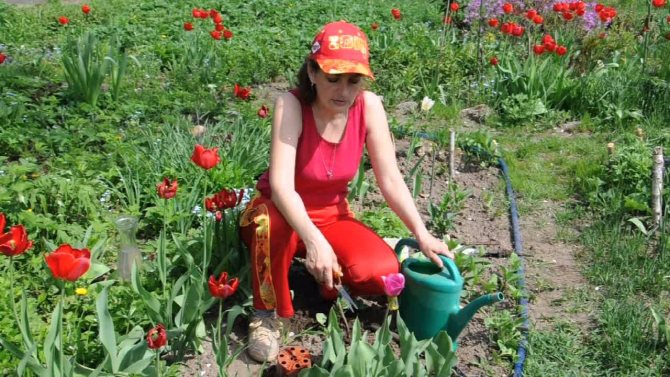
Transplanting tulips
The timing and months of this process differ depending on the geographic location. The following describes when to dig up tulips and how to store them until planting in the fall. For example, in the southern regions of Russia, tulips should be dug up in June - July, to the north in July - early August, in the central regions in late July - early July.
When to dig up lilies
Favorable dates when you need to dig up tulips for transplanting according to the lunar calendar:
| Month | Number |
| May | 25-28 |
| June | 7,8;11,12;14,15; 21-25 |
| July | 3,4;8-12;17-22;31 |
| August | 1-9;13-18 |
In the spring, when they bloom, it is not recommended to plant them. This can lead to shredding of the bulbs, and as a result there will be fewer plants next year. You need to dig it out when the upper leaves turn completely yellow, and the lower ones will be slightly yellow. This means that the onion has exhausted itself, and there are not enough nutrients in the soil.
Important! Do not dig tulips with green leaves, as their bulb will not be ripe enough.
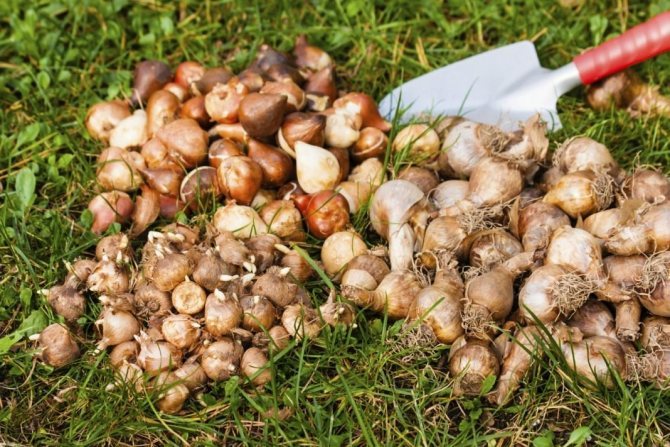


How to dig up tulips correctly
When to dig up and plant crocus bulbs
To do this, it is worth choosing sunny weather, the land in the flowerbed must be dry. Earlier species are dug first, then middle and later ones.
Note! When digging, the shovel must be held strictly vertically so as not to damage the onions.
It is forbidden to uproot it, you need to carefully remove it, then it will not go anywhere.
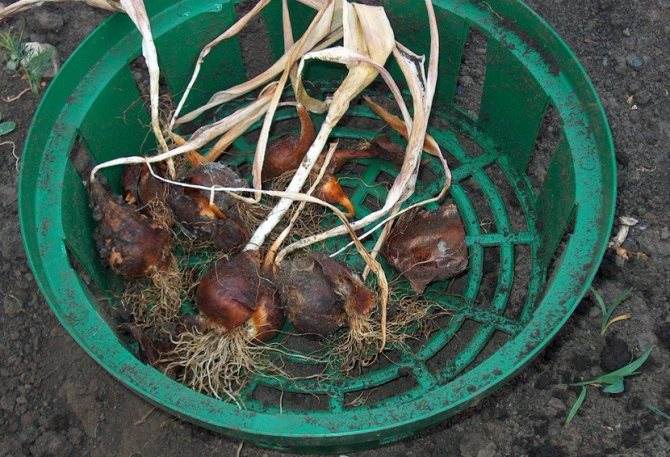
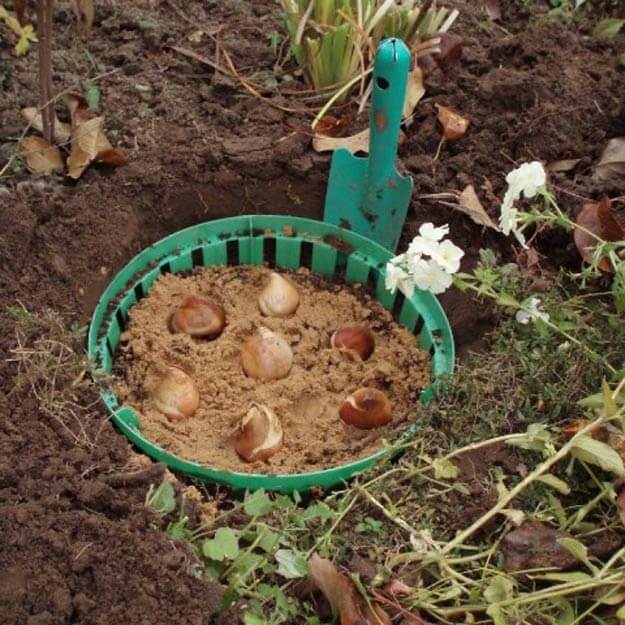
Garden nets and boxes are very popular when planting. You can use a cut potato mesh bag. They need to be dug into the ground, then the future baby, which forms on the bulb, will remain in the net. This will facilitate further collection in the fall.
After digging, the soil from the tubers and roots must be cleaned off, the leaves and stems must be cut off. Then the roots are removed and the bulbs are sorted. Damaged during collection, for example, with a shovel or a pitchfork, can be treated with iodine, but provided that they are minor.
For your information! Alternative drugs - a strong solution of potassium permanganate, phytosporin.
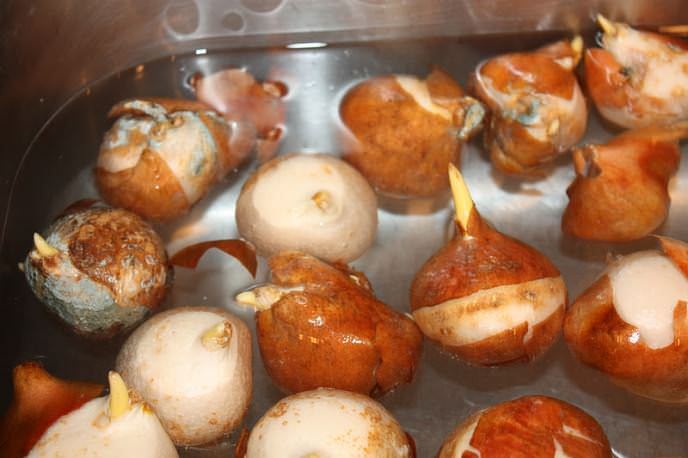
If it so happens that the weather is rainy, then it is worth rinsing the bulbs and drying them. If any damage is found, then it must be treated with a disinfectant solution, and then dried well again. Diseased bulbs are not usable and should not be kept with others. This must be strictly monitored, otherwise there is an opportunity to lose all tubers.
The disinfecting solution is diluted in the following proportions: 1 liter of water at room temperature + 1 tbsp. a spoonful of salt. You can add a spoonful of baking soda for more effect.
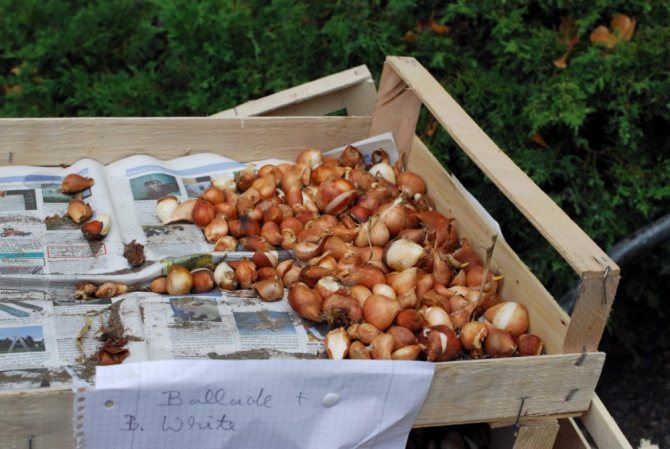
For the next 2 days, the bulbs are dried in the sun, cleaned of leaves and dirt, selected by varieties and distributed in boxes.
If the tubers are dug up too early, then the situation can still be remedied. To do this, you need to return them to the ground and wait until the foliage turns yellow and wither, and then repeat the procedure: remove and dry.
There is another option - to send them for storage along with the rest. Florists write that the survival rate with this method is also high.
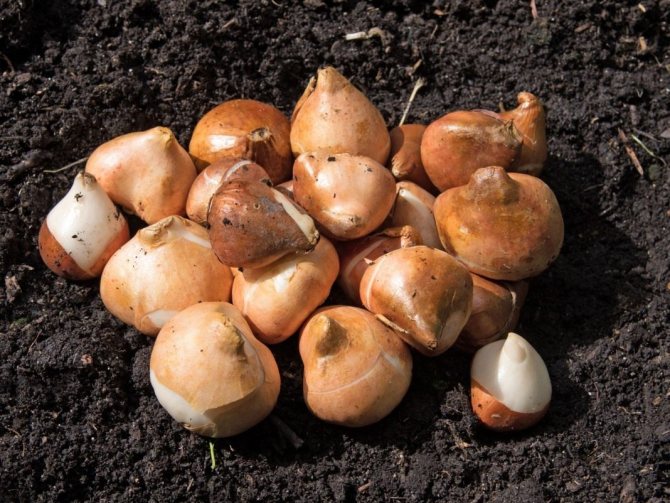
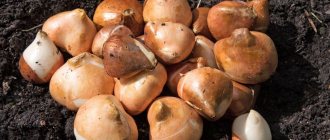
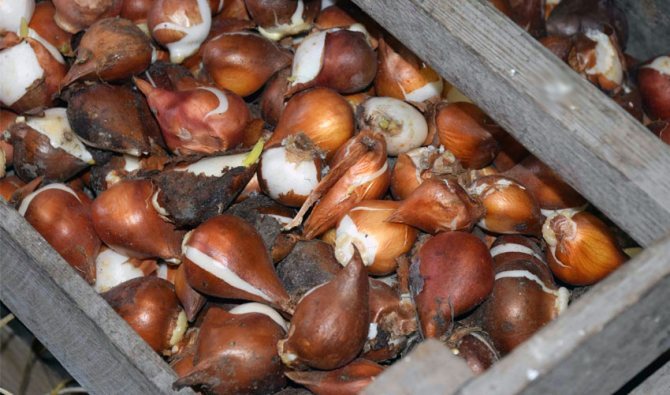
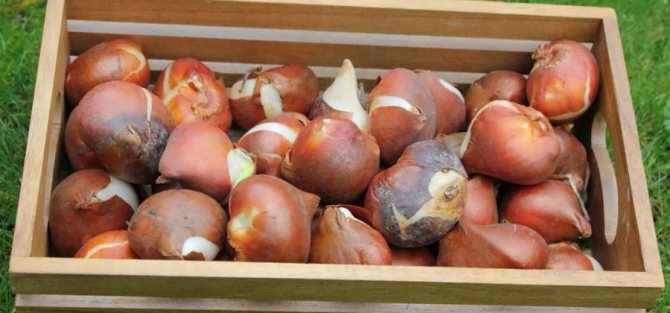
Tulip tubers
What to do with tulip babies after digging
The bulbs on which there are babies are also subject to storage. True, the timing will be much shorter than that of conventional bulbs. They dry out faster (in a few days). Regarding their further fate, the opinion of flower growers differs: somewhere they write that they need to be planted earlier, thereby allowing them to grow, but the best option is to plant in August, and cover with a small layer of humus on top to keep them from damage for the winter.
How to store tulips before planting in the fall
It should be laid in a thin layer to ensure normal thermoregulation and oxygen supply. For small ones, they use bags, for large ones - boxes. The room should be warm and humid enough, but in moderation. In a damp place, they will rot and mold. It is worth checking the bulbs periodically and removing the affected ones to avoid spoilage of all flowers. They don't need light.
Additional Information! It is best to keep the boxes off the floor if there are rats or frogs in the basement or cellar.
You need to distribute the bulbs in accordance with the size:
| Category | Bulb diameter, cm |
| Large or extra | 4 |
| 1 parsing | 3,5-4 |
| 2 parsing | 3-3,5 |
| 3 parsing | 2,5-3 |
| Baby 1 | 1,5-2,5 |
| Baby 2 | Less than 1.5 |
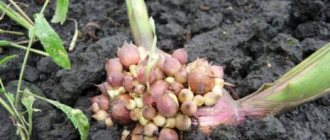
![]()
A variety of tulips with a high reproductive rate
For varieties with a high multiplication factor, special conditions are needed so that they can be stored without problems:
- in August, the storage temperature should not exceed 20 ° C;
- in September - October - 14-17 ° С.
The rest of the tulips have an average reproductive rate, and this is the vast majority. They should be stored at 20 ° C, which is lowered by 3 ° in October.
Poorly breeding varieties need a different temperature regime: in summer - 24 ° С, in autumn - up to 24-27 ° С, and by October it should be reduced to 17 ° С.
Indoor humidity should not exceed 70-80%.
Maintaining a special climate for the bulbs is very important; the quality and quantity of bulbs that can be planted in the future depend on this. At this time, buds and daughter bulbs are laid.
Important! In order not to get confused about the varieties of tulips, it is best to label each box according to the species.
Optimum storage temperature
The room temperature should be within + 23 ... + 25 ° С, humidity - 60–65%. Too dry air leads to shrinkage of the bulbs, and in a more humid environment they are more likely to rot.
Is it possible to store tulip bulbs in the refrigerator
The refrigerator is not the best place to store tulips. Not everyone can withstand the temperature of + 4 ° C, which is maintained inside the refrigerating chamber. Only some of the tulip varieties can be stored on the bottom shelf of the refrigerator, however, it is better to find a place for them with a temperature of at least + 15 ° C.
When to plant tulips
Before planting flowers, it is worth considering the possibility of leaves drying in the middle of summer, which does not look very aesthetically pleasing. To do this, you need to plant the bulbs next to summer flowers so that their bushes then cover the fading tulips.
Pruning tulips
You cannot trim the leaves immediately after flowering. To the bulbs there is an outflow of nutrients that are needed for proper growth and the appearance of children. An infection can penetrate through the cut, because it is not protected by anything. Flower buds can be trimmed, it is even useful. Then they will not waste energy on the germination of seeds.
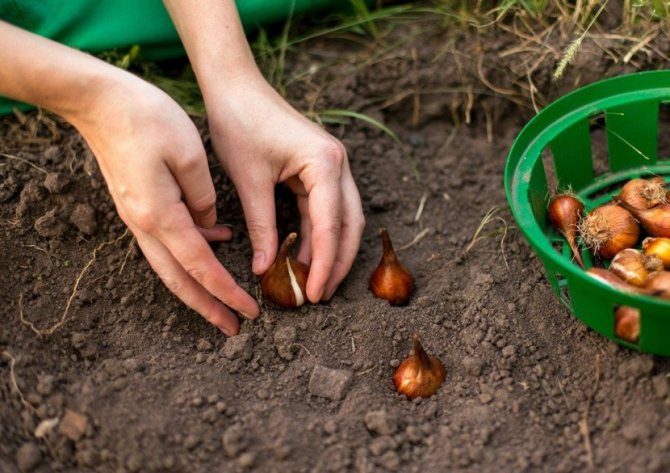
The best time for planting is considered to be autumn, September and early October, when the soil temperature is 6-10 ° C. Landing is possible later in November. But then you should take care of covering the tulips with leaves or other equipment.
Planting too early can cause bulbs to become ill, as higher temperatures encourage the development of viruses. If planted later, the onion may not develop sufficiently.
For planting, it is better to choose a dry, windless place where the sun's rays penetrate. Grow well in any fertilized and cultivated soil. Loose, humus-containing soil is most suitable. It can also be planted in clay soils, but on condition that it is fertilized with compost or peat. The main thing is that there is no stagnation of water, otherwise in winter the bulbs can be exposed to diseases or simply freeze.
Important! Fresh manure should never be used as a fertilizer for tulip bulbs.
When planting, you can and even need to use special bulb fertilizers.You can buy them at specialized stores. They contain all the essential minerals and nutrients that are needed for normal growth and development.
Before planting, you need to look at all bulbs for damage and disease. Selected tulips must be treated with a solution of potassium manganese acid for 1 hour. It is worth planting in the garden immediately after processing.
For the extra-class, the planting depth is 17 cm, the second and third fences are planted at a depth of 13 cm, there are even fewer children - about 7-9 cm.It is not necessary to press strongly into the soil so as not to damage the roots.
If planting is carried out on dry soil, then the furrows must first be watered abundantly with water, then put fertilizer and sprinkle with earth. Only after that is the bulb itself planted to a depth of 9-10 cm with the roots down.
Note! You constantly need to change the landing site, they return to the previous one no earlier than 3 years later. When frosts begin, it is worth putting a little peat on top of the beds, then the flowers will be protected from frost. This layer creates favorable conditions for development. It is not removed in the spring.
Summer storage features
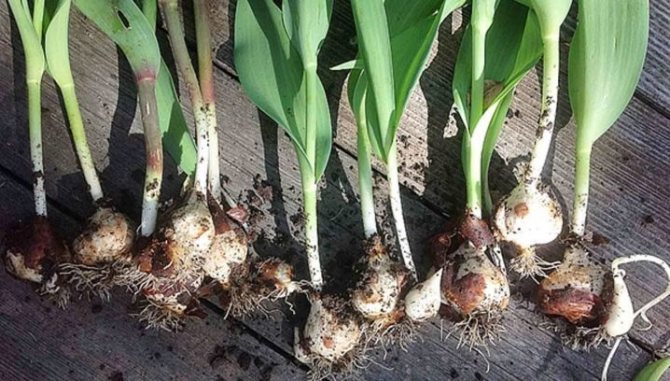
Within a month after flowering, the bulb ripens. At this time, there is an intensive outflow of nutrients from the stem and leaves, they gradually turn yellow and wither. The bulb itself becomes yellowish brown. When ⅔ of the leaves are withered and the stem becomes soft and pliable, the tulips can be harvested. In central Russia - this is the second half of June.
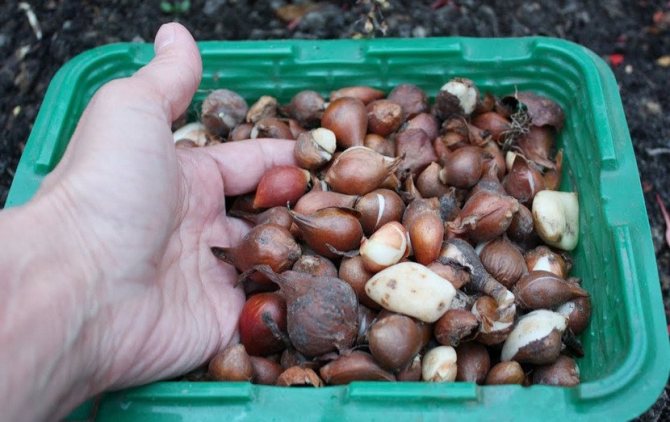
Seed preparation
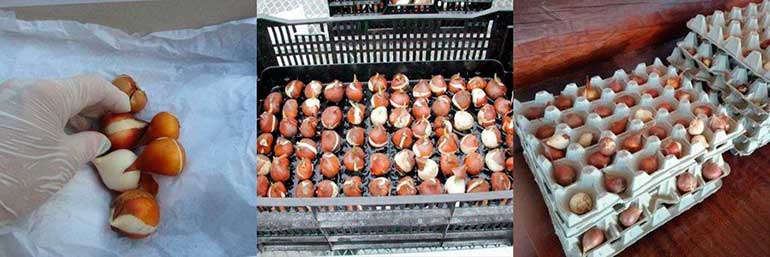
The dug nests of bulbs, along with roots, covering scales and soil residues, are placed in baskets or boxes (perforated) and left to dry for a week in a warm, dry and ventilated place. At home, a canopy, a shed, a veranda is suitable. Avoid direct sun exposure - this can burn delicate scales.
Next, the bulbs are disassembled. They are cleaned of integumentary scales and old roots, rotted, damaged specimens are discarded, calibrated by size. If the defects are insignificant (mold, superficial sores) they are removed mechanically - washed off, scraped off with a knife. To protect the planting material from further infection, it is etched in a manganese solution and dried.
Note! Experienced growers recommend treating the bulbs with the "Maxim" preparation before storing them. It is a contact fungicide, the action of which is aimed at protecting the seed from fungal diseases and rot.
Storage conditions
How to store tulip bulbs until autumn so that they do not rot, dry out, and germinate prematurely? Disassembled planting material is laid out in containers in 1-2 layers. During July-August, complex processes of laying the organs of the future plant (leaves, flowers) will take place in the bulbs, and for this it is necessary to provide conditions.
- The main thing is the temperature regime! For the first three weeks - 25–30⁰ С, all subsequent time before disembarkation - no more than 20⁰ С.
- The correct humidity is 60–70%. Excess moisture can lead to the appearance of putrefactive infections or untimely germination, a lack of moisture can lead to drying out of the fleshy scales. If you notice that the bulbs are shriveled, humidify the air with a spray bottle or place an open container of water next to it.
- The third condition is air access. Never store bulbs in plastic bags - they just won't last until they are planted!
The evidence of proper storage is a clean, dry, firm bulb, with no signs of bottom sprouting at the time of planting (mid-September).