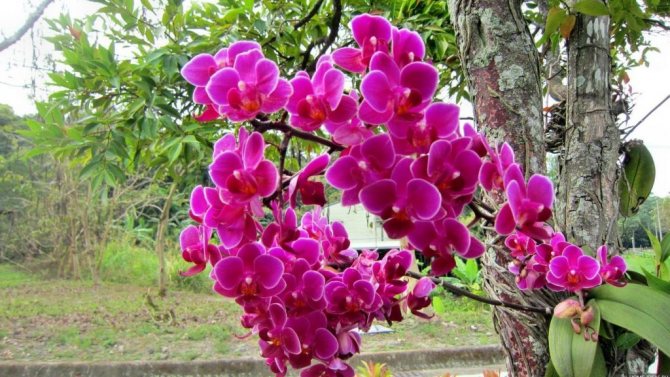
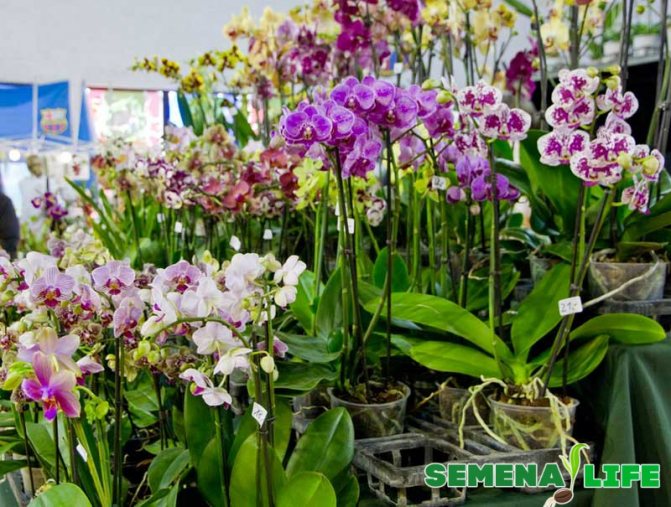
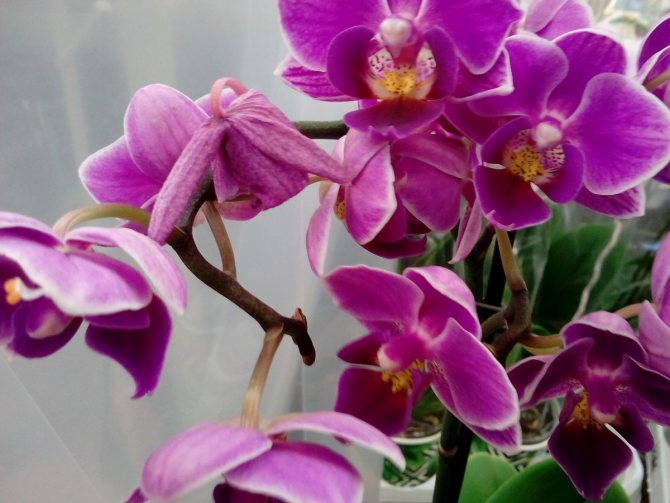
Beautiful and unusual flowers of indoor orchid varieties cannot leave indifferent amateur flower growers and real professionals. However, if you buy an adult plant in a store, and then almost anyone can propagate it, then not every home botanist, even an experienced one, will be able to grow an orchid from seeds. Exactly how exactly to do this correctly in order to achieve a result, we will tell you in our article.
The problem of purchasing orchid seeds from China
There are many seed producers in Russia, but none of them deal with orchids. On sale you cannot find the usual bags from or "Aelita" filled with orchid seeds. And European stores do not offer such a product either. Therefore, those flower growers who want to grow an orchid from seeds, willingly or unwillingly, have to turn to Chinese trading platforms.
The range of orchid seeds in Chinese online stores is impressive. Colors - the most diverse, up to those that do not exist in nature. Their prices are also very affordable - from 30 to 80 rubles for a bag of 100 pieces.
The problem is that Chinese seeds either don't sprout at all, or something else grows out of them. It is impossible to find reviews testifying to the positive experience of growing orchids from such material.
Important! Chinese orchid seeds are sold not only in online hypermarkets such as Aliexpress or Tiu. They can also be found on world trading floors, for example, on “eBay ". There they cost a little more - 150-300 rubles per bag, but the result of growing will be the same.

Chinese orchid seeds are most often ordinary fakes, as are the photographs that accompany them. Moreover, there is no need to be tempted by such fantastic exotic as "crane orchid" or "cat's head" - such plants are, in principle, impossible.
Features of seeds
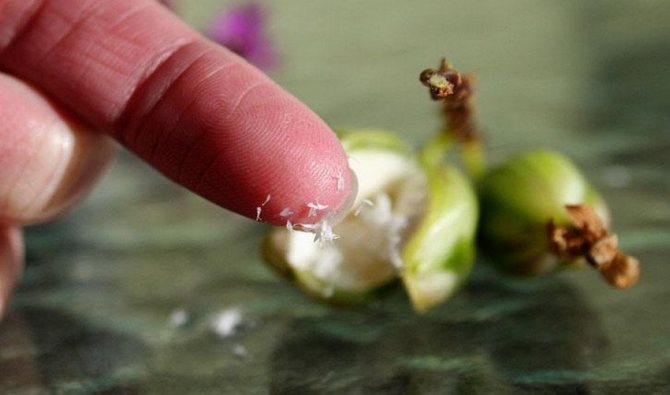
The phalaenopsis orchid has small seeds. To see what the seeds of a room orchid look like is possible only under a microscope.
Phalaenopsis orchid seeds have some physiological characteristics that complicate the process of their successful germination:
- There is no shell (endosperm) that surrounds the embryo. Such a shell helps the seeds to absorb from the soil all the necessary micro and macro elements for full growth and development. In tropical orchids, seed embryos form a symbiosis with fungi, sticking to their mycelium. Almost any type of mushroom is suitable for this process - honey mushrooms, tinder fungi, rhizoctonia or phytophthora. Li>
- Seedlings without a protective sheath are sensitive to environmental conditions. They do not have strong immunity to various diseases and pests. If they are not provided with optimal microclimate conditions, they will not be able to get new plants from them.
It is necessary to create greenhouse conditions for seedlings with a consistently high temperature, air humidity and good lighting. Under such conditions, you can grow new specimens that will bloom for the first time 4-5 years after sowing.
Orchid artificial pollination technology
There are only two ways to get normal orchid seed:
- meet an orchid collector and order seeds from him;
- pollinate the plant yourself and collect the seeds.
The first method is suitable for those who do not have their own blooming orchids at their disposal or want to grow from seeds some sort that is not in their own collection. Orchid owners who want to experiment with artificial pollination can go the second way.
Artificial pollination is a fairly simple procedure, if you know what to do and get your hands on a little. It is produced using the following technology:
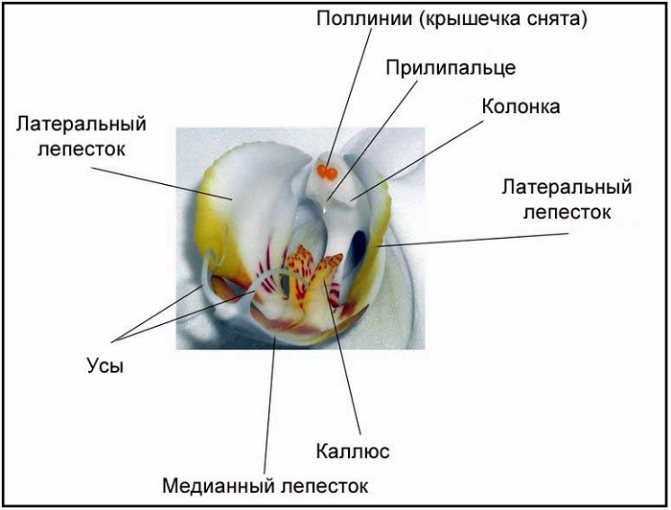
- The flower has a column - a reproductive organ in the form of a small “nose” (“stigma”) in the center of the flower. On its top, translucent specks are usually noticeable - these are pollen grains ripened inside the column.
- Take a toothpick or wooden skewer. Its tip gently lifts the column, and pollen grains are removed.
- The pollen grains are transferred deep into the column, into its open lower sinus.
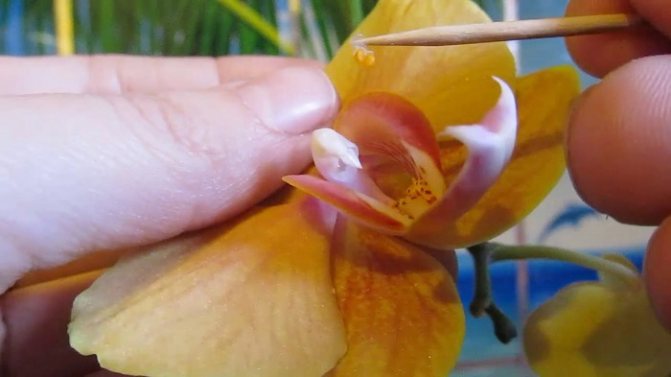
The inner surface of the columnar sinus is sticky, like the pollen grains themselves. Therefore, there is no need to fear that they will fall out of there.
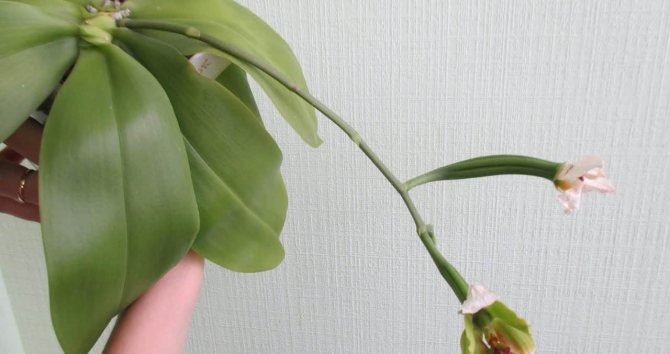
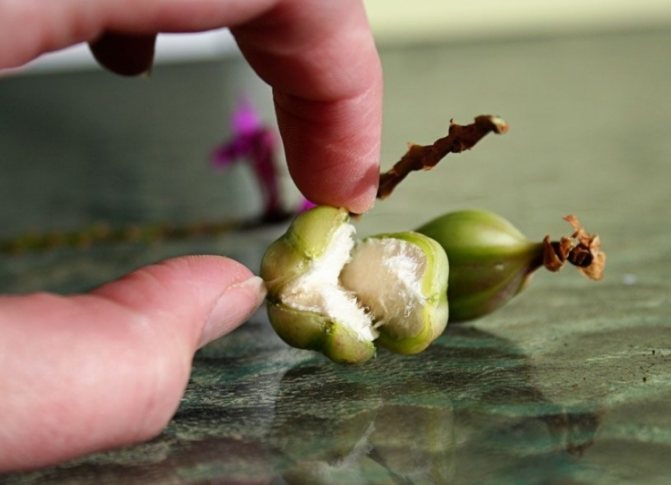
If pollination fails, after 2-3 days the flower will simply wither and fall off. In case of successful pollination, on the second day, you will notice that the column sinus begins to close. This process will last for several days, after which the petals will wither, but the flower itself will not fall off. Its pedicel will begin to turn green and thicken - this is how an ovary is formed. From this point on, you need to be patient, because the ripening of the fruit in orchids takes as long as in humans - up to 9 months.

Brief description of the flower
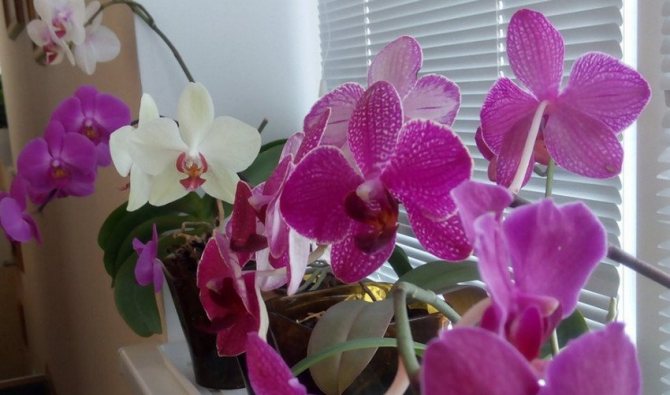
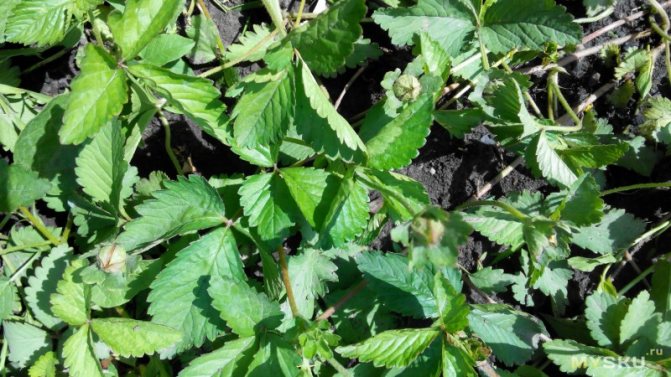
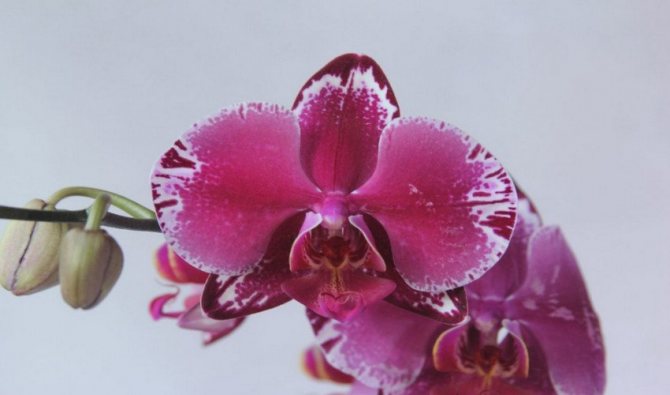
The orchid is rightfully called the aristocrat among flowering plants, so it is graceful, graceful and unique. This flower is ranked among the family of orchids or orchids, one of the most ancient and numerous on Earth. Today it is known about the existence of about 25 thousand natural species and 100 thousand artificially bred hybrids.
The orchid forms a rhizome with highly developed lateral shoots and aerial roots. Stem height, size, shape and color of leaves and flowers depend on the species and variety. There are compact bushes up to 30 cm high and specimens with high growth - up to 1 m.
Inflorescences are of 2 types: a pedunculated raceme, consisting of several flowers, and a single spikelet.
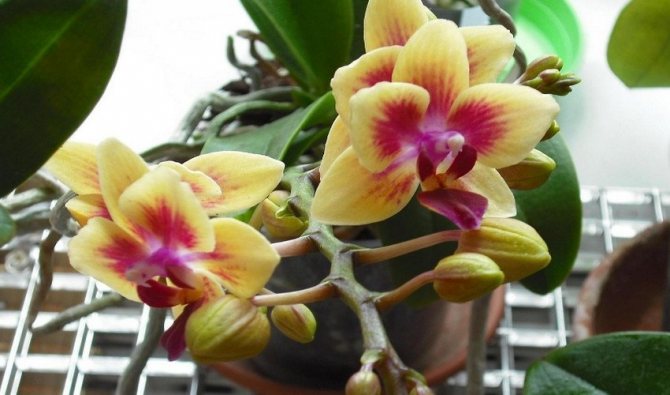
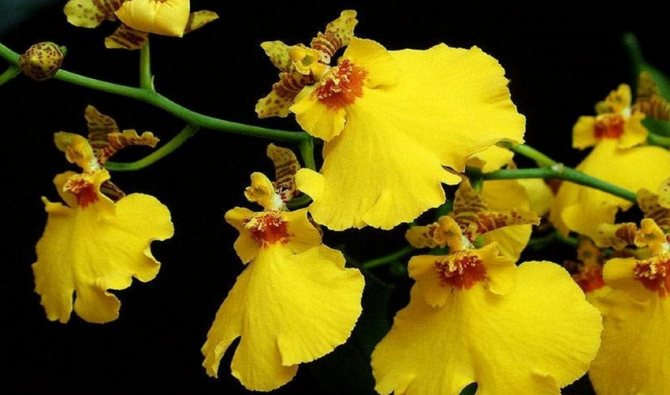
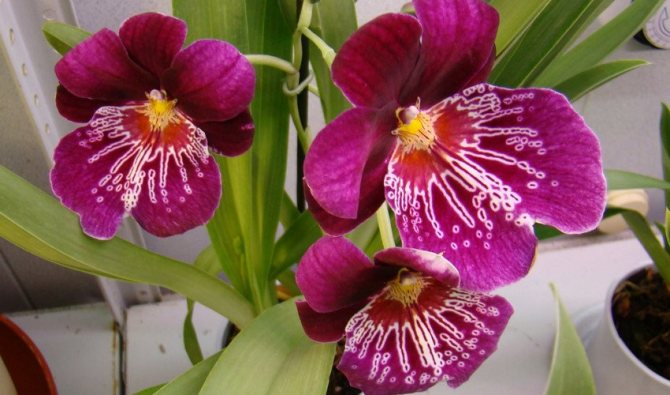
Flowers can reach a diameter of several millimeters to 25 cm. The color of the petals is white, pink, purple, lilac, yellow, black.
Among indoor orchids by type of growth, there are 2 types:
- Monopodial... Growing up. The leaves of the upper tier are always larger than those of the lower one. Forms adventitious roots on the stem.
- Sympodial... The rhizome is located horizontally. The flower grows in a bush with several branches. Has a pseudobulb or bulb from which a flower arrow can form.
Among the most popular indoor types:
- phalaenopsis;
- aerrangis;
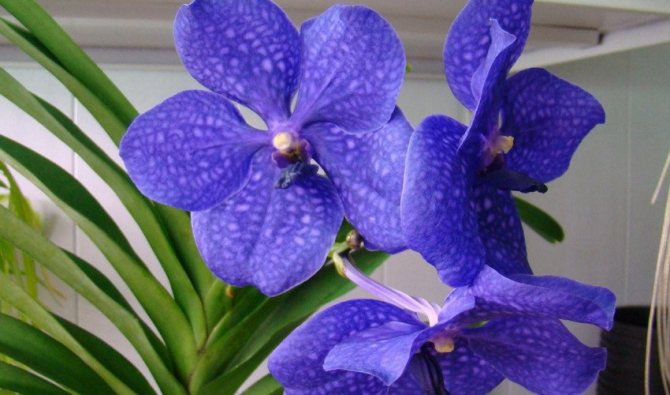
- wanda;
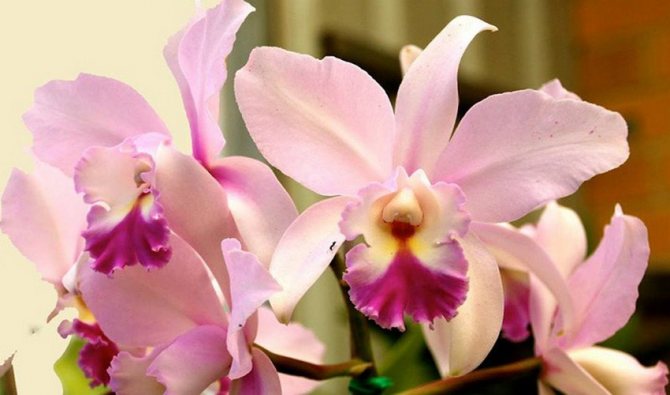
- cattleya;
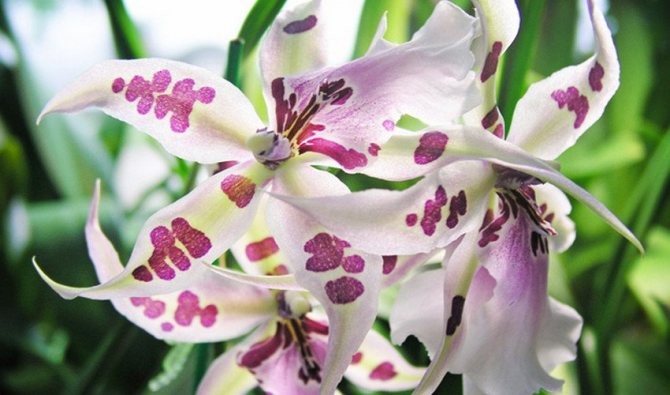
- cambria;
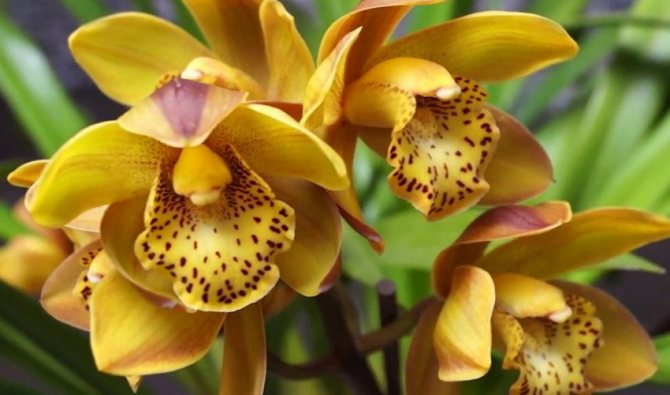
- cymbidium;
- oncidium;
- miltonia.
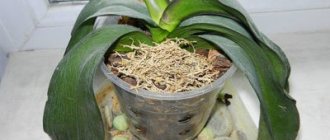
Collecting and storing orchid seeds at home
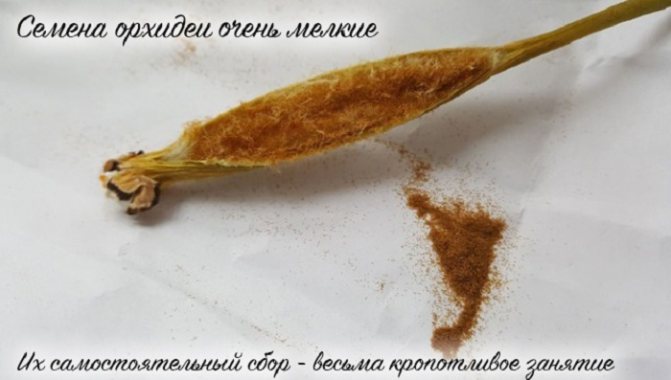
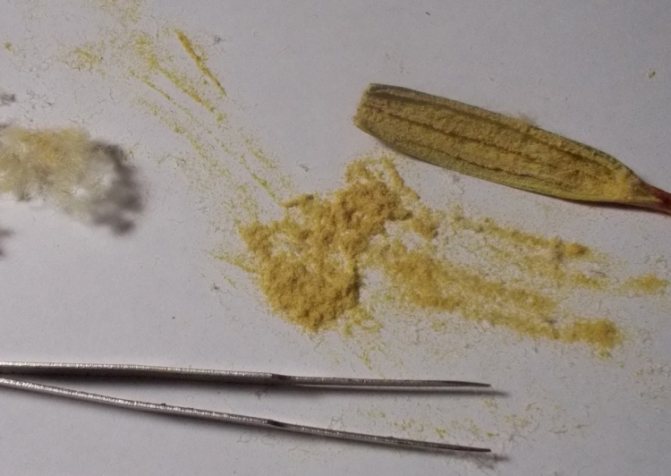
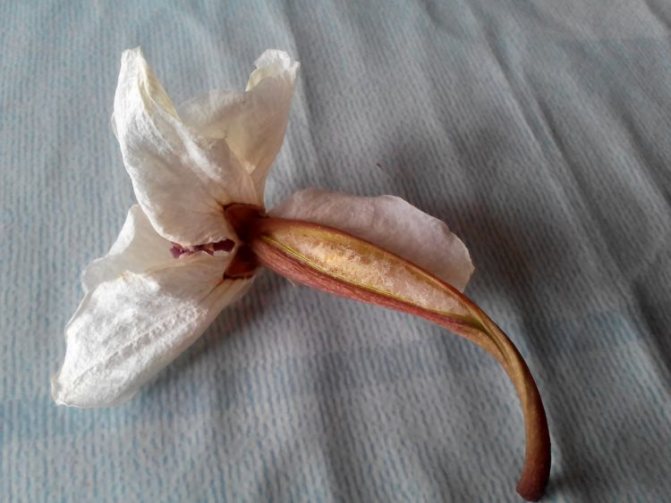
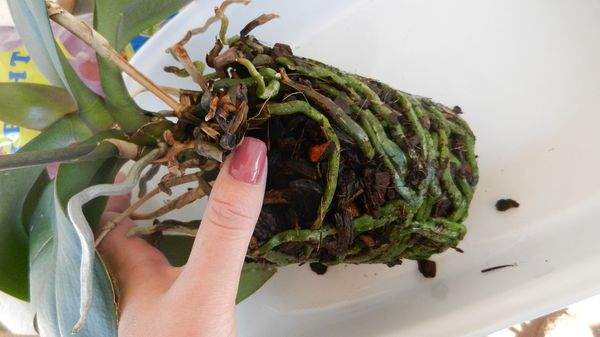
The fruit of the orchid is an elongated capsule with valves that are visible in the form of longitudinal grooves. At first, it has a green color, but gradually changes color to brown or yellowish. As soon as the color change begins, you need to put a small paper cap on the box. It will keep the seeds from spilling out.
A box that has dried is considered fully ripe. She can be cut from the peduncle and opened. Many dusty seeds are found inside. They are so small that from half a million to several million ripen in each orchid fruit. This circumstance proves once again that buying orchid seeds in bags of 100 or 200 pieces is a waste of money. First, it is not clear how 100 dust particles are counted. Secondly, not all of them have an embryo, and the percentage of germination of orchid seeds is very low.
The collected seeds can be sown immediately.If sowing is delayed, you can store them in the refrigerator by wrapping them in paper and folding them in a plastic sealed container.
Tip # 1. It is convenient to open the box on a white sheet of paper. Having opened the shutters, you need to take it by the petiole and tap the top of the fruit on the leaf. The seeds are reluctant to spill out, because inside the capsule they sit in a loose, fluffy mass that holds most of the seeds. These fibers need to be rotated several times in order to extract all the contents.
An orchid seed is 15 thousand times smaller than a wheat one. Sellers who offer to buy seeds by invoice (100 or 200 pieces) are deceiving buyers.


Pros and cons

Seed propagation is a rather complex process with advantages and disadvantages. It should be understood that orchids do not have a supply of nutrients or endosperm. The peculiarity is that there are very few nutrients, and they are in the embryo.
The smallest seeds often die during germination. In the event that the seed has sprouted, it looks more like a tuber-like formation or proto-feed. In order for it to resemble an independent plant, that is, it could break complex organic compounds into simpler ones, it needs to become infected with a fungus. But the plant can die exactly. Or because the orchid is too weak, and the fungus will destroy the seed. Or the plant's immune system is very strong and it cannot get infected.
Pros:
- Preservation of maternal and paternal chromosomes in the future plant.
- The result is a hardy and weather resistant plant.
Minuses:
- First flowering in 4–5 years.
- Ensuring maximum sterility during planting.
- Very small seeds. Moreover, they are susceptible to microbial diseases.
- A complex nutrient medium is required.
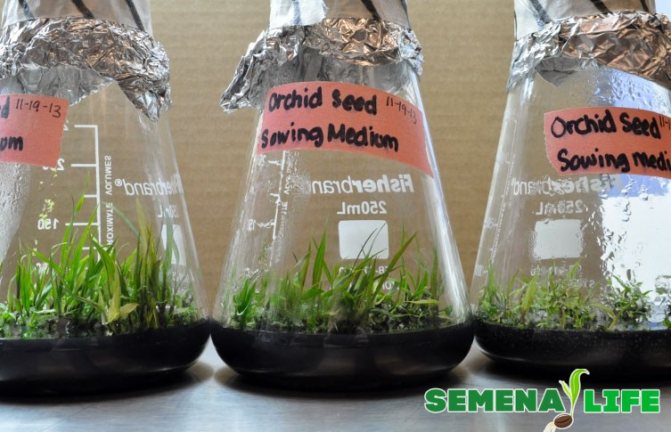
Orchid seed culture medium recipes
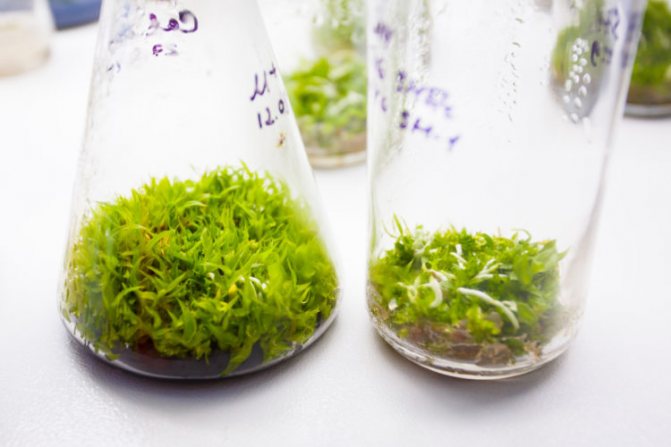
Sowing orchid seeds is the most difficult procedure in the growing process. This also applies to the preparation of the substrate. Orchids are never sown in soil. They require a special sterile nutrient medium.
Orchid seed nutrient formulations resemble microbiological media. There are many homemade recipes available. The most common options are as follows:
| Recipe | Ingredients | Preparation |
| Agar-agar medium | Agar-agar - 15 g Dextrose or regular sugar - 20 g Complex fertilizer for orchids | For 1 liter of water, according to the instructions, the required amount of fertilizer is diluted. The solution is heated to 950C, sugar and agar-agar are added to it. The mixture is kneaded. |
| Starch medium | Corn or potato starch - 80 g Sugar and honey - 4 g each Activated carbon - 1 tablet Banana puree - 25 g Complex fertilizer for orchids | Dissolve the required amount of fertilizer, puree, sugar and honey in 400 ml of water. Crush a charcoal tablet, add to the solution. Add the starch, place on the stove and bring until thickened, stirring continuously. |
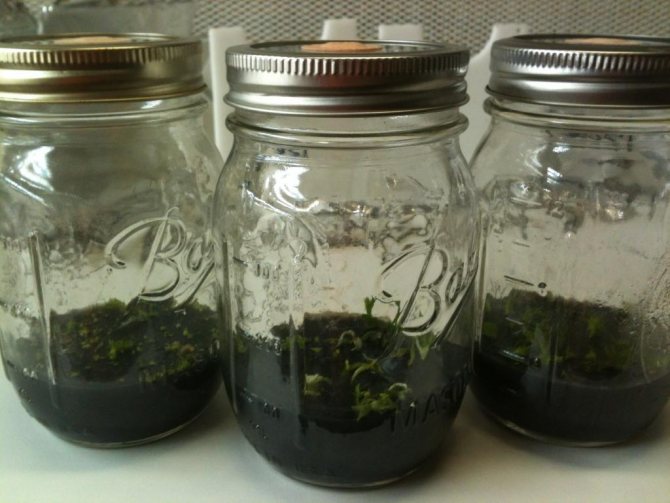
The prepared medium must be poured hot into a sterile half-liter jar and covered with a lid. The height of the layer should be about 3 cm. Next, the jar is sterilized in a water bath for minutes, after which it is tightly sealed and left to cool.
Preliminary preparation
First, you need to purchase seed, substrate and containers for germination and picking of seedlings, as well as think over where to place crops in order to provide them with the necessary conditions.
Typically, China is the main supplier of orchid seeds today. Seed material is ordered online.
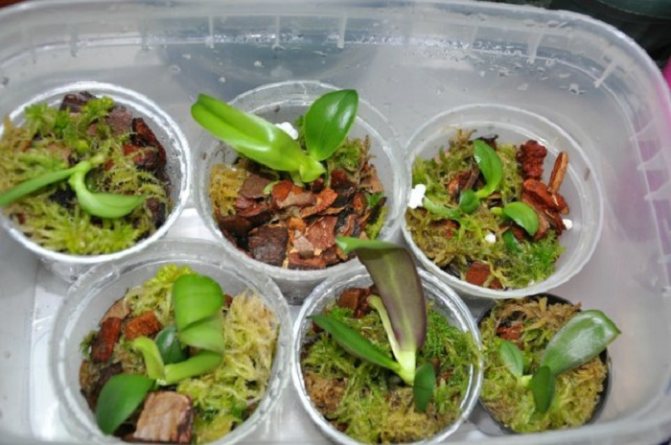
Special flasks (sold in specialized stores) or glass jars with resealable lids are used as utensils for germination. As a substrate - agar-agar gel nutrient, Lewis Knudson nutrient medium.
Orchid seeds will not grow in soil or sand. Sphagnum moss is also suitable, but it is not always possible to achieve its sterility and a certain acidity.
The preparatory process consists of the following stages:
- Disinfect the containers for planting - boil, rinse with steam for an hour, or bake in the oven for half an hour at a temperature of + 130 ... + 150 ° С.
- Pour 10-15 g of agar-agar with water, leaving until it swells.
- Boil 200 ml of distilled water.
- Add agar-agar, 10 g of glucose, 10 g of fructose to it, without stopping stirring.
- Wait for dissolution.
- Add a solution of potassium carbonate or potash, orthophosphoric acid drop by drop until the acidity level is 4.8–5.2 pH (checked with litmus paper).
- Pour the hot solution into flasks. The substrate should fill one third of the container.
- Close the flasks with lids and place in a pressure cooker or a saucepan of water for half an hour.
- Check the containers and substrate for sterility, leaving them covered with cotton wool for 5 days.
- After this period, if no mold has formed, 10 minutes before planting, place the seed in a chlorine solution (10 g CaCl² / 100 ml water).
Important! Do not place seeds in moldy soil. It is necessary to re-prepare a new substrate, observing sterility.

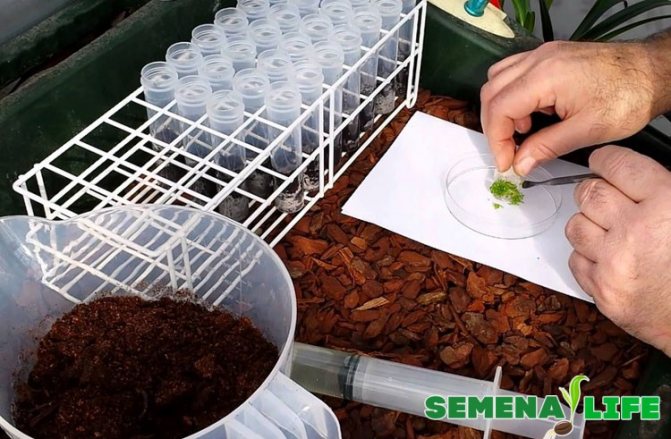
Sowing seeds for nutrient solution
At all stages of sowing orchid seeds, it is extremely important to maintain complete sterility. Ideally, this process takes place only in microbiological boxes. However, even without them, you can try to minimize the risk of contamination of the nutrient medium by microorganisms. This will require the following tools and materials:
- hydrogen peroxide:
- any chlorine solution (for example, household "Whiteness");
- sterile surgical gloves and gauze;
- small sterile containers for seeds (for example, test tubes);
- disposable syringes without a needle or laboratory pipettes;
- sterile scissors;
- Scotch.
The seeding procedure is performed as follows:
| Stage | Performance |
| Preparation |
|
| Sowing |
|
| Sealing |
|
Then the cans are placed on a shelf illuminated by a phytolamp. The air temperature should be from +25 to + 280C. This creates the same conditions under which orchids are grown in glass flask on orchid farms.
The seeds, and then the seedlings, will spend many months in a hermetically sealed jar. Therefore, sowing must be carried out as quickly as possible so that the microflora contained in the air does not settle on the nutrient medium, and subsequently mold does not develop.
What is this breeding method?
Sexual reproduction of plants is carried out by planting seeds. In this case, an exchange of genetic material occurs. The process of transferring parental traits plays an important role in breeding, and makes it possible to develop new plant varieties of the same species with the necessary properties. Seed fruits emerge from flowers. The essence of obtaining a seed with an embryo of a new plant is the fertilization of the eggs with the sperm of the pistil, as a result, a fruit is formed, and then a seed appears from the ovules.
Transplanting orchid seedlings from a jar
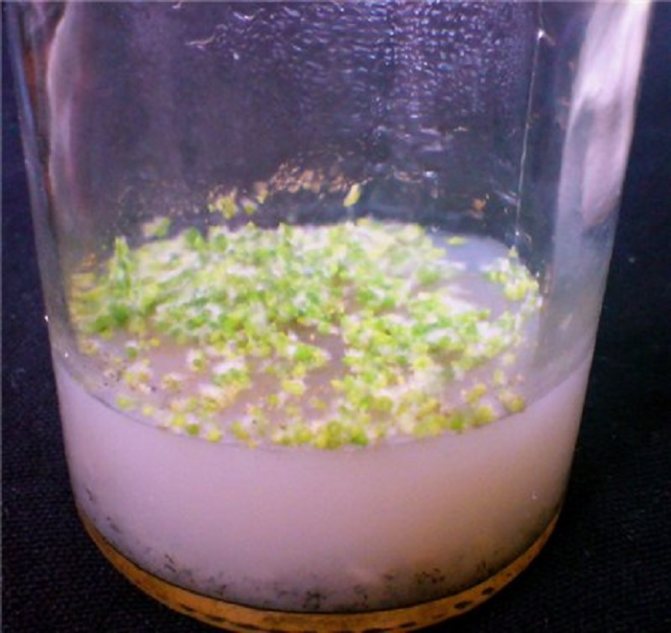
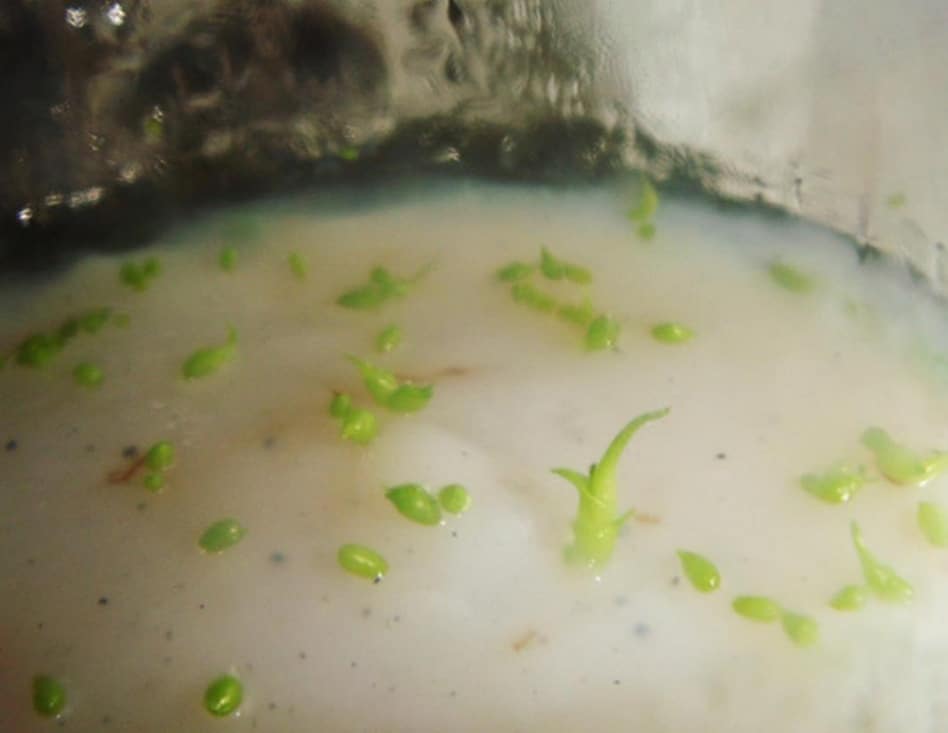
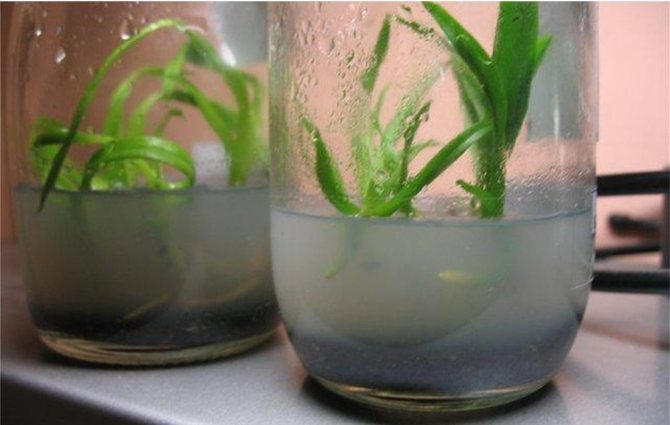
If the seeds are well ripened and viable, you can observe the process of their germination after 2-3 weeks. Seedlings develop slowly, within about six months. All this time, you need to maintain the desired temperature and light the jars. In no case should they be opened prematurely (ventilated or watered).
Opening a jar with seedlings can take place when they have roots of sufficient length and 2-3 leaves each. Extracting seedlings is done like this:
- the bank is opened;
- under a stream of warm, but not hot water, the nutrient medium is washed out;
- seedlings together with water are poured out.
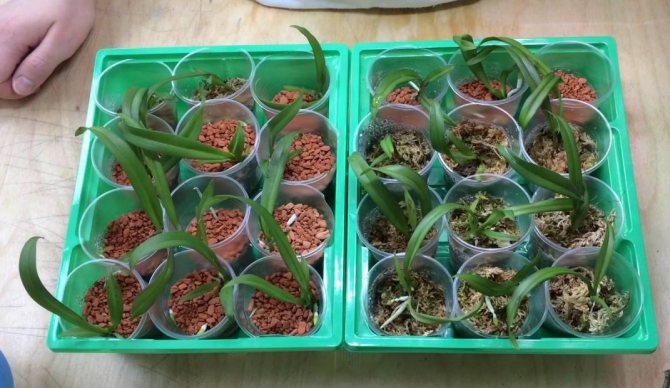
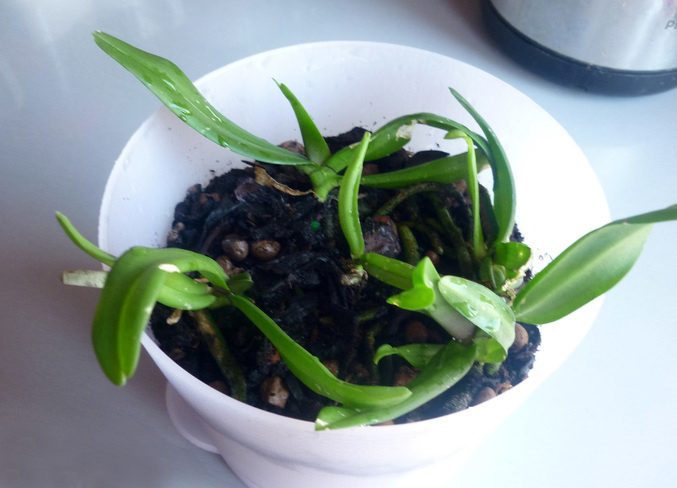
Then the cups are prepared for planting them. At first, it is very convenient to use ordinary plastic, disposable, 2 pieces per seedling. In one, many holes are made on the bottom and walls. A substrate is laid in it, consisting of finely chopped pine bark and sphagnum moss. A seedling is planted in the substrate. At the bottom of the second glass, a little expanded clay is poured, and the "leaky" glass is inserted into it.
Transplanted seedlings need good light, warm air and moderate humidity. Until they are fully rooted, they are not fed. It is possible to give a weak fertilizer solution only after the seedlings start growing in a new place.


How to plant and grow seeds: a step-by-step guide
Planting seed is also carried out under sterile conditions:
- Place the flasks in a wire rack, which is placed over a container of boiling water.
- Seeds are taken with sterile tweezers and placed in flasks.
- Shake the flasks to evenly distribute the seed.
- Close with sterile lids.
- Place in prepared conditions.
Germination in different species occurs at different times - from a month to a year. The sprouts look like balls at first. It is interesting that the leaves are formed first of all, and then the roots.
Seedlings are transplanted into non-sterile soil after 12 months. Transparent plastic cups are suitable for picking. Sphagnum moss is used as a substrate, mixed with fern and pine roots in equal proportions.
Also, crushed activated carbon is mixed into the substrate (10 tablets / 1 liter of substrate). Before planting, the soil mixture is poured with boiling water and kept for 30 minutes. Then the mixture is scattered over the containers.
The pick is made as follows:
- Pull the sprouts with forceps in a circular motion. You can also fill them with warm water and let the agar-agar melt.
- Plant the sprouts in a container with a prepared substrate.
- Place in a warm place.
- Seedling care consists in regular spraying with warm soft water. Six months later, they can be transplanted into regular soil and a permanent pot.
Did you know? In the nectar of some species of orchids, for example, Coriantes, the marsh dumpling, there is a narcotic substance that intoxicates insects. After landing on the bud, the animal may not be able to fly away for 40 minutes.

Expert advice on caring for orchid seedlings
In order for seedlings obtained from seeds to take root well in the cups and not die after being removed from the jar, you need to take some precautions:
“As soon as a young orchid leaves the greenhouse and sterile conditions in an aggressive environment, it gets severe stress. The percentage of lunges at this stage is quite high. Treatment with Fitosporin-M and weekly spraying with Epinom-Extra helps to reduce it. Seedlings should not be heavily waterlogged, but drying them is also undesirable. After rooting, it is useful to fertilize with potash fertilizers, and even better - complete mineral complexes with trace elements. "
A. Davydovskaya, owner of the greenhouse
How to prepare orchid soil
Various components are used for cooking. The main thing is to observe proportions. Here are examples of several available formulations:
- charcoal and 5 parts of pine bark;
- coal, sphagnum 2 parts, pine chips - 5;
- charcoal, pine bark, peat in equal parts and 3 parts of humus.
The components must be prepared in advance:
- moss must be soaked in water for a day for insects to surface;
- peat is cut into small pieces, bark into chips, everything is poured over with boiling water, dried.
Topical questions about growing an orchid from seed
Question number 1. Where can you buy a ready-made flask with orchid seedlings and how much does it cost?
Indeed, orchids in flask cans are much easier to buy than seeds. Most often they are sold on orchid farms, mainly on Asian ones. Many tourists bring them from Thailand as souvenirs. If you have a goal to buy seedlings in a flask, you can place a collective order on the forums of orchid lovers or in groups on the social network. It is also possible to order them through online stores. The cost of flasks is very different and depends on many factors: the variety of orchids, the size and material of the container, the number of seedlings. The price can range from 700 to 4500 rubles.
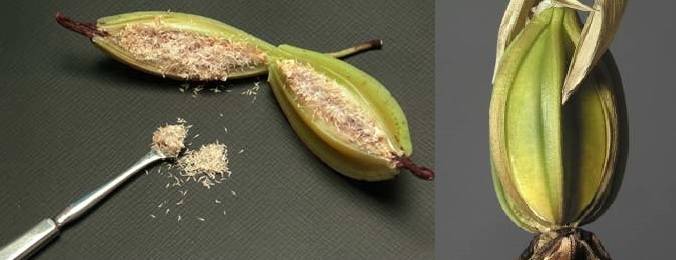
What does it look like in the photo?
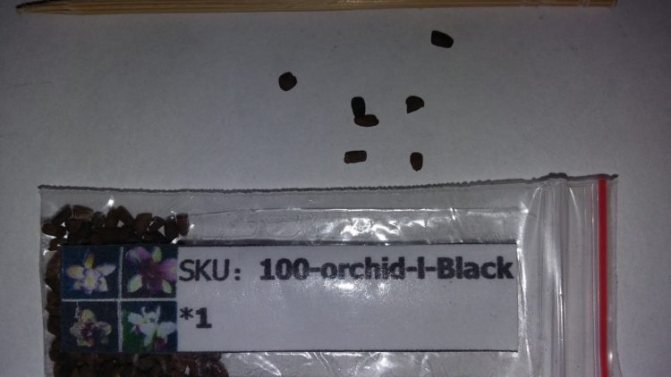
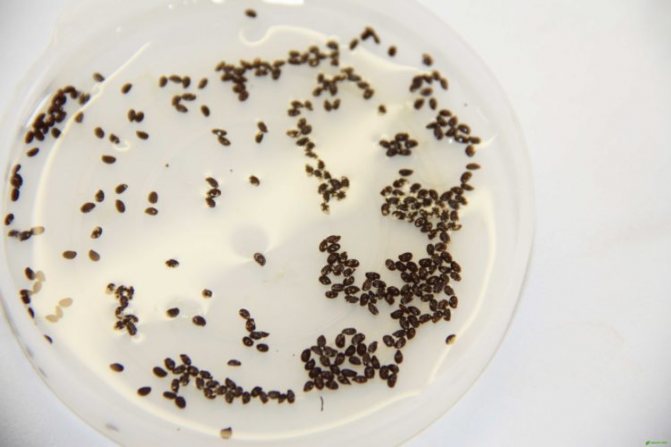
Orchid seeds are rather small, more like dust particles. For a season, they can ripen up to a million. It is worth noting that they sprout extremely poorly.
See how flower seeds look in the photo:
Seed handling rules
So, the order is completed, the package has been successfully received, and moreover, you are lucky enough to become the owner of real orchid seeds. Joy has no boundaries, but this is only the beginning of the path. Now you have to conjure over the coveted purchase in order to get the coveted plants. We remember that the seeds are very vulnerable - they are easily affected by any infection. Therefore, when starting to work, you need to observe strict sterility - this applies to both the gardener and the garden tool.
Basic landing rules
When the seed orchids have grown enough, they need to be transplanted into a separate pot. This must be done carefully, trying not to damage the delicate roots of the plant. The whole procedure involves the following steps:
- remove the plant, carefully freeing the roots from the old soil mixture;
- carefully examine the condition of the root system, if necessary, remove dried root shoots with scissors, as well as those that were damaged during extraction;
- we select a pot that is suitable in size;
- We pour a little new soil mixture into it, place the plant and add more soil, so that it completely fills all the free space between the roots. It is important to leave the growth point on the surface;
- in a pot with a planted orchid, the soil should be lightly tamped (rather, just pressed) and moistened.
That's all, the transplant of a self-grown orchid is completed. Now the plant needs rest - put it in the shade for the next few days to adapt.
What container and soil to choose?

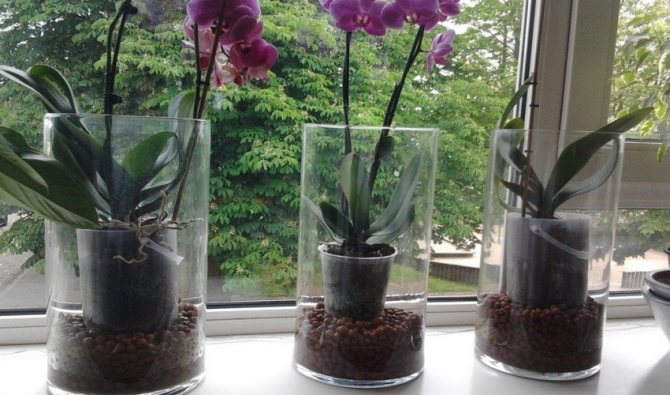
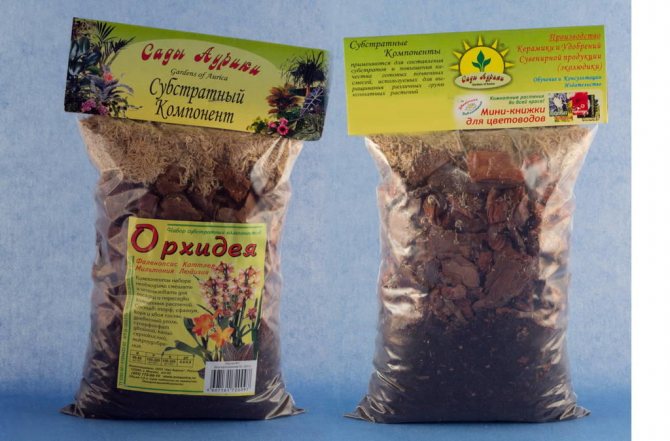
The plant needs a pot and soil only as a support - if the vessel is selected correctly, the roots will occupy the entire space and the phalaenopsis will begin to actively grow. You can buy a ready-made substrate, or you can prepare a mixture for an overseas beauty with your own hands. To do this, expanded clay or polystyrene is poured at the bottom, and then bark mixed with moss.
Take into account the fact that dry bark is water permeable, therefore, before making a substrate from it, you need to rinse and leave it in water for several days. The pot must be transparent or light.
Necessary equipment
Anyone interested in how to plant orchid seeds needs to know that regular containers or pots will not work for these flowers. It is necessary to purchase special glass flasks or containers with a narrow neck for chemical reagents, with a volume of about 300 ml. A conical Erlenmeyer flask, for example, will do. If it is not possible to purchase such dishes, use glass jars with tightly screwed lids. The containers must be sealed tightly.
As a rule, corks are also sold complete with flasks. If you don't find them, make them yourself - roll up a tight gauze or cotton swab and wrap it in aluminum foil. Four holes with a diameter of several millimeters are drilled in the lids of the cans and tightly clogged with cotton wool.
Care after the procedure

The place for placing flower pots must be chosen very carefully - you must not allow a burn on the leaves. The temperature should be 25 degrees, an increase of up to 35 degrees is permissible. If it is high for a long period, it can lead to a decrease in turgor and shedding of flowers.
Aerial roots should not be placed in a pot. It is important to cut off the dead parts, because if they begin to die off, the trunk will become bare and the plant can completely rot.
Phalaenopsis should not be transplanted frequently. You can do it every 3 years if the substrate has lost its quality. Over time, it can become black, fragile. The procedure is carried out after flowering.
The plant grows from the top, because the root system is at the top. The stems and roots remain in the pot. To make young plants happy, as long as possible and develop as needed, do not forget about top dressing, watering and spraying. And if you notice the presence of diseases in time, you need to immediately take action to save the phalaenopsis.
Problems and difficulties
Problems in growing orchids from seed can await at any stage. However, the most common the reason for the low germination rate is low-quality seeds, the slightest flaws in sterility, non-observance of temperature and humidity conditions. As a result, the death of seeds or seedlings and the absence of a result in the form of a beautiful flower. Starting this process, it is worth analyzing your conditions, the availability of time and money, as well as a lot of patience, so as not to be disappointed by the difficulties.
Orchid lovers should be aware that these plants can be grown from a bulb, from a baby, in water or in a closed system, but the article on the Thai orchid may also be interesting.
How to distinguish fake from real?
Since obtaining orchid seeds is a very complicated process, which in most cases requires laboratory conditions, many growers prefer to buy them. However, buying seeds is a serious matter, which, they say, requires the right approach... Consider the main aspects to look out for when buying orchid seeds:
- Manufacturer (seller)... It is best to buy seeds from large specialty stores that have a good reputation.
- Price... Undervalued prices often signal poor quality material. But one should not forget that a high price is not a guarantee of quality.
- Packaging... The seed bag must be neatly glued, the text on it must be readable. It should contain the following information:
- name and contact details of the manufacturer;
- the exact name of the culture (according to the Register);
- GOST;
- weight in grams;
- batch number;
- shelf life.
IMPORTANT! The expiration date of the orchid seeds should be printed directly on the packaging, as there is the potential for a "renewal" on the label on the expired sachets.
When shopping online, it is not easy to follow the above rules. First of all, you need to pay attention to the reputation (of the company or store) that offer the seeds.
Very often, unscrupulous sellers sell seeds of completely different plants, sometimes even weeds, under the guise of orchid seeds.
What seed material is sold in the PRC?
Reference! There are more than 30,000 varieties of this magnificent plant in the world, 300 of which are bred in China.
These varieties have not only a variety of shades and shapes, but also have a delicate, distinctive aroma. The most popular and demanded are:
- dendrobium (Dendrobium);
- cymbidium (Cymbidium);
- vanda (Vanda).
This plant grows in nature in hard-to-reach places, impassable thickets and secluded valleys, far from people. Therefore, in China, this flower is a symbol of moderation, solitude and modesty.
Can it be cultivated like this?
If you are lucky enough to get real orchid seeds from a Chinese site, then theoretically you can grow an orchid from it. But, unfortunately, this is a very long and laborious process. You will have to purchase the necessary equipment and materials, maintain sterility and the desired temperature. Some growers, jokingly, call all this a real laboratory. Moreover, the result will have to wait a long time.
REFERENCE: the planted seed will be able to turn into a full-fledged adult orchid flower in 4-6 years.
Possible crop problems
Seed propagation of orchids is a complex and lengthy process. The main difficulty in growing seedlings from seeds is maintaining complete sterility. At the slightest miss, mold appears on the surface of the crops, and this means that all efforts were in vain.
Some orchivores are trying to save the seedlings: they prepare a new medium, and the contents of the vessel affected by mold are poured into a small bowl and 2-3 drops of a 1% solution of a fungicide, for example, basezol, a biostimulant and hydrogen peroxide, are dripped into it. After 15-17 minutes, the seedlings are moved to a new environment.
Problems also arise during the removal of young plants from the vessels in which they germinated, and their further adaptation in the environment. The remains of the nutrient medium should be well washed in a fluconazole solution in order to avoid the appearance of various microorganisms that provoke rotting of the plant root system.
What to consider when growing
Characteristic qualities of seeds: the plants of this group have very small, barely distinguishable seeds that do not have any nutrient, therefore they need a special growing medium.
Composition of the substrate used as a nutrient medium: for germination of seeds, gel-like substances are used, such as agar-agar isolated from seaweed, or artificial horticultural gels with a specially selected composition.
For replenishment, simple sugars, such as glucose, or ordinary granulated sugar are added to the composition. Sterility: in order not to infect weak and unstable seeds and sprouts with diseases and infections, it is necessary to sterilize the growing utensils and nutrient solution. The pH level of the nutrient composition: with the help of special additives, it is necessary to equalize the acidity to the required level of 5, 1-5.5.
Orchid seeds what they are

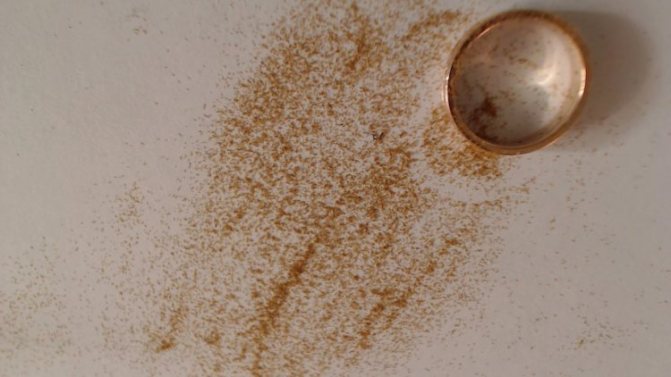
Orchid seeds (phalaenopsis) ripen in a box with 3 or 6 valves. There are up to 4 million of them, the length of one reaches from 0.3 to 3.3 mm. Only ripe seed can be used after the capsule is dry. Orchid seeds look like dust or sand due to their large number and small amount. The dust from the seeds is not black, but a yellowish-cream shade.
Harvesting seeds is very difficult. But nature has compensated for the size of the achenes with a large number of them in a box. Under natural conditions, orchids reproduce by seeds. The wind blows the seed dust, the seeds fall on the bark and leaves of trees and germinate.
The seed takes about 2.5-3 months to fully ripen.
Crops keeping conditions
A small mini-greenhouse, a homemade greenhouse or a florarium is ideal for placing containers with crops. Depending on the type of sown orchid, the formation of seedlings occurs within 6-9 months.
During this period, the crops are kept under constant conditions with good illumination for at least 14 hours a day, if illumination is needed, the light source is placed at a distance of 30 cm from the vessels.
The ambient temperature is kept constant at 25-28 degrees Celsius without sudden changes. Air humidity is desirable about 70%.
At first, tiny green balls appear on the surface of the nutrient mixture.Soon, barely noticeable hair-like rhizoids, designed to absorb vital nutrients from the mixture, stretch from them. Then the leaves are formed and at the very last moment - the roots, when the plant already has 2-3 true leaf blades.
When and how to replant sprouts
From sowing seeds to the moment of transfer to the substrate, it takes up to a year. The following composition is prepared for transplantation:
- 1 part of chopped bark of a coniferous tree, sphagnum moss, fern rhizomes;
- 10 tab. activated carbon (pre-crushed).
A layer of classic drainage is placed at the bottom of the plastic cups, then the prepared soil is placed. Seedlings from the original container are removed in a circular motion, the roots are washed. The sprouts are carefully transferred to the cups with the substrate. At first, small orchids do not water, but simply spray, making sure that the soil remains moist.
The orchid is not touched for six months, and then transplanted into the usual traditional soil for orchids.
How to get or get seeds from a flower?
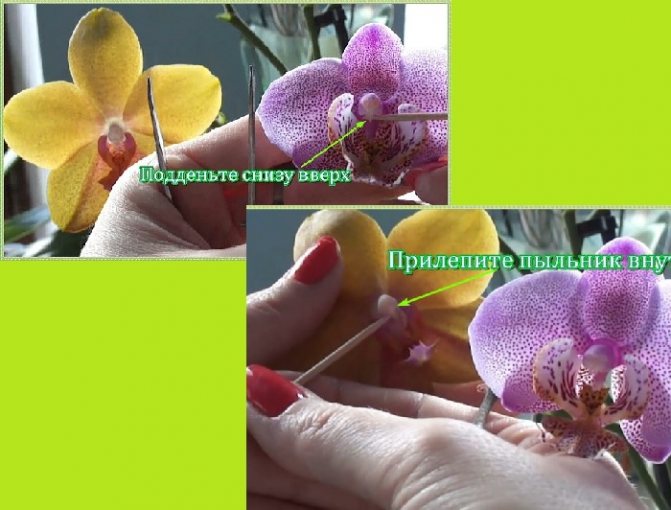
Pollination is required to obtain seeds. In the natural environment, pollen is carried by insects. In the artificial one - you have to work hard:
- Remove the cap from the stigmas. Under it there will be balls with pollen on the legs (pollinia).
- Open the cap carefully. Remove the polylines with a toothpick or small tweezers, holding them by the legs.
- Find the column at the bottom. Place in the groove of the polline located in it.
If the pollination is successful, then within a day the hole in the cap will close, the flower petals will begin to wither, and the base, which is attached to the peduncle, will swell.
When pollination, do not touch the pollen balls. They are very gentle.