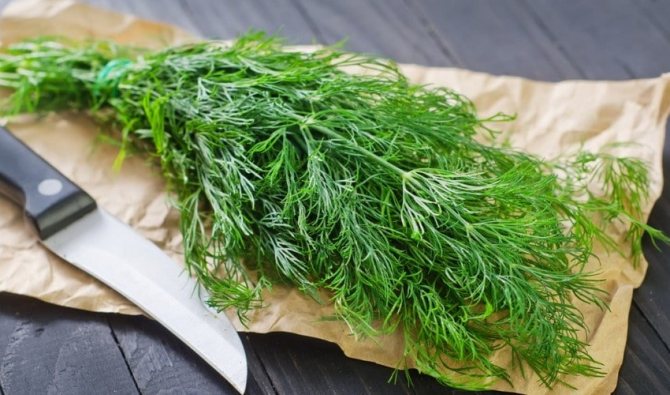
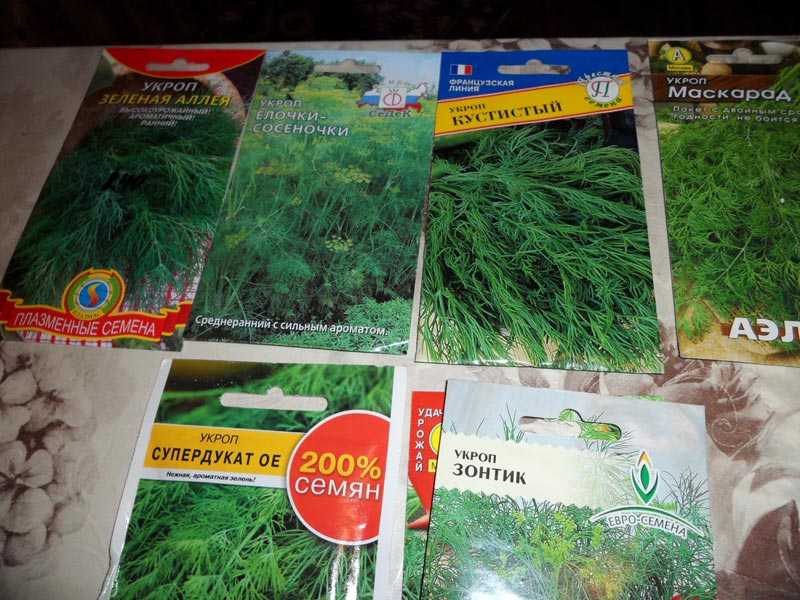
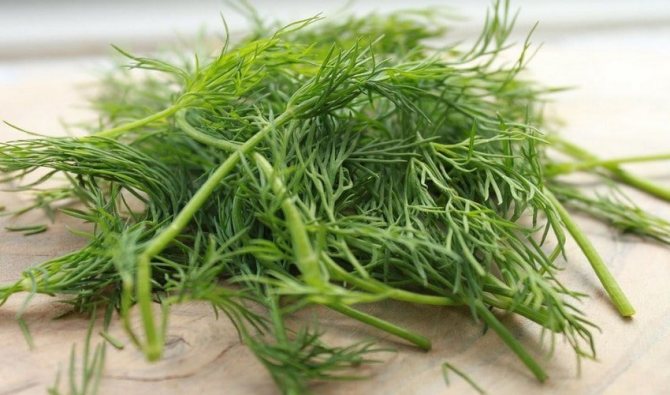
In winter, there is not enough greenery on the table. And I add dill to many dishes. The plant is useful, and it gives a special taste. Last year I decided to grow dill right at home in winter, especially since there were no problems with choosing a variety. And this year the question was not even raised: whether or not to plant. I decided to plant even more, since ecologically clean, healthy and tasty greens won not only households, but also guests. Let's talk about how to grow dill at home, what you need to consider first.

How to choose a dill variety?
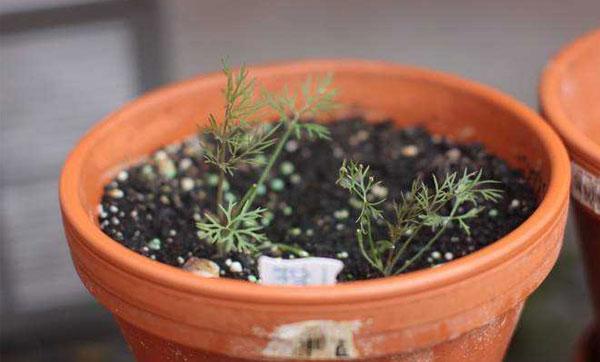
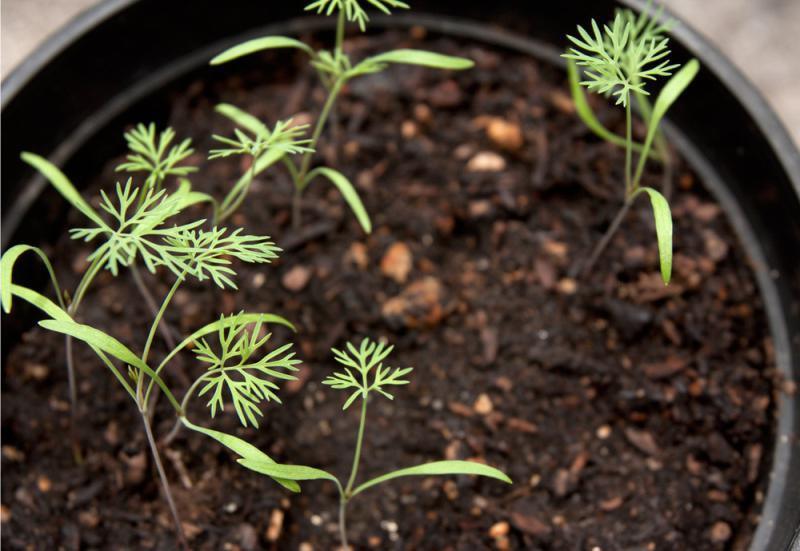
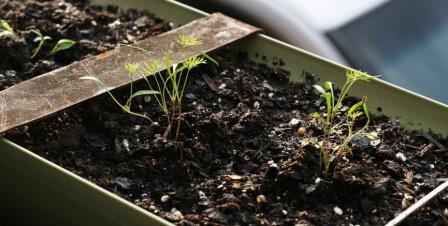
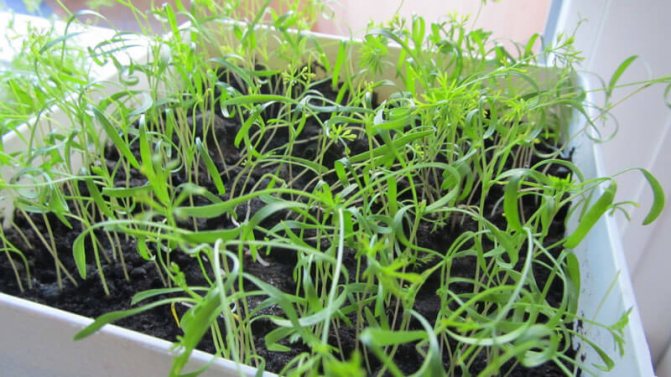
At first glance, it is not difficult to grow dill at home: it is enough to sow seeds in any container with soil, water the seedlings and remove weeds as necessary. But in fact, instead of thickets of green, fragrant dill, in a pot, pale thin blades of grass with little or no aroma often sway lonely.
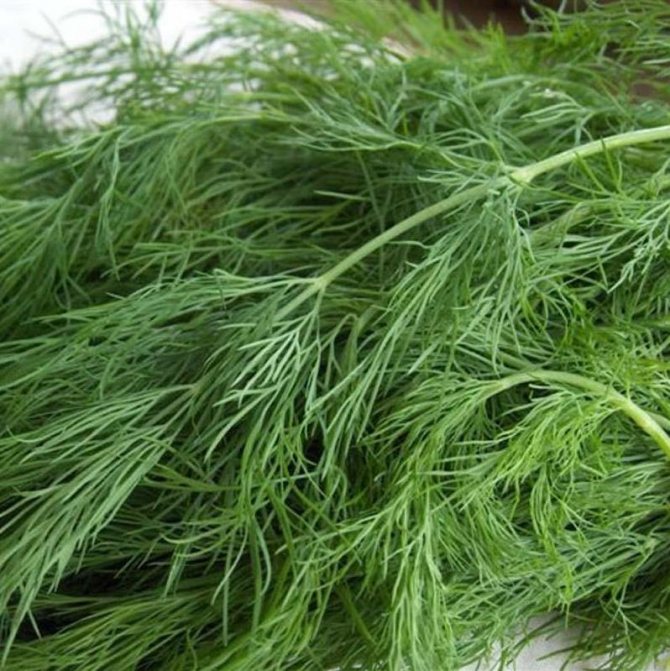
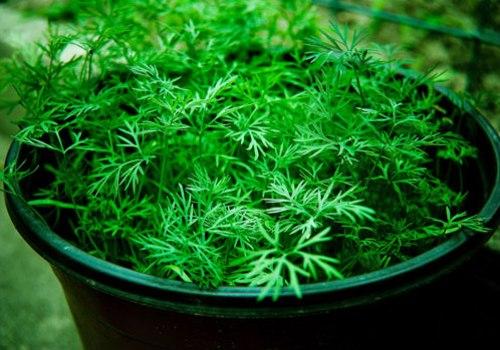
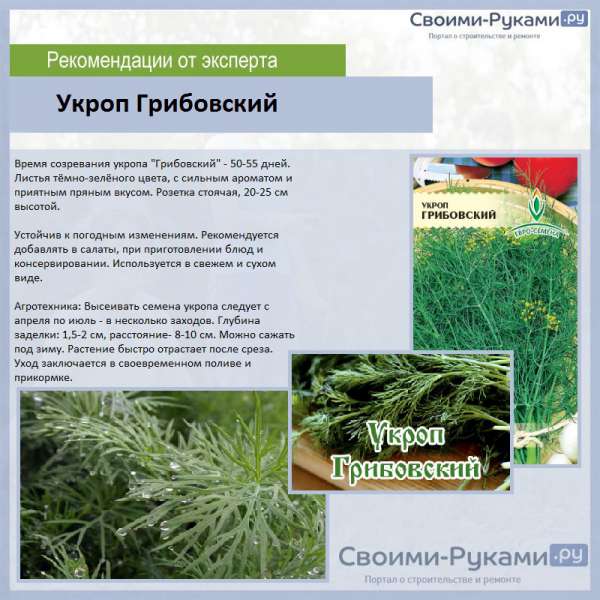
The secret to getting a good harvest is in choosing the right type of dill. Experienced gardeners at home most often opt for the early-ripening variety Gribovsky.
They are attracted by undemanding care, high productivity, resistance to diseases and temperature fluctuations. The cheerful greens of Gribovsky dill with a strong aroma will show off on the windowsill within 1-1.5 months after planting in the ground. To get a good harvest of this variety at home, there is enough fertile land and weed control.
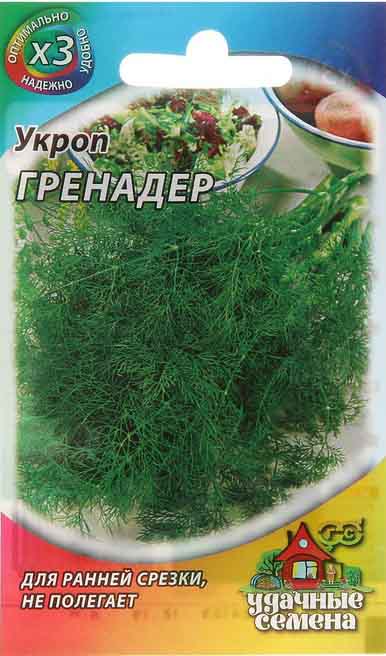
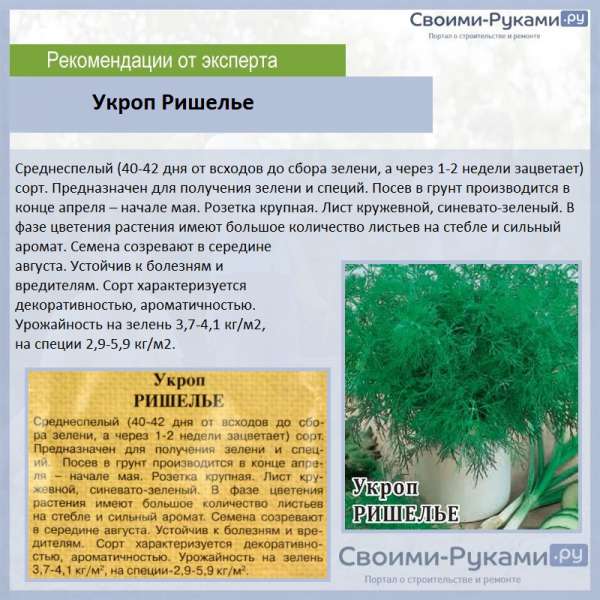
Other varieties are grown on the windowsill: Grenadier (early ripening), Richelieu (mid-ripening with fragrant bluish-green leaves), Kibray (late ripening with wide beautiful leaves). At home, gardeners also cultivate southern varieties with a more spicy taste, which are more finicky.
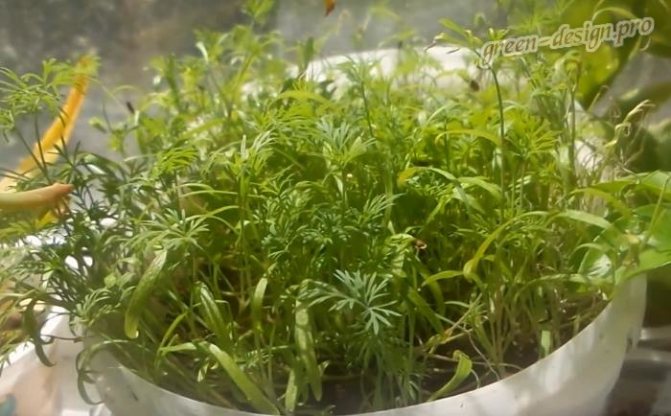
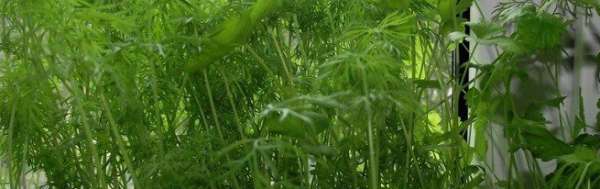
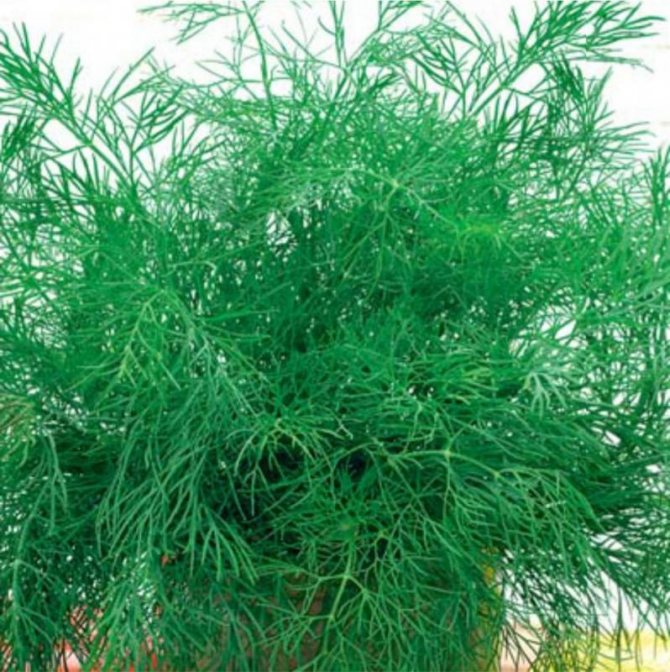
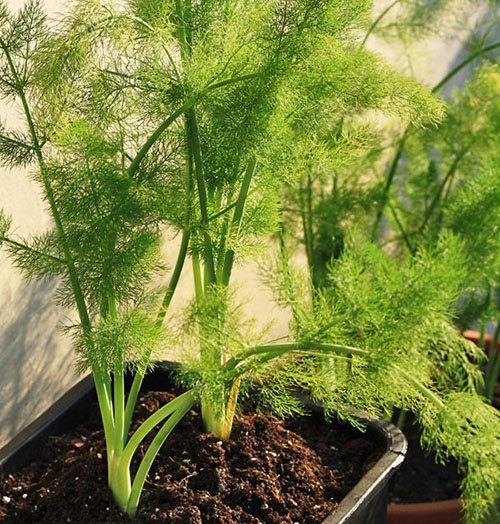
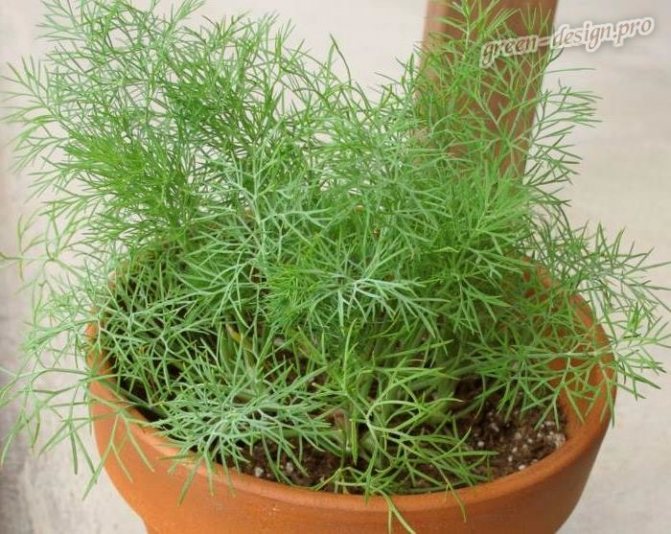
Late-ripening varieties have their own advantages: they bush more strongly, produce more greenery. They ripen longer, greens grow for a longer time. There will be even more greenery if you sow the seeds of bushy varieties. Its abundance will look great on a windowsill or balcony. Growing dill on a windowsill has not only a utilitarian but also a decorative function: it perfectly decorates the interior.
There is no special type of dill intended for growing on the windowsill. When choosing a seed, you should focus on ripening timing.
It is important not to make a mistake here: although the early varieties give green mass very quickly, they are worse leafy and quickly stretch into flower stalks than late-ripening ones. Late varieties of the bush type (Salute, Gourmet, Russian size) do not have time to ripen in the beds over the summer, but they are perfect for growing at home.
On the window, such dill forms well-leafy dense bushes with new shoots emerging from the sinuses. For growing at home, late varieties are ideal.
What varieties are suitable
For growing on the windowsill, you can choose any variety of early and medium ripening periods. They have both advantages and disadvantages. For example, early varieties grow quickly (after 10-15 days you can get the result), but they can still stretch if they lack lighting, as well as with strong temperature drops, as a result, the dill becomes thin, pale green.Medium or even late varieties, although they are inferior to the early ones in terms of harvesting and differ in that their greens can be obtained later, but they grow more lush, and the time for obtaining greens lasts longer.
Among the good early varieties of dill for growing on the windowsill are Gribovsky, Aurora, Dalny, Grenadier. Of the mid-season varieties for forcing greens, the following are suitable: Lesnogorodsky, Bushy, Richelieu, Abundant, from the late ones - Salute, Alligator, Gourmet, Kibray, Didl.
Soil preparation

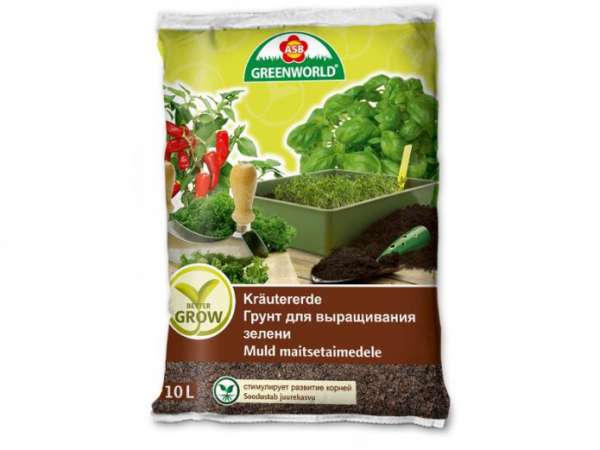
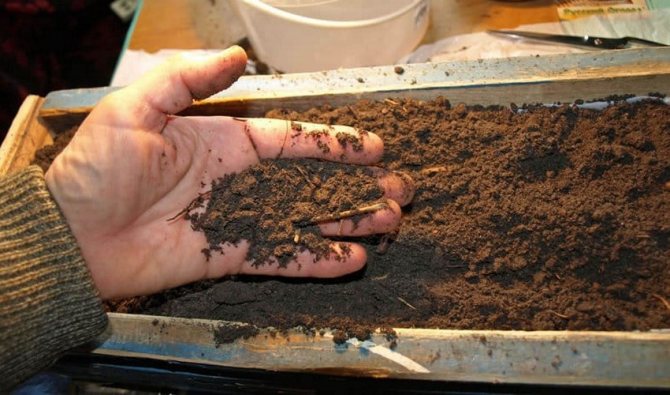
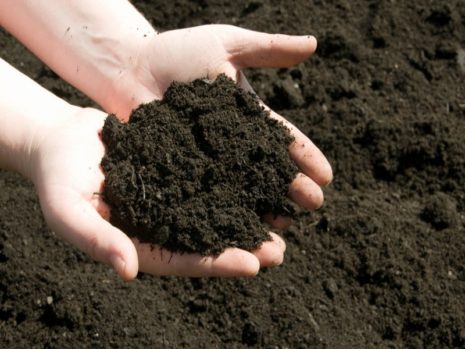
In a vegetable garden, dill grows on almost any soil. It is possible to successfully grow it at home only in a fertile soil mixture, which must be prepared in advance.
To do this, in the fall, prepare loose garden soil and mix it with purchased neutral soil intended for indoor plants before sowing. For sowing, it is recommended to select a container of sufficient size so that the dill is not constrained, and do not forget to make a drainage layer at the bottom of the container.
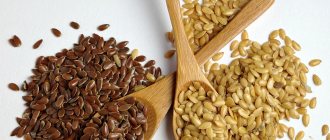
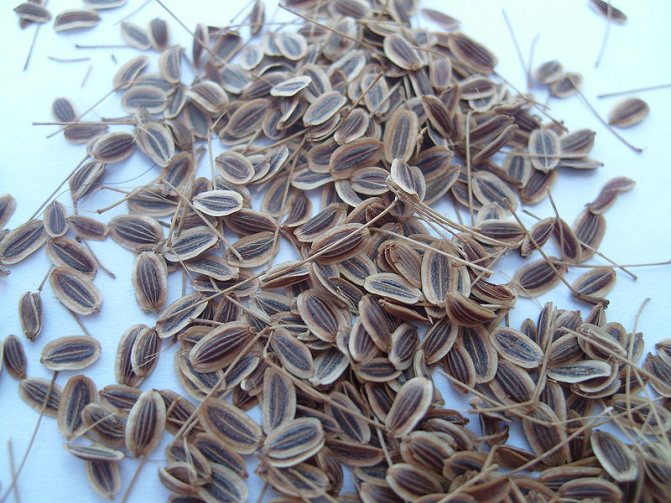
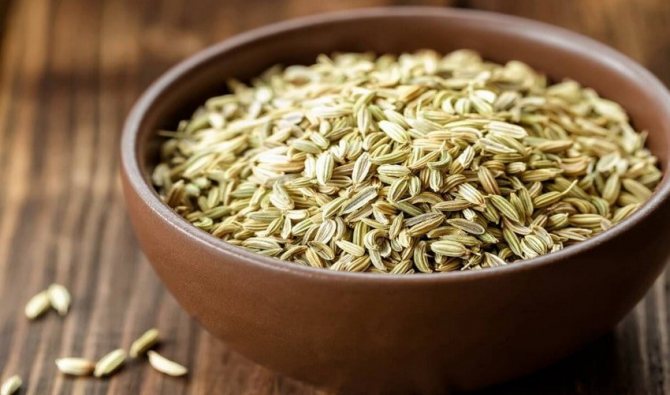
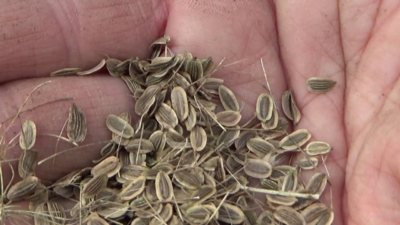
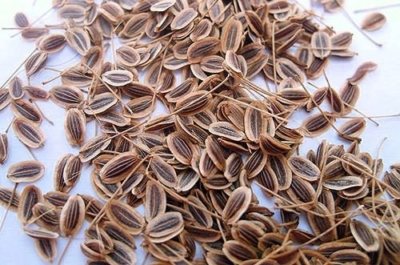
Dill seeds take a long time to germinate due to their high oil content. Before sowing, they must be soaked for 20 hours in warm water, through which oxygen is passed with the help of an aquarium compressor. A more affordable option is to place the seeds in warm water for two days and change it to fresh water every 6 hours.
We prepare the planting material.
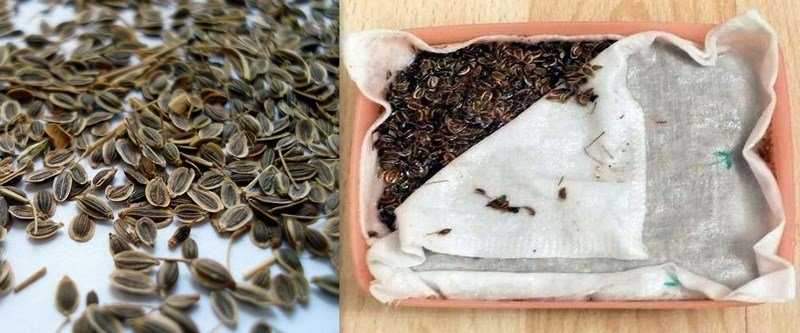
Dill seeds contain a large amount of essential oil, so they germinate for a very long time. Some manipulation can be done to speed up this process.
1.If you have an aquarium compressor, soak the seeds in warm water for a day, place the compressor in the same container and allow air to flow through this water. 2.Place the seeds on a cotton cloth, cover with it and cover with warm water. In this form, the seeds should be for two days, the water must be changed periodically. 3. Soak the seeds for 12 hours in a growth stimulator ("Epin", liquid vermicompost, aloe juice diluted with water).
Whichever method you choose, after soaking, spread the seeds on a paper towel and dry as you only need to plant dry seeds.
Selection of containers
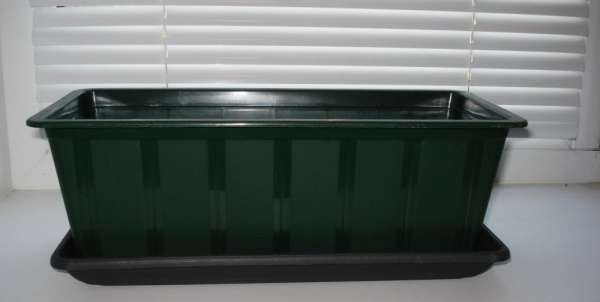
For growing dill, you can use wooden or plastic boxes or ordinary flower pots with a volume of 1-2 liters. To ensure the drainage of excess water, holes must be made in them. A drainage layer of any small pebbles, broken brick, expanded clay or pebbles is placed on the bottom of the containers.
After sprinkling it with sand, soil is poured on top. It should be nutritious and neutral. You can mix garden soil with peat and compost, or buy a ready-made special compound.
How to grow other greens at home
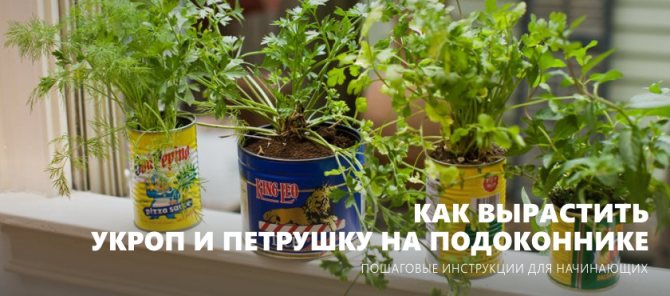
Beginners are also interested in what can be grown on the windowsill in winter, except for dill, because growing greens is a long process that needs to be invested in. In addition to dill, you can plant onions and parsley at home. Unlike dill, parsley is not so capricious, but the sunrises appear later. The principle of sowing and care is identical to dill. There are two ways to grow parsley: seeds and root vegetables.
Seed cultivation
To grow parsley on the windowsill, you should choose early ripening varieties. When compared with other varieties, early maturing seeds will sprout 2 weeks earlier. This includes the curly variety Astra and Moscaruse, as well as the flat variety - Plain, Irinka and Laika. Planting seeds:
- Seeds are germinated before planting.... The gauze is slightly moistened in water and the seed is wrapped in it. Then it is placed in a dark place and left to germinate. After 3 days, the gauze is squeezed out, and the seeds are slightly dried.
- Soil is poured into the container and thoroughly moistened... Then, shallow grooves are made with a depth of no more than 1 cm and seeds are planted in them. The grooves are covered with earth and re-moistened with water.
- Sowing pots are placed in a warm place for 14-20 days.... The room temperature should be at least +20 degrees. During this period, the crops are not covered with foil. Seeds are watered with settled or boiled water once every two days.
- After sprouting, the seedlings are thinned out... A distance of about 4 cm is left between the shoots.
- Young shoots are watered sparingly after the soil dries.... It should not be allowed to dry completely or be too wet. The temperature in the room is lowered to +10 - 15 degrees. This can be done by opening the window at night.
- In winter, parsley needs additional lighting.... For this, fluorescent lamps are installed over the pots, which are turned on daily for 8 hours. For plants planted in early spring or summer, sunlight is sufficient.
- After two months, the parsley will reach its maturity.... The height of an adult plant is 10-12 cm. This means that the crop can be cut and served.
Related article: A table instead of a window sill in a room
The disadvantage of this type of cultivation is the long wait for the harvest.
Reproduction by root crops
In contrast to seed propagation, growing parsley with root crops is faster. With this method, you do not need to spend 14 days germinating seeds. Root vegetables are purchased at a grocery store or dug up in their garden. The number of buds and leaves formed depends on the diameter of the root crop. The most suitable size is a root crop of 2 to 4 cm. The larger the size, the better. The prepared pot is filled with soil, then moistened and planted with root crops.
- Parsley is planted in rows. The distance between the roots is made at least 2 cm, and between the rows 4 cm.
- Landing is done so as not to cover the heads with earth.
- The ground is gently crushed and watered.
- Parsley is taken out to a cool place (on the balcony) and transferred to the windowsill after the first sunrises appear.
- During active growth, the plant needs to be watered abundantly and often.
If you plant small roots first, and large ones a month later, then the harvest can be harvested throughout the winter period.
Preparing seeds for planting
Before sowing dill, you should prepare the seeds. They are soaked in warm water for at least 8 hours, and the water is changed several times. Some vegetable growers recommend soaking the seeds even for 24 hours.
After that, dill seeds are soaked for another 3-5 hours for disinfection in a 0.5% solution of pale pink potassium permanganate. The prepared swollen seeds are dried before planting by spreading them on fabrics. Those that did not sink to the bottom during soaking can be thrown away immediately: nothing will grow out of them.
Preparatory activities
Not all plants grow successfully in indoor conditions. Often, the indoor climate is completely unsuitable for growing vegetables or herbs. But dill is not one of those, which is the advantage of this culture. It develops well and grows in a cool room, so you can get a decent harvest at home.
Variety selection
Regardless of the type of dill, shoots appear quite quickly after planting. Within 6 - 8 weeks, you can already get the first greens. The culture is unpretentious, it is enough just to follow the simple rules of care. The main ones are moderate moistening of the soil in the container and providing the right amount of lighting, since it is often not enough during the winter months.
- Before starting to grow, you need to choose one or more varieties. However, there are no specially bred for indoor cultivation. All varieties are not fundamentally different. Only the ripening time is essential.
- All varieties are divided into early maturing, medium ripening and late.If you decide to choose an early variety in order to get fresh greens as quickly as possible, then the dill will really rise early, but the flower stalks will also begin to stretch quite actively.
- Late varieties of this culture reach technical maturity in a sufficiently large amount, but the seed material does not have time to ripen before the onset of cold weather. It is them that plant breeders recommend to use for growing at home.
- If you study the numerous reviews of gardeners who regularly grow dill indoors in winter, then among the early ones you can distinguish the Grenadier and Gribovsky. The latter is very undemanding, it feels great in the room, it develops well and grows, it is productive, and is also practically not susceptible to diseases. To all the positive characteristics, you can add excellent taste and a unique aroma.
- Among the late varieties, a rather large number is especially popular: Alligator, Amazon, Salute, Buyan, Dill, Kibray, Russian size. They grow very well on the windowsill. More and more leafy shoots sprout from the axils of the leaves.
- Among the mid-season, it is often used for growing in the Richelieu room. Some gardeners also grow southern varieties, which have a special aroma and spicy taste, but they are more capricious in cultivation.
Choosing a place for dill
If you have enough roomy windowsills, then you can try to grow several varieties at the same time, combine early and late varieties. Thus, you will have fresh greens all the time.
- The main condition for growing any greenery is the availability of sufficient amount of light during the winter months, when the daylight hours are short. Therefore, first decide on additional light sources. Place containers with planting material near them. For the successful development of dill, at least 15 hours of light are needed per day if the boxes are in the back of the room.
- Lamps should be exposed at a distance of half a meter from greenery. If the containers are on the windowsill, then it will be enough to light up only in the morning for no more than 4 - 5 hours.
- If you plant dill in the second half of March and continue the entire summer season, then artificial additional lighting is not needed.

What temperature is needed in the room
Dill has a fairly good cold snap resistance, but in order for shoots to appear after planting, it is necessary to observe the temperature regime. For this plant it is +17 - 20 degrees.
Periodically, it is allowed to take out containers to the loggia or balcony, terrace (if a private house). So you can cultivate dill for the entire autumn period, until frost occurs.
Do not place containers in a room where it is very cold and damp, as rot or fungal infection will begin to attack the bushes. Dill is most susceptible to such a disease as powdery mildew. Acceptable humidity level - no more than 50%.
There is one more detail that must be taken into account when planting and growing this greenery: it is undesirable for the leaves to touch the cold glass of the window. This can lead to freezing of the crop and the death of the plant.
Dill planting technology
Dill seeds can be sown directly on moist soil without making holes or grooves. From above they are sprinkled with peat mixed with humus. For one square decimeter of soil, it is enough to sow 0.3 grams of seeds.
To provide future plants with conditions for comfortable growth, it is recommended to leave a few centimeters between seedlings. The grown plants will not shade each other.
To get the best result, you can make grooves 1 centimeter deep in the ground, spill them with water and place the prepared seeds on the bottom.From above they are sprinkled with dry earth from the edges of the grooves so that a dense crust that prevents the emergence of seedlings does not form on the surface of the soil.
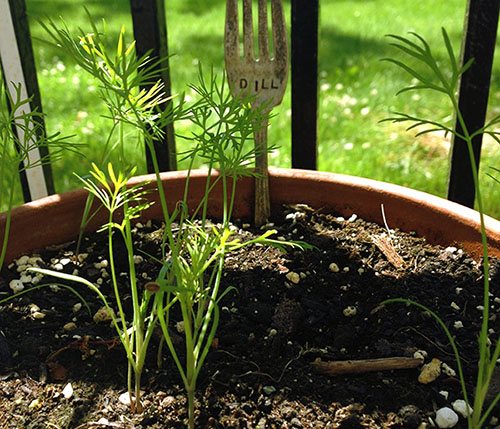
It is recommended to cover the container with crops with cellophane wrap and remove for a week in a dark place with a temperature of about 20 ° C. The first shoots will begin to appear in a week. In 10-12 days, all the seedlings will crawl out of the ground.
Sowing dill seeds
Sowing technology is very similar to sowing seeds for growing seedlings. Moisten the soil slightly before sowing. It is better to use a spray bottle for this. On the surface of the soil, make shallow, 1 - 1.5 centimeters, grooves. To avoid thickening of dill crops in a pot, plant one seed at a time using a damp match or a toothpick, observing a distance of 3 centimeters between them. Then the seeds are sprinkled with earth and moistened again from the spray bottle.
Advice. You don't have to make the seating grooves. Pour the soil in the pot not to the top, but with a margin. Simply spread the seeds over the surface of the soil, and sprinkle with a thin layer of earth.
After sowing, cover the container with seeds with any transparent material (film, glass) and place in partial shade. The temperature for germination should be moderate, within + 18-20 degrees. The first shoots, depending on the variety of dill and germination conditions, can be expected in a week. Massively, they will begin to sprout in 10 - 12 days. After that, the dill can be moved to the illuminated windowsill. Remove the film (or glass).
Lighting
Dill is a very light-loving plant. Good lighting is perhaps the most important condition for growing it. In the summer, when there is much more light, when the daylight hours are long on the windowsill, it will receive sufficient lighting. Of course, if this window sill is on the east, west or south side. When placing dill on a south-facing windowsill, it will need protection from the scorching sun.
But in winter, when there is already not enough light, daylight hours are significantly reduced. At this time, dill will need additional lighting. It is not difficult to organize it. An ordinary white fluorescent lamp is suitable for this. Phytolamps can also be used, which is preferable. Moreover, there are now quite a few such lamps using economical LEDs.
Dill care on the windowsill
Basically, caring for dill grown on a windowsill or balcony consists in the timely removal of weeds, watering and spraying.
Temperature and humidity
It is best to grow dill at a temperature of + 18 ° C, but even when the temperature drops to + 8 ° C, for example, on a glassed-in balcony, the plants will feel quite comfortable. If the temperature in the room is above + 20 ° C, it is necessary to increase the illumination so that the dill bushes do not turn out to be light, elongated and lethargic.
In order for the plants to gain strength, and not stretch up, in the first week after the emergence of seedlings at night, it is advisable to lower the temperature in the room by opening the window. To prevent the dill from stretching, you can take out crops to the glazed balcony. Excessive dryness or high humidity have a detrimental effect on dill.
After cutting, the leaves and stems of dill do not grow back. To cut fresh greens continuously, it is recommended to sow seeds every 3 weeks on the vacated area of your micro-town.
When growing dill at home, do not forget that this plant is very light-loving. From March to August, it is easiest to grow it on a window: on a light windowsill in fertile soil, plantings form lush greenery and without additional lighting.
Plants grown in the autumn-winter period will stretch and fall without additional illumination. Due to the consumed electricity, the costs of growing will increase. During this period, planting will have to pay more attention.
Dill needs regular watering, which should be given special attention during seed germination and the emergence of young shoots. For irrigation, use clean, settled water.
Dill grows well in moist soil, but there should not be too much water: this will lead to mold on the soil. It is advisable to spray greens in a dry room more often. It is recommended to turn the pots 180 degrees daily so that the dill grows beautifully and does not stretch too much.
Planting once every 2-3 weeks should be fed with a complex mineral fertilizer. Some owners simply practice periodically adding vermicompost. If the dill was sown in fertilized fertile soil, feeding will not be required immediately, but after massive re-planting.

The timing of emergence and harvest of homemade dill
Dill sprouts, if the seeds have been prepared, after 1-1.5 weeks. You can harvest fresh herbs, respectively, after 4 or 5 weeks. You can grow it until flower stalks appear in the axils of the leaves. Cut the dill stalks at the very root. They do not grow back again, so the pot is sown with seeds again. This time, feeding is carried out along with sowing and again after 2-3 weeks. If the dill does not grow in a pot or grows poorly, the soil is completely replaced.
To arrange for yourself a kind of conveyor of fresh dill greens, the seeds must be planted in containers for distillation approximately every 2-3 weeks.
Growing dill on a windowsill in winter
Not every greenery can grow well indoors. Some plants prefer colder months and may even flower at home. Dill loves cool weather, so it's relatively easy to grow it at home. You can sow it on the windowsill from mid-autumn to early spring.
This process does not require special skills and efforts. Dill sprouts quickly, its leaves are ready to be harvested within 6-8 weeks. Do not just forget that in winter, greens must be regularly watered and additionally illuminated.
Excessive dryness or high humidity is detrimental to dill. Powdery mildew affects greens at high humidity. Normally, the air humidity should be in the range of 40-50%. If the windows are cold to the touch, the foliage of the plants can freeze, the greenery can die.
An excess of fertilizers is more negative for dill than a lack of them. At the same time, it must be borne in mind that indoor greenery grows slowly during the winter months. From mid-October to mid-March, it is not recommended to reduce the amount of fertilizer. As a top dressing, you can use any liquid fertilizer intended for indoor plants.
After the formation of flower buds, feeding of greens is stopped. Plants can be cut at the base of the stem. After 6-8 weeks, the crop is ready to harvest. Dill is usually used fresh, so it is harvested periodically to add to dishes.
It is convenient when there is always fresh greens at hand - the dishes cooked with them become more aromatic and tastier, therefore, prudent housewives can often find dill on the windowsill. At home, this unpretentious plant feels no worse than in the garden, and with good care it gives a lot of lush greenery.
We plant seeds and take care of the dill.
Now that all the preparatory work is completed, you can start planting.
Moisten the soil in the container and spread the seeds over its surface, press them a little into the ground. Then pour a centimeter layer of soil on top, level and additionally moisten (it is better to do this with a spray bottle, so as not to erode the soil and not displace the seeds). After that, cover the container with a bag, glass or cling film and put it in a warm place, the presence of sunlight at this stage is completely optional.After the emergence of sprouts, the shelter must be removed, the seedlings must be thinned out, leaving a distance between them at least three centimeters and the container must be rearranged to a permanent bright place.
In order for the greens to start growing actively, you must follow some rules. In the future, when you are completely comfortable with caring for dill, you can gradually plant the seeds so that new greens constantly grow. Keep the temperature just below 20 degrees for the first couple of weeks. This will allow the sprouts to get a little stronger before they start to grow.
Develop an optimal watering schedule: the ground should not dry out, but it should not be excessively wet. Water only when the topsoil is dry. Greenery that grows indoors needs more liquid than when grown outdoors, so you can sometimes spray the plants.
With the onset of spring, watering can be increased, but do not forget to drain excess moisture from the pan to prevent root rot.
Despite the presence of additional lighting located from above, the greenery will still stretch towards the window. Therefore, do not forget to turn the dill container 180 degrees so that the plants grow evenly.
Be sure to fertilize once every month and a half, as the soil will quickly deplete. As a top dressing, you can use "Agrolife", liquid biohumus, complex dressings for decorative leafy indoor plants or nitrogen-containing fertilizers (in this case, the greens will grow faster).
Instructions on how to grow dill on a windowsill
In the garden, dill can grow on almost any soil, but successful cultivation of dill at home is possible only in a fertile soil mixture, which must be prepared in advance. To do this, in the fall, you should prepare loose garden soil and mix it before sowing with purchased neutral soil for indoor plants. Select a container for crops of a sufficient size so that the dill is not cramped, and do not forget about the drainage layer at the bottom of the container.
Since dill seeds germinate for a long time due to the high oil content, they must be soaked for 20 hours before sowing in warm water through which oxygen is continuously passing (for example, using a compressor from an aquarium). Another option is to simply place the seeds in warm water for two days and change it to fresh water every six hours.
For best results, you can make grooves a centimeter deep in the ground, spill them with water and lay the prepared seeds on the bottom.
Seeds can be sown directly on the surface of the moistened soil, without grooves and pits, sprinkling with peat mixed with humus on top. Sufficient seeding rate is 0.3 g per 1 square decimeter of soil. For best results, you can make a centimeter deep groove in the ground, spill them with water and place the prepared seeds on the bottom. From above, dill seeds are sprinkled with dry earth from the edges of the grooves, so that a dense crust does not form on the soil surface, which prevents the emergence of seedlings. Cover the container with crops with cellophane and put it in a dark place with a temperature of about +20 degrees for a week.

Step-by-step instructions for sowing dill at home
Sowing dill in forcing containers is not difficult at all. You will need containers, soil mixture, dill seeds and warm tap or well water. How to do this, we will describe in detail below.
Selection of containers for growing
To grow dill greens in an apartment, you need to take pots 10-15 cm deep and wide enough so that plants, especially their root system, can freely develop in them. Therefore, the deeper the container, the higher and more magnificent the dill in the pot will be.
Ordinary flower pots with a volume of about 1-2 liters are suitable. At the bottom of the containers, you need to make several small holes for drainage, excess water will go through them.
Choosing the right soil
The substrate for dill grown at home on the windowsill should be fertile, light, loose, airy, not thickened after watering, and let moisture through. The easiest way to get it at a grocery store is ordinary soil for vegetable seedlings. Its acidity should be neutral. If you do the soil with your own hands, then you can mix good garden soil, rotted humus, coarse sand and non-acidic peat.
If the forcing of dill takes place in winter, then the components of the mixture must be prepared in the fall. After preparing the substrate, it must be disinfected to prevent plant disease with fungal diseases - spill with a solution of potassium permanganate (1%) or Fitosporin (diluted according to the instructions) and dry. In winter, you can freeze it outside for several days. Another option for disinfection is to steam the substrate in the oven at 180 ° C for 40 minutes in a baking sleeve.
Presowing seed preparation
Dill seeds contain a lot of essential oils that interfere with their rapid germination. To remove them, they are soaked in hot water for 1-3 days. During this time, the liquid is changed several times a day. Then it is drained along with the floating seeds, and the rest are laid out on fabrics and dried to make them easier to sow.
Recommended to read
Useful and medicinal properties of dill and contraindications
Useful and medicinal properties of dill seeds and contraindications
Rules for growing rosemary in an apartment, planting and care
How to properly plant dill with seeds and seedlings in open ground
Landing technology
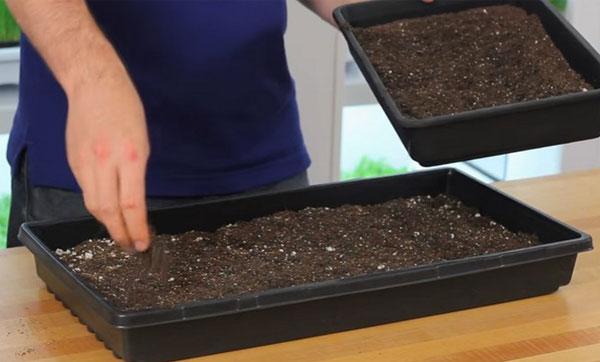
Sowing dill is carried out as follows: a layer of expanded clay or any other drainage material about 2-3 cm thick is poured into the pots, a substrate is placed on top of it and leveled. Water and wait until the water is completely absorbed. Sprinkle the seeds evenly on top, then sprinkle them with a thin (2 cm) layer of the substrate and compact it with a spoon. Seed consumption - 0.3 g per 10 sq. see The pots are covered with a transparent film and placed in an unlit place until the seeds germinate, in which the temperature does not drop below 20 ° C.
Growing dill on the windowsill - the secrets of success
Growing dill at home, first of all, you need to remember that this plant is very fond of light. Place crops on a light windowsill, and in winter, provide additional lighting for dill by installing fluorescent lamps at a height of 50 cm above the plants. On the windowsill, it is enough to turn on the lamps in the morning for about five hours, but if the boxes with dill are in the back of the room, the supplementary lighting should last at least fifteen hours.
Dill care rules at home:
- dill must be watered regularly, especially paying attention to watering during seed germination and when young shoots appear;
- once every two weeks, it is recommended to feed the plantings with complex mineral fertilizer;
- it is best to grow dill at a temperature of +18 degrees, but even on a glazed balcony when the temperature drops to +8 degrees, the plants will feel quite comfortable;
- if the temperature in the room is above +20 degrees, you need to increase the illumination, otherwise the dill bushes will turn out to be elongated, sluggish and light;
- in the first week, as the shoots seem, it is advisable to lower the temperature in the room at night by opening the window, or to carry out the crops to the glazed balcony so that the dill does not stretch out.
The dill needs to be watered regularly, especially paying attention to watering during seed germination
Growing at home can be more or less hassle depending on what time of year you plant the dill. The easiest way to grow dill on a window is from March to August, since planting without additional lighting forms lush greenery, provided there is fertile land and a light windowsill.In the autumn-winter period, without additional illumination, the plants will stretch and fall, which means that you will have to pay more attention to them, and the costs of growing will increase due to the consumed electricity.
Starting a new interesting business of growing greenery in a room, but not having an idea of the intricacies of the process, you, of course, will get some results. Although it is not a fact that they will be positive, because dill has certain properties and requires initial knowledge in the field of agricultural technology and thoughtful preparation.
Dill on the windowsill
Contents of step-by-step instructions:
Choosing a place for growing from seeds
There is little room on the windowsill for growing a large number of plants. In this regard, at home, it is recommended to plant only the most demanded greens for you and your family. So, what conditions are necessary for growing dill in your apartment on the windowsill:
- Lighting. Perhaps the most important rule when planting any green grasses is to have adequate lighting. Without the optimal amount of light, your plants will turn light green. Dill is a very light-loving plant. Greenery will feel most comfortable on a well-lit windowsill. The plant needs to be exposed to sunlight for at least 6 hours, which is much more important than heat.
- Temperature. Dill is characterized by resistance to cold and immense endurance. However, despite this, the ideal temperature for growing healthy dill on the windowsill is 17-20 ° C. Dill boxes or pots can sometimes be taken out onto a loggia or open balcony. Greens can be left on the balcony only if frosts are not expected on the next night; until the autumn cold comes, the cultivation of the plant in such conditions is going well.
- Air humidity. For the successful cultivation of homemade greenery, it is necessary to maintain optimal air humidity. Increased performance or excessive dryness can be detrimental to the plant. With high levels of air humidity, greens are exposed to a very dangerous fungal disease, which is called powdery mildew. The optimum air humidity should be in the range of 40-50%. It is very important not to allow the windows to feel too cold to the touch from the inside. In this case, the dill foliage will begin to freeze and the plant will soon die.
Read also: Budleya: types, planting and care in the open field
The subtleties of growing
You can plant dill and grow it in an apartment all year round. The intensity of care depends on when the seeds were sown. Dill planted in autumn or winter will require more effort and time than greens sown in summer.
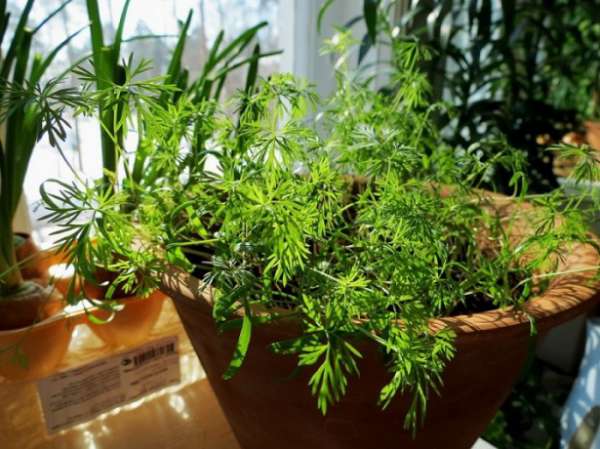
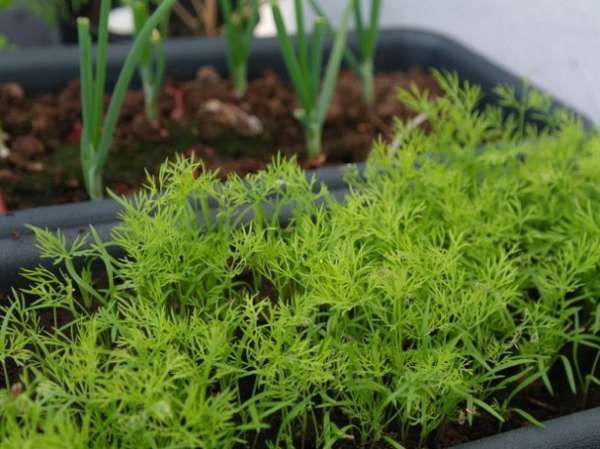
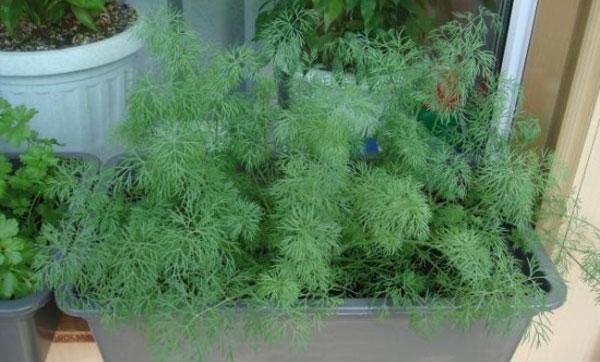
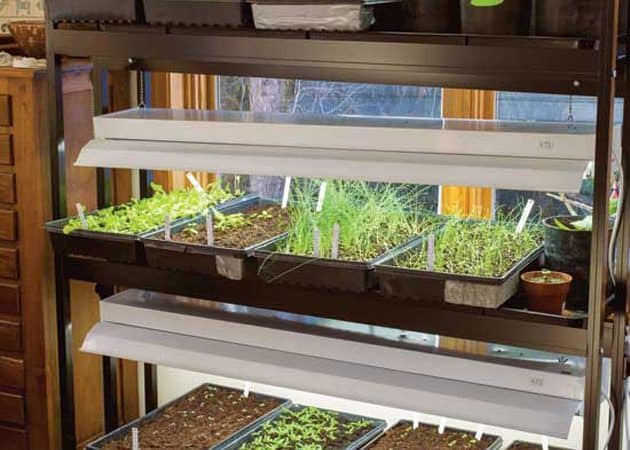
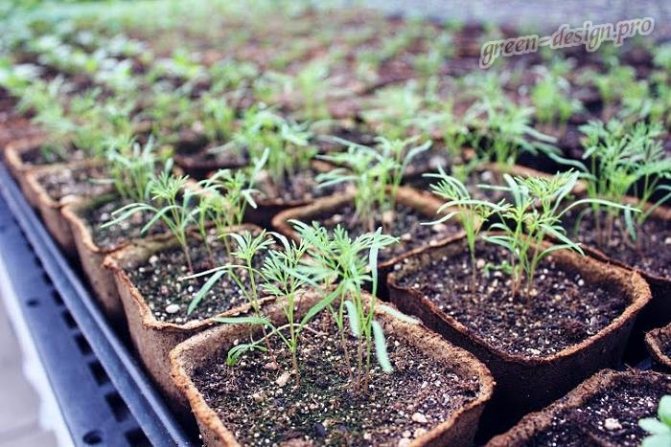
Photo of growing dill on the windowsill
On the sunny side in good soil, dill, planted in spring and summer, does not need additional lighting and usually grows into dense, branched bushes. Good growth of dill seedlings provides a long daylight hours, therefore, in winter or in cloudy weather, an additional source of light will be required.

Choosing a variety of dill for the windowsill
If, when sowing parsley or celery, the appearance of a peduncle should be expected only the next year, then when growing dill from seeds in a dry warm room microclimate, the plant can bloom, practically without forming foliage. Therefore, the productivity of the vegetable garden on the windowsill primarily depends on the choice of the variety for sowing.
Today there are several dozen worthy varieties that have proven themselves in the open field. For a pot culture, plants that give green mass as long and abundantly as possible are suitable.
Examples of such varieties are:
- Asparagus bouquet.
- Superdukat.
- Beam.
- Abundant.
- Kibray.
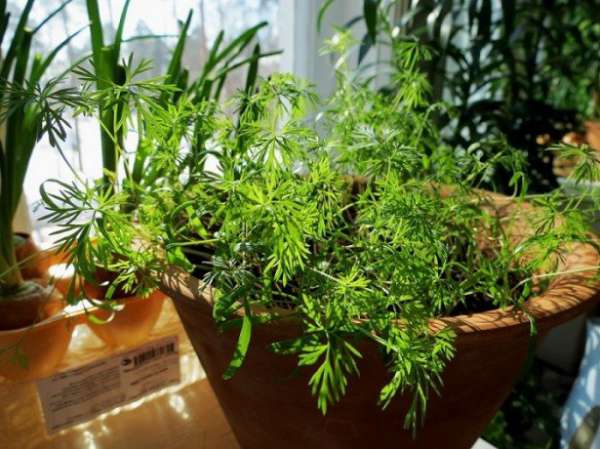
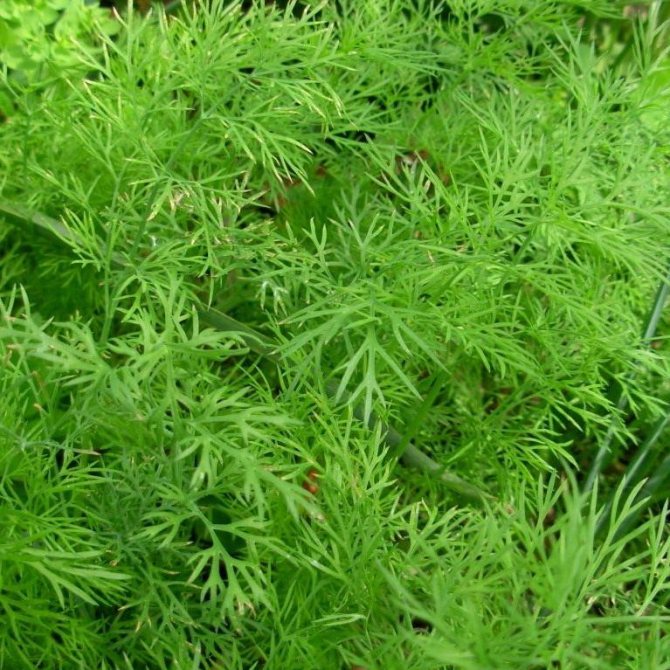
Dill plants that form a dense green bush on the windowsill feel good.
If necessary, actively growing shoots can be pinched to cause branching and the appearance of new foliage.
The correct choice of planting material and preparation
Choosing the type of dill seeds requires the right approach to obtain a rich harvest. The seeds do not differ in any way visually, they only have different ripening periods. Therefore, the varieties are divided into early, medium and late.
For home cultivation, experienced gardeners choose the undemanding, persistent and productive variety Gribovsky, which gives fragrant greens. Seeds only need to be planted in fertile soil and weeds are weeded in time.
A good vegetable garden on the windowsill can be created with seeds of the late-ripening Kibray variety, with an early Grenadier and a mid-season species called Richelieu. Southern varieties with a spicy taste and aroma also take root well on windowsills, but are more picky about the conditions. Late-ripening varieties are chosen for growing on the windowsill by experienced gardeners.
Inexperienced novice farmers have many questions about growing dill at home. Can't you just stick seeds in the ground, water the seedlings regularly and weed the weeds in the pot? True, instead of thickets of fragrant greenery, you can observe the harvest in the form of rare colorless and tasteless blades.
What rules must be followed when planting dill at home so that the greens turn out to be no worse than on the market?
How to grow dill
Choosing a variety for growing at home
So how to properly grow dill at home from seeds so that it gives a rich and healthy harvest? First of all, you should be careful when choosing the right seeds for planting. There are no special varieties that would be suitable for growing a plant at home. However, most varieties of dill differ from each other only slightly. The main difference, as you might guess, is the time it takes to ripen. On this basis, all varieties are divided into late, mid-season and early. Early species are able to acquire the necessary green mass in a fairly short period of time, but they also quickly expand into flower bearers.
Late-ripening varieties for cultivation also form fairly abundant foliage, but their seeds ripen at a later time. Therefore, in order to plant dill at home, late varieties of dill are most often used, since they are ideal for growing a plant on your windowsill.
In addition to the above types, the following are well suited for growing dill at home:
- early maturing Grenadier;
- mid-season Richelieu;
- early Gribovsky.
These varieties are distinguished by their early maturity and impeccability in care, they tolerate temperature extremes with a large amplitude and are resistant to various diseases, and give an excellent harvest. The mushroom variety, among other things, has a unique aroma and amazing taste.
Preparing the necessary inventory
Planting begins with the mandatory preparation of seeds. They are soaked in warm water for at least five hours, then the water is drained and the seeds are poured with an average solution of potassium permanganate for two to three hours. This must be done to decontaminate the seed.

Planting dill includes proper seed preparation
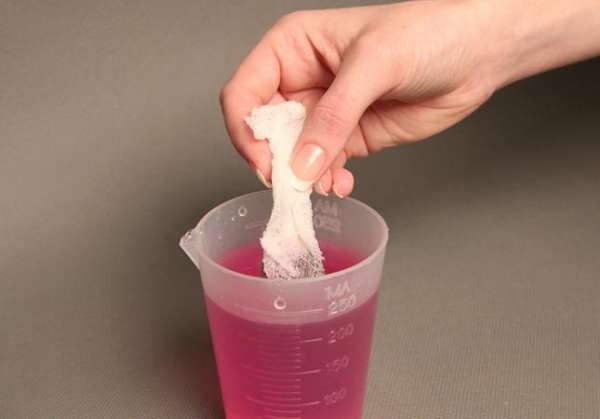
Soaking seeds in potassium permanganate
During soaking, containers are harvested, which can be simple pots for indoor flowers or boxes made of wooden boards especially for this case. The container capacity depends on the planned harvest volumes, but if you are not guided by this indicator, try first planting greens in a one or two liter pot, in the bottom of which there are drainage holes to drain excess water. The container must be placed on pallets.

Plastic containers for dill
Box with pallet
Sometimes seeds for seedlings are planted first in small peat pots, and from them greens are planted in permanent containers. The choice of a permanent container must be approached competently, so that the pots harmoniously fit into the decor of the residential interior and do not spoil the room with their nondescript appearance.

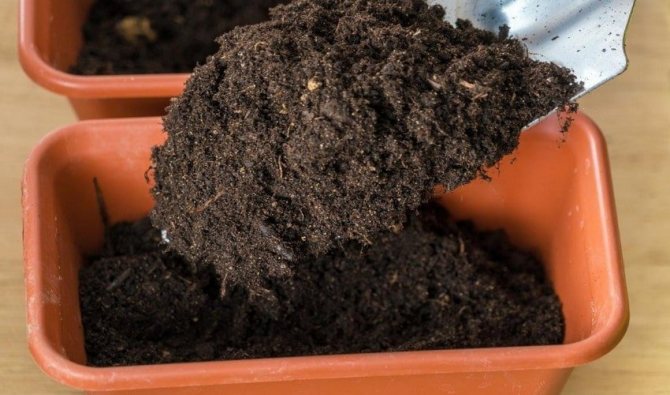
A small layer of drainage is poured into the prepared pots, which is suitable for ordinary expanded clay, crushed stone or pebbles. The next small layer is not too fine sand. The top layer is a nutritious fertile soil in the form of a ready-made soil mixture intended specifically for this culture, or a mixture of ordinary turf, humus and peat.
Vermicompost is an essential ingredient in the soil in which dill will grow.
Now you can start sowing and growing fresh herbs right in your own room.
Seeds that have sunk to the bottom when soaked can be planted in the ground. Sunken seeds are sown after preliminary drying on a cloth or cotton wool.
There is no special rule for geometric sowing of dill, you can sow greens in a pot in rows, bunches or in any other order. After sowing the seeds, an additional thin layer of soil is poured on top, not more than two centimeters. Then the surface of the soil is slightly moistened, and the pot is covered with polyethylene. The greenhouse effect can be obtained using cling film, this is a very convenient way.
Planted dill pots or boxes should be on the warmest and most well-lit windowsill so that the average temperature is plus eighteen degrees Celsius. The containers are kept in the light and warm until the first sprouts of the dill appear. If you followed all the recommendations correctly, the crops will sprout within a week, maximum ten days after sowing.
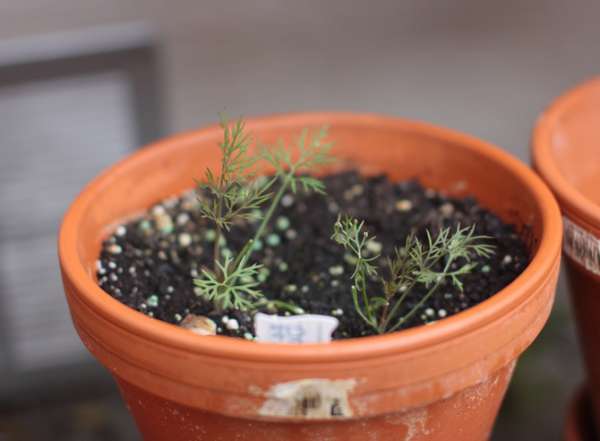
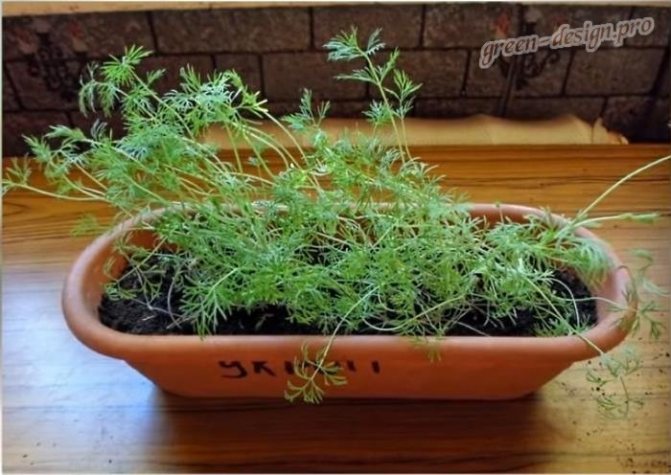
Dill grows in pots
Preparing the "bed"
In the case of dill, you do not need to grow seedlings with subsequent picking, so immediately pick up a constant container. Dill will grow for a long time, its root system grows well, so you need to choose the appropriate pot or box: large enough, deep, designed for a large amount of soil. Only in such conditions will the plant be able to develop well and constantly grow greenery. In a small and shallow container, the roots will soon become cramped, the plants will be weakened and frail, and will most likely wither over time. In addition to the size of the container, the main requirement will be the presence of drainage holes in it.
Next, we start preparing the soil. Of course, you can take the land from the garden or from the garden, but most likely, along with the land, you will bring home weed seeds, and if you are very unlucky, then also the larvae of pests. Therefore, the best option would be to purchase store-bought soil, but even it is recommended to disinfect it before sowing seeds.
The most important requirement for the soil is that it is sufficiently loose. To do this, you can add vermicompost, coconut fiber, peat or humus to the purchased soil. The main thing is to end up with a loose nutrient soil. Before planting, heat the soil in the oven or simply pour it with a manganese solution, this is a preventive measure that helps prevent the development of any diseases.
Lay drainage at the bottom of the container, for this you can use expanded clay, gravel, shells or small stones. Then fill in the soil and start preparing the seeds.
Sprout care
As it turned out, growing the first green seedlings is not a difficult process at all. Labor and time costs begin during the further cultivation of thick, fragrant dill.
Dill needs to be looked after
The film must be removed from the containers as soon as all the sprouts have risen. Care during the warmer months consists of good lighting, regular watering and spraying of the dill.You also need to remember to turn the seedling pots once a day so that the plants do not lean to the side, but stretch upward.
Winter cultivation consists of the same steps as in the summer months, it is only necessary to provide the dill with good lighting during the short daylight hours. With a lack of light, it is impossible to get fluffy bushes, since the sprouts begin to stretch upward excessively in search of sunlight. As additional lighting, a regular lamp installed at a half-meter height above the pots of greenery is suitable. Morning illumination of dill on the windowsill is up to six hours a day, and for sprouts in the back of the room, you need to turn on the lamp for at least fifteen hours.
Dill requires a lot of light
The optimal mode for green crops is a temperature of seventeen to nineteen degrees above zero, although dill will tolerate small deviations in one direction or another without loss. Regular watering should be moderate, and it is recommended to fertilize the soil with mineral fertilizer twice a month.

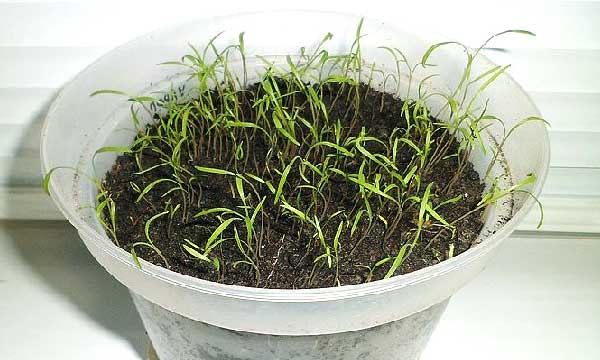
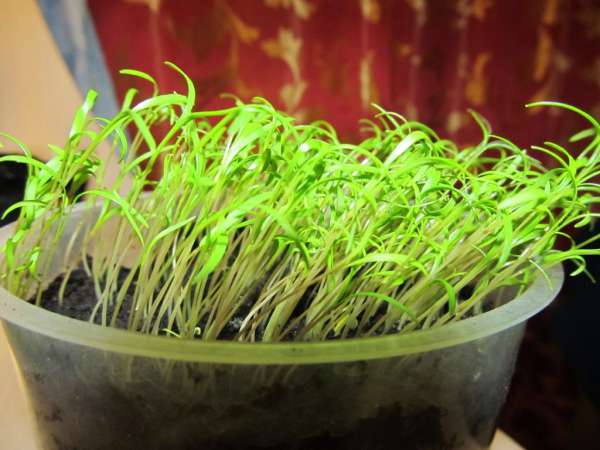
Dill on the windowsill in 3 days
So, growing dill at home turns out to be more difficult in the autumn-winter period, when the plants do not have enough sunlight. But at any time of the year, you can get fresh greens if you devote time and sufficient attention to growing them.
Video - Home Tricks. Dill on the windowsill
Care features
Although dill is a drought tolerant plant, it will grow best with regular watering. Green grasses grow very poorly in conditions of a lack of water in the soil. The moisture for dill may not be enough on warm days and the greenery begins to require more watering. Therefore, try to water your greens regularly, but within normal limits - soil overflow should not occur. The condition of the soil can tell you how often you need to water the dill. Before the next watering, you should first make sure that the soil is completely or almost dry.
Watch closely how fast the dill grows. For active growth, it is recommended to place fertilizers in containers with herbs, however, feeding can be done no more than once every six weeks. For dill, an excess of fertilizers is more negatively affected than a lack of them. In winter, you should reduce the amount of dressings for indoor greenery by about a quarter. It is necessary to make such a cut between mid-October and mid-March. For feeding dill, you can use any liquid complex fertilizer for indoor plants, but all actions must be performed according to the specified instructions.
In winter, dill is especially sensitive to the lack of light. Therefore, care should be taken to create additional lighting for indoor greenery. You will need to install several fluorescent lamps. There are two main options for solving this problem: use fluorescent lamps or special phytolamps, which are sold in specialized stores. In this case, the height of the plant should not exceed the mark of 50-60 cm.
For those who are concerned about the question of how many days dill will sprout after sowing, we will answer that you should not expect quick results. The first shoots usually appear in about a couple of weeks. After the first formations of flower buds are noticed on the greenery, you should stop feeding and cut the plant from the very base of the stem. The dill will be ready for its first harvest in about 6-8 weeks.
As a rule, dill is used fresh, it is recommended to add it to your dishes immediately after cutting. Harvesting should start at the top, which will help stimulate the growth of greenery and allow you to harvest a bountiful harvest as long as possible.
As you can see, growing dill on your windowsill is quite a simple, but very exciting process. These healthy greens do not require any special care and difficult conditions.All you need is proper watering and good lighting. Do not give dill too much fertilizer and keep an eye on the humidity of the air, and then the fluffy green bushes of this plant will be a wonderful decoration for your kitchen.
Tips from experienced gardeners for successful cultivation
To quickly grow high-quality shaggy bunches of dill, you need to know some secrets of sprout care:
- we must not forget about regular watering, especially during seed germination;
Watering is carried out as the soil dries, in small portions

So that, as the bushes grow, they do not experience a deficiency of nutrients, they feed dill on the windowsill twice a month
All recommendations should not make you think that it is quite problematic to cope with growing dill at home without having experience in this matter. But this is not at all the case, because dill is easy to plant on the windowsill, since the plants have enough fertile soil and good lighting from the window.

14–20 days after the first sowing, the next batch of seeds is sown
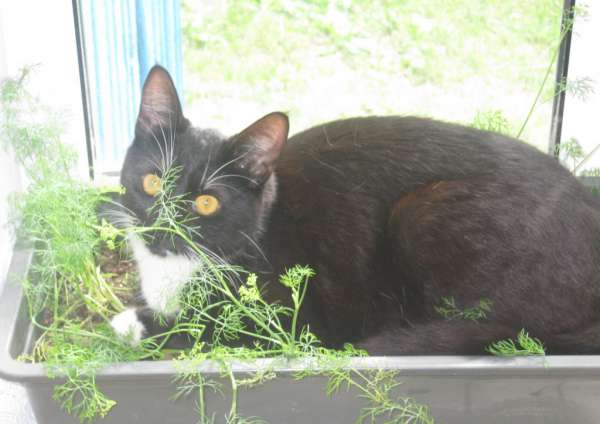
Remember to protect the dill crate from pets
The beneficial properties of dill and its piquant aroma make this greens indispensable in the preparation of various dishes. In addition, calcium, phosphorus, vitamins and potassium salts in dill greens are essential components of masks to improve the color and refresh the skin of the face.
Thus, in order to obtain vitamins all year round, you just need to properly organize the planting of dill and other garden greens, which are not particularly demanding on the conditions, on your windowsill. If you are a beginner gardener and have no experience in this interesting business, we recommend planting dill in the warm spring and summer months.
Video - How to grow dill at home in winter
It seems that there is nothing easier than growing dill. However, this is a very light-loving culture, and its seeds, rich in essential oils, germinate for a long time. These features will have to be taken into account, they will be especially noticeable when growing dill on a windowsill.
Useful properties of the plant
As we have already noted, dill is valued not only for its good taste. Its chemical composition is enriched with mineral salts (phosphorus, calcium, iron), acids and vitamins useful for the human body (ascorbic acid, thiamine, carotene, etc.), as well as essential oils.
Thanks to this complex of nutrients, the spice has a beneficial effect on the motility of the digestive tract, increases appetite, and helps to normalize metabolism.
Individual parts of the plant are used in pharmacology for the preparation of medicines, in cosmetology to create creams and a variety of essences. Traditional medicine also widely uses plants for the treatment and prevention of various diseases of the human digestive system.
Regular use of spices improves the functioning of the gastrointestinal tract, is a good prevention of various diseases.
Growing dill in an apartment
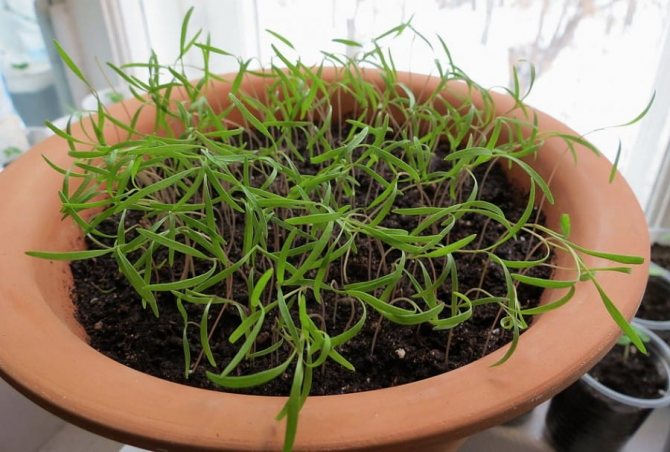
I tried to grow dill on the windowsill in March-April. But this culture lacks light even in the spring months. Even on the southern window, blades of grass, consisting of thread-like stems and leaves, grew. Therefore, I concluded that without backlighting, dill can only be grown on the balcony in summer. Arranging lighting for the sake of a bunch of dill is somehow illogical. If we are to spend electricity, then on a whole home mini-garden, where other greens will grow, and maybe vegetables.

Without highlighting, you will have about the same results.
Dill is one of the most light-loving crops. To grow it in an apartment, you will need phytolamps or ordinary daylight lamps. If available, you can place pots with herbs not only on the windowsill, but also in the back of the room.
How to sow dill at home
Get the seeds first. Some gardeners advise buying early varieties, others - mid-season ones, others - late ones. Choose whichever you like. The nuance is that the early ripening early throw out the flower arrow, their bushes are small, and the later ones build up their vegetative mass for a long time, they have a lot of leaves.
Buy the soil along with the seeds. Suitable for indoor flowers, seedlings, universal for vegetables.
You can take a primer specifically for greenery, but a universal one is also suitable.
If possible, stock up on your soil mixture. To do this, take and mix 1: 1 garden or turf soil and compost or humus.
You will also need drainage:
- expanded clay,
- coarse sand,
- broken bricks,
- river stones.
Of course, you need a pot or a box. Its depth should be about 20 cm. Fill the bottom 3 cm with drainage, then pour the soil mixture in a layer of 15 cm. And there should still be sides for irrigation on top.
Soak the seeds for several hours in warm water (+ 30 ... +40 ° C), then they will germinate faster. Dry seeds can germinate in 2 weeks or later.
Methods for sowing dill at room conditions:
- Make grooves 2-3 cm apart, no more than 1 cm deep. Spill them with water. Spread out the seeds, you can thickly. Cover the grooves with loose earth.
- Smooth and moisten the soil in the pot. Spread the seeds evenly over the surface. Sprinkle them with slightly loose earth.
That is, you can sow both superficially and slightly deepening. Do not water the seeds from above. They can go with water to the depth of the pot and will not germinate. Cover crops with foil or glass and place in a warm place. Favorable temperature for dill: + 15 ... +18 ° C, but to accelerate germination, it can be increased to +25 ° C.
Lighting conditions for growing dill from seeds
Green crops in the apartment are assigned the brightest places, while taking care that the direct rays of the sun do not fall on the pots.
If sowing dill even at home takes place from March to August, plants create lush bushes on well-lit windowsills and do not require additional lighting.
But most often dill is grown at home in the winter. And here you cannot do without artificial illumination of landings. It is best to hang a special phytolamp at a height of 50-60 cm from the home plantation, giving the spectrum necessary for the plants. If this is not possible, white fluorescent lamps will do. Taking into account the illumination, daylight hours for dill on the windowsill should last up to 13-15 hours. Such a measure is especially important at the stage of emergence, until the plants have risen and matured.
By receiving the required amount of light, the bushes will not lean against the window pane, stretch out and look weakened.
How to grow dill on a windowsill so that the supply of greens to the table is uninterrupted? Unlike parsley, which for a long time releases new leaves instead of the collected ones, dill practically does not form greens after cutting. Therefore, 14–20 days after the first sowing, the next batch of seeds is sown. In this case, on the windowsill there will always be dill ready to harvest with marketable greens of approximately 10 centimeters in length.
Dill diseases and their prevention
Despite the fact that growing dill at home is considered the safest way, even then the seedlings are not protected from possible infections. For example, it is enough to overdo it with watering the plant so that its root collars begin to rot. To avoid contamination of dill, you should:
- Disinfect the soil if you take it from your own site. Ready-made soil mixtures do not need disinfection;
- Disinfect seeds if they are not purchased. This can be done by immersing them in a solution of potassium permanganate for half an hour;
- Sow a moderate amount of seeds per pot. Do not try to grow as many plants as possible, because if they get cramped, they will start to hurt, or just wither.
Dill requirements for soil, light, moisture
If you are going to grow dill in an apartment, you must immediately understand that this will not be an easy task.It is in the garden that it often grows self-seeding and practically without care. There are no such conditions at home.
Firstly, this plant does not like heat, and a temperature above 20 ° C in an apartment is bad for it. And in the first week, the seedlings should be cool. Secondly, during winter cultivation, heating batteries, which dry out the air, will greatly interfere, and it will need to be artificially humidified. It is easier with the soil: the "bed" will simply need to be watered almost every day. Thirdly, dill needs a lot of light. Daylight hours with the help of various lamps will need to be extended to 14-15 hours.

Dill needs a lot of light to grow
Perhaps these are the biggest problems, since you can simply buy good fertile soil for a box of dill at the store: it will be better than trying to mix the soil with ingredients that are unlikely to be at hand.
Crop care, albeit not very difficult, will be required daily.
How to plant dill correctly
The success of growing homemade greens largely depends on the characteristics of the planting containers, the quality and nutritional value of the substrate, the preparation of seeds, as well as the sowing technology.
Preparing the container for planting
Dill has a sufficiently developed rod-type root system and requires a deep volumetric container for its full development. When choosing one, give preference to containers with a depth of 15–20 cm. After all, the height of the aboveground part of this garden crop is proportional to the size of the roots.
Therefore, the lower the box, the poorer the bushes in it.
For sowing, you can use plastic garden containers or homemade wooden boxes. Alternatively, any container with the proper depth will do. Some housewives prefer to plant herbs in plastic bottles with a volume of 6-10 liters with the side cut off.
In any case, there should be drainage holes at the bottom of the container (if necessary, you need to make them yourself). Otherwise, the plant will be struck by root rot, for which stagnant water will be a favorable environment.
To prevent this from happening, you need to start sowing by disinfecting the selected pot with a weak solution of potassium permanganate. After that, it is filled with a layer of expanded clay about 3 cm thick.
Did you know? The famous Russian writer Nikolai Nekrasov loved dill. At his request, this greens should have been present in all first and second courses.
Soil preparation
For better germination of dill grains, a loose nutrient soil with neutral acidity is required.
You can use a commercially available universal substrate, or you can prepare it yourself from the following components:
- garden land (1 hour);
- river sand (0.5 hours);
- high-moor peat (2 hours);
- compost or humus (1 hour).
Before sowing, the soil (including the store one) is disinfected.
There are several ways to do this:
- Steaming the mixture in a double boiler or scalding with boiling water. Under the influence of high temperatures, pathogenic microbes will die, but after the procedure, the soil will need to be dried for some time. It is important at this stage to prevent favorable conditions for the development of the pathogenic environment.
- Frying in the oven. The method, like the previous one, is based on the effect of a short-term increase in temperature. Its danger lies in the fact that an excessively long stay of the earth in such conditions can burn out all useful elements from it, therefore, it is necessary to disinfect the substrate with the help of an oven quickly, having preheated it to + 200 ° C.
- Disinfection with chemicals (a weak solution of potassium permanganate or "Fitosporin").
Seed treatment
Considering the thickness of the skin on dill seeds, as well as the amount of essential oils contained inside, it is advisable to soak the planting material in warm water for 3 days before sowing. And in order to protect the grains from pathogenic bacteria, change the liquid several times daily.
Important! To prevent dill from losing its freshness in the refrigerator, it is recommended to rinse and dry it thoroughly. After that, the greens must be laid out on a paper napkin in a glass container and sealed with a lid.
To accelerate their germination, you can add a few drops of any growth stimulator (Kornevin, Emistim, Ecosil) at the last water change.
Sowing technology
Subject to all agrotechnical rules for sowing, dill greens, depending on the variety, will appear in a month and a half.
To meet the requirements of the culture and provide the necessary conditions for its growth, proceed step by step according to the instructions below:
- Fill cleaned and decontaminated containers with prepared substrate and flatten. Make sure that about 3-4 cm of space remains on top. Otherwise, you will not be able to water the plant.
- Moisten the substrate abundantly with standing water at room temperature. Wait until the ground has completely absorbed moisture.
- Sow seeds. This can be done using rows about 1–1.5 cm deep, or simply by spreading them over the soil surface. After that, the "bed" is sprinkled with fresh substrate and it is lightly tamped with palms.
- To accelerate germination, the container is covered with glass or plastic wrap and removed to a dark and warm place.
Useful tips for growing
In order for homemade dill to develop at an accelerated pace into lush rosettes, experienced housewives advise:
- At elevated growing temperatures, increase the daylight hours accordingly. Otherwise, the sprouts will be very elongated or will not stop growing at all. This recommendation is especially relevant in winter, when heating systems are turned on.
- Regularly turn containers with greens in different directions to the window, because the shoots eventually lean towards the light source.
- After the emergence of seedlings, do not immediately remove the shelter from the container, but begin to gradually adapt to the environment. To do this, on the first day, the container is opened for half an hour, with each subsequent day increasing the interval by 2 times. Within 10–12 days, the cover can be completely removed from the landing tank.
Dill from the windowsill is a real find in winter and a way to save money on purchased products. To grow homemade greenery, you do not need special equipment and knowledge. An unpretentious spice needs basic care and a little attention.
Seed handling
Dill for self-cultivation at home is purchased with seeds, the planting of which is not immediately welcomed - you can end up without a crop at all. Observing the same rules on how to grow dill on a windowsill in winter, you can get a large harvest.
Seed preparation and sowing
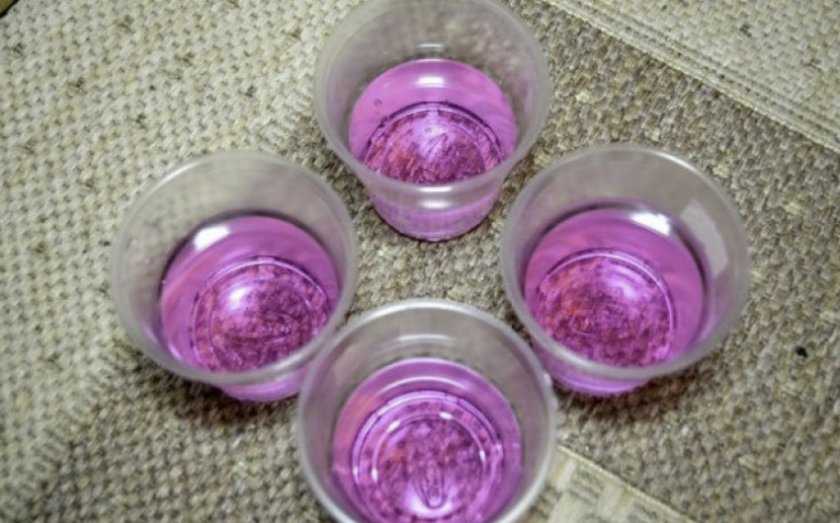
Before planting, it is necessary to study exactly how to plant dill at home in order to prevent mistakes that are fatal for the harvest. Purchased dill seeds are placed in warm water in a glass. This is necessary for the selection of fertile specimens.
Those seeds that sank to the bottom in 10 minutes of soaking are later planted.
After soaking, the seeds are dried on a cloth - this will require placing them under the sun or artificial lighting. The dried seeds are poured into a prepared container with earth. The exact layout of the presented greenery does not exist - straight rows, circular landings, and point planting in bunches are suitable here.
After laying the seeds on the soil, they must be covered with a new layer of soil, but no more than 2 cm. You should not additionally press in the seeds - just sprinkle them with a new layer of soil.
The soil should be slightly moistened, for which it is better to use a standard spray gun - it will not wash off the layer laid out on top, but only moisten the soil.
After watering, the container is completely covered with polyethylene, it is more convenient to use cling film. The created greenhouse effect contributes to the rapid pecking of seeds.
To speed up the process of spitting seeds, you can use additional soaking for several days - no more than 4-5. Pour warm water into a glass and dip the seeds into it.
During the day, you should change the water again to warm or install a glass near the central heating. It is better to dry the soaked seeds a little before planting, and only then start planting. After such soaking, sprouts are pecked twice as fast.
Placement of containers
Having studied how to plant dill at home, you should start preparing the site. Growing in an open-air vegetable garden, these greens require more sunlight and adequate ventilation. At home, and in winter, even more light and heat is required.
Therefore, the planted seeds in a container are exposed on a windowsill on the sunny side. This provides natural light and a kind of ventilation during the winter.
Of course, in winter there is a risk that the earth will simply freeze over. To prevent this from happening, it is recommended to additionally install a fluorescent lamp on the windowsill - this is both additional lighting, which is not enough in winter, and heat, which is extremely difficult to achieve on the windowsill.
As soon as the first sprouts appear, the film is removed from the container and care is taken in the usual way - correct watering is carried out, additional lighting is created, and top dressing is done.
Dill on the window on hydroponics
How can you do hydroponics at home?
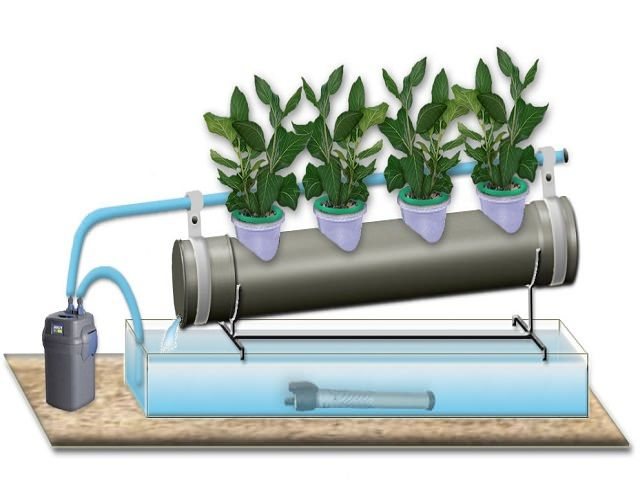
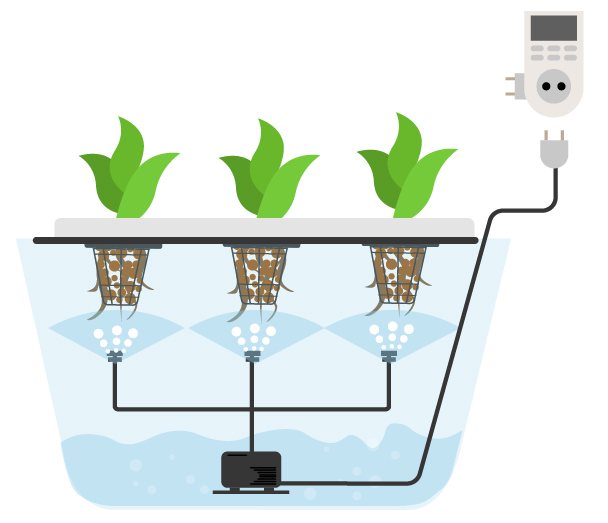
Hydroponics is a system in which plants develop without soil, and they receive nutrients from water, pre-saturate it with a nutrient mixture.
You can make the simplest system yourself:
For more complex systems, be prepared to splurge on materials -
- flow tubes with cutouts for cups;
- a heating element with a thermal relay to maintain the temperature of the solution;
- cups with holes (seedling pots) and filled with substrate (straw, moss, expanded clay, pumice, pearl, gravel, etc.) and vermiculite; If you want to fill the pots with mineral wool, be sure to observe safety precautions while working with gloves.
- container with solution;
- timer pump;
- hose system;
- seeds;
Place the seeds in cups with filler, cover with foil. As soon as the shoots appear, and we release them into the holes prepared in the pipes, through which the liquid enriched with oxygen and nutrient mixture flows, since it does not stagnate, and the substrate is constantly in a wet state, we get a good harvest without soil. And we will definitely provide light illumination with a duration of 15 hours.
How to do it yourself video:
Many types of greens can be grown in the nutrient solution:
- dill,
- basil,
- cilantro,
- Melissa,
- parsley, etc.
We will learn to use the small space of our windowsills with greater efficiency.
Dill varieties for growing on the balcony
To provide yourself with fresh dill year-round, you must follow a very simple rule: do not sow only one variety of dill.
Like most other vegetable crops, dill varies in maturity. Depending on this, there are differences in the green mass, the duration of the growing season and the tenderness of the leaves.
Helpful advice! If you are thinking of growing greens for the first time on the balcony, you need to purchase varieties of early, medium and late ripening in the store at the same time.
There is no need to list all the variety of varieties of certain ripening periods. Any seller in the store will answer this question. Moreover, preference for certain varieties is given not only by the picture on the bag with seeds, but also by the region and climatic zone in which the dill will be grown. It is absurd to recommend dill varieties that grow well on the balcony in the Black Sea region for the Arctic.
But why it is worth simultaneously planting three varieties of different ripening times at once should be explained.
Early varieties of dill characterized by rapid seed germination and early appearance of a sufficient amount of green mass to be eaten. However, early varieties of dill manage to release only 4-6 leaves before the start of stemming. That is, the yield of green mass in early varieties is very insignificant.
Early varieties of dill:
- Gribovskiy with a pleasant aroma blooms 2 months after sowing the seeds. Differs in unpretentiousness to growing conditions and gives a lot of products.
- Grenadier with blue leaf needles
- Richelieu is a medium-ripening variety with bluish leaves
The main criterion when choosing a suitable dill is the timing of its ripening. Mid-season varieties dill give a much larger amount of green mass and can satisfy the need for it for a long time. As fresh leaves are collected, new ones grow in their place, but they are significantly inferior to the first in aroma and are coarser.
Late varieties of dill do not have time to ripen in central Russia, but their green mass is black and thick, it can be harvested for 2-3 months.
Late varieties of dill:
- Russian size
- Gourmet
- Kibray
- Firework
- Alligator
- Dipl
- Buyan
By planting dill of different ripening periods at the same time, you will get the best option. You do not have to wait for the most productive late-ripening dill to grow. It will be possible to satisfy your needs at the expense of the early maturing, and then remove it and sow the late maturing in its place. So, periodically planting new seeds with an interval of 2 weeks, you will be able to provide yourself with dill all year round.
How to plant?
Sowing seeds in a pot involves several preparatory measures.
Before sowing, you will need:
- decide on the capacity for the plant;
- purchase or prepare soil;
- decide on a place for a spicy plant;
- prepare seed.
Each of the stages of preparation requires compliance with certain conditions and recommendations.
Pot
Flower pots with a volume of up to 2 liters are suitable for sowing dill... If you intend to sow a large number of plants, then ordinary tree boxes can be used. It is important that special drainage holes are made in the selected container. It is required to select a suitable pallet for the container.
There are no special requirements for a dill pot. The only thing worth focusing on is the convenience of placing plants on the windowsill. You can use peat pots for sowing seeds, and then transfer them to a pot for further cultivation.
Priming
It is imperative to provide for a 2 cm drainage layer at the bottom of the selected container or flower pot. To do this, use ordinary expanded clay. If it is not possible to use expanded clay, then ordinary sand will do.
If you do not want to prepare the soil yourself, then you can purchase a ready-made one in the store and mix it in a 1: 1 ratio with garden soil or use pure commercially available soil. Preparing the soil yourself, you need to mix garden soil, peat, humus and universal soil in equal quantities.
Window selection
Dill is considered a crop of long daylight hours, so it is recommended to choose the lightest window for plant growth. It is best to place the cultivated spice pots on the southeast or south side of the house. It is not forbidden to grow dill in the room, but additional measures will need to be taken to fill the lack of light. In any case, it is important to choose the brightest spot for the plant.
Seed preparation
It is recommended to prepare seeds before sowing.... Preparatory activities are as follows:
- The required amount of inoculum is placed in a gauze piece of tissue or bandage and immersed in warm water for 1-2 days.
- A solution of pale pink potassium permanganate is prepared and the seeds are immersed in liquid for 15-20 minutes, after which they are washed with water.
- Additionally, you can carry out the processing of the seed and use a growth stimulator, for example, Epin. Dilute the product according to the instructions and leave the seeds in the solution for 3-4 hours.
Then you can immediately sow dill in a flower pot or other container in which it will grow on the windowsill of the house.
The most suitable time for sowing dill is March-August, however, given that at home the temperature is generally always constant and subject to adjustment, you can sow seeds at any convenient time. The only thing that should be foreseen is the possibility of creating optimal conditions for the growth of culture.
Step-by-step planting procedure
Sowing seeds is carried out in accordance with the following algorithm of actions: Prepared soil is poured into the selected container and poured abundantly with water, but the soil is not waterlogged.
- If the container is long and allows you to sow several plants, then grooves are made in it, up to 1 cm deep.
- The seeds are placed in such a way that the distance between them is kept 10-15 cm. If the dill is grown in separate pots, then 1-2 seeds are enough for one container.
- After distributing the seeds in the soil, they are covered with a small amount of earth and covered with foil. Leave the pots in a warm, lighted place.
- After the first shoots appear (about 11-14 days of sowing), the film is removed and the pots are placed in a permanent place of growth.
Soil preparation
Under natural conditions, dill grows well on any soil. For growing at home, you will need with
independently prepare the soil mixture that is optimal for this plant.
Several options are possible:
- The best choice is the land from the garden, on which dill grows well in the garden.
- Soils with neutral acidity, enriched with humus or spent mycelium from oyster mushrooms or other fungi.
- A mixture of garden soil and store-bought soil mixture for growing flowers in a 1: 1 ratio.
It is important that the soil is sufficiently loose. All large lumps must be broken up. On light, breathable soil, dill will grow rapidly.
Sowing
To sow dill at home, you must follow the following sequence of actions:
- cover the bottom of the container with a drainage layer (2-3 cm);
- fill the container with earth, not reaching the edge by 2-3 cm;
- sow seeds, cover with earth on top (0.5 cm);
- water;
- close the container with a package or glass;
- place in a warm place.
Important. Dill can be planted both in rows and in scattering. The method of planting does not affect germination.

Possible growing difficulties
Dill is an unpretentious garden crop, and there are no special difficulties in its home cultivation. Even beginner gardeners can grow lush spice bushes, if they provide the plant with a well-lit windowsill, the recommended mode of heat and moisture.
Inhibition in growth and elongation of shoots indicates improper cultivation and inappropriate conditions.
Lack of growth
The reason why dill does not grow on the windowsill must be sought in the level of its illumination, as well as in the fertility of the soil. Examine seedlings carefully for symptoms of diseases and signs of pest activity.
If they are absent, pour nitrogen-containing substances on the culture. Once a week, after watering, loosen the soil in the root aeration box. Such manipulations will enhance the development of dill. And also make sure that the air temperature in the apartment corresponds to + 18 ° C, and the daylight hours for the plant are at least 15 hours.
Important! With high germination of dill seeds, dense sowing must be thinned so that the distance between the plants is at least 2-3 cm.
Dill sprouts are strongly elongated
This happens when there is not enough light in the room. In winter, be sure to illuminate crops with lamps.It is important to place them above the crops so that the light spreads evenly over the entire container.
How to properly care for?
Caring for the plant, you will need to perform the following activities:
- Watering the soil... You need to water the plant, focusing on the condition of the soil. Watering should be carried out after the soil is almost completely dry. In no case should waterlogging of the soil be allowed, as well as its complete drying.
- Top dressing... Fertilization is carried out once every 6 weeks. Moreover, the amount of fertilizer is the same throughout the growth of the crop. Mineral fertilizers intended for vegetable crops are used for feeding. They need to be bred in accordance with the instructions for the purchased product.
- Temperature for dill should not exceed 20 degrees. If the temperature regime exceeds the specified one, then you need to take care of the maximum increase in daylight hours and spray the plants with water daily.
Additionally, you need to periodically turn the pot 180 degrees. This can be done daily. Such an event will allow the plant to stretch upward, and not grow towards the light. As for additional lighting, it is required only in winter.
Description and the best varieties
Dill is the most widely used spice. From early spring to late autumn, housewives add fresh aromatic herbs to soups, sprinkle boiled young potatoes, decorate salads. With the arrival of winter, you can grow it at home on a windowsill.
All varieties of dill are divided into early, mid-season and late:
- Early - fast-growing varieties, which, having grown 5-6 leaves, open a flower umbrella and proceed to the formation of seeds. It takes 35-40 days from sowing to cutting the greens. They give greens the fastest, but they are also the first to coarse. The main purpose is seasoning in conservation and getting a harvest in the shortest possible time. Varieties - "Gribovsky", "Grenadier", "Dalny".
- Mid-season - before releasing the flower arrow and becoming coarse, they manage to grow up to 10 leaves. It takes 40-50 days from germination to harvest. Representatives - Richelieu, Lesnogorodsky, Kustisty.
- Late-ripening varieties begin flowering after 65 days and form a powerful bush. They are best suited for windowsill cultivation. Varieties - "Alligator", "Amazon", "Kibray". A distinctive feature is a strong aroma.
An interesting novelty is the early Aurora variety. Cutting greens can be done 25-30 days after germination. The leaves of this plant are very fragrant and juicy.
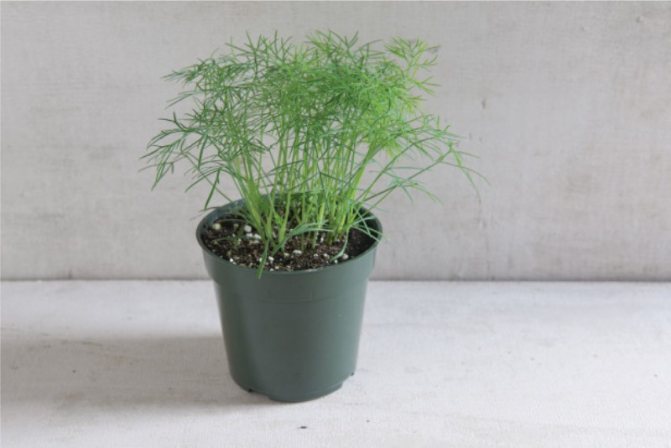
When growing a culture on a windowsill in a ceramic or plastic pot, containers with a wall height of at least 10 cm are preferable, with a mandatory hole for excess water to drain.
To view the plant overview:
Harvesting
Growing dill
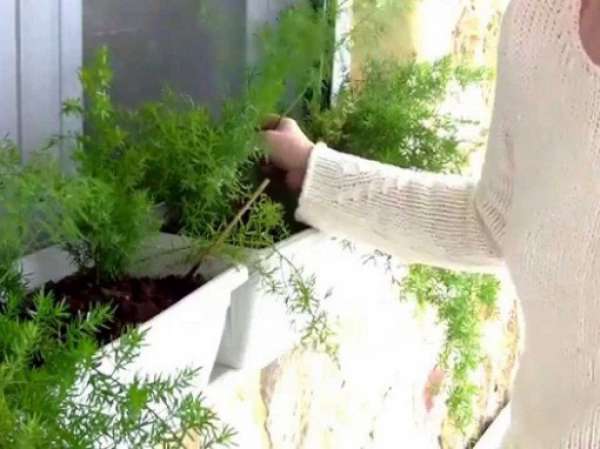
We figured out how to plant dill at home on the windowsill, grow and care for, but how to harvest correctly? It is best to harvest when the plant has reached 20-25 cm in height and should start by harvesting the lower leaves. After cutting off the lower leaves-stalks, it is advisable to spray the dill, the leaves will appear on the stem a little later. Well, after the complete cutting of the bushes with dill greens, it is necessary to sow new seeds and continue growing dill in the winter at home in apartments and on window sills.
Own dill on the windowsill in winter and early spring is a real storehouse of fresh vitamins, and besides, it is an exciting, albeit troublesome, occupation. Try it, and dill on the windowsill, growing it from seeds and eating it in the winter will become your hobby for a long time.
Dill: planting and care in the open field
Despite the above caveats, dill does not require labor-intensive care for its full and volumetric growth. So, you need to follow just a few basic recommendations.
Watering
Growing dill in the open field on a windowsill requires mandatory watering during the summer and winter.
Here you need settled water at room temperature - there is no need to use special distilled water, since this greens are not so whimsical.
Dill loves moisture, but this does not mean that the soil should always be wet. It is enough to water as the top layer of the soil dries up, which will happen quite often in summer and winter, taking into account additional lighting.
In winter, you should be careful with watering, since the use of additional lighting can lead to a deceptive effect - the top layer of the soil will quickly dry out, and inside the ground will be still wet. In order to prevent fungal diseases during watering in winter, it is necessary to check the condition of the soil in depth.
To do this, simply stick your finger into the ground without touching the sprouts. If the soil is wet, watering should be delayed, even if the top layer dries out.
Fertilizers
Dill should not be left without fertilizers necessary for normal germination. They are used only in the case of using ordinary soil for planting. Provided that the acquired fertile soils are used, additional fertilization is not necessary during the growth of dill.
Fertilizers permitted for use include any liquid solutions intended for the fertile growth of the presented culture. Fertilizers are used twice a month according to the instructions for the purchased fertilizer.
Pay attention to this material - The best varieties of tomatoes for polycarbonate greenhouses.
Vermicompost also has an excellent effect on the state of greenery, which is poured every three weeks on top of the soil layer.
Tips from experienced summer residents, reasons for failure
Many beginners who want to arrange a greenhouse right in the house often do not understand why greenery does not grow on the windowsill. Therefore, those who are interested in how to plant, grow dill and parsley in the house should remember:
- indoor plants are capricious; for good growth, you need to create suitable conditions;
- the climate necessary for seedlings is not always possible to organize in a city apartment;
- homemade greens can taste very different from those grown outdoors.
Pulling seedlings
A frequent question arises among beginners: why dill stretches a lot and what to do. During the heating season, amateurs may be faced with the fact that the dill stem is stretched out, and there are not many leaves. The only correct solution is supplementary lighting with fluorescent lamps.
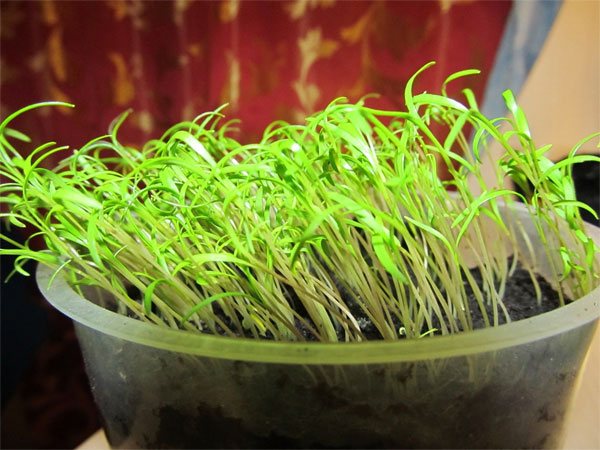
The next reason for pulling greens is dense seeding. When young plants lack light, they begin to grow tall. In this case, you need to thin out the plantings, leaving the strongest specimens.
Yellowing of leaves
Yellow, curled leaves can be a sign of:
- overflow;
- illness;
- damage by pests.
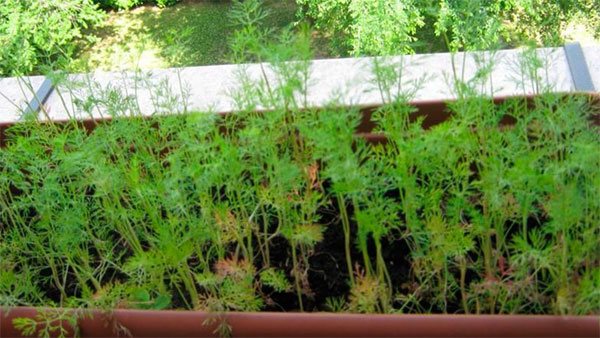
To solve the problem, you should:
- revise the irrigation regime;
- in case of detection of pests, characteristic features of diseases (mold on the surface of the soil, decay), treat with the help of special preparations or folk remedies;
- lower the temperature in the room, periodically ventilate.
Dill is a cold-resistant and light-loving plant. It is not difficult to grow it outdoors. But in a greenhouse or at home on a windowsill, it is more difficult to obtain fragrant leaves; it is difficult to create suitable conditions in a room.
We grow dill at home on the window: basic rules and secrets of care
Many owners are happy to see fresh herbs on their table. It is not always possible to buy greens in the store, which will be fresh and healthy. That is why it makes sense to start growing these crops on your own windowsill. growing dill at home - this is absolutely not a laborious activity, it helps to fill the lack of vitamins necessary for the body, with the help of fresh herbs.
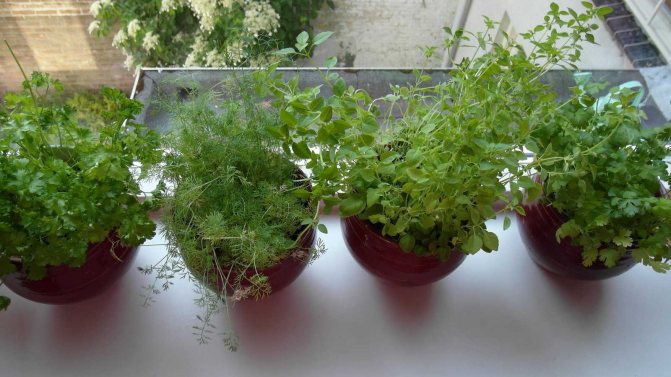
Growing dill at home.
In order to plant and grow juicy bushes of greenery at home, it is not necessary to spend money, time and effort.It is enough to plant seeds, and then carry out timely watering, top dressing and loosening. Subject to these simple manipulations, after 5-6 weeks on your table there will be greens grown by your own hands, rich in vitamins and minerals.
Inventory and packaging
The first thing you need to prepare is the container in which you will grow dill on the windowsill. For our purposes, it is better to take a container with a depth of 15-20 cm with the obligatory presence of drainage holes in the bottom. There are several options:
- Peat pots This type of container is more often used for growing seedlings, so as not to later resort to the picking procedure, but they are also suitable for growing dill. However, dill seedlings from peat pots can be transplanted into another container after germination so that the plantings look more aesthetically pleasing and fit into the interior.
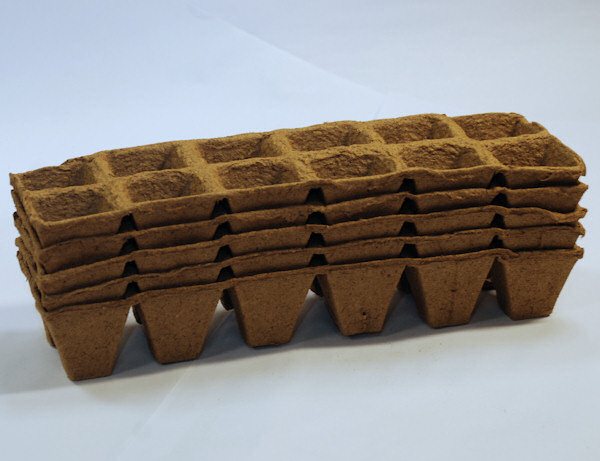
- Plastic pots and boxes with pallets This type of container for growing is the most practical and common. If you choose it, you do not have to dive the dill seedlings after germination.
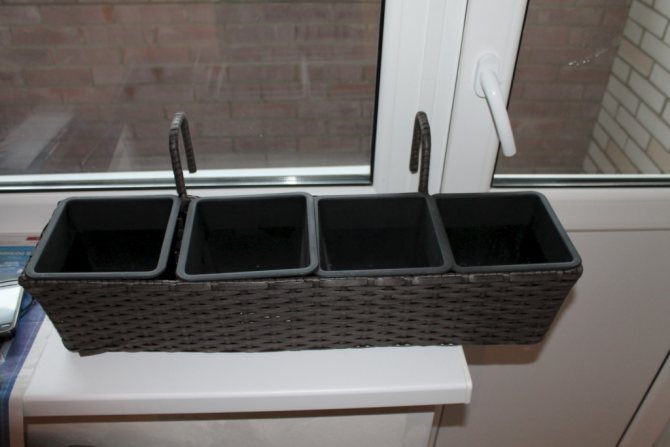
The container and its filler are ready, now you can start growing dill on the windowsill, even in winter, even in summer.
Seed selection
Seed correctly is half the battle. There is no special variety intended for indoor cultivation. Therefore, when choosing a seed, one must focus on the timing of its ripening. They are subdivided into early, mid-season and late:

Early maturing varieties are distinguished by fast seed germination. This usually happens after 3-4 weeks. They do not give much greenery and quickly begin to bloom. (Gribovsky, Grenadier, Carousel, Aurora, Early miracle.)- Mid-ripening ones are distinguished by a richer harvest, but seedlings appear 10 days later. And they do not bloom as early as the early ones. (Kibray, Umbrella, Smelly, Richelieu.)
- Late ripening. The first shoots have to wait a long time, but this is fully compensated by the abundance of greenery. (Russian, Giant, Alligator, Buyan.)
What are the beneficial vitamins found in carrots?
For beginner gardeners, it is recommended variety Gribovsky... It is the least whimsical, has a higher yield, is more resistant to temperature extremes and diseases. Fragrant and aromatic greens.
To grow dill, Gribovsky is enough to sow it in fertile soil, water it as needed, and weed weeds.
Experienced gardeners prefer to plant Richelieu, Grenadier or Kibray varieties... They are demanding on growing conditions, but have a good harvest. They also successfully grow southern varieties, the taste and aroma of which are more intense and pronounced. But they need special conditions.
Preparation
To grow dill at home you will need:
- Capacity... When planting, gardeners use plastic containers with a volume of 1 liter. There must be drainage holes in the dishes - they prevent the stagnation of water in the ground. Sometimes summer residents take pottery or wooden boxes.
- Priming... Dill does not tolerate acidic soil, but loves to grow in neutral or slightly acidic soil. Gardeners can easily compose soil from the following ingredients: 2 parts of garden soil, 1 part each - coconut fiber, river sand, peat. A little wood ash is also added.
- Drainage material... Gravel, small pebbles or expanded clay are great.
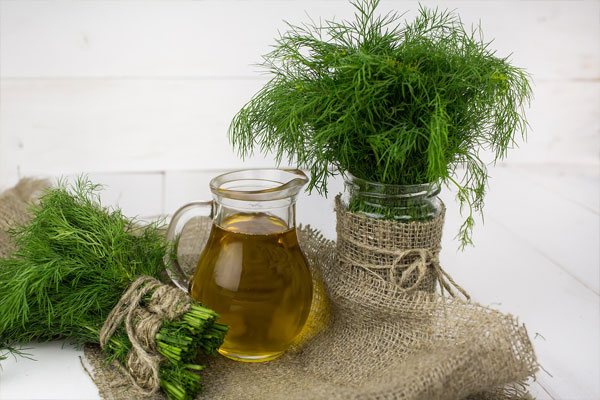
Good to know. The self-formulated formula must be decontaminated. The most effective and safe way is to freeze it for 7 days. Under the influence of cold, pests and disease spores die. The following methods are no less popular: steaming, treatment with Fitosporin, spilling with boiling water, calcining in the oven, processing with a solution of potassium permanganate.