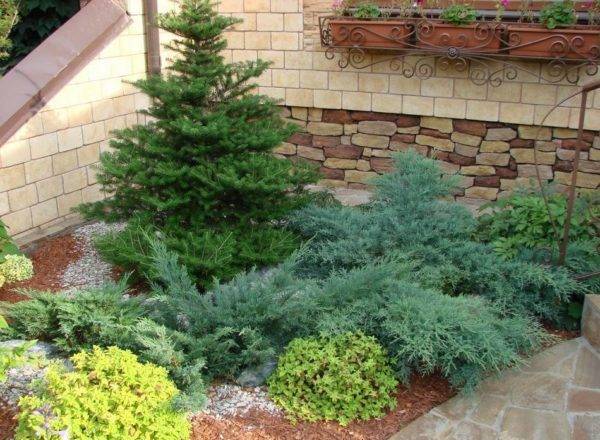
Have you ever wondered how much the exquisite simplicity of coniferous compositions costs? Yes, a lot. But there is a way to create beauty and reduce costs - you need to learn how to propagate plants on your own. This requires a system and some secrets. We will share the experience of cutting junipers.
Reproduction of juniper at home
Breeding features
Representatives of conifers, which include juniper, are long-livers. Their main difference is that the vegetative stage of fruiting occurs much later than in other plants.
The first cones appear at 9-10 years of age, they ripen for 2-3 years.
In their natural environment, dioecious conifers, which have female and male cones, reproduce by seeds and spores by spreading them in nature over long distances by winds and birds.
The seed method is suitable for ordinary varieties and is not suitable for decorative seedlings, because does not retain its original qualities.
Artificial conditions require long-term stratification - holding in the cold. The sprouts obtained from seeds often do not take root well due to the underdevelopment and weakness of the root system.
The method of cuttings is best suited for propagating junipers, it is faster and easier, and it can also be done at home. Main advantages:
- the obtained seedlings show intensive growth and development rates, reaching the size of an adult plant 3-4 years earlier than seedlings from seeds;
- the next generation retains the quality characteristics of the mother tree;
- the adaptation period for cuttings to new growing conditions is reduced;
- resistance to environmental factors in the obtained young seedlings is higher;
- the method gives a high rooting rate and is suitable for all varieties.


How juniper multiplies
Fuchsia - propagation by cuttings at home
Reproduction of junipers is possible in several ways. Each of them has its own peculiarities and disadvantages.
How can you plant a juniper:
- using seeds;
- cuttings;
- layering;
- dividing the bush.
The last 2 methods are not suitable for all types of juniper. Layers are obtained from creeping varieties, and only a young bush can be divided.
Seed breeding is a very laborious process:
- cones ripen for 2 years;
- seeds require long-term stratification;
- varietal qualities are not preserved;
- seeds have low germination rates.
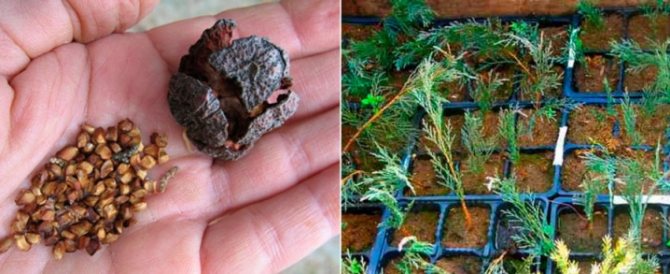
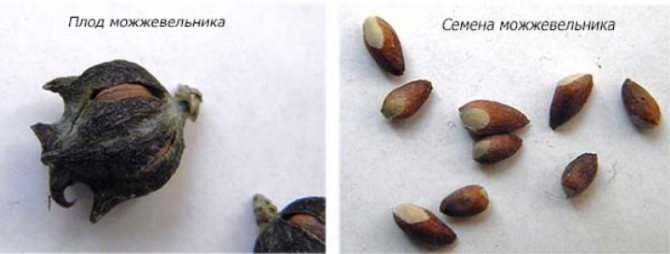
Juniper Seeds
Because of this, the vegetative method is popular. Propagation by cuttings is the simplest and most effective way. It has a number of advantages:
- varietal properties are fully transferred to the seedling;
- a full-fledged bush is formed in 2-3 years;
- seedlings quickly adapt to growing conditions;
- cuttings show high growth rates.
Juniper has an unusual characteristic. The direction of growth of a new bush depends on where the stalk was cut from:
- from the top - the plant will stretch up;
- from the side - the shrub will begin to develop in breadth.
Many gardeners have a logical question of how to grow a juniper from a twig at home, so that it quickly takes root and grows actively. And more on that below.
Dates of the
Reproduction of juniper can occur all year round, throughout the season, not excluding winter.
- In the summer - with branches and layering. Mostly propagated by creeping, creeping varieties, but this is not the best period for obtaining seedlings from prickly horizontal varieties, harvesting is carried out no later than July, so that the plants have time to take root by winter and not freeze.
- Autumn is suitable for the seed method.
- In winter, it is better to use cuttings, planting planting material in a heated room. It is prepared from the first days of February to be planted next month.
- In the spring, they are rooted with branches or propagated by layering with lateral shoots fixed in the horizontal direction.
Preparing the substrate for germinating cuttings
The soil for rooting cuttings must meet the following requirements:
- Be light and loose, without the risk of compaction.
- Be breathable.
- Be moisture absorbing and do not dry out too quickly.

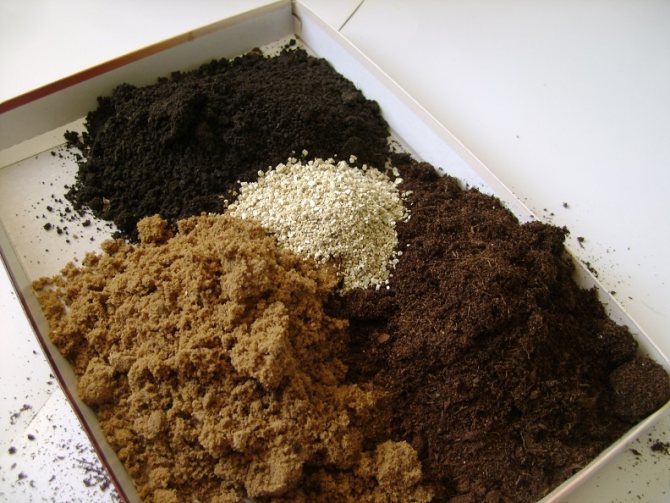
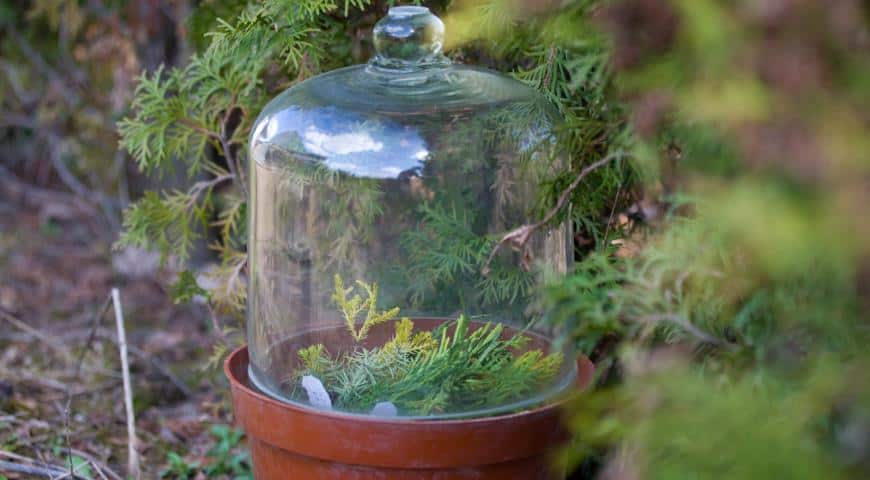
Such characteristics are possessed by a mixture of peat and sand, taken in equal parts without adding lime or ash. Of course, it will dry out quickly enough, therefore, after placing the planting material selected for reproduction and moistening into it, it is recommended to cover the rooting container with a film or transparent polymer cap.
Description of technology
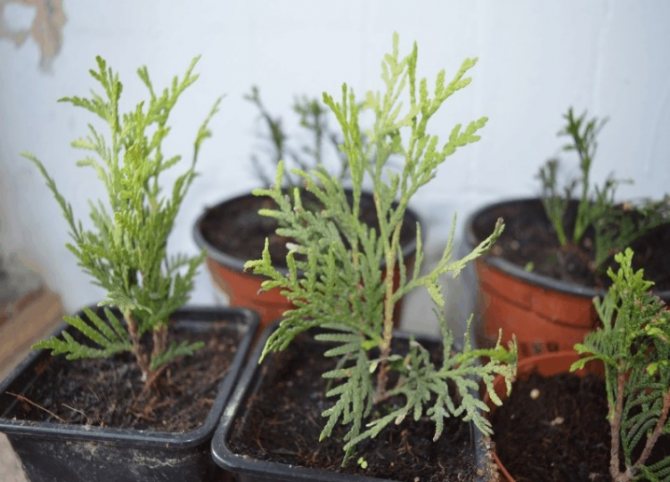
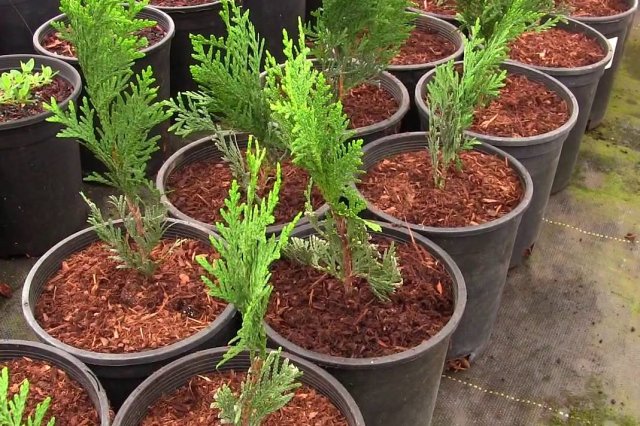
We breed junipers in small pots
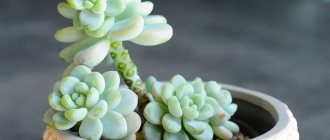
There are certain varieties of juniper that are best propagated by cuttings. It:
- Meyeri;
- Holger;
- Kurivao Gold;
- Mint Julep;
- Mordigan Gold;
- Wiltoni;
- Dream Joy;
- Lime Glow;
- Gold Coast;
- Hit.
Substrate preparation
For rooting of blanks, a soil mixture is made from humus and peat taken in equal proportions. It is allowed to add river sand, crushed charcoal and perlite.
Lime, lime flour and ash powder help to neutralize excess acidity.
Preparing cuttings
The harvesting of planting material is carried out throughout the garden season, starting in early spring and pumping in late autumn, but the most suitable time for this is April-May.
As a donor tree, specimens aged 8-10 years are suitable, in which varietal characteristics have already formed.
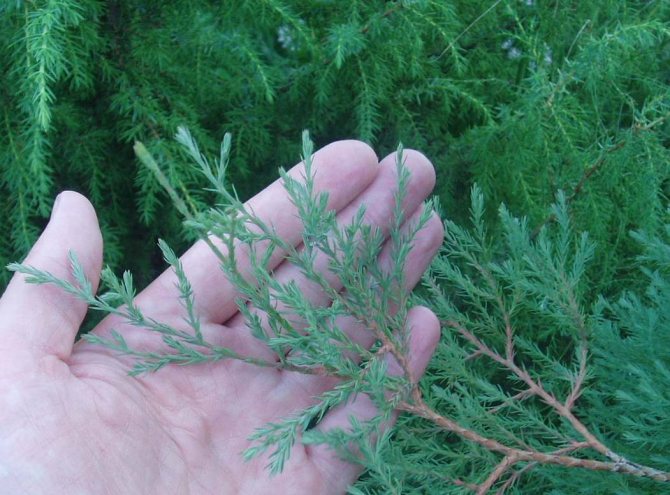
Shoots are harvested from not yet lignified green juniper branches, taking into account the peculiarities of the species:
- for columnar varieties - from those growing in the upper part;
- for spherical varieties - from those growing on the sides.
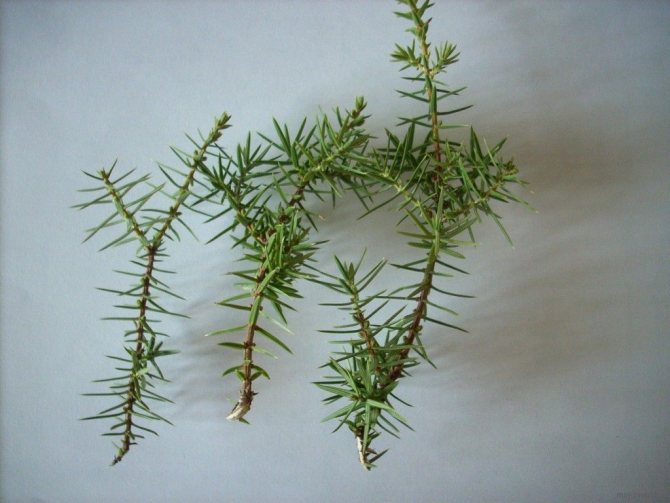
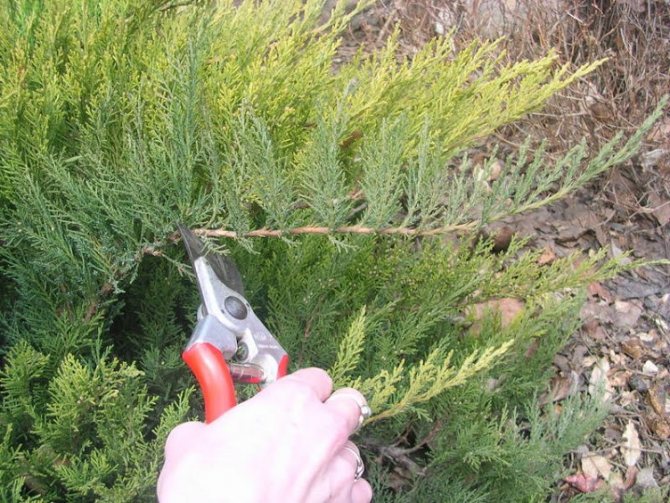
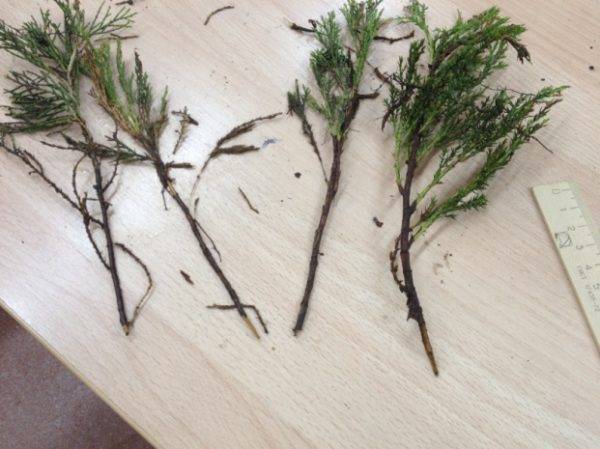
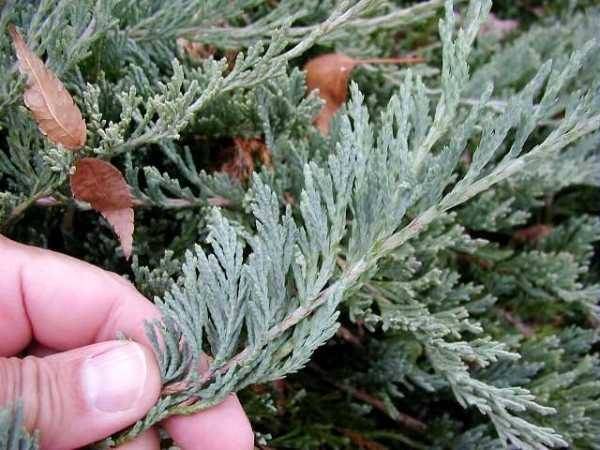
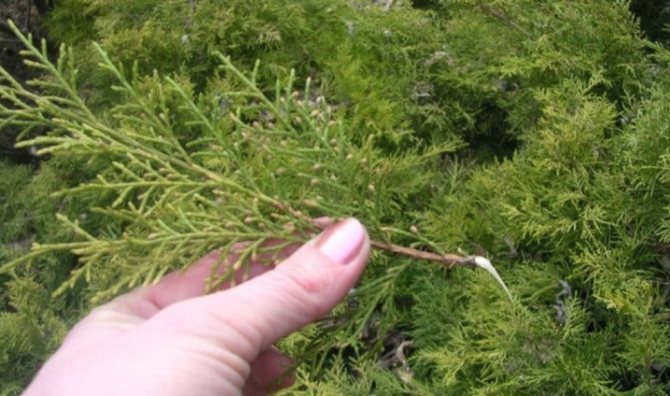
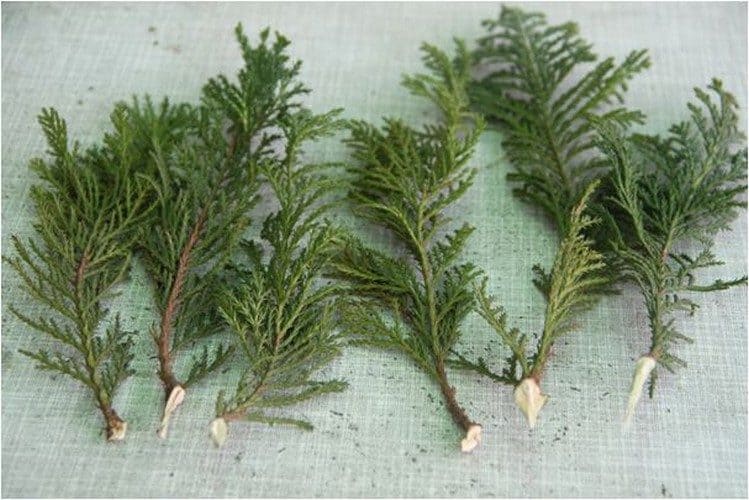
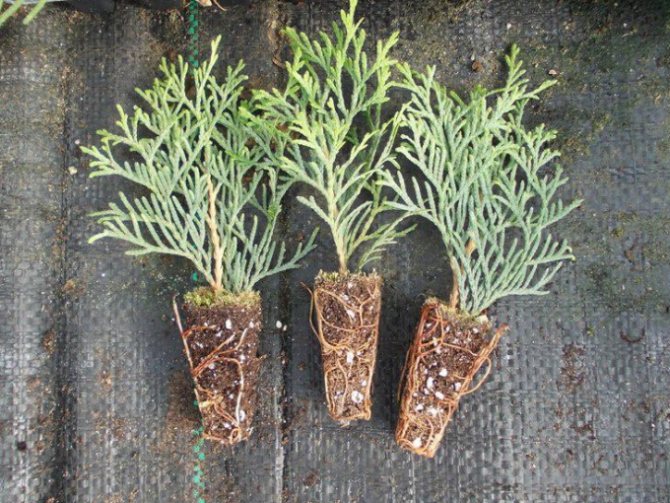
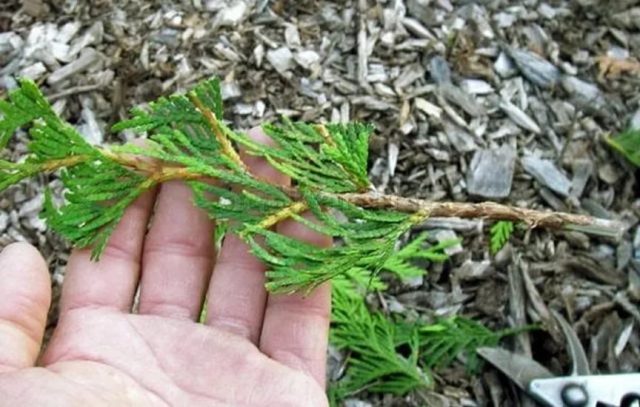
The average length of the cutting to which the shoot should be cut is about 0.15-0.2 m. The maximum possible length is 0.25 m. The fence is carried out together with a part of the bark, the so-called heel.
For creeping juniper varieties, cuttings are removed from vertically arranged branches.
The best time for cutting planting material is early in the morning. Before planting, cuttings in the lower part (about 4-5 cm) are cleaned of needles and bark and kept for 0.5 days in an aqueous solution of Epin. In the upper part of the shoots, the needles are left for aeration.
Rooting
For rooting, creeping juniper varieties are planted in a prepared nutrient substrate at an angle of 45 ° C, other varieties - in a vertical direction.
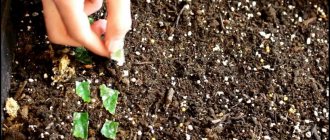
In the soil I make depressions 3-4 cm wide up to 1 cm, inserting a stalk into the hole, sprinkle it with earth and water it. From above, the sprout is covered with polyethylene or a jar.
When placing the shoots in a single container, it is necessary to maintain a distance of 5 cm or more.
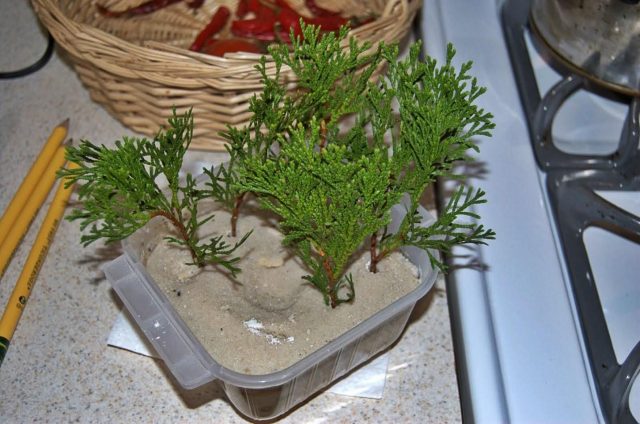
One of the ways to root twigs harvested in winter is to plant them in a layer of sphagnum moss, which is pre-soaked in water:
- for the role of a container, take a fabric strip on which the soaked moss is spread;
- sprinkle the cuttings with Kornevin from below and lay them out so that the tops are above the level of the fabric strip, and the lower part is on a sphagnum pillow;
- a strip of fabric is folded in half, covering the bottom of the blanks, and rolled up, fixing with an elastic band;
- the roll is wrapped in polyethylene and placed in a cool place until spring, until the shoots give roots.
How to propagate a juniper by cuttings
To successfully breed a juniper with cuttings, you need to follow the correct sequence of actions. Mistakes made at any stage will affect the further development of the bush.
Juniper cuttings
Selection and procurement of planting material
How to propagate jasmine by cuttings
Before propagating a juniper, you should choose the planting material correctly. Then healthy and powerful plants will grow from the cuttings.
There are several rules:
- for harvesting cuttings, juniper bushes are used, which are at least 8 years old, so that the seedlings retain the characteristics of the donor plant;
- cuttings are cut from the middle part of the juniper, if they want to get spreading bushes, from the top - vertical. This nuance is especially relevant for columnar varieties, because it allows you to fully preserve the qualities of the mother plant. From one bush, you can collect as many seedlings as is required to improve the territory;
- choose green cuttings rather than lignified ones. They start work in the early morning, when all parts of the bush are saturated with moisture;
- when pruning, they capture a small piece of a branch on which a stalk grew, the so-called "heel". Thanks to her, plants take root faster;
- the best cutting length is 12 cm. It is permissible to use larger branches, but not more than 25 cm.
Important! Sharpened and disinfected tools are used for grafting.
If transportation of the cutting is required, then after cutting it is wrapped in a damp cloth and placed in a plastic bag. So it can be stored for a couple of days.
How to prepare a cutting
Preparation of the cutting for rooting takes place in three stages:
- The needles are carefully removed with a sharpened knife, trying not to hurt the bark. Leave only the uppermost ones for breathing.
- The lower part is treated with a growth stimulant to increase the likelihood of rooting. Some growers put the cutting into a nutrient solution. To this end, sugar should be diluted in warm water in a 2: 1 ratio. But with this method, the bark can flake off, so it is better to use a stimulant in the form of a powder or paste. In exceptional cases, it is permissible to simply water the substrate in which the cutting will grow with a solution to improve root formation.
- After 24 hours, the cutting is moved into the prepared soil.
The more responsibly the gardener approaches the preparation, the higher the likelihood of successful rooting.
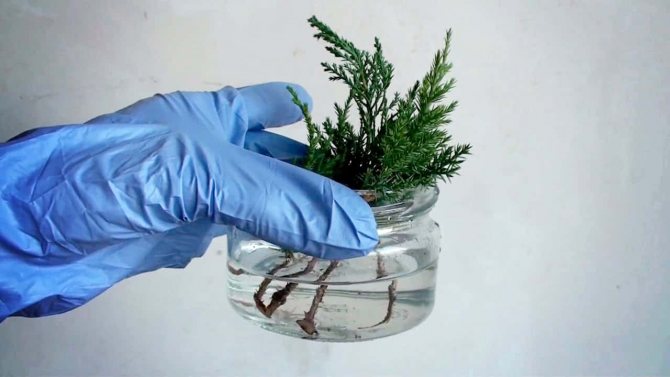
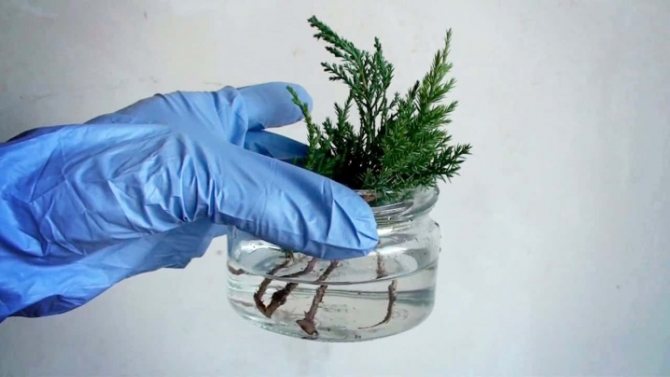
Important! Junipers cannot be rooted in water. From a long stay in a humid environment, their bark exfoliates, which negatively affects the viability of the cuttings.
How to root a stalk
To answer the question of how to propagate a juniper in a quick and easy way, you should familiarize yourself with some of the tricks of rooting a cuttings. Success largely depends on this stage.
First, a nutrient substrate is prepared. The soil mixture should be:
- loose;
- breathable;
- moisture-absorbing.
The substrate is made from sand and peat mixed in equal proportions. To ensure good air exchange and moisture capacity, put a small amount of charcoal and perlite.
Soil mixtures
How to properly propagate a juniper:
- In the soil mixture, a pit is formed with a depth of 3-4 cm and a diameter of 1 cm. A stalk is placed in it, the surrounding ground is crushed with hands and watered. If several cuttings are planted in one pot, then a distance of 6-8 cm is left between them.
- For speedy rooting, the temperature is maintained at 18-23 ° C. At higher rates, the roots die and the soil dries out, and at too low rates, the cuttings begin to rot.
- The pots are removed to the greenhouse. If this is not possible, then they are simply covered with bags.
After planting, care is reduced to maintaining optimal lighting and periodic watering. The soil is moistened as it dries, avoiding excess water. Saplings require diffused light, they develop much worse in direct sun. When growing in a bag, systematic ventilation is required. If the plants are not opened in time, condensation will begin to collect and the seedlings will die.
Important! In a pot, the plant should stand for 2-3 months. But the first roots appear within 25-30 days.
When growing Cossack juniper, propagation is used not only by cuttings, but also by layering. In varieties, the crown of which should spread along the ground, the lower shoots are rooted. They are not cut from the bush, but tilted towards the soil. The future seedling is fixed on the surface of the soil with a metal hook, and the place of contact is sprinkled with earth.
This procedure is carried out in the spring. Around August, roots will form on the layer. After that, it is separated from the mother bush and moved to a permanent place of growth.


How to stimulate rooting
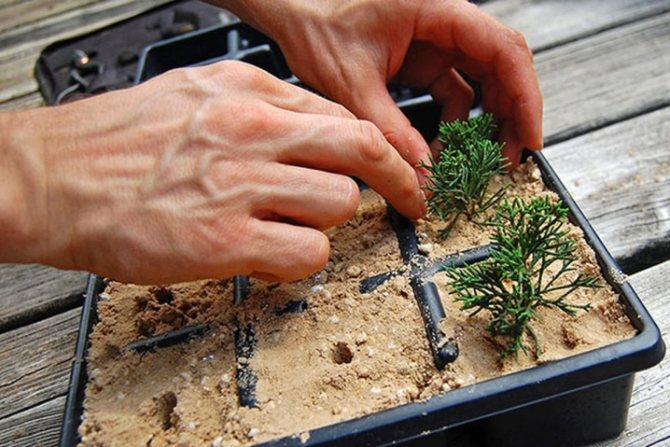
Cuttings can be done at home
It is possible to root cuttings at home with stimulating drugs, but in order to increase the survival rate and shorten the period of root formation, it is better to use root formation stimulants.
Means that activate the development of the root system:
- Kornevin. Developed on the basis of indolylbutyric acid. The dosage is 1 g per 1 liter of water.
- Epin. In addition to activating root formation, serve as a means of increasing immunity. The dosage is 0.5 ml per 1 liter of water.
- Heteroauxin. Refers to phytohormonal preparations based on indoleacetic acid. Dosage - 1 table. For 1 liter of water.
- Zircon. Complex composition from a mixture of hydroxycinnamic acids. The dosage is 1 ml per 1 water.
Folk remedies include:
- sweet water;
- potato tubers;
- baker's yeast.
Rooting stimulants
The modern market offers gardeners a huge number of drugs to stimulate root formation. Previously, folk remedies were widely used:
Now there is no need to waste time preparing solutions with your own hands. Purchased drugs are easy to handle and cost-effective.
The most popular are:
- root is a stimulant based on indolylbutyric acid. For 1 liter of water, 1 g of the drug is required;
- heteroauxin is a phytohormonal agent. The active ingredient is β-indoleacetic acid. Put 1 tablet on 1 liter of water;
- epin stimulates root formation and improves immunity. Take 0.5 ml for 1 liter of water;
- zircon is a multifunctional complex preparation, a mixture of hydroxycinnamic acids. Add 1 ml per liter of water.
Do not exceed the dosage indicated by the manufacturer, because the opposite effect will occur - inhibition of the planting material.
The cuttings are immersed in the solution for about a third. The remaining liquid is used for irrigation.
Planting cuttings in open ground
The first roots appear on the 25-30th day after planting, and rooting occurs after 2-3 months.
However, it can be transferred to open ground only after the end of the formation of the root system, which usually occurs in the 3rd year. Actively growing new green shoots will tell you about the successful development of the roots.
Rooted seedlings can be transplanted earlier than the recommended time for cultivation in a greenhouse.
Transit times vary by region. It is planned so that by the time the first frost occurs, the plant has already had time to adapt to new growing conditions.


Instructions for the grower

A plant obtained by cuttings and planted in the ground tolerates the acclimatization process more easily and adapts better to unfamiliar conditions. Nevertheless, in order for the plant to receive not only the characteristics of the mother juniper, but also all the bonuses from cuttings, it is required to follow a strictly verified algorithm and strictly follow agricultural techniques.
Material preparation
Before breeding juniper, you need to choose the right material for planting. In this case, powerful and healthy conifers will grow from the cuttings. The main rules for the preparation of planting material are as follows:
- Experienced growers use 8-year-old junipers to preserve all the traits of the cuttings donor.
- The shoot on the cutting is often cut off from the middle part of the mother ephedra in the case of bush forms. In the case of columnar varieties, only the apical shoots are used.
- Not lignified shoots are selected. Semi-lignified branches can be used, but more often young, still green, branches are used as planting material.
- Cut the shoot on a stalk in the early morning hours, when all areas of the juniper are full of moisture.
- In the course of cutting off the shoot, you need to capture a part of the branch on which the cutting previously grew, creating a "heel". This facilitates easier and faster rooting.
- The optimal length of the cut shoot is 12 cm, but longer ones are also allowed - up to 25 cm inclusive.
- All work is performed with sharply sharpened and sterile garden tools.
Cutting preparation involves 3 stages:
- The needles are cut with a sharp blade - the bark should not be damaged. Only the apical ones are left, which are required for normal air exchange.
- The lower cut is treated with a preparation that stimulates the growth of the root system.
- After 1 day, the cuttings are placed in the prepared substrate.
Juniper is not recommended for rooting in water. In a humid environment, the bark begins to peel off from this ephedra, which adversely affects the viability of the planting material.
Substrate
In many respects, the success of rooting depends on the soil mixture in which the juniper planting material is placed. The substrate should have the following characteristics:
- high air permeability;
- high moisture capacity;
- good looseness.
First, a nutritious soil mixture is prepared, consisting of peat and sand, which are taken in equal proportions. To increase the moisture content and air permeability of the substrate, a small amount of perlite and charcoal is added.
Stimulation of rooting
Gardeners can use the preparation to root cuttings better and faster. The range of such formulations is significant:
- Kornevin is a drug based on indolylbutyric acid. The solution is made at the rate of 1 g of the product per 1 liter of water.
- Epin - improves immunity and stimulates the formation of the root system. The solution for use is prepared from 0.5 ml of the drug per 1 liter of water.
- Heteroauxin is a phytohormonal drug. The base is β-indoleacetic acid. 1 tablet requires 1 liter of water.
- Zircon is a complex multidisciplinary product. Based on hydroxycinnamic acids. The solution for use is made up of 1 ml of the product and 1 liter of water.
It is prohibited to violate the dosages indicated by the manufacturer, since the opposite process will begin - inhibition of root formation and planting material as a whole.
But, it is possible to use folk remedies:
- weak honey solution;
- composition based on potato tubers;
- willow water;
- yeast-based product.
The cuttings are immersed by a third in a solution of a purchased or folk remedy to speed up the rooting process, and the rest is used to add to the water for watering in the future.
Planting the cuttings in the ground
The process of planting the cuttings in the soil mixture is as follows:
- A hole of 3-4 cm is formed, with a circumference of 1 cm. The stalk is placed in the hole, the soil around is tamped a little and watered.When there are several cuttings in 1 container, then there should be a gap of 6-8 cm.
- The room temperature is maintained at 18-23 ̊С. If the mark of the thermometer is lower, the cuttings rot, and at higher temperatures, the soil dries up and the roots die.
- It is required to create the effect of a greenhouse - for this, containers with cuttings are covered with cling film or transparent glass.
Further care involves maintaining normal lighting and periodic watering. The light should be diffused, it is advisable not to allow direct contact with the sun's rays. Regular airing is required so that condensation does not collect under the shelter, otherwise the planting material will die.
Structural features
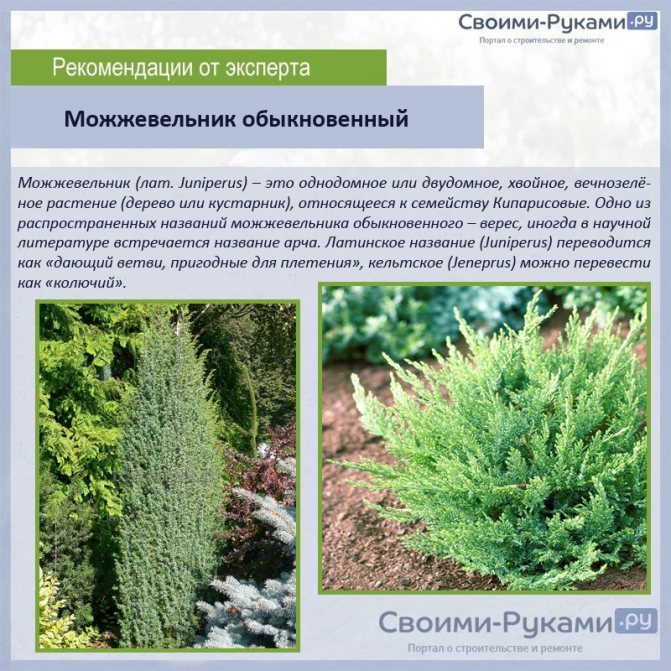
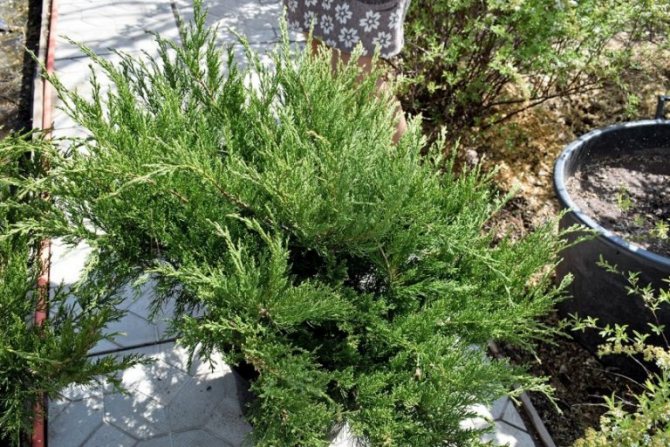
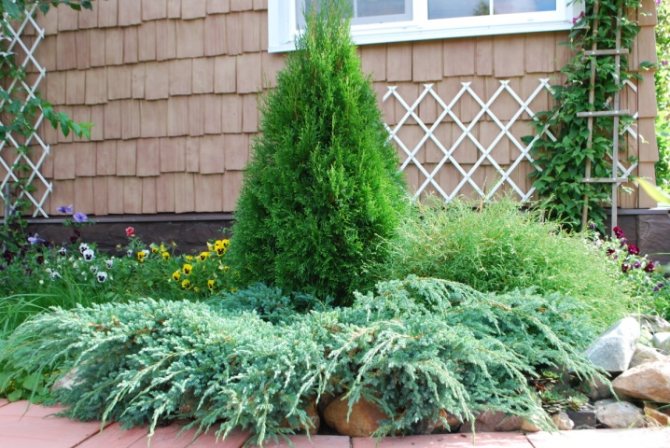
Juniper is a long-lived evergreen coniferous culture from the cypress family. There are both tall trees (up to 12 m) and shrubs (no higher than 3 m).
For landscape design, creeping species are interesting, reaching a height of no more than 0.7 - 1 m.
Despite the differences in appearance, these plants have common generic characteristics, which include:
- slow speed of processes: the first cones appear only at 8-9 years of age, and ripen - 2 years;
- seed germination is possible only after prolonged stratification;
- root formation occurs in a short period: from 5 to 10 years of age of the mother liquor;
- the presence of "memory" of shoots - vertical cuttings grow vertically, segments of horizontal branches - horizontally;
- peeling of the bark at high humidity.
Without knowing these features of the juniper, you can wait a long time for the appearance of new pets. And often it never comes.
Landing time and procurement rules

Cutting is a cheap option for getting young conifers. This method has many advantages:
- preservation of varietal characteristics;
- the formation of powerful roots;
- high vitality;
- less susceptibility to pests;
- faster maturation;
- rapid acclimatization and active development;
- the survival rate of cuttings is 2 times higher than that of seedlings.
It is possible to use cuttings to obtain new conifers from spring to the beginning of winter.
Experienced gardeners prefer the autumn period. This is explained by the fact that evaporation of water with the onset of cold weather actually does not occur, which favorably affects the state of the planting material and its development.
Choosing a specific time for planting, you need to focus on climatic conditions. For better rooting of the planting material, it is required that the temperature in the room be at a level of 5 to 25 ̊С. Lower temperature readings or a thermometer mark above the specified limits adversely affect the reproduction process and can lead a new plant to death.
To obtain viable and resistant to adverse factors, seedlings are taken exclusively from adult ephedra. Juniper must be at least 8 years old. But, it is undesirable for the ephedra to be more than 10 years old.
Depending on the place from which the cutting was taken, the young ephedra can subsequently develop in different ways. When the apical part of the juniper is cut off, the daughter specimen will tend mainly upward, and in the case of lateral shoots - to the sides. With a vertical crown, branches are cut into cuttings vertically, and in the case of bushy conifers, lateral shoots are used.
Reproduction methods
- Seeds;
- Cuttings;
- Layers;
- By grafting on the stock.
Each of them has its own characteristics and limitations.
Note! Vegetative methods, in contrast to seed, allow you to preserve all the decorative varietal properties.
| Breeding method | Simplicity | Time to reach an adult plant | Efficiency (survival rate) | Seedling vitality | Limitations |
| Seeds | Beginners can do it | At least 7 years old | Up to 30% | low | Varietal characteristics are not preserved; |
cones must be pollinated with male spores
Obviously, the most profitable method for home breeding of a juniper is by cuttings. It is fast, simple, and also very likely to get your own seedlings.
Rejection by wild varieties can be circumvented by sowing them with seeds. This is what happens in nature.
However, if you think that in order to achieve the result, you only need to cut a branch and stick it into the ground, you will definitely fail. Coniferous culture, although extremely unpretentious, is capricious in the breeding process and requires increased attention. Let's consider all the nuances.
Reproduction by layering
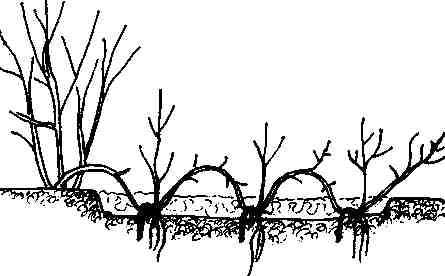
It is quite easy to propagate juniper by layering. This option for obtaining young specimens of ephedra is most often practiced in the case of creeping varieties of culture. Juniper branches are tilted to the ground and gently fix them to it. This is often done using specialized studs or staples.
In the places of fixation of the juniper shoot with the soil, it is required to periodically huddle and moisten the earth. In order for rooting to be successful, exclusively young shoots are used for cutting, which have not yet had time to lignify.
To accelerate the formation of the root system on juniper layering, it is required to prepare the soil in advance. To prepare the soil, the following manipulations are required:
- they dig up the earth;
- the dug up soil is loosened;
- peat and coarse sand are added to the soil.
The cuttings are rooted for six months or a year. It is permissible to cut off the cuttings from the mother ephedra only after the juniper has developed and is actively growing. The separated cuttings, together with the roots, are transplanted to a separate, prepared for it, place of constant growth.
Timing
For all operations, 2 periods are suitable: spring and autumn.
You can cut a plant in spring or autumn.
The advantages of each of them:
- sap flow begins in early spring, the plant is more active, there is a high probability of developing a strong root system of the cuttings during the favorable summer months;
- in autumn, the processes stop, including the evaporation of moisture, i.e. the cuttings retain all the nutrients accumulated over the summer, which will be used for the rooting of the seedling.
The first roots of a juniper appear in 30-40 days, and viable roots in 2-3 months. Therefore, most gardeners lean towards the spring procedure. Moreover, at this time, the pruning of the bushes takes place, during which the planting material is harvested.
For autumn cuttings (September-October), lignified shoots are used, which are planted in the ground the next year.
Cultural hybrids reproduce very well at the age of 8-10 years, when the forces have already accumulated, but the aging processes have not yet started.
Seedling care
It takes 60 to 70-90 days for any ornamental juniper to take root. Seedlings are planted in open ground not immediately, but after 2-3 years, when the roots get stronger. Small bushes are planted in a special bed - a school, and for another 2-3 years they are carefully covered for the winter with non-woven material, spruce branches, so that small plants do not die from severe cold.
Rooted seedlings or grown seedlings are usually planted in 2-3 years in early spring, in April-May, so that the root system grows over the summer, and young specimens adapt in a new place for the upcoming wintering.
Post-planting care consists of the following mandatory procedures:
- regular watering;
- shading from the bright sun, which causes burns to the needles;
- weeding and loosening the soil;
- mulching the soil with peat, humus;
- annual feeding with nitroammophos (50 g per 1 square meter) once every 2-3 months;
- removing dried twigs;
- frost protection with covering material, hilling, spruce branches.
Step-by-step instructions
In order for the stalk of a juniper to take root, you must:
- prepare the correct substrate;
- prepare good planting material;
- create suitable rooting conditions.
Soil preparation
The rooting substrate should be lightweight and breathable. Acidity - neutral or slightly acidic.
A soil mixture of equal parts is suitable for cuttings:
Disinfect the soil before use. To do this, it is calcined in an oven at a temperature of 150 ° for 20 minutes or spilled with a pink solution of potassium permanganate.
After the mixture has cooled, add 1 part of the soil from under the adult junipers to it. This will speed up metabolic processes and improve the absorption of nutrients, because the roots of conifers live in symbiosis with soil fungi, which provide their vital activity.
The bark flakes off in a humid environment, which can cause the stalk to rot. Therefore, it is necessary to maintain the moisture content of the substrate at a certain level. To do this, perlite or vermiculite is mixed into it.
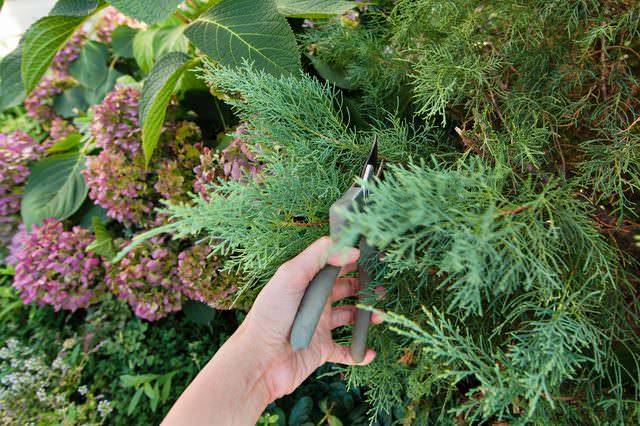
Cutting preparation
It is better to harvest planting material on a cloudy day, without rain. This will help the cuttings lose less moisture.
First of all, you need to choose a mother plant. It should be healthy, symmetrical, with a dense, lush crown of the correct varietal shape.
If it is necessary to propagate brightly colored specimens, then the branch that is illuminated by the sun for the longest time is chosen.
Shoots have a "memory" - they remember in which direction they grew on the mother plant.
- In columnar and pyramidal varieties, the cuttings are taken from vertically located central branches of 1-3 orders of magnitude from above.
- Cutting from a horizontal ephedra will give life to a plant that develops in breadth.
Powerful, even, annual shoots 10 to 20 cm long are best suited for rooting. Thin and crooked ones will give the same crooked and weak offspring.
In green young branches, like in old, completely lignified ones, the ability to form roots is markedly reduced.
Recommendations:
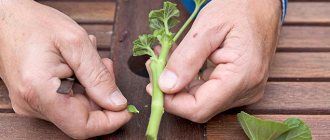
It is better not to cut the selected shoot, but to tear it off with a sharp downward movement. In this case, it is separated from the stem with a "heel" - a part of the branch, from which the root system of the seedling will be formed.
A young tree needs good care
If the tail at the "heel" is more than 2 cm, it is shortened with a sharp instrument.
If you can't tear it off (the shoot is too powerful), then you can cut it off with a sharp knife. Just be sure to capture a couple of centimeters of the lignified uterine stem.
The torn off shoot is cleaned from the bottom by 4-5 cm from small branches and needles, trying not to leave "hemp". Small wounds on the stem stimulate the appearance of roots in this place.
Possible problems, tips
It is difficult to breed a juniper on the site, but it is possible, the rooting of cuttings and cuttings does not take much time compared to the life of the tree. On average, long-lived bushes grow for about 300-500 years or more, with which a very small annual growth is associated. During the spring-summer season, it is easy to prepare a large number of cuttings, and even if only 5-10 of them give roots, this is already a very good result.
In order for the seedlings to take root well and grow, they do not get sick, the following tips and nuances should be taken into account when harvesting, planting material.
- Plucked twigs retain the "habits" of the mother plant. Shoots taken from the top will continue to grow straight, while the lateral cuttings will begin to slope, eventually turning into a creeping bush with a spread crown.
- You should cut branches for rooting on a cloudy day or in the evening, when the sun is no longer shining. Shoots should be no more than 20-25 cm long, with needles removed at the bottom.
- When rooting, the shoots should be buried 3-4 cm, watered moderately, since waterlogging of the soil can cause decay. It is better to spray the soil with a spray bottle.
- In spring, it is most convenient to root shoots in a greenhouse, in summer, you can germinate directly on the ridges, covered with a protective film. In autumn and winter, the shoots collected after frost are planted in pots, kept at home under plastic bags cut off with plastic bottles.
- A suitable temperature for growing roots is 23-24 ° C, that is, normal indoor or outdoor in summer.
Reproduction of a juniper at home is a lengthy but simple procedure. If desired, any gardener will be able to get as much planting material as is needed for the decoration of a garden, summer cottage, house adjoining plot, practically at no cost.
Alternative breeding method for horizontal species
Conifers, in which the branches practically touch the ground, can be propagated by cuttings-layers.
To do this, in early spring, as soon as sap flow begins, a groove is dug under the branches growing parallel to the ground and filled with a fertile substrate.
- the shoot in the place of rooting is cleaned of small shoots and needles;
- make small cuts in the bark;
- sprinkle with a powdery root stimulant;
- laid in a groove;
- pinned before and after the rooting site with brackets;
- watered with warm water;
- fall asleep with fertile light soil.
By winter, this layer will take root. It is separated from the mother plant and planted in a permanent place.
Juniper is one of the most popular crops in landscape gardening. Propagation of this ephedra by cuttings is a relatively simple method that allows you to get many young and strong plants.
Selection of cuttings and their preparation
A separate line worth mentioning is the choice of cuttings for propagation, from which it will be possible to grow healthy, completely repeating the characteristics of the mother plants. There are several immutable rules here:
- The material must be cut from the branches in the upper and middle parts of the crown. In this case, the cuttings should not be semi-lignified.
- If you want to grow a sprawling juniper bush, cuttings are taken from the ends of the lateral branches. At the same time, branches taken from the middle of the bush, growing vertically in maximum proximity to the trunk (in columnar varieties and varieties), cuttings will also grow upward and branch little.
- It is necessary to cut the cuttings from the mother plant with a "heel", that is, a small part of the branch on which they grew. This will lead to faster rooting.
- Conifers from harvested cuttings must be removed with a sharp clerical knife without damaging the bark.
To successfully propagate juniper, cuttings will need treatment with a root stimulant. There are many similar drugs, however, there are secrets here too. So, it is unlikely that it will be possible to root the stalk in a jar with a root-forming solution, since the active exfoliation of the juniper bark occurs in the water, which significantly reduces the productivity of the planting material. The best option is to treat the cut with a powdery root former or paste. Most gardeners even prefer to moisturize the substrate in which the cuttings will be located with root formation stimulants.
What varieties can be propagated?
As you know, the overwhelming majority of ornamental plants retain their distinctive features only during vegetative propagation by cuttings. However, not all juniper varieties can be propagated in this way. The following types of culture are subject to cuttings.
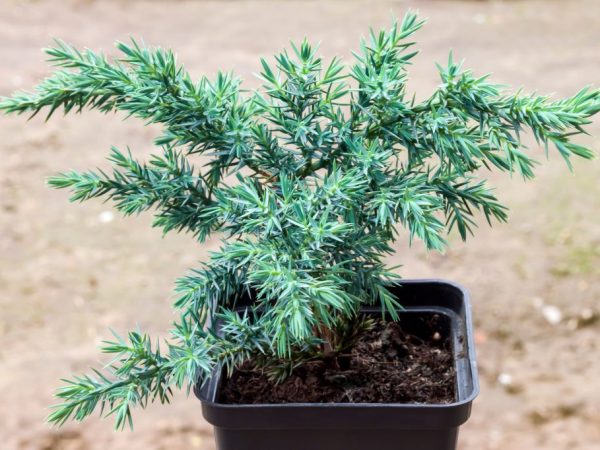
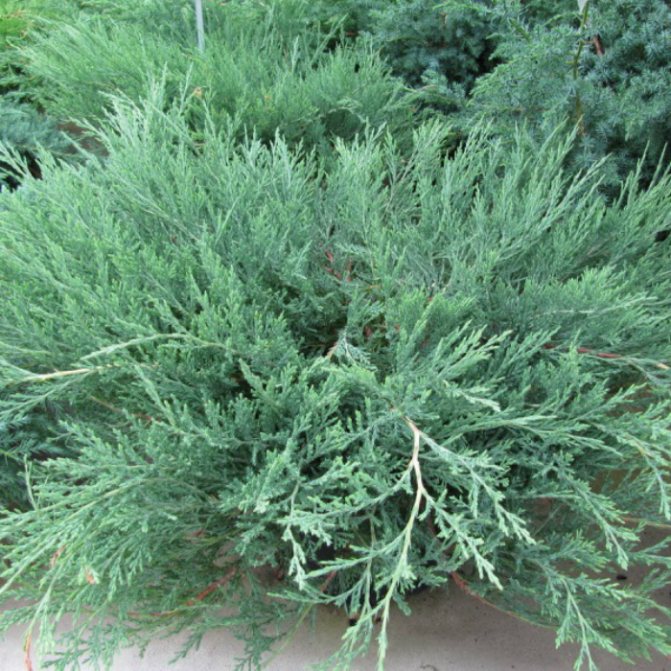
- Meyeri - an ornamental shrub with blue-green needles and a pronounced steel sheen. This plant belongs to dwarf - its height varies from 30 cm to 1 m, so it is often used to form bonsai. It looks consistently impressive thanks to the hanging shoots and dense crown.
- "Mint Julep" - this plant attracts attention with wide branches and thick mint-colored needles. In winter, the needles of this juniper do not tarnish.The plant is resistant to prolonged frost, gas pollution and summer heat.
- "Mordigan Gold" - golden juniper with pronounced antiseptic and bactericidal properties. The plant looks extremely noble thanks to the horizontally diverging shoots and the unusual color of the ephedra. It grows slowly, reaching 2 m in diameter by maturity.
- "Wiltoni" - an unusual juniper forming a creeping carpet with needle-like needles of a silvery shade. It is difficult to imagine, but a small stalk over time can grow by 3 meters in all directions, and in addition to the main lashes, it gives a lot of lateral ones, so you can get 2 square meters from one bush. m of fluffy carpet.
- Dream Joy - another juniper with creeping shoots. The height of the bush reaches 40 cm, the crown diameter is only 1 m, the annual growth is 15-25 cm.
- "Gold Coast" - a low-growing bush no more than 1 m high with needles of a pleasant yellow-green color. Prefers illuminated areas; in darkening, the color loses its saturation and depth. Unpretentious to soil types and air pollution.
- Lime Glow - another interesting juniper with rich green needles. The shoots of this plant grow radially, a slight depression forms in the middle, by September the needles acquire a bronze tint.
- "Hit" - a dwarf variety of junipers with a height of no more than 20-25 cm. The branches grow unevenly, the young shoots are distinguished by a pronounced herbaceous color, which sharply states with a shade of aged needles. Used to decorate rockeries and walking paths.
Popular varieties for grafting
Depending on the particular variety, juniper can propagate easily by cuttings, but some of the common varieties give better results when dividing the bush or in the case of obtaining new specimens by cuttings. Among gardeners, the following varieties are common:
- Mint Julep;
- Meyeri;
- Dream Joy;
- Holger;
- Hit;
- Lime Glow;
- Wiltoni;
- Gold Coast;
- Gold Mordigan;
- Kurivao Gold;
- Golden Star.
Full success in the case of cuttings can be obtained using junipers of the following varieties:
- Meyeri - dense turquoise or dark gray-steel needles. Plant height - from 30 to 100 cm. In addition to cuttings, seed propagation is allowed.
- Holger - height up to 80 cm, needle-shaped leaf plates are painted in bluish-gray color.
- Kurivao Gold is a vigorous variety, it is possible to get it with all the characteristics of the mother plant only by cuttings.
- Schlyager - "growth" up to 25 cm, crown - up to 150 cm in diameter. Reproduction by seeds, layering and cuttings is allowed.
- Mint Julep - mint green color of the crown, you can get new specimens only vegetatively - layering and cuttings.
- Viltoni - bluish-silver crown, when using seeds, the new plant loses the characteristics of the mother juniper. Only vegetative options for obtaining new Wiltoni are suitable.
- Lime Glow is a dwarf, the crown is painted in a bright greenish-yellow color. In the autumn season, the foliage changes its tone to bronze-copper. New copies are obtained by cuttings.
At the beginning of autumn and the reproduction of juniper almost in winter - at the end of the autumn season, does not differ from this process in the spring and summer.
Terms of cuttings
Depending on the type of juniper, rooting branches can be harvested at different times, from early spring, when the snow melts, to late autumn.
It is best to collect shoots in spring, optimally in March, during this period sap flow and bud awakening begin, such planting material can be completely rooted in the current season.
Summer harvesting of material is allowed. It is best to do it in early June, when active growth ends and lignification of the young growth occurs.Depending on the type of ephedra, rooting lasts from 2.5 months to a year. Some varieties of junipers give only callus in the first year, and a full-fledged root system is formed only by the next year.
In autumn, already lignified branches are cuttings - they are planted only next year.
We draw your attention to the fact that the first roots of a juniper appear in 27-30 days, but in order for the root system to become viable, it will need to grow for at least one more month. That is why the shoots harvested from July to September are planted in an open area only a year later.


How to propagate juniper
Juniper is a unique plant in many respects. So, even under natural conditions, this long-lived plant is very difficult to propagate by seeds. There is no need to talk about attempts to sow seeds at home with a positive color, since a lot of effort and money will have to be spent to implement such an idea. However, this will not guarantee the receipt of high-quality planting material. And the thing is that seed reproduction delays the fruiting of juniper bushes by at least 10 years, and seedlings grow very slowly.
A great alternative to seeds is cuttings. This method is easy to organize at home, and the whole process takes just a few months. The seedlings obtained by cuttings have a stronger root system, better survive adverse conditions and give a quick growth.
Depending on the time of the proposed landing in the ground, you need to propagate the juniper at different times of the year:
- for planting in spring, cuttings are harvested no later than mid-February;
- for planting in the fall, it is recommended to cut plants from the beginning of summer.
Such a gradation of terms is not accidental - ephedra, including juniper, form a root system for a long time. The first viable roots appear on the cuttings after 25 days, and the rooting of the planting material occurs no earlier than 2 months after the start of the procedure for planting them in a special substrate.
Another point to consider when propagating by cuttings is their "correct" size. They, unlike other horticultural crops, are always more dense and voluminous. That is why their length should not exceed 25 cm. In addition, it is important to pay attention to their slope. If erect species of juniper can be planted vertically for germination, then creeping or with a spreading crown is best planted with a slope of 45-55 degrees.
Procurement of planting material
Juniper grown from cuttings can grow both healthy and fluffy, and crooked, weakened. This largely depends on how the planting material was collected. In order for the plant to fully meet all your expectations, you should adhere to the following recommendations.
- As a mother plant, it is best to take a plant at the age of 5-8 years, since at an older age, the ability of conifers to root formation is significantly reduced.
- The parent plant must be healthy, with a dense crown of bright color.
- For creeping varieties, the cut location does not matter. In this case, it is important to choose a well-developed, spreading branch that is exposed to sunlight. This is especially true for bright varieties.
- In cone-shaped, columnar and pyramidal varieties, it is necessary to cut the central shoots of the 1-3 orders of magnitude from above. If you take cuttings from a side branch, you risk getting a juniper actively growing to the sides.
- It is important that the branch intended for grafting has a living apical bud and a full-fledged growth cone, otherwise the seedlings will begin to bush strongly.
- Experienced gardeners recommend using shoots on which slight lignification has already begun, since too young cuttings and too old branches give a low percentage of rooting.
- Procurement of material should be done in cloudy weather or early in the morning. This will significantly reduce the evaporation of moisture from the cut area.
- Do not touch overly thin branches, as they will use up the entire supply of nutrients long before the roots begin to grow. It is best to take one-year cuttings with a length of 20-30 cm.
Description and features of the plant
Junipers have an extremely long lifespan. They can grow up to 500 years old. The culture is used to decorate parks, gardens, and personal plots. She is planted:
- singly;
- in groups;
- in rows;
- in the alleys;
- on the alpine slides;
- as ground cover crops.
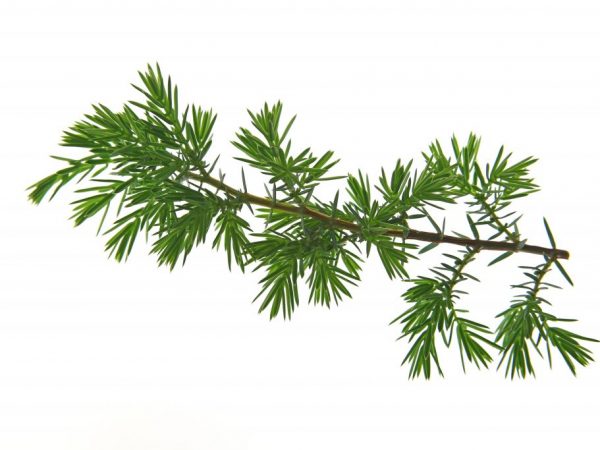
Juniper
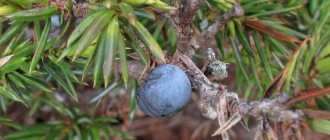
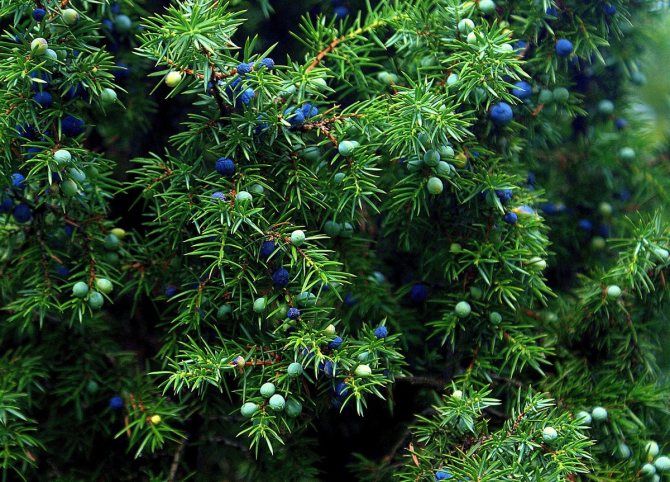
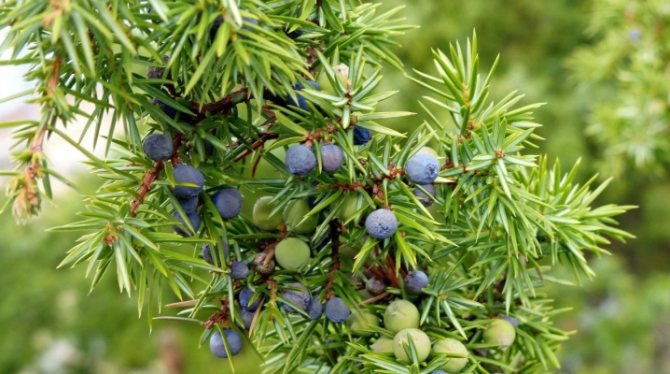
The needles of junipers are mainly of the needle type, subulate, tough. The length of each needles ranges from 1 to 2.5 cm. They are arranged in 2-3 pieces in whorls along the shoot. Older plants have small, scaly needles. Cones are similar to berries because they have a fleshy outer shell. Ripen for 2-3 years.
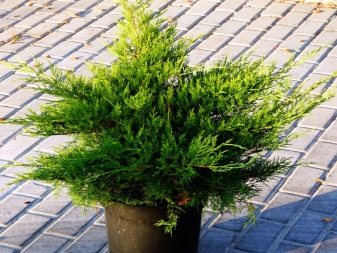
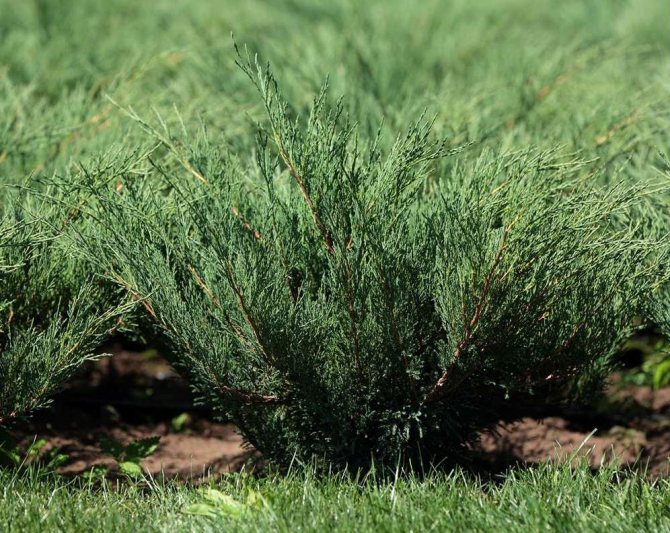
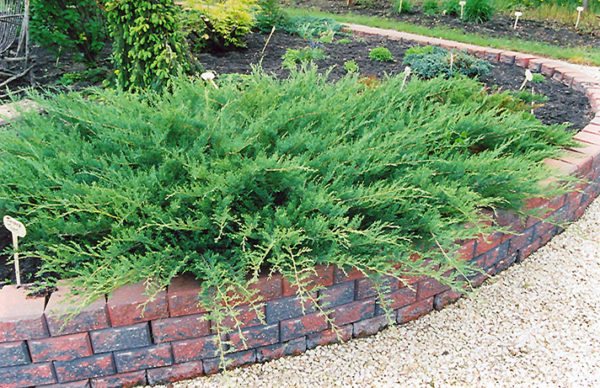
The size of the bush depends on the variety. There are pyramidal, spreading or creeping varieties. The height reaches 1.5 m.
The culture is developing slowly. The only exceptions are a few species of fast-growing junipers, in particular, the Cossack. It has many beautiful forms, which are most common in Russia, Europe and Asia.
Note! Junipers are light-loving, durable and drought-resistant plants. Most of the species are winter-hardy, not demanding on the quality of the soil and thrive even on poor soils. The root system is well developed. It improves the structure of the earth by loosening it and circulating air.
Rooting features
Juniper cuttings are rooted in a nutritious substrate - the earth should be light, aerated, with a neutral or slightly acidic reaction. It is best to use a mixture of peat, turf and river sand with the addition of perlite and vermiculite. It is not recommended to add ash, shells or lime, as they give an alkaline reaction to the soil.
If you are going to root a couple of cuttings, then you can use a flower pot. Expanded clay, crushed stone, large pebbles or any other drainage are certainly poured at the bottom, then the prepared soil mixture is covered with a layer of 15-20 cm and sprinkled with sand. If the number of seedlings is large, it is better to plant the blanks in large boxes or greenhouses.
Planting cuttings for rooting has its own characteristics - just sticking into the ground is not enough here. Step-by-step landing instructions include several stages.
- Using a wooden peg, a hole is formed in the prepared ground at an angle of 50-55 degrees. If you plan to plant several shoots, then the distance between the holes should be about 7-10 cm.
- The cuttings are laid at an angle, deepening them by 3-5 cm.
- The earth around the processes must be properly compacted, so that no voids remain.
- Seedlings should be watered through a spray bottle or through a sieve so that the soil is thoroughly moistened.
- It is better to plant the cuttings in a greenhouse - for this they are covered with plastic wrap or a bottle.
Intensive root formation in juniper occurs at a temperature of 21-25 degrees and a humidity level of 95-100%. At this point, direct sunlight should be avoided.
On average, seedlings are ready to move to a permanent location in 3-4 months. However, this time frame may shift for different varieties. Root formation often stops in the summer and continues in the fall.
During the period of root formation, it is necessary to keep the soil moist. If the seedling remains indoors until the next season, it is necessary to treat it with fungicidal solutions once a quarter to prevent disease. Lighting should be diffused, but bright - light contributes to the formation of phytohormones responsible for root growth.
After the roots reach 1.5-2 m, it is necessary to harden the juniper little by little. To do this, open and ventilate the greenhouse every day.
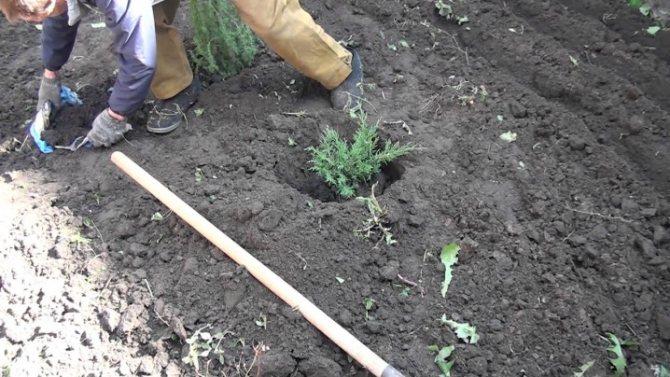
Disembarkation to a permanent place
Rooted juniper cuttings can be planted in a permanent place 65-70 days after they are placed in a greenhouse. At the same time, it is important to handle the seedlings very carefully, since their roots are very thin and brittle. A clod of earth should not collapse under any circumstances.
In some cases, for example, when planting in the fall, it is recommended to dig in the seedlings along with the container in the garden. This option is suitable for specimens rooted in separate pots. Such plants need to be insulated thoroughly, and the risk of juniper freezing remains quite high. That is why many gardeners prefer to plant them in the spring, leaving them in the room for the winter.
Reproduction of juniper at home - rules and advice from gardeners
The first roots appear on the 25-30th day after planting, and rooting occurs after 2-3 months.
However, it is possible to transfer it to open ground only at the end of the formation of the root system, which usually occurs in the 3rd year. Actively growing new green shoots will tell you about the successful development of the roots.
Transit times vary by region. It is planned so that by the time the first frost occurs, the plant has already had time to adapt to new growing conditions.

Usually gardeners try to carry out the procedure immediately after the snow melts, as long as there is no risk of burning out the needles in the active sun.
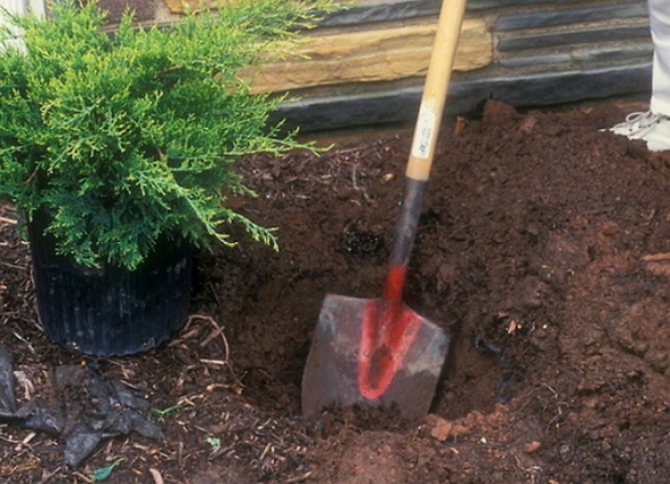
In the open ground, the sprouts are transplanted together with an earthen lump in order to avoid injury to the roots that are not yet fully strengthened, deepening along the root collar. The substrate for the planting pit is made from the same components as for rooting.
A hole is dug to a depth of 1.0 m or more, starting from the size of the earthen lump - 2-3 times its diameter. A drainage system is required.
Juniper is a coniferous plant popular among summer residents; many people prefer to plant it in compositions. To get new seedlings, it is recommended to propagate the juniper by cuttings at home. This method is more convenient than seed, and most importantly, the costs are minimal.
Cutting is a cheap way to get new conifers for the improvement of the site. This method has many advantages:
- the obtained samples retain varietal characteristics;
- have greater vitality;
- form a strong root system;
- take root faster and develop actively;
- less exposed to pests;
- there are 2 times more established cuttings than seedlings;
- reach the size of an adult shrub several years earlier than planting from seeds.
Juniper cuttings can be carried out from early spring to autumn. Some gardeners prefer to separate the shoots in the spring when the period of active growth begins. From April to May, you need to cut off semi-lignified cuttings from the formed part of the bush. A thickened base, or "heel", should remain on the workpiece. The optimal shoot length is 12 cm, but no more than 25 cm.
In the fall, seedlings can also be obtained from cuttings. The arguments in favor of autumn planting are based on the fact that the stomata of plants are closed due to increased air humidity. Branches in the fall practically do not evaporate water, which has a beneficial effect on the condition of the bush and its reproduction.
If you cut off the upper part, then the tree will develop mainly upwards, if you separate the lower branches, then the daughter plant will begin to grow in breadth. If the crown is vertical, then the cuts of the juniper branches are made vertically.If the crown is bush-shaped, then the cuttings are taken from the lateral parts.
You should not rush to transplant a juniper to a permanent place of residence. The time for planting rooted bushes is chosen so that they have time to adapt before the onset of cold weather. Cuttings harvested early, for example, in winter in February or late autumn, can be planted in spring. Ideally, it should take about 70 days from the date of planting in the greenhouse.
If the branches were cut late, then it is best to grow the juniper at home until the next spring. In some cases, planting is allowed in the fall. If the seedling is rooted in a separate pot, it can be moved into the open ground and dug in without removing it from the container. Since the risk of freezing is high, you will have to use insulation.
You can plant the plant in early spring, as soon as the snow melts. If you move it later, then there is a risk of burning the needles in the sun. A well-lit place is selected, slight shading is allowed. The seedling is transferred to the open ground with a clod of earth so that the root system does not suffer. The roots of a young juniper are very thin and fragile.
For landing, prepare a landing pit with a drainage layer. The approximate size is 1 * 1 m or 2-3 times larger than a soil lump. The seedling is immersed in a hole and covered with soil, leaving the root collar at the very surface. After planting, the plant is watered and mulched.
Young specimens during the first years of life must be protected from frost and bright sunlight. The plant is undemanding to moisture, can tolerate drought, but does not tolerate waterlogging of the soil. It is enough to water the juniper once a month. In the spring, it will be useful for the ephedra to feed with nitroammophos (45 g per 1 m 2), in the summer, organic or mineral fertilizers are used. Top dressing is applied once a month if a tree or bush develops too slowly.
To successfully grow a group of conifers, a gardener needs to know how to propagate a juniper with cuttings. Varietal characteristics are preserved only if all breeding rules are observed, starting from the time of separation of the cuttings and ending with its adaptation in the garden.
An illuminated area is allocated for a juniper, partial shade is permissible. The cuttings are moved into the ground along with a lump of earth and try not to damage the still fragile root system.
To plant a juniper, dig a hole, the size of which is 2-3 times the volume of the roots. Drainage must be laid down.
The location of the seedling depends on the variety:
- columnar juniper is placed vertically;
- bushy - with a slight slope.
The plant is buried along the root collar, watered and mulched.
On a note! In the first years of growth, young bushes are covered for the winter and protected from the bright sun. Juniper is drought-resistant, does not tolerate waterlogging of the soil. It is watered about once a month.
At the beginning, it is advisable to fertilize with nitroammophos (50 g per 1 m²). In summer, organic and mineral fertilizers are applied.
To decorate the garden, you should know how the juniper reproduces. It is not a complicated process, but it does require adherence to certain rules. With strict adherence to the instructions, a powerful bush will certainly grow from the cuttings, which retains the varietal qualities of the mother plant.
Have you ever wondered how much the exquisite simplicity of coniferous compositions costs? Yes, a lot. But there is a way to create beauty and reduce costs - you need to learn how to propagate plants on your own. This requires a system and some secrets. We will share the experience of cutting junipers.
Reproduction of juniper at home
A viable root system appears in the cuttings as early as 3 months after planting. However, it is too early to plant it in the ground, it is not ready to survive the winter. Therefore, in winter, seedlings are kept in greenhouses or in an unheated light room with an air temperature of at least 4 degrees.
Features of the reproduction of juniper cuttings at home in spring and autumn
Junipers are highly decorative, winter well in mid-latitudes, and create a healthy microclimate around them. The simplest and most effective way of propagation of all its varietal forms is cuttings.
Since representatives of the cypress family are considered extremely unpretentious, inexperienced gardeners think that for rooting, it is enough to stick the cutting into the ground.
In most cases, however, this approach fails. In this article I will tell you how to choose and plant a stalk correctly, prepare the soil, and take care of the seedling in the future.
How to plant cuttings in spring?
To plant them, simply sticking into the ground is not enough. You must follow the short instructions below.
Note!
It is important that the direct rays of the sun do not fall on the improvised greenhouse. The fact is, the cuttings will root better in the shade.
Rooting will occur more intensively if the ambient temperature (including soil) does not fall below 21-24 degrees, and the humidity level is within 95-100 percent.
Rules for harvesting coniferous cuttings
The result of breeding conifers by cuttings in winter depends on the choice of material. When examining the ephedra, suitable branches are selected based on the following characteristics.
- Shoots should not be younger than 1 year, while branches of 3 years of age are considered the best option for breeding before winter.
- Shoots should be outwardly developed, look strong, not have any flaws.
- The length of the shoots for junipers, cypresses, thujas should not exceed 15 cm, the length for spruce and fir - up to 10 cm.
A cloudy day is chosen for grafting, the cut is carried out in the morning. In order to have a good idea of the sequence of actions during the propagation of conifers by cuttings, many breeders watch videos with master classes of specialists. This is justified for the reason that the success of further rooting depends on the quality of the cuttings and the choice of the shoot.
Reproduction of juniper at home - rules and advice from gardeners
Most of the ornamental varieties retain their characteristics only when cuttings. Among the whole variety of juniper, there are several specimens for which seed reproduction is contraindicated.
They reproduce successfully and quickly by cuttings:
- Variety Meyeri (scaly type) - the owner of decorative blue-green needles with an unusual steel shade. This dwarf, growing from 30 cm to 1 m in height, is often used to create bonsai. Annual growth varies between 8-10 cm. It looks attractive due to the dense crown and hanging shoots.
Juniper can be propagated from spring to autumn. However, experienced gardeners note that the procedure carried out at the beginning of the season gives the best results.
The timing of cuttings largely depends on when the cutting is planned to be planted in the ground:
- reproduction of a juniper by cuttings in the summer is carried out if it is planned to plant a plant in the fall. But they are harvested no later than June. Otherwise, they will not have time to take root and will freeze out in winter;
- planting material is prepared in early February for planting in the ground in spring.
In order for the plant to take root in a new place, you need to let it form a root system. This takes about 70 days. Before planting it is not worth it, because the probability of death is high.
Cuttings harvested in late autumn or late winter are moved into the ground in spring. If they were cut in the summer, then it is important to have time to carry out the procedure before the cold snap. With the onset of early frosts, seedlings continue to grow at home until the next season.
On a note! The transplant is carried out immediately after the snow melts. In hot weather, the needles burn out, so there is no need to wait for strong warming.
Layers
This method of breeding coniferous species is suitable for those who already have a plant growing on the site.The method is used only for creeping juniper on the ground, since the branches must touch the surface of the ground, for example, some varieties of the Cossack species. Shrub propagation from a branch is carried out during an active growing season. It takes 6-12 months to root.
Preliminary preparation consists in abundant watering of the mother plant, loosening and introducing peat, rotted humus and river sand into the soil. Bend the one-year-old shoot to the ground, fix it with hairpins. Periodically loosening around the layering. Spud, water the rooting place. It is allowed to separate the seedling only after it grows the root system, develops the aboveground part.
Juniper is most easily propagated by vegetative methods. The choice of method depends on the type of culture. Breeding of creeping forms is carried out by layering, vertical varieties - by cuttings. Rooting is advisable in spring, so that during the active growing season the plant has time to adapt to the new environment.
Features of cuttings of juniper
You can cut junipers throughout the season, but early spring or autumn is considered the best time for this. In summer, this is usually not done. At temperatures above + 25 ° C, the vital activity of the plant slows down greatly, and the cuttings may simply die. Low temperatures also negatively affect this process. Therefore, it is possible to root a juniper in winter only at home.
Juniper cuttings have one interesting feature. If you take them from the top of the plant, then the future tree will tend to grow upward and form a narrow crown. If cuttings are taken from lateral shoots, the crown of the future bush will grow in breadth. Therefore, for reproduction of tree junipers with a narrow crown, you need to use twigs taken from the top of the tree, and for bush and creeping varieties - from the side. In varieties with a variegated crown, planting material is taken from the sunny side.
Important! Cuttings can be stored for only a few hours by wrapping them in moist sphagnum moss.
Juniper species
Juniper Cossack grade "Blue Danub"
Most plant species easily tolerate the realities of Russian climatic conditions. Juniper is not picky about care, easily tolerates dry periods. Despite the fact that this plant loves the sun's rays, it can grow in shaded areas.
In our country, the following types are most common:
- juniper virginiana, which came to us from the North American continent;
- rocky, can grow up to 10 meters high;
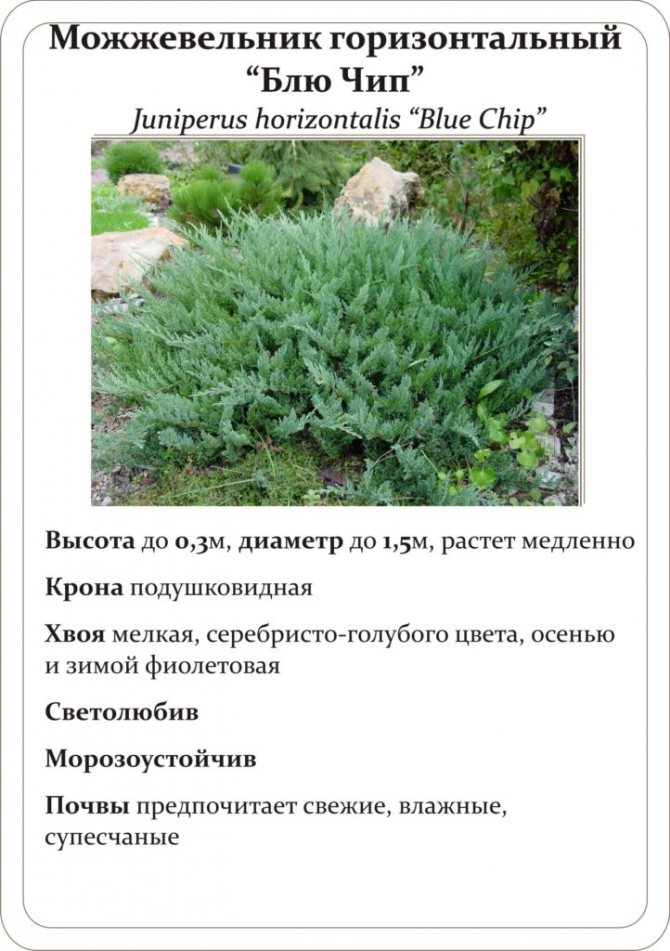
- the horizontal juniper will wrap up any area with a carpet, its variety Cossack juniper allows reproduction by all known methods;
- juniper medium is resistant to environmental influences, originated from the combination of the Cossack with the Chinese;
- the common juniper has creeping and tree-like forms.
When is it better to propagate conifers by cuttings
Cutting of shoots from the mother tree is permissible at any time of the year. The preservation of the genetic material does not depend on the timing of cuttings. Experts are of the opinion that the best time for cuttings is winter. In the first decade, the processes of sap flow are activated in trees.
During the period that passes from the moment of harvesting before winter to the beginning of planting, conifers have time to take root well. In summer, strong lignified seedlings are planted on the site.
Reproduction of conifers by cuttings before winter
Harvesting of conifers is carried out before the onset of winter. This increases the plant's chances of a successful spring-summer planting.
To carry out cuttings of conifers before winter, choose the upper shoots or tops. The length should not exceed 20 cm. After cutting, the cuttings are cleaned of needles, leaving only a part of the bark. If in some places the bark is separated, then it is completely removed.
Rooting of conifers by cuttings before winter is possible in several ways or by mixing them:
The simplest and most effective way is considered to be rooting conifers with water. It is not suitable for all types of plants. Shoots of pines, fir, cypress trees take root poorly by water. Thuja and juniper sprout quickly enough.
Reproduction of conifers by cuttings in autumn
It is possible to grow conifers by cuttings in the fall. Autumn cuttings differ little from winter ones. When using the soil, the shoots are left on the terrace or veranda, before the onset of winter they are brought into a warmer room.
Read also Shelf life of dried mushrooms
Reproduction of conifers by cuttings in summer
For summer grafting of conifers, the method of rooting in boxes is suitable. In summer, shoots need to be watered frequently due to the hot weather. In the fall, they are transferred to the garden bed or taken indoors for the winter to be planted next season.
Reproduction of conifers by cuttings in spring
Spring cuttings of conifers are very rare. Experts believe that this period is not suitable for rooting. Shoots spend the summer outdoors, in winter they need room heat.
Propagation by cuttings
At home, cuttings are most often used to propagate juniper plants. They take root better, acclimatize successfully and develop faster.
The most successful time for grafting is in the spring, in this case, by the end of summer, the seedlings will have strong roots. In autumn, young plants can be placed in open ground, providing a small shelter for wintering. If grafting is done in summer, then the root system will not have time to get stronger. In this case, in winter, the plants should be at home or in the country in a closed room.
For successful reproduction, perform the following steps:
- 1. Cuttings are harvested in cloudy or rainy weather. To do this, take branches 10-15 cm long and separate them with a sharp knife along with a piece of wood from the trunk.
- 2. All needles and branches are removed from them to a height of 3-4 cm from the cut. Prepared cuttings can be planted immediately in the ground. If this cannot be done, then for some time they are able to stand in a jar of water, but no more than 3 hours.
- 3. To root the cuttings, they are planted in tall boxes with drainage holes, filled with a mixture of peat and humus in equal parts. A drainage layer is laid at the bottom, and sand (3-4 cm) is poured over the soil. The cuttings are buried 3 cm at an angle of 60 degrees, keeping a distance of at least 7 cm between them.
- 4. The boxes are positioned so that they are illuminated by diffused sunlight. Juniper does not like too high humidity, so watering is rarely carried out. Top dressing during this period is also not needed.
- 5. When planted in the ground in a permanent place, the cuttings are treated with growth stimulants. If a creeping juniper multiplies, then it is placed horizontally, all other varieties - vertically.
Junipers are a group of coniferous shrubs and trees that have a different appearance. Belong to the cypress family. The culture is often used in landscape design due to the abundance of forms and varieties. Many novice gardeners are interested in the peculiarities of growing a juniper, in particular, how it reproduces at home. This is not at all difficult to do if you know some of the features.
The choice of material for grafting
Junipers grown from cuttings can be lush and healthy, or weak and crooked. The whole point is how and from what place of the plant the planting material was taken. To make the grown ephedra meet your expectations, use the following guidelines:
- For the role of mother plants, choose young bushes 5-8 years old, since the ability to form a root system in junipers decreases over time.
- The mother plant should be healthy, with a dense, symmetrical, even crown.
- The place of cutting cuttings in creeping varietal forms does not matter much. The main thing is to choose a developed, spreading branch, which is regularly exposed to the sun's rays (important for variegated and brightly colored forms).
- In pyramidal, columnar and bush species, cuttings are cut from the central branches of the 1-3 order (from above). If you choose the shoot of a side branch growing horizontally, then the bush will subsequently grow in breadth.
- For grafting, select shoots with a healthy apical bud and a growth cone, otherwise the seedlings will become unnecessarily bushy.
An important point: it is better to harvest cuttings from shoots on which lignification has already begun. Too young, as well as too old branches, the rooting rate is much lower.
Care for young seedlings
Caring for a newly planted plant is quite simple. Every spring it is necessary to fertilize the soil with nitroammophos, but the consumption should not exceed 50 grams per square meter. No other fertilizer is required. You do not need to feed the juniper more than once a month. It is better to spray it more often during sunset or dawn; in bright sunlight, this should not be done. There is no need to prune the plant; as a last resort, you can remove branches that have dried or broken.
Juniper prefers soil with an acidic character, can confidently reproduce on sandy soils. The older the plant grows, the higher its resistance to the cold of the middle zone of our country.
Read How to determine the acidity of the soil
Even the laziest person can grow and care for a plant, since it is completely unpretentious. But you need to stock up on remarkable patience, because the results of the reproduction of the juniper can only be seen in a few years. But it will turn out to be an excellent decoration of the personal plot.
How to care after landing?
Active rooting of cuttings occurs two to four months after planting. Although the more accurate time will depend on the specific variety of juniper, and root formation in the summer may stop, resuming with the onset of autumn.
In order to avoid stagnation of moisture during the first watering, it is necessary to act with caution, and carry it out only after the earth has dried out. Water at ambient temperature is used for irrigation. In order to prevent the development of diseases, plantings should be watered with fungicidal solutions several times a year.
Note!
Due to the fact that the seedlings will be in for about a year, it is important that the covering material always remains transparent (this must be maintained).
As for the lighting, it should be diffused, but bright, because under the influence of light, the production of a plant hormone is activated, which is responsible for root formation.
And when the cuttings take root and growths appear, hardening can begin (that is, periodically open the greenhouse and ventilate the plants). You can insulate for the winter with leaves, covering material or burlap.
On a note!
A year later, young bushes can already be transplanted into the garden. For this purpose, they are transferred together with the earthen lump into the previously prepared soil.
How to grow from seeds?
The propagation of juniper by seeds is most often used by breeders - in this way they maintain the intraspecific diversity of the crop, which greatly contributes to an increase in the resistance of plants to unfavorable environmental factors, therefore, increases their survival and competitiveness.
Seed material can be purchased at any specialty store, or you can take it from friends on whose site the juniper grows. Often they resort to the third option - they collect cones from a wild-growing bush.The last two methods are considered more reliable, as you can fully imagine how your plant will turn out. At the same time, when purchasing seeds in a store, there is always a choice of varietal material.
Seed propagation includes several stages.
Semen collection. To do this, from the tree you like in the wild, you need to pick several blue-black cones, you do not need to touch the green ones - the seeds in them have not yet reached the required degree of maturity.
Please note that juniper seed germination is low, so prepare as many cones as possible.
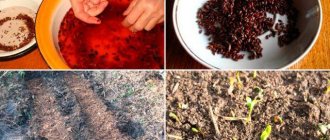
After harvesting, the cones should be soaked in warm water for several hours - this treatment allows the seed to get free from the shell. After that, they must be thoroughly rinsed and placed for half an hour in a weakly concentrated solution of hydrochloric acid for stratification. The result of such manipulations is the destruction of the dense seed coat, which greatly accelerates germination.
You can also break the shell mechanically. Of course, it is not worth pounding on it with a hammer, but it will be useful to rub it intensively with sandpaper. If you have such a rarity as a washboard, then you can rub the cones on its surface - this is how the cones themselves are destroyed, and with them the shell. By the way, this method is most often used by procurers in the taiga.
At the next stage, the box with seeds planted in soil mixture for conifers should be taken out into the street, this should be done in winter, so that they undergo final stratification in the snow in the frost.
If the seeds were able to survive the winter and sprout, in May you can plant seedlings in the garden. It is extremely important to mulch the planting and protect it from direct sunlight for the first month so that weak shoots can form a root system and healthy shoots.
After a couple of years, the seedlings can be moved to a permanent place - by this time they become strong. However, all work must be carried out as carefully as possible so as not to damage the growth point and roots.
How to root ephedra from a cutting
Rooting, which is carried out before winter, consists of several successive stages.
- First, the stalk is cut or broken off. In this case, a piece of wood with remnants of bark should remain at the base.
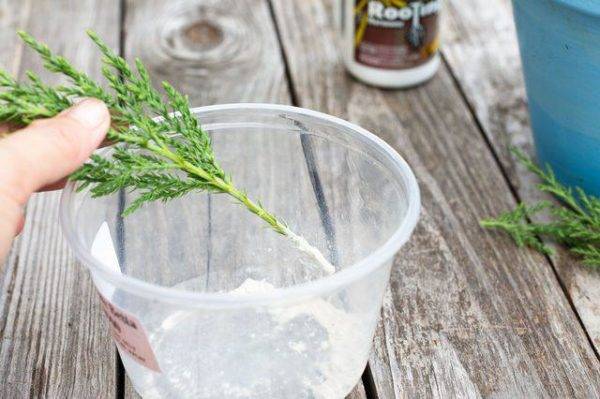
- A fresh cut is powdered with a root-type biostimulant. This will help the cuttings take root faster.
- A suitable container with high sides is chosen for the seedling, then it is filled with wet sand. Before planting, it is spilled with a weak solution of manganese.
- A depression is made in the sand. It is convenient to use a wooden stick with a diameter of at least 6 - 8 cm.
- Shoots are buried in holes at a distance of 3 - 5 cm from each other.
- The soil is compacted so that no voids remain inside.
- The container is covered with plastic wrap or plastic cap. This helps create a greenhouse effect inside the container. Thanks to this, the soil will be timely moistened.
Landings are removed in shaded areas, where they constantly maintain a temperature regime of at least +22 ° C.
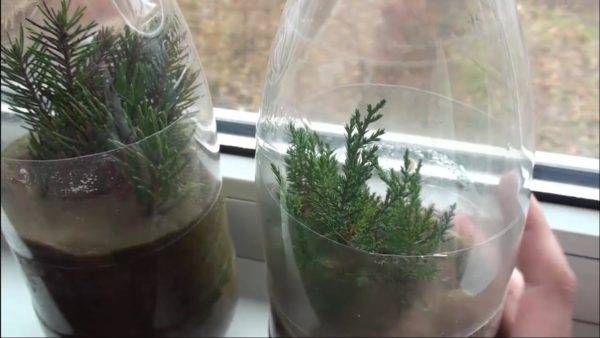
Many people use rooting cuttings in the water before winter.

- The prepared material is released into the root growth biostimulator solution for 12 hours.
- At the same time, sphagnum moss is being prepared. It is soaked in water, then the excess water is squeezed out.
- Moss is laid out on plastic wrap up to 10 cm wide and up to 1 m long.
- Cuttings are placed on the moss so that the tip of the scion is visible above the tape.
- The film with moss is rolled up with a snail, pressing it tightly to the surface.
- The prepared snail is tied with a tourniquet and placed in a bag with a little water.
This structure can be hung from the window like a flowerpot. After rooting, the seedlings are planted in prepared soil.

Care
Active rooting of cuttings begins only 2-4 months after planting in the ground.This time frame is rather arbitrary, as it depends on the type of juniper. At the same time, it is required to accept that in the summer season the process of formation of the root system can be inhibited until the onset of autumn coolness. The root system for such a period is not able to gain enough strength for an open space, therefore it is recommended to leave the cutting in a greenhouse until the next warming.
In order to prevent stagnation of water near the root system of the juniper, the ephedra needs to be watered with an arrangement, allowing the ground under the plant to dry out. For irrigation, settled water is used, which, according to its own temperature, corresponds to the environment. To prevent fungal-type diseases, when watering, fugnicidal compositions are added several times a year.
When the main part of the root system has already been formed on the cuttings and growths begin to develop, hardening is carried out. For this, the greenhouse must be opened for a short time and fully ventilated. In the winter season, it is recommended to cover young plants with burlap, synthetic covering materials or leaf litter.
In the spring, young junipers need to be transplanted to a permanent place of growth, for which the plants are moved into prepared holes along with an earthen clod, taking into account each of the moments of the process.
Disembarkation to a permanent place
You should not rush to plant young juniper plants. This issue needs to be considered taking into account the full list of factors and rules:
- The planting period of rooted plants is selected taking into account the time for adaptation. If the cuttings were harvested at the end of winter, early spring, then the planting material can be planted immediately - the optimal period is 70 days from being placed in greenhouse conditions. In the case of late harvesting, the juniper hibernates indoors, subject to each of the conventions, until the next spring.
- In the variant of a separate potting rooting of the cuttings, planting in the fall is possible. But, in this case, the plant is moved together with the soil and additional insulation is used. Before full adaptation in the open field, the juniper is highly susceptible to freezing risks, which is highly likely to lead to death.
- Maintaining a coma on the root system plays a major role - the roots of a young plant are easily damaged. The approximate dimensions of the landing hole are 1 m2, they should be 2-3 times large relative to the earthen coma. A drainage layer is placed at the bottom of the pit - this is taken into account in the matter of depth with the condition that the cutting is immersed to the root collar.
- Choosing a place for planting a juniper requires bright diffused lighting. The only tolerance is the presence of light shading on one side. According to this characteristic, the exact timing of the procedure is also determined - if the length of the day has already increased, then there are risks of burnout of coniferous landscaping.
- While the plant is still small, the ephedra needs to be protected from direct sunlight and winter frosts. The option of such protection is selected depending on the general conditions - for the winter it is possible to cover the juniper or completely wrap it with insulating materials, and in the summer it is simply to organize temporary shading on excessively sunny days.
Immediately after planting, the juniper needs to be watered - 1 bucket of water is enough without auxiliary impurities. In the future, the ephedra is watered no more than once a month. Fertilization of juniper in the spring requires the use of mineral fertilizers, for example, nitroammophos. With this composition, it is better to limit yourself to 45 g per m2. In the summer season, organic matter is used - compost or rotted manure. Also, fertilizing is applied in the case when the plant develops too slowly.
Watering
The duration of rooting of juniper cuttings, subject to the general conditions, is 60-80 days. This period requires constant maintenance of soil moisture.Watering is carried out through agrofibre at least 3-4 times a day.
In fact, the cutting should not dry out. However, rooting of conifers in clean water should not be performed, as this can cause the death of a new plant.
Growing conifers from cuttings
Further care for conifers includes several rules:
- After planting for rooting, the shoots need regular moisture. They are sprayed with warm water once a week. The land should not be waterlogged or dry.
- For the full development of the culture, a temperature regime at the borders of +18 to +22 ° is necessary. Frost-resistant species will feel comfortable at temperatures from +16 ° C.
- Shoots need regular ventilation. To do this, the boxes are opened for several hours daily, gradually increasing the length of time.
- Plants are fed with special preparations for conifers 1 - 2 times per winter.
- To saturate the soil with air, the soil is regularly loosened.
Many breeders plant conifers after rooting in closed greenhouses. It should be borne in mind that young plants at this stage need warmed up soil. The soil index should not be lower than +25 ° C, the air temperature inside the room can fluctuate from +18 to +20 ° C. In addition, it is necessary to monitor the humidity: at this stage, its indicator should be higher than usual.
There are several signs by which you can determine that mistakes have been made in caring for conifers:
- Redness or fluttering of the needles indicates the presence of a fungal infection (this can be caused by an excess of moisture or planting in soil that has not been disinfected);
- Scattering of formed young needles is a signal of a lack of nutrients, possible acidification of the soil.
Cuttings
When reproducing juniper by this method, shoots growing up are cut off. The lateral branches can give the horizontal development of a new plant, used in the bonsai technique, but depriving the specimen of varietal characteristics. When cutting a juniper, the timing of the work should be observed, the seedlings should be created favorable conditions for rooting.

- preservation of varietal characteristics;
- the obtained seedlings are distinguished by high vitality;
- a strong root system is formed;
- grow to the required size several years faster than when sowing seeds.
To obtain juniper seedlings, the necessary conditions must be met - to properly prepare cuttings, build a mini-plate, maintain heat and humidity at the required level. Planting material for growing spreading bushes is recommended to be taken from the middle of the plant, and for vertical ones - from the top. Store is permissible no more than 2 days, wrapped in a damp cloth.
One-year-old shoots from mature trees or shrubs from 8-10 years old are suitable for cuttings. Cut so that a small heel is separated from the main branch - a lignified piece of bark. The length of the cut shoot can be in the range of 10-25 cm, the lower part must be cleaned from the leaves.

The greenhouse will protect the juniper from drafts, sudden changes in temperature, dry air. The room should be warm and light. Direct sunlight should not be allowed on the cuttings. At the same time, it is important to periodically ventilate, gradually temper it before removing the package, and accustom the seedlings to the environment.
On a note! It is undesirable to root a juniper in water, since detachment of the bark is possible, the viability of the cuttings decreases.
Period of work
It is advisable to breed coniferous species in this way in the spring. Collect planting material at the end of February in order to grow a viable seedling in 2 months. If you want to plant a juniper in the fall, cut the cuttings in late July - early August.It is advisable not to transfer to open ground just before winter, so rooted cuttings can be left at home until spring. Before planting in the open ground, hardening is carried out for such specimens.
Temperature regime

Optimum performance for rooting of juniper cuttings is 23-25 ° C, a temperature rise of more than 26 ° C negatively affects the process. After the appearance of the first roots and before the formation of the first buds, it is recommended to keep the planting material at 18-20 ° C. It is especially important to observe the temperature regime for cuttings cut from a young growth.
Procedure
The step-by-step implementation of cuttings significantly increases the chances of getting a healthy plant in a short time.
Juniper cultivation point by point:
- Use a sharp knife to cut off the stalk with the heel.
- Clean the lower part of the needles, taking care not to damage the bark.
- Treat the cut site with a powder or paste of a growth stimulant.
- Prepare a loose, moisture and breathable, nutritious substrate. You can mix peat and river sand in equal proportions by adding charcoal and perlite.
- Pour a drainage layer of expanded clay into the container. Fill the rest of the volume with the prepared soil mixture, leaving 2-3 cm to the edge.
- To deepen the cuttings of juniper by 3-4 cm, if necessary, put a support in the form of a stone or stick. In one flower pot, it is permissible to root several cuttings, placing them at a distance of 6-8 cm from each other.
- Transfer the container to the greenhouse or cover with a bag. Put on a bright, warm place.
- Provide basic care - maintaining the microclimate, periodic watering.
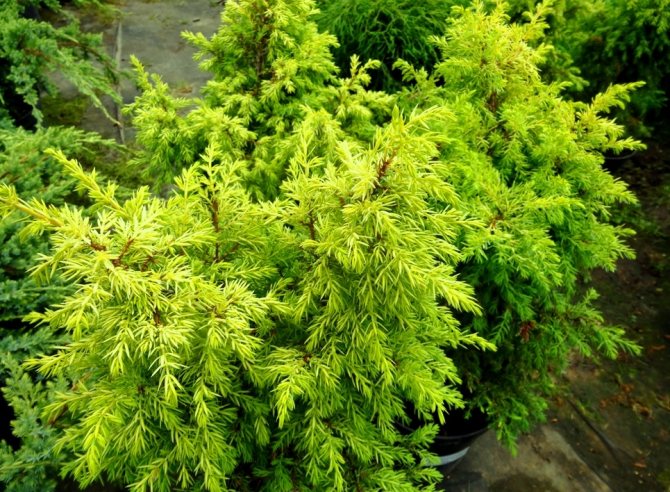
Waterlogging of the soil should not be allowed, but drying out will negatively affect the young roots. It is important to ventilate the greenhouse, remove accumulated condensate. The cutting will begin to take root in 20-30 days, but it will take 2-3 months to form a sufficient root system. Further cultivation is carried out in the open field. A seedling of an ordinary juniper and other upright species should be placed vertically when planting, varieties with a horizontal crown - at a slight slope.
Soil preparation
The prepared planting material is planted in a specially prepared substrate. Since the rooting of conifers is a long process, it is important to properly prepare the soil mixture:
- It should be loose, light, and well aerated.
- Junipers love soils with a neutral or slightly acidic reaction, so do not add ash, lime, and shells to the substrate.
- Juniper cuttings root well in peat mixed with an equal volume of: a) sand, b) perlite, c) vermiculite, d) leaf / sod land.
If you plan to root several petioles, then you can use a flower pot for planting. Drainage is laid out on the bottom, then a layer of 15 cm of soil mixture, the top is sprinkled with sand. When there is a lot of planting material, it is planted in greenhouses, large boxes or greenhouses.
Note: if you doubt the quality of the components of the substrate, then first disinfect them by steaming or spill with a solution of potassium permanganate.