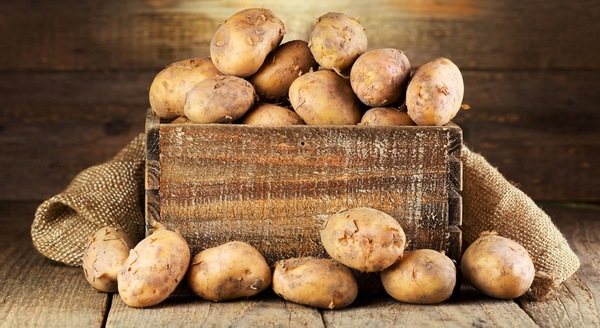
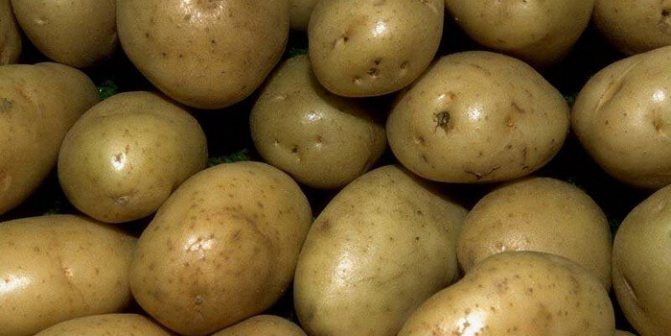
Potato growing methods
Consistent technology for growing potatoes provides for a competent selection of a place for planting, soil cultivation, selection of the desired variety, and care of seedlings. Some plant growing methods eliminate some of the steps and minimize the effort to care for the crop.
There is a traditional agricultural technique for growing potatoes and non-standard methods of harvesting using various designs, devices:
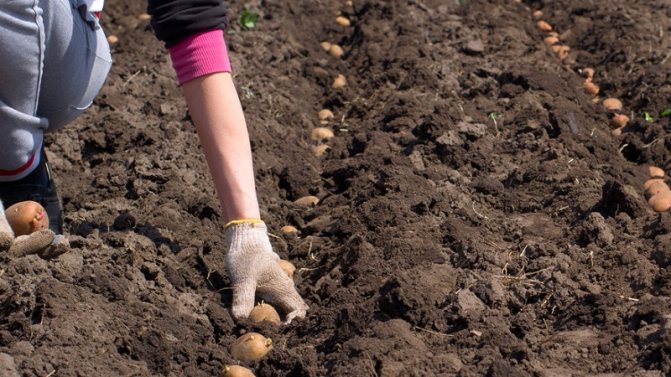
- planting in open ground. Sprouted seed potatoes are planted on fertilized ridges, observing the square-nesting method. A gap of 45-50 cm is left between the nests. The plantings are regularly loosened, spud and watered. It is important to choose a suitable variety in accordance with the climatic zone, so that the bushes have time to grow, the fruits to ripen;
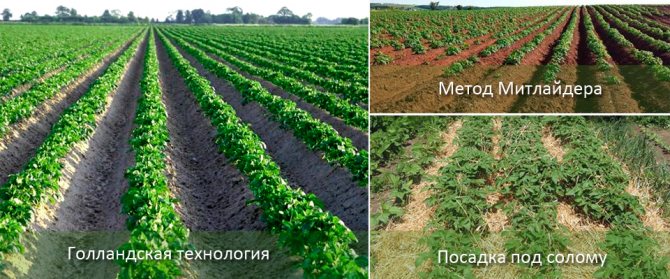
- Dutch technology. The method consists in strict observance of crop rotation, in which potatoes are changed for crops of siderats (cereals or beans) every 4 seasons. When planting seed material, a distance between rows of at least 75 cm is observed. The soil is fertilized before winter and during spring digging;
- growing potatoes in a greenhouse. The method is used to obtain early-maturing potatoes and planting root crops in winter. The ridges are dug up, fertilized. The tubers are planted in the traditional way. Seedlings are spud, weeded, watered. Potatoes grown in a greenhouse structure are suitable for digging after 1.5-2 months;
- potatoes in tall beds or the Meatlider method. On the field, narrow long ridges up to 50 cm high are formed. Experienced gardeners organize boxes of boards or other material, fill them with earth. The technique involves planting tubers in a staggered arrangement. With this planting, the plants receive the optimal amount of nutrients, usable area, light and moisture. It is easier to care for the plantings, since fewer weeds grow in such areas, water remains in the soil for a long time, useful elements are not washed out;
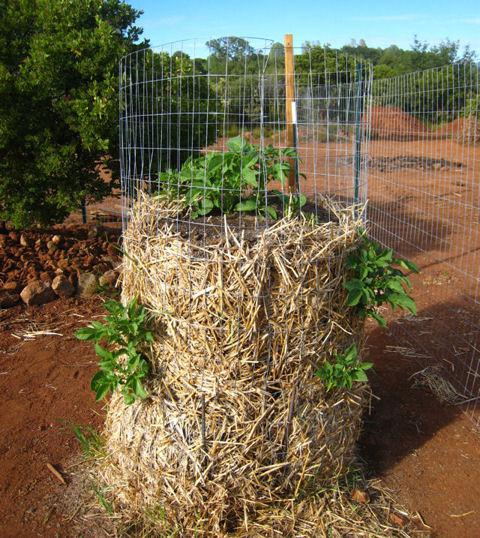
- root vegetables in a barrel. The method allows you to grow potato crops with a shortage of area and on breeds unsuitable for plant growing (complex reliefs, mountains, rocks, watered soils). A filler (sawdust, branches, gravel, foliage) is poured into the bottom of the container up to half, then fertile soil is placed into which the seed is embedded. Instead of barrels, polyethylene or polypropylene bags are also used;
- potatoes under the film. The field is dug up and fertilized in the standard way. When the snow melts, the ridges are covered with strong polyethylene, markings are made for the nests, cuts or holes are made into which the sprouts will go. The method allows you to grow early varieties of potatoes, excludes the stage of weeding, retains moisture in the substrate;
- potato mounds. In the garden, slides with a diameter of 2 m and a height of up to 1 m are formed from the soil. On the slopes, observing a distance of 40 cm between rows and nests, seed potatoes are buried along with fertilizer. In the center of the elevation, a depression is formed into which regular watering is carried out. The plantings are weeded and spud every 3 weeks. The method allows you to increase the yield by 30-40%;
- growing potatoes in the grass. An unconventional method involves placing sprouted prepared seed potatoes directly on an undeveloped plot.A large amount of straw or cut grass is collected in advance to form a dense continuous layer 20-30 cm high. Seeds of a standard size are placed at the base of the grass cushion. Planting does not need weeding and loosening. All useful substances, moisture, potato sprouts and tubers are obtained from rotting hay. During the dry season, the territory is watered once a week. As the bushes grow, mulch is added. As a result, a clean crop is harvested without the use of a shovel or equipment. The formed grass layer is suitable for use in the next season or for mulching other plantings.
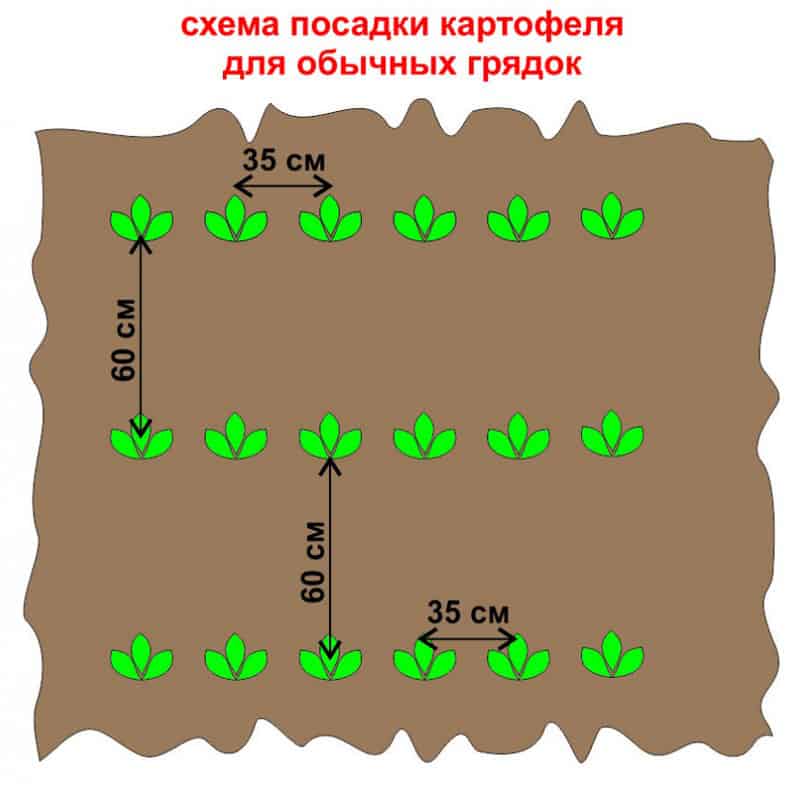
All of these methods are successful in compliance with the requirements under which the potato bushes actively grow and form fruits. For any method of crop production, observe the distance between the nests (at least 60-70 cm in row spacings and 35-40 cm between crop units), while planting seed tubers, use top dressing.

Advice
You can plant not only whole tubers, but also cut into pieces. This is done when there is a lack of seed or with large tubers. However, this makes the plant weaker.
In this case, you must adhere to the following rules:
- Each part should have 2-3 eyes.
- Such parts can be planted after roughening the cuts so that they do not get sick in the ground.
- Parts of a tuber should weigh at least 30 g.
It is necessary to plant potatoes in even rows, leaving the same distance between the bushes and in the aisle. This can be done in 2 ways:
- The marking of the beds is done before planting.- mark the first row, and the subsequent ones are measured from it.
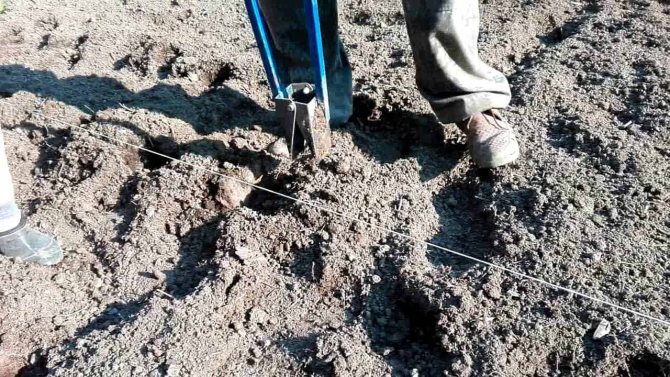
- During the planting of rows, a rope with sticks is used, which are tied on each side, while the rope is pulled and serves as a kind of ruler. When planting rows, it is moved, at a distance equal to the row spacing.
Interesting! With an even planting, you can plant 350-500 potato bushes on 1 acre of land.
Predecessors and variety selection
For successful crop production, consider a variety of factors that affect the activity of root crop growth, susceptibility to disease, and pest attacks. Observe the crop rotation when growing potatoes. It has been experimentally and analysis of observations proved that the vegetable grows better after growing on the ridges of certain types of crops.
The best predecessors before embedding potato planting material are:
- legumes (soy, peas, chickpeas, beans);
- cauliflower;
- pumpkin (squash, cucumbers, pumpkin, zucchini);
- onion;
- garlic.
Special attention should be paid to the choice of potato varieties, which are classified according to the ripening rate. It is recommended to plant a crop with the onset of stable heat, when the soil at night cools at least 5 degrees. Analyze the natural features of your region in order to choose the optimal variety.
| Classification | Ripening period, days | Examples of |
| Early | Up to 80 | Zhukovsky, Spring, Ilyinsky, Red Scarlett, Ryabinushka |
| Mid-season | 81 to 120 | Aurora, Darenka, Ragneda, Adretta |
| Late ripening | 121 to 150 | Lorkh, Zhuravinka, Rocco, Seagull, Slavyanka |
Solanaceae, which take a minimum of time to mature, are less susceptible to common diseases. Rapidly ripening roots give a small yield and are not suitable for long-term storage. Experienced summer residents plant different varieties of early maturity on the site. Early-ripening potatoes are grown for sale or consumption, mid- and late-ripening crops - for storage and consumption in winter.
WHAT IS POTATO USEFUL
Potatoes appeared on our continent only three hundred years ago. His homeland is South America, where the culture was grown by local Indian tribes. The edible tubers were brought to their country by Spanish sailors, who liked them.
Very quickly, potatoes with stews and spices became a favorite dish of the Spanish nobility. Then this dish began to be prepared in all taverns and inns. From there, the tubers migrated to the peasant fields.
Very quickly, potatoes spread over the territory of almost all countries of Western Europe. It was brought to Russia from Holland by the Decree of Peter I at the end of the 17th century. The tsar ordered to plant this "overseas vegetable" all over Russia and gave it the name "second bread", which was later fully justified.
Today it is difficult to imagine your diet without sweet - boiled or fried potatoes. In addition, it is not only tasty, but also very healthy.
The tubers contain vitamins: B1, B2, B3, B5, B6, B9, PP, C, E, K. They contain magnesium, calcium, potassium (570 mg per 100 g of weight!), Phosphorus, iron, zinc, boron, cobalt, folic acid, various complex amino acids, starch, bioflavonoids, fiber.
It is the young potatoes that have just been dug out of the garden that have the greatest nutritional value.
Soil preparation
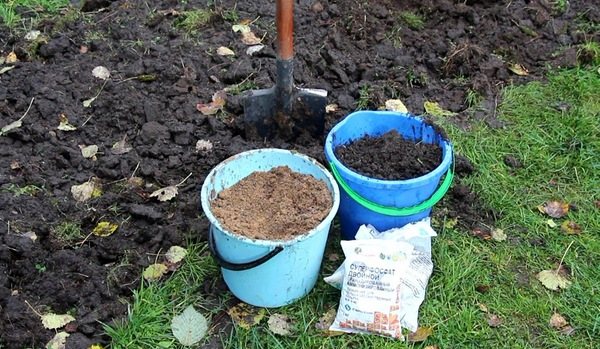
To grow potatoes and get a good harvest, you need to prepare a favorable soil substrate. The vegetable prefers sandy loam and loamy fertile soils with a light structure. The soil should contain a large amount of nutrients, retain moisture well enough aerated. You can plant a varietal crop on a sandy or clayey soil and, using mineral fertilizers, organic additives, and mulching, achieve good results.
Analyze the soil on the site, study the information on the selected potato variety, how to grow, what measures to take to improve the quality of the soil. Determine the acidity of the earth using a laboratory test, a home appliance or a set of litmus strips in order to carry out corrective procedures if necessary. Potatoes grow well in soil with a pH of 5.1 to 6.0. To obtain a rich harvest, fields and ridges are prepared in two stages - in autumn and spring.
Autumn processing
Digging up a plot for potatoes before winter is especially important if the territory is dominated by clay and groundwater is close to the surface. The rise of the soil mixture contributes to the rapid descent of snow masses in spring, the death of pests and pathogenic microflora, and the removal of weeds.
It may be interesting How to properly store potatoes in a house or apartment How to grow a large crop of tomatoes Rodrigo potato variety: description and characteristics, reviews
Carry out an autumn digging according to the following recommendations:
- remove plant residues;
- if the soil is characterized by low fertility or has not been processed for a long time, add a complex of nitrogen and phosphorus-potassium additives with a consumption of 20-30 g per 1 sq. m;
- cover ridges with acidic soils with lime, 500 g per square;
- dig up the field to a depth of 25-30 cm using a shovel or equipment for growing potatoes and other crops (walk-behind tractor, plow);
- do not break large clods and do not harrow ridges to improve soil aeration and create unfavorable conditions for harmful insects;
- apply a layer of 10-15 cm of matured compost or manure with a consumption of 8-10 kg of material for each square of the area;
- cover the organic layer with rotted sawdust, old straw or sand, depending on the type of soil. The height of the cover layer must be at least 5 cm.
Important!
It is not allowed to bring fresh manure or droppings to the field under potatoes. The organic material will react aggressively and will burn the planted seed tubers.
In the winter months, the introduced substances will dissolve and penetrate into the soil structure, compensate for the deficiency of nutrients, and create a favorable environment for microflora.
Spring work
With the descent of snow masses and the drying of the field, you can begin pre-sowing treatment of the site for planting potatoes. If you introduced organic matter into the beds before winter, you will not need to add manure or compost again in the spring. Autumn preparation has laid a fertile foundation for successful crop production.
Carry out the following works in the spring:
- distribute nitrogen fertilizers over the surface of the field (for example, Ammophos with a calculation of 30 g per 1 sq. m);
- dig up the area with a shovel or plow to a depth of 20 cm;
- rake and break large earth clods.
Without autumn processing of potato beds, scatter humus or rotted manure over the surface at 8-10 kg per 1 sq. m, complex fertilizers of mineral or organic type with consumption according to the instructions from the manufacturer. These measures contribute to obtaining an optimal quality substrate in which potatoes grow well.
Choosing a seat for landing
As soon as the country agronomists have made a choice of which variety and by what method to plant potatoes, a place is chosen for the potato beds. The vegetable loves light soil with a small content of sand. He likes places on former peat bogs and black soil.
The clay area will hinder the growth of potatoes. They solve the problem by adding sand to the plot, fertilizing with manure, and planting potatoes on the ridges. The acidity is reduced by adding wood ash or lime to it.
In the fall, the site is dug on a shovel bayonet, weeds and plant residues are removed, fertilized with manure and compost, but the earth is not leveled. This is done to retain spring moisture and for better aeration. If the site is clayey, then it is better to make grooves to drain spring water from autumn. In the spring, the garden is re-dug up with the overturning of the layer. After a winter with little snow, it is enough to loosen the plot, retaining moisture.
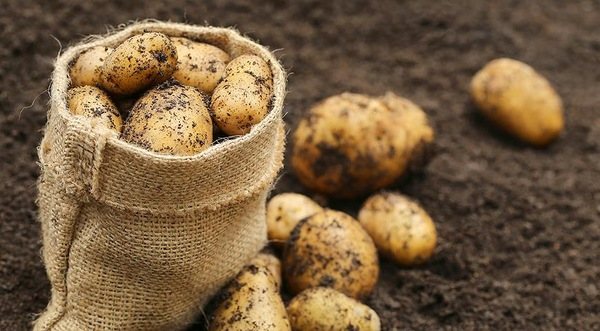
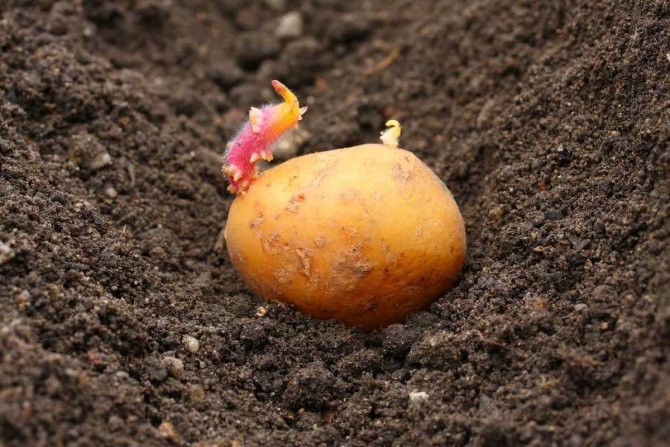
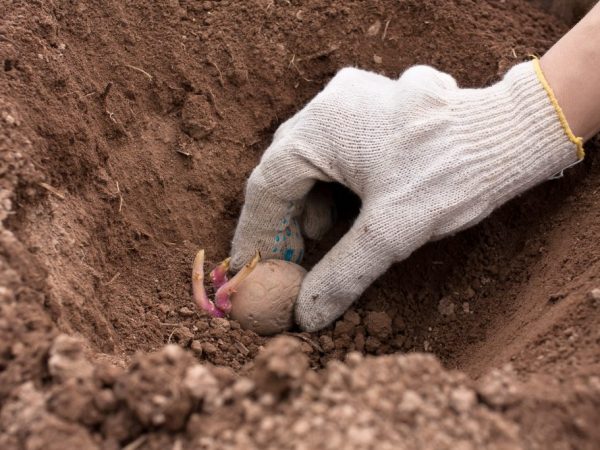
Preparation of planting material
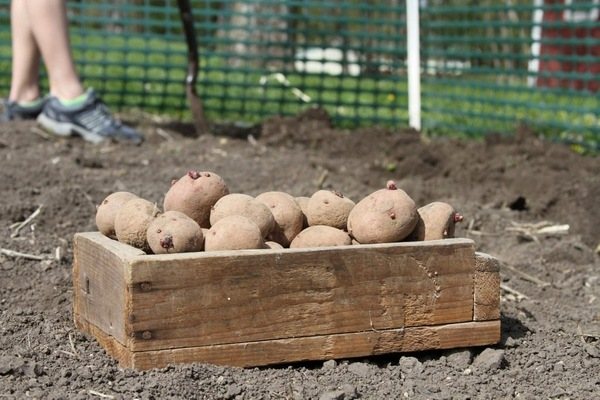
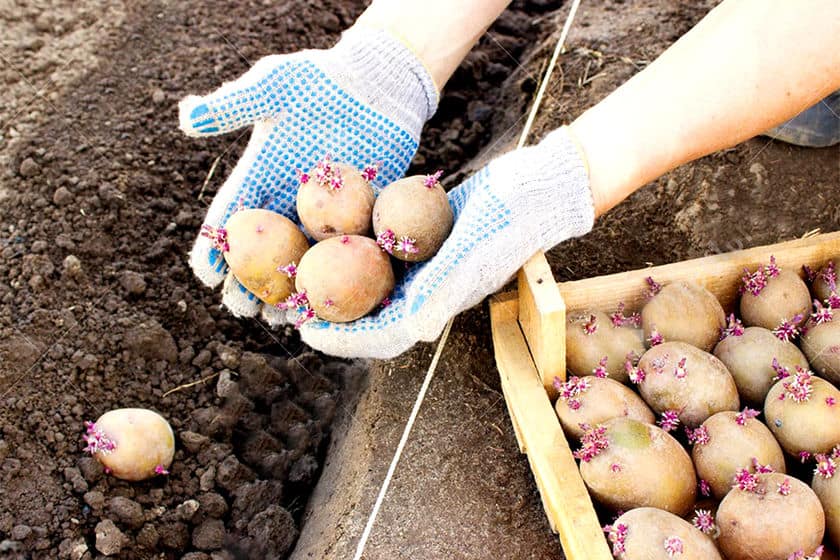
In order to get a rich, stable harvest for many years, follow the correct potato farming practices when pre-planting seed tubers. Experienced gardeners prepare planting material, starting in autumn, stocking from varieties that have produced the largest number of large and high-quality fruits, specimens weighing from 50 to 100 g.
Selected potatoes are subjected to greening - an event as a result of which solanine is formed in the pulp. Green potatoes should not be eaten as the cooked dish will contain the toxin. The substance produced under the influence of light actively participates in the process of germination of sprouts and protects tubers from fungal infections during storage.
Prepare planting material in the spring in the following sequence:
- get the potatoes selected for planting in 1 month;
- place containers with tubers in a light, warm place for 3 weeks;
- when sprouts more than 2 cm in length hatch on potatoes, move the material to a room with a temperature of at least 25 degrees or outside during the day in sunny weather. Stage duration - 1 week;
- Soak sprouted fruits in a solution with a bioactivator of growth or with the addition of a fungicide. The proportions of the funds are indicated in the instructions for the preparations.
The purpose of all events is to awaken biological resources in seeds, prepare them for planting, change conditions. Sprouted potatoes in 10-15 days, in favorable weather, stably sprout in amicable sprouts over the field. Unprepared tubers emerge only after 3-4 weeks.
Growing in a barrel
This method is useful for those who practically do not have a personal plot, but want to eat potatoes grown with their own hands.
A 15 cm layer of soil is poured into a barrel of any material or a tall box on the bottom. Tubers with sprouts are placed on top. When they rise 5 cm, sprinkle them with another layer of earth and again wait for the shoots to appear.Having filled in this way a part of the barrel so that only a third of the height remains, they stop filling up the soil. Watering, feeding. The crop is harvested gradually, starting from the top layer. You can get up to four buckets of potatoes from one barrel.
Planting methods for growing potatoes
One of the secrets of growing potatoes with a rich harvest is the correct placement of the seed and the correct placement of the nests. Maintain a distance of at least 60 cm between potato rows when growing an early variety of root crops and at least 70 cm for a late vegetable. The culture grows close to the surface of the earth, so sprouted tubers are placed at a depth of 8-12 cm.
When landing in open ground, several methods are used:
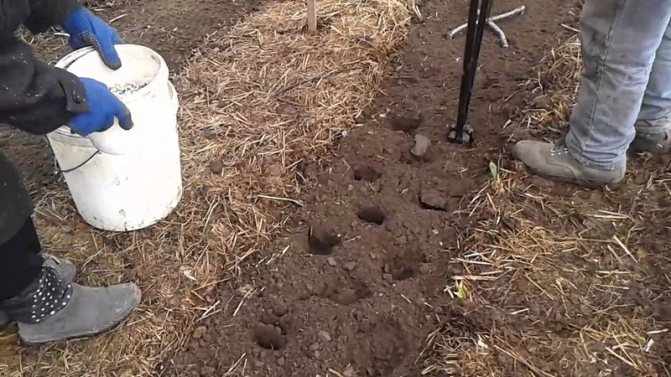
- ridge. The planting type is organized in fields with a close location of the groundwater level. The plot is plowed, harrowed, rows-ridges are formed on the surface with a distance of 70 cm. The seed vegetable is buried 10-12 cm in the center, making gaps between the nests 40 cm;
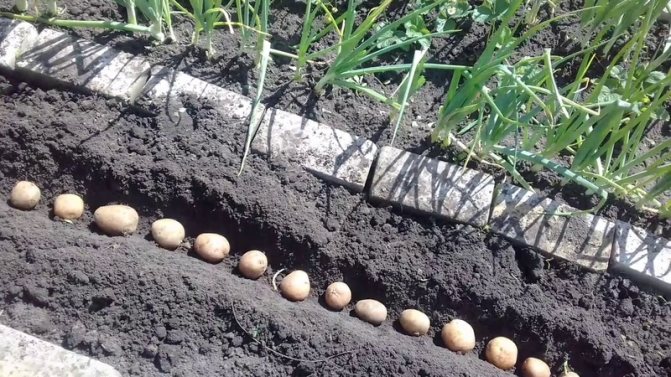
- trench. The territory is cultivated with a shovel or plow, furrows are made at a distance of 60-70 cm from each other. The sprouted root crop is placed in the grooves, observing the distance between the bookmarks 35-40 cm, covered with soil. The method is suitable for sandy loam areas in higher elevations and in the southern regions. In the trenches, moisture lingers longer, the nest does not overheat in the heat;
- solid or square-nested. The field prepared for planting is marked out in rows at intervals of 50-60 cm. On a flat surface, recesses are made at a distance of 50 cm, fertilizers are placed inside the hole, the seed fruit with growths is placed in the center, sprinkled with earth. 2-3 weeks after germination, the bushes are spud. The plantings are regularly loosened, watered and fertilized throughout the growing season. Tubers are planted under a bayonet shovel together. One person digs holes, the other brings in top dressing and lays down the planting material.
Important!
When planting potatoes in the ground, pour fertilizer into each hole so that the plant receives enough resources for active growth and development.
Regardless of the chosen method of planting in open ground, for each hole, use at least 500 ml of matured organic matter (compost, humus, mullein, droppings), 150-200 g of wood ash. For poor soils, add nitrogen fertilization to the listed components (Ammofoska, urea in combination with lime or dolomite flour).

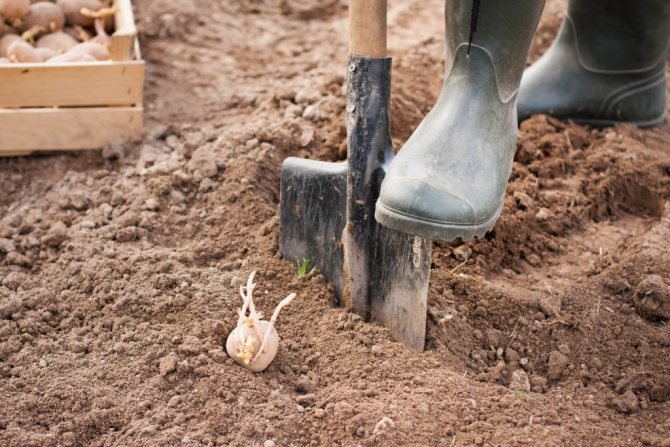
How to plant potatoes under a shovel
Despite the growing interest in more sophisticated ways of forming beds, planting potatoes under a shovel has been and remains the most common option. This "grandfather's" way of planting by hand, although simple, also requires certain knowledge from the gardener.
How many centimeters deep
The method is simple shoveling - a hole is made in the ground for embedding, half the length of the blade, that is, the same 10-12 cm.
The classic layout of tubers in the shovel method is 70 cm between rows (boletus) and 30 cm between holes.

A bayonet shovel is best for this method.
What shovel is needed for planting potatoes
Most convenient for working in the beds type of shovel - bayonet... Its blade is made in the shape of a rounded petal. High-strength metals are used as a material - tool steel, or even titanium. Standard blade sizes:
- Length - 32 cm.
- The width at the base is 23 cm.
There are also non-standard options, as a rule, their size varies upwards from the norm.
How is landing without a shovel
When preparing the beds, you can completely do without a trench tool. Firstly, earthwork is done faster using a garden plow, but the method is only good if you plant the potatoes in the furrows.
Subsequently it will require laborious hilling.
Gardeners have many options to choose from to plant potatoes professionally or in the country. Let the plant be one of the most common and tolerant of harsh conditions, it no less than others requires effort and effort from a person in cultivation.
Every year, in the early days of May, millions of people go to their plots to plant potatoes. Despite the huge crops in agricultural firms throughout the country, this crop is 30 ... 35% produced on private farmsteads.
The population has accumulated experience that comes from their ancestors. Having your own potatoes is a guarantee that there will always be food in the house.

Caring for potatoes after planting
Successful cultivation of potatoes in the country is possible only with regular planting care after the embedding of prepared seed tubers in the soil. Before sprouting above the ground, the field needs to be watered with water and nutrient solutions.
After landing, carry out the following activities:
- weeding. Avoid abundant growth of weeds. Plants take nutrients, moisture from the root crop, prevent the bushes from growing;
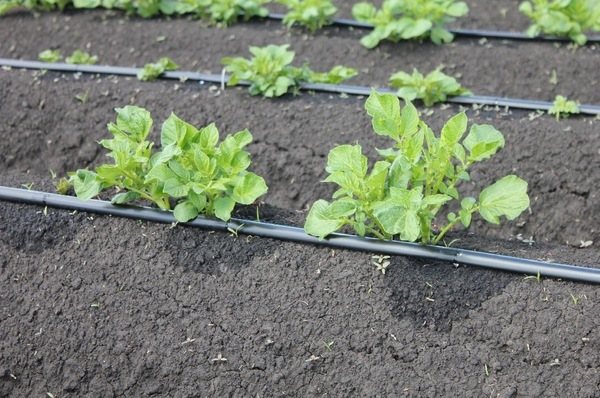
- watering. In case of prolonged drought, organize watering of the plantings at a frequency of 1 time in 3-5 days, depending on the type of soil. Loams need to be watered less often, sandy substrates more often;
- loosening. The soil in the potato field is regularly loosened with a rake or a garden hoe with teeth. The procedure is aimed at breaking up the soil crust formed after rain and as a result of soil caking. The tool is deepened by 5-6 cm and the top layer is disturbed, simultaneously removing weeds. As a result, the root system and the underground part of the culture receive oxygen, moisture penetrates more easily into the lower layers. Until the sprouts hatch from the moment the seeds are embedded in the substrate, the ridges are loosened every 7 days;
- nutritional infusions. 14-16 days after planting the seed in the ground, water the field with the infusion of cow dung. Prepare a solution with proportions of 1 kg of organic matter to 10 liters of water, soak for 1 day and evenly moisten the ridge.
Avoid compaction of the planting area and the formation of a dense earth crust on the surface. When working, use movement on the board so as not to trample the soil and exclude damage to the seedlings.
Final part
How deep to plant the potatoes will depend on several factors. First of all, it is the composition of the soil and climatic conditions. Depending on the cultivation method, the embedment depth can vary from 5 cm to 1 m.

Potatoes are an unpretentious culture. With suitable soils, it can be successfully grown even in cold climates. The yield can be significantly increased with strict adherence to the rules for planting potatoes. Consider to what depth and how many centimeters deep to plant the culture.
Care of potatoes during growth

When growing early potatoes and late varieties, regular watering, feeding, loosening, and hilling of plants are mandatory care procedures. It is necessary to care for the plantings regularly, observing the vegetative phase.
Agronomic technologies provide for the following measures for growing potatoes at home:
- Top dressing. Fertilization is carried out during the entire period of the formation of bushes, the formation and maturation of tubers. Nutrient organic complexes and mineral compounds are added at intervals of 3 weeks. They constantly monitor the condition of the tops and stems in order to give the plants the missing component in time. Dry granular and powder forms, in accordance with the instructions, are added to the ground before hilling, loosening. In addition to ready-made mineral mixtures, the use of nutritious organic infusions (nettle, liquid manure) is effective. Potato fields are no longer fertilized by any means 2 weeks before the ripe tubers are excavated.Mixtures and materials are delivered under the root or sprayed to the tops;
- Hilling. The procedure is to raise the soil around the potato bush in order to support the foliage, improve soil aeration, rapid penetration of nutrients, dry fertilizers into the lower layers of the earth. 20-30 retreat from the center of the nest and hoist the soil with a garden hoe, deepening the working part of the tool at an angle by 7-5 cm. The first hillock is carried out as soon as the tops grow 12-15 cm from the earth's surface. In the future, the work is repeated every 2-3 weeks until flowering. During potato flowering, the vegetable is not touched so as not to damage the green parts. Hilling is stopped when the bushes are closed in a continuous field;
- Weeding. Weed removal is carried out both as a separate procedure and during the hilling of the rows. Weeds are uprooted and removed from the field to prevent re-germination of the grass. Most often, potato plantings are affected by woodlice, sow thistle, spurge, bindweed, buttercup. Analyze the varieties of weeds in order to determine the change in soil acidity in time and carry out the necessary work to correct it.
| Symptoms of a lack of nutrients in the soil | What fertilizer to apply | What element is missing | Proportions, quantity per 1 sq. m, g | How to deposit |
| Weak growth, sluggish leaves, clarified tops | Urea, ammonium nitrate, ammonium sulfate | Nitrogen | 15-30 | Pouring into the ground and mixing with the soil or preparing solutions (for 10 liters of water). Best done before rain or watering |
| Purple leaf color, leaf spots, leaf drop, stem depletion | Superphosphates, Ammofoska | Phosphorus | 20-30 | Preparation of solutions in 10 liters of water, watering 500 ml under each nest |
| Rust on the upper segments of the bushes, delayed flowering | Potassium nitrate, potassium salt, potassium chloride | Potassium | 15-20 | Embedding in soil or preparation of aqueous solutions |
Carry out any planting care activities in the morning, before the active sun phase, or in the evening, after 18 hours. It is more expedient to work with the land after watering or a long rainy season.
How to plant potatoes
The most crucial moment is landing. It is important how deep the potatoes are planted. Most recommend to deepen the tuber by 10 ... 12 cm. The simplest and most effective device is the “hoof”.
Hoof landing
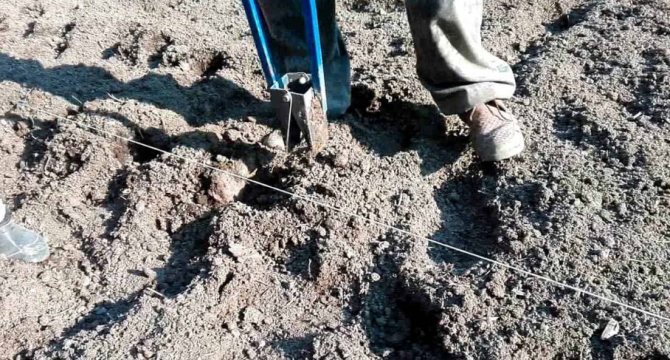
The cords are pulled along which the landing will be made. The planting tubers are laid out at the desired distance. All that remains is to walk and press them into the soil.
Some are afraid that the "hoof" will crush the potato. If the soil is well dug, then you should not worry. The depth is adjustable with a cross bar. It is nailed at a distance of 15 cm from the edge of the hoof. Three to five potatoes are introduced into the soil per minute. The landing is quite fast.
Attention! Inside such a device there is a small depression (about 2 cm), it allows you to distribute the load on the root crop when pressed.
Using a potato planter
Many craftsmen make potato planters. This device has movable cheeks, they can be moved apart by the handles.
- The cheeks are closed and pressed on them with the foot.
- Under the influence of a person's weight, a depth of 10 ... 12 cm occurs.
- The seed is thrown into the existing hole.
- Then the handles move apart, the potato reaches the bottom.
- The potato planter is pulled out.
- The existing holes are filled with a rake or a hoe.
Landing is done at high speed. It is inconvenient to just carry a bag of seeds over your shoulders.
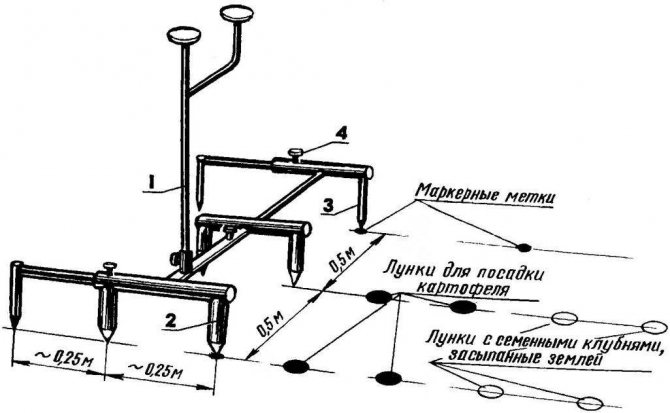
Planting by digging channels
Another interesting method and device for it is planting in prepared trenches. With a small plow mounted on wheels, furrows can be made in a short time. Then it will remain in them to decompose the planting tubers. The work is completed by sprinkling the soil with a rake.
With the help of such a device, two people sow a hundred square meters of potatoes in 40 ... 50 minutes.
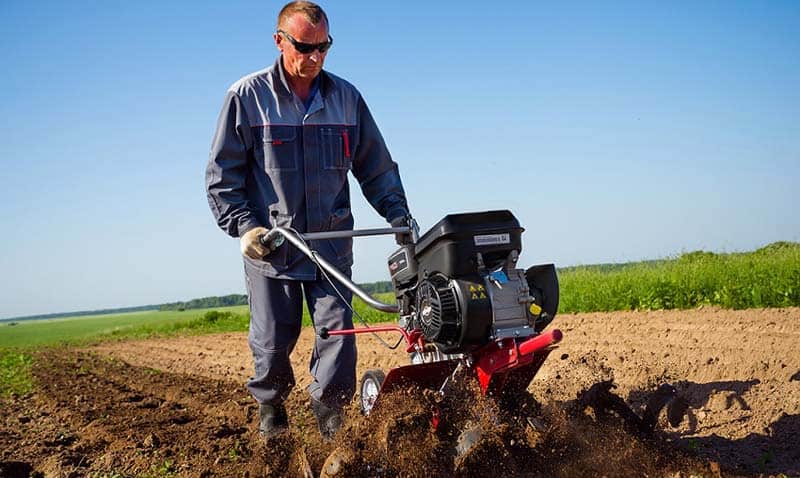
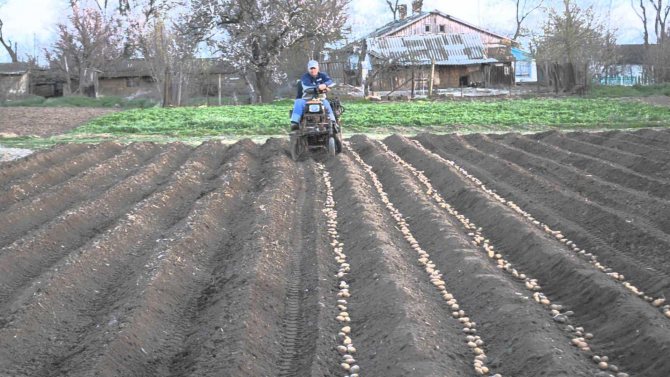
Mechanized landing
Motoblocks have firmly taken their place in personal plots, they are used in summer cottages and in garden associations. Farmers in large fields use mechanized planting methods.
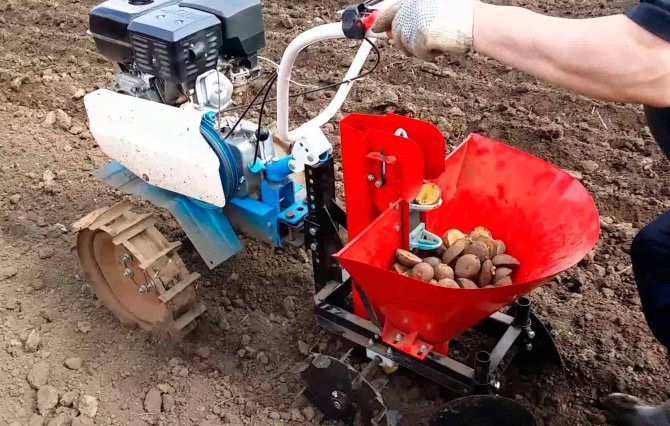
For motoblocks, several types of potato planters are produced. They help to sow quickly and qualitatively different varieties of potatoes. The adjustments help ensure consistent seed placement. It remains only to choose a convenient operating mode according to your strength.
The least time-consuming planting is with a walk-behind tractor and attachments.
Growth regulators for potatoes
The successful cultivation of potatoes in Russia is complicated by a difficult climate and low soil fertility in most regions. The use of growth regulators that stimulate the active development of green parts, root appendages, the formation of root crops, can accelerate and increase the result.
Among gardeners with many years of experience in growing potatoes in different regions, the following preparations received positive reviews:
- Epin. The liquid agent in ampoules is diluted with water (1 ampoule per 400 ml of water) and the seed is sprayed 24 hours before embedding in the ground or a stimulant solution (1 ampoule per 5 l) is sprayed onto the tops of the grown seedlings. Water should be used only filtered, boiled at a temperature of 18-20 degrees. The active components adapt the plant to changing weather conditions, enhance the culture's immunity, and help fight most common diseases. The use of the adaptogen is safe for humans, insects, and pets. As a result of using in a short time, we visually notice the active growth of tops, lush flowering, strengthening of the root system. Treatment of potato plantings with a growth regulator increases the yield by 50%, improves the keeping quality of tubers. Store the liquid mixture in a cool dark place;
- Bioglobin. Synthetic protein growth regulator obtained from placental elements of animals. As a result of treatment with the agent, the growth of all parts of the root crop is accelerated by 2-4 times. The action of the remedy has a short-term effect, but prolonged effects. By spraying the planting material with a solution (2 tsp of suspension per 10 l of water), it quickly awakens its own resources of tubers. The stimulant increases the yield by 2 times, if you carry out regular spraying of the tops in conjunction with other fungicides;
- Poteytin. Highly proven growth promoter for biological treatment of potato seed prior to incorporation into the soil. After using the drug, the tubers adapt faster to new conditions, sprout as early as 6-7 days after planting, easily tolerate frosts down to -5 degrees, are resistant to pest attacks, and are less susceptible to diseases. Adaptogen treatment increases yield by 25%. For pre-planting treatment, 1 ampoule is diluted with 750 ml of filtered warm water. During the cultivation of potatoes with a diluted solution (1 ampoule per 10 liters of water), the bushes are sprayed before the flowering phase.
The use of growth regulators for processing sprouting potatoes and use for processing during the growing season enhances the immune forces of the vegetable, helps to obtain a larger yield, and accelerates the growth of all parts of the crop.
Traditional cultivation technology
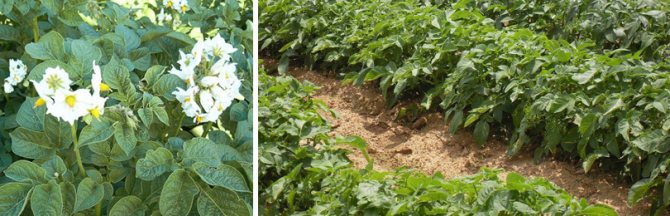
The technology of growing potatoes using the traditional method is known to every summer resident. It implies 2-4 hilling per season and several weeding. Potatoes are planted with a width of about 70 cm between rows. Organic fertilizers are applied. In dry weather, watering is performed. Colorado potato beetles and their larvae must be collected manually, since herbicide treatment is not used in the traditional potato growing system.
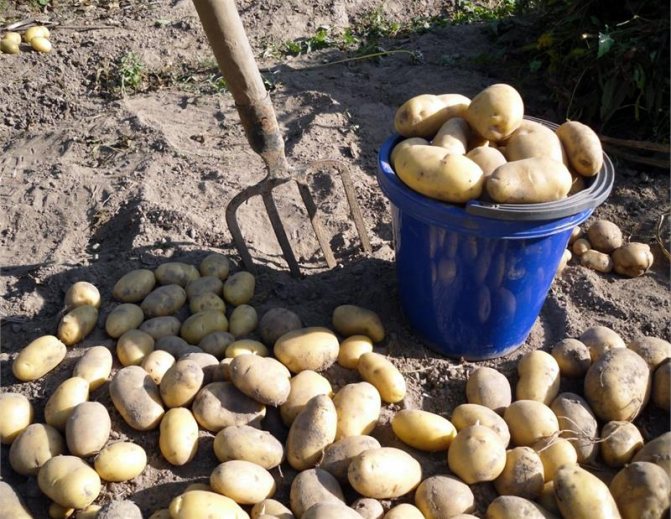
The tops begin to dry out by August, but they do not need to be mowed.The harvest is most often dug in September. By this time, the tops have already dried up, and the skin of the tubers has become denser. Dig in dry weather and leave the potatoes to dry for several hours in the sun. Then he is removed for storage in the cellar.
Diseases and pests
Due to unfavorable weather conditions in most areas, potato bushes are often infested with insects and fungal diseases. Infection of plants occurs due to the active reproduction of pathogenic microflora in the soil during prolonged rains and at low temperatures.
The most common threats to potatoes are:
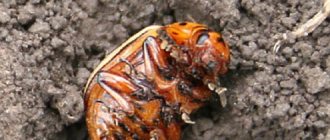
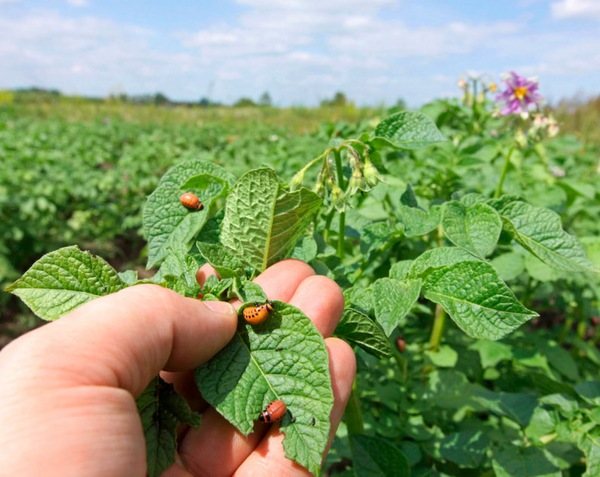
- Colorado beetle. Processing is required at the first sign, when the brown striped insect lays the larvae on the green parts of the plants. During the flowering period, it is recommended to refrain from fighting the pest. Collect the pest by hand or treat it on a warm day without precipitation with one of the proven drugs - Akarin, Agravertin, Bicol, Bitoxibacillin, Fitoverm, Tuberculosis;
- bear. Protection from large voracious insects of dark brown color and their guise is carried out even at the stage of tuber preparation. When germinating seed, spray the potatoes with Maxim or Prestige. When laying in the holes, put onion husks on the bottom, plant marigolds along the edges of the potato planting. If a colony is found, place special granules of the "Thunder", "Grizzly" or "Medvetox" agent near the bushes;
- potato moth. Dendrobacillin, Enterobacterin, Lepidocid, Bitoxibacillin are effective for prophylaxis from a small gray butterfly laying eggs on the tops. Treat affected plantings with Sherpa, Zolon, Arrivo, Danadim, Decis preparations;
- wireworm. Processing from large yellow worms-larvae of the click beetle is carried out by means of Cruiser, Commander, Prestige, Imidor, Tabu. Correct crop rotation, periodic sowing of green manure, maintaining the neutral acidity of the soil, adding ammonium nitrate with lime to the ground will help to minimize the appearance of the pest;
- scoops. The fight against the caterpillars of the gray scoop butterfly is done by adding Bazudin, Iskra-M, Nembakt to the soil or by spraying with Chrosphos. Remove weeds from the ridges, loosen the soil, liming when the acidity rises;
- nematodes. Treat the area where small white worms are found with Thionazine. As a prophylaxis, crop rotation, burning of plants and tops affected by the pest, autumn treatment with urea, aging of seed potatoes in a weak aqueous solution of potassium permanganate are effective.
Important!
Observations showed that potatoes were more often affected by diseases, which grow both in nutrient-poor soil and in overly fertilized soil. Avoid a shortage or excess of additives when fertilizing a crop.
| Disease | Symptoms | Recommended measures |
| Dry rot | The defeat of a young potato with a gray fungal bloom on the outside of the peel and in the pulp | Seed material processing by means of Fitosporin, Baktofit, Maxim |
| Rhizoctonia | Potatoes are covered with black dense bloom and blotches. Low-growing tops | Regular application of a complex of mineral fertilizers. Regular crop rotation. Extracting sprouted potatoes in solutions with Agate, Pentafag, Integral |
| Black rot | Another name for "black leg". Darkening of the stems at the base, falling tops, twisting of leaves, rotting of tubers | Compliance with crop rotation. Maintaining a neutral soil acidity index. Regular feeding. Inoculation with TMTD |
| Late blight | Spotting, darkening of stems, leaves, rusting of tubers | Spraying seed tubers with fungicides. Compliance with crop rotation. Treatment of the site with the means of Radomil, Epin, Oksikhom, Revus, Ditan |
| Scab | The defeat of the peel of root crops by growths and blotches of brown, silver, black | Treatment of plantings with Kubneschit in proportions 1: 1, Fitosporin. Compliance with crop rotation, in the strength of the crops of green manure |
Treatment with fungicides and seed growth stimulants will significantly enhance the immunity of the root crop and increase resistance to infections, diseases, fungal infections, and pest attacks. Regular tillage and planting will help to effectively fight most harmful insects and fungi.