Pepper's predecessors and neighbors

Planting bell peppers should be carried out in accordance with the crop rotation and not returned to their original place for 3-4 years, so that pathogenic organisms and pests of this culture do not accumulate in the ground. Since peppers belong to the nightshade family, they should not be placed after tomatoes, potatoes, eggplant and tobacco.
The most suitable outdoor pepper precursors are:
- cucumbers;
- cabbage;
- onion and garlic;
- root vegetables (beets, carrots, radishes, etc.);
- beans, beans;
- perennial grasses and green manures.
As the latter, you can plant peas, mustard seed, rye, lupine, clover, buckwheat, marigold. These plants grow a large green mass in a short period of time, which allows it to be cut before flowering for later incorporation into the soil. The agrotechnical method allows you to enrich the soil with nitrogen, sugars, microelements available for subsequent crops, improve its structure, and lime weeds.
If siderates are sown in early spring, then they must be embedded in the ground 15-20 days before planting sweet pepper seedlings in open ground.
Also, various green manure plants can improve the soil, for example:
- rye is effective against nematode;
- flax and calendula will scare off the Colorado potato beetle;
- radish and mustard neutralize pathogenic flora;
- phacelia will prevent the spread of late blight and banish the wireworm;
- lupine fights root rot;
- alfalfa is a natural antiseptic.
In addition, marigolds, calendula and dill planted in the aisles of sweet peppers will deter many ground pests. Despite the fact that pepper is a capricious culture, it coexists well with many plants. These include cabbage, carrots, zucchini and beets.
Growing pepper in the open field is permissible next to onions, garlic, dill, basil, radishes, thyme, corn. The garden bed should be placed on the north side - then it will protect the paprika from the cold wind.

Watering rules and mulching
Bell peppers need to be watered once every 5 days: a young plant will need water in the amount of one liter, and for an adult 2 liters. It is best to choose the morning time for watering, it is recommended to use rain or settled warm tap water.
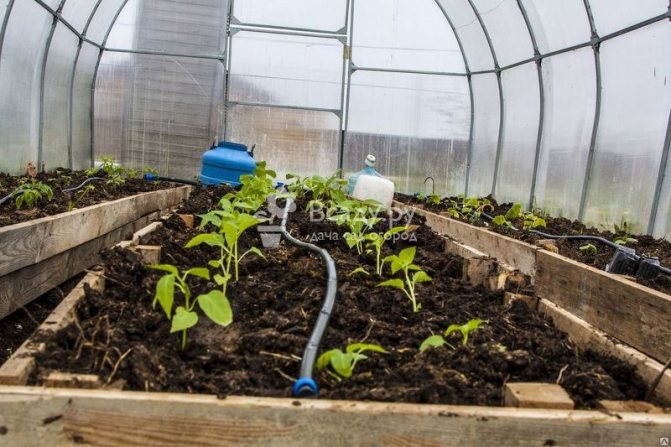
Sweet pepper cultivation
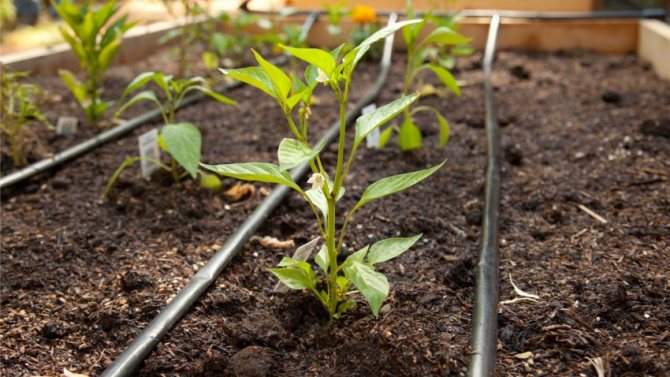
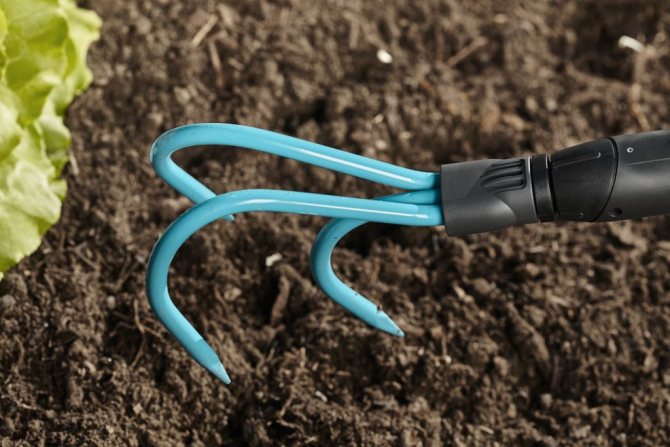
Plants are watered near the roots; many gardeners use a drip irrigation system. It is important not to allow water to enter the deciduous parts. Upon completion of watering, the greenhouse room must be ventilated. It is necessary to loosen the soil every other day, at the same time weeding is carried out. Experienced gardeners use the Swift cultivator with self-sharpening blades for this work.
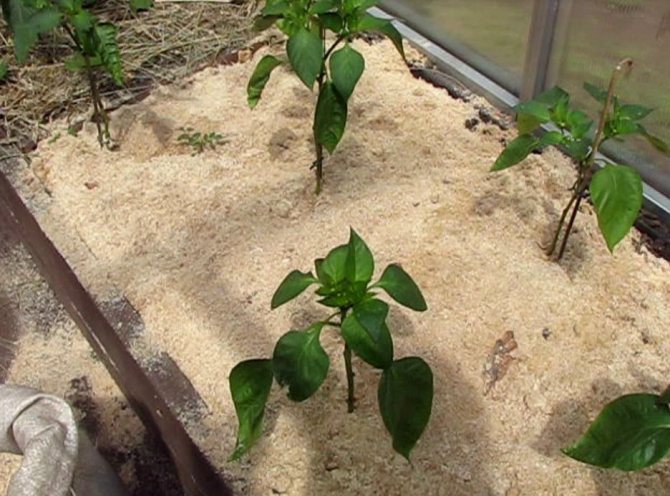
To avoid overheating the soil and less evaporation of moisture, add mulch, which is used as:
- sawdust;
- straw;
- compost;
- humus.
In addition, mulch also has a lot of useful properties:
- the soil layer is always loose;
- oxygen is supplied to the roots in the right amount;
- weeds grow much more slowly.
Note to the gardener. It is necessary to ventilate the greenhouse daily, but avoid the presence of a draft. You can open windows or doors on one side. In extreme heat during the daytime, the film is removed on one side of the greenhouse.
Site selection and soil preparation for growing pepper

Landing site
Since the culture needs light and warmth, but it is afraid of drafts and stagnant moisture, the area under it should be sunny, even and closed from the prevailing winds by buildings or other plants.
From autumn, under a deep digging (35 cm), organic fertilizers (manure, humus or compost) should be applied at 4-5 kg per 1 sq. M. In the spring, you need to re-dig the area or loosen it deeply (15 cm) and apply for each square meter:
- 40 g of potassium;
- 40 g phosphorus;
- 25 g nitrogen.
Also, cover should be provided for peppers from recurrent frosts and in case of prolonged rains.


We are waiting for the harvest
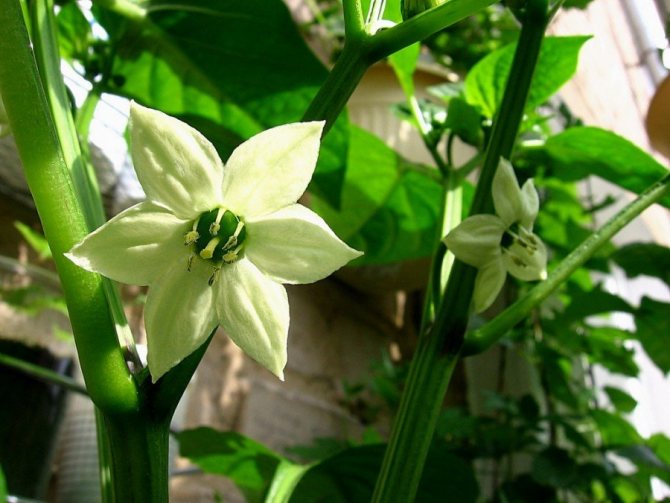
Most domestic peppers are self-pollinated plants. By the way, they can also be pollinated. Therefore, try to keep different varieties of peppers apart from each other.
When the first fruits appear, do not overload the plant - leave up to 4-5 fruits on it.
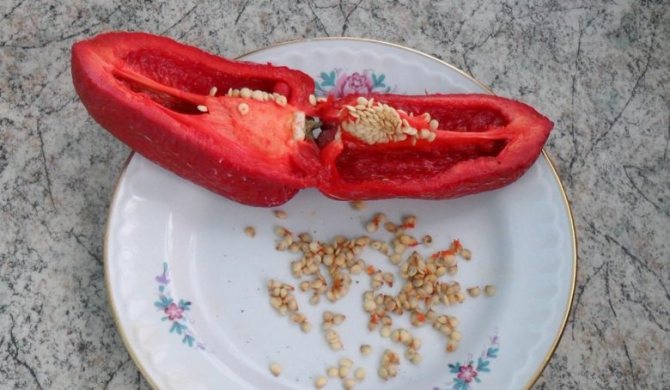
Getting our own seeds
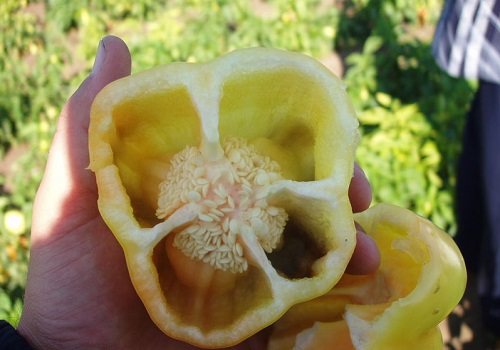
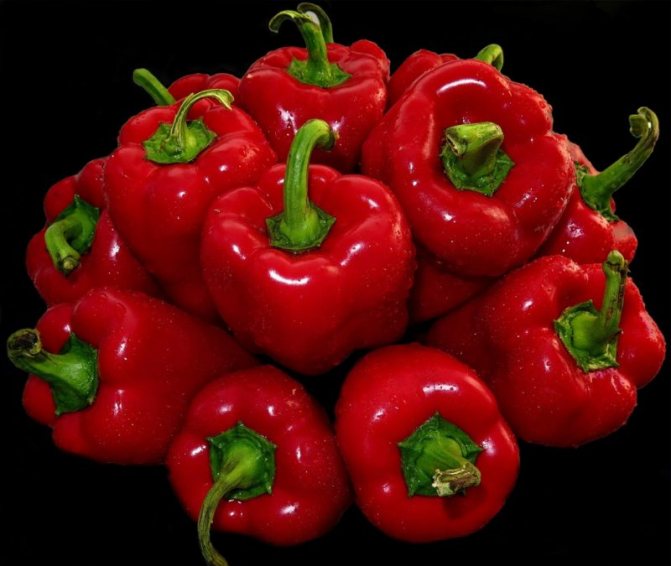
For this we select red, ripe fruits. Cut the pepper neatly in the circle of the stalk and very carefully remove the seed-bearing, holding it by the stalk.
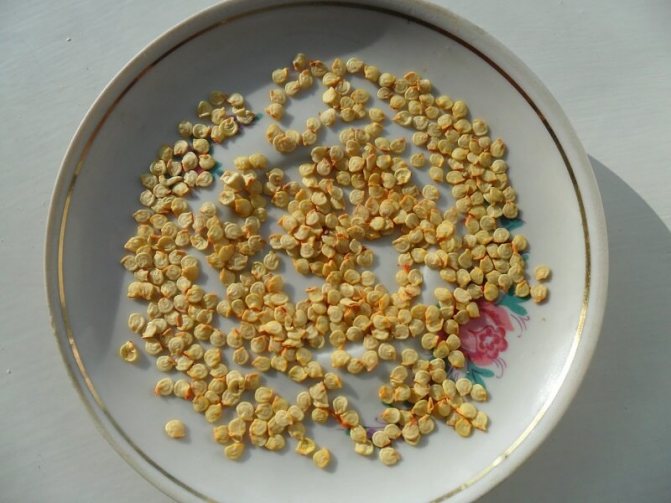
We devote the next 4 days to drying the seed crop at a temperature from + 25 ° C to + 30 ° C. And we separate the seeds. Store them in a paper bag in a warm, dark place.
The maximum shelf life of seeds is 5 years.
We transplant the plant
It is necessary to transplant peppers on the windowsill once a year. He wants new, fresh land for a richer harvest (after all, he has already taken everything useful from the old soil). Change the land completely to fresh.
Transplant the plant carefully, being careful not to injure the root system with an earthy clod.
And after two years of the pepper's life, it already needs to be changed. It is a biennial plant and will readily pass the baton to younger, stronger peppers.
I wish you a rich harvest!
See you soon, dear readers!
Arrangement of beds
The soil for growing pepper should be light, moderately fertile. For dense clay soil, it is necessary to add a bucket of sand and rotted sawdust per 1 sq. M. On loams, half of this volume is sufficient. In the spring, manure is not applied, only humus or compost is possible. To disinfect the soil, it must be spilled with a solution of copper sulfate (1 tablespoon per 10 liters of water).
Arrangement of high ridges
If the site is low-lying, then it makes sense to make the ridge higher and enclose it with a box of boards. On a sunny flat place, it is better not to do this, since the earth will dry out quickly.

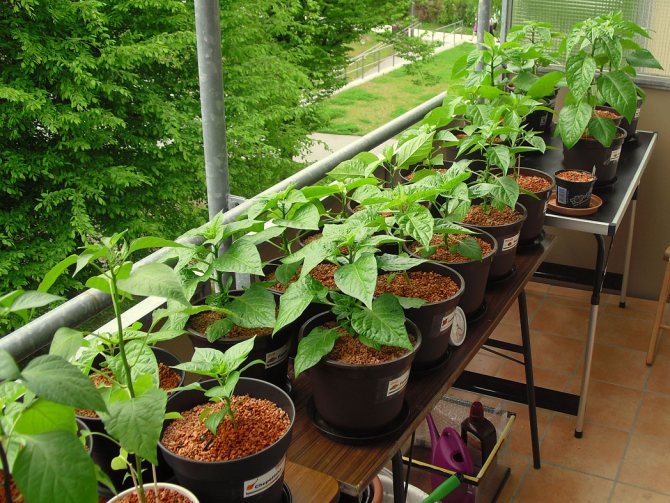
How to prepare a balcony for growing bell peppers.
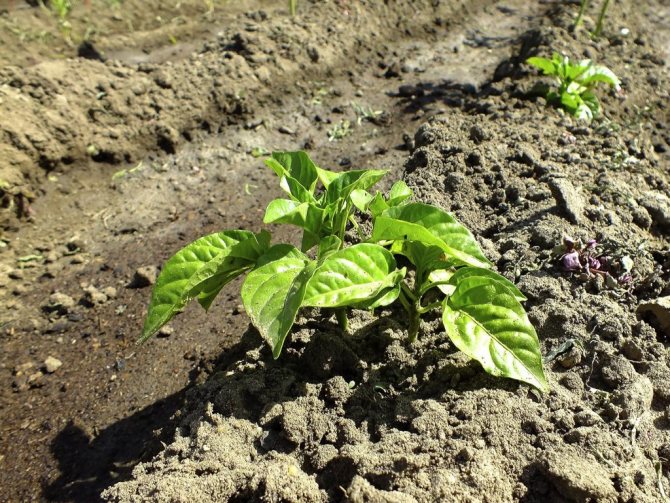
Lack of a vegetable garden is not a reason to give up growing a delicious vegetable. Seedlings will actively grow, both indoors and on the balcony. In order for the planted seeds to germinate and develop fully, it is necessary to carry out a certain preparation of the place where the seedlings will grow.
First of all, shelves or racks are installed on the balcony. By visiting a gardening store, everyone can purchase special greenhouses that will help grow fruiting plants. The main advantage of such structures is the saving of space on the balcony.
Important: the balcony on which the seedlings are grown must be well ventilated.
The best varieties and hybrids of sweet peppers for outdoor use
The successful cultivation of sweet peppers and their harvest depends largely on the correct selection of varieties and hybrids. What are the best peppers to plant outdoors?
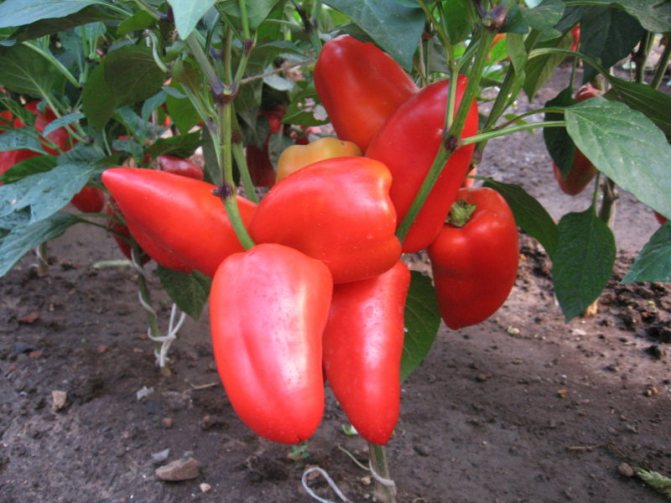
- Peak NK... A mid-early variety with a height of 70-80 cm with red fruits weighing 130-160 g (the thickness of the juicy wall is 5-6 mm). Up to 14-15 fruits are tied on the plant. Ripening is simultaneous. Plants are resistant to verticillium, mosaic, alternaria. The growing season is 120 days. The placement intervals are 40 × 50 cm or 45 × 45 cm. The variety is unpretentious, recommended for growing in many regions, including for the middle lane. For fresh consumption and processing.
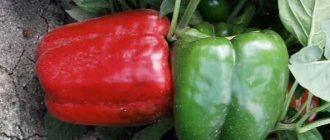
- California miracle... Medium early (110 days) pepper with cubic fruits, in technical ripeness of green color, later - red. Weight 90-130 g, thick-walled (7-8 mm), aroma is pronounced. Resistant to mosaic, characterized by long-term fruiting. The height of the bush is 55-65 cm. The planting pattern is 30 × 60 cm. For salad purposes and for processing. The fruits are stored for a long time.
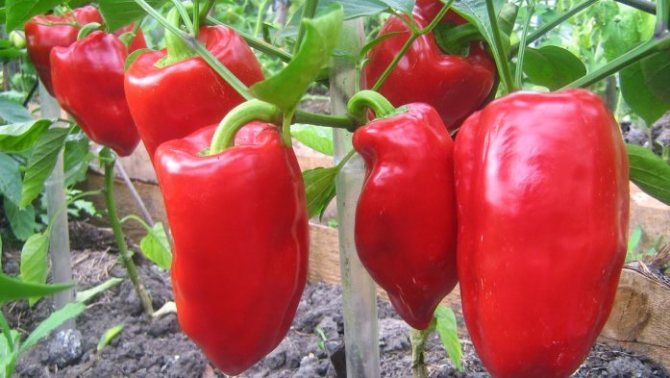
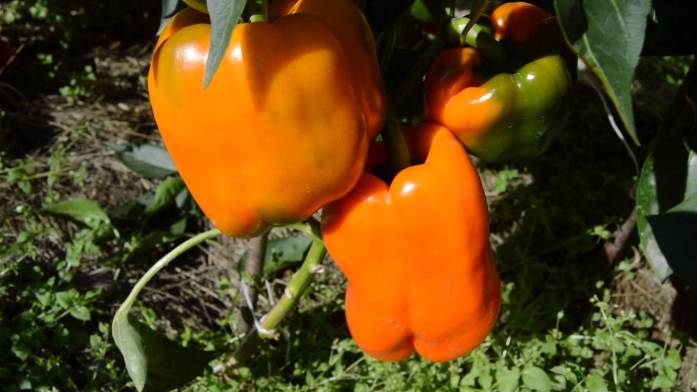
- Freckle F1... A large-fruited, early-ripening hybrid with orange fruits with stable yields in all weather conditions. The height of the bush is 1 m, the fruits are prismatic, tetrahedral with a concave top. Wall thickness - 7 mm, weight 160 g, yield 12-13 kg per 1 sq. M. Planting density 3.5 pcs. for 1 sq.m. Planting 30 × 50 cm with 2-3 stems culture.
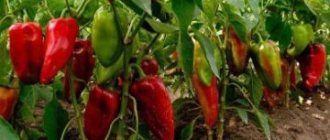
- Bogatyr... Powerful sprawling bush, 75 cm high, yield 8 kg / sq.m. Medium ripening (130 days). Fruits are red, up to 17 cm long, weighing 200-300 g with thick walls, universal use, without signs of bitterness with a long shelf life. Layout 50 × 35 cm.
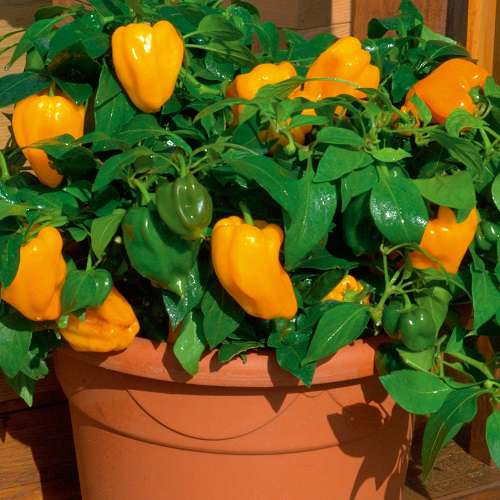
- Cockatoo F1... An early ripe (90 days) productive hybrid 65 cm high, large fruits in the form of an elongated yellow prism, weighing 200-220 g, up to 17 cm long. Plants are resistant to adverse climatic conditions and stress. Planting density is 4 pcs. for 1 sq. m. Productivity 8 kg / sq. m. Forming of this pepper is not required.
- Ultraviolet... Mid-season hybrid (period to harvest 125 days). At biological maturity, cuboid fleshy fruits of dark purple color (10 × 10 cm), weight 200 g. Resistant to mosaic, stocking density 3 pcs. for 1 sq.m. The yield is 8-9 kg / sq.m.
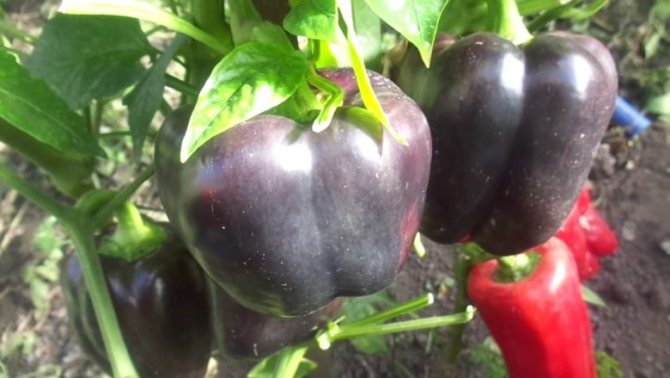
Purple pepper in biological ripeness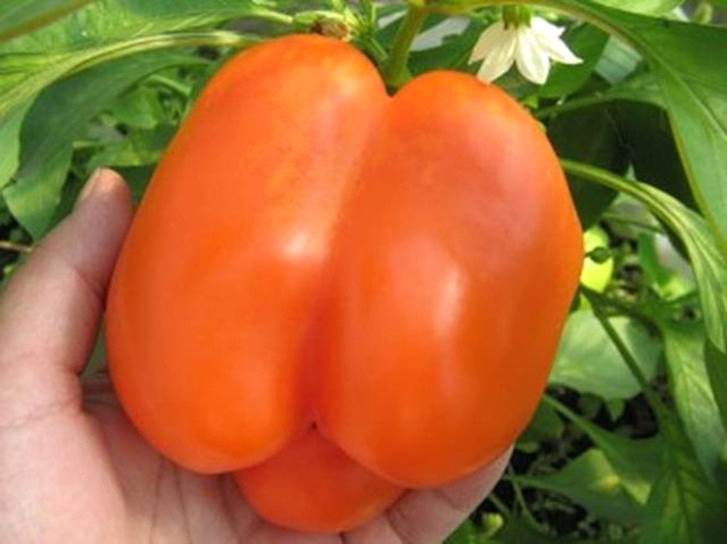
Variety "Freckle"
All of the above varieties and hybrids are suitable for planting in open ground and under a film cover. It should be borne in mind that varietal peppers are zoned to a particular region and you can take seeds from them for future plantings.
Hybrids are the result of crossing several varieties or genetic modification and are not adapted to the weather conditions of a particular region due to their versatility. Therefore, they require more careful agricultural technology of sweet pepper in the open field. The seeds of the hybrids have no maternal qualities.
Seed preparation technology
The technology for growing bell peppers begins with the preparation of seeds:
1. Sorting... First, by visual inspection, very flat and damaged seeds are removed. Then a salt solution is prepared (1 tsp per 200 ml of water) and the material is lowered into it, mixed and after 3-4 minutes it is poured together with the floating seeds. The heavier fragments remaining at the bottom are washed and dried on a cloth.
2. Disinfection... To do this, use ready-made preparations (Vitaros, Fitosporin-M, Maxim, etc.) or a solution of raspberry-colored potassium permanganate. Seeds, wrapped in gauze or bandage, are dipped in a solution and kept for half an hour. Then they are washed and placed for germination.
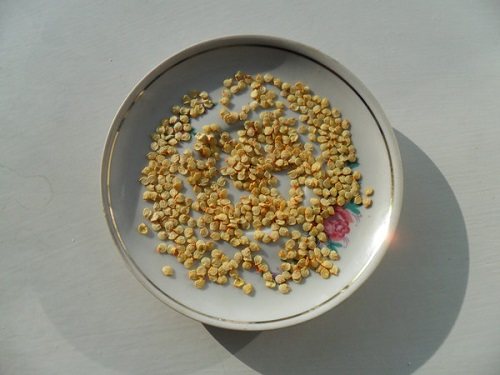
Bell pepper seeds
3. Germination... To do this, use cellulose sponges or gauze folded in several rows. Seeds are laid out on the selected material, covered with the same on top, put "sandwich" on a saucer and a little water is poured. In the future, moisten as it dries from the spray until roots appear (8-10 days). In this case, it is important not to overdry the seeds, but also not to flood them, since they need both oxygen for breathing and moisture for swelling. To speed up the process, you can pre-treat the seeds with the Epin growth stimulator.
4. Hardening... At the stage of germination, the swollen seed material should be alternately placed in the refrigerator several times (12 hours each) and removed from it.
If all the secrets of germination are observed, then the seeds will quickly pick up and will be ready for planting on seedlings.
Agricultural technology of sowing seeds for seedlings
The optimum sowing time for most varieties is 50 days before disembarkation into open ground.If you use a store substrate, then you should take either a universal one, or for tomatoes, peppers, eggplants (nightshades).
You can also prepare the soil yourself. To do this, take:
- 3 parts of humus;
- 5 parts of peat;
- 2 parts of garden or turf land.
Another recipe contains the following ingredients:
- 2 parts of peat;
- 1 part sand;
- 1 part of garden or turf land.
In both cases, it is advisable to ignite or steam the soil and add 1 tbsp. ash on the substrate bucket.
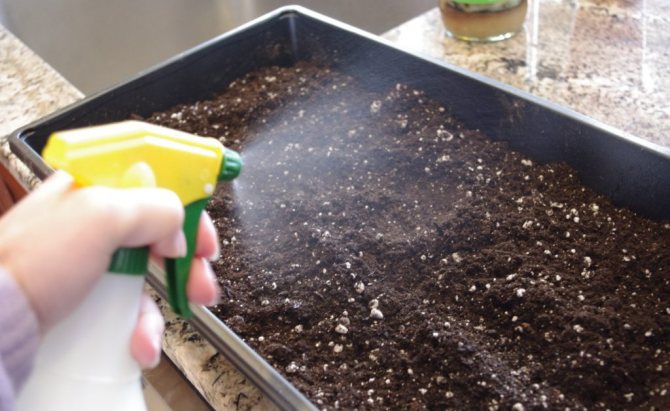
Preparing the soil for sowing seeds
For sowing, use special containers or plastic half-liter glasses, boxes of yogurt, kefir, juice, etc. Store products already have holes for excess moisture to escape and air to get to the roots. You will have to make them in improvised pots. It is better to place them on the lateral surface at a height of 1.5-2 cm - so the water will not immediately flow into the pan, and the roots will fill the entire space, striving in depth.
When the seeds are ready for sowing, you should:
- rinse all containers with a solution of potassium permanganate;
- fill with soil by ¾;
- moisten with a light solution of potassium permanganate;
- spread the seeds;
- sprinkle with soil 6-8 mm;
- tamp slightly;
- water;
- cover with foil;
- remove to a warm place before germination.
If subsequent picking is supposed, then sowing can be done in large, shallow containers, laying out the seeds according to the 1 × 2-3 cm scheme.
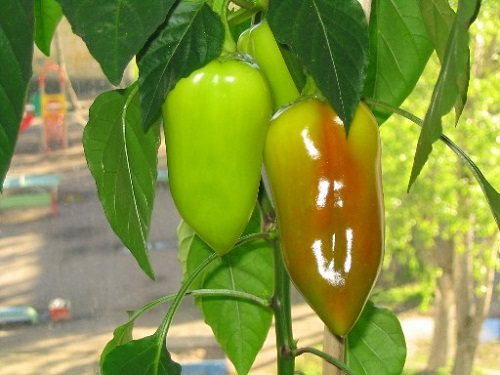
The origin of the pepper
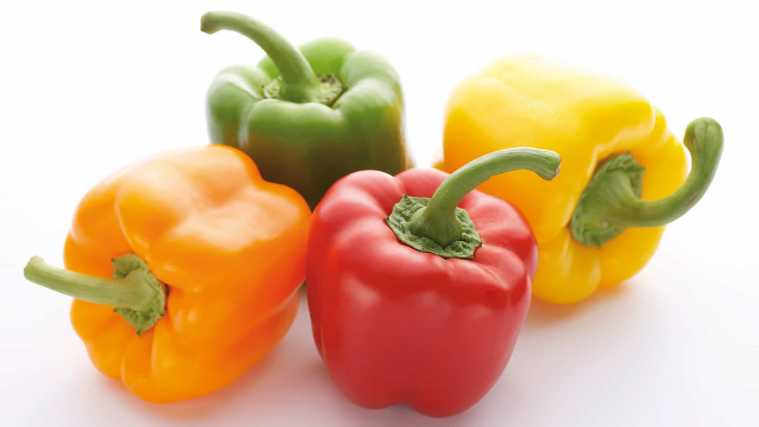
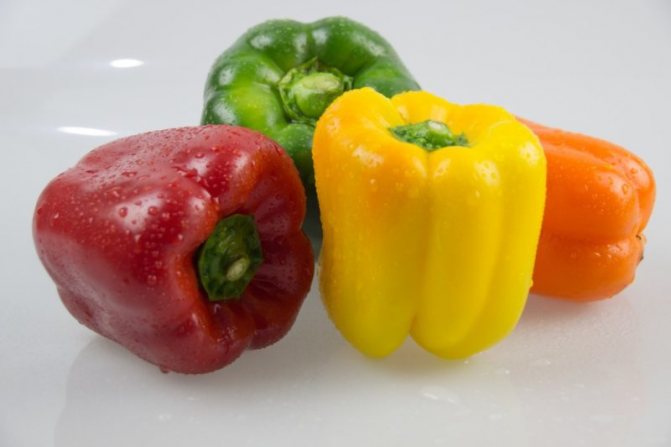
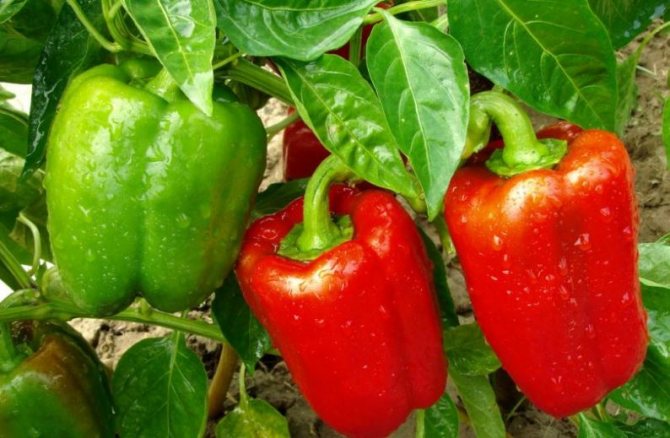
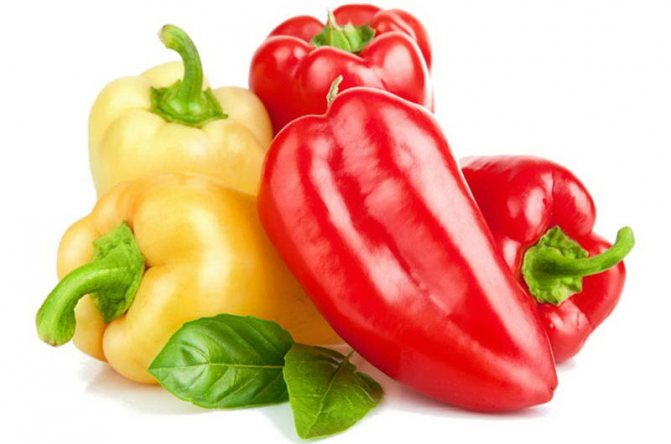
The number of varieties of peppers is enormous. There are more than two thousand names in nature. Perhaps the sweetest and most vitamin among them is Bulgarian.
Surprisingly, the story of the handsome red man began in Mexico. To get to European lands, he had to overcome Spain, the Turkish coast and even the Iranian deserts. So the Bulgarian variety settled in the middle lane.
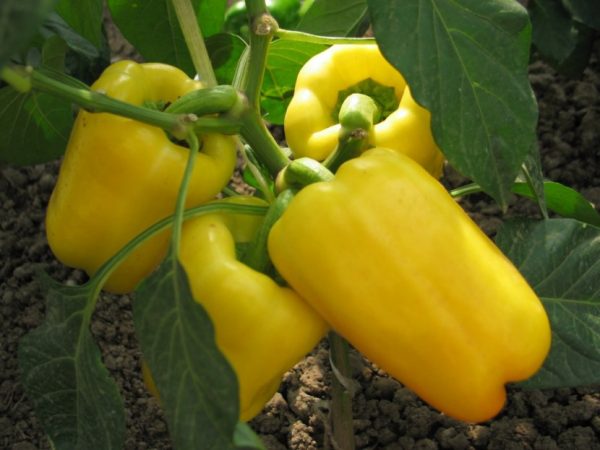
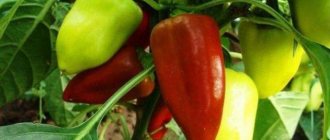
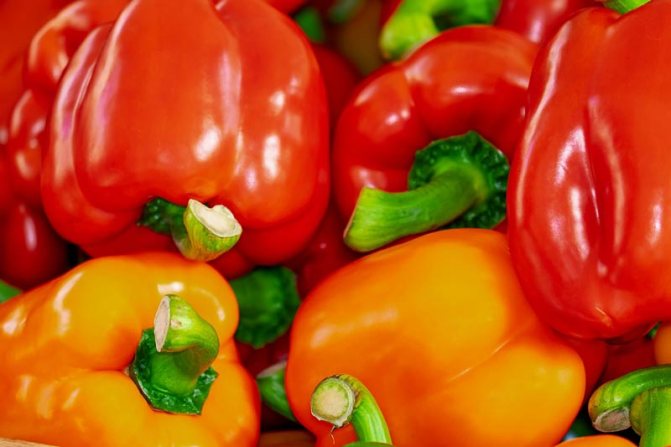
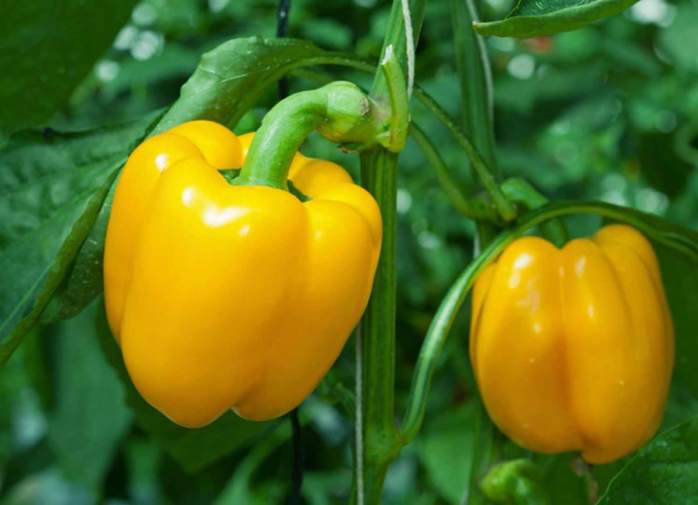
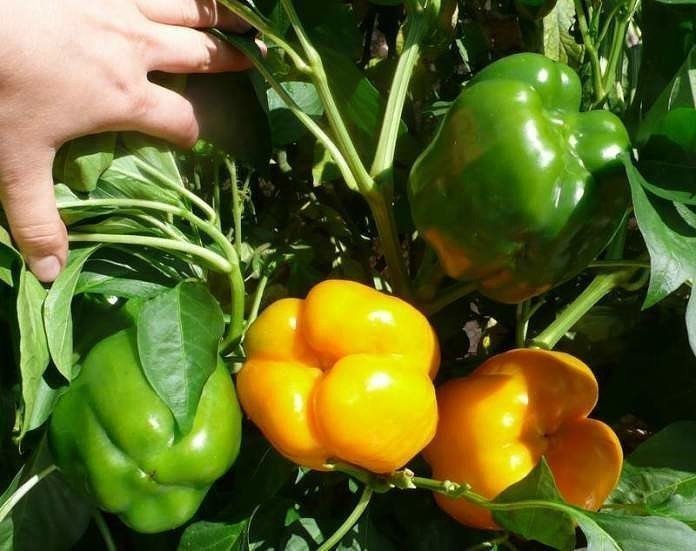
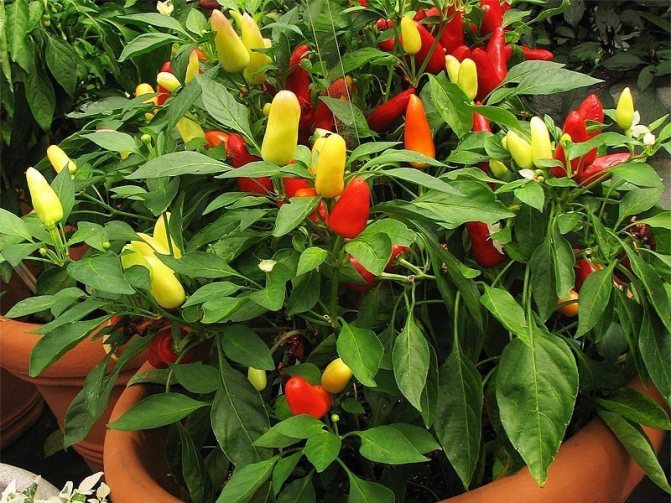
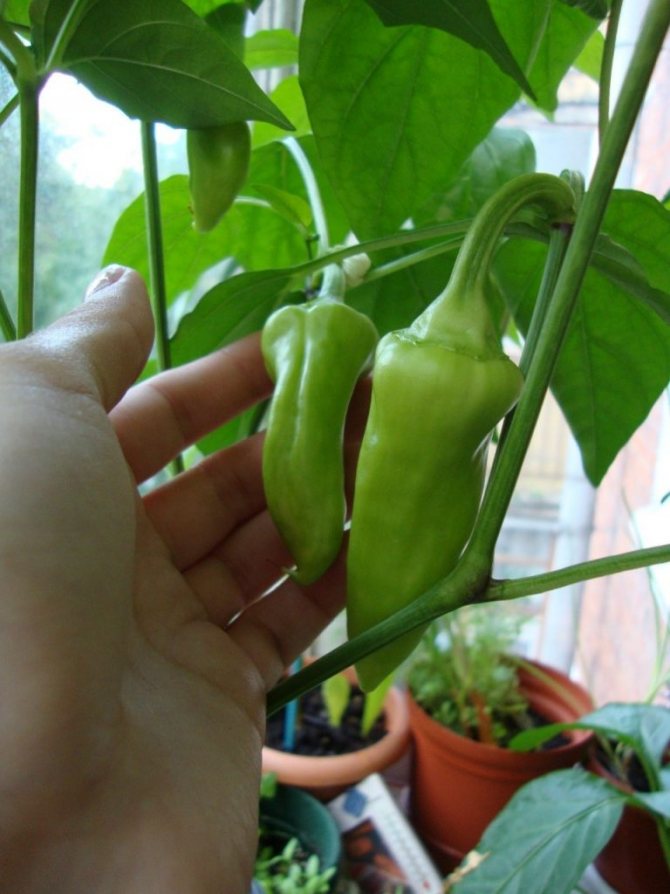
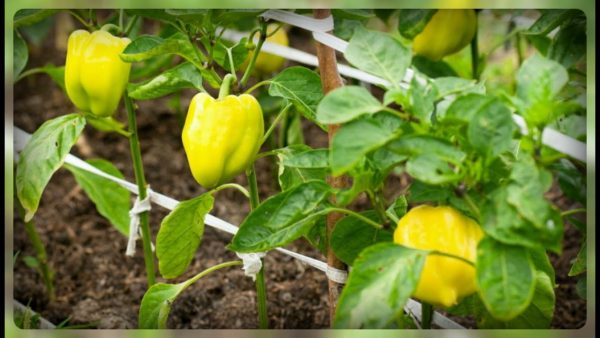
Yellow peppers ripen in groups
Despite its capricious temperament, the sweet vegetable has firmly taken root on Russian soil. Moreover, it requires increased attention, which gardeners love to pay to crops. Getting a good harvest is not easy, but the effort is undeniably worth it.
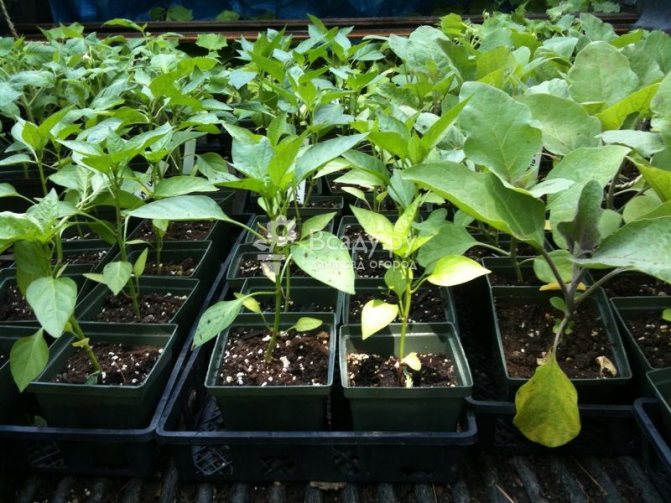
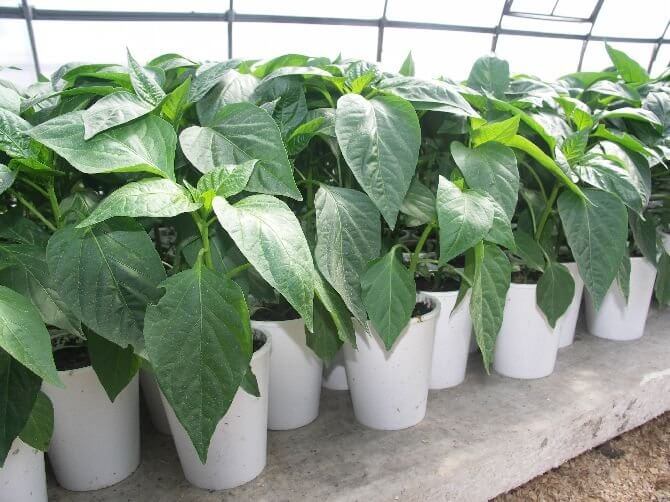
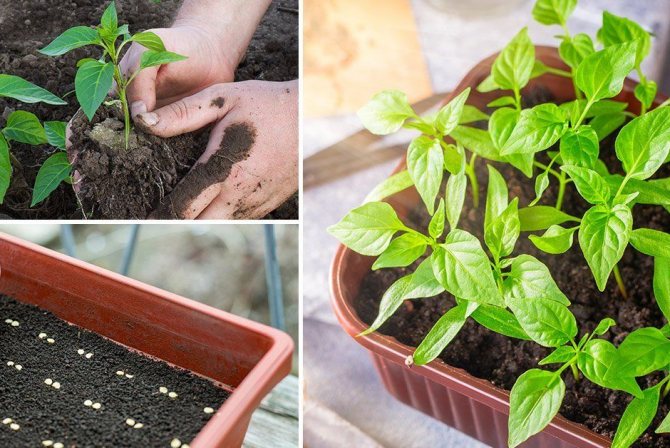
Growing seedlings
After the emergence of seedlings, the shelter should be removed, the seedlings should be transferred to a sunny windowsill, the temperature should be maintained at 22-23 degrees, lowering it at night to 17-18, so that the seedlings do not stretch out. If the daylight hours are less than 12 hours, then it must be supplemented in the morning and evening hours with LED or phytolamps.
Plants should be periodically turned so that the stems do not bend and watered in time, avoiding waterlogging and drying out of the soil (2-3 times a week), depending on the age of the seedlings.
Care features
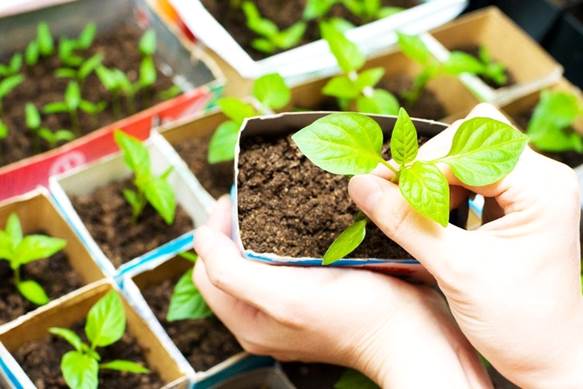
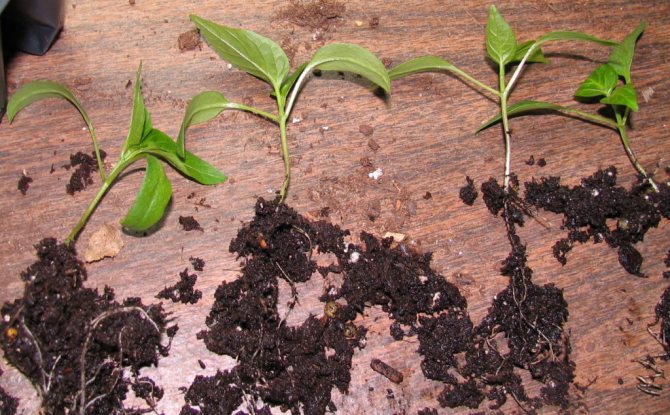
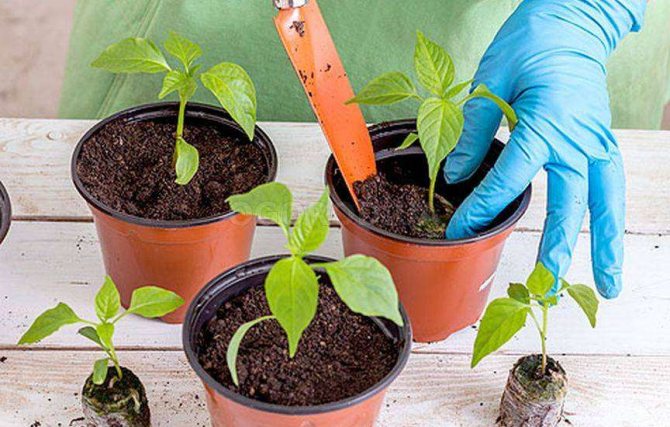
Seedling picking
When 2-4 true leaves appear, the seedlings dive - they are seated in separate pots. The land is used the same as for sowing. At the same time, they do not need to be deepened, since pepper does not form additional roots, and the root collar can rot.
The picking process consists of the following steps:
- 3-4 hours before transplanting, the seedlings are watered;
- poured into pots and slightly compact the earth;
- a special peg or pencil makes a recess in the form of a check mark or the letter "v";
- take out the seedling with a fork;
- place it in the recess made;
- press the soil with a peg or pencil on one side;
- watered.
For the first 1-2 days, the plants are not placed on a strongly lit window. The temperature regime remains the same. If there was no opportunity to unpack the pepper immediately into the pots of the proper volume, then when it appeared, transshipment could be carried out. This is done when the seedlings reach a height of 17-20 cm. For this, the plants are transplanted together with the earth into another container.
Top dressing
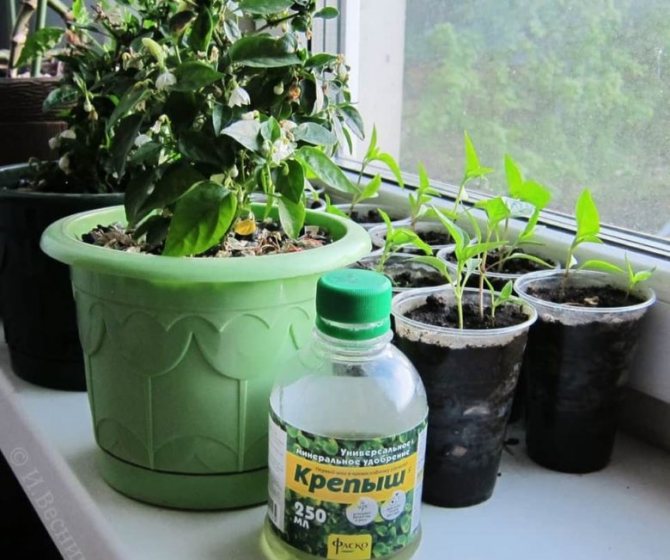
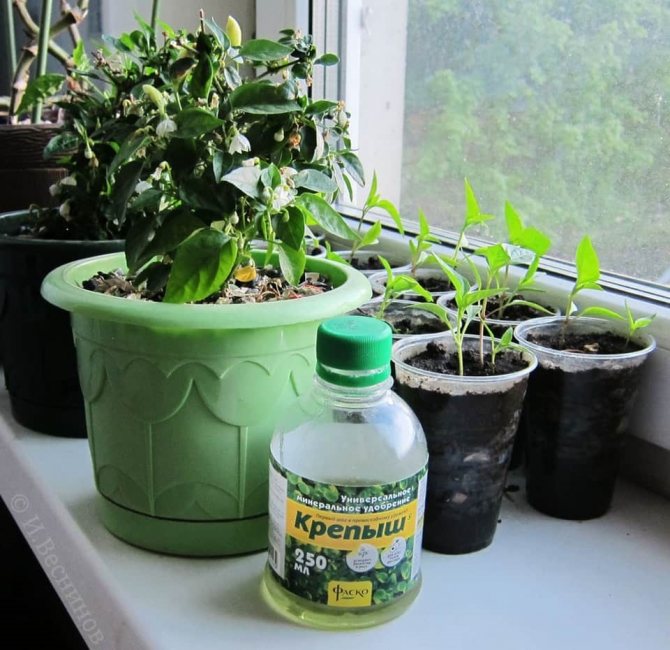
After 2 weeks, the seedlings should be fed with Strong, Lux, Agricola, Solvent, or prepare the composition yourself.
For 1 liter of water take:
- ½ tsp urea + 2.5 ml of potassium humate.
- 1 g of ammonium nitrate + 2 g of superphosphate + 2 g of potassium.
The second feeding is carried out 2 weeks after the first, when the peppers already have 5 true leaves: 2 g of ammonium nitrate + 3 g of superphosphate +3 g of potassium or Kristallon, Ideal, Kemira Lux and so on.
How to feed paprika
If the care of the pepper is insufficient, then the leaves report a shortage of one or another nutrient. If not enough:
- iron - the tops dry out, the leaves brighten from above;
- copper - leaves wither;
- phosphorus - the appearance of purple veins;
- bora - the tops turn black;
- nitrogen - the leaves become thinner and turn yellow;
- calcium - the top rots;
- potassium - a yellow or orange border appears on light leaves;
- humate - weak growth.
For the prevention of blackleg, young plants can be watered with a weak solution of potassium permanganate (1-2 times a month) and an infusion of wood ash.
Hardening before planting
Before planting the pepper in the ground, it should be hardened. To do this, in 10-14 days, the seedlings are taken out daily or a window is opened. At first, for 30-60 minutes, gradually increasing the time spent in direct sunlight to the maximum. At this time, the seedlings should be protected from drafts.
What kind of feeding does pepper need
For vegetable crops, mineral fertilizers are important, which are applied up to twice a month. It can be potassium chloride, superphosphate and ammonium nitrate. All these components are diluted to 10 liters of water. Top dressing is often combined with watering. Fertilizers must be applied to the soil 14 days after the seedlings are planted.

Growing sweet peppers
It is recommended to change the mineral dressing to organic, which has a lot of benefits. Over-matured organic matter is diluted with water in a proportion of 3 parts of organic matter per 1 liter and allowed to brew for three days. Then water is added one to ten and applied near the root system in the amount of one liter for each bush.
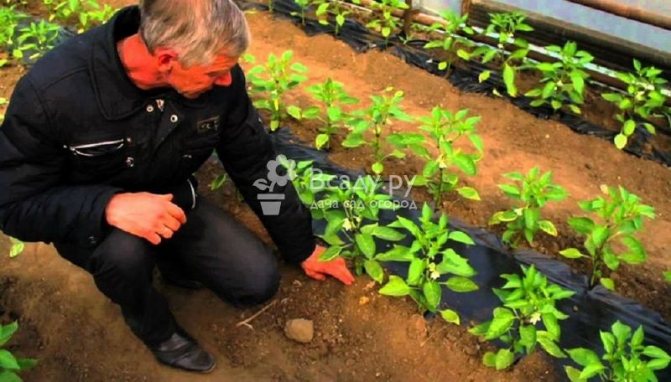
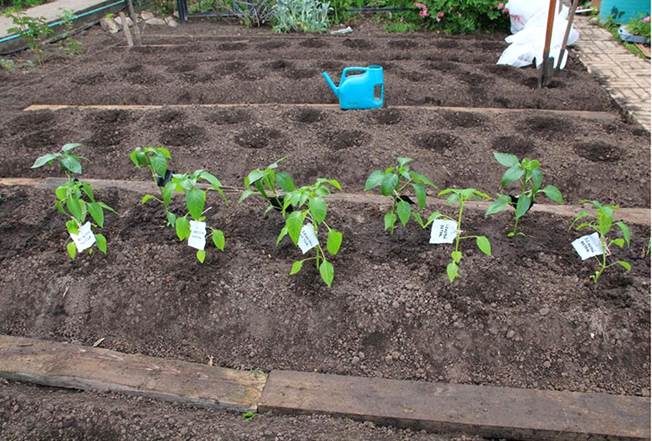
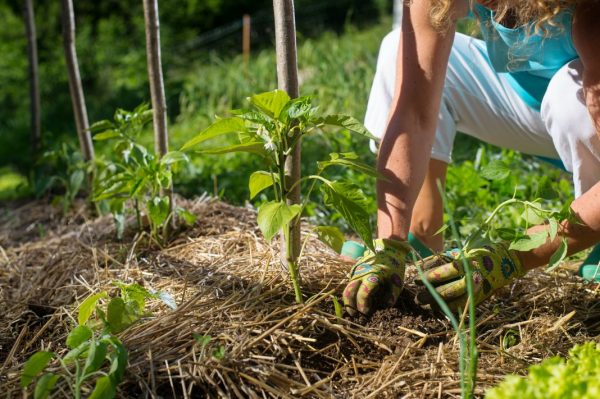
Dates for planting peppers in open ground
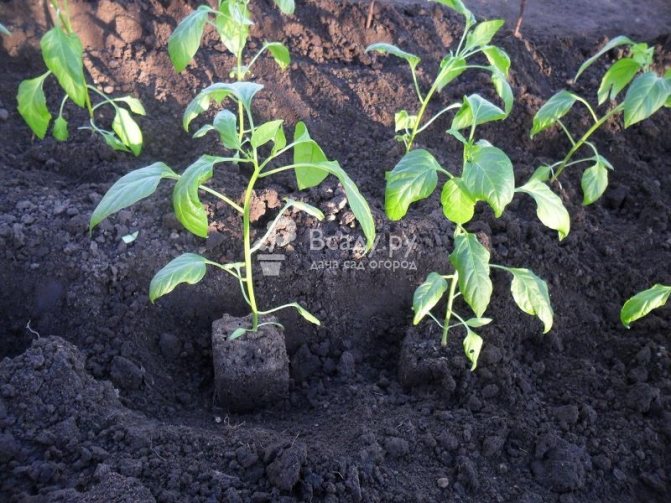
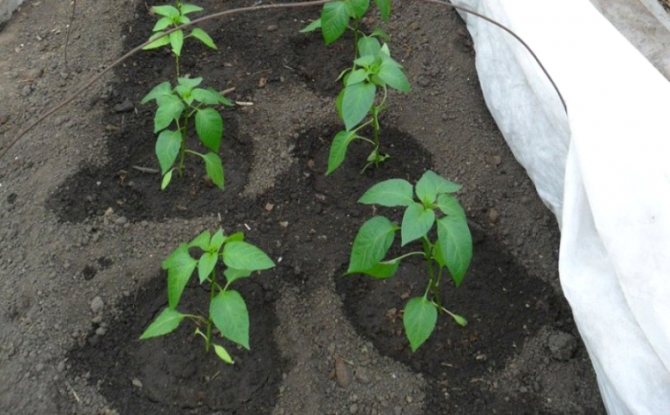
Planting peppers in open ground
Pepper is a plant with a long growing season. Therefore, in the southern regions it is recommended to sow it in January in order to plant it in open ground in March, in the rest it is recommended to sow it in March to plant it after the threat of frost.
In any case, planting is carried out in a warm ground (+15 degrees), otherwise the plants will freeze, the color may fall and, in the end, the yield of the crop will not be complete. In case of return cold weather, a non-woven covering material or film should be prepared and arcs installed.
Optimal planting time
Gardeners tell when to plant bell peppers so that they produce high-quality fruits. Works are carried out:
- late February or early March. It is required to take into account climatic conditions - planting even in greenhouses in cold weather slows down the growth of the crop. Window pepper is placed on the north side;
- April. On open ground, work is carried out only after the ground has completely warmed up. The seedlings are watered abundantly. The soil must be fertilized;
- in winter. If the vegetable is grown on a windowsill, 12-hour daylight hours are maintained using phytolamps. The requirements for peppers for seedlings are similar;
- late July or early September. To get a late harvest, the crop is watered.
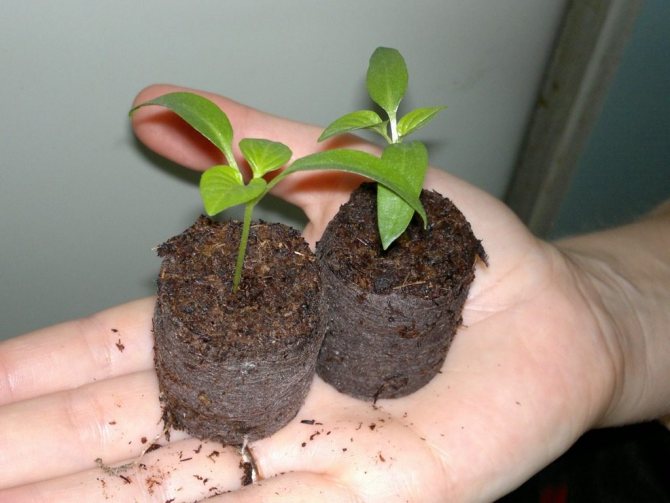
The correct planting of delicious bell pepper seeds for seedlings is carried out in peat containers. The soil is watered and then covered with foil or glass. The normal temperature for seed germination is from +25 degrees. If mature plants are already on the site, it is allowed to drop containers under them.
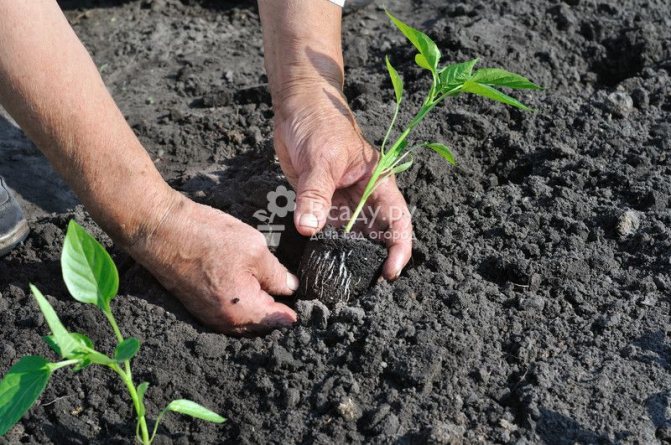
Planting in the ground, seedling planting scheme
The yield depends on the correct planting of pepper in the open field, since dense placement will lead to fungal diseases and rotting of the stems, and too loose - to excessive lighting and burns of the fruit. Landing can be done in 2 ways:
- Plant 1-2 bushes in a nest at a distance of 35-40 cm with a row spacing of 70 cm.
- The distance between the bushes is 20-25 cm, the row spacing alternates between 30 and 70 cm.
Two-line fit
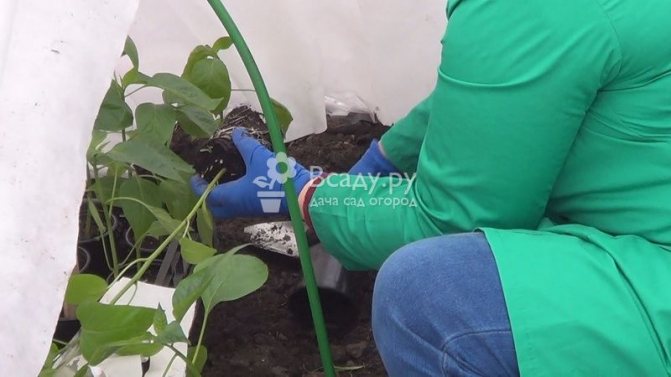
In the second case, 2 close lines are obtained, as a result, the number of plants planted in the same area as in the first case increases. It should be borne in mind that tall varieties and hybrids that require a garter need more feeding area. The day before planting, the seedlings are watered, planting holes are prepared in such a way that the plants fit into them with a lump of earth, but the root collar remains on the surface. Then:
- pour 1 tbsp into the holes. l. potash fertilizers (without chlorine) or 1 tbsp. ash and 2 handfuls of humus each, if it was not introduced earlier;
- spill them with a pink solution of potassium permanganate;
- remove the seedlings from the pot, trying not to violate the integrity of the clod of earth and roots;
- lower the bush into the hole;
- sprinkle with earth;
- tamp it with your hands by building a watering groove;
- water;
- mulch with rotted sawdust, peat or humus.
Landing rules provide for the evening or cloudy day.
Seed preparation
To rid future plants of infections, the seeds should be kept for 20 minutes in a 2% solution of potassium permanganate, then rinsed with cool water. And soak in nutrient solutions of epin or zircon (growth biostimulants):
- Epin. Take 2 drops for 100 ml of water.
- Zircon. Add 1 drop to 300 ml of water.
The seeds should be kept in a healing solution for about a day at room temperature. Then place them in damp gauze and place them in a dark, warm place.
Keep the pepper seeds there for 3 days at a temperature of + 20 ° C to + 25 ° C. Periodically moisten the cloth with warm water (it must not be allowed to dry out).
As soon as the seeds hatch, you can transfer pepper on the windowsill.
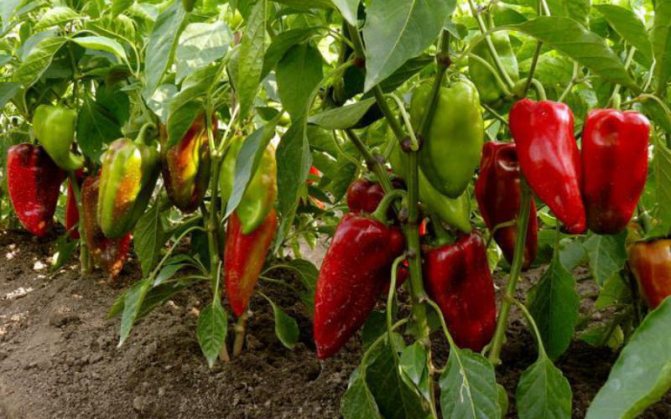
Outdoor Pepper Care
In the first days, young peppers after planting in the ground should be shaded with acrylic or cloth. Until the threat of frost has passed, it should be covered with the same acrylic or film on arcs at night.
Taking care of pepper correctly means watering, feeding, weeding, loosening, mulching.
Shaping, tying and sheltering if necessary. You should also leave a few bushes in case of a lunge, since not all peppers can take root.
Watering and feeding
The first 2 weeks after planting, while the peppers take root, fertilization is not required, just watering is enough. How to properly water peppers outdoors? To determine the watering time, you need to take a handful of soil from a depth of 10-12 cm and hold it in your fist if:
- the lump crumbles, then the earth is dry and immediate watering is required;
- water seeps through the fingers - the soil is waterlogged;
- with a free fall to the ground, the lump crumbled, watering will be required in 1-2 days, turned into a cake - in 4-5 days.
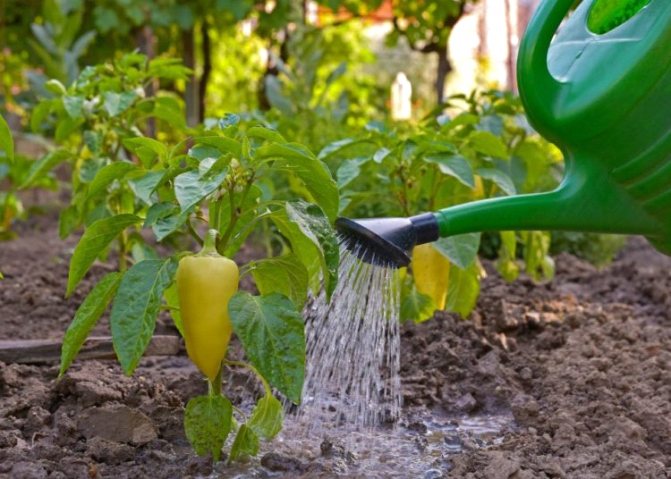
Outdoor watering
When the filling and ripening of fruits begins (as well as on sandy and sandy loam soils), watering should be carried out more often. But we should not forget that waterlogging of the soil will lead to the fall of flowers and ovaries, the spread of root rot.
Peppers should be watered correctly only along the aisles so that moisture does not get on the plants, and the root system becomes larger, striving for water.
Top dressing is done several times during the growing season:
- 1 month after planting with nitrogen, potassium, phosphorus.
- A month later - nitrogen, potassium.
- During the period of fruit filling - potassium and phosphorus.
In addition, once a month, you can water with an infusion of ash and a solution of microelements for peppers.
Loosening
Loosening or adding mulch is carried out after each watering to prevent the formation of a soil crust. Moreover, it is not carried out after the first 2 waterings, until the plants take root (10 days). Loosening is done shallowly, since the surface roots can be disturbed, it is better to loosen only the aisles.
Bush formation and pinching
The agrotechnology of growing peppers in the open field involves pinching and forming a bush. Pinching (or scientifically - pinching) of the growth point activates the growth of stepchildren and, as a result, increases the number of ovaries. At the same time, the bush becomes spherical.
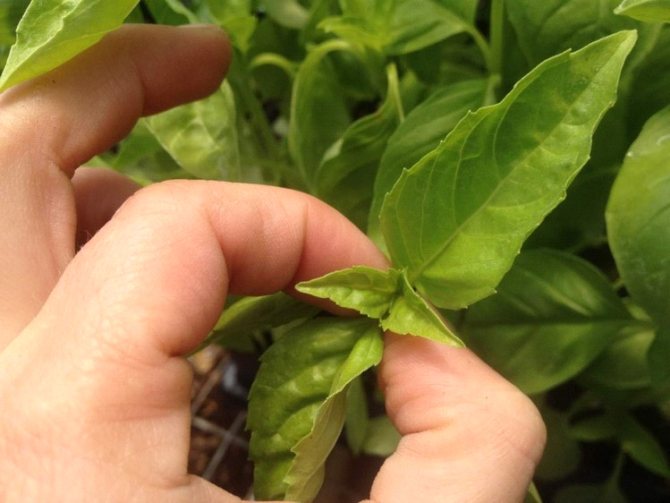
Pinching peppers
Removing extra stepchildren is desirable for all varieties, but for tall bushes requiring tying, it is simply necessary. Low-growing plants can not be formed if the distance between them is observed. With large areas of vegetable plantings, pinching and shaping are not relevant. The formation of peppers in the open field is carried out as follows:
- Several shoots are formed at a height of 27-30 cm. In the place of branching there is a root bud, which should be removed, and the shoots should be pinched at a distance of 4 cm from it.
- Subsequently, you need to leave the 3 strongest stems, pinch the rest.
- Over time, gradually remove the lower leaves and barren branches.
- After the formation of a sufficient number of fruits, pinch all points of growth to allow the peppers to fill and ripen.
With the active development and growth of new stems, pinching is carried out 2 times a month, in a quiet stage - 1 time per month. Stepsons should be removed before they have time to grow strongly. After removing developed shoots without ovaries, it is necessary to allow the plant to recover. In this case, it is better not to water for several days.
Medium and tall varieties need to be tied up so that the stems do not break under the weight of the fruit or unfavorable weather conditions.
To do this, even at the stage of planting peppers:
- set stakes with a length of 150-160 cm with a distance of 3 m;
- pull a wire between them;
- tie the stalks of peppers with a figure of eight, wrap them around and tie them to a wire.
All shoots should be tied so that the stem does not break.
Diseases and pests, measures to combat them
When planting pepper, attention should be paid to its possible diseases:
- Anthracnose. The disease multiplies by spores, causing the appearance of necrosis of any parts of the plant in the form of yellowish spots. Infection occurs most often through seeds, implements, if crop rotation is not observed. As a preventive measure, fungicides containing copper are used.
- Spotted wilting. Young leaves are affected, they become bronze in color with dark spots. Later, the spots spread to the stems and petioles. Sucking insects spread the disease. Precautions include removing weeds and treating with fungicides.
- Fusarium. The fungus clogs the vessels in the stems, the leaves wither, curl, then turn yellow, the ovaries fall off. High humidity contributes to the appearance of all fungal diseases and root rot.
- Top rot. With an excess of nitrogen, a deficiency of calcium and uneven watering, the tops of young bushes cover watery spots. Diseased seedlings are removed, the rest are fed with calcium.
- Late blight. Brown spots on all parts of the plants appear when crop rotation is not observed, unwanted neighboring plantings. If found, all nightshade plantings should be treated with Gamair, Quadris, Ridomil-gold, Bravo. For prophylaxis, spraying with Bordeaux liquid is carried out.
- Blackleg. The disease often affects seedlings when they thicken, waterlogged and low temperatures. Diseased plants are removed, the earth is spilled with potassium permanganate.
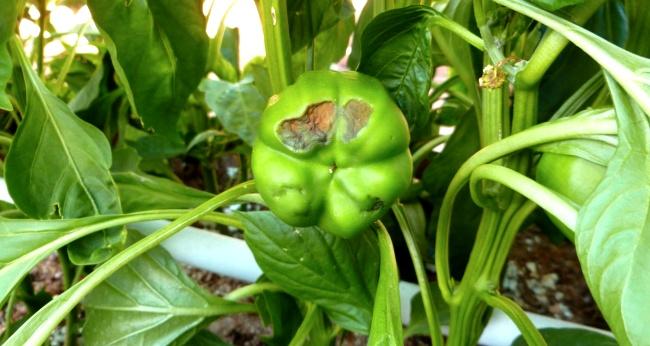
Top rot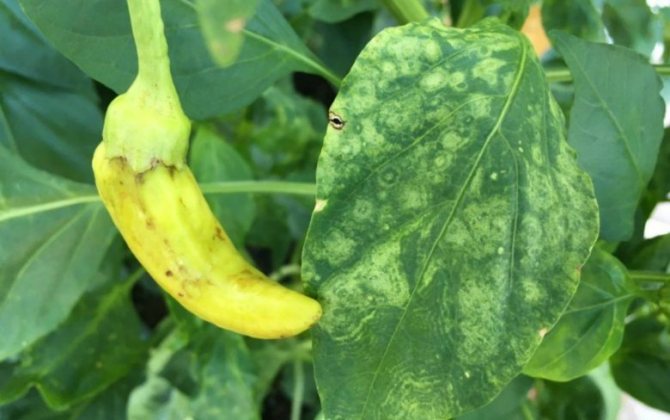
Late blight
Among pests, the following are more common:
- Spider mite. In open ground, the pest is less likely to affect plants than in greenhouses. A small insect sucks out the sap of plants and braids the lower part of the leaves with cobwebs. Medicines: Fitoverm, Karbofos, Aktelik.
- Aphid. It can be located on all parts of the bushes, feeds on juice. Control measures: extermination of ants, treatment of plants with Karbofos, Decis, Keltan.
- Naked slugs. They eat leaves and fruits. In the fight against them, you can dust the plants and soil with ash, dry mustard, ground pepper, use a special tool "Strela".
To scare off pests, planting can be combined with garlic, marigolds, cilantro and other pungent-smelling crops.
Everyday worries
Adult plant care can be combined in three steps: moisture application, pepper content and fertilization.
Selection and application of fertilizers
Fertilization starts when the sprout has a couple of true leaves. For the first feeding, half a gram of ammonium nitrate is diluted in a liter can of water. Potash fertilizers (about 1 g) are added to the mixture, as well as 3 grams of superphosphate. The next fertilization is carried out in two weeks. The amount of fertilizer is doubled.
Top dressing is carried out for both young shoots and mature plants. Young growth is watered with strong nettle infusion. It can be prepared by taking one part greens and ten parts water. The infusion is kept for two days and heated to room temperature before use.
The last feeding of seedlings should take place no later than two days before "relocation" to the street.
Tied bushes
Over the entire season, chicken manure is used several times. For top dressing, a ratio of 1:10 is suitable.
Top dressing is vital for the Bulgarian variety if the owner expects a good harvest. Potassium deficiency can be identified by the appearance of the plant. If a dry border appears on the sheets, it is necessary to fertilize the soil.
However, you should not overdo it. An abundance of potassium chloride can kill the plant.
Table. How to determine the lack of fertilizers.
| Substance | Symptoms |
| Low nitrogen | The leaves take on a dull grayish color. Their surface is matte. The new sheets are smaller than the previous ones. |
| Little phosphorus | You can determine such a shortage by the purple tint of the underside of the sheet. The leaves themselves are located along the stem, as if leaning against it. They are directed towards the inflorescence. |
| Lack of magnesium in the substrate | The surface of the sheet takes on a marble pattern. |
| Excess nitrogen | An excessive amount of it leads to the discharge of the ovaries. The plant also loses leaves in a short period of time. |
Superphosphate prices
superphosphate
Working with the stem
If the weather is hot outside, the stalk of the pepper is stepchild. Removal of lateral leaves is carried out if the air humidity is sufficient. In dry weather, stepchildren do not cut off, even if the air temperature is high.
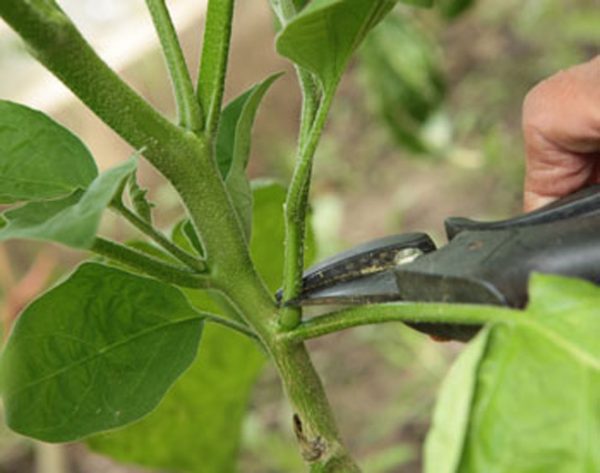
Pruning shoots
It is worth cutting off not only the lateral shoots, but also the central inflorescence. It is not difficult to define it. The flower grows from the first fork.
Peppers are pruned during the growing season. To prevent the upper leaves from shading the plant, long branches are cut off. Under the main fork of the plant, absolutely all shoots must be eliminated. The sprouts in the crown are also cut off.
You can prune branches while fertilizing. The approximate time between pruning is 10 days. It is also necessary to repeat the procedure immediately after harvesting the fruit.
To attract flying pollinators to the site, gardeners resort to a little trick. Pepper leaves are sprayed with a weak sugar syrup with two grams of boric acid. Such irrigation is carried out during the flowering period.
To reduce watering, the plants are mulched with overripe straw. The procedure will allow you to add moisture once every one and a half weeks.
Mulching bushes
After using the straw, the stems are tied up.
Video - How to manipulate a growing bush
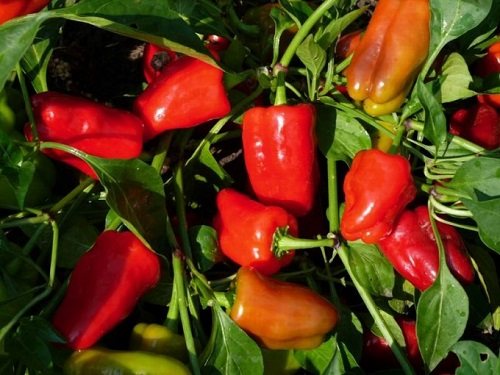
Pepper harvest time
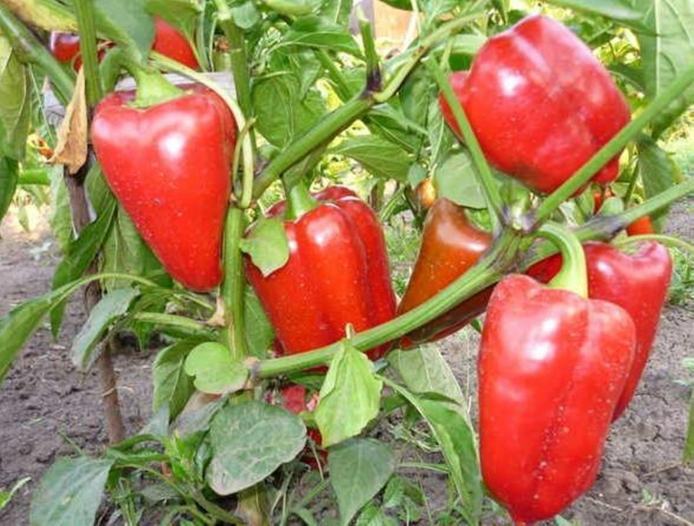
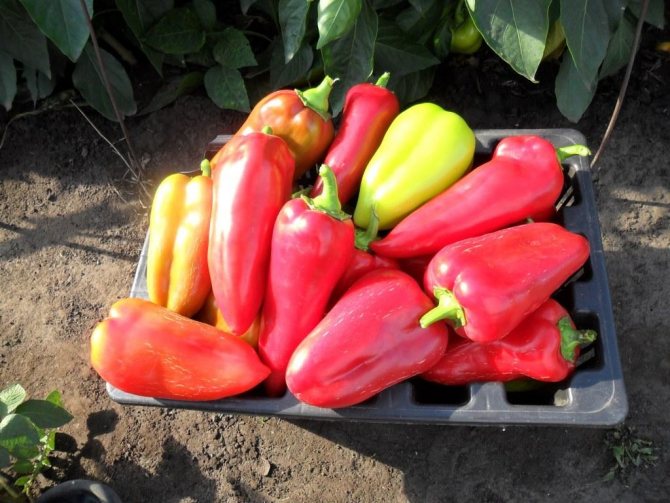
You can remove the first fruits with the onset of technical ripeness. Mass harvesting takes place in August-September, depending on the variety and growing region. It should be borne in mind that biological ripeness occurs about a month after technical ripeness. Therefore, if you remove the green fruits when they reach the desired size, you can get additional ovaries. If you wait for biological ripeness, then you will be able to use beautiful fresh peppers.

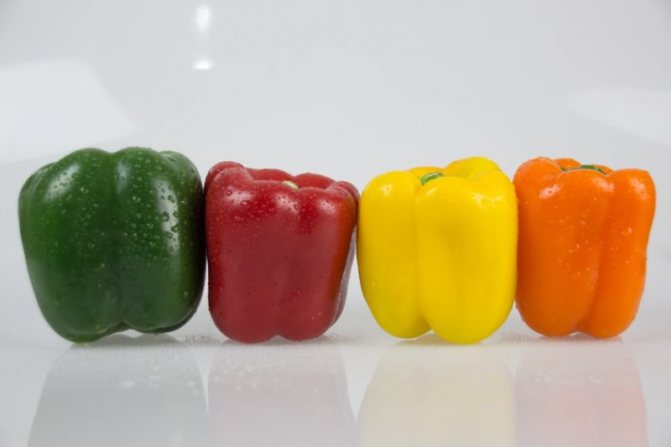
Harvest
Experienced gardeners harvest in an intermediate state, when they already contain a large amount of sugars, trace elements and vitamins. They can already be used both fresh and for processing.In any case, the crop must be harvested before the onset of persistent night frosts. In order for the crop to be well stored and, if necessary, ripe, it must be removed with the help of a secateurs along with the stalk.
Characteristic
Pepper has important qualities of a good vegetable. In addition, its composition is quite pleasant and makes you think about how to grow it yourself at home. It is perfect for cooking and will fill any homemade sauce with a pleasant taste. A large amount of water in the composition is very much appreciated, the pepper itself has a number of vitamins that will be very useful in use (here you can find vitamins A, C, E, B, etc.). There are only 27 calories for one such pepper in about 100 grams. Of course, the main argument remains the usefulness of this vegetable, the rich set of vitamins is downright amazing. Bell peppers have "A" and "C" which stimulate nail growth and aid vision. In addition, peppers have a number of B vitamins that help with health and sleep. Vitamin P helps to improve the condition of blood vessels.
We recommend reading:
The best varieties of cucumbers: description and photo
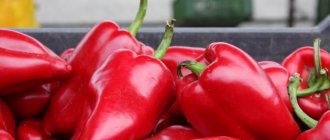
Bell pepper
It will be very useful to use pepper during vitamin deficiency. There are really a lot of trace elements in pepper that help the body, fill it with fiber and remove harmful substances from the body. With frequent use, you can perfectly normalize food processes.
Often bell pepper is filled not only with a healthful meaning, but also with a kind of miracle for rejuvenating the skin, since it has an excellent effect on nail growth and improves skin condition. Well, of course, people who want to get rid of excess weight do not pass by, because 27 calories per 100 grams inspire confidence.
How to grow peppers in a greenhouse, including polycarbonate
In most regions of the country, bell peppers have to be planted in greenhouses. The appearance of polycarbonate greenhouses has significantly helped to maintain the necessary temperature and humidity conditions, to create the necessary illumination. In such greenhouses, harvesting is possible at an earlier date. Through a double layer of material, the sun's rays fall on the plants already scattered, there is no need to fear burning the leaves.
Landing time and technique
In general, of course, planting of seedlings in a greenhouse is carried out earlier than in an ordinary garden bed, and the specific dates depend both on the region and on the quality of the greenhouse. The guideline is all the same, as in the open field, is the achievement of the required temperature in the greenhouse. In the suburbs, for example, landing is practiced immediately after Victory Day or a little later. The greenhouse should be carefully prepared, possibly replaced with soil. The beds are prepared as well as outside the greenhouse, but they must be spilled with a light pink solution of potassium permanganate.
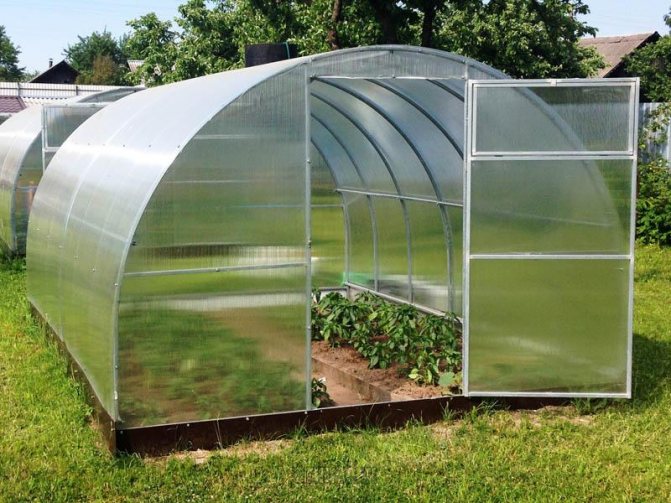
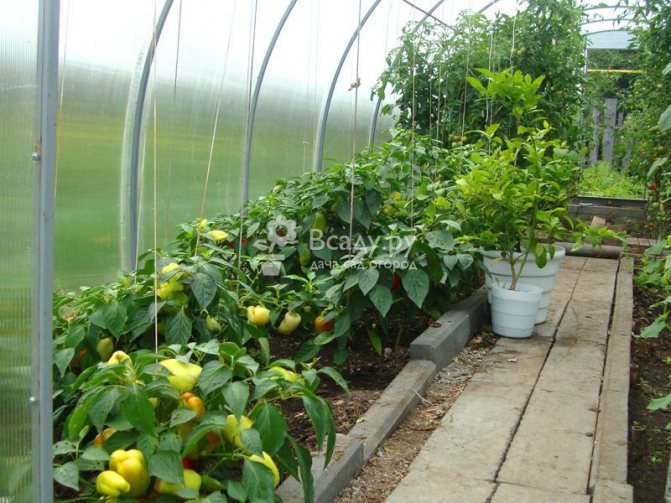
A polycarbonate greenhouse is more reliable than a film greenhouse, but everything in it is done in the same way
The planting technique is similar to that for open ground. It is important to choose the right neighbors as well. It is categorically impossible to grow sweet and bitter peppers in the same greenhouse: they are pollinated, neither one nor the other will really work. There is no strict prohibition on, for example, cucumbers and tomatoes, but we must remember that growing these crops requires different air humidity. For peppers, the optimal value is 70 ... 80%: it is also suitable for other neighbors, but if the cucumbers last longer, then for peppers a higher moisture content is destructive.
Care features
Pepper care in a greenhouse is similar to that in the open field, only it is necessary to take into account the absence of rain and the mandatory requirement of ventilation, without which it is impossible to maintain the required air humidity. If the owner only visits the greenhouse on weekends, it's best not to mess with it at all. The frequency of watering depends on the conditions: the soil is kept in a moderately moist state. Top dressing is given according to the traditional culture scheme.
When using mineral fertilizers, it should be remembered that a little underfeeding is better than overfeeding.
In greenhouses, they try to plant tall varieties, so formation is indispensable.Bushes lead into two or three stems, other stepchildren and branches thickening the bushes are systematically removed. If, on the contrary, branching is not enough, pinch the corresponding tops. Any damaged leaves are cut off immediately. At the end of July, the tops of all shoots are pinched, and the flowers that appear in August are removed. Sometimes it is necessary to normalize the ovaries, since for most varieties the bush will not be able to pull out all the fruits formed.