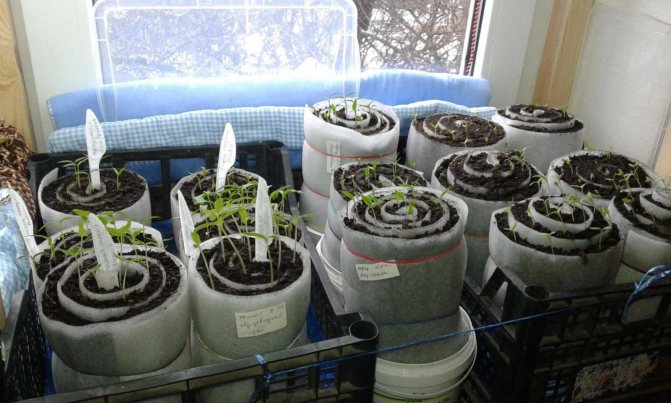
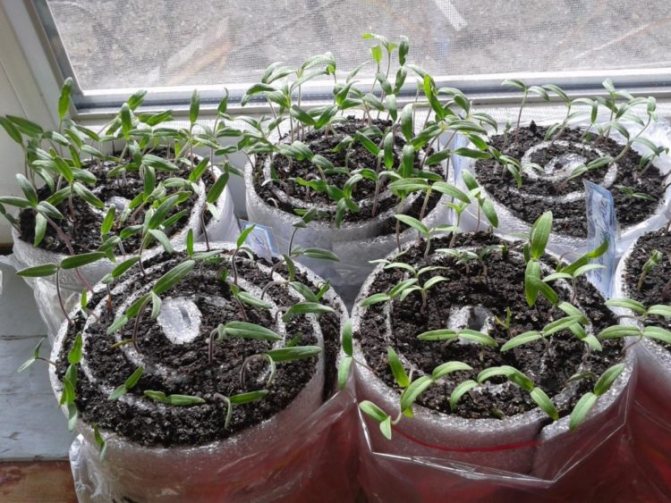
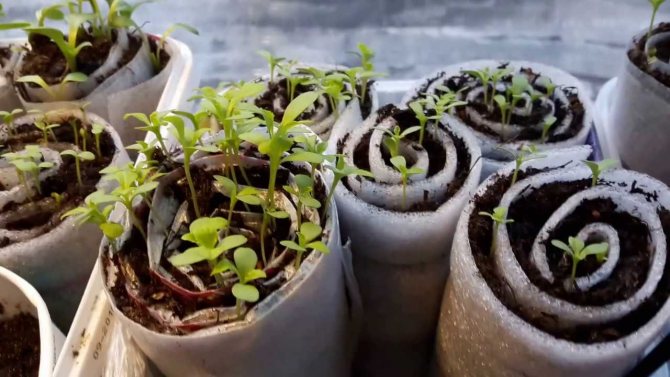
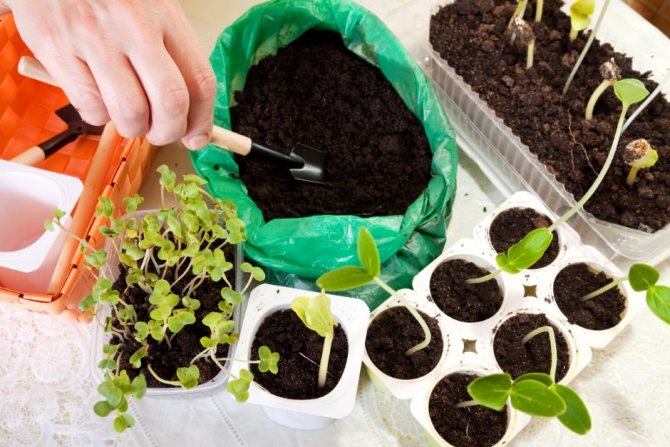
An incredible way, when seedlings are grown in snails, relieves gardeners from using massive boxes on the windowsills, cluttering the room. This is a new and original method to get strong shoots, save indoor space and soil for germination.
What seedlings can be planted in rolls?
Snails are small bundles of materials that allow air to pass through and make it easier to grow plants before they dive into individual pots.
The advantages of growing seedlings in twists:
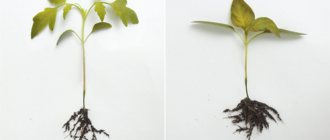
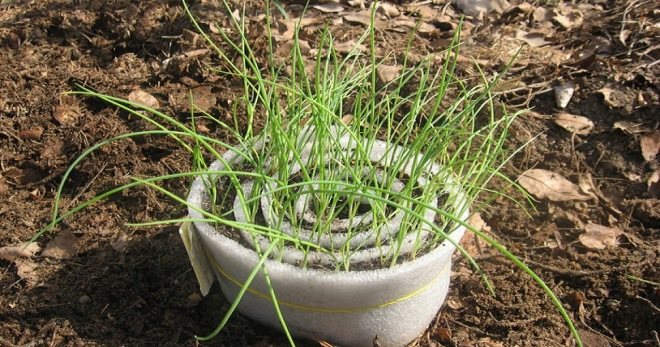
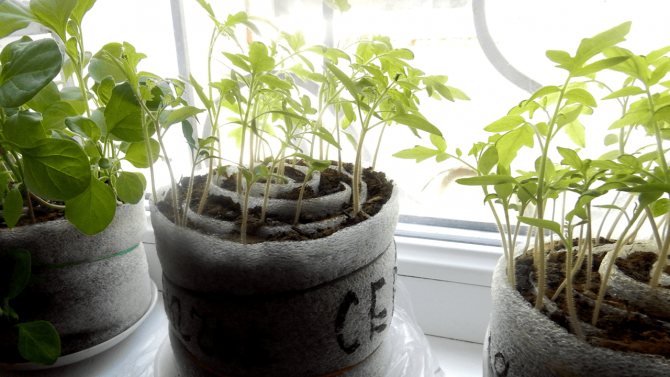
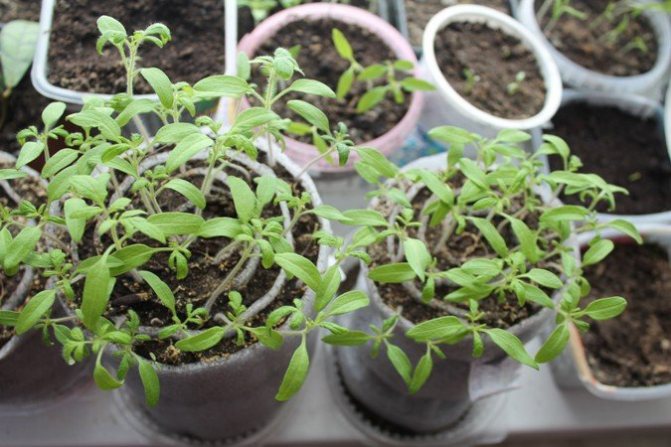
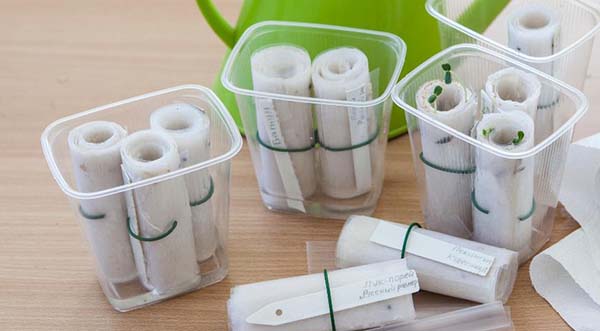
We save space for growing seedlings. In one roll, with a diameter of 15 - 20 cm, you can grow from 70 - 90 plants. When picking, plants can be removed from it without disturbing the root system by gradually unrolling the twist and we get high-quality planting material (less often it is exposed to stretching and diseases).
Low cost of consumables, the ability to reuse consumables.
Insufficient lighting or waterlogging of the soil can lead to stretching of seedlings with this method of growing seedlings, but with another method of growing it can reduce the quality of seedlings.
The following plants are grown in twists
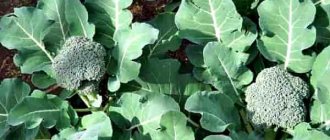
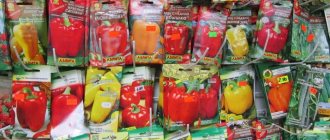
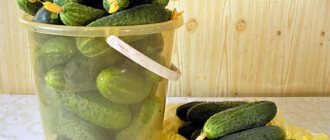
- vegetables, cucumbers, onions, peppers, eggplants, tomatoes, cabbage, zucchini and ornamental crops;
- berry crops - strawberries, strawberries;
- flowers - petunias, delphiniums, marigolds.
Care rules
The snail is designed to minimize grooming. Light and warmth are the main factors in the successful cultivation of seedlings. Particular attention should be paid to watering, feeding and picking. This will make it much easier to grow seedlings.
Watering
Weak sprouts are watered by sprinkling water. The main watering is done as the top dries. When the roots have already reached the bottom of the pallet, they can be watered from below.
Top dressing
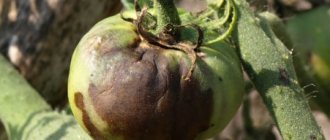
Tomatoes in a snail are fed with nitrophobic and traditional fertilizers when 2-3 leaves are formed on them. For a liter of water, take a teaspoon of nitrophosphate and fertilizers, then mix everything thoroughly. Feeding schedule: once every 2 weeks.
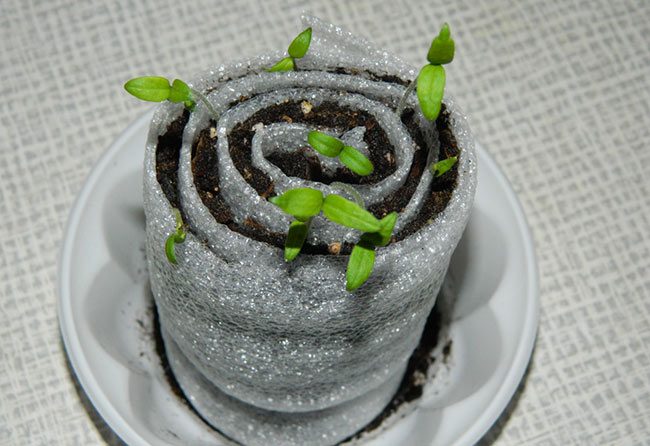
Sowing seeds in a snail on toilet paper - seedlings without land
It is very common to hear about seedlings in toilet paper. Speech, in this case, is not about the classic seedlings, but about the germination of seeds.
There is not always confidence in the quality of the seed, therefore experienced gardeners are advised to germinate seeds before sowing, and then plant them in the garden.
This method is good because the seed container takes up little space; horses are not damaged during transplantation and it is convenient to separate the seeds.
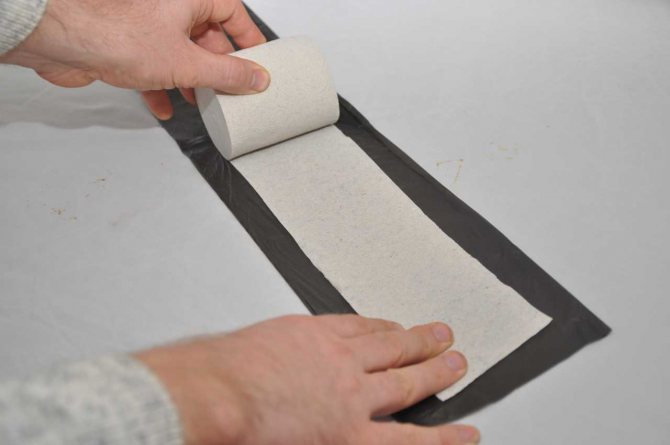
The planting process is like rolling with soil, only instead of earth we use toilet paper soaked (in warm water).
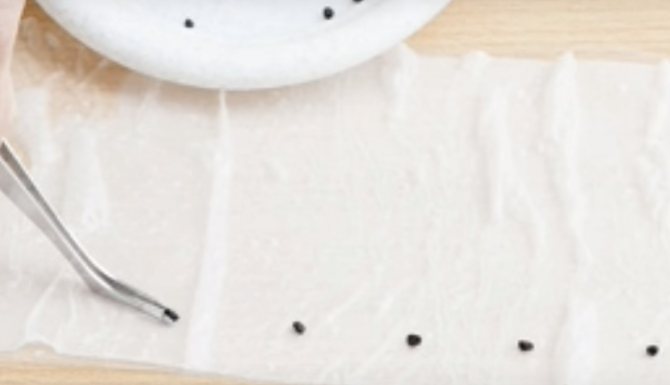
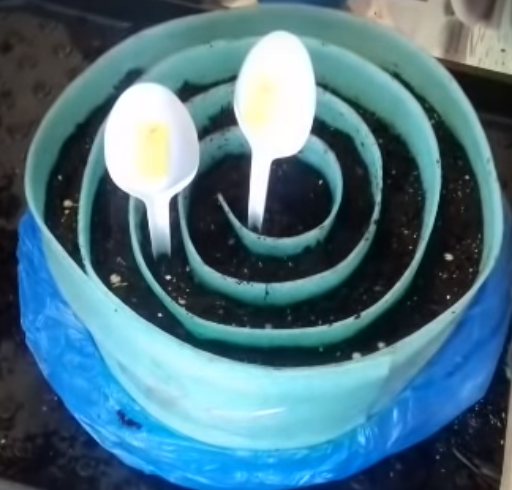
We need: polyethylene 10 cm wide. 30 - 50 cm long; toilet paper (multilayer); scissors; planting material; elastic band (stationery); container for roll installation.
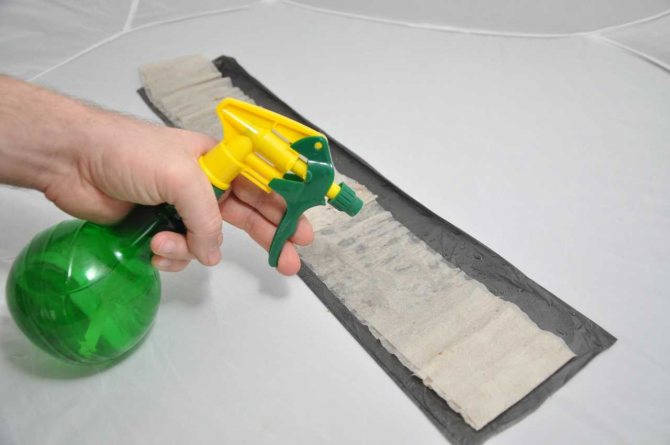
We prepare the workplace, cut off the polyethylene than the width of the toilet paper. Then we spread polyethylene and put toilet paper on top of it and moisten it before placing the seeds.
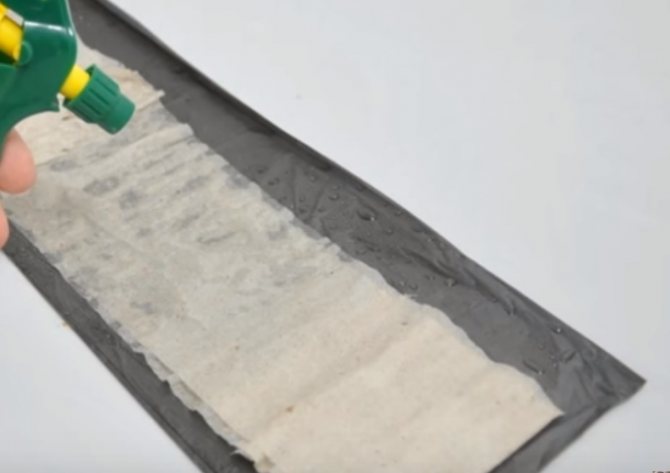
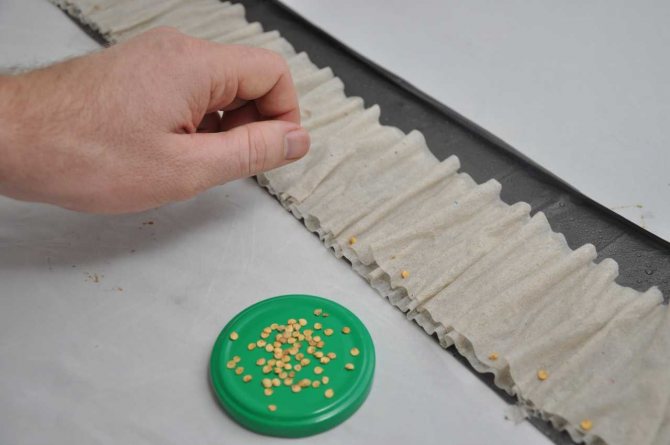
We retreat 2 cm from the top edge of the paper.and spread the seeds with a distance of 4 - 5 cm between them, put another layer of toilet paper on top of the spread seeds and moisten abundantly with water (from a spray bottle).
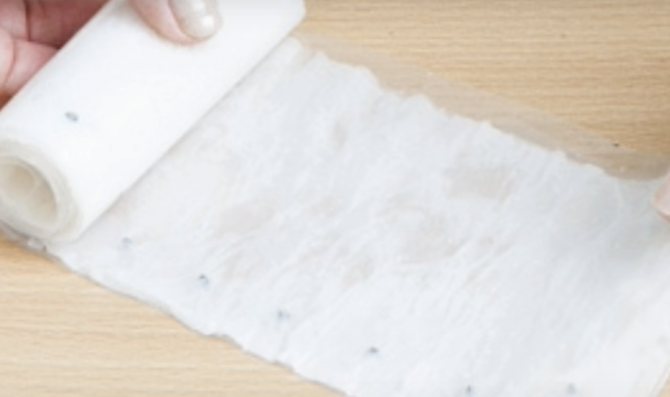
Then we roll up the structure with a roll, fix it with stationery rubber bands (they are sold) and place it in a container with heated water (360C), cover it with polyethylene and set it on a warm lit windowsill.
The container should be filled with water at a height of 1/4 roll.
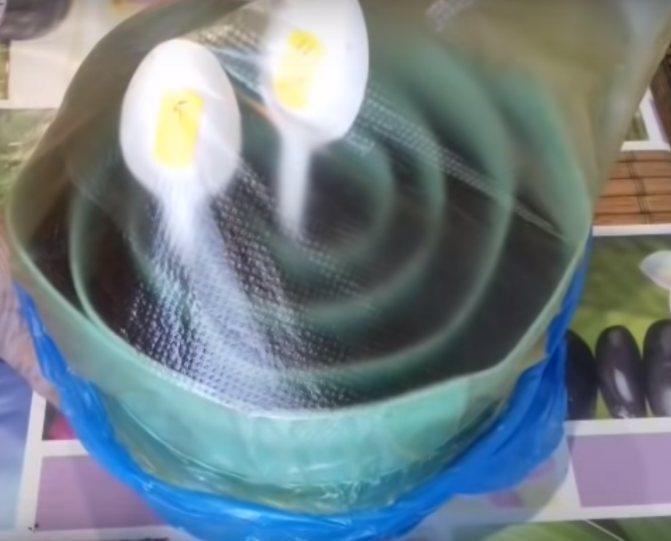
As soon as the first leaves appear, we fertilize the seedlings, add top dressing to a pan with water.
Moisture enters the seeds through toilet paper, and the film creates a greenhouse effect!
author
https://youtu.be/TL01nmdcgUA
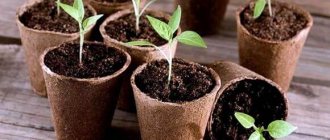
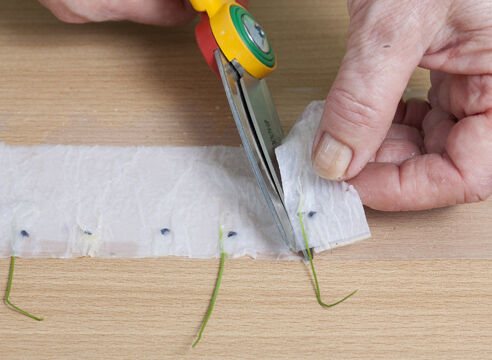
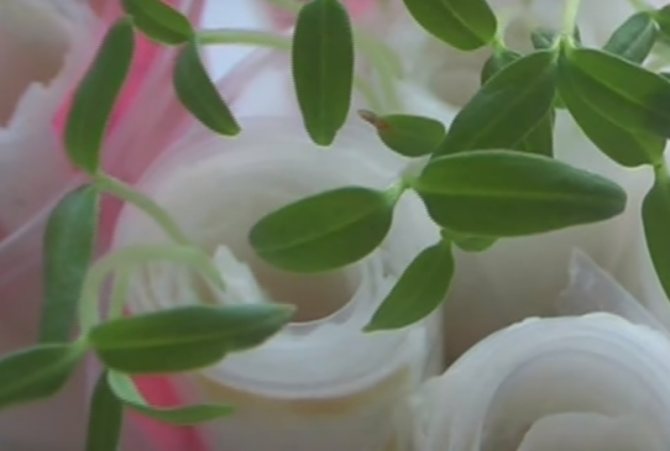
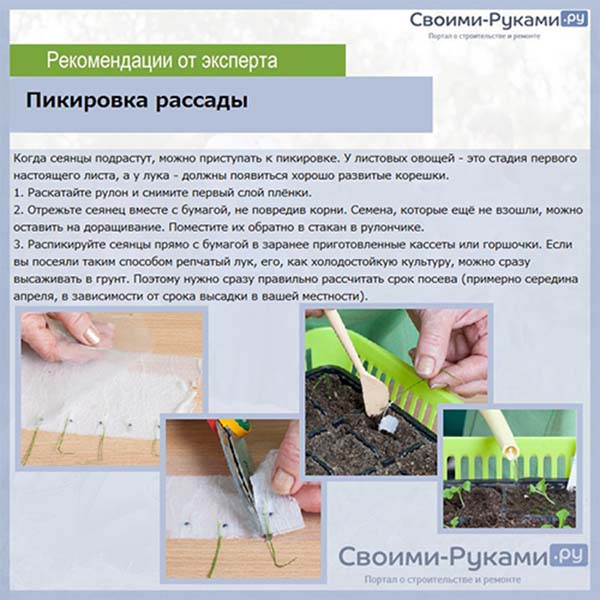
We dive the seedlings in separate containers (as soon as they grow up), gradually unfold the roll (cutting off pieces of toilet paper with the plant with scissors) so as not to damage the roots and place them in a container with fertile soil. Toilet paper will not interfere with plant development (dissolve).

Seed preparation for germination
The prepared seed material sprouts faster, they are more hardy and stronger. First, the seeds are selected - small and empty ones are thrown away. Good-looking seeds are re-examined and more closely examined for suspicious spots and damaged parts of the upper shell. After sifting out the "debris", you must perform the following sequence of actions before placing the seed in the snail:
- We need seed treatment against viruses. To do this, for 20 minutes. they are soaked in a concentrated (cherry) solution of potassium permanganate, then washed.
- For 12 hours, the seeds are left in a nutrient solution for 1 tsp. wood ash or nitrophosphate and 1 liter of water.
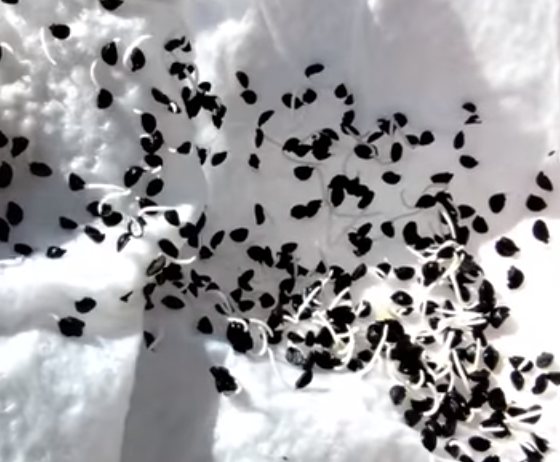
- Then they are soaked - the seeds are left in warm water (25 ̊С) for 1 day.
- After soaking in warm water, the seeds need to be hardened in cold water for 1 day. The fluid is changed every 4 hours. Instead of water, it is possible to send the seeds to the refrigerator (-10 ̊С) for the same time period. The cloth in which the seeds are wrapped before being sent to the refrigerator must be damp.
Note! Seeds are sown immediately after hardening. It is not recommended to sow several varieties of tomatoes in 1 snail, the maximum number is 2 varieties. But, you need a fixed limiter - so that there are no difficulties with the definition of a specific variety.
How to plant seedlings in a snail
Let's consider more similarly how to twist this miracle.
What will be required in order to start sowing seeds in a "snail":
- The mat is a pallet. It will ensure cleanliness while preparing the "roll". You can also place seedlings on it - this will save your windowsills;
- Substrate under the laminate (porous polypropylene), 2 mm thick, the material is considered environmentally friendly;
- The soil mixture should be light, before using it we sift it through a garden sieve and moisten it to a state (when it is kept lumpy when squeezed in a fist), but do not overmoisten;
- A thin elastic band (clerical) or a string to secure the resulting twist, tape (wide);
- Capacity with water;
- A syringe or spray bottle for easy watering;
- Tweezers for spreading seeds (but not required);
- A food bag or cling film to create a greenhouse effect, a container in which we will place the roll (small plastic buckets, plastic containers for mayonnaise or other food products);
- Sawdust will help to avoid excess moisture and form the necessary microclimate in the container;
- If desired, you can use a growth stimulator ("Epin", "Epin-Extra", "Energen").
Remember:
- Seeds of only one variety are planted in one snail, since there are different periods for pecking seeds, different volumes of the root system and different sprout heights.
- The appropriate potting mix is prepared for the different plants.
- The calculation of the distance between seeds is determined differently for each plant.The distance can vary from 2 cm to 10 cm.
- If it is planned to plant seedlings directly into the ground, then the width of the substrate should be 15-17 cm, if picking is carried out, then the standard width is 10 cm.
After processing, we germinate the seeds on a damp napkin until they are pecked, then we sow them in separate cups, in a common container or, like me, in a snail.
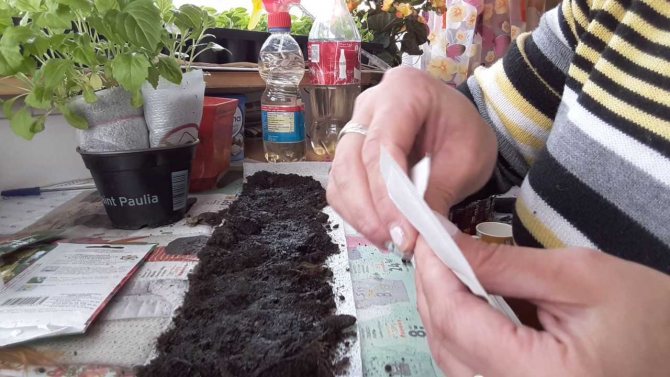
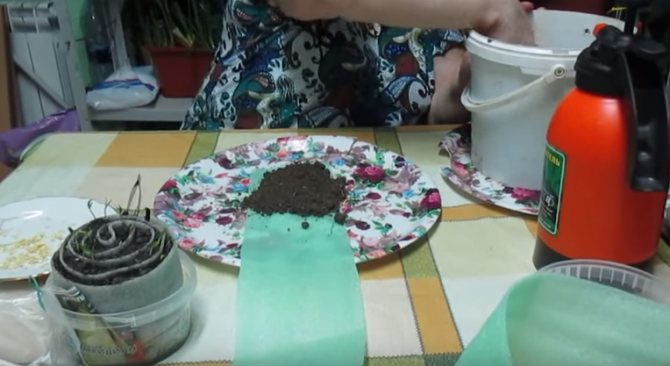
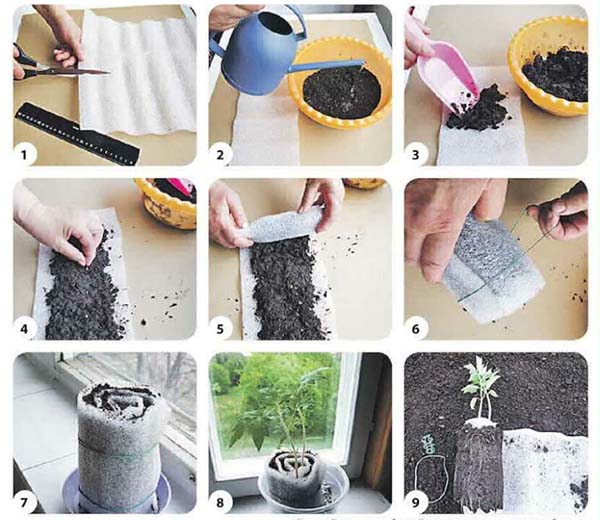
Next, we prepare the substrate and lay it on a surface convenient for work.
It is convenient to use the sides when twisting - they prevent the soil from spilling out and help to apply the soil evenly
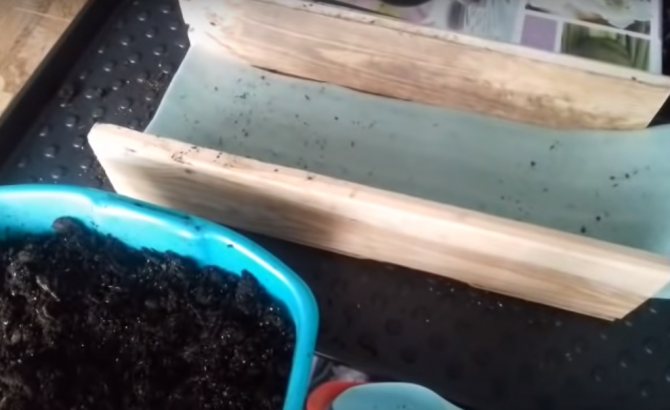
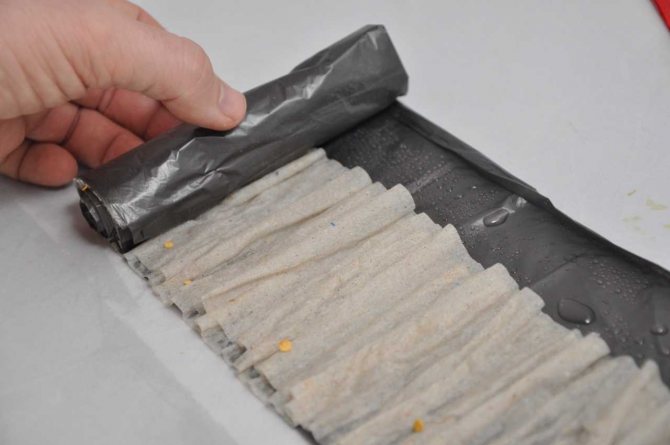
Using a clerical knife, cut a strip 15-17 cm wide from a roll of counterfeit material.
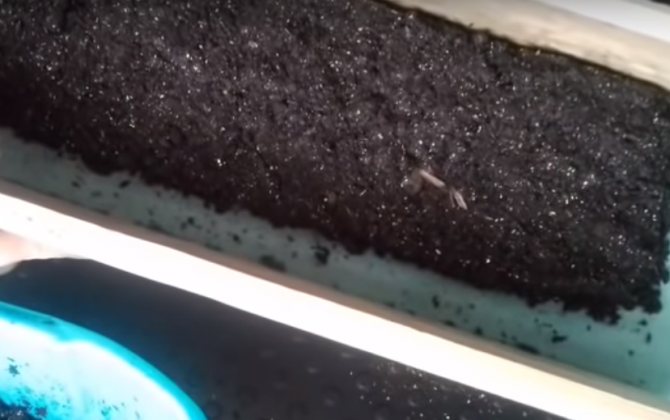
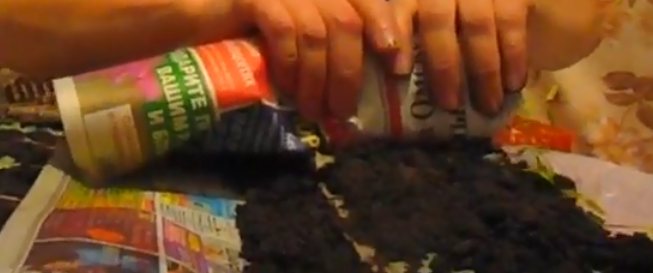
Pour the prepared soil mixture over the entire width of the unrolled tape in a layer of 1.5-2 cm, compact it a little on the tape and spray them with a spray bottle (you can add a growth stimulator to the water according to the recommendations on the package).
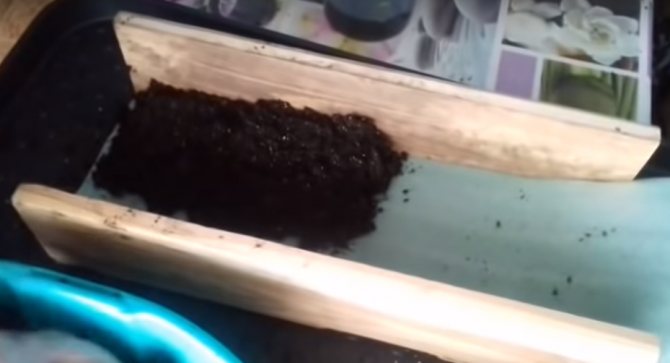
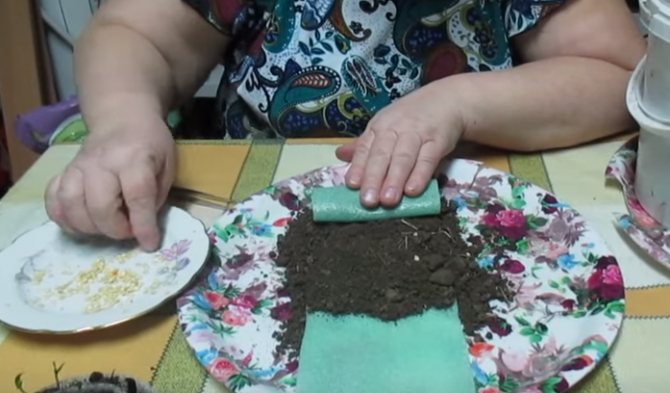
On one edge, it is necessary to leave a free strip of about 2 cm - it will be required when adding soil to the plants.
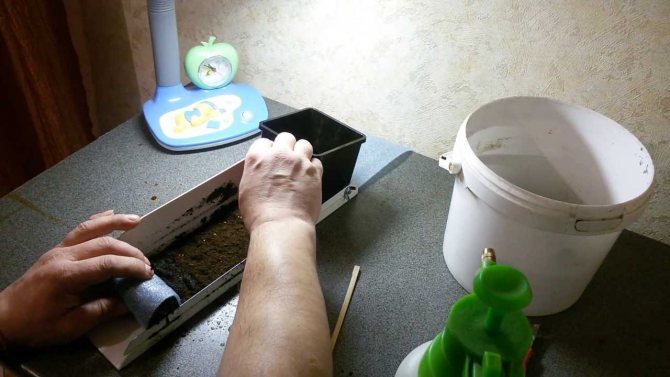
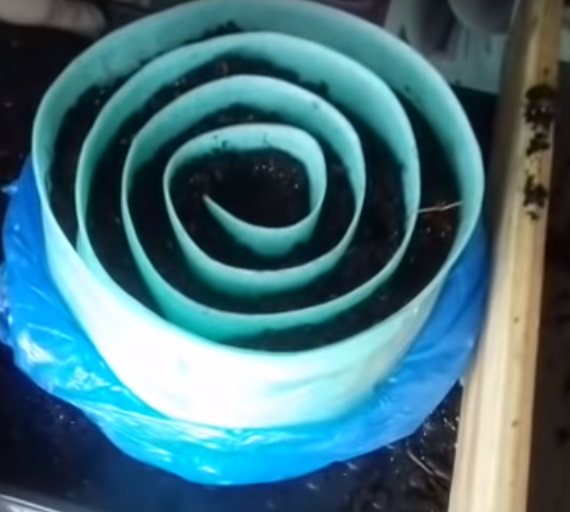
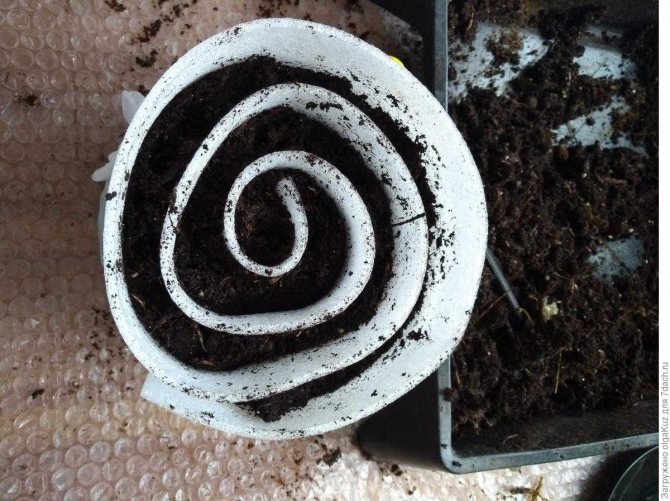
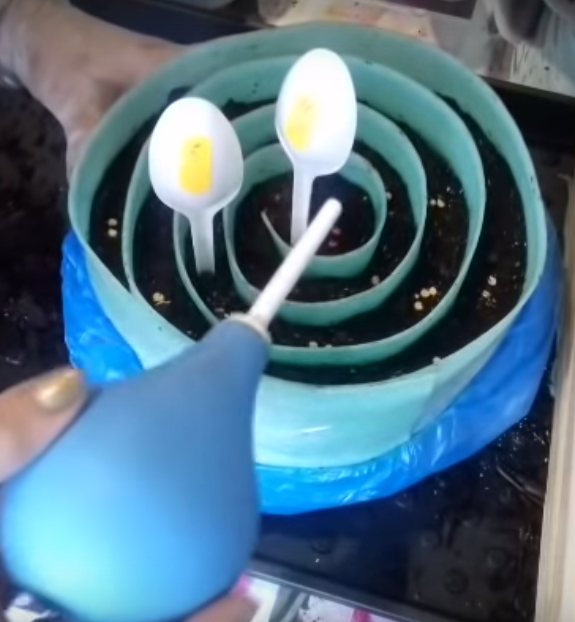
We carefully fold the "snail".
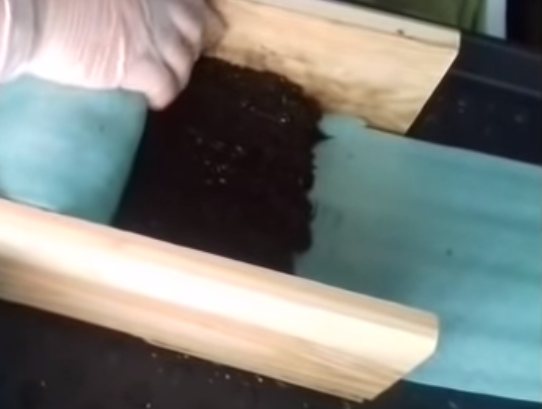
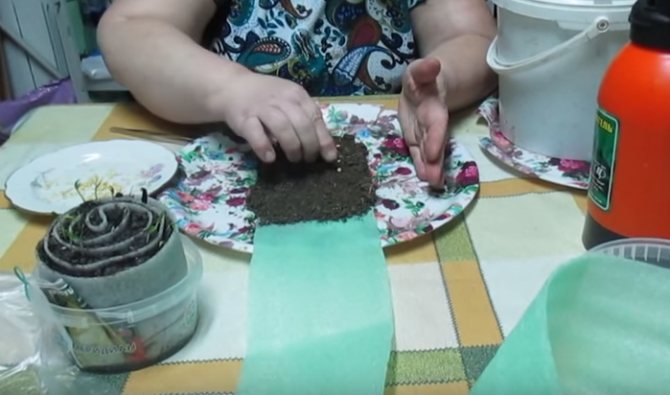
We fix the edge with tape (so that the twist does not creep), place the roll in the container and spread the seeds (sprinkle with earth on top and press lightly).
In order for the seeds to germinate, you need to water all the turns in the resulting folded structure. It is not necessary to spare the water (its lack will affect the germination of seedlings), but we are not zealous either)))).
Do not forget that seeds from different varieties may have different germination times.
We cover with a bag or cling film to create a greenhouse effect and maintain a constant level of humidity. We place the container in a warm place for seed germination.
author
https://youtu.be/W6LBKKqciNg
Once the backing has been washed, it can be reused.
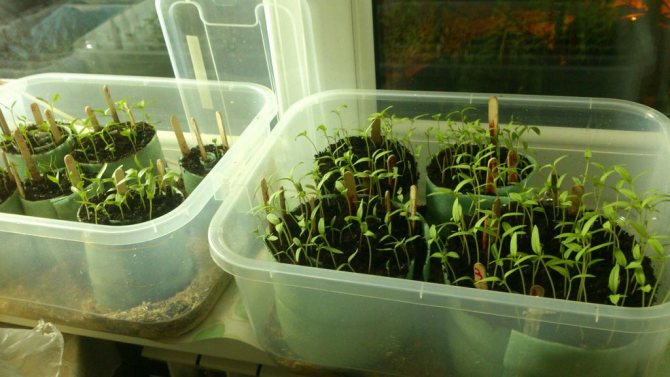
Now for the planted seeds, good lighting is not important, but try not to miss the moment, and put the container in a well-lit place immediately after pecking out the "loops" of seedlings from the ground.
The process of planting seeds in a homemade structure takes no more than 20 minutes.
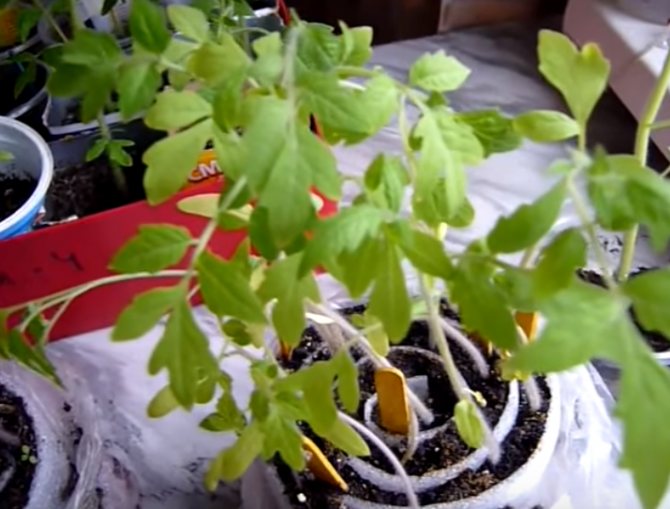
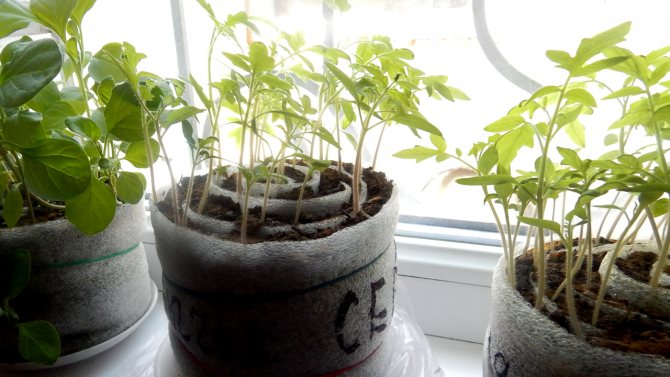
Now the seedlings will need more solid nutrition.
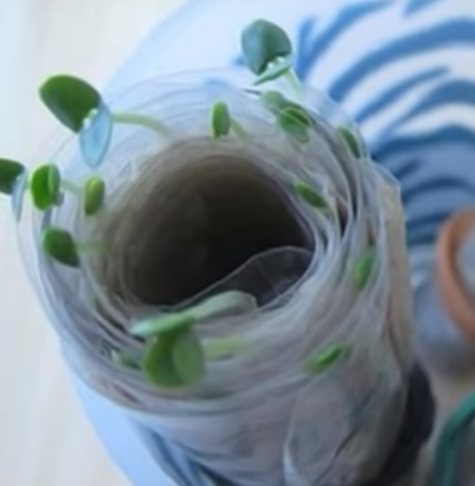
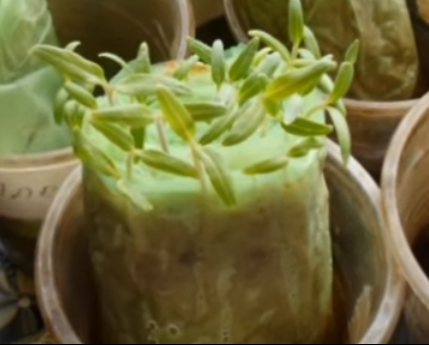
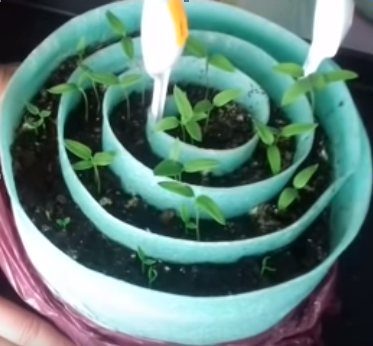
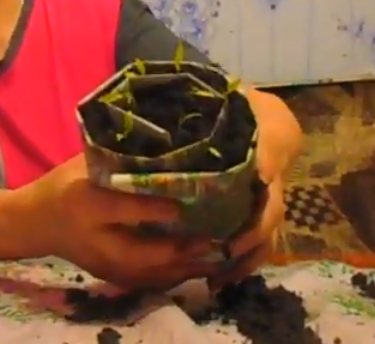
After a while, we check our "snail". By this time, all the seeds should have hatched and formed "loops" of plants, we reject unhatched seeds and very weak sprouts, so that the place is not empty, you can put new seeds.
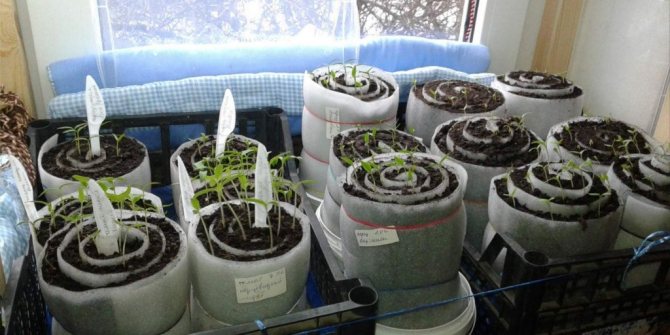
In a snail, you can grow seedlings with and without a dive.
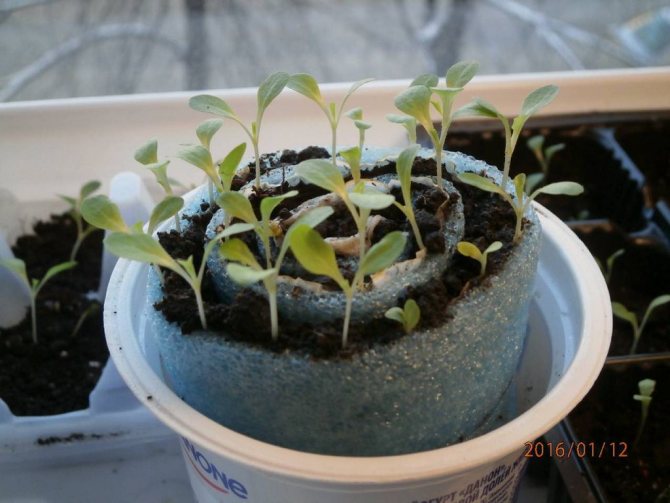
After the appearance of the cotyledon leaves, remove the bag or film from the seedlings. When rolled with soil mixture, seedlings can develop well up to the age of picking.
Remember: tomatoes are very fond of being transplanted!
To grow without picking, it is necessary to increase the distance between the seeds.

We make a "snail" according to all the rules
The result of painstaking work will delight the gardener if the design is done correctly. We will understand all the intricacies of its manufacture.
What materials will be needed
Before starting work, you need to prepare everything you need:
- underlay for laminate;
- two- or three-layer toilet paper;
- pharmacy gum or scotch tape;
- spray bottle with water;
- knife or scissors;
- seeds for germination;
- soil soil;
- containers for the installation of "snails".
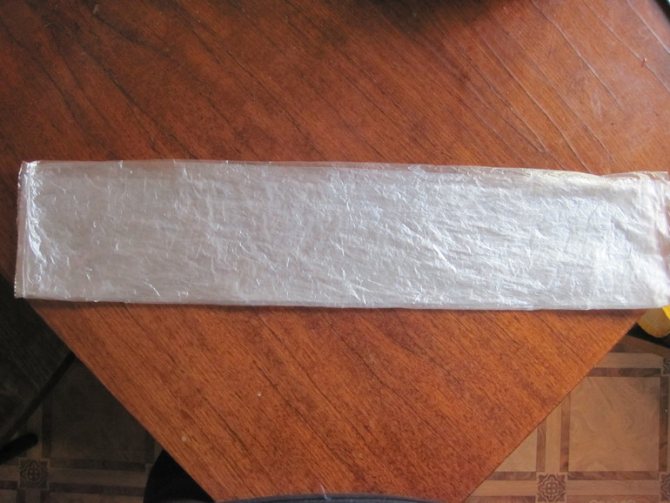
IMPORTANT: seedlings in a "snail" need a non-metallized (without a foil layer) substrate, the thickness of which does not exceed 2 mm.
We make blanks
The underlay for the laminate is cut into strips, the width of which is equal to or 2-3 mm less than the height of the toilet paper roll.
We spin the snails from the substrate
There are 2 methods of making "snail structures" from a substrate.
- with soil:
- A layer of soil about 1 - 1.5 cm thick is poured onto the cut strips.
- Seeds are laid out on the ground, having retreated 2 cm from the edge of the substrate. The distance between the seeds is 2 cm.
- Having slightly pressed the seeds into the ground, a strip from the substrate with seeds is twisted, giving it the shape of a roll.Try to make the curl tight, so the seeds will not be able to slide down the cellophane.
- Secure the twist with a pharmacy rubber band or tape.
- Putting the twist so that the edge with the seeds is on top, add the earth between the layers of the substrate.
- Install the twist in a plastic container, water the "snail". The first watering is performed from above, then water is added to the container. Some housewives also practice wetting the soil before planting seeds.
- A plastic bag is put on the twist and secured with a pharmacy rubber band.
- The container with seeds is left in a warm place until sprouts appear.
- without soil, in toilet paper:
- Toilet paper strips are placed on the backing strip.
- Moisten the paper with water. You can use a nutrient solution of mineral fertilizers for moistening or just the water left after boiling the eggs. For irrigation, liquid at room temperature is used!
- Spread the seeds on paper.
- Make a twist, securing the substrate with a pharmacy rubber band or tape.
- Place the snail in a container by pouring water to the bottom.
- They create greenhouse conditions for the structures, putting on a plastic bag on top, and leave them in a warm place.
IMPORTANT: when growing seedlings without land, you need to ensure that there is always water in the container (the height of the water layer is 2 cm).
Making a snail from a newspaper
The lack of a substrate under the laminate at hand is not a reason to abandon the "snail". It can also be made from auxiliary material, for example, by sprouting seeds in a newspaper.
The procedure is not much different from the manufacture of a twist with a substrate.
- A regular-sized newspaper sheet (2 newspaper pages) is folded in half lengthwise to form 4 layers of paper.
- They put the folded newspaper in a plastic bag, placing it not in the center, but on one side. The cellophane left without paper will be at the bottom of the twist, forming its bottom.
- A layer of potting soil is carefully poured onto the cellophane in which the newspaper lies.
- Seeds are laid out on the ground, cellophane is carefully twisted. It is better to start twisting from the sealed side of the bag, which is its bottom.
- Secure the twist with tape or rubber bands.
- Having added land if necessary, the structure is installed in a container and watered.
- Put a bag on a twist, fix it and leave it until sprouts appear.
IMPORTANT: gardeners do not have to ask "The seedlings in the snail are stretched out, what to do" if they remove the plastic bags on time. This should be done immediately after the sprouts appear. The left package will lead to the pulling of the seedlings.
How to water seedlings in a snail with soil
Seedling care consists of watering. Water the plants along the top of the roll as long as the plants are still small and the root system is not yet developed (this is most conveniently done with a syringe).
As the plants grow, you can switch to root watering (just pour water directly into the container) or a bag.
If it is necessary to water from above, it is imperative to use a spray bottle so as not to wash off the seeds and growth into the lower layer of the substrate.
Why are these methods remarkable?
The "snail" consists of a flexible long tape, which is wrapped in several layers. Fertile soil is laid between the layers. Seeds are planted in it. Using this method, you don't even need to use the earth. Instead of earth, soft toilet paper is placed between the layers of tape. If the earth is replaced with paper, a "diaper" is obtained.
Both methods have many advantages:
- a large number of seeds are placed in a small area. In ordinary pots, this will not work;
- there is no need for diving (planting grown sprouts in different containers). In such conditions, the roots of the seedlings are not intertwined, and there is no "competition" between the shoots for space or lighting;
- the gap between the shoots is enough for the full development of each of them;
- seedlings do not stretch during growth - due to the same lighting.If there is a need to change the position of the convolution, it is simply rotated towards the light;
- the washed backing is suitable for reuse.
Seedlings in a snail from the newspaper
For those who are looking for ways to save on material (or there is no way to purchase a substrate), you can make a twist from polyethylene and newspapers.
Polyethylene is laid out on the layer of the newspaper. Pour soil on top. We twist the roll.
author
https://youtu.be/N29j1vKfjao
We fix and sow seeds.
Preparing the soil for planting seeds
Preparing the land for planting seeds is an important factor in obtaining good seedlings. There is no universal soil suitable for all plants.
But there are a number of mandatory requirements for the soil that is used for seedlings:
- fertility;
- nutritional value;
- looseness;
- moisture capacity;
- acidity;
- disinfection;
The composition of the soil for sowing seeds must include organic and inorganic substances:
| Organic matter | Inorganic substances |
| Garden land | River sand |
| Peat or its substitute - coconut fiber | Perlite |
| Compost | Vermiculite |
| Bark | Expanded clay |
| Sawdust | Hydrogel |
| Ash | Mineral supplements |
In addition to these substances, ammonium nitrate, urea, superphosphate, potassium sulfate should be included in the soil for seedlings in snails.
It is strictly forbidden to add clay, salted sea sand, tea and coffee brews to the seedling soil mixture.
The soil for planting seeds in snails can be prepared by yourself.
Soil composition for different crops:
| Culture | Soil composition |
| Eggplant | Garden soil, humus, sawdust, ash in the proportion: 2: 1: 0.5: 0.4 |
| Peppers | Peat, garden soil, rotted sawdust, humus in the proportion: 4: 2: 1: 1 |
| Tomatoes | Peat, earth, compost, coconut substrate in a ratio: 8: 2: 1: 1 |
| Cabbage | Sod land, peat, sand, humus, lime, ash in the proportion: 5: 5: 2.5: 2: 0.4: 0.5 |
| Cucumbers | Peat, sod land, humus, rotted sawdust, sand in the proportion: 2: 2: 2: 1: 1 |
| Melons | Earth, humus, peat, sand, ash in the proportion: 2: 2: 2: 1: 0.05 |
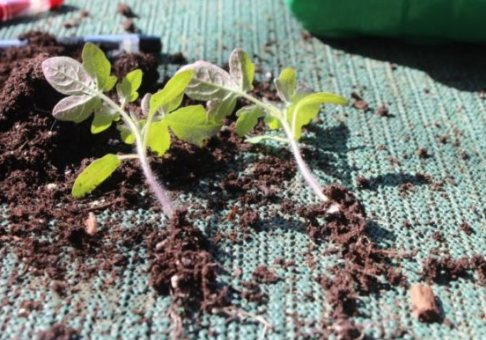
Features of growing tomato seedlings in a snail
We already know how to properly prepare seeds and soil for planting tomato seedlings. But how to plant it in a snail? The main thing to remember when planting tomatoes in a snail is that they love picking. The following guidelines are given based on this condition.

author
https://youtu.be/ZQpWJ6fi9hA
- The twist height for tomatoes should be no more than 10 cm.
- Fill with soil, not reaching 2 cm to the edge.
Seeds are laid out:
- from the soil surface at a distance of 1-1.5 cm;
- 1-1.5 cm apart.
The tape with soil and seeds is rolled up in the form of a roll to the point where there is still no soil solution. Then, holding the already rolled roll with one hand, you need to pour soil onto the next section of the tape and arrange the seeds in the same way.
Materials for creating a snail
In order to create an unusual pot for a large number of seedlings, the following materials are needed:
- a transparent container with low edges (it is in it that the snail will be located);
- underlay for laminate (waterproof, soft and porous material), it is recommended to use tape 10 cm wide and 1-1.5 meters long;
- tweezers;
- 2 highly stretchable elastic bands;
- plastic bag;
- priming;
- seeds.

Seedlings in a snail
Sowing pepper in a snail without picking
The twist should be done with a height of 15-17 cm.
Spread the seeds that have nailed at a distance of 2 cm. There is no need to sow thicker: the sprouts of pepper will shade each other and stretch out.
When planting pepper, it should be borne in mind that he does not like picking. With this in mind, increase the distance between the seeds.
Fill the top with soil mixture in a layer of 1-1.5 cm. Compact a little. It is necessary to water the crops of pepper carefully, making sure that the seeds are not washed out to the surface of the soil. Label the varieties. To prevent moisture from evaporating too quickly, place crops in a greenhouse or in a bag.The temperature must be maintained at + 25 ° C.

With the emergence of seedlings (on the 5-7th day), place the crops in a bright place with a temperature of + 15-17 ° С. Water with lukewarm water in moderation, making sure that no water accumulates in the pan. To prevent the seedlings from leaning towards the light, turn the bowl with the seedlings relative to the window or illuminate them with a phytolamp.
What is good and what is inconvenient for a "snail" for tomato seedlings
Sowing in a "snail" got this name because of the principle of twisting the material into which the seeds are placed. It resembles a roll or a snail. There are two main variants of "snails":
- "Snail" without earth inside (such a roll is also called "Moscow tomato seedlings"),
- "Snail" with the addition of earth.
Inside the material from which the "snail" is twisted, you can add fertile soil, or you can add paper
Advantages and disadvantages of "roll" seedlings
The main advantage of this method is that it saves space. If you want to sow "all at once", and the space on the windowsill is limited, then the method of sowing in "snails" is just what you need.
Other advantages of this method include the following:
- seedlings have a well-developed root system;
- picking of seedlings takes place without damaging the roots;
- it is convenient to water seedlings through a pallet in which there is a roll;
- you can grow tomato seedlings (undersized, standard early-ripening varieties) even without picking.
Proponents of this method call only one drawback of this method - the possibility of pulling out seedlings. To avoid it, it is recommended not to use sowing in snails for vigorous, indeterminate varieties, and also to supplement the seedlings with phytolamps.
To prevent seedlings from stretching out, sow undersized varieties or use supplemental lighting with phytolamps
Errors when landing in a snail
Inexperienced gardeners make a number of mistakes that affect the quality of seedlings.
- Seeds do not germinate well. If the roll is not rolled up tightly enough, then the seeds slide down, which makes it difficult for their germination and further growth. You need to spread the seeds in accordance with the recommendations on the package, and make the "snail" dense.
- Plants grow poorly. To create a twist, use only a laminate underlay. The material retains moisture and heat well, very soft. If you use other materials at hand, then the growth of seedlings can be much worse.
- Seedlings are pulled... This is because the package was removed too late. It must be removed as soon as the seeds hatch, otherwise the lingering greenhouse effect provokes the rapid growth of seedlings. This has a negative effect on further yields.
- Early pick. You need to start picking only when the roots appear from the bottom edge of the roll. There is no need to be afraid that the plants will not have enough nutrition.
How to avoid common mistakes
If you twist the snail loosely, the paper or soil with seeds may settle down. To avoid this mistake, roll the roll firmly, but not too tightly. If the structure has settled, unfold the roll, level the paper or soil, and wrap the backing back.
It so happens that the seeds do not germinate after planting in the "diaper". This means the toilet paper is swollen with moisture. The roll is unrolled, the paper is replaced and the re-planting is carried out. To avoid such cases, you do not need to pour a lot of water into the sump. Seedlings planted in this way cannot be watered in the usual way: they only need to be sprayed from a sprayer.
There is a method in which a roll is rolled from an ordinary newspaper. In this case, there is a risk that the paper will swell, so it is better to use more durable and flexible materials for the backing material.
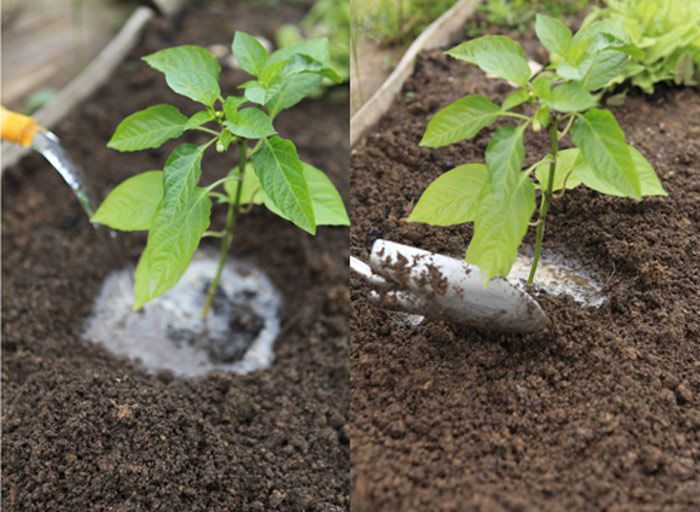
You can make a "snail" with or without earth. If you properly care for the seedlings, the sprouts will turn out to be healthy and strong. By May, they will be completely ready to be planted in a greenhouse or open ground.