Not all summer residents have a backyard farm. For some, the dacha is a place where you can take a break from the bustle of the city and relax after a hard week of work. For others, a suburban area is an additional source of income. Gardeners and livestock breeders have a solid arsenal of equipment that needs to be stored somewhere. For such purposes, you can use a garage, but it is better to wield a change house. Building a shed with your own hands with some experience is not so difficult. The main thing is to organize the process correctly.
The purpose of the barn
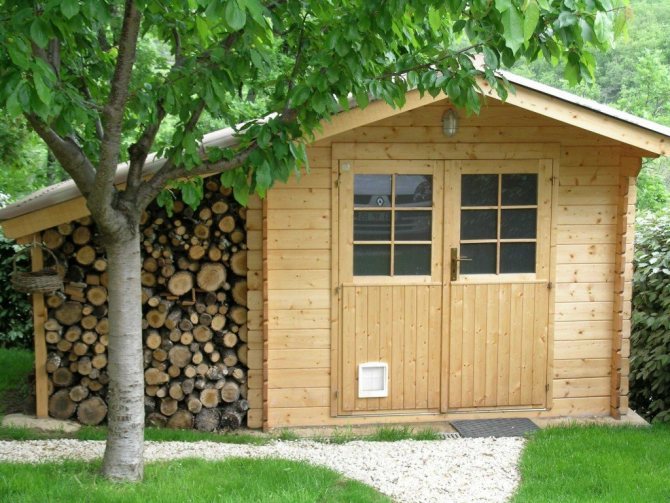
Before you start building a barn, you need to understand for what purposes it will be used. It is required to give an exact answer about the purpose of the outbuilding. If you need to use it as a woodshed, then build a shed of wood.
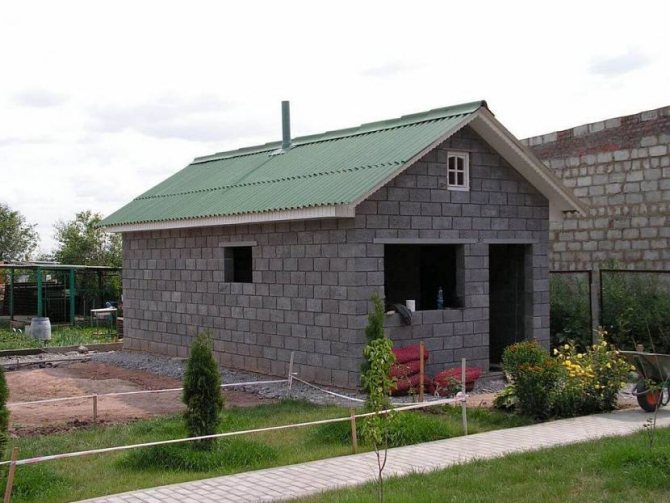
In the event that pets will be kept in the barn, then the building must be strong and at the same time warm, especially in winter. In this case, you need to turn your gaze to foam concrete.
Beauty is important in any building
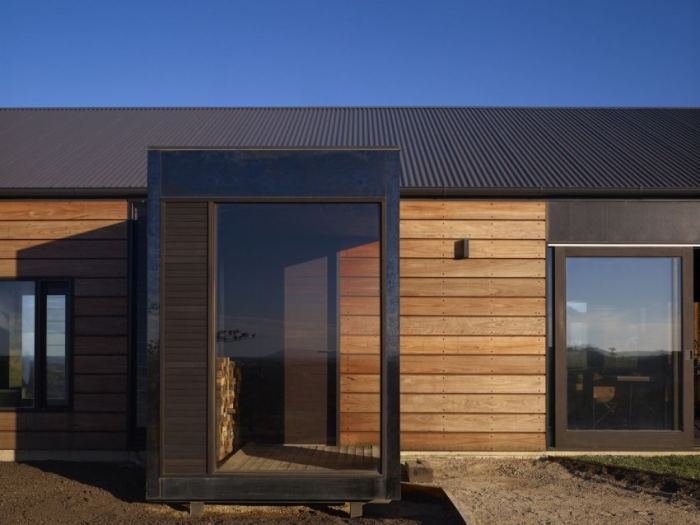
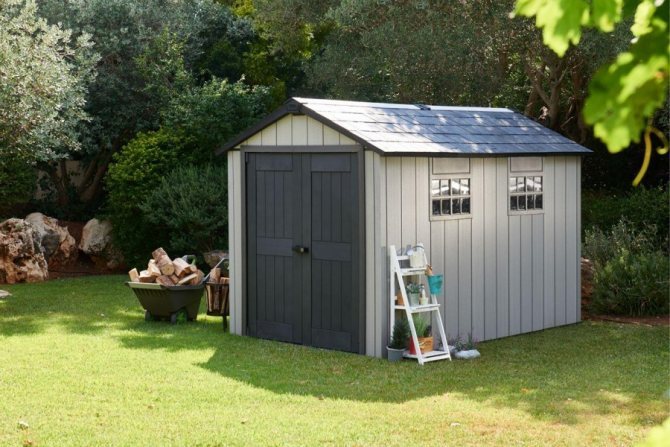
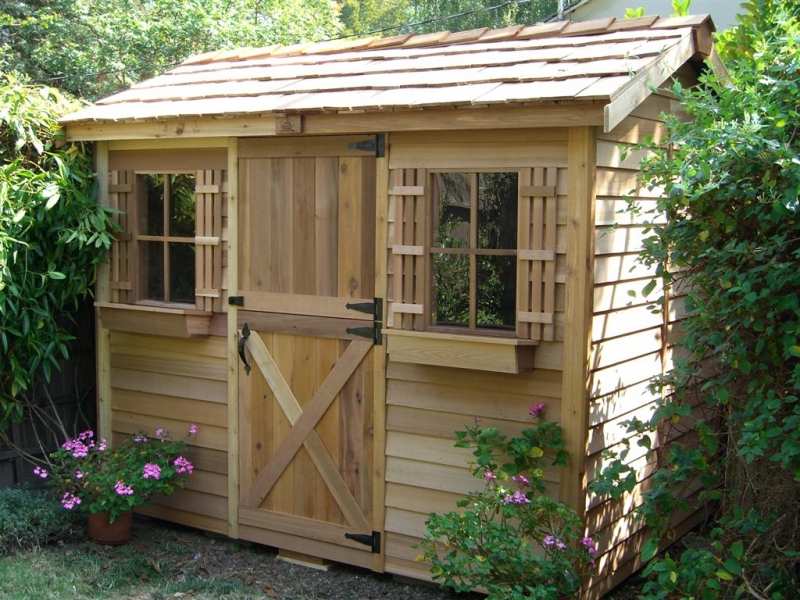
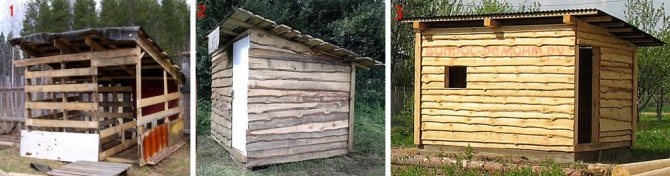
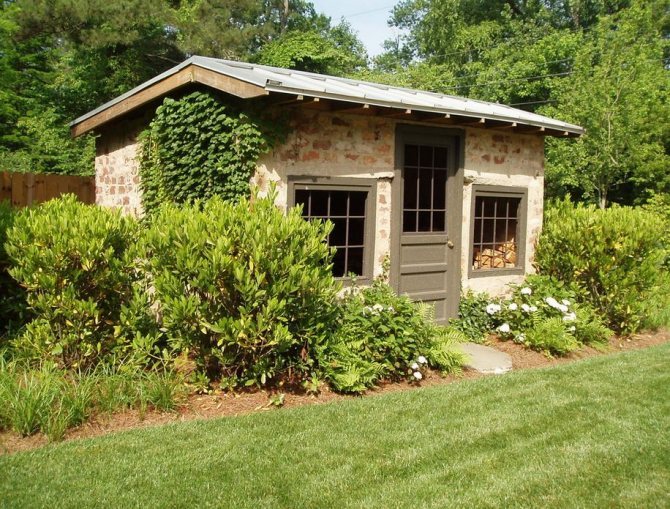
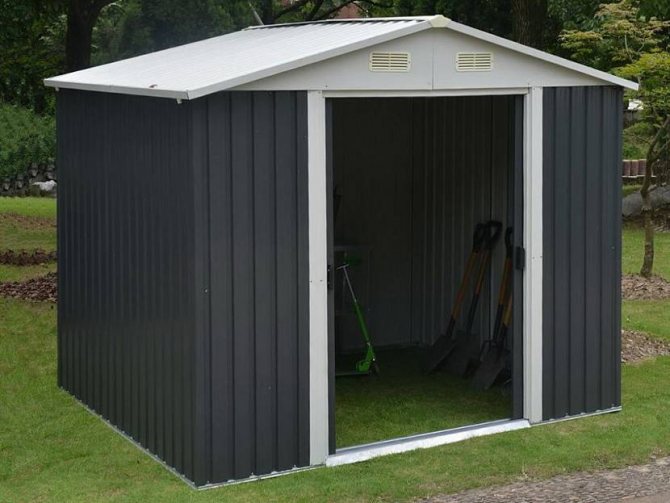
If a completely metal structure appears on your site, then your building will acquire a light urban or even industrial shade. On a suburban area, it is still better to build a barn made of wood. It is simple, beautiful, and quite modern. And from the point of view of ecology - an absolutely acceptable option.
A wooden shed can be built from solid wood: logs, beams. You can even apply the lower part of the trunk with the root system. Then on your garden plot there will be a nice little hut on chicken legs.
Such a construction can be done independently. You just need to go to the forest and choose the log you need. The easiest way to build timber frame structures. But here you need to stock up on a good saw and patience.
Frame structures usually take longer to build. In this case, it is not necessary to invite specialists.

Where does the construction of a barn begin?
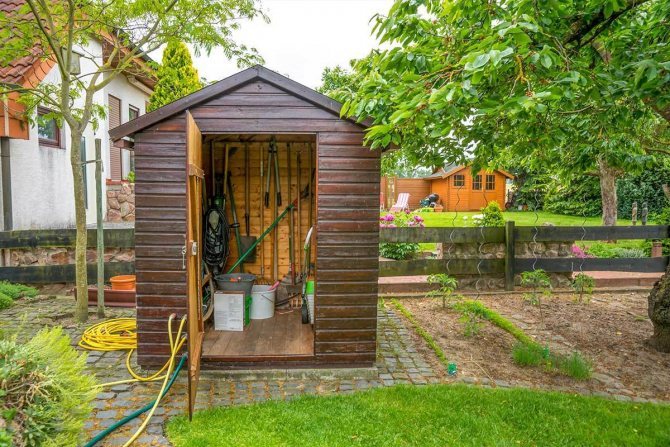
Often, a barn is the first building that is erected on the site, at the stage of starting the construction of a house, or even before that. Hide tools, building materials, shelter from bad weather or spend the night - in everything, the "shed" becomes an irreplaceable and versatile assistant.
After the site is inhabited, tools and implements are stored in the outbuilding, which is necessary for caring for the garden and vegetable garden.
They bring in snow-removing equipment, lawn mowers, building materials that remained after the construction of the cottage. And often - everything that is a pity to throw away or is planned to be left "for later", because the zealous owner goes into business.
It is not surprising that over time, the barn turns into a "trash", clogged with a mass of necessary and unnecessary things. If it is easier for the owner to go to the market and buy the wrench or hardware needed on the farm than to find them in the utility block, then something needs to be done about it. And it is necessary to start in advance, even before the construction of the barn begins, having correctly designed it and calculating the optimal dimensions.
MAKS001 Participant of FORUMHOUSE
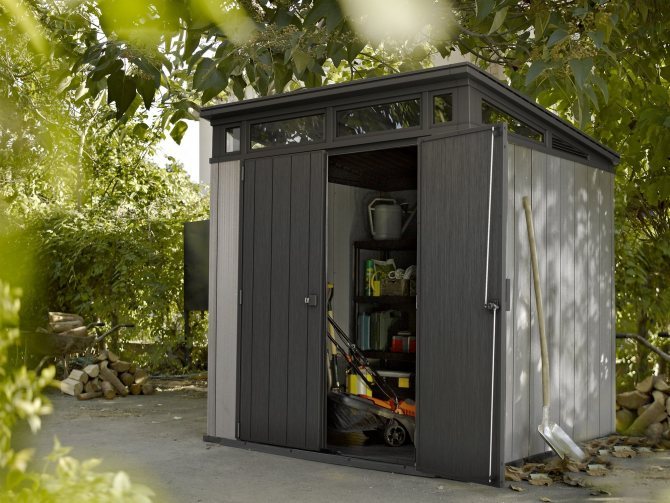
I have a brick house of 200 sq. m and an ordinary change house measuring 6x3 meters. One day I realized that the change house, which had been in operation for 3 years, had outlived its worth.I sold it and wondered what to do with the instrument and other things pulled out of it. I decided to build a barn. At this stage, I made a fatal mistake - I consulted with my wife about the dimensions of the outbuilding. As a result of long negotiations, during which the wife saw no point in building something big, we came to a common denominator - a small utility block, about 2.5x3 meters + high ceilings.
Let's show right away what happened to the user.
The problem is that all the beautiful "pictures" on the correct placement of things in the barn broke on the reefs of harsh reality a year later. The racks and shelves were crammed with various "rubbish", and there was practically no free space.
When asked what to do with this, the user found the only correct answer - to attach another ... shed to the shed. According to MAKS001, headaches can be avoided by immediately building an outbuilding of normal size. And so I had to buy another iron door, erect walls and further down the list.
How to calculate the optimal size of a barn and turn it into a universal utility unit
As you can see from the above, under the word "shed" each developer means his own building. In one case, you need a small utility block for storing garden tools and various little things, and in another, the barn grows to the size of a house. But there is one nuance that unites them. It's usability.
The barn should be practical, which means it should be made for specific needs.
Therefore, instead of taking the size of a barn from the Internet or from a neighbor, it is better to decide on your own what you need a barn for and what you plan to store in it.
There can be a lot of options for such planning. For example, at the initial stage of construction in the barn, you need to place a tool, some building materials, equip sleeping places.
In the future, the barn can be transformed from just a "pantry" on the site - to become a workshop, as well as a place for storing firewood or pellets.
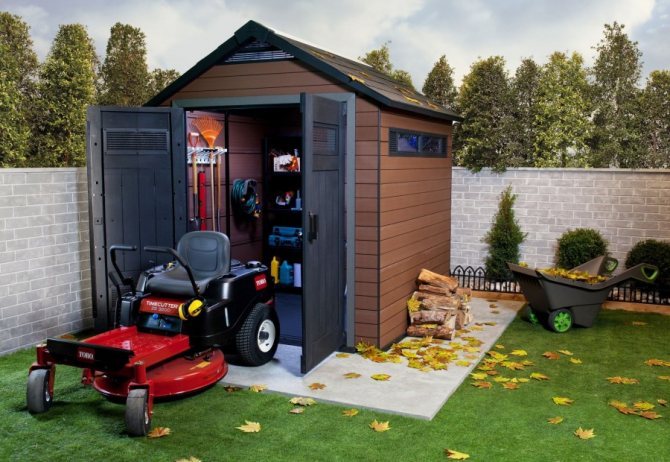
Or it can turn into a "garage" for storing various equipment - a motor cultivator, lawn mower, vibratory rammer, snow plow, etc.
Any summer resident has a basic set of tools and agricultural implements, which cannot be done without on the site. It is from this list that we must build on when calculating the minimum size of the barn.
For example, to store a simple set of garden tools - shovels, rakes, axes, hoes, small shovels, saws, brooms - you can take 2 square meters. m.
If you plan to actively grow your garden and store fertilizers, greenhouse materials in the shed, increase the area to 3-4 square meters. m.
If you have electric tools: a gas trimmer, a pressure washer, garden pumps, hoses, sets of ordinary tools, you need even more space - 5 or more square meters.
These figures cannot be considered dogma. They are a rough guide.
Practice shows that the averaged and the optimal size for an outbuilding can be taken as 3x6 meters with a height of 2.5 m.
In this case, it will be possible to place long building materials in the shed - boards and fittings. To equip a small workplace for a home craftsman, put up racks for storing hardware and various things necessary in everyday life.
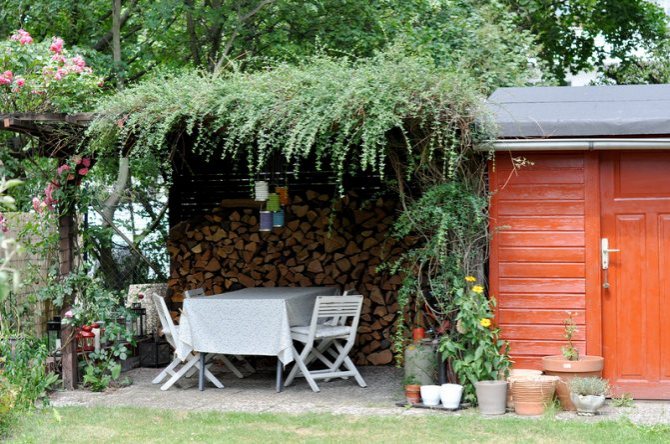
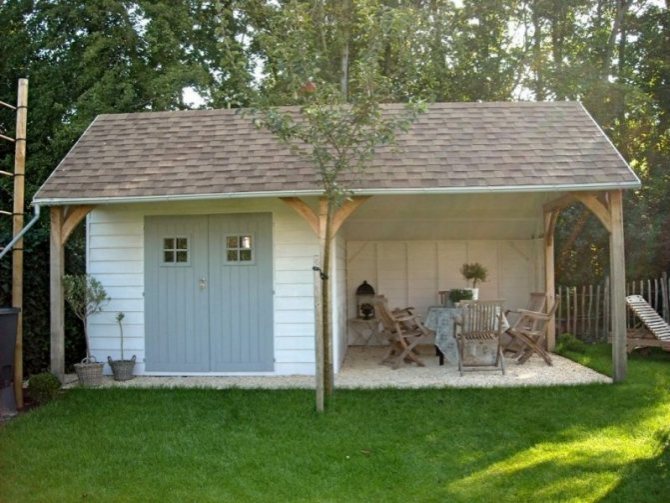
When building a barn, do not forget about arranging a small terrace with a canopy, where you can work outside in bad weather or just relax, sitting at the table in the evening.
This greatly improves the usability of the utility block.
An important stage is the zoning of the barn. To do this, we divide the building into a number of rooms - blocks, each of which stores its own. For example, "dirty" things - a garden wheelbarrow, shovels, rakes, spades, watering hoses, ie.what is necessary for working with the land, it is better not to drag it into the outbuilding, but to place it on the side in a small compartment with separate doors.
So these tools will always be at hand and you will not have to sweep / wipe the floor in the barn every time, cleaning out sand, black soil, fertilizers or clay.
We allocate space for a work table, shelves with carpentry and metalwork tools and storage places for bolts, nuts, nails, screws, etc.
The rule: what is required first and foremost, we put closer to the entrance. Anything that is rarely used or depending on the season can be placed in the depths of the shed against the far wall.
If you plan to store long materials in the shed, then the door, for the convenience of dragging them in, should be done not in the middle of the building, but on the side - on the right or left, or at the end. If you do not "greedy" at the height of the barn, then the attic can also be the best place to store the remains of fittings, boards, plywood, pipes.
Those. all that is not needed often, but if necessary, you can easily get it. In addition, even before construction, we think over whether the shed will be insulated. In our climatic conditions, this will allow working in a farm building in late autumn and winter.
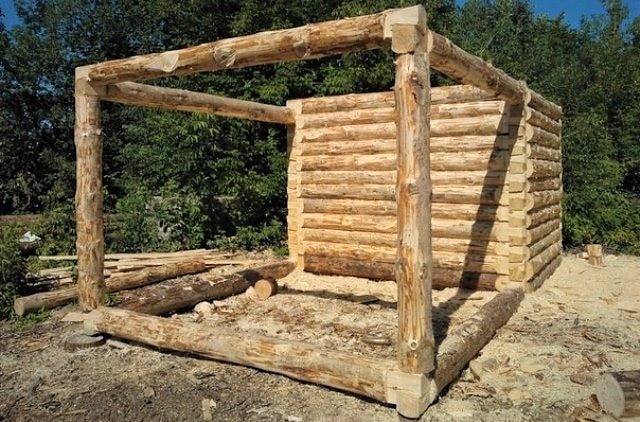
Beams, logs and sleepers
When building a house from logs or a bar, they must be purchased in such a way that there is enough for the shed. Buildings from one material look much better than different types.
It is better to entrust the assembly to specialists. Many of those who did this work with their own hands later honestly admit their mistakes and mistakes.
A blockhouse made of timber or logs as a barn is the optimal solution for year-round keeping of animals and setting up a workshop. For a cold warehouse, it will be cheaper and easier to assemble a regular frame, sheathed it with slate, board or metal profile.
Occasionally on farmsteads there are outbuildings made of old sleepers. Today, wood is rarely used for their manufacture, since it was replaced by reinforced concrete. Nevertheless, in remote corners of Russia, you can still find deposits of sleepers that have served their time.
If you manage to buy them on the occasion, then there will be no special problems with the construction of a farm building. Such a structure cannot be called beautiful, but you cannot deny it quality and durability.
Assembling the walls is simple: the sleepers are stacked one on top of the other, tying them up at the corners. The walls are fastened in height with steel brackets driven into the side edges of the beams. In corner joints, for greater rigidity, the staples are driven in from above, connecting the joined crowns with them.
There is another installation method. In this case, part of the sleepers along the perimeter of the building is vertically dug into the ground. The rest are cut with a chainsaw so that a spike is formed at the ends. A groove is formed on the posts, stuffing two bars onto the sleepers.
After that, sleepers are inserted into the prepared grooves in layers, fixing them together with the help of brackets.
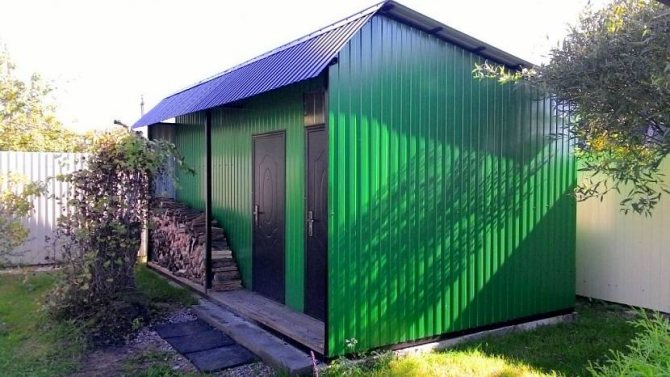
Profile shed
In order for the shed to be not only cheap, but pleasing to the eye, it is necessary to use corrugated board. A pleasant bonus to the relative cheapness of the building material will be its lightness. But a weak rigidity will require strengthening the outbuilding with the help of jumpers.
Basically, a metal shed does not differ fundamentally from a frame shed. The main difference is the cladding material used.
Comparison of prices for various construction options, taking into account their quality
The cheapest segment of utility rooms, where prices vary between 11,000 - 30,000 r, is represented by frame structures of a small area. So the economy class assumes, as a rule, a bare box measuring 1 × 1 m (2 × 1.5 or 2 × 2 m). Lining is used as a cladding, the roof is covered with ondulin or roofing felt.
Frame sheds priced between 30,000 and 70,000 are in the mid-range.They differ from inexpensive buildings in size (for example, 3 × 3 or 6 × 2 m) and cladding material.
The price of expensive frame-type utility rooms can reach 160,000 rubles. For example, a 5 × 4 m shed costs on average about 85,000–95,000 rubles, 4 × 7 m - 133,000 rubles, with partitions - 155,000 rubles.
To the cost of the box will be separately added prices for components, such as roof overhangs, insulation, steps, etc. As well as payment for work.
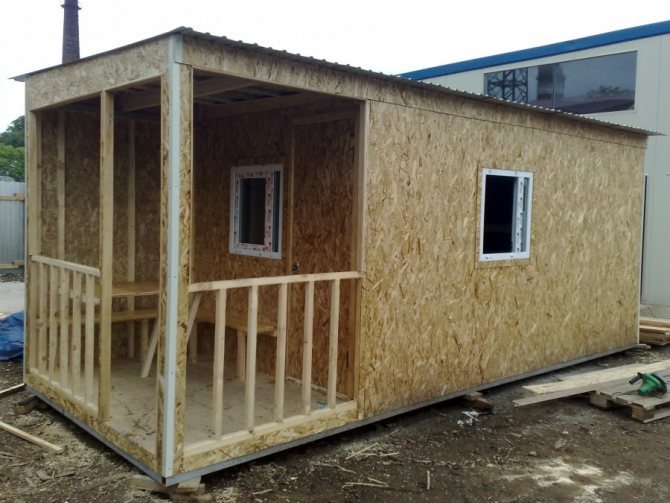
For example, the price for a 3 × 4 m utility block based on a metal frame in the basic configuration, including a frame, walls, a roof with waterproofing, a door, is 113,000 rubles. The cost with installation is about 156,000 rubles. To this we must add the cost of a window with installation - 16,700 rubles, insulation - 16,500 rubles, interior trim with corrugated board - 32,400 rubles, drain - 7800 rubles.
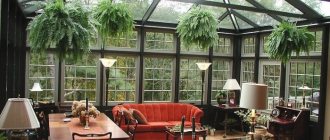
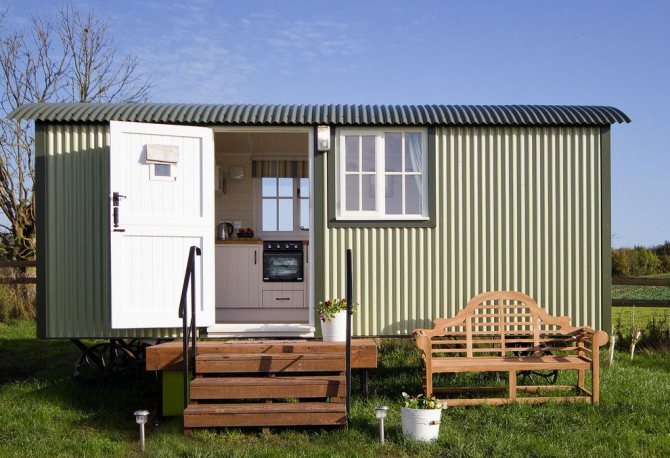
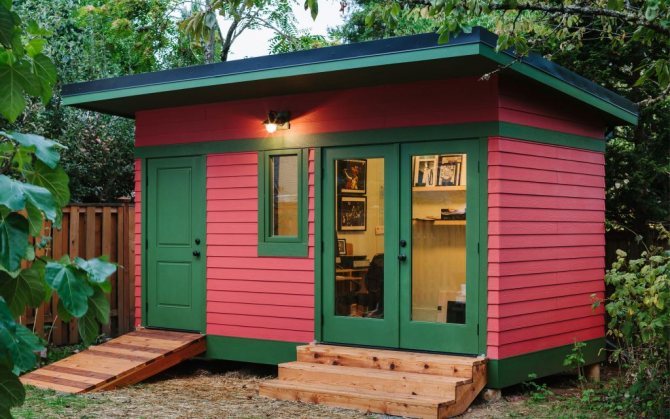
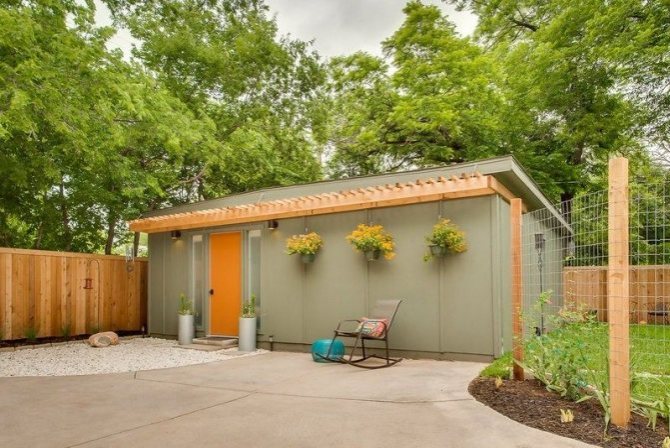
Such a building can serve as both a utility room and a house for children Source houzz.de
There is also a category "Lux", which includes designer models for individual orders. Their cost can start from 600,000 rubles.
Container blocks cost in the range of 40,000 - 65,000 rubles, depending on the size and configuration. Typical dimensions: 2.4 × 2.4 × 2.4 m, as well as 2.4 × 2.4 × 4.0 m and 2.4 × 2.4 × 5.8 m.Basic equipment includes hardboard interior trim, floors Chipboard, thermal insulation and wooden windows.
Prices for buildings made of foam blocks start from about 100,000 r (4 × 2 m), 150,000 (3 × 4 m), 340,000 (6 × 4 m).
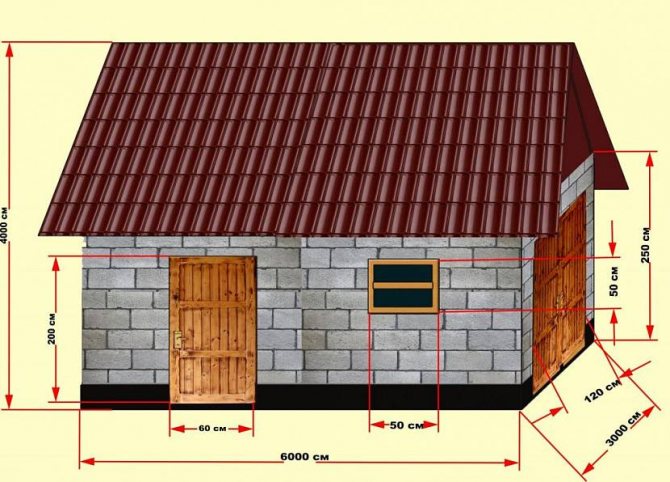
Hozblock dimensions
Before ordering a shed for a summer cottage, you need to decide on a future purpose, which may affect its parameters. Experts recommend the following ratio of size and purpose:
- inventory - 1.5x1.5 m;
- inventory, paints, fertilizers and so on - 1.5x2 m;
- pump, hose, lawn mower and other equipment - 2x3 m;
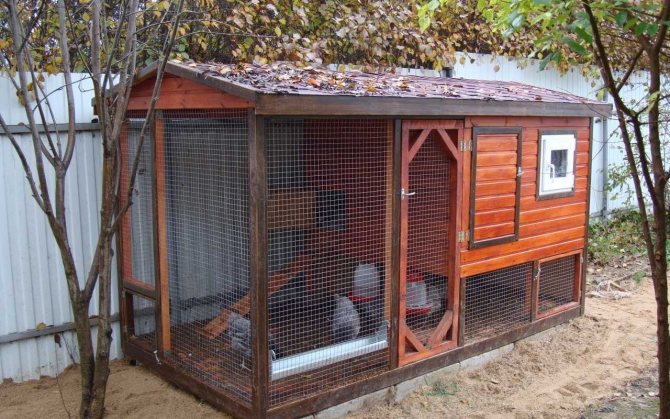
- keeping of small farm animals and poultry - the size depends on the number of planned animals.
To store inventory and various materials, shelves and hooks are hung on the walls. Quite often, sheds are built with a margin, making their base area 3x6 m.
The size of the outbuilding directly depends on its main purpose: it will be a room for storing inventory or for keeping animals
This might be interesting!
In the article at the following link, read about the frame of a shed with a pitched roof.
Roof covering
When erecting a shed, it is necessary to pay special attention to the roofing, since the susceptibility of the building to the effects of the environment depends on it.

And if roofing material or simple boards are mainly used for a frame shed, then something more serious is required for a foam block shed. The ideal solution would be to choose slate or corrugated board. This will reduce the risk of moisture getting inside the outbuilding.
The floor inside the barn will directly depend on who will live there. For birds it is better to use straw, and for pigs it is better to pour concrete screed and lay boards.
To start choosing the type of building, you need to determine with the material and its availability with you. In the presence of a significant amount of building material, which is enough for the construction of a building, it is necessary to give preference to it.

Construction stages
Frameworks are considered one of the most popular utility rooms. Their construction takes a minimum of time and is carried out according to the standard scheme:
Assembling the base
- After the earth is rammed so that the soil gives maximum shrinkage, a sand-crushed stone pillow is prepared, the perimeter of the building is marked.
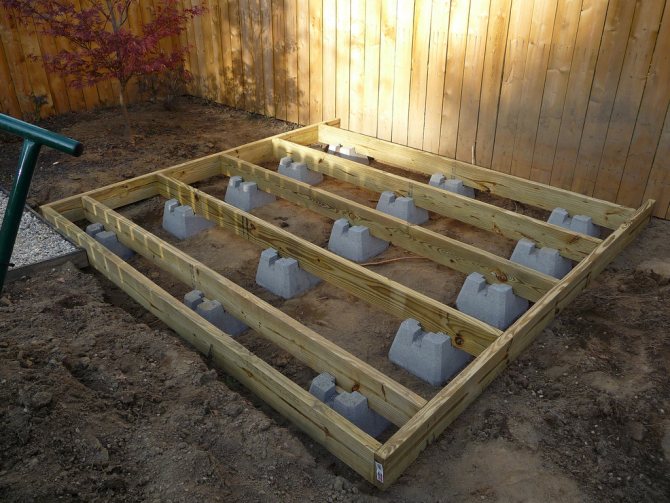
- In the corners and in the middle of the long sides, concrete blocks are installed.
- A wooden frame or a metal frame is assembled on the blocks.
- Logs are assembled for the floor, a heat-insulating layer and a floor covering, for example, linoleum, are laid.
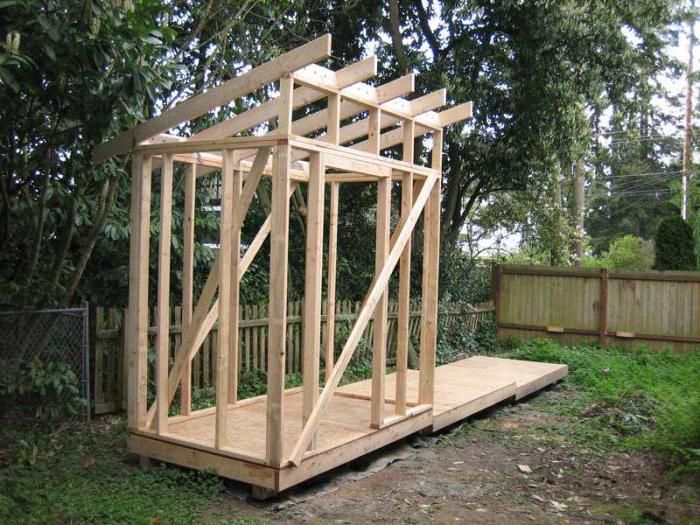
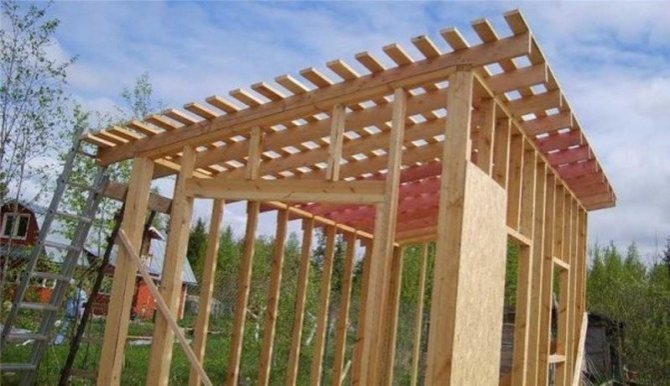
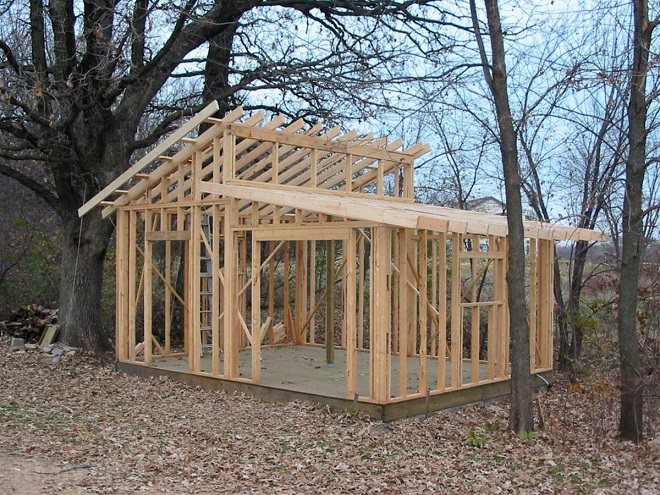
Shed frame with a pitched roof Source
Walling
- Support pillars are exposed at the corners, and racks around the perimeter.
- Door and window frames are mounted.
- External and internal cladding is carried out.
Construction of a pitched roof
- The frame posts are connected to the strapping frame.
- Lay a waterproofing layer, then fasten the crate.
- The crate is covered with roofing material or a soft roof.
- A corrugated sheet is mounted, as an option - a metal tile.
After completing all the installation work, they proceed to the interior decoration of the room.
Gable frame on a columnar foundation Source sami-
Tips for a novice builder
The economic block cannot be called a complex structure, and it is quite possible to build it independently. But it is important, firstly, to stock up on building materials and tools in advance. Secondly, it is important to perform all operations sequentially, in stages:
Draw up a plan and bring the necessary building materials to the site. Prepare the construction site by clearing the area of debris, unnecessary trees and shrubs. Then go directly to construction work. If a capital structure of bricks or blocks is assumed, then a strip foundation is equipped. But for a wooden or frame structure, a pile or columnar structure is sufficient. Be sure to arrange waterproofing.
After that, they begin to erect the walls, and then the roof. The next stage is interior decoration. The choice of options is wide, for every taste and budget. It can be plaster on brick or masonry, drywall, lining, etc.
If it is planned to keep chickens in the barn, then the interior decoration should be easy to clean and disinfect. Plastered or planked walls are best disinfected by whitewashing with fresh lime.
We build a shed with a wooden frame with our own hands
Since the most common barn options are timber-framed structures, it can be considered one of the best. The availability of materials makes it easy to build a reliable structure with your own hands. In addition, a solid foundation is not required under a wooden shed (even with metal sheathing). This feature allows you to save both time and money for the construction of the facility. To guarantee a long service life of the structure, it is necessary to initially prepare the tree: treat it with an antiseptic. Additionally, it is recommended to carry out the treatment with a fireproof impregnation. Such compositions will eliminate the danger of burning a wooden frame in a force majeure situation. It is also worth taking care of proper ventilation. This will ensure good wood preservation. Below we will consider all the stages of the construction of such a shed for storing tools and garden tools.

Required materials and tools
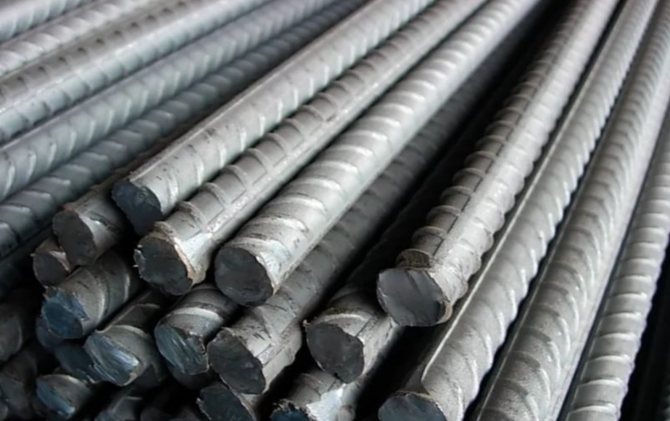
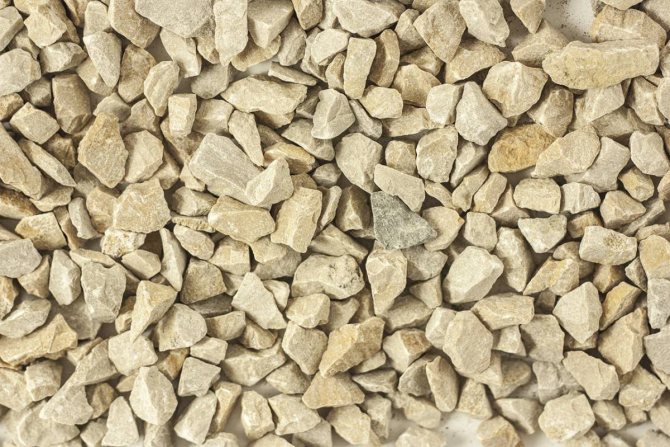
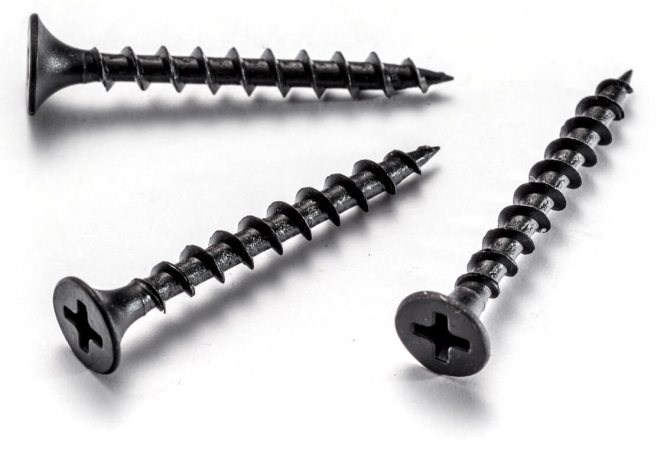
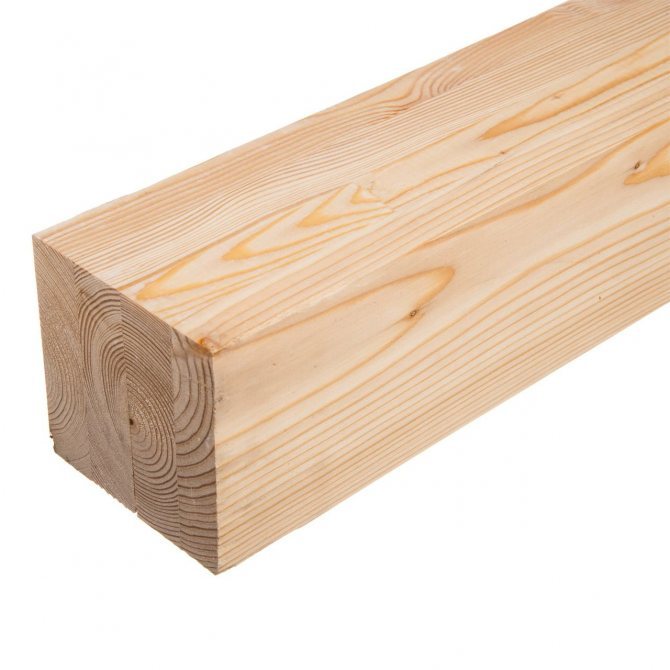
Obligatory materials for creating a reliable foundation for any building are crushed stone, sand and cement. Additionally, asbestos pipes and fittings or bricks are used for the foundation. For the construction of straps and the construction of the frame, you will need a bar with a cross section of at least 10x10 cm (for a solid construction, it is recommended to choose a bar with a section of 15x15 or 20x20 cm). As a floor covering, a floor or terrace board with a thickness of about 2-3 cm is suitable. Sheathing of the frame can be carried out with a profiled sheet or with wood materials: boards, slabs. Also, the clapboard can be cladding. For work, you will need a chainsaw or circular saw (for adjusting materials), a screwdriver and wood screws. For wood processing, antiseptic and fireproof impregnation is required.
Shed base - do you need a foundation
A small frame-type shed made of wood is lightweight, so it can actually be erected without a solid foundation. But at the same time, the distance from the ground to the object itself should be about 20-40 cm. This requirement is based on the need to prevent the contact of the tree with the ground and to increase the shelf life of the wood. The most suitable type of foundation for a frame shed will be a columnar one.Its elements should be located at every corner of the building. Also, auxiliary pillars are located at a distance of 0.5 m from each other under the future walls of the building. You can build a columnar foundation using one of the following technologies:
- Made of bricks.
Pits are dug about 90 cm deep. A cushion of rubble and sand is laid at the bottom. On top of bricks using concrete mortar, columns are built. If the central part of the pillars remains hollow (with special brick laying), then it is poured with concrete.

- From asbestos pipes.
A hole is dug under each pipe 1 m deep. A cushion of rubble and sand is laid. Reinforcement is installed inside the pipes, concrete mortar is poured. The outer part of the pipe, which rises above the ground, is covered with mastic or bitumen.
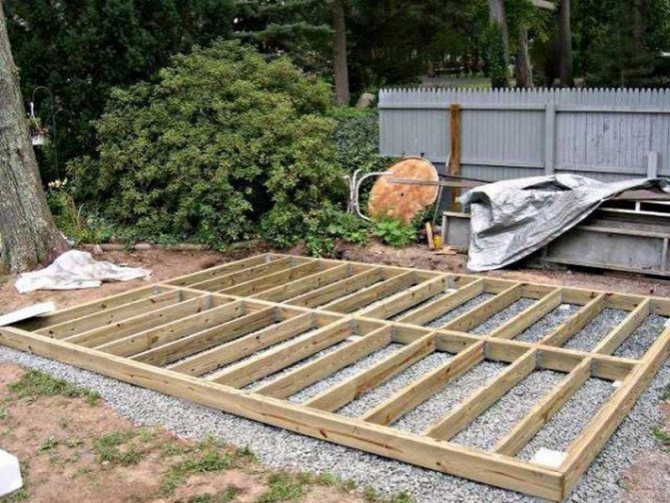
We lay logs and install floorboards
The construction of a reliable and durable wooden frame begins with the impregnation of all wood building materials with antiseptic and fireproof impregnations. Then you can proceed to the direct assembly of the wooden floor:
- The pillars of the foundation are covered with roofing material. A bar is laid out around the perimeter of the future barn. In the corners, the elements can be connected with brackets, bolts, in a groove (additionally fixed with nails).
- Logs are installed inside the lower strapping - transverse boards located upside down. They are attached to the strapping with staples and additionally fixed with nails. The step between the lags will be 20-30 cm.
- On top of the log, an OSB board or plywood is nailed (for woodmen, this step can be skipped). The task of the auxiliary materials is to maximize the reliability of the floor.
- On top of the "rough" floor, a floorboard about 2 cm thick is nailed.

Assembling the frame
The fabrication of the frame for each wall is carried out separately, taking into account the location of the windows and doors. Vertical supports at a distance of 60 cm are nailed perpendicularly to a separate board (bottom harness). At the top, the vertical supports are sawn off at an angle to attach the top harness under a pitched roof. To arrange a window, a pair of horizontal boards are nailed between adjacent vertical supports. The window frame will be located between them. After assembling each wall, the workpieces are set strictly along the edge of the previously assembled floor and nailed to it. Additionally, the adjacent walls are fastened with staples. For vertical supports and window "restraints", you can use a board with dimensions of 10x5 cm. But for arranging a doorway, strapping, it is better to use boards of 15x5 cm.
Laying roof rafters
By preparing the top trim during the wall assembly process, the installation of a pitched roof will be simple and quick. Prepared building materials must be treated with an antiseptic and only then used. The rafter system for a pitched roof is being installed according to the following scheme:
- Across the upper strapping with an edge upwards, the boards are installed - counter-battens. They can be fixed in different ways: by nailing them down with a pair of nails or securely fixing them with special staples.
- A crate is mounted from similar boards, but they will be located not with the end, but with the side up. The step between the elements of the lathing can be from 30 to 40 cm, depending on the selected type of roofing materials. The crate is fixed with nails or wood screws.
- If necessary, installation of steam and waterproofing is carried out.
Roof - choice of materials
A shed roof of a shed does not require a lot of material. That is why the owners can not be limited only to the budget roofing. Suitable options for finishing the roof of the utility unit include:
- slate;
It will allow you to quickly and easily carry out roofing work, belongs to the cheapest roofing materials.True, it is short-lived and, moreover, will not be able to complement the beautiful exterior of the building.
Site preparation
The first thing to do after choosing a location is to mark the site. It is usually marked with pegs placed in the corners of the future structure. A string is pulled over the pegs - this will make it easier to control the level of the foundation being built.
Layout and tracing of the site for the future barn
The foundation for the shed can be made in different ways, and the choice will depend on what material the structure will be erected from. Most often, a shed is built on a frame type, but some owners prefer to erect such a farm building from bricks.
The frame structure is much lighter than a brick one, so you can choose a monolithic, columnar or strip foundation for it, or you can install it on concrete blocks of a relatively large size.
A tape and monolithic version of the foundation is well suited for a brick structure. You can, of course, adapt the columnar to it by making jumpers between the posts, but this is quite troublesome. To choose the right foundation for the planned structure, you need to know what they are.
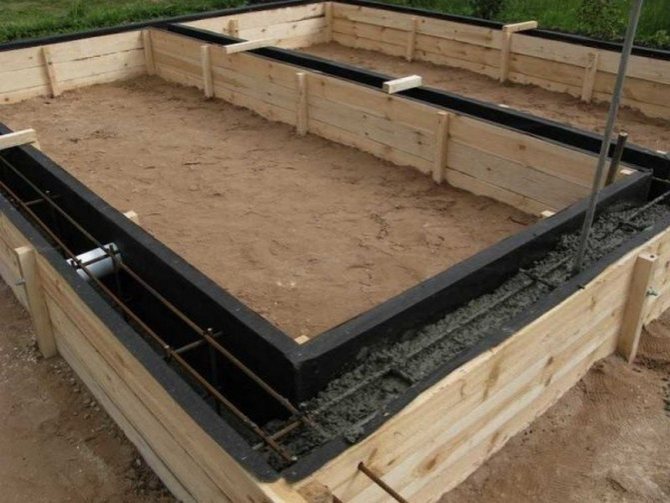
Monolithic foundation
A monolithic foundation, although the most expensive and time consuming to install, has several advantages over other types of foundations.
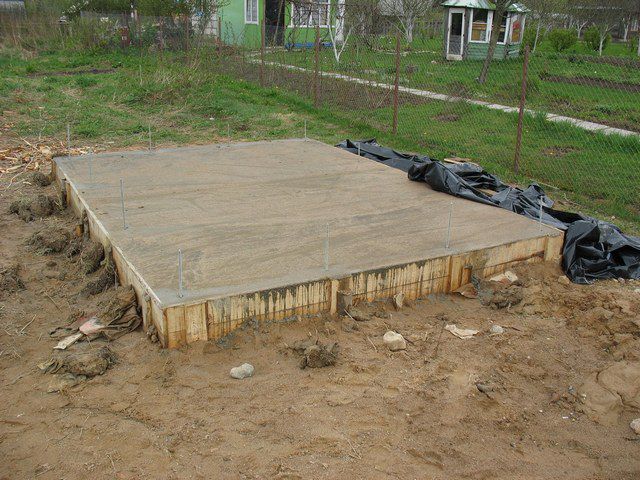
Monolithic foundation
- It is durable and strong, so even when the wooden structure falls into disrepair, it will be possible to build a new one on the old foundation.
- Having built such a foundation, the owner receives not only a base for the walls, but also a finished barn floor.
- If concrete is reinforced with topping, then the floor does not require additional flooring. But if you wish, you can put linoleum or tiles on it, i.e. the concrete base gives the full right to choose its decoration.
The construction of such a foundation is as follows:
- On a marked site, a not too deep pit is digging, since a barn is a light non-residential premises that does not require warming of the base. Therefore, its total thickness can be 300 ÷ 350 mm, i.e. its underground part will be 200 ÷ -250 mm, and the aboveground part will be 100 ÷ 150. Even if the walls are built of bricks, half a brick thick (and more for a barn is usually not required), such a base height for it will be quite enough.
- In the prepared area, it is necessary to loosen and remove the soil 400 ÷ 550 mm deep.
- Then, at the bottom of the pit, you need to arrange a 100 mm sand cushion, which will waterproof the foundation from below. Sand must be poured with water and thoroughly tamped.
- Crushed stone is laid on the sand in the same layer. She also compresses to the maximum. Crushed stone will make the base more durable and prevent it from sinking.
- A formwork is installed around the pit, with a height of 100 ÷ 150 mm above the soil level.
- Next, a rough concrete solution is mixed, which is laid on the crushed stone in a layer 7-10 cm thick and evenly distributed throughout the pit - this will be a rough screed.
- Then immediately the reinforcement grid with cells of 60 ÷ 100 mm is laid. It can be fixed with wire staples by sticking them in several places in the rough tie.
- If the floor area of the shed is large enough, then after the rough screed grabs, you need to install the beacons flush with the formwork height. They will be necessary for the convenience of leveling the surface.
- Further, a thinner cement-sand mortar is poured, made in proportions of 1: 3, and leveled with a rule along the guides of the beacons.
- The structure must be given several hours to set, and then covered with plastic wrap on top to uniformly cure.
- If it is planned to strengthen the surface with topping, then this process is carried out on a newly set, but still damp surface.
Strip foundation
A strip foundation will require less costs, but having arranged it, you will also have to make a floor from boards, plywood, or also pour a screed, but thinner, since this type of foundation is intended only for the basis of wall structures. It can be made both under brick walls and under frame wooden ones.
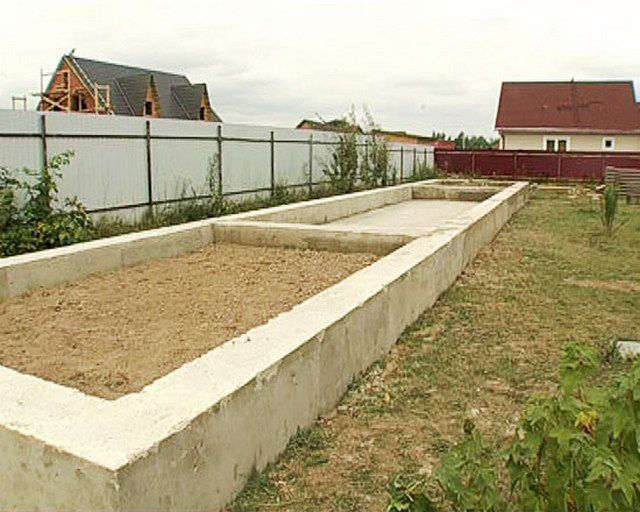
Ready strip foundation
- For the strip foundation, a trench is being dug along the perimeter of the marked area, about 100 ÷ 120 mm wide than the thickness of the future walls. The depth of the trench, like that of a monolithic foundation, should be 400 ÷ 550 mm.
- Laying the sand cushion and strengthening with crushed stone is also done in the same way as when constructing a monolith.
- Further, the trench is fenced off from the outside and inside with formwork, which should be 200 ÷ 350 mm high.
- A welded structure made of reinforcement is installed on the crushed stone layer, it is desirable that it be 50 ÷ 70 mm high below the upper edge of the formwork.
- Further, a concrete mixture is poured into the formwork and tapped with a bayonet shovel to remove air that can form cavities inside the concrete, which will weaken the structure.
- The top of the poured foundation is leveled along the upper edge of the formwork, and the structure is left to solidify.
- When the concrete hardens, the formwork is removed from the base.
- Inside the foundation, it is best to fill in small fraction expanded clay, it will insulate and waterproof the floor, and also will not allow rodents to start, since they simply do not live in it.
Column foundation
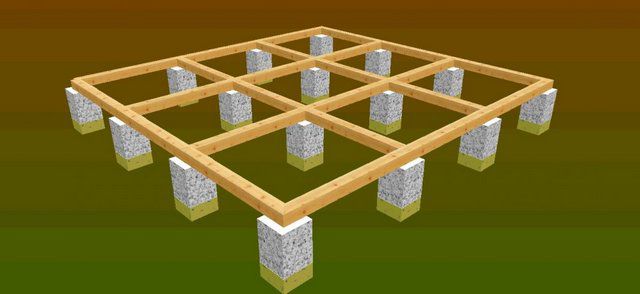
The supports of the columnar foundation can be made of bricks or cast from concrete
The columnar foundation is used for the construction of a frame structure. Install it as follows:
- The area allocated for the shed is marked out precisely for the columnar foundation, since the supports must stand at a certain distance from each other, it usually ranges from one to one and a half meters.
- The required number of holes 350 ÷ 450 mm deep, about 400 × 400 mm wide at the top are dug along the markings.
- At the bottom of the dug holes, a layer of 100 mm of sand is poured and the same amount of crushed stone. Each of the layers compresses well.
- The next stage is the flooring of the waterproofing made of polyethylene film, it should line the pit and come out to the surface, to the height of future posts, plus 70 ÷ 100 mm.
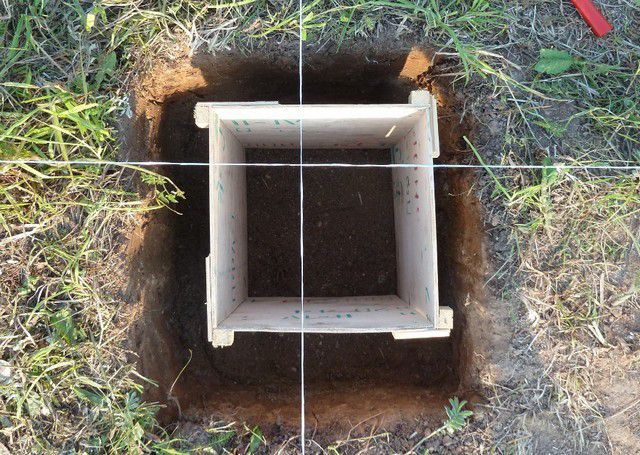
Formwork for pouring the pillar foundation support
- A formwork is installed in each pit - a box without a bottom. Inside it, the waterproofing film is straightened and fixed with staples along its top. The shed structure will be raised from the ground to the height of the box.
- In each formwork box, a welded or wire-bound reinforcement structure is installed.
- After that, the concrete solution is poured. From above, along the formwork, it is leveled and left to solidify.
- While the columns are solidifying, if desired, the following work can be carried out, which will reduce the ingress of moisture into the barn. To do this, across the entire site, around the posts, 50 ÷ 70 mm of the fertile layer is removed, and sand is poured and tamped in its place, and fine gravel is poured on top of it.
- After the concrete has set, the formwork is removed from the posts, and then it will be desirable to cover them with a waterproofing material, for example, bitumen mastic or liquid rubber.
Prices for bituminous mastic
Bituminous mastic
Video: barn on a columnar foundation
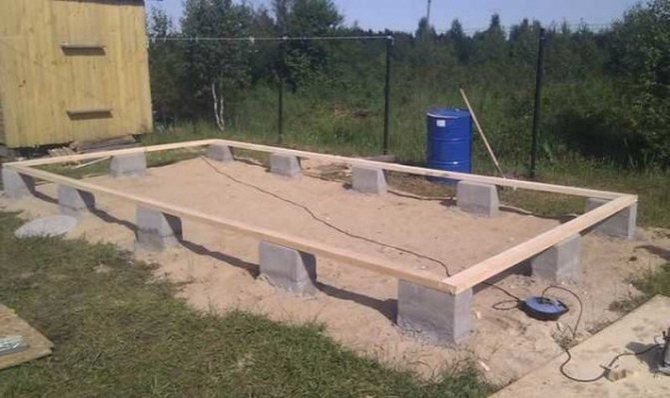
Concrete block foundation
This type of foundation is only suitable for a frame structure, and its installation is the simplest of all the above.
- First, the marked area is cleared, the fertile soil layer is removed from it by 50 ÷ 70 mm.
- Instead of the extracted soil, a layer of sand is poured, watered and compacted.
- A layer of fine gravel is laid on top of it, which also needs to be tamped.
- Further, concrete blocks of the required height are laid on the prepared site around the perimeter. The distance between them should be no more than one and a half meters.The blocks need to be aligned using a level.
After the foundation of any type is ready, on its surface you need to lay a waterproofing of roofing material in 2-3 layers.
Video: building a barn on a concrete block base
Ready-made sheds-hozblok for summer cottages
In addition to the erected sheds, there are also mobile models made of metal and plastic - cabins. Their advantage is that they can be used immediately after installation. But they are suitable exclusively for organizing a warehouse for firewood, storing inventory and tools. Each of these types of objects has its own characteristics:
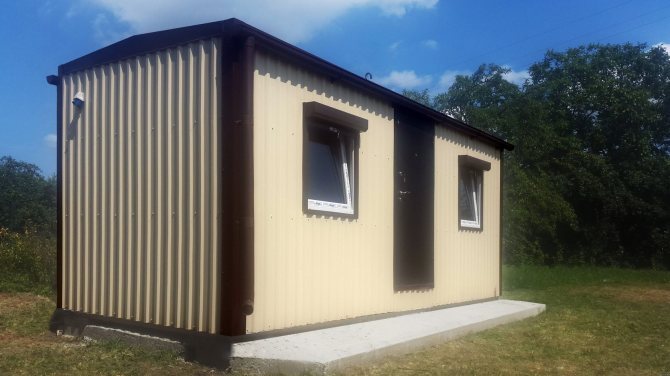
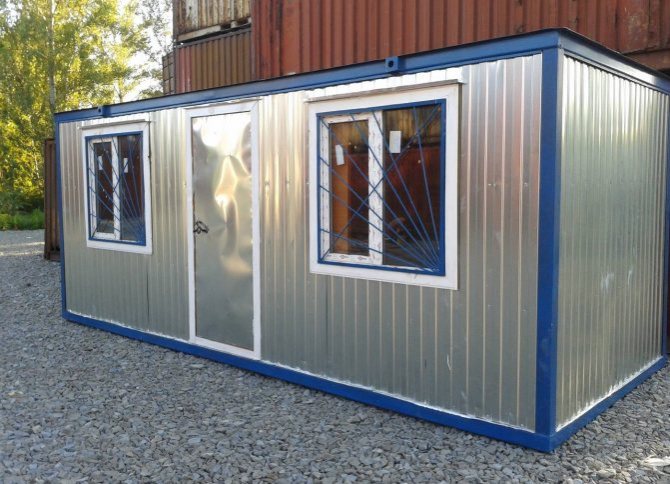
- Metal change houses.
Includes channel frame and corrugated sheathing. Additionally, they can be insulated with foam. The advantage of such sheds is reliability and durability. If desired, a two-story utility block can be built from such objects. The disadvantages of such sheds are the high cost, the complexity of transportation.
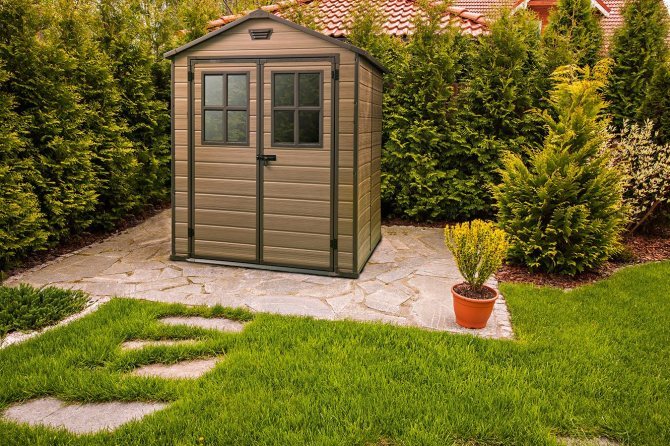
- Plastic sheds.
They are a prefabricated structure that resembles plastic houses for playgrounds. They have an average price, but at the same time they are lightweight, which eliminates the need to make a foundation for them. True, such models cannot be called environmentally friendly. In addition, in harsh regions (with frosty winters or very hot summers), plastic sheds will not last long.

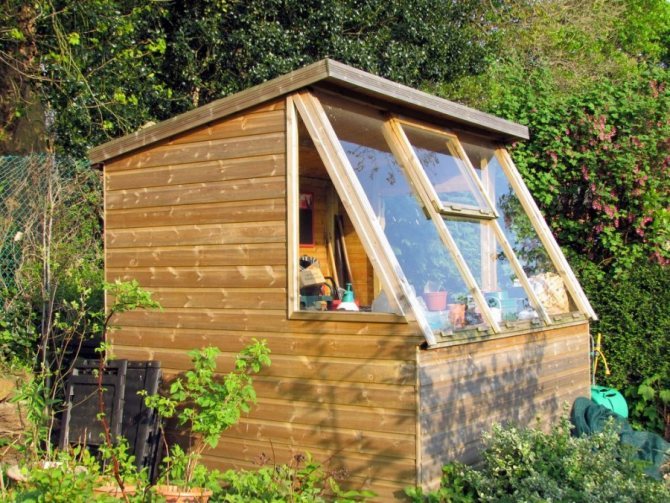
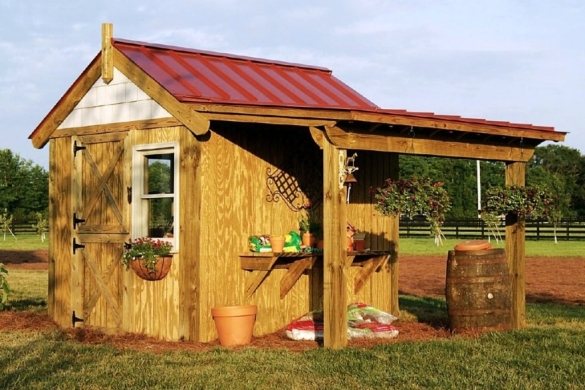
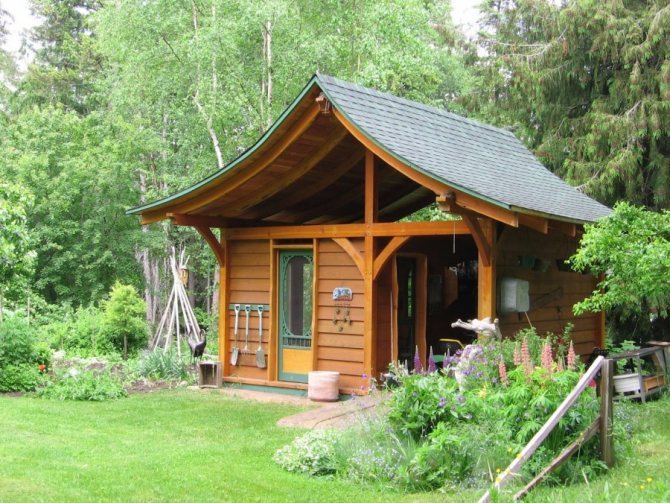
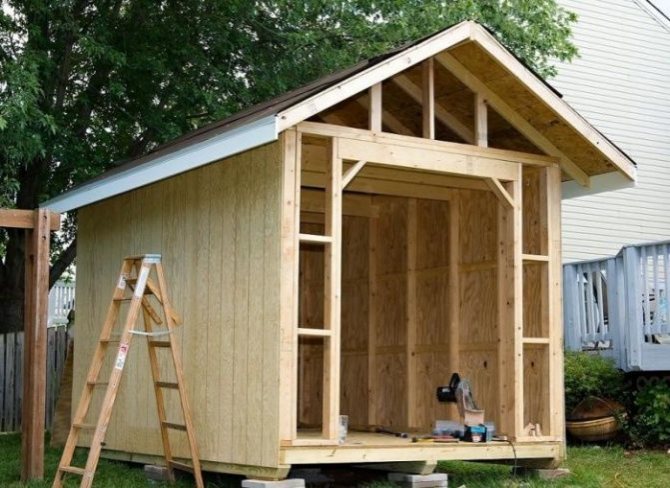
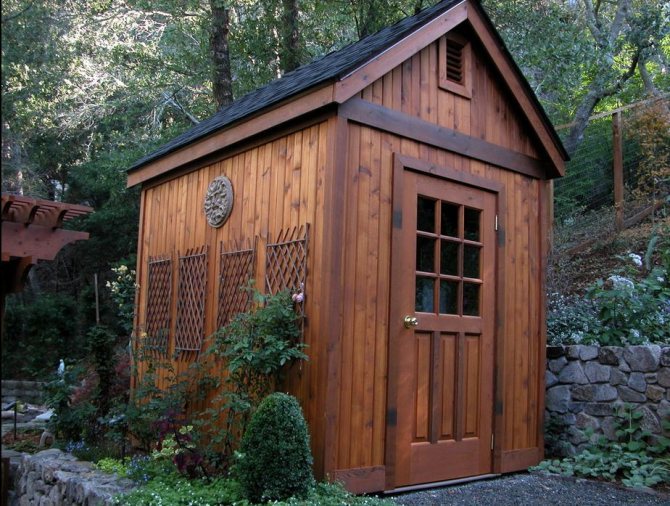
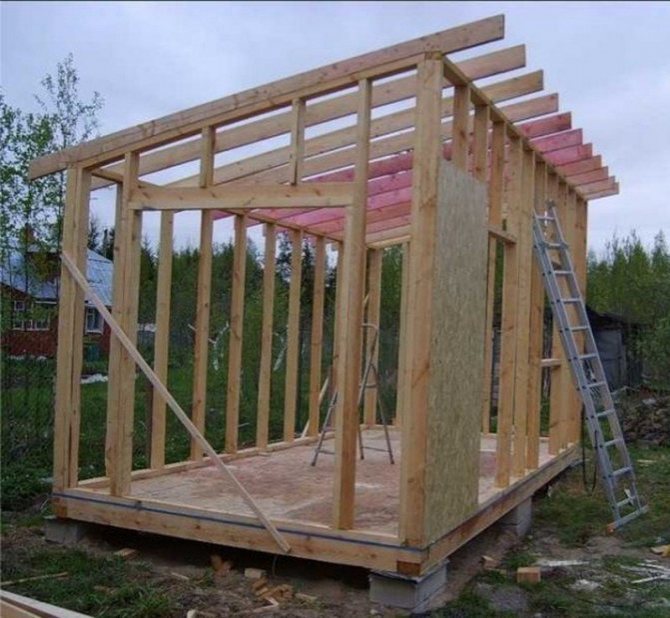
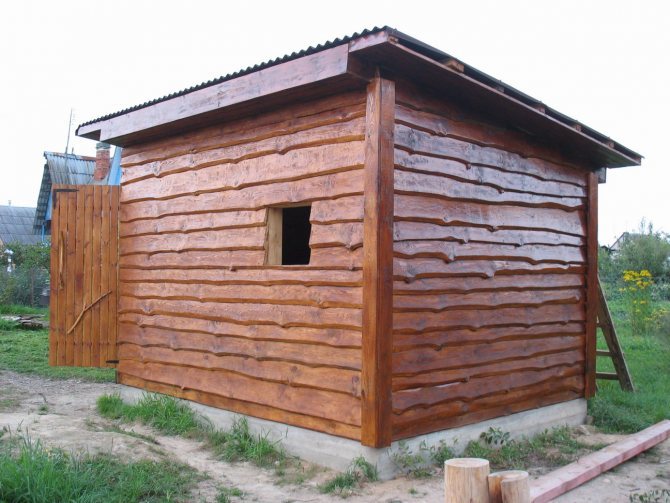
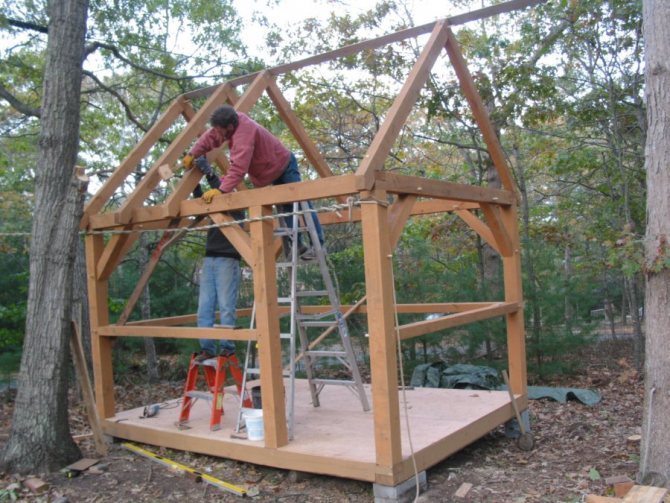
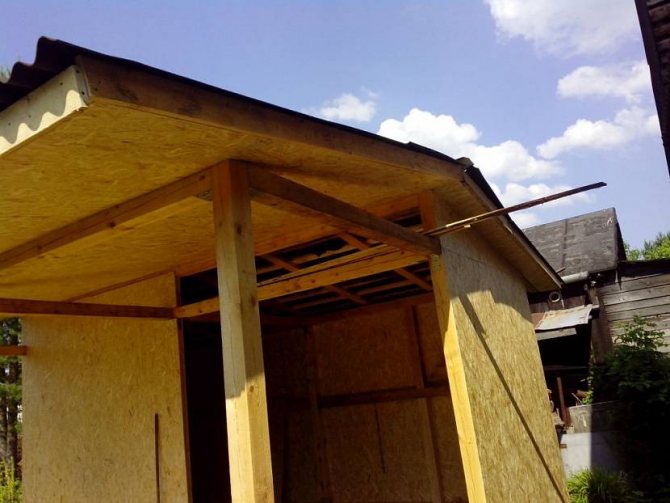
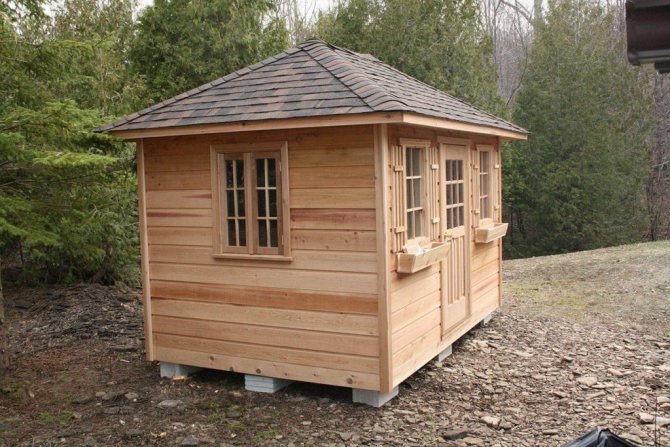
Superstructure
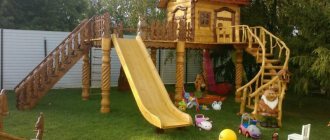
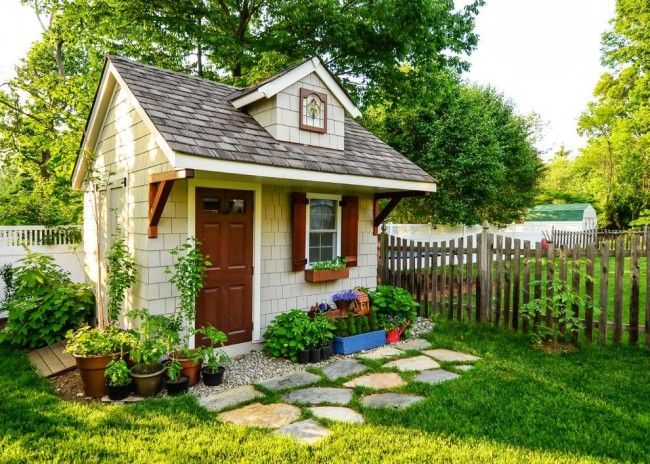
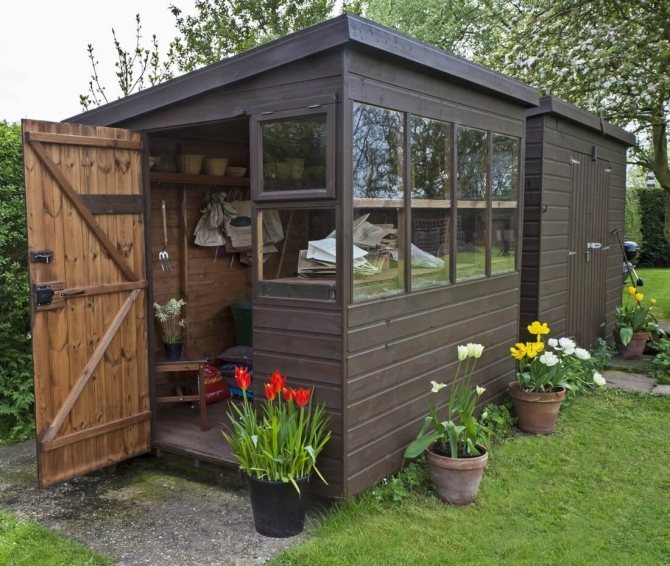
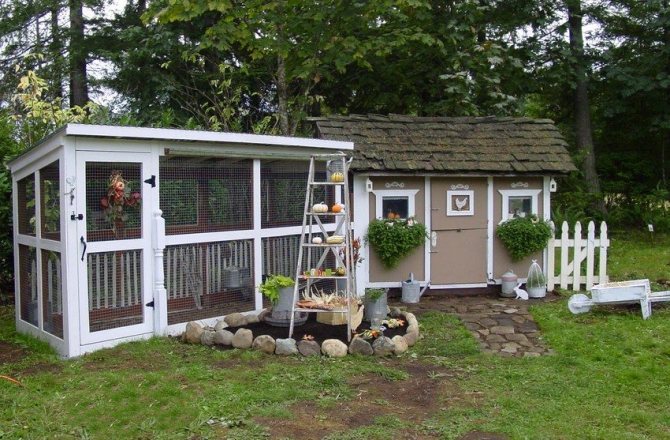
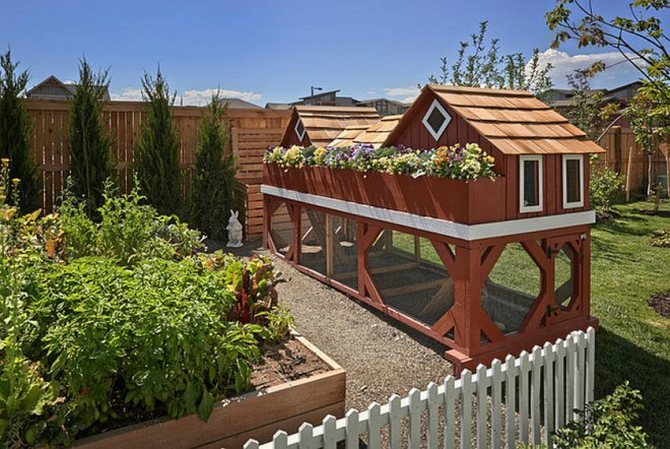
So now we are building a barn. For example, such as in fig. He, too, will easily stand in a 6-acre cottage, but a little more: you can sleep well in it, and there is a tool compartment. In the future, perhaps for a woodshed or poultry house.
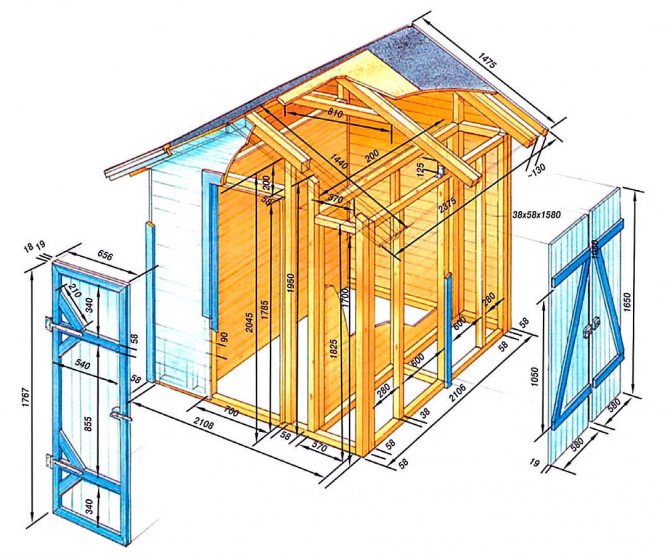
Small country shed
For beginner builders, as a rule, difficulties are caused not by reading drawings and diagrams, but how to put your hands to all this? Unaccustomed to carpentry, not hardened from calluses and not provided with special tools? We will dwell on this in more detail.
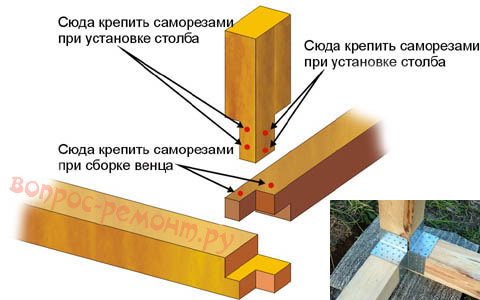
Frame connections
The barn, as mentioned above, is uninhabited and in general, from the point of view of SNiP (Building Rules and Norms), is barely a structure. Therefore, it is possible, without fear of anything, either in essence or on paper, to use thin-walled metal connectors for wooden parts. As for residential buildings, SNiPs are merciless: their metal parts must be from 4 mm thick. This is dictated by the requirements of fire resistance: in case of fire, the building must resist the fire until it collapses, for a time sufficient at least for the evacuation of people. It's easier with a barn.
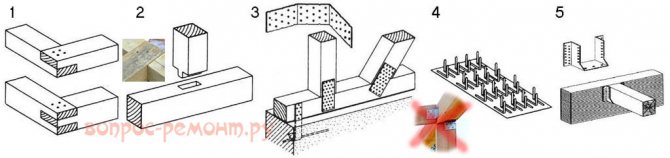
Ways to connect barn parts
Mustache, paw and tenon joints (pos. 1 and 2 in the figure), which require a special tool and sufficient carpentry skills, can be omitted. If you still have to, then you can reinforce it with hardware not with a square or an envelope, but with a pair of nails / self-tapping screws diagonally (on the sidebar in the same place) or along, if the part is narrow.
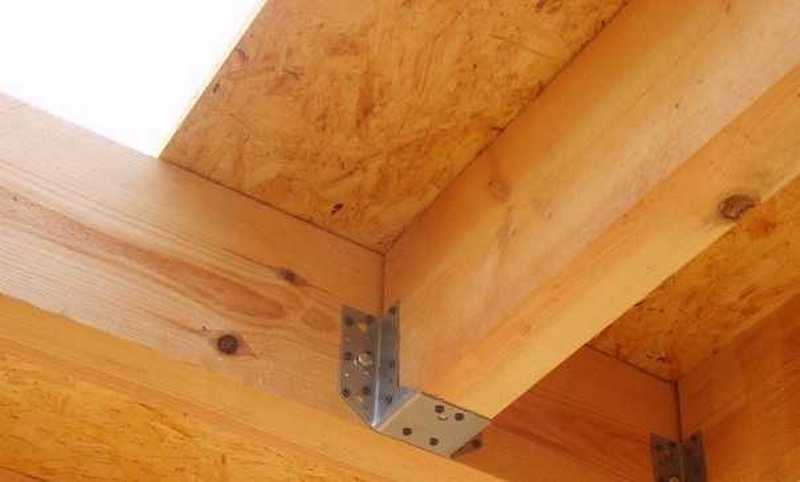
Connections on stamped corners (crossed out in red) without inserting wooden parts are not entirely reliable on logs and ceiling beams, because they are not adapted to shear loads, and the corners themselves are quite expensive. Perforated plates, pos. 3. They can be bent as you like, getting incl. and pockets holding vertical stresses. How do you like the ceiling in fig. on right? No tie-in-slotting of thorns-grooves with painstaking calculations and mistakes inevitable for a beginner, and at least keep an elephant in the attic.
Ceiling frame on metal thin-walled connectors
Perforated plates for embedded anchors are especially good, in the same place in pos. 3. Remember the question: how to put the finished barn on the foundation? It is now clear how.
Nail plates, pos. 4, allow you to save even more on fasteners, but, firstly, they can only be used flat. Secondly, fastening with them requires skill so that the nail folds do not crumple. The nail plate must either be gradually hammered with a hammer evenly over the area, or, conversely, immediately driven in with one powerful and accurate blow with a sledgehammer.
Note: for constant shear-loaded nodes, eg. floor lag, it is still better to use special thin-walled lag pockets or pockets for lag, pos. five.
About sheathing
For all technical parameters, the best barn cladding is plank. Technologically, it is also not difficult, if sheathed in a cut ("herringbone", see fig.). And it is very cheap if the board is unedged for the sheathing, and what kind of sheds come out of skillful hands can be seen in some figs. in the article.
Shedding the barn with planks
Only boards
Many timber merchants sell boards cheaper than timber, because more of them come out of one forest. In addition, having a circular, it will not be difficult to dissolve cheap unedged ones into measured ones. Therefore, a shed of boards entirely is a very relevant question.
How to solve it is shown in Fig. below. Plank beams can be assembled even from scraps, pos. a) and b). Intermediate racks are made box-shaped (pos. C) for internal partitions, and T-shaped (pos. D) frame window and door openings.
Techniques for building a barn from only boards
Are only boards?
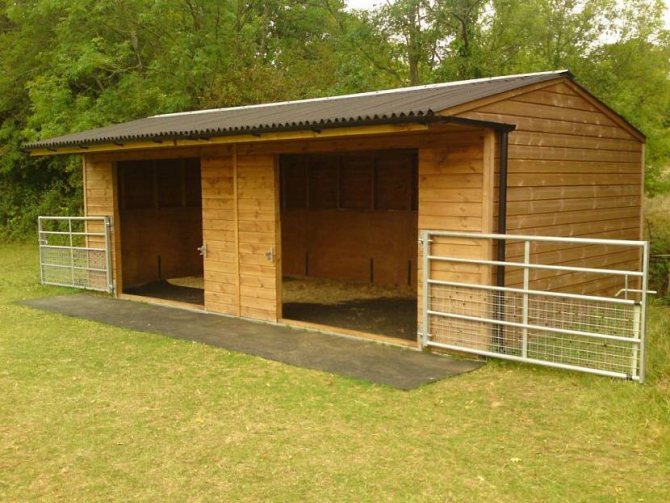
Profiled sheet sheds are most often sold ready-made on a metal frame, pos. 1 in fig. In general, this is not the best option: in such a shed it is stuffy in summer, cold in winter. But, perhaps, for economic reasons, you will stop at such a design. Then you need to take into account that a thin profiled sheet in the building structure will not be a working sheathing and the wooden frame of the shed from the corrugated board needs reinforced.
Actually, the reinforcement of the frame will cost extra money and work will not cost, it is enough to put the braces in the entire wall of 40-mm boards not flat, relative to the lower crown, but with an edge, pos. 2. In this case, there will be a door and a window in the front wall. If only the door, then its opening is made in the middle and the jibs are placed on both sides of it.
Sheds with sheathing of corrugated board and small scraps of boards
The braces do not cut into the racks, they are simply nailed. Horizontal slats with a thickness of the thickness of the board are stuffed under the skin; when crossing with braces in the crate, breaks are made. The sheathing is attached to both the crate and the braces.
Note: it is highly desirable to adjust the dimensions of the shed and the selected corrugated board so that the corners of the waves of the vertical sheathing fall on the corners. Then they are attached directly to the corner posts, which will give some additional strength to the structure.
The same type of frames can be sheathed with a small non-measured board: container (pos. 3), scraps. You can make a shed out of anything very cute in different ways. For example, lighten old boards as described below, sand, stain with stain and fill in an artistic mess, pos. 4. Or paint the boards separately, displaying geometric patterns, or something else to fantasize.
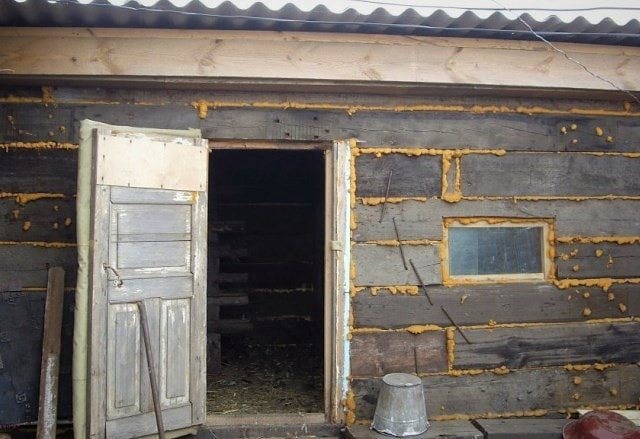
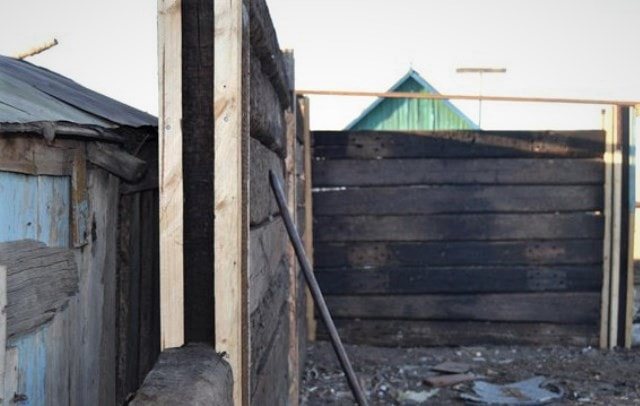
Very "bad" boards
Old boards are dark and unsightly. The frame of a barn in haste can be made literally from garbage, pos. 1 in fig. The result is a painfully familiar bawdy shack, pos. 2. However, if you got this from your great-grandfather, but it is still quite dilapidated and crooked, it is not so difficult to bring it to a form similar to that in pos. 3:
Substandard board sheds
- Take out the window, remove the door.
- Support the corners from the outside with struts made of poles, aligning the pillars. It does not go further - no need, why should it be durable.
- Inspect carefully, reinforce with self-tapping screws. We do not touch old nails, let them rust to the end.
- Remove the roof and roof battens.
- Treat the entire structure with a wood clarifier (reducing agent).
- After 2-5 days, treat with another biocidal impregnation, drying oil or, in extreme cases, working off.
- Polish with acrylic varnish if desired. There is no need to paint, the "rusticity" will go away, and the "crookedness" will be eliminated by all forms.
- Put a new window, hang a door, roof.
About lightening wood
Wood restorers are made on the basis of bleach.Therefore, if lumber is processed individually, you need to work in the air or in a well-ventilated area. It is not necessary to apply the composition with a spray, as is often written in the instructions (they seem to be made up by marketers, not forestry technicians), everything around is sprinkled with a caustic liquid. Treat with a brush; best of all - plastering; it draws in a lot of solution and gives it out evenly.
We got to the roof
The advantages of a shed roof have already been mentioned. If you are more satisfied with the gable roof, then its rafters will be quite enough with one suspension without crossbars, pos. B in Fig. The material is everywhere - 100x50 timber or 100x40 board. Mauerlat is not needed, the trusses are attached to the beams of the upper harness at the corners or bent perforated plates. All parts of the truss are connected in the same way.
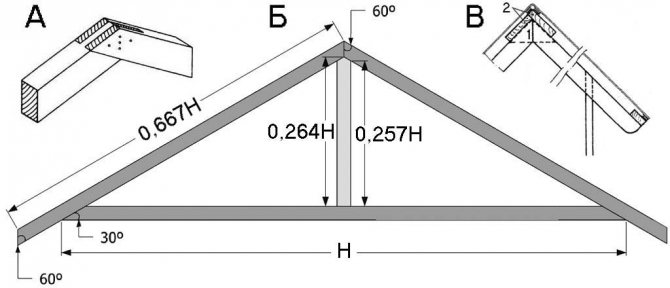
The structure of the rafters for the gable roof of the barn
Cutting the tops of the legs into each other, as usual (pos. A), is not worth it, as well as fastening the ridge corner of the legs with a steel plate: the first is too difficult, the second is weak. The ridge of the roof is formed, firstly, on the ground with kerchiefs (pos. B1) from scraps of boards from 20 mm thick. The kerchiefs are placed on both sides, fastened with 12 self-tapping screws, 3 for each half of the kerchief. And the rafter structure receives its final strength after installing a ridge girder from 2 boards, pos. AT 2; it is nailed or screwed to the legs, 2 attachment points per leg.
Carpentry or how to build a barn
When the floors are ready, they move on to carpentry work: a grillage is made from a bar along the laid piles, which will serve as the lower belt of the shed. Then, vertically along a plumb line, they put the racks, loosening them first with temporary, and then with permanent braces, just as it was described in the article about the device of a shower in the country.
Barn frame diagram
In this case, the racks on the side farthest from the doors should be lower to create a slope. We mount the frame (Fig. 2), lay the lathing, slate. We sheathe the frame with the selected type of sheathing. We install the door block and platband.
Recommend: How to build, make a chain-link fence with your own hands
Now it remains to perform a protective paint on the outside of the barn. From the inside, it is enough to treat the tree with an antiseptic impregnation, for which it is better to use a combined composition that not only reduces flammability, but also protects against damage by fungus, insects - woodworms.
The cheapest, but quite reliable treatment is painting with lime compounds. In addition to antiseptics, lime also slightly increases the fire resistance of wood. The disadvantage of such a color is its low strength, which requires its renewal at least once every two years.
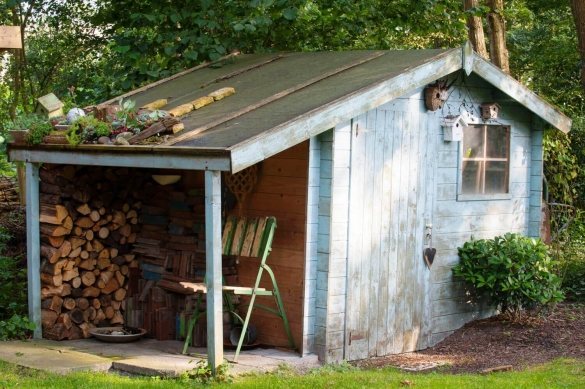
Painted barn
For more information regarding small ancillary structures, see the article on building a gazebo.
We build ourselves
The answer to the question of how to build a barn yourself can be found on the Internet. There are many building options that an untrained builder can handle. In addition, it is always nice to build something yourself. In the case of a residential building, it is better not to take risks if you do not have sufficient experience and qualifications.
As for the barn, then there is an opportunity to experiment without fear of negative consequences. After all, if after some time the utility room becomes askew or becomes unusable due to your miscalculations during construction, this can always be corrected.
It is better to independently build buildings that are small in area and are simple constructively. The simplest option is a shed based on a frame.
Roof arrangement
Building a barn involves the creation of a waterproof gable or pitched roof. Sometimes other options are used, for example, hipped, round, hipped, but they are installed very rarely.
The most profitable and common option is single-slope, good natural ventilation is provided, no additional investment is required, material savings. The slope should not be towards the door. Gable models are better only externally, ventilation is worse, but under the roof you can arrange a place for storing inventory or a hayloft, a slope of at least 25 degrees.
The following materials are mainly used for the roof:
- slate
- the most cost-effective material, you can reuse or buy second-hand, which gives additional savings, durable, is not afraid of the influence of precipitation or sun rays, a good lathing is required, fragile; - metal tile
- inexpensive, good appearance, durable, large selection, but subject to scratches, corrosion; - professional sheet
- soft, sold in rolls, looks like a metal tile, but costs less;

For the roof, corrugated board is often used.
- roofing felt
- sold in rolls, soft, low price, easy to fit and fasten, ugly look, needs to be stacked in several layers; - ondulin
- light weight, decent appearance, bends, which is why it is often called soft slate, easy to fit and fasten, easily flammable; - flexible shingles
- high performance, aesthetic material, is quite expensive, therefore it is not recommended for use on utility blocks.
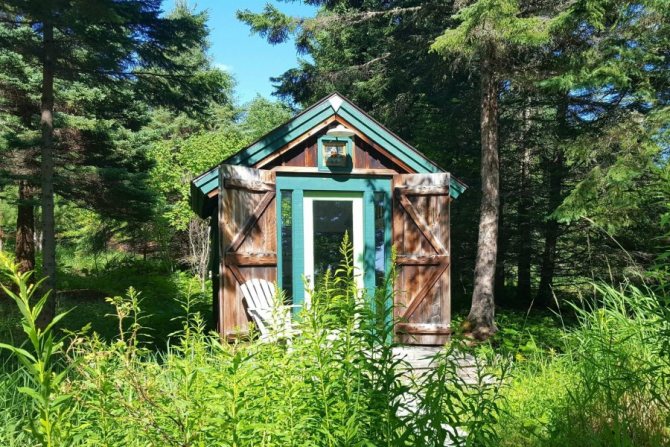
Any exterior barn decor can be created. It can organically fit into the design of the entire territory. In some cases, highlight and focus.
Choosing a place to build
Determining the location of the utility unit should take into account sanitary and building codes. Therefore, it is simply impossible to do without taking into account the plan of the land plot and drawing up an accurate drawing. Before building a shed, you need to consider the following requirements:
- The distance from a residential building to a poultry house or an object for keeping livestock should be more than 12 m. But at the same time, if the household. the building has a wall adjacent (adjoining) to the house, then the distance between their entrance doors should be at least 7 m.
- The distance from the fence to the shed with equipment should be more than 1 m, from the fence to the poultry house, pigsty - at least 4 meters.
- The drainage of water from the roof should be carried out to the owner's site, and not to the neighboring site or to the passage (path) between adjacent sites.
It is imperative to make a path from the house to the barn, which will ensure ease of movement. Good lighting of the barn will also be useful, regardless of the peculiarities of its operation.
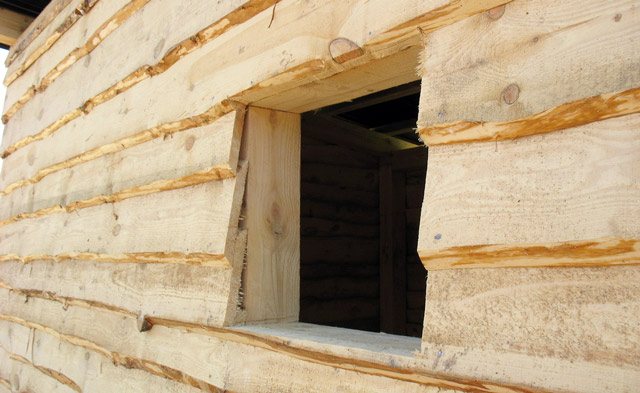
Installation of windows and doors
I installed a used wooden door. I changed the front door in the apartment, so she went into the barn. I made the door frame in place from the boards, bought hinges and installed the door.
I made two locks - one mortise, and the second hinged for greater reliability.
Initially, I planned to install a large wooden window in the barn 1200x600 mm, but in a construction supermarket I bought an inexpensive plastic window measuring 800x600 mm, of course, and installed it. To do this, I had to slightly reduce the window opening.
The window was fastened with universal screws 100x6 mm. Pre-removed the double-glazed window and drilled 2 holes on the side in the frame. I installed the window frame in the opening and fixed it at the level with self-tapping screws. I put back a double-glazed window.
Outside, I decorated the opening with a casing and installed a galvanized ebb. I made a wooden window sill inside and filled the cracks with sealant.
What materials are they built from?
It is better to build a shed for a summer residence or a country house from the material that was used for the construction of the main task, if you need to create a single ensemble. Alternatively, this issue can be solved by choosing an exterior finish.
Expensive finishing materials can be replaced, for example, with siding, which looks like a stone, brick, timber, log.
If the project of the barn provides for solid walls, then you need to purchase foam concrete, slag or gas blocks, bricks.
Wood frame shed
The advantages of this type of structure are the following characteristics:
- The structure of the barn is assembled from ready-made parts that can be purchased from construction companies.
- The construction is easier to carry out, because all the parts are clearly matched to each other.
- The shed will stand for a long time if it is periodically processed.
- The hozblok will come out cheaper than, for example, a brick one.
The disadvantages include the fact that the tree burns well, is prone to decay, can crack, warp, dry out and swell.
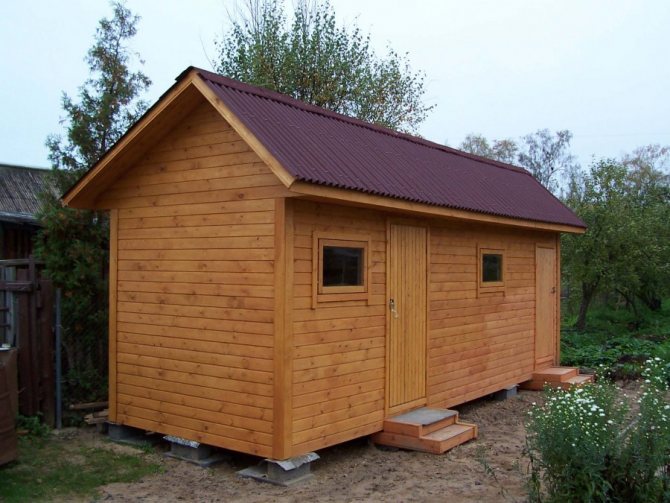
Shed with a gable roof made of metal tiles
A gable roof is not desirable in areas with strong winds, but it is better in terms of snow melting and appearance.
Longitudinal beams should be 10 * 10 or 5 * 15. If you are making a capital structure, you need a reliable support for the roof - a Mauerlat, on which the supporting beams are placed.
You can order a metal skate or get by with boards that are knocked together with nails. They must first be treated with antibacterial drugs. The rafters need to be made with a slope of at least 25 ° and exit from the wall by 30-40 cm.
The metal tile has a long service life, is easy to install, fire safe, and is produced in a wide range of colors.
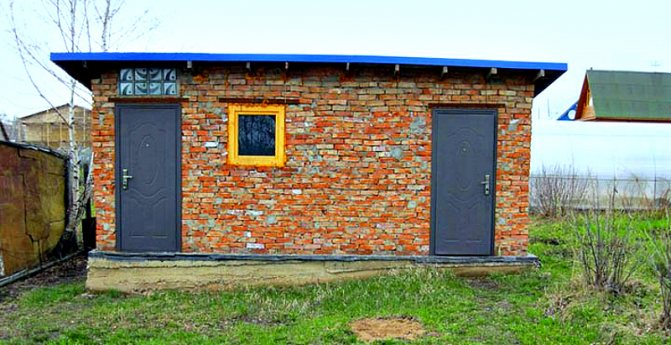
Sheds made of blocks, bricks and stones
For a capital structure, in order to make a reliable foundation, you will need:
- crushed stone;
- sand;
- metal or polymer reinforcement;
- cement.
This type of construction is the most durable. In sheds of this type, it is easier to maintain a microclimate if you take the necessary measures for waterproofing and insulation.
Beams, logs and sleepers
The sleepers that are used on the railway are material that has been treated against any climatic influences. The disadvantage is that they have a specific odor and appearance that requires lining.
It takes skills to work with a log competently. Buildings made of it are solid, reliable, retain heat well and protect from moisture.
A structure made of high-quality timber can hardly be called a barn. It is easy to work with this material due to its rectangular shape.
Slab shed
If the board is dry, then the structure does not require a foundation. The entire building can be installed on old tires or bars, waterproofing and a barn can be installed.
The roof is made of roofing material, securing it through the slats. Before installing the doors, the utility block is upholstered with a metal mesh to give stability.
Materials and constructions
When choosing a utility block project, you need to take into account which option is most suitable for you, and what material will be used to build it. According to these parameters, buildings are conventionally divided into prefabricated, frame, brick and container buildings.
Frame hozblok
Most popular because they save time and money on construction, foundations and materials. A solid base of the structure is made of metal or wood, boards or sheets are attached on top, it can be insulated inside.
For cladding can be used:
- Wood, any board
... Inexpensive material, but processing and painting is required, it is considered short-lived. First, the foundation is made, then the frame is mounted, the rafters for the roof are attached. The frame is sheathed with a board or slab, the tongue-and-groove avoids the appearance of cracks. When keeping animals in winter, it is additionally worth using insulation and film. Wooden buildings are inexpensive, but they are flammable, rotting, short-lived, insects appear in them, constant protective treatment is required.
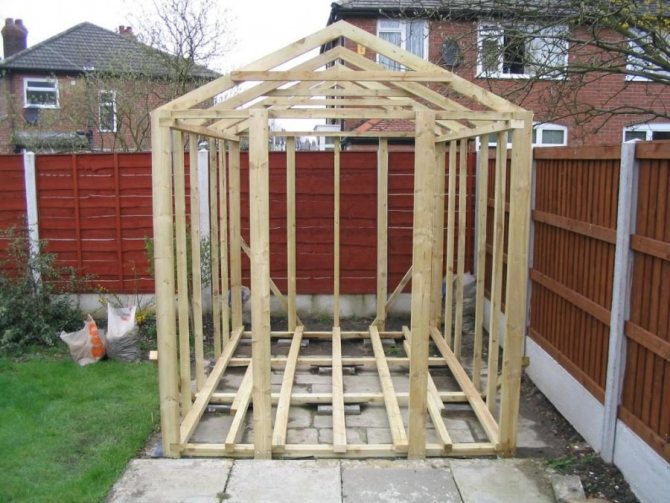
The frame structure of the barn is light and quick to erect Source seattlehelpers.org
- OSB boards
... A durable material that practically does not rot. When building a frame, it is necessary to mount the supports as accurately as possible - the plates must fall on them. The cost is higher than that of the boards, but maintenance and installation is much easier. Coated with paint as additional protection.
- Metal
... For the frame, any small-diameter pipes are used, they are concreted, vertical runs are twisted or welded, then cladding in the form of corrugated board and similar materials is attached. Periodic corrosion protection is required. The building is cold, but it can be insulated, it serves for a very long time, it can be easily disassembled if necessary.
The corrugated building is cold in winter and is only used to save inventory Source dacha.today
- Polycarbonate
... It is mainly used for greenhouses, but it can also be used in a barn, it is not recommended for a workshop or warehouse. Installation of sheets on any type of frame with special self-tapping screws with a washer.
- Slate
... Better to mount on a wooden frame. The dimensions of the sheets allow you to build a utility block very quickly. An economical option, but such sheds have an unattractive appearance, and the material itself is very fragile.
- Sawdust concrete
... A monolithic technology is used, the frame is assembled and sheathed with OSB, the result is a formwork. A mixture of sawdust and cement mortar is poured inside. The walls are strong and have good thermal insulation values. Suitable for keeping animals, setting up a workshop and so on.
- Pallets / pallets
... Alternative to timber, are inexpensive. They are put on the foundation, twisted with bolts, the rafters are mounted, the frame is sheathed, for example, OSB.
This might be interesting!
In the article at the following link, read about how and from what to build a barn.
Stone block constructions
The project of a barn made of brick or similar materials necessarily takes into account the arrangement of a solid foundation. Subject to technology compliance, the structure will be durable, but the construction is expensive and time-consuming.
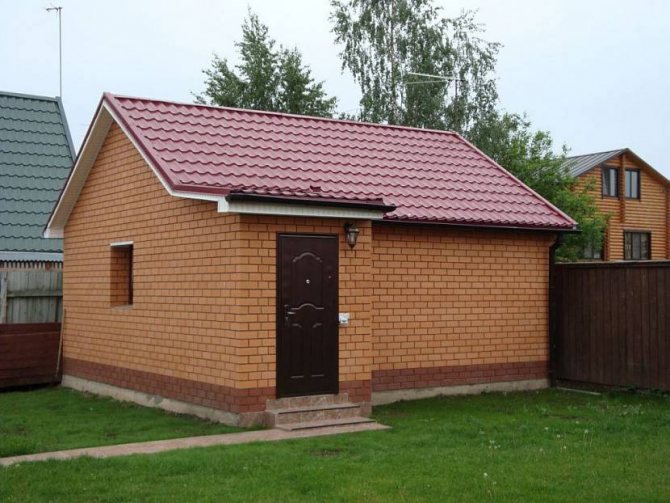
A brick building is stronger and more reliable, but requires more costs Source plot.kz
In this case, the following materials can be used:
- Brick
... Differs in high price and labor costs, high weight, which requires a strong foundation. But the building will have a good appearance, you can do without cladding. The hozblok will stand for many years, is not afraid of the influence of precipitation, is fireproof, does not undergo mold, does not harm rodents, does not require constant reconstruction.
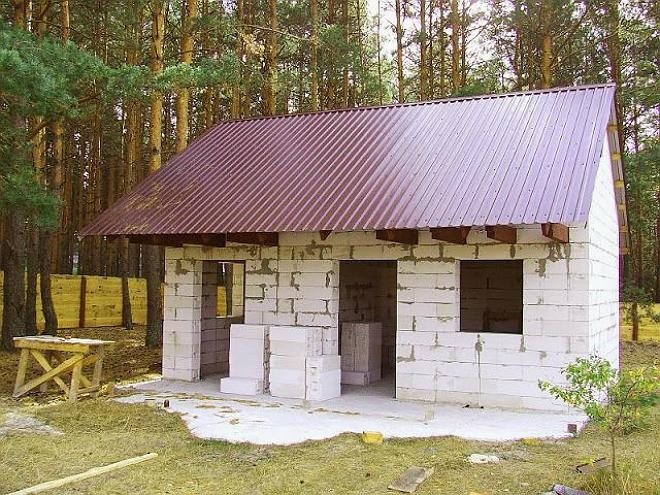
- Foam blocks
... With a limited budget, it allows you to get a durable barn. The blocks have a porous structure, large size, low weight, so the building is being built quite quickly. The advantages are considered a favorable price, resistance to rodents, moisture, fire, good thermal insulation performance and a small load on the base. However, there is a possibility of shrinkage, and the blocks do not have a very attractive appearance, therefore, facing work may be required, if this is of principle.
A foam block shed will be warmer and will not strain the budget Source plotnikov-
- Gas blocks
... Very similar to foam blocks. They retain heat well, are resistant to fire, are lightweight, inexpensive. However, they can deteriorate due to moisture, and the water absorption rate is 35%, therefore waterproofing is required.
- Arbolit
... Made from wood chips and concrete. They have good thermal insulation and vapor permeability. Lightweight, strong and large blocks make construction easier and reduce foundation requirements. They are not afraid of rodents, mold, you can easily mount fasteners. But this material does not have the best indicators of frost resistance, imprecise geometry, and poor moisture resistance. Mandatory cladding is recommended.
Arbolite is rarely used for the construction of buildings, since the manufacture of blocks from this material is quite laborious.
This might be interesting!
In the article at the following link, read about the foundation for the barn.
Container
The fastest and easiest option, which is ready to use. The metal frame is sheathed with metal canvases, there is a heater in which communications are laid. Outwardly, it resembles an ordinary container, but inside it can be made as a storage room or a full-fledged structure with a bathroom, a shed, and so on.The most functional ones are often used as temporary or seasonal houses.
Basically, they are delivered already assembled, only communications on the site are connected. A durable utility block, does not require a lot of time for arrangement, a slab or columnar type is used as a foundation. The cost is quite high, but can be rearranged or sold if not needed.
The hozblock from the container is assembled quickly, it is better to store inventory in it Source deco.access.ly
Prefabricated
A kind of frame, with identical technology. Supplied as separate parts, which are assembled as a constructor. To do this, there is an instruction in the kit, so the question of how we build a barn disappears by itself.
The design of the panel is sandwich, SIP or plastic. A frame is installed, after which structural elements are attached to it, all the work takes very little time, no insulation or external finishing is required. The cost of such models is higher than that of block or frame ones.
Models with plastic elements do not have insulation, are considered not the most durable and are not suitable for keeping poultry or small animals.
Erection of the foundation
You can make a strip or columnar base. Frame structures should be arranged on the first type, and small outbuildings are recommended to be erected on the second type of foundation. However, you need to know that the strip base should in no case be erected in areas with peat soils or sedimentary soil.
To erect a columnar base, the following steps should be performed:
- under the pillars of the foundation, it is necessary to dig holes 80 cm deep, which must be placed every one and a half meters (they should be done at the corners of the object being erected and in the zones of abutment of the partitions);
- Fill holes with gravel with sand or crushed stone, the thickness of this layer should not exceed 15 cm;
- install pieces of a metal pipe or a sleeve made of roofing material in the prepared holes in size;
- cover the area between the ground and the rack with gravel and sand;
- fill the grooves of the pipes with fittings (10 mm thick), which you want to tie with 2 mm wire;
- fill the pipe cavities with concrete.
The pillars can be treated with special mastic to improve the waterproofing of the foundation. In addition, they can be made from concrete blocks or bricks.
To build a shed with a strip foundation in the country, you need to perform the following steps:
- make markings for the object being built, taking into account its overall dimensions;
- prepare a ditch 30 cm wide and 40 cm deep;
- fill the trench with sand with gravel. The height of this layer should be 15 cm;
- strengthen the side walls and bottom with roofing material;
- install the formwork around the perimeter of the recess;
- install a reinforcing frame over the entire area of the trench;
- pour concrete mortar;
- wait three weeks, after which the concrete will completely harden.
The foundation must be made so that it protrudes to the height of the base above the ground level.
What to consider when building bird and animal sheds
The main requirement for the construction of a barn for cattle is the correct organization of competent ventilation (if necessary and heating), compliance with the requirements for the size of the structure. For example, for one chicken, the size of a hen house of 1 square meter is considered normal. meter, for ducks and geese - 2 sq. m for each bird. In addition to such a shed, you can attach an aviary. In a barn where cows, pigs, goats or horses will be kept, different regulations apply. A corral with a size of 6 square meters should be allocated for one cow. m, for one pig - 5 sq. m. For construction, a tree is used, since animals will gnaw the crossbars of the corrals. A prerequisite is the presence of windows, which will ensure sufficient natural light and ventilation of the room. The floor is made of concrete and planks with the organization of special gutters.It is with their help that the cleaning of individual corrals will be carried out.
How to save on foundation
Look again at fig. with a columnar foundation. Doesn't it seem a bit too many pillars? Yes, the bearing capacity of such a foundation under the shed is excessive, even if it is made of M75 concrete. But there seems to be nowhere to go: if you put the pillars less often than after 1.5-1.7 m, then the lower crown will not receive proper support. And the foundation, anyone can understand, is the most expensive and difficult part of the barn. So, a shed 3 by 3 m is quite possible to put on 5 pillars instead of 9, without losing in the least in strength.
How to save money on the foundation of a barn
Let's take into account again that the barn is a non-residential structure, ancillary and atypical technical solutions in it are permissible. And, remembering what we taught at the university, we will first turn the flooring from a shield into a membrane. With hands, this crazy is realized simply: we lay the floor from grooved boards from 100x40 to 150x40. It is more expensive than the edged one, but the savings on poles will many times exceed the cost overrun on the timber.
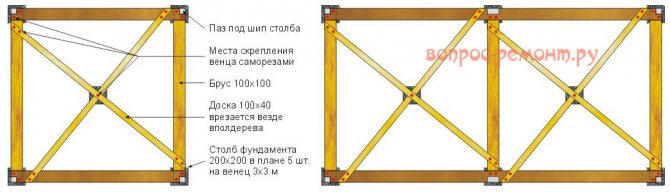
Installation of a corner post on a quarter tenon
Then remember that a triangular membrane is much more rigid than a square one of the same area. As a result, we get the lower crown, as on the left in Fig. There is no need to fiddle with trigonometry, calculating oblique grooves: they are marked in place by placing a board on the frame. The floor is laid without logs, right along the beams of the crown, from edge to edge. Two 3x3 modules can be brought together for a 6 by 3 m shed, but you do not need to sculpt a large structure from such modules: the calculation is valid if the cells have no more than 1 common beam. There are additional conditions:
- Frames only lumber 100x100 mm; prefabricated boards are not suitable.
- The vertical frames of the module are reinforced with struts from a 100x40 board flat on steel fasteners without a tie-in, except for the one where the door will be.
- For a 6x3 shed, additional vertical posts from the same board with a step of 1.5 m are also needed (not shown in the figure).
- The flooring of the 6x3 frame is made of 6 m long boards so that the floor boards are solid.
- It is highly desirable to put corner posts (the same beam 100x100) on the so-called. quarter thorn, reinforced with corners, see fig. on the right, above, and the large intermediate frames 6x3 are half-tree, as indicated in the diagram.
Installation of floors and walls in a wooden shed
It is recommended to use OSB boards, which must be fixed with nails or self-tapping screws to the joists. Waterproofing is laid on top of them. After that, it is necessary to make a finishing floor from a tongue-and-groove board, at the ends of which there are special grooves. The risk of crevices will be eliminated, so the strength of the coating will increase if floors are made from these boards.
You can build a warm barn quickly and cheaply if you use insulation, namely: foam, mineral wool or expanded clay. However, it must be laid at the very beginning. To do this, the OSB sheets must be attached from the bottom of the lag. This should be done before erecting wooden racks. You can also stuff insulation on top of the lag. This requires:
- make a counter-lattice, which is necessary for the formation of cells. Insulation will be laid in them;
- waterproofing is laid on the subfloor;
- the vapor barrier should be covered on top of the insulation;
- perform a clean floor.
The walls of the barn are made of boards or lining. To insulate them, you need mineral wool, polystyrene or polystyrene foam. On the outside, the material must be closed with waterproofing, and on the inside - with a vapor barrier with further sheathing.
Installing the frame
At the very beginning, the wooden beam, which is the basis of the building, is treated with special means to prevent the tree from deteriorating. The timber is mounted already in the finished foundation using roofing material as a gasket between the concrete product and a wooden post. It is best to lay the floor right away, this will make it possible to mount the vertical posts in the best way.
At the bottom, pillars are attached, it takes into account how many corners there will be, as well as openings.Before you fix them thoroughly, you need to check that the racks are distributed vertically. When the racks are fixed, the upper harness is installed on them, this will be the upper part of the frame. Just before that, you need to make cuts on the sides and in the middle. A bunch of all elements is carried out using metal corners and self-tapping screws.