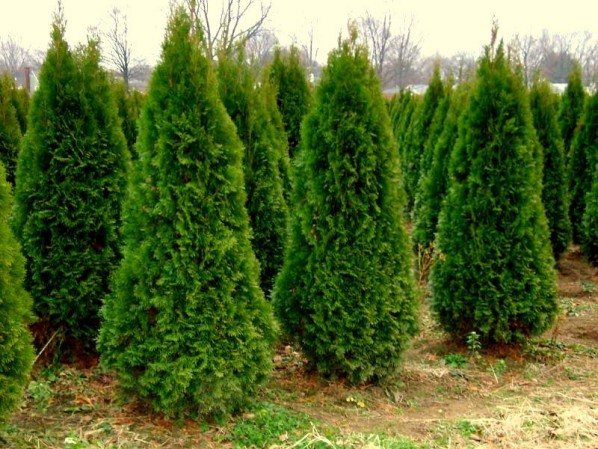
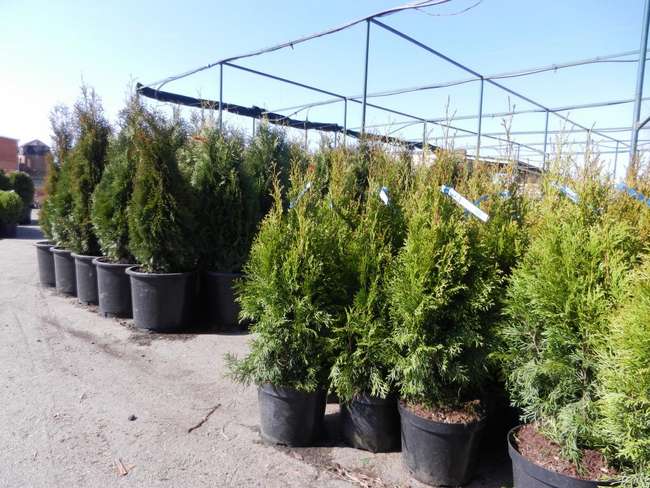
It always seemed to me that in order to have such a beautiful plant as thuja at home on a personal plot, you need to spend a lot of money.
After all, these plants are quite expensive. But it turns out that it is quite possible to grow such a beauty on your own without spending money on it. Since I succeeded, I want to tell you how to do it yourself and completely free of charge.
If you have a dream to grow lush and luxurious thuja on the site, then the grafting method will be an excellent solution that can be carried out without problems and costs. And if you follow the rules, it will give excellent results.
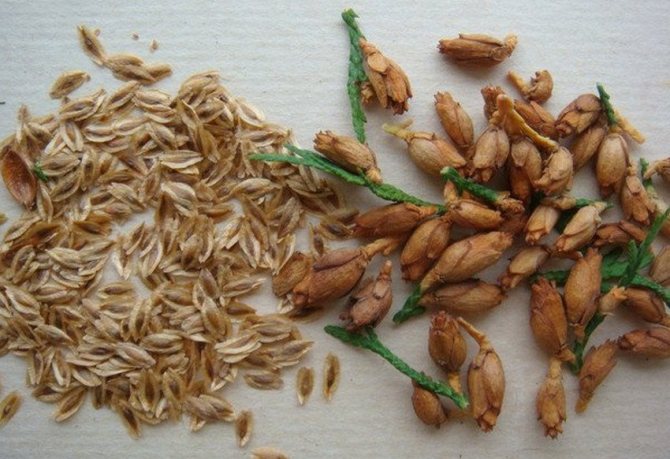
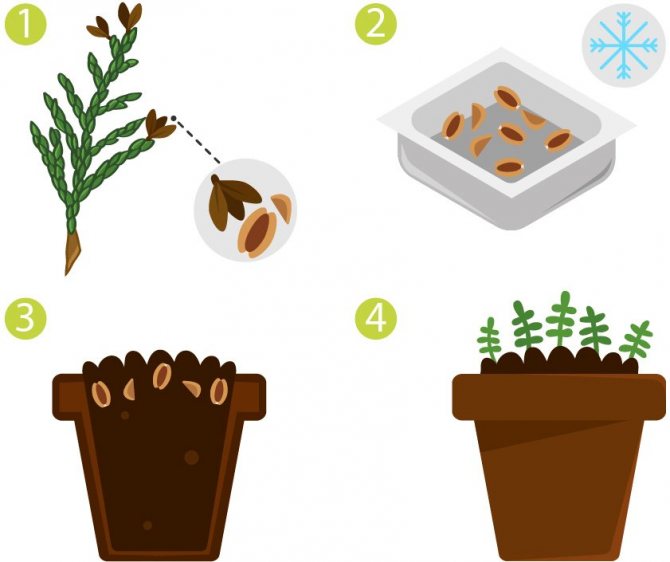
Thuja can be propagated in two ways: using seeds and cuttings.
Reproduction using seeds is not popular, since this method is longer, and it is possible to see the result of your labor only after a few years. While propagating thuja by cuttings is much faster and more convenient.
It is best to reproduce thuja by cuttings in spring or autumn. This method is the most simple and effective. Its advantage is the ability to preserve varietal qualities, and the ability to get a full-fledged small tree in a couple of years.
There are also disadvantages with this method, since such trees are not too hardy.
When to graft thuja: optimal timing
On the question of when it is better to propagate thuja by cuttings at home: in spring, summer, autumn or winter, the opinions of experts differ slightly. Someone argues that it is better to do this in winter, while someone claims that the ideal dates are in the spring.
But despite such disagreements, the propagation of thuja by cuttings in the summer is the most optimal option. The thing is that the event, held in the summer, makes it possible for the twigs of the bush to fill up with strength, adapt and root normally for transplantation to a permanent place in the next season.
Important! Propagation of thuja at home by cuttings in the summer should be when the growth of shoots has stopped.


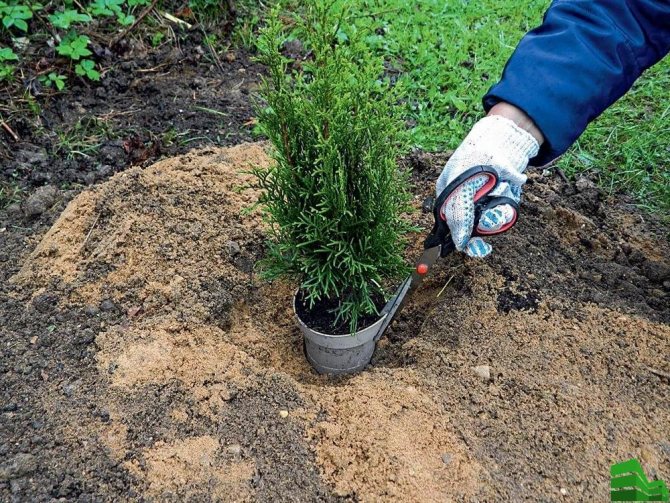
Open ground transplant
Young thuja are transplanted in the fall, after their final formation of the root system.
The best place is the southwestern or southeastern side of the site, well lit by the sun.
The successful rooting of a seedling will be indicated by the appearance of new shoots on it.
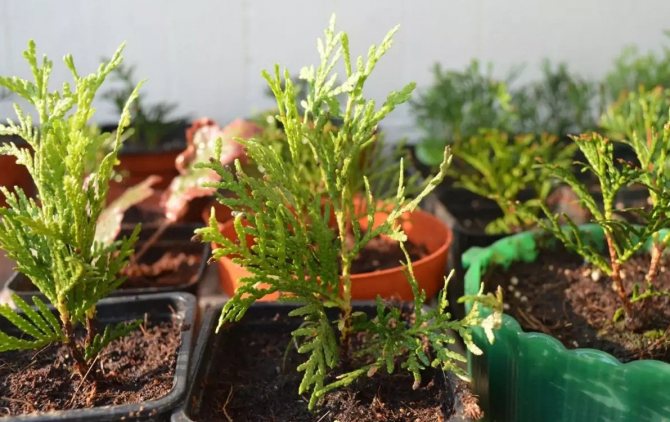
Attractive unpretentious ephedra can be propagated by sowing seeds or cuttings. The seed method is quite long and laborious, and a beginner can also cope with cuttings. If a thuja of the desired variety is already growing in your own dacha or with friends, you can take twigs from it for divorce. This article describes how to propagate thuja with green cuttings.
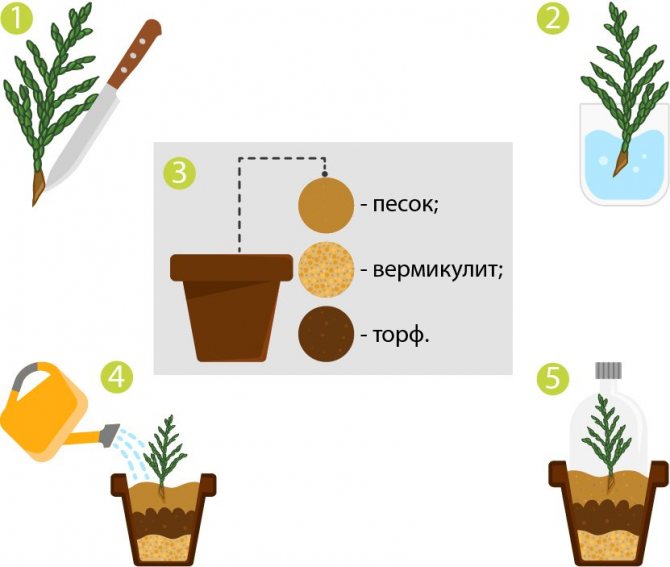
How to properly cut thuja cuttings
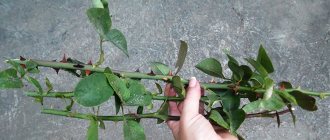
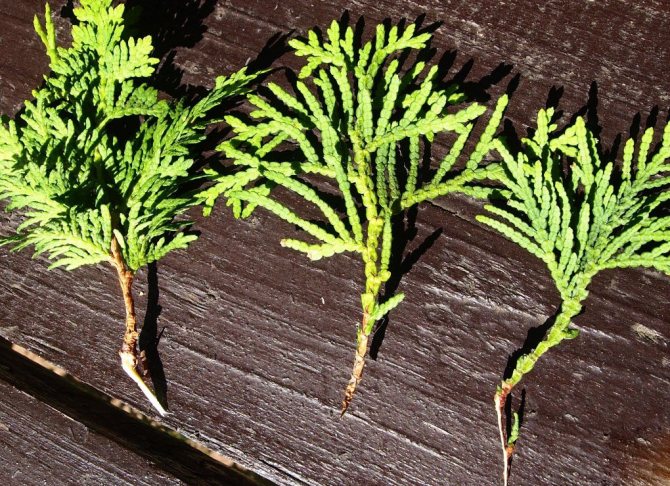
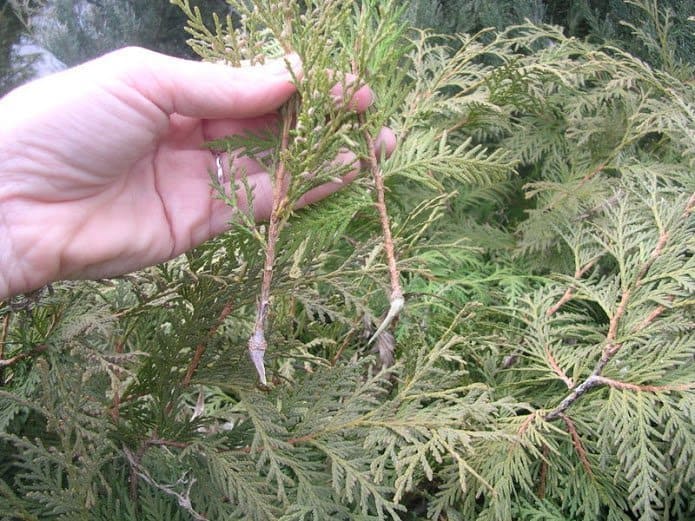
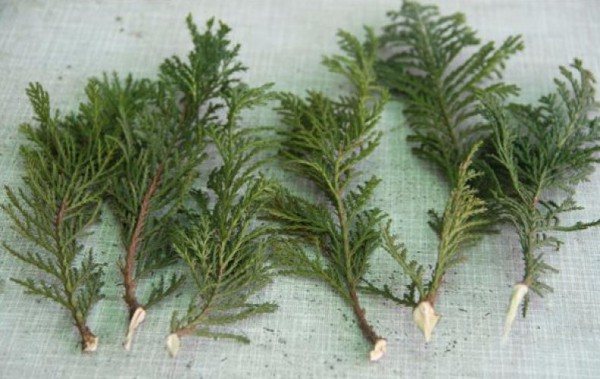
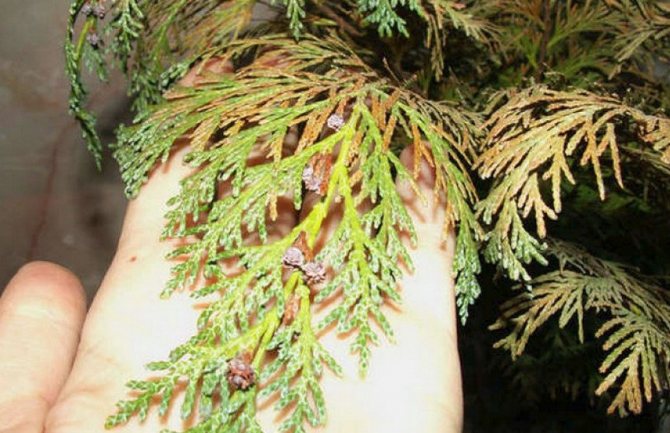
For reproduction, it is necessary to choose a healthy shrub; you cannot take branches from a sick and weak tree. It is also not recommended to take cuttings from lateral shoots, as it is possible to obtain a curved seedling.
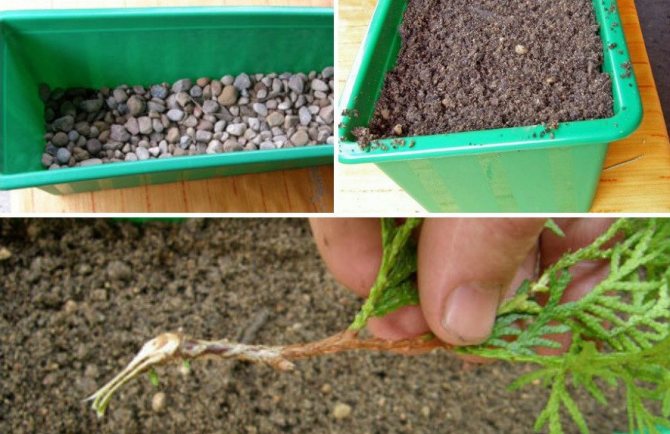
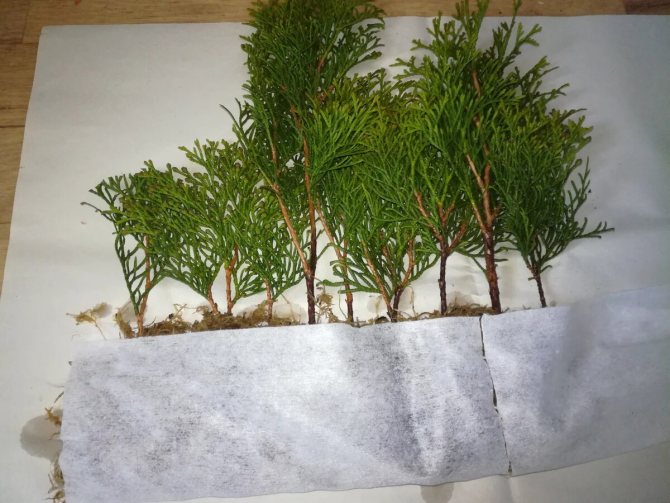
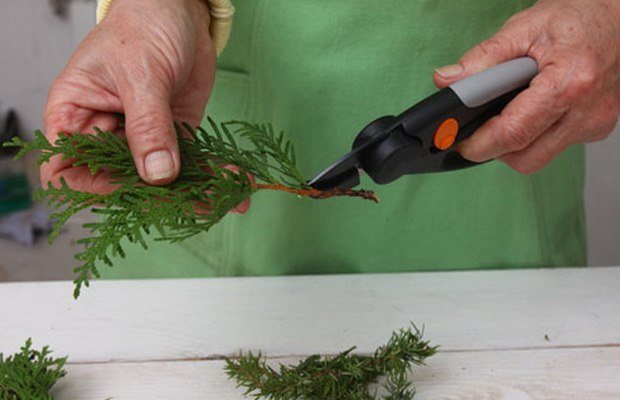
For the reproduction of thuja, a normally developed skeletal branch in the upper part of the shrub is ideal. For the cutting, you should choose two- or three-year-old lignified growths about 10-15 centimeters long, which are located at the ends of the shoots.
The stalk must be torn off sharply together with a small piece of wood with last year's bark, which is called the "heel" (it is recommended to tear it from top to bottom). Thanks to the "heel", the branch will be able to take root sooner, since it contains useful substances that the plant has managed to accumulate. When peeling off the bark on the handle, you need to lightly clean this place with a knife.
In the photo, a correctly cut thuja stalk:
Advice! In case of severe lignification, you can use a pruning shears, it will help to gently remove the material.
Breeding features
How to grow a tree from a thuja twig? A more detailed story about this method of growing a plant is presented later in the article. In the meantime, let's consider some of the features of reproduction.
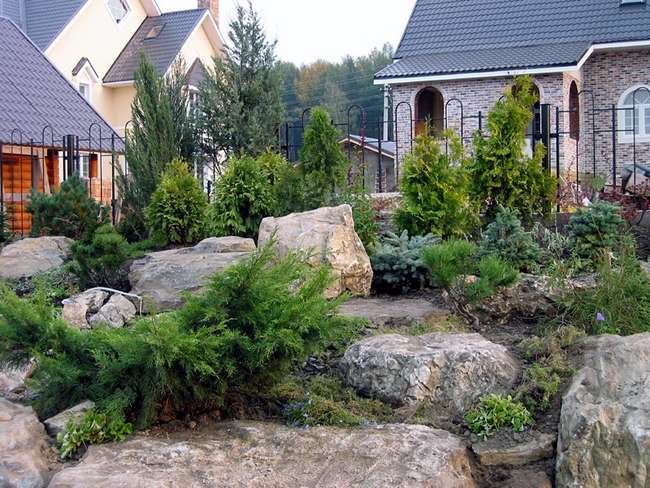
Due to its unpretentiousness and resistance to frost, this plant is often used for landscaping adjacent areas. But thuja is a relatively expensive pleasure, so it is best and not so difficult to breed them yourself. Even novice gardeners can do this.
Two breeding methods:
- seeds;
- twigs and cuttings.
The first method is rather painstaking and long, it takes 6 years. In addition, it is generally accepted that plants grown from cuttings are more hardy. It is also not advisable to propagate by seeds the thuja of ornamental varieties. The best way to reproduce is by branches.
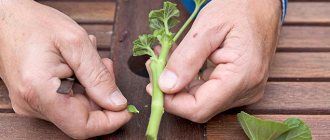
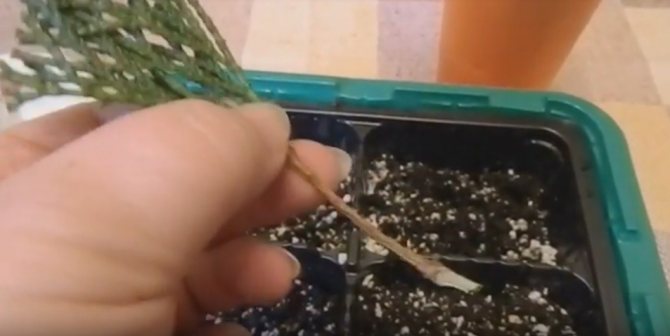
How to prepare thuja cuttings for rooting
First of all, excess needles should be removed from the cutting in order to prevent decay. To do this, you need to cut off the branches from the bottom and slightly peel off the bark. And with an abundance of branches, you can make the needles a little shorter in other places.
After these manipulations, the twigs must be placed in a solution of the drug to stimulate the growth and formation of roots for about 12 hours (for example, the preparations "Epin", "Kornevin").
Note! Storing cuttings is not permitted, as they may deteriorate and become unsuitable for planting. But if for some reason you are not able to carry out rooting, then you can wrap the branches with a damp cloth and leave them in a dark, cool place.
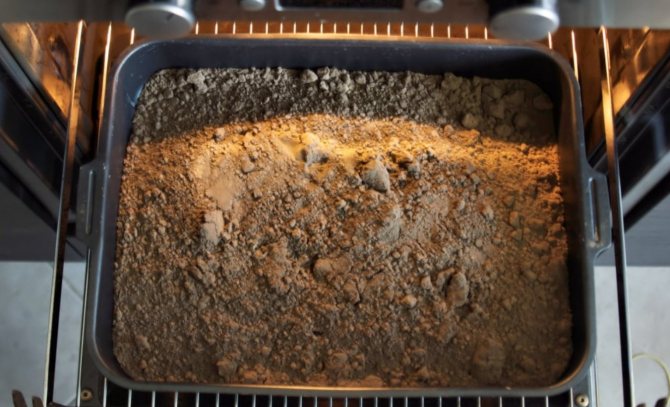
Soil preparation
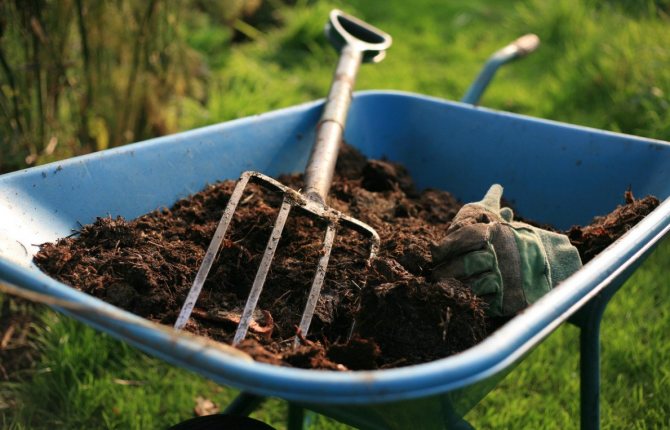
It is optimal to use light soil with good drainage properties or ordinary river sand as a soil for rooting cuttings (the main thing is that it is clean). If the first option suits you more, then you can prepare the substrate yourself: you should mix sand, peat, leafy earth in equal proportions.
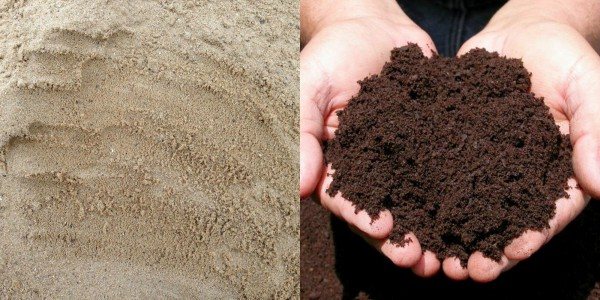
For seating, it is necessary to use containers with a shallow depth. They must have aeration and drainage holes. Containers or seedling trays are ideal for this purpose.
When using sand, it must be boiled for five minutes before use and be sure to cool. When using both sand and soil mixture, it is necessary to add a three percent solution of potassium permanganate and mix.
Then place expanded clay or other small stones on the bottom of the container. Now you can transfer the soil or sand to the prepared containers.
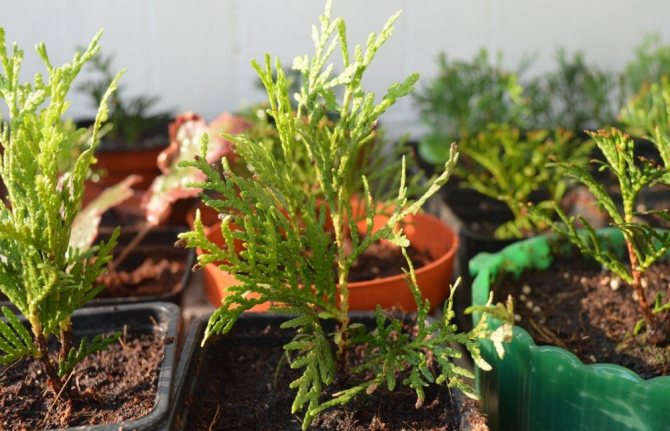
Immediate rooting process
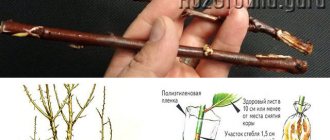
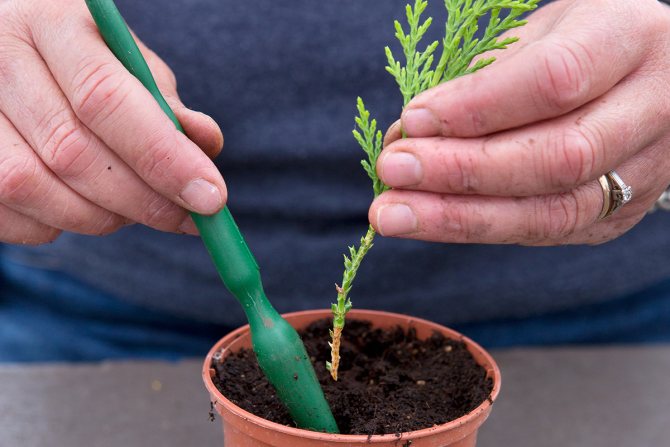
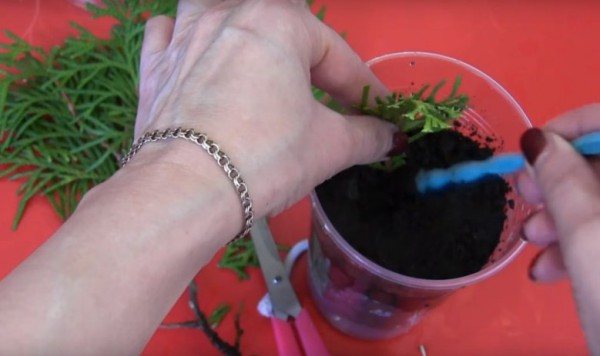
When rooting thuja cuttings, you must adhere to the following step-by-step instructions:
- Lightly process the roots of the cutting in the "Kornevin" preparation.
- Insert them into the ground at a 45 degree angle to a depth of about one and a half or two centimeters. The optimal distance between cuttings is five centimeters.
- Then you should lightly compact and water the plant.
- Cover the containers with plastic wrap or plastic bag, or place the branch in a plastic cup and cover with the same cup on top.
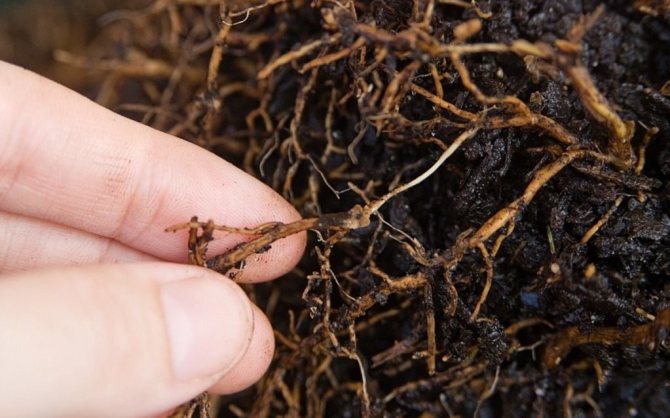
Note! Some time after the event, new shoots will begin to appear on the plant. This means that rooting was successful.
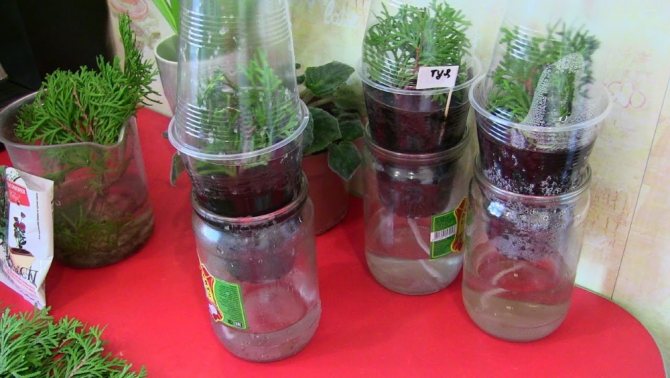
Video: rooting of thuja cuttings in a glass.
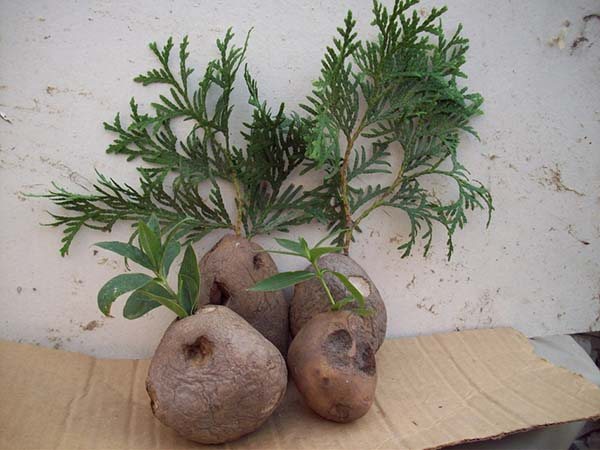
Non-standard way of rooting cuttings in potatoes
Some gardeners also practice another equally interesting way of propagating thuja by cuttings - rooting in potatoes. Potato nutrients and starch are beneficial to the twig, helping to root successfully.
To do this, take a few healthy, fresh potatoes, wash, remove the eyes, then make a hole about 4 cm long in them with a nail. After that, you need to place the thuja stalk in the hole of the potato. Pour some fertile soil into wooden crates and place the potatoes in the soil. Cover the potato stew with a cropped plastic bottle. Then you can unscrew the bottle cap and water it.
There is also a method of rooting in a jar of water, but it is not very productive, it is better to do this in a substrate.

Further care
It should be remembered that thuja is primarily an ornamental plant, and its main function is aesthetic. The tree should be pleasing to the eye, and for this it needs to look good. In order for the thuja to have beautiful green needles and a graceful shape, it needs appropriate care.
Watering
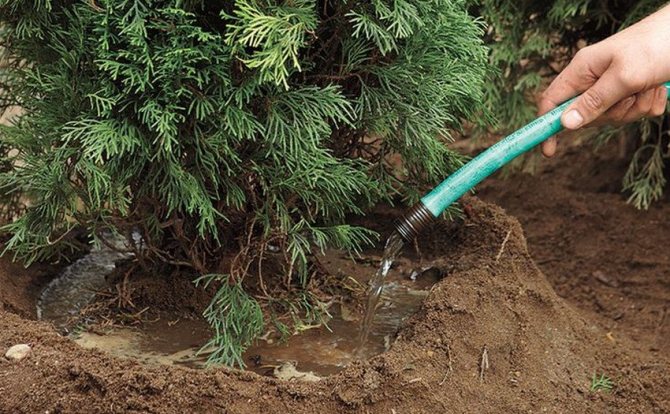
After the thuja is planted in a permanent place, at first it should be watered quite abundantly... Depending on the size of the plant - from 10 to 40 liters of water weekly.
A young tree is best watered by sprinkling with water settled in the sun.... With this watering, the water well nourishes the root system and the soil next to the tree. In addition, moisture removes dirt deposits from the needles, which makes it easier to breathe and promotes better thuja growth.
Top dressing
If you applied fertilizer when planting a tree, you no longer need to feed the plant for the first couple of seasons. Otherwise, the fertilization scheme is as follows:
- early spring, before the onset of swelling of the buds, 20 g of nitroammofoska for each plant. From mid-spring to the end of June, universal fertilizing for conifers is introduced, such as Fertika Lux, Aquarin, MicroMix, Green Needle, etc., according to the instructions;
- universal fertilizers should be applied, on average, twice a month... For example, Kemira-wagon (50 g / 1 m²) is a good product;
- when applying fertilizers, the emphasis should be on potassium and magnesium, less - for phosphorus, and pay very little attention to nitrogen;
- in August-September make only magnesia (1 tbsp. l. per 1 tree), potassium salt or saltpeter in the same volume. Do this at any time, once during the specified period;
- magnesium is responsible for making the needles beautiful and healthy... If you do not want the crown to have a rusty color, but to please the eye with a beautiful emerald hue, add a one-time 20 g of magnesium sulfate per 1 m² of soil.
Important! When applying dressings for all conifers, remember: they do not need fertilizers in the quantities that deciduous ones need. These plants do not shed foliage, do not bear fruit, nitrogen is taken from the atmosphere, and excess fertilizer can burn the roots and cause yellowing of the needles.
Top dressing is very important if the soil on your site is rather poor.... How the thuja will take root in a new place in the first two to three years is of decisive importance for the further condition of the tree. If it is forced to grow on poor soils, your task is to facilitate the adaptation of the plant as much as possible and nourish it with useful substances and minerals, but not overdo it.
Moreover, organic matter should not be ignored: at the beginning of spring, once every 2 years, you can feed the thuja with well-rotted mullein, chicken or pigeon droppings, or humus. For plants of the western type, it is necessary annually, during the autumn digging, to apply 0.5 liters of wood ash per 1 m² of the area.You can also dissolve this ash in a bucket of water and water the near-trunk area of the tree.
Important! Conifers do not need nitrogen in such quantities as deciduous ones, and after the beginning of July it is even harmful. This mineral contributes to the growth of green mass and the active growth of shoots, which do not have time to get stronger before the onset of winter and can freeze.
Loosening and mulching
As you know, thuja roots grow just below the surface of the earth, so loosen the soil after watering carefully and no deeper than 5-7 cm... It is necessary to loosen the near-stem area after each watering, in order to avoid the formation of a crust that interferes with the normal aeration of the roots.

After loosening, the soil should be mulched with pine bark, sawdust and peat. This measure prevents moisture evaporation
Particular attention should be paid to the pre-winter and first spring watering.... They should be abundant enough, autumn - in order to saturate the roots with moisture for future use, if possible, the second - to quench thirst after winter. Watering should also be done in winter, during thaws.
Preparing for winter
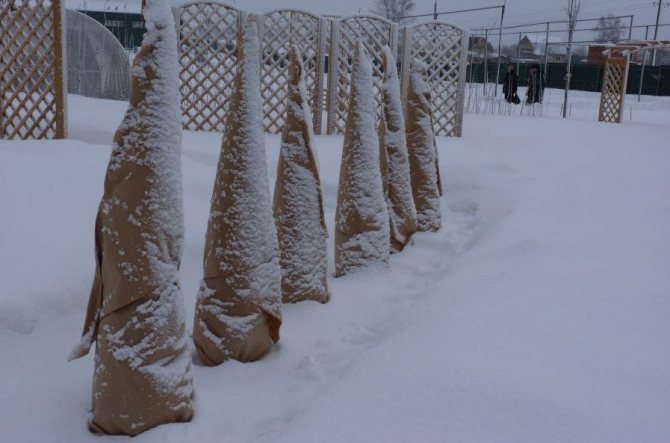
Until thuya is 5 years old, she should definitely create a winter shelter. Pine branches are best suited for these purposes. But one shelter from pine branches is not enough, in order to properly prepare a tree for winter, it is necessary to perform a number of the following activities:
- Shortly before the onset of the first frost - abundant pre-winter watering. Cover the soil around the thuja, and the space between neighboring plants (if you have several trees), with new mulch, consisting of pine sawdust and bark, peat and straw.
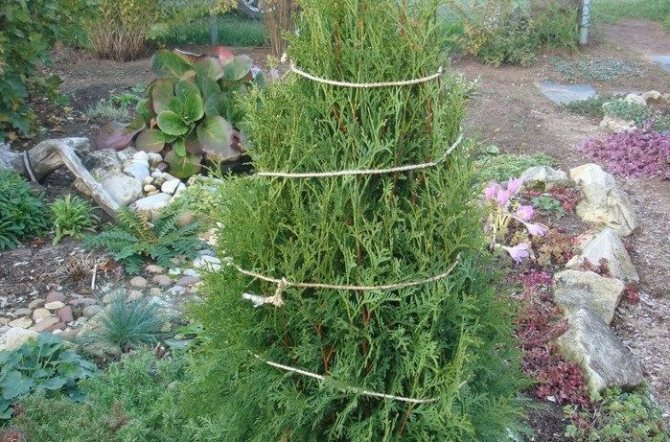
- Tie the crown of the tree with a soft strong rope, pulling the branches to the trunk. This must be done so that the mass of snow does not break them.
- Take spruce branches, preferably pine, and cover the tree with it. Start from the bottom, covering the trunk well, and build the shelter as high as possible, for young plants - up to the crown. An adult thuja can not be covered, perhaps, slightly insulate the trunk near the ground. But you need to mulch the soil.
- If the air temperature drops below -13 ° C, the young tree should be covered with a spunbond type material, and plants are also covered with it with the arrival of spring to prevent sunburn of the needles.
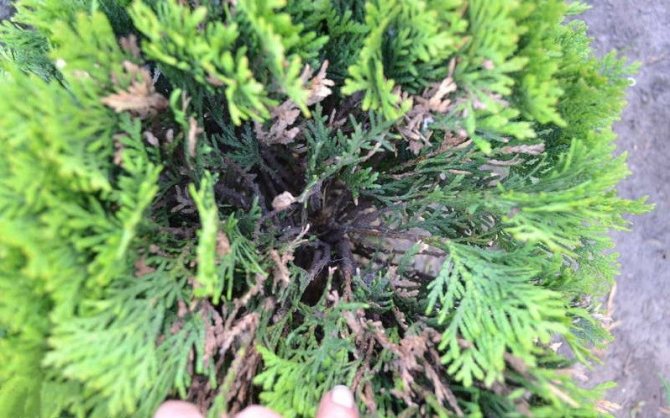
Pruning and shaping
The first time they cut their hair immediately after transplanting to a new place. Then sanitary pruning should be performed regularly, with the onset of spring and shaping - at any time of the year... The purpose of sanitary pruning is to remove the needles that have been frozen over the winter and thin out the excess green mass.
Forming trims are made to shape the crown... Tuya loves such events and responds to them with a thick and lush crown. This type of pruning begins in the spring and continues until autumn, and in the summer it is only slightly corrected, bringing light touches to the overall picture.
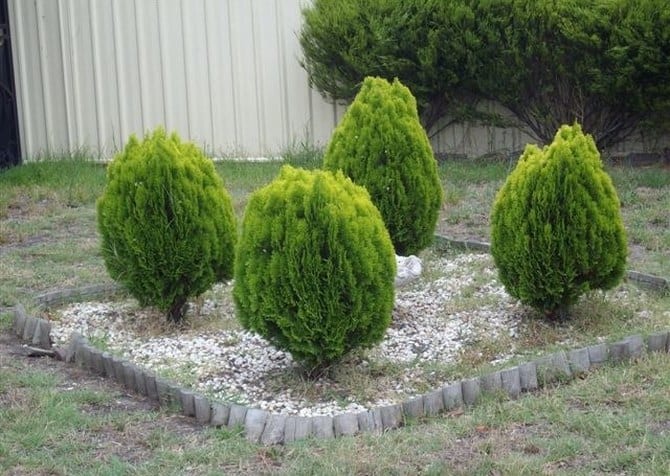
There are several types of crown:
- pyramidal;
- columnar;
- spherical.
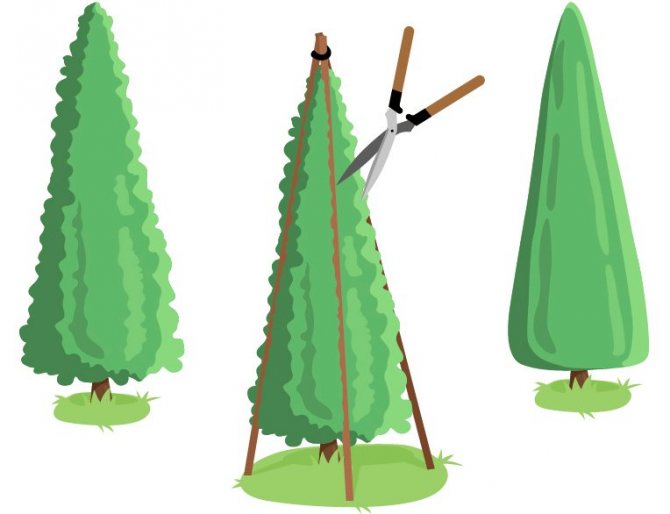
To give the plant more bushiness, you should pinch the top shoots.
Formative pruning the first time they do it in the fourth year of thuja's life. During the season, perform one formative and 2-3 corrective pruning.
Concerning sanitary pruning, this procedure requires attention rather than aesthetic taste. In the spring, the main task is to remove frozen and dry growth.
Important! You should not do major pruning later than the second half of July, only corrective ones. Serious pruning stimulates the growth of young shoots that may not be able to withstand frost.
Here are a few tips to help you trim correctly:
- before starting the procedure, take a look at the plant, mentally give it the shape that you want to see;
- pruning should be performed on a dry, cloudy day, in order to avoid the formation of rusty spots on the needles, which may appear as a result of abundant evaporation of moisture;
- do not cut the thuja after precipitation, this can lead to the appearance of pests and cause the development of diseases;
- when trimming, use special templates, they will help to give the tree the desired shape. In addition, there is a twine to form the crown level;
- use only sharpened pruning shears for trimming.
Video: Cropping thuja
Prevention of diseases and pests
Thuja is quite resistant to diseases and pests, especially if you comply with sanitary standards, process the crown on time and apply top dressing.
For the prevention of diseases, the following measures should be taken:
- plantings of thuja should not be too dense, for example, in a hedge, the distance between adjacent trees is at least 0.5 m;
- regularly prune and form the crown - its excessive thickening is a favorable environment for the development of diseases and pests;
- apply fertilizers on time, top dressing has a beneficial effect on the state of the immune system, which prevents the plant from getting sick;
- favorable conditions for the development of fungus are high temperature and humidity. If it is difficult to do something with the temperature, then the moisture level can be influenced - do not pour too much water during irrigation;
- disinfect garden tools well, and quarantine newly acquired plants.
Did you know? Currently, in wildlife, there are thuja more than 10 centuries old. That is, these trees are the same age as the Baptism of Rus (988).
However, preventive measures are not always sufficient to avoid an outbreak or pest infestation. The greatest danger is posed by viral diseases. The most common signs and treatments are described below.
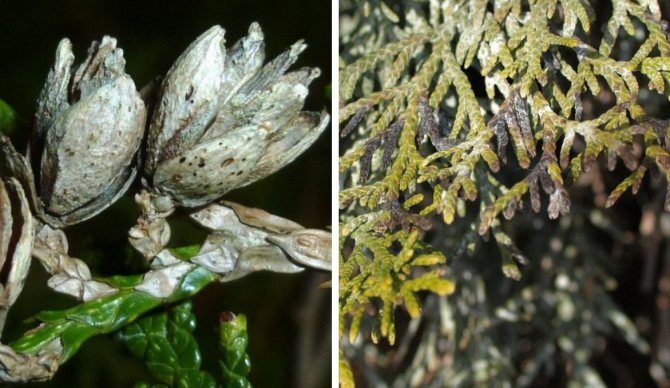
Fusarium. The fungus first affects the tips of the shoots, which is expressed in their yellowing, the appearance of an orange bloom - these are spores. If such signs are found, with the help of a sharp pruner, all shoots and needles with signs of the disease are removed.
After trimming diseased areas, the thuja should be treated with antifungal drugs.eg "Topsin M 500 SC". It is necessary to carry out preventive treatment with the same drug and plants located nearby, as well as the adjacent territory. This measure is aimed at preventing an outbreak of the disease throughout the garden. Re-processing is performed after 10-14 days.
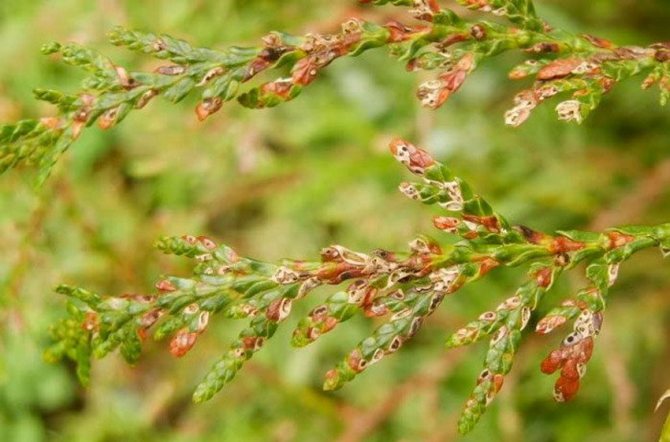
Spotting. The fact that the thuja is sick with spotting will tell a yellow bloom on the needles and shoots. First, small spots appear, which over time increase in size and merge into one large array of yellow color, the color of the needles becomes brownish.
For treatment, first remove the affected areas, then apply "Abiga-Peak", "HOM" in the manner indicated in the manual.
Gray mold. The disease is difficult to detect at the initial stage, when it shows characteristic signs, most often it is too late to treat the tree - it needs to be removed and burned, away from the site, and the place where the thuja grew is well treated with fungicidal preparations. Signs of mold - the first to see watery formations on the shoots, which soon acquire a rusty hue, and later turn white.
Root rot... At the first stages of the disease, the thuja scales turn yellow, then the bark cracks, from the bottom up, starting from the base of the trunk. Unfortunately, the most effective treatment is the destruction of the diseased thuja (burn outside the garden) and careful fungicidal treatment of nearby plants and soil. In addition, all organic remains of the diseased tree must be removed.
Late blight. Perhaps the most dangerous fungal disease. It is difficult to detect at the very beginning of development, since the first disease affects the lower branches located at the very bottom. This branch dries up and soon dies, and phytophthora affects the entire tree.At this stage, the bark and scales turn brown, the root collar begins to rot, which leads to the early death of the plant.
Tuya, sick with late blight, is uprooted and destroyed away from the summer cottage. The soil in the garden, trees and shrubs growing nearby, are treated with preparations such as "Biosept" or "Bravo", according to the instructions.
For the treatment of most of the fungal diseases, drugs such as "Topsin", "Sarfun", "Rovral FLO" and others are used.
Video: Thuja diseases: causes and treatment
Of the pests that pose the greatest danger to thuja, one can single out coniferous aphids and false shields... The fact that insects have chosen a tree can be recognized by crumbling yellowed needles.
The preparations "Karbofos", "Rogor", "Decis" are quite effective against pests, with which the tree must be treated in early spring, before active sap flow begins. Used for the same purpose "Actellik", "Chlorophos". Treatment with drugs is carried out in the third decade of June and repeated, after 15 days.

Thuja is able to decorate with itself any personal plot, it looks great as a decorative element of landscape design of streets, boulevards, squares and parks. Despite the fact that the tree has a majestic graceful appearance, it has quite moderate requirements in terms of maintenance.
Features of planting a young plant
Before planting the plant in open ground, you need to put a mixture of compost, manure and garden soil in the hole. The root system of the thuja should not be broken, and the root collar should be left above the ground.
After planting the plant, it should be watered abundantly and pine bark or sawdust should be placed on top, which will protect the root system of the plant. The mulch should not cover the lower branches of the thuja, as they can rot.
Breeding periods
The answer to the question of whether it can be grown from a twig is unambiguous. Sure you may. When is the best time to hold such an event? It is advisable to carry out cuttings in the spring, since it is at this time of the year that all processes occurring in wildlife occur faster. And in thuja (in its shoots) there is an activation of the movement of juices, therefore, the cut cutting will take down the first roots much faster. Reproduction usually takes place from late March to early April. If this period is missed, cuttings can be carried out in June.
There is some danger that branches planted for germination may fall under spring frosts. This can be avoided by installing a box with cuttings in a greenhouse with a film.
How to grow thuja from a twig in summer? Summer cutting occurs in the second wave of plant growth. During this period, sufficient watering of the substrate is important, where the branch roots are formed. All the time you need to monitor the frequency of watering and soil moisture. The seedlings can be severely affected by the summer heat. Therefore, the plant should be sprayed all the time with a spray bottle (twice - in the morning and in the evening).
It should be noted that thuja can be reproduced both in the substrate and in water. A plucked twig takes root almost equally in a glass of water and in the ground.