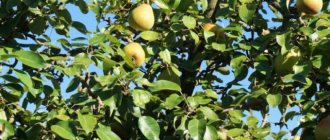
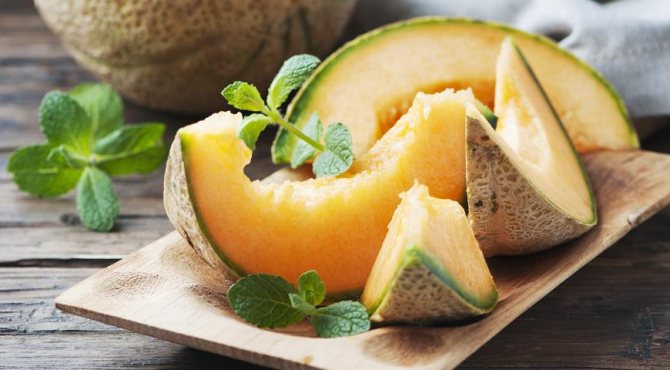
Why I decided to try growing a melon in a greenhouse
Like any experimental gardener, sooner or later the idea came to me to grow my own melons. Of course, not those huge ones with a breathtaking taste and smell that grow on southern melons. But small greenhouse melons, which also delight with excellent sweetness and aroma.
I have tried ultra-early varieties, varieties of medium ripening times. Pre-planted seedlings - this made it possible to harvest the first greenhouse harvest by mid-summer. The experiment was more than a success - melons, one of the most unpretentious southern crops, require no more care than cucumbers and tomatoes.
This plant does not actually suffer from diseases and pests, it feels great in the greenhouse. And it gives a very tasty vitamin harvest, surpassing the store in terms of benefits and quality.


What to plant next door
In order to scare away harmful insects, sowing along the beds with melons of spicy varieties of herbs - spinach, dill, is practiced in a greenhouse.
You can plant legumes that will contribute to the saturation of the soil with nitrogen, but choose undersized varieties to prevent excessive planting density. Salad and radish are often found next to the melon.
If the greenhouse is spacious, then cucumbers will develop well on the beds adjacent to the melon. Given the identical environmental requirements, you can plant watermelons as well. To prevent the appearance of a spider mite, a black radish is planted near the melon. Clumps of nasturtium will serve as a good protective barrier against pests.
An overview of my favorite melon varieties for greenhouse planting
Let me tell you about my favorite melon varieties that deserve the attention of both a beginner and an experienced experimenter:
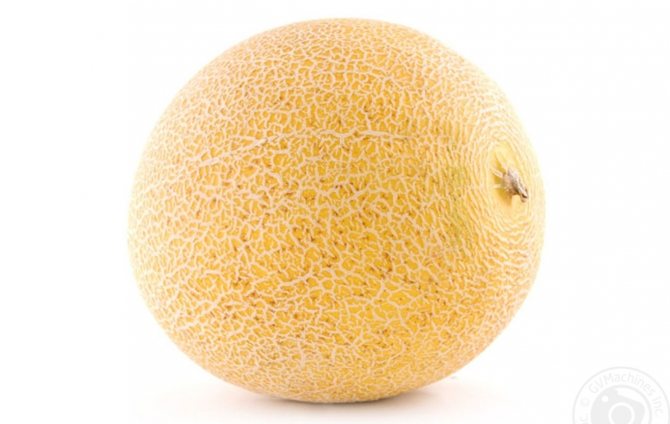
- Princess Svetlana. The variety is recommended for cultivation in greenhouse conditions in the central regions by the State Register of Breeding Achievements of the Russian Federation. The ripening period is about 3 months. Melons are round, weighing up to 1.5 kg, with an unusual white skin. The pulp is juicy, bright orange in color with a strong pleasant aroma. The variety is suitable for long-term storage and long-term transportation.
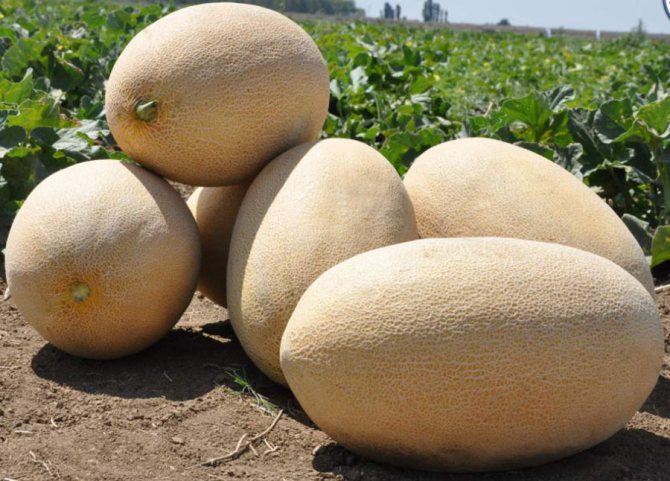
- Krinichanka. An early variety that ripens by 70-75 days of development. Fruits of a beautiful sunny color, oval, weighing up to 2 kg. The pulp is very juicy and sugar - both greenish and milky. A rare variety that feels great in partial shade.
- Hope. Cold hardy early variety - harvest is ready for 70-75 days. Melons are small (up to 1 kg), lemon color, unusual ribbed shape. The pulp is very fragrant, tender, of a light orange hue.
- Collective farmer. Probably the best-known variety, both outdoors and indoors. The approximate ripening period is 75-95 days. Melons are small (0.7-1.5 kg), round, of a nice orange color. The "filling" is crispy, dense, juicy with a light aroma and recognizable taste. The variety is suitable for long storage and transportation.
- Muscovite. A cold hardy early variety that matures in about 70 days. The weight of orange oval melons is 0.5-1.5 kg. Fruits, harvested early, are less sweet, but with a wonderful orange flavor. And the late harvest of Moskvichka is the most sugar-rich. The variety is not suitable for long storage.
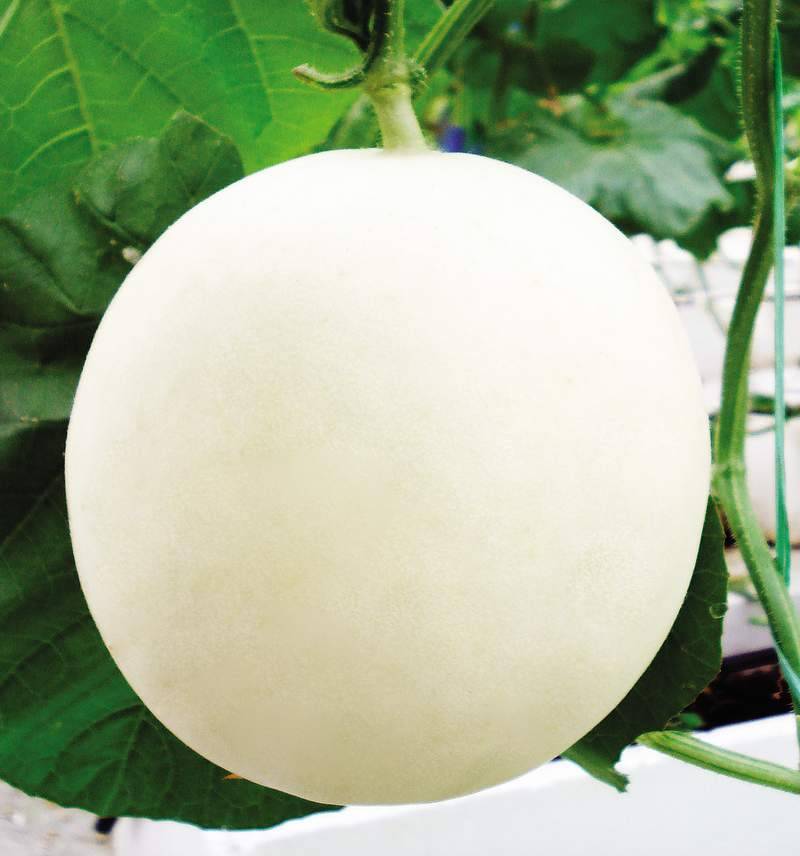
- Titovka.One of the earliest ripening varieties - the harvest ripens 55-70 days from seed pecking. The size of the fruits depends on the comfort of the greenhouse conditions - you can also grow orange giants of 3-3.5 kg. The pulp is fleshy, snow-white and very tasty. The level of resistance to infections is medium.
- Gold of the Scythians. One of the popular early hybrids, maturing in about 70 days. Fruits are yellow, regular round shape, weighing up to 1 kg. The "filling" is sugar, juicy, with a pleasant aftertaste. The variety is not only high-yielding, but also disease-resistant.
If you have a capital polycarbonate greenhouse, I can recommend varieties: Canari, Amber, Ozhen, Solnechnaya, Gaul, Original.
There is also an option not to buy seeds, but to collect them from the melon you like. But I recommend doing this only as an experiment - you may be in front of a hybrid or a late-ripening type. Take your time and plant freshly harvested seeds - you run the risk of growing a seedling "rich" in barren flowers. Before sowing, "aging" is required for 3-5 years.


When to plant melons in a greenhouse
I will present you with universal information on the recommended dates for planting melons:
- Soil temperature at a depth of 10-12 cm is not lower than 15 C.
- Daytime air temperatures - not less than 20 C, night - not less than 15 C.
Thus, depending on the specifics of the region, melons are transported to greenhouses no earlier than mid-May.
By region
In most Russian regions, with the exception of the southern ones, melons are grown mainly in greenhouses. Moreover, the culture is not sown with seeds, but preliminarily bred with seedlings. I'll tell you about the peculiarities of growing in each area:
- Middle lane, Moscow region. If the greenhouse is not heated, the relocation of the seedlings can only be planned for mid-May. It is important to avoid thickening of the plantings - plan for 1 m2 no more (depending on the variety) 2-5 seedlings. And also monitor the optimal humidity, air circulation - mulch the soil, remove excess, old tops. If the soil begins to acidify, it is promptly neutralized with ash.
- Ural, Siberia. When moving melons, I recommend focusing on transporting tomatoes and cucumbers to greenhouses. In the harsh conditions of these regions, melons should be grown in greenhouses in high or warm ridges. To wait for the harvest, form plants in no more than 2-3 lashes. Such northern melons need enhanced nutrition - every week they dissolve urea in water for irrigation, and from the second half of the summer they replace fertilizer with ash.
- Northwest. Melons are grown in greenhouses only on high ridges with a decent layer of mulch. They are transported to the garden in the last week of May. It is important to periodically ventilate the greenhouses - melons do not tolerate too humid air. If the summer is cool, gardeners turn to artificial pollination.
When choosing a melon variety, I advise you to check whether it is suitable for growing specifically in your area.
Lunar calendar
I will present the dates favorable for the lunar calendar for sowing melons for seedlings and dates for transplanting into a greenhouse:
- April: 1-4, 8-13, 15-19, 23-27, 29-30.
- May: 1-3, 7-11, 13-17. 21-25, 27-31.
Please note that the sowing number is the date the seeds are soaked.


Preparation for growing melon seedlings
I will tell you in detail, step by step, how I prepare melon seedlings for a greenhouse.
Seed preparation for sowing
Melon is an unpretentious culture: seeds hatch without soaking or preparation. But, if you want to harvest a rich tasty harvest, I still recommend not to ignore my instructions:
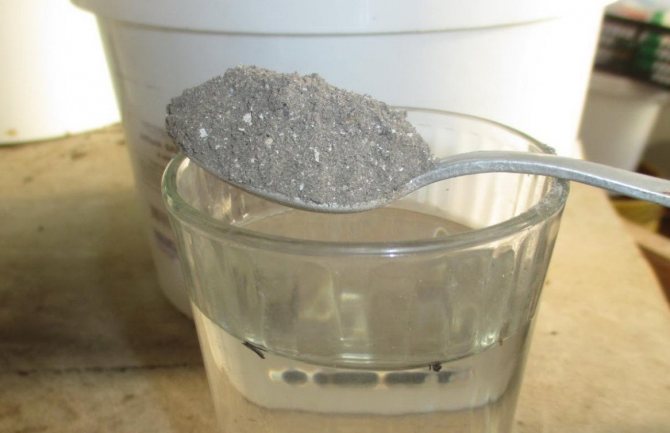
- Check for hollowness. Dissolve 3-5 g of salt in 100 ml of water, dip the seeds in the liquid. Discard all pop-up instances.
- Warming up. Hold the seed in water at an approximate temperature of 50 C for 2-3 hours. This procedure initiates the formation of productive female inflorescences.
- Disinfection.Dilute the pink potassium permanganate solution - dip the melon seeds in it for 20-30 minutes, then rinse them thoroughly with warm water.
- Growth stimulation. Dip the seeds for a couple of hours in a solution of boric acid (a few crystals in a glass of water) or "Zircon", "Epina".
- Hardening. Place the seeds in an envelope made of a napkin, natural cloth, and immerse them in a saucer with warm water (30-35 C) for 2 hours. Then keep the night in a damp package in the refrigerator. Repeat within 2-3 days.
To wait for germination faster, you can then soak the seed in warm water - wait for the emergence of "embryos" of the roots.
Soil preparation
I tentatively prepare melon seeds in the first or second week of April. I save for them either plastic cups from dairy products (with a diameter of at least 10 cm), or peat pots.
I prepare soil mixture for seedlings according to one of the "recipes":
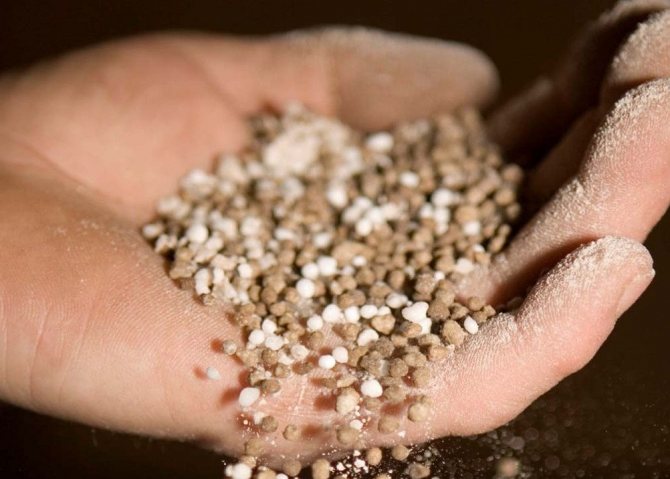
- Garden soil + humus in a ratio of 1: 3. I add 1 tbsp. a spoonful of potassium preparation, 3 tbsp. spoons of phosphate fertilizer and 1 tbsp. a spoonful of nitrogen.
- Garden soil + humus in a ratio of 1: 3. I add 1 teaspoon of potassium sulfate and 1 tbsp. a spoonful of ash.
If you are using a garden substrate, be sure to decontaminate it first. The easiest way to spill soil is with a strong manganese solution.
Sowing seeds
Sowing melon seeds is carried out according to a simple algorithm:
- I fill the cups with the mixture.
- In each I make a depression of 3 cm.
- One glass contains one seed. I put it on a wide barrel.
- I fall asleep with the same soil mixture.
- I cover the containers with glass or wrap them in plastic.
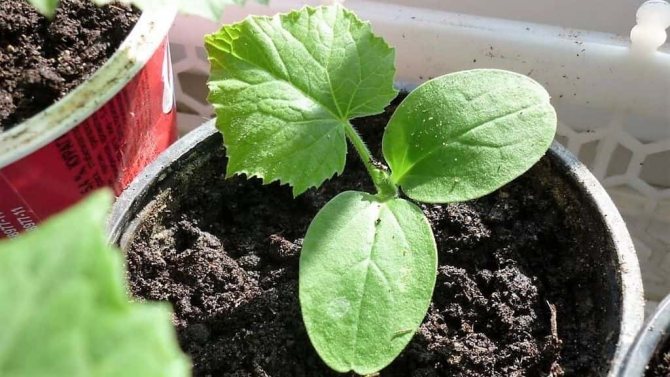
After planting, I take the future seedlings to a warm place (25 C). As soon as sprouts appear, I remove the shelter, lower the temperature to 20 C.
Seedling care
Melon seedlings do not require special care:
- Do not place the cups too tightly - young seedlings need room to grow.
- Water only as the soil dries up - it is best to spray the ground with warm water from a spray bottle.
- Provide adequate lighting - at least 12 hours a day. If there is not enough natural light, install phytolamps.
- Carry out two dressings with any complex mineral composition. The first fertilization - on the 10th day of development, the second - after another 10 days.
A week before moving to the greenhouse, I harden the seedlings - I take them out on a glazed warm loggia, increasing the time of "walks" every day.
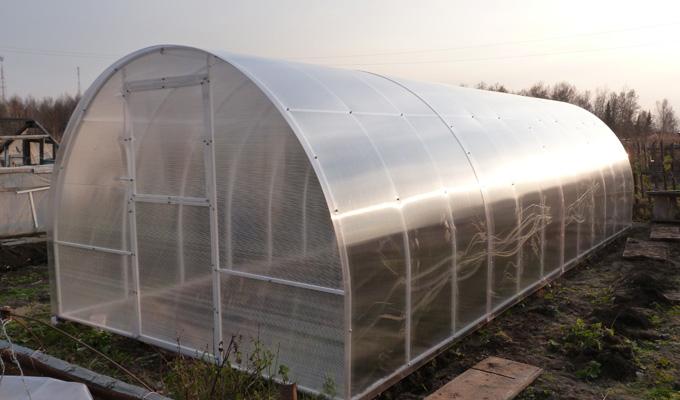
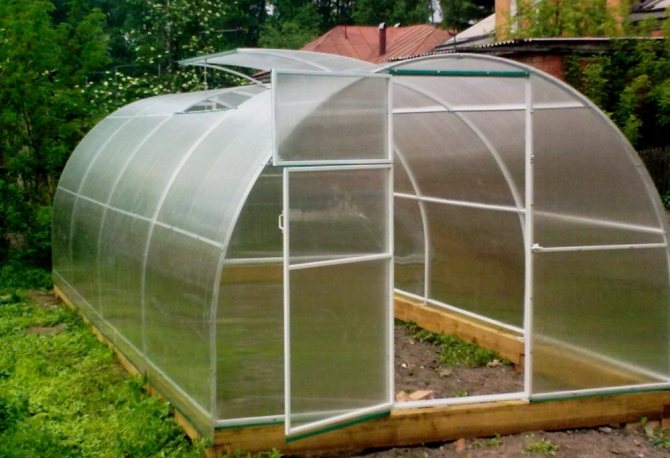
Greenhouse preparation
First of all, I advise you to decide whether your greenhouse is suitable for growing melons:
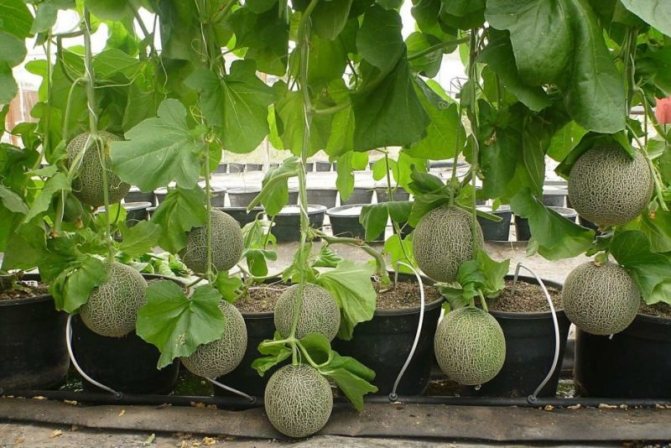
- Although this plant is small, it needs a large food area. If you have a compact greenhouse, you will have to install trellises so that the melon grows vertically, upward.
- The minimum height of the greenhouse is 2 meters. Supports should be installed in it, to which you will tie up the shoots. I installed dense vertical posts (metal rods, thin plastic pipes) and pulled rows of thick wire between them every 50 cm of height.
- The maximum distance of melon ridges from windows, transparent walls of the greenhouse is 0.5 m. Most melons are photophilous - they develop poorly with a lack of sunlight.
- The greenhouse should be thoroughly cleaned of plant debris, remnants of last year's plants. Ideal if you freshen up the topsoil.
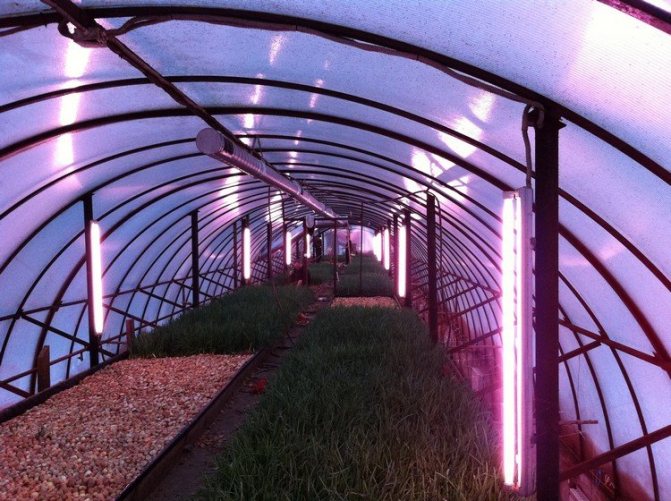
For those living in Siberia and the northern regions, I additionally recommend lighting the greenhouse - to use the phytolamp. Melons need at least 12 hours of daylight for proper development. If there is a threat of sharp or prolonged frosts, heating devices are also needed.
Preparing the soil for planting seedlings
Melons prefer the following substrate:
- Loams (but not "clean" clay). If the soil is heavy, fix it by adding sand - a 1 m2 bucket is enough.
- PH neutral soil.If the substrate in the greenhouse is acidified, add lime in the fall, and in the spring - chalk or dolomite.
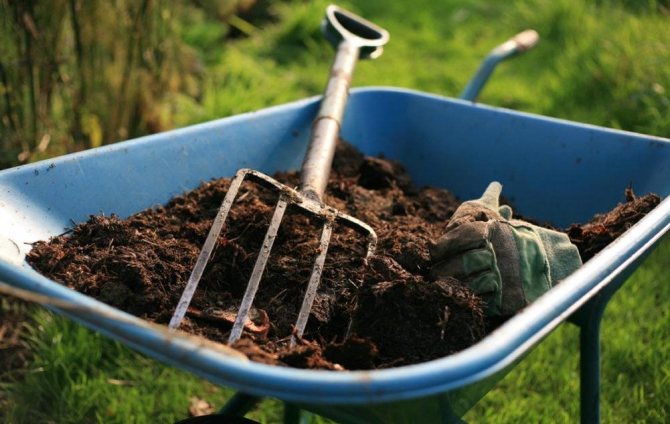
For digging in the fall, I bring in (per 1 m2):
- Humus - ½ bucket.
- Superphosphate - 20-25 g.
- Potassium sulfate - 10-15 g. Sometimes I replace it with natural fertilizer - a 1-liter can of ash.
- Urea - 10-15 g.
Another "recipe" for the autumn preparation of the substrate (per 1 m2) - with the replacement of the top layer of the earth:
- Peat + sand in a ratio of 3: 1.
- Chalk - 250 g.
- Azofoska - 30-40 g.
With such preparation, in the spring, it is enough to loosen the ground - and start forming the beds.
Neighbors and predecessors
It is best to plant melons in a greenhouse where cucumbers previously lived. Other predecessors are also not prohibited, with the exception of melons and tomatoes.
Great neighbors for melons are beans, peppers, eggplants, and herbs. The latter are effective "repellers" of harmful insects. The joint planting of melons and watermelons is popular. But keep in mind that both cultures require a lot of space to develop.
I do not recommend the proximity of melons and cucumbers - these plants have different requirements for air humidity. In addition, these are related crops - cross-pollination is possible, which significantly improves the taste of melons.
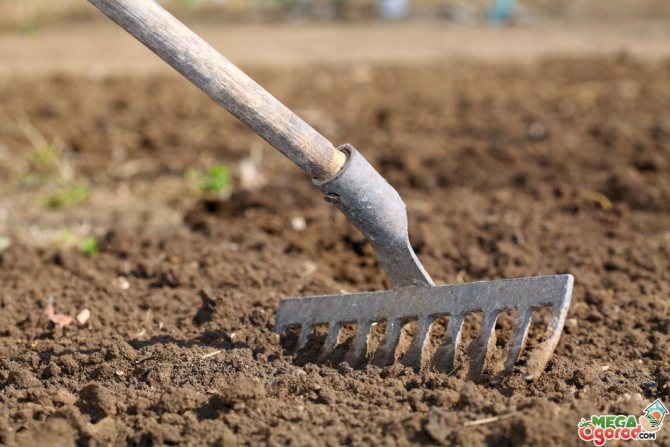
Formation of beds
If it is difficult to call your greenhouse insulated, I recommend, following my example, to build a warm ridge:
- I remove the top layer of soil 20-25 cm high, fold the substrate nearby.
- I put drainage in the formed depression - crushed stone, expanded clay, chips, crushed pieces of wood. Above - a light layer of dry grass, hay.
- The next layer (5-6 cm) is made of humus. I cover it with rotten foliage or small sawdust.
- The last layer - the garden soil returns to its place.
In conclusion, I water the garden bed with warm water, cover it with black agrofilm. After a few days, she will warm up well and will be ready to accept young seedlings.
How to choose the right landing site?
Preparing the garden and soil is the key to a good harvest.
Bed formation:
- The top layer of soil is removed by 20 cm
- Further, branches, expanded clay and crushed stone are laid in the received trench
- Hay or mowed grass is lined on top of the drain
- Then sprinkle with humus, which is sprinkled with fallen leaves or sawdust
- Cover everything up with earth
- Mineral fertilizers and lime can be added to the soil (if the soil is acidic and heavy).
- The made bed is spilled with warm water and covered with a dark covering material to quickly warm the soil.
In this way, a nutritious and warm bed is obtained in which the culture will grow and bear fruit well.
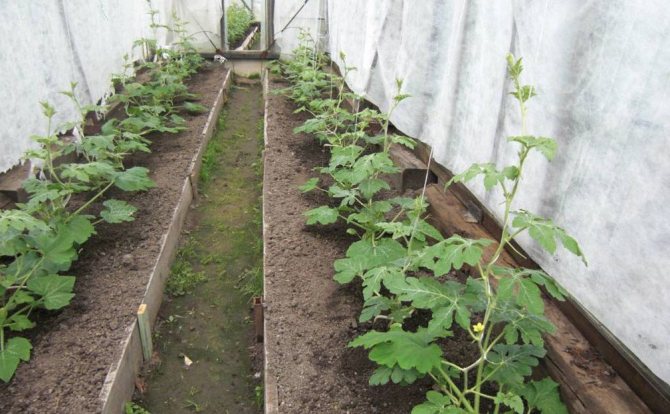
Planting seedlings in a greenhouse: step by step instructions
Planting seedlings in a greenhouse is a very simple event:
- Make holes according to the scheme 70x50 cm.
- When digging a hole, be guided by the diameter, the height of the pot with seedlings - an earthen ball with a root system should fit freely in the recess.
- Immediately before transplanting, spill the wells with warm water, put a handful of compost on the bottom.
- If you have used peat pots, plant the plants directly in them. If plastic - carefully, holding the base, rinsing the walls of the glass, pull out the seedling with an earthen lump.
- If the greenhouse is small, place two plants in one hole, pointing them in opposite directions.
- Do not deepen the earthen lump with roots - let it rise 1-2 cm above the surface of the ridge.
After transplanting, I give the plants a week to adapt - I don't touch them at all. Then I start the standard care.
growing melon seedlings
Care for melons after planting in the greenhouse
Now is the time to talk about the features of my care for greenhouse melons.
Watering
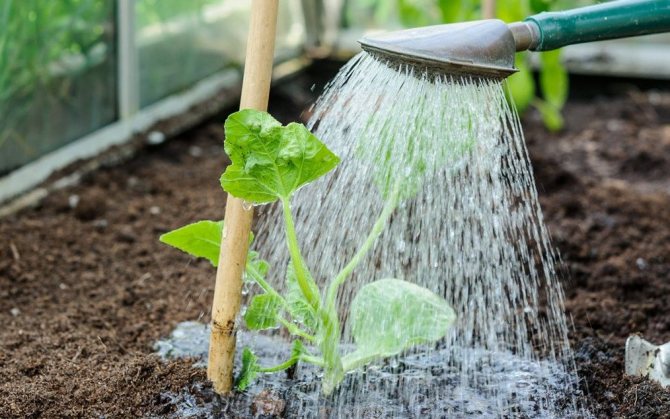
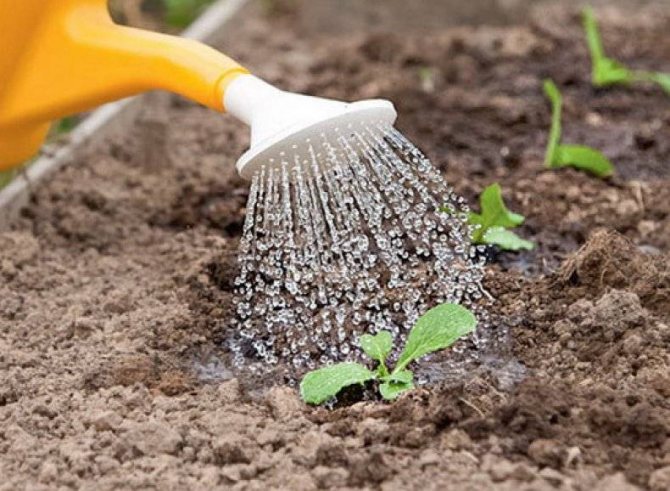
I'll tell you about my main rules for watering melons:
- After transplanting, infrequent but abundant watering is shown - once a week.
- With the formation of fruits, I increase watering frequency. As soon as the melon becomes the size of an orange, I cut it again.About a month before the harvest is ready, I cancel watering for good - this forces the plant to deposit more sugars in the fruits.
- For water procedures I use only water heated in the sun.
- I water it at the root, trying not to spray moisture on the tops and root collar.
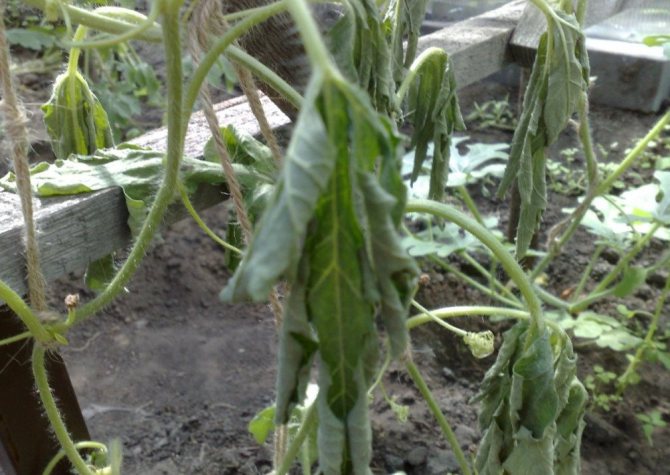
- The plant "speaks" about the lack of water by drooping tops - in such cases, I increase watering frequency.
- After water procedures, I must remove weeds, loosen the ridges and slightly huddle the plantings.
I do not forget that melons are drought-resistant plants. Therefore, I try to keep the humidity in the greenhouse at the level of 60-70%: I ventilate, wipe off the condensate, and lay the mulch.
Top dressing
As for fertilizers, everything is quite simple - greenhouse melons need no more than 3 feedings:
- The appearance of the 2nd true leaf - mullein infusion.
- Blooming buds - infusion of mullein with the addition of ash.
- The fruits reach the size of a large plum - only the ash infusion.
I try not to use mineral fertilizers in order not to achieve the accumulation of harmful substances in the melons. I also add nitrogen-containing compounds with caution - only until the fruits appear.
Temperature regime
The optimal temperature conditions for melon development are 25-30 C. With the beginning of fruit formation, I slightly adjust this indicator: I reduce it to 20-22 C in the daytime and to 16-18 C at night.
Lighting
The optimal daylight hours for melons are 12 hours. The plant responds painfully to the lack of light, therefore, in northern conditions, it is advisable to equip LED, fluorescent lighting, phyto lamps in the greenhouse.
But the development of the melon is disrupted even with a daylight hours of more than 12 hours. Therefore, I try to plant the plant in the greenhouse as early as possible - the main thing is that it blooms before the long June-July days.

phytolamp for growing seedlings of melons
Pollination
If in open ground this function is completely taken over by insects, then in a closed one you have to try yourself. The easiest way is to periodically open the vents, doors to the greenhouse so that bees, butterflies, and wasps fly into it. You can attract insects by planting honey plants in a greenhouse, spraying melons with sweet syrup.
But I do not rely on chance and do the pollination myself. The first way I distinguish flowers:
- Men's. With clearly visible stamens, on thin pedicels.
- Women's. Appear later than men, open only in the morning.
The easiest option is to pinch off the male flower, remove the petals and pass it along the female pistil with the stamens. An alternative is to arm yourself with a watercolor brush and use it to transfer pollen from the male to the female inflorescence.
Plant formation
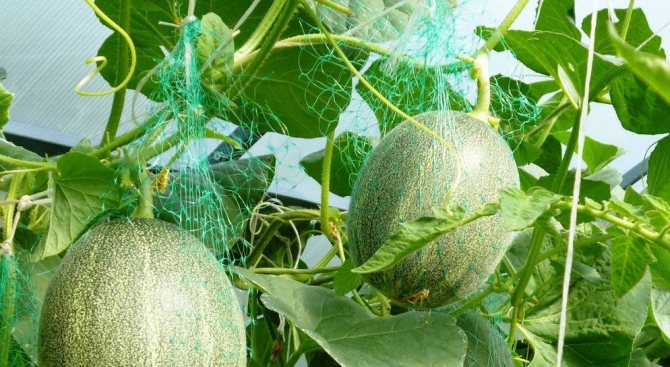
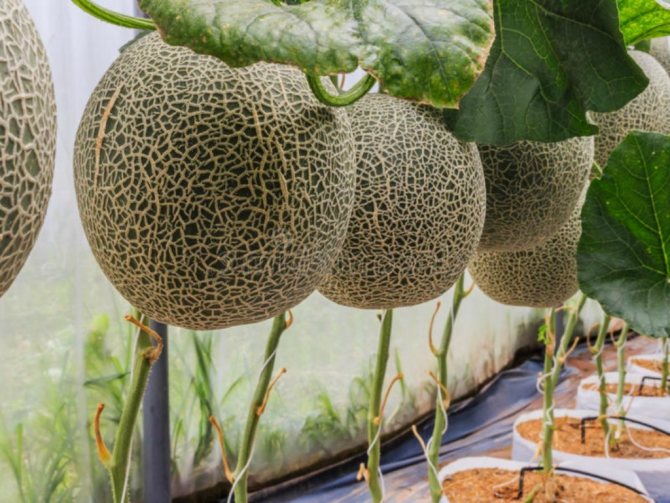
Perhaps the most difficult thing in caring for melons is their formation: pinching stepsons, removing excess inflorescences and buds, pruning. On one bush of a medium-sized variety, it is possible to grow no more than 5-6 melons. In the case of "giants" - no more than 2-3.
I don't want to scare newbies with the complexity of formation - if you do not want some record harvests, you can not do them at all. Melons "superfluous" for the plant die off naturally. I will share my experience with experienced gardeners:
- I keep a greenhouse melon in one stem. But I never choose the main escape in this role - it is most often poor on the ovary.
- As soon as 5-6 leaves appear on the plant, I pinch the top. This stimulates the appearance of side lashes - the most powerful one I leave. But only one - a greenhouse plant in cramped conditions is not able to "feed" more.
- As soon as a lone shoot grows to 40 cm, I tie it to a support. Those leaves, branches that spread along the ground, I cut off. Be careful: the most productive daughter shoots are of the 3rd order.
- On each "daughter" of the main lash, I leave only one ovary. Above it - no more than 3 leaves: I pinch the tip. I delete unproductive branches altogether.
- I pinch the central shoot as soon as it reaches the greenhouse ceiling.
- I do not wait for my stepsons to grow back - I remove them young, leaving a small "stump".
The main advice - try to tie up fruiting shoots as quickly as possible, direct them vertically until they break under the weight of melons.

Possible difficulties
Even experienced gardeners face some difficulties when cultivating melons in a greenhouse.
If the fruit is not set, then the cause may be an insufficient number of female melon flowers. This happens for the following reasons:
- wrong watering regime;
- low light;
- lack of fertilizers;
- use for sowing fresh seeds.
There will be no embryos on the stems if the flowers have not been pollinated due to the absence of bees in the greenhouse.
Sometimes in the process of melon growth it is observed how the ovaries turn yellow, drying up and then falling off. This happens in a greenhouse in which an excessively hot atmosphere is established. The reason may also be thickened plantings, poor lighting, moisture deficit, sharp and frequent temperature changes, and depleted soil.
Competent agrotechnics helps to cope with problems, including methods and techniques for caring for melons in the closed conditions of a greenhouse covered with polycarbonate.
What difficulties can arise when growing melons in a greenhouse or greenhouse
I have already noted that all melon varieties are very unpretentious gardeners who rarely suffer from pests or diseases. But still, I want to arm you with tips in case of difficulties.
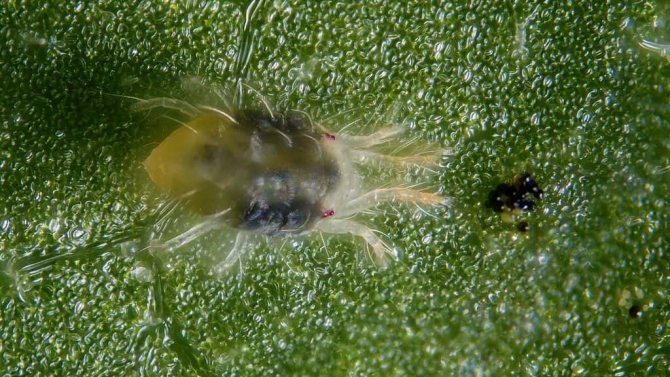
Pest control
The main pests that threaten melons are melon aphids and spider mites. The harm from them is about the same - they suck out the cell sap, weakening the plant, depriving it of its vitality.
Prevention of these uninvited guests is simple for me - I follow the rules of crop rotation, I do not grow melons after unsuitable predecessors, I fight weeds in the greenhouse in a timely manner. If pests appear, I dilute a soap solution: 3-4 tbsp. tablespoons of shavings of laundry soap for 5 liters of water. I spray the plantings with this liquid several times a week. If this folk method does not work, I apply (according to the instructions) "Karbofos".
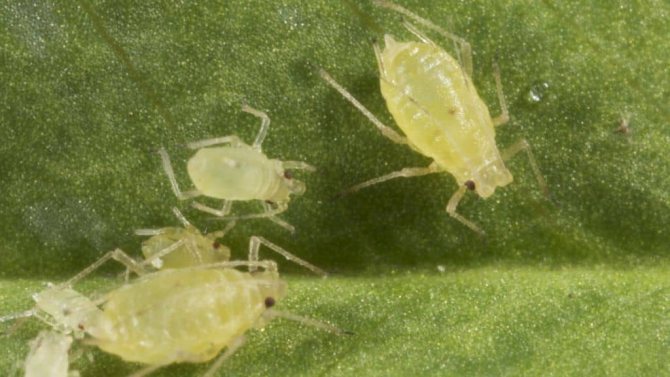
aphids in the garden
spider mite in the garden
Disease prevention
I'll tell you about the most common diseases of melons:
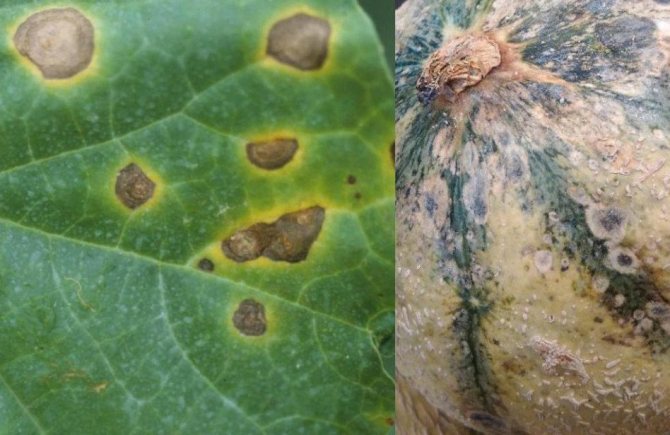
- Anthracnose. When damaged, yellowish blotches and spots appear on the ground part of the plant. They then turn dingy pink. A sure remedy for anthracnose is spraying with 1% Bordeaux liquid. Prevention - preventing too high humidity in the greenhouse.
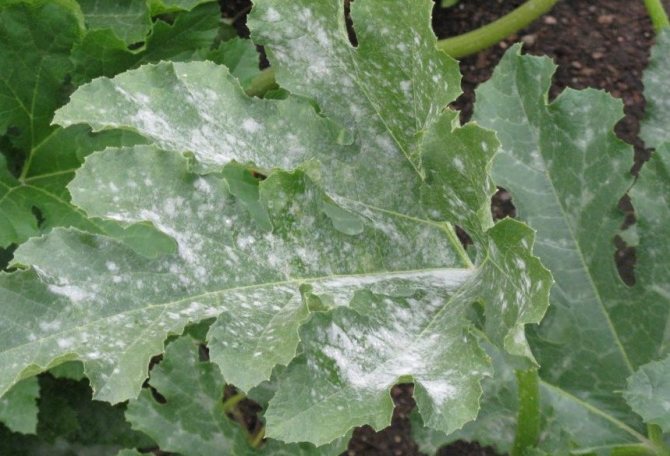
- Powdery mildew. First, on the leaves, and then on the shoots, a white bloom appears, similar to flour. If you start the disease, it goes on to the fruit. From such a defeat, the tops dry out, wither, and the melons begin to deteriorate. To stop the disease, I spray the plants with sulfur products. The best prevention of powdery mildew is disinfection of seeds, thorough autumn cleaning of the greenhouse.
- The spot is olive. Spots, brownish ulcers appear on the leaves and stems. If infestation is ignored, they cover melons as well. The disease can be stopped by systematic treatments with preparations containing sulfur.
If last year there were plants in the greenhouse affected by either diseases or pests, it will not be superfluous to arrange preventive treatment for melons:
- Ash solution. For 5 liters of water - ½ glass of ash, 2-3 tbsp. tablespoons of shavings of laundry soap
- A solution of copper oxychloride. Suspension concentration - 0.4%. I process the melons with the mixture about every 2 weeks.
- Solutions "Fitosporin", "Zircon", "Tsitovit". For preventive purposes, a two-stage spraying is sufficient: when 3-4 true leaves appear and budding.
Now you know the main instructions and secrets that will help you harvest a luxurious melon crop even in the harsh Siberian and Ural conditions.I advise you to pay due attention to the preparation of both seedlings and greenhouses. Do not forget about the prevention of diseases and insect pests.
Features of harvesting and storing crops
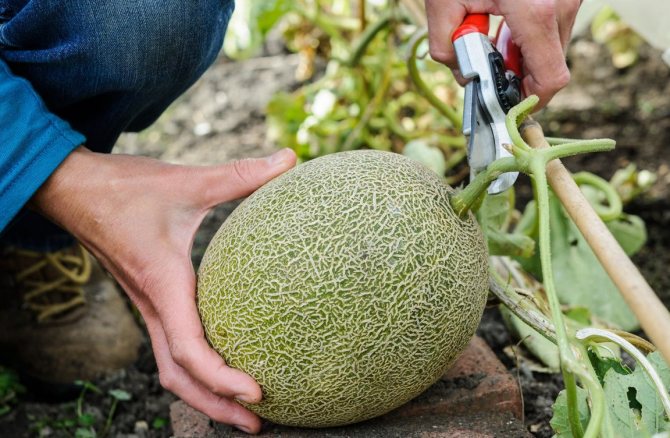
Having determined that the bulk of the melon harvest in the greenhouse is already ripe, they begin to harvest it. The fruits are harvested together with a stalk about 30 mm long in the evening or in the morning.
Leave them for four days in the garden, turning over on the other side every six hours. Then the finished melon crop must be placed in a cool room without lighting, in which disinfection measures are first carried out. If the walls are wooden or concrete, they must be whitewashed with lime.
Melon fruits can be laid out on shelves, which are first sprinkled with dry sawdust. They are well stored in nets suspended on a stretched cord.
The storage temperature is maintained at about 1-3 degrees, the average humidity should be 80%. The fruits of early ripening varieties, which are removed in a fully ripe form, can be stored for a week.
If late-ripening crops were grown in the greenhouse, then such melons retain their presentation for a maximum of six months. To keep the mid-late varieties longer, they are harvested when the fruits reach the stage of technical ripeness. In the process of storage, they ripen, improving the aroma and flavoring bouquet.
Expert opinion
Stanislav Pavlovich
Gardener with 17 years of experience and our expert
Ask a Question
Important! It is necessary to systematically inspect the melon crop, promptly removing specimens showing signs of decay.