Breeding methods for clematis at home
You can propagate clematis at home in many different ways, which differ from each other in complexity and technique. Everyone, even a novice florist, will be able to choose the method that is most suitable for him, because if all the recommendations are correctly followed, any work will be successful.
Propagation by green cuttings
This method is one of the most effective, but at the same time lengthy and difficult. When grafting green shoots, the survival rate is 60-95 percent. Tangut clematis, burning, taiga also reproduce by cuttings.
It is necessary to harvest green petioles during budding, before flowering. In this case, they will be more viable and the survival rate will greatly increase.
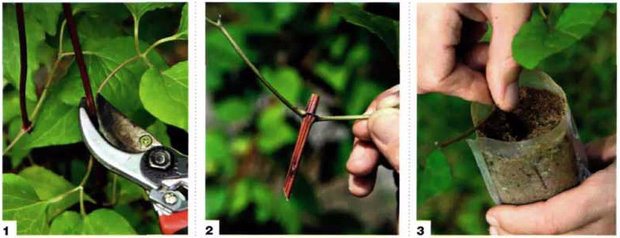
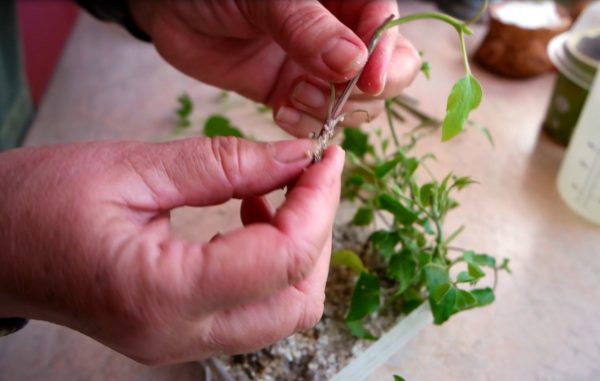
Harvesting green cuttings for breeding clematis
Preparation of shoots for cuttings is as follows:
- Cut the cuttings above the first or second real leaf, and for such purposes the middle part of the shoot is best suited;
- Then you need to leave one knot on the handle., for this, an oblique cut is made at a distance of 4-6 centimeters under it and a straight line 2 centimeters higher;
- To reduce moisture evaporation, large leaves are cut in half;
- To speed up the rooting process will help treatment with growth regulators, which include heteroauxin, root or sodium humate. A 1/3 stalk is placed in a ready-made solution and kept there for 10-12 hours;
- Thereafter shoots are rinsed with running water, and the preparation process can be considered complete.
Clematis can be rooted in greenhouses, greenhouses, tunnels and in ordinary houseplant pots, which are also placed under a film or glass shelter. It is best to use a mixture made from equal parts of sand and peat as a substrate.
To protect the kidneys from drying out, when planting, the knot is deepened by 1 centimeters. The distance between plants should be 5-6 centimeters, and between rows 10-12.
In order for the shoots to actively grow roots, they need proper care:
- the optimal temperature is considered to be the interval from 18 to 22 degrees;
- the first month the seedlings are watered daily, and after that 1-2 times a month;
- clematis prefer moist air, so they need to be sprayed 2-3 times a day;
- also once a week, the plants are sprayed with a solution of Cycron.
If all the rules are observed, the cuttings will root in 50-60 days. After this period, the plants begin to ventilate, and then the film is completely removed, while for the winter period the plants are covered with sawdust or peat, and on top with a leaf. In the spring, the seedlings dive, and in the fall they are transferred to their permanent residence.
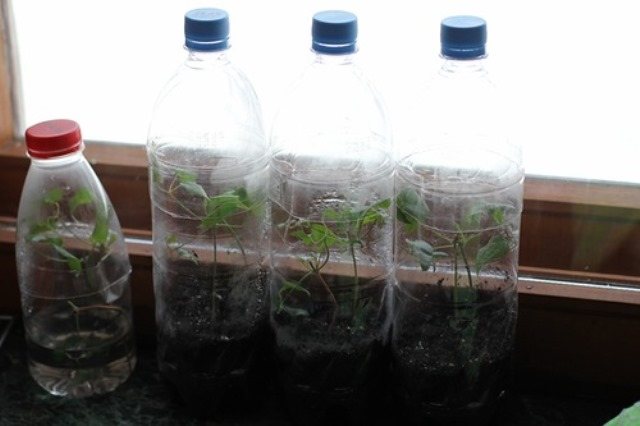
Strengthening bottled cuttings
Rooting cuttings in bottles
Experienced and resourceful florists have come up with a rather interesting way of rooting clematis cuttings; when using it, you can significantly save space in a common greenhouse.
To root the shoots of a plant in a bottle, you must adhere to the following algorithm of actions:
- A large plastic bottle is cut in half and the substrate is poured into the lower part;
- Then the prepared stalk is deepened, and the upper part of the bottle is placed in place and wrapped with tape. Such an unusual solution will allow you to create a small greenhouse for each plant;
- The resulting bottle is dropped into the ground to the level of the substrate poured in it, while it is recommended to choose slightly shaded areas;
- After 15 days, they begin to ventilate the greenhouse, that is, unscrew the plug for 20-30 minutes a day;
- As soon as the first shoots appear, the cork must be completely unscrewed, and several drainage holes must be made in the bottle.
Rooting lignified cuttings
Low-flowered and wild varieties of clematis are well suited for propagation by lignified cuttings. With this method, the success rate is 60 percent.
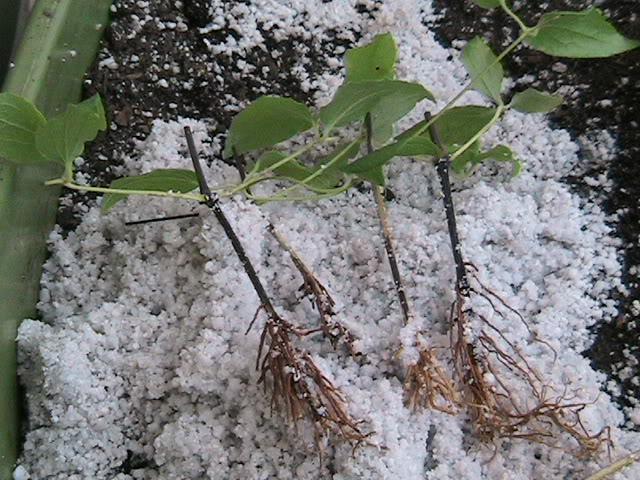
Rooting lignified cuttings
Cuttings are cut in early - mid-August. Shoots 7-10 centimeters long with one or two nodes are well suited for such purposes. Before rooting, the cutting must be kept in a root growth stimulator for 24 hours.
Then the prepared cuttings are planted in a pre-moistened substrate at an angle of 45 degrees, so that the upper part is deepened by 1 centimeter, and the lower one by 3.
Further growth of lignified cuttings should take place under the following conditions:
- for the winter period, the shoots are covered with a film and placed in a cool place;
- in March they are transferred to a greenhouse and the temperature is gradually raised to 20 degrees;
- it is necessary to water the soil as it dries;
- as soon as the shoots reach a length of 10 centimeters, they are pinched over the second node, this procedure will help speed up the rooting process;
- after 3 months the first roots should appear. At the same time, to stimulate growth, the plant is fed with complex mineral fertilizers;
- cuttings should spend one more winter in boxes or a greenhouse, while they are covered with peat and covered with a film;
- with the onset of spring, clematis are planted in the garden, and in the fall they are moved to a permanent place.
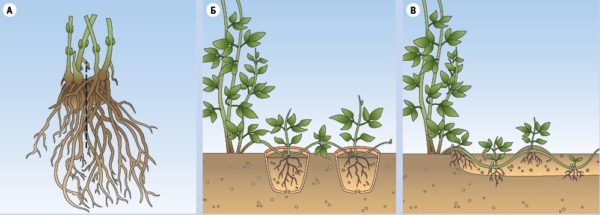
Reproduction by layering
Many experienced growers believe that this method is the simplest and most effective. The probability that new, independent plants will appear from the layers is 90%.
In order to get young clematis from cuttings, you must perform the following steps:
- In early spring, when clematis is tied to a support, a young and healthy shoot is chosen, which must be laid in a previously prepared groove 7-8 centimeters deep, while the end of the shoot should look out of the ground by 20-30 centimeters;
- A top with well-developed buds must necessarily remain on the surface, otherwise the shoot will not germinate;
- Then the groove must be regularly moistened, and as soon as the young shoots grow 10-15 centimeters, the distance between them can be covered with humus or loose soil;
- During the summer, the layers are watered and mulched, and in winter they are covered with leaves or needles;
- The following spring, small plants are carefully cleaned from the ground and cut between the nodes into separate bushes.
After all the work done, clematis will be ready for further cultivation and transplantation to a new place.
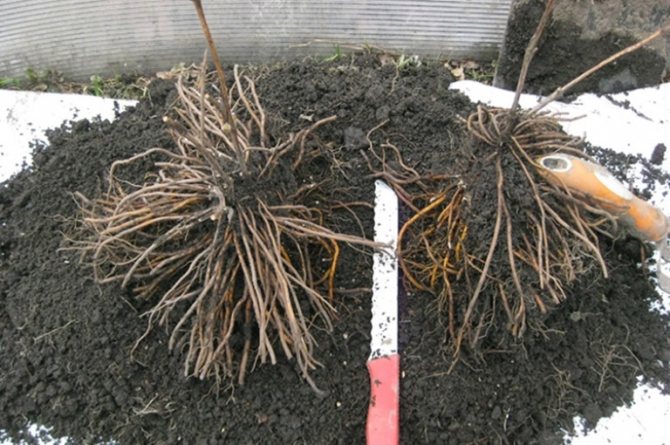
Dividing the bush
This method is the fastest, although it is quite laborious.... When you reproduce it, you will have to perform complex and painstaking work.
If a young bush, whose age does not exceed 5-6 years, is subject to division, then it is simply dug out of the ground and cut into several parts. Moreover, on each plot there must be a bunch of roots and 1-2 shoots.
Old clematis is much more difficult to dig out. In this case, a kind of deep digging is made from the side and the exposed root is washed. After that, a part of the rhizome is cut with a shovel and divided into several more seedlings.
When planting small bushes in a new place, they are shortened to 2 buds.
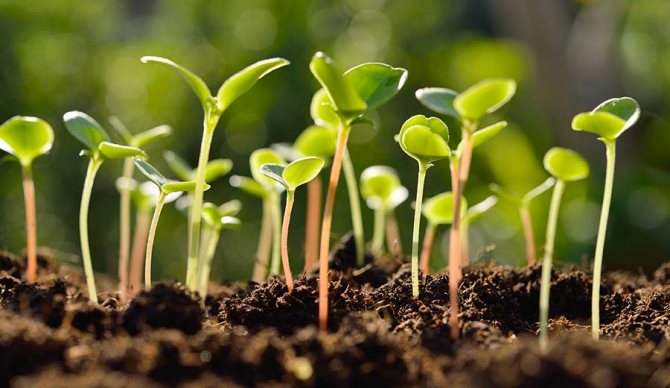
Seed propagation
Reproduction of clematis by seeds is a rather complicated and troublesome method., which does not give any guarantee of obtaining new plants. Also, during the propagation of hybrid species, the varietal characteristics of the parent plant will not be preserved.
You can sow clematis both in autumn and spring. In the first case, in the middle of autumn, unprepared seeds are scattered over the garden bed, and dripped on top with a small layer of sand. In this case, the planting material will undergo natural stratification and the first shoots should appear in the spring.
Also, plants can be sown in April-May, but before that, the seeds need to be stratified. To do this, they are first soaked for several days, then placed in wet sand and put into the refrigerator for 2-3 months.
Further care of the plantings will consist in timely watering and weeding. The first sprouts that appear are protected from direct sunlight. As soon as the first true leaves appear on the sprouts, they can be dived into separate containers.
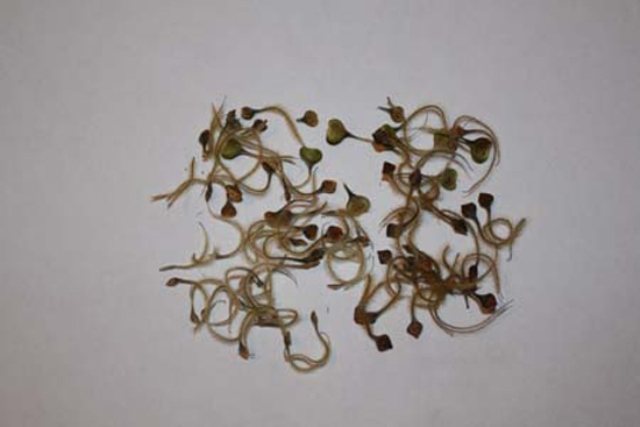
Clematis seeds
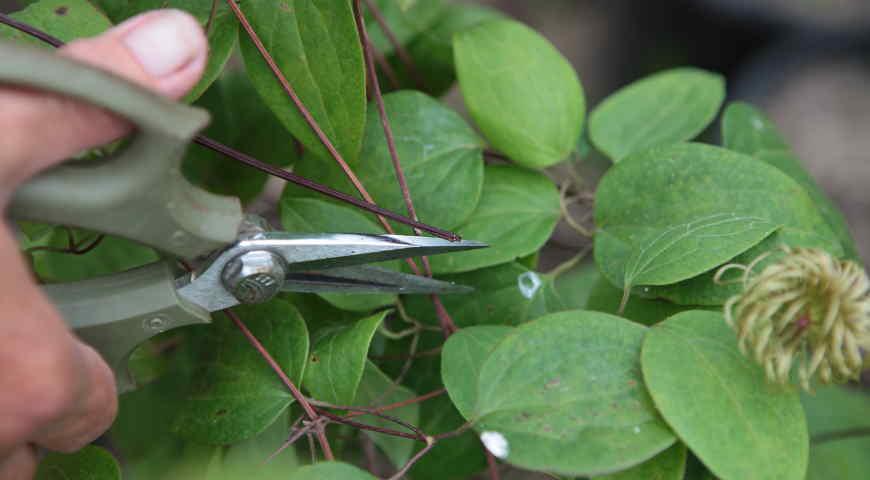

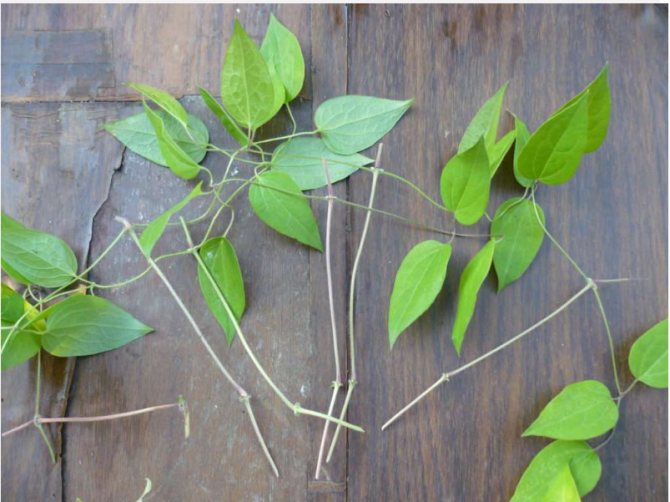
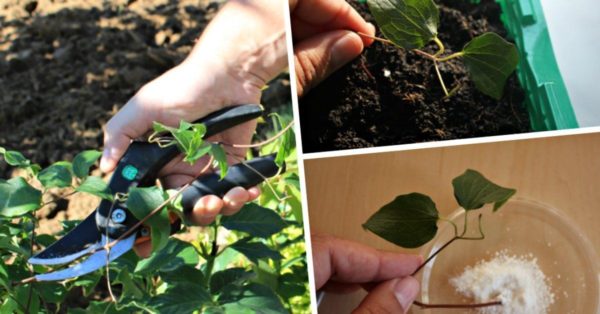
How to prepare cuttings
Unlike many other plants, the apical parts of the shoots are rarely used for cutting clematis - they simply root poorly. It is better to take lateral or middle shoots. You can use both green young shoots and partially lignified ones - both of them take root well.
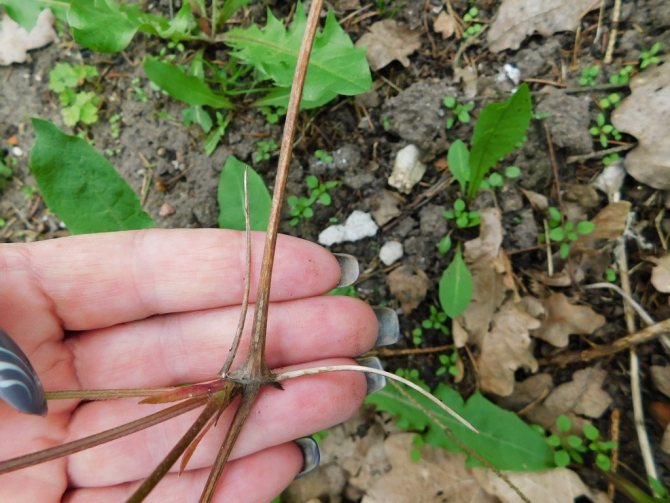
It is recommended to cut green cuttings from the side shoots devoid of buds. The apical part must be removed, and then cut the shoot into cuttings of the same length (10-15 cm). Make sure that each stalk has a pair of internodes - this is important for the subsequent growth of the vine. If we are talking about a lignified shoot, it should be cut off when the budding phase is either just beginning or has already ended.
The cut from the bottom should be oblique, 2-3 mm above the internode. Be sure to make the upper cut straight.
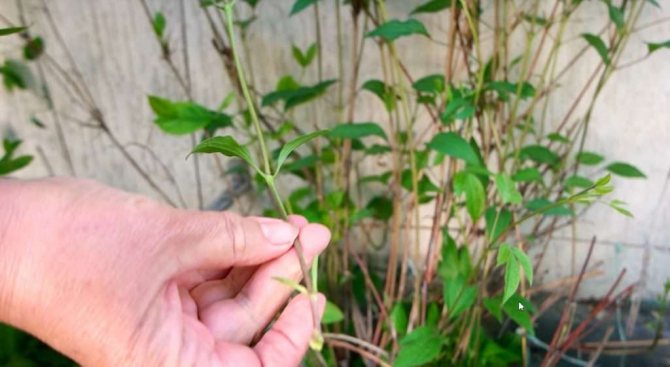
Preparation
If there is foliage below, remove it; it is also advisable to shorten the upper leaves by two-thirds of the length.
Soak cuttings deprived of foliage with the bottom part in a root stimulator. This measure will direct the vitality of the cuttings to the active formation of the root system. Prepared cuttings of clematis can be rooted both in water and in a nutritious substrate.
Time for breeding clematis
The exact time for clematis breeding will depend on the method chosen. If we summarize all the information said earlier, then we can come to the following conclusion:
- in the spring, harvesting and rooting of green cuttings occurs;
- lignified cuttings are harvested at the end of summer, and they take root throughout the winter season;
- in the spring, they fold back and fix the layers, which are subsequently buried in the ground;
- it is also recommended to carry out work on dividing the bush in the spring;
- You can propagate clematis by seeds in both autumn and spring. Stopping at this method, each gardener independently determines the most convenient period of time for him.
The most effective way to breed clematis
The simplest, most understandable and fairly stable way of breeding clematis is to use cuttings. In this case, the percentage of successful completion of the work is quite high.
Dividing the bush, although not the easiest, is the most effective method, in which the quality and result will only envy the skill of the grower. Moreover, using this method, you can get clematis seedlings on the same day.
Reproduction by cuttings very often gives a positive result, but in this case you will have to make enough effort and carefully monitor the shoots for a long time. Seed propagation is of low popularity due to the fact that it is unlikely that the original characteristics of the plant will be preserved.
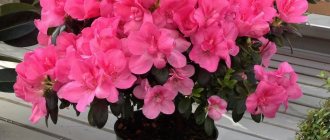
Clematis is a very beautiful and vibrant plant that can be propagated in many ways. When choosing a particular method, it is worth starting from your skills and capabilities first.
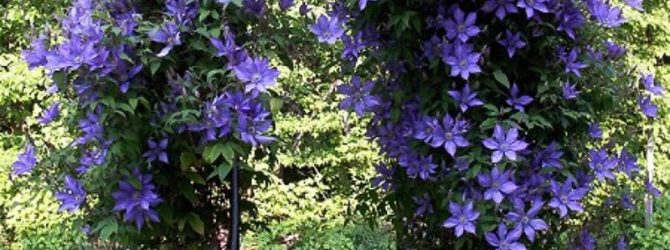
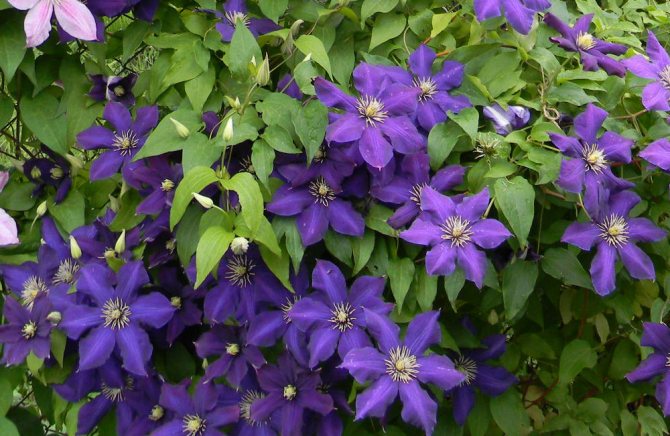
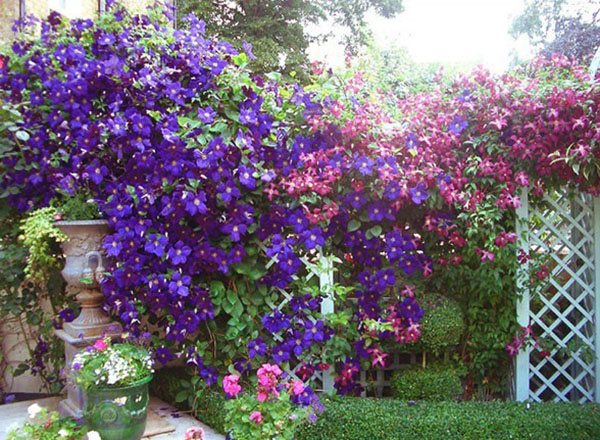
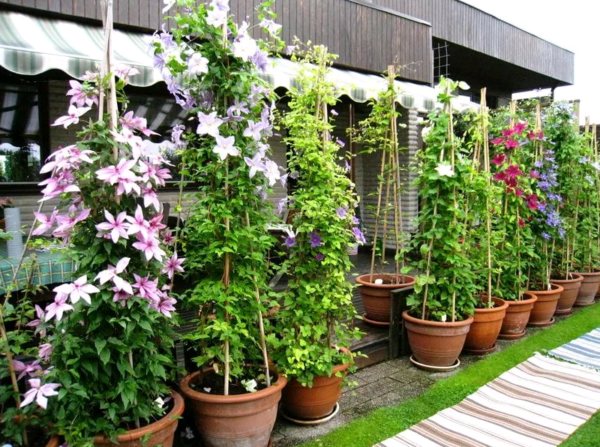
Liana-like clematis with large, bright flowers are commonly used in gardening. And thanks to selection, a large assortment of varieties is now presented. Therefore, you can choose the items you like and then diversify them yourself. Breeding clematis is not so difficult if you know the appropriate methods.
How to propagate clematis by layering in the summer - a practical guide
Clematis are not uncommon in the gardens of professional summer residents and amateur flower growers. Flowers of amazing beauty impress with their colors and sizes. In addition, caring for the king of vines is not at all difficult. Many are interested in how you can propagate a shrub, because planting material is very difficult to get, and it costs a lot.
Breeding methods for clematis
Clematis can be propagated in many ways:
- cuttings;
- dividing the bush;
- layering;
- from seeds;
- vaccination.
The differences will be only in the degree of complexity of the procedure, the long-term waiting and the availability of material. First of all, it is recommended to build on the presence of this ornamental plant on the site. If there is, then it is easier to resort to options with cuttings, layering or division. If the cultivation of clematis is only in the plans, then you will need to purchase seeds.
Each method has its own pros and cons. Seed propagation is rarely used and mainly for species clematis, since preservation of the original characteristics is not guaranteed with it. Vegetative methods are more suitable for varietal representatives. The first three methods are the easiest to implement, which show about 90% plant survival. It is more difficult to propagate clematis by grafting, which requires experience and certain skills. Usually, professional growers resort to this method to obtain rare clematis hybrids.
Reproduction of clematis by cuttings
It is easier and more productive to propagate flowers in this way than in another way. True, you will have to spend a lot of effort and be attentive to the choice of planting material so that clematis propagated in this way will successfully bloom in a few years. Young plants are suitable for grafting, preferably no older than 2 years. Only healthy shoots are selected. Both green and lignified branches can be rooted. In the first case, the survival rate will vary from 60 to 95%, in the second - no more than 70%.

Annual shoots are chosen for cutting green cuttings.
Green cuttings are harvested in early spring, in June or July (before flowering). The cut is made at an angle of 45 °, stepping back from the bottom about 30 cm. Then the branches are divided into parts 7-10 cm long. Each must have at least two living buds. Do not forget to remove the existing leaves on the cuttings. It is permissible to cut no more than 1/3 of all shoots from one clematis bush... Then the soil is prepared, which must be air and moisture permeable. The following composition is optimal: leaf compost (2 parts) and river sand (1 part). Cuttings root no less well in perlite and vermiculite, after which they must be transplanted into nutrient soil.
You can dig in the cut stems right away in the garden or in the greenhouse. To do this, make a depression with a finger, set the shoot and cover it with soil, and then with sand, in a layer of up to 4 cm. But it is more convenient to observe the root formation in plastic cups. Drainage holes are made in them from below, a soil mixture (perlite) is poured and a stalk is stuck there. It is only pretreated with Kornevin or another growth stimulant. It is important that the internode is half open.
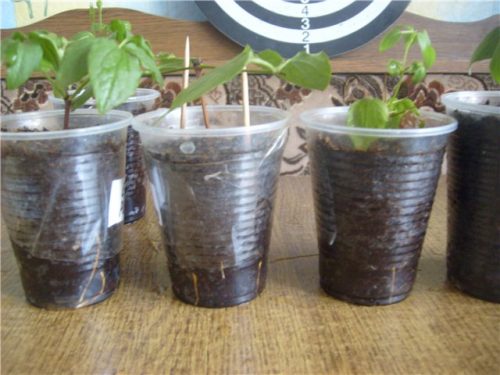
It is easier to see the resulting roots in transparent cups.
In both cases, a film cover will be required to create a greenhouse effect. The most favorable temperature for rooting is from 25 to 30 o C.
In the heat, there are more chances to take root in those cuttings that are located outdoors in the shade of any tall plantings.
Further care after grafting clematis in the summer involves regular moistening from a spray device - 2-3 times a day and watering with zircon solution - 1 time a week. After 1.5–2 months, new roots grow. From that moment on, they begin to open an impromptu greenhouse daily for airing, and a month later they completely remove it. If young clematis are planted outside, then for the first winter they are covered with a box and covered with foliage or other plant material from the garden. The next spring, the plants are transplanted to a permanent place.
Lignified cuttings are prepared in the fall and buried in a container with a substrate, then they are placed in a dark and cool room for the winter. In the spring, it is rearranged into the light, after which the shoots are planted in moist soil and covered with a plastic cap. Full rooting will occur in at least 3 months.

Lignified cuttings are prepared in autumn and planted in spring.
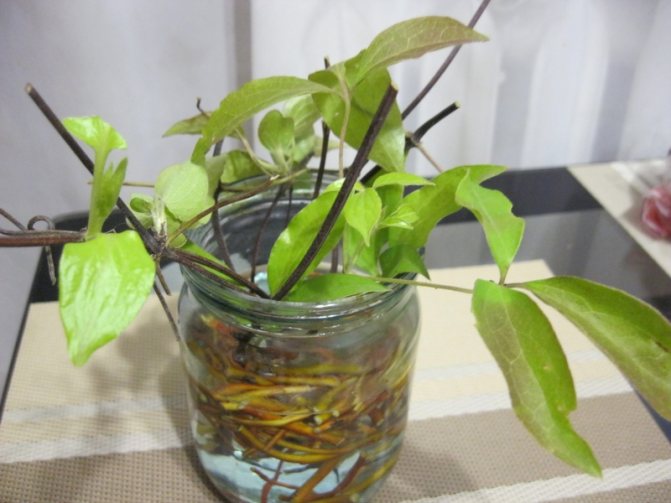
You can germinate clematis in water by immersing the lower part of the cuttings in it. Then they place the container in the shade (brightly lit window sills will not work). Change the water several times a week. Within 1–1.5 months, the roots will appear. When they reach five centimeters in length, the shoots are planted in separate containers with soil and grown at home.
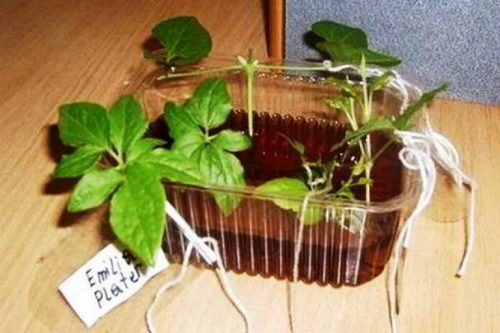
Roots appear faster in the water
Video: how to propagate clematis by cuttings
By dividing the bush
This method, although laborious, is quite effective. As a result, seedlings can be obtained literally immediately. The only thing that can become an obstacle is damage to the root system during division and transplantation. This option is suitable for clematis older than 5 years - such specimens have already formed a large number of shoots. But it is advisable to resort to such reproduction only in extreme cases:
- the need to change the location of the vine for some good reason;
- rejuvenation of a plant that has grown greatly and has lost its attractive appearance.
The procedure for dividing the bush is carried out in the fall (in the regions of central Russia) or in early spring. In the latter case, it is important to have time to do this before the start of sap flow. Prepare a site in advance for planting by digging and applying mineral fertilizers. Then they dig holes.

it is more convenient to divide the bush with pruners
- Prepared holes are watered abundantly. You can add Kornevin to the water.
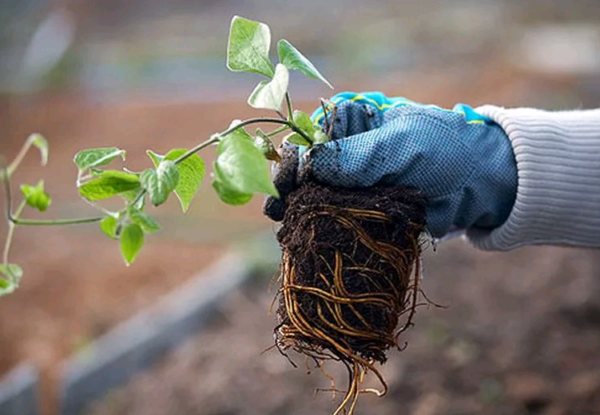
- Cut off the ground part of the plant, leaving only a stump with 2-3 buds. Then they dig it in (trying not to touch the roots), carefully remove it, shake off the earth and wash it out of the hose.
- Cut the root ball into several large divisions using a sharp garden tool. Each part should have a tuft of roots with renewal buds.
- If necessary, shorten the roots and remove those that are damaged. Then the cuttings are soaked in a fungicidal solution.
- After that, they are seated in the pits, sinking the root collar by 10-12 cm.
After the completion of the work, watering is not needed - there is enough water initially filled. The first time clematis is moistened after 7-9 days.
Video: how to divide the rhizome correctly
Layers
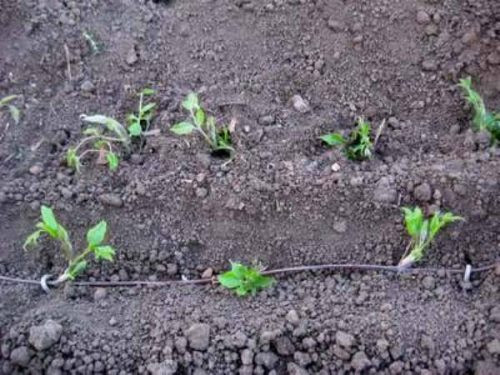
When propagating by layering, the shoot is not immediately separated from the mother bush
Reproduction by layering is perhaps the most understandable and stable method. In the future, it allows you to grow strong seedlings with the highest decorative indicators, since there is no injury to the parent bush. The procedure is carried out in early summer.
The scheme of actions is standard:
- A furrow up to 10 cm deep is made next to the plant.
- A low-lying stem is placed in it. You can hide it all (except for the top) or partially (only at the level of one node).
- Carefully sprinkle the branch with earth, leaving leaves outside, and fix it with wire.
- Water this place abundantly.
Throughout the summer season, the layers are regularly moistened, preventing the soil from drying out. At least 3 times it is fed with mineral compounds or watered with any growth stimulant.
The rooting of the allotted shoot occurs in the fall, but it is planted only the next year - in August - September or in early spring. To do this, cut it off from the original bush, carefully dig it up and plant it in another place. This year, clematis is not allowed to bloom - the formed buds are immediately plucked. This will allow it to take root faster.
Useful tips from experienced gardeners
Regardless of the chosen breeding method for clematis, it is important to adhere to certain rules:
- the optimum temperature for rooting cuttings is from 10 to 20 ° C;
- if possible, a fogging device is installed next to the propagated shoots;
- when dividing the bush, too long roots are shortened by a quarter of the total length, and the places of the cuts are slightly dried and treated with a highly concentrated solution of potassium permanganate;
- for the fastest recovery of the divided plant, it is recommended to water it with any nutrient mixture;
- to protect young clematis from rodents and slugs, put a tablet of the drug "Storm" next to it or scatter granules of Metaldehyde.
In the absence of relevant experience in terms of breeding clematis, it is better not to choose the method with seeds and grafting.
Temperature background
It is very difficult to ensure the optimal temperature regime for normal root formation. It is good when the cuttings are transplanted at 20-24 ° C. Indicators above have a detrimental effect on the flower. On hot days, the chances of survival of the cuttings are reduced.
Amateur gardeners and professional gardeners pay special attention to such an important process as the propagation of clematis by cuttings. It is this method that makes it possible to obtain several more copies of your favorite plant variety. The process is quite easy and fast, if you consider some important points and tips. When the cuttings are successful, beautiful young clematis grow.
Testimonials
It didn't work with green cuttings in one run, and last year I did this: in the spring, after removing the shelter and the garter, I put on a bag without a bottom on one lash, tied it at a height of 10 cm from the ground, covered it with seedling soil, spilled it well and tied it up again. It turned out to be such a candy on a stick. I wound a couple of layers of lutrasil on top from overheating. She put a block under it so that the whip would not break from the weight of the package. Over the summer, I untied the bag a couple of times and moistened the soil. This lash swelled like everyone else and bloomed. And in the fall, the roots in the bag were stuffed, and they were all very thick. Moreover, they pierced the package from below and got to the ground!
Natalia
Last year I tried to propagate by layering, but it didn’t work - it was as dry as it was, I couldn’t keep the earth wet.
Alla
I bought an already flowering bush this spring is already flowering. When planting and pruning, I cut the lianas and put them in the water, pouring a pinch of the root into it. After 2 months, roots began to creep on 3 out of 10. I planted the cuttings in the ground and in 4 days they had centimeter roots - about 5 pieces.
Faina
All these methods of breeding clematis, except for dividing the bush, take a lot of time. This is due to the duration of the preparatory measures and the rooting period. In general, it takes about a year. Despite this, the result is worth it.
Clematis is considered the king of the garden. It is difficult to take your eyes off the living flower waterfall. Most varieties of clematis are hybrid. They are bred vegetatively: by cuttings, layering, dividing the bushes.The seed method is only suitable for varieties with small flowers.
Advantages and disadvantages of autumn cuttings

The formation of clematis bushes occurs in the fall. Pruning is mandatory for this type of plant. It improves development and growth, promotes spring awakening of the kidneys. During the formation, many branches remain, they are cut into petioles, which can be used for planting and propagation of plants.
Benefits of planting in the fall:
- plants get hardened, get used to temperature extremes;
- autumn seedlings are ahead of spring bushes in growth;
- in a rainy season, no need to waste water for irrigation;
- in the fall, gardeners have more free time for pruning than in the spring, when mass work is underway.
In the spring, the twigs have not yet grown back after the autumn pruning, you can overdo it with pruning. In addition, in the spring, the buds swell and the juice moves along the branches. At such a time, it is better not to disturb the vine.
The disadvantage of autumn cuttings is that you can not guess with early frosts, and the seedlings will freeze before they take root. Cuttings take root in autumn more difficult than in summer. In summer, they are rich in biostimulants, they stimulate the appearance of buds.
Breeding methods for clematis
Clematis rarely produce seeds, the seed method is laborious and rarely germinates. If the seeds take root, the bush still loses its maternal properties. Clematis can be propagated in several ways. The most common way is by cutting clemises.
Cutting clematis in autumn
For propagation of clematis by cuttings in the fall, bushes 3-4 years old are needed. After pruning the bush, strong healthy branches are chosen. It is better not to use tops with buds. Cut the middle part of the shoot without buds, but with 2 nodes and a couple of buds at the base of the leaves. A sharp knife or pruner is used for trimming; it is better to work with gloves. Growing clematis with cuttings is an easy way of reproduction, but it will take more than one year of plant life to wait for abundant flowering.
Reproduction of clematis by layering
In May or early summer, 2-3 long healthy shoots are chosen on the bush. They are laid in small grooves to a depth of 8 cm, you can fasten them with a hook, a clothespin, so that the shoot does not bend. When watering the bush, the place of the layering is watered abundantly. When the shoots grow up to 15 cm in length, the ground around is covered with mulch. By autumn, new plants can be replanted.
In the middle of autumn, all leaves and part of the shoot are removed from the cut branches to the first developed bud. The branches are tied, laid in the dug grooves. A layer of peat is poured on the bottom of the holes and on top of the shoots, the material retains moisture, has air permeability. They fill the ditch with earth and compact it. In the spring, this place is well watered and fed with mineral supplements. When seedlings appear, the soil is mulched with moss, humus. The next fall, the plants are planted on the site.
Hilling method
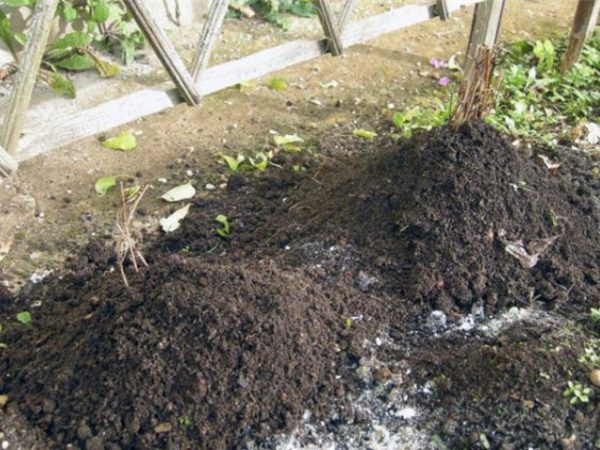
In the summer, you can grow cuttings for autumn planting. To do this, in June, a box without a bottom and top is placed on the growing branches. The earth is poured regularly until the building is completely filled. A part of the branch with two developed buds should remain uncovered. During this procedure, the soil is watered abundantly. By the fall, the cuttings will be ready for planting. Shoots are cut at a height of 20 cm from the ground. They spud around the bush with nutritious soil 15 cm high and cover with insulation for the winter.
How to properly propagate clematis by seeds
Clematis seeds are sown in the ground in the fall, immediately after ripening, or in the spring, after stratification at a temperature of 0-5 ˚C for 2-2.5 months. You can sow seeds directly into the soil, or you can first grow seedlings, and then transplant the seedlings into the garden. For growing seedlings, a substrate is used, consisting of equal parts of universal soil and sand.Seeds are freely distributed over the surface of a wet substrate, sprinkled with a layer of sand, sprayed with sand from a spray bottle and sown until emergence at a temperature of 25-30 ˚C.
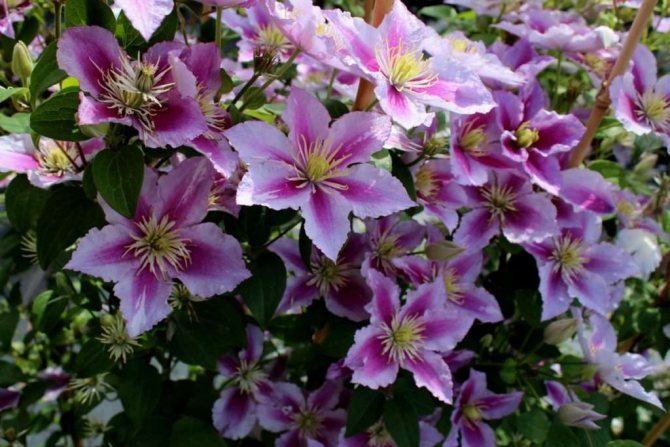
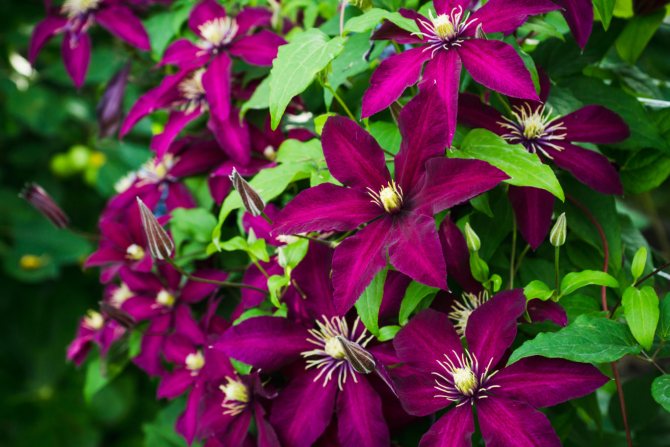
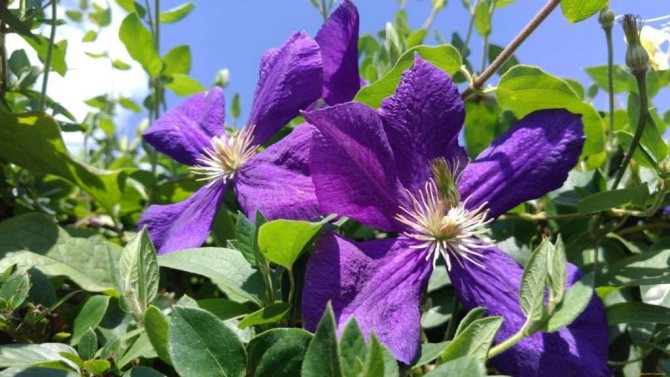
Blooming clematis on the site
As soon as the sprouts begin to hatch, the container is placed under bright diffused light. Caring for clematis seedlings consists in airing the cuttings and timely moistening the substrate, in addition, drafts should be excluded and the seedlings should be shaded from direct sunlight. At the stage of development of the first two true leaves, the seedlings dive with a step of 15-20 cm on a bed with light soil located in the penumbra. As they grow, they are pinched to stimulate branching and root development. At the end of the growing season, they are covered for the winter, and in the spring they are transplanted into a trench to a depth of 5-7 cm, keeping the distance between plants 40-50 cm, and the shoots are shortened, leaving only 2-3 nodes on them. After growing for 2-3 years, when the first flowering has passed, clematis can be planted in a permanent place.
Features of autumn breeding
Correct pruning of branches, pruning of stalks, their leaving and soil affect the further development of clemitis. Incorrect cut or abundant watering can destroy the young.
Preparing cuttings
Pruning cuttings is best done during bud formation. This is mainly late spring - early summer.
The sequence of harvesting cuttings:
- the cut is made over 1-2 sheets;
- take the middle part of the branch;
- cut at an angle of 45 degrees by 5 cm under the first knot and 2-3 cm above the second knot;
- large leaves are removed;
- placed in water for 1/3 of the petiole;
- shoots are placed for 9 hours in a dark place in a growth stimulator: root, sodium humate, heteroauxin;
- after the twigs are washed under running water.
Soil preparation
Clematis prefers an alkaline habitat. Soil with high acidity is lime. Prepare a light, moisture-absorbing and breathable soil:
- Use the composition: sand, humus, peat (1: 1: 1).
- A mixture of river sand and sphagnum moss.
- Land from the garden, peat, humus in 1 part, 0.5 parts of sand, 20 g of superphosphate per 5 kg of the mixture.
- You can root the petioles in coconut fiber, perlite, vermiculite.
Planting and caring for cuttings
To achieve abundant flowering, you should not plant clematis in a sunny place, it is better to choose partial shade. Do not plant a plant near an iron fence and near the walls of the house. Roof water should not flood the bushes. Vines are not grown in drafts and windy areas.
For rooting of lignified cuttings, seedlings of small-flowered and wild varieties are taken. Branches are cut in August 8-12 cm long with two nodes. After the shoots are let in the water, the roots are planted in boxes for rooting. The lower part of the petiole is deepened by 3 cm.To keep the buds from drying out, the knot is deepened by 1 cm.The distance between the seedlings is 6 cm, and between the rows is 15 cm.
To actively build up the root system, you need to take care of clematis:
- temperature regime in the room 19-22 degrees;
- the first three weeks, the plants are watered a little daily, then once every 10 days is enough;
- seedlings need high humidity, they are sprayed 3 times a month;
- regular ventilation of the room;
- once every 8 days, the petioles are sprayed with zircon, a plant growth regulator.
- after rooting the cuttings, the film is removed, in the spring they are dived, and in the fall they are planted in the garden.
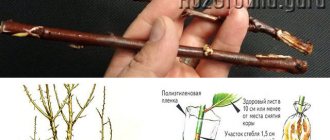
How to root a scion
You can grow clematis cuttings in greenhouses, greenhouses, tunnels and in boxes on windowsills. If the pruning of the bushes is done in the fall, then the cuttings must first be rooted, and in the spring they must be planted in the ground. There are several ways to grow petioles.
Plastic cups
In a transparent plastic glass, you can clearly see what is happening with the roots of plants. Application of cups:
- fall asleep with a nutrient mixture;
- small holes are made in the container for drainage;
- watering the ground;
- the petiole is added dropwise so that the knot is half filled with soil;
- cover the glasses with foil before rooting.
When the time comes for planting plants from the cups, the seedlings are transferred to the hole along with the soil in which they grew.
The soil
The petioles are planted in a soil mixture in a film greenhouse. A cardboard box is driven into the ground. The soil must be free of weeds and harmful microorganisms. It is better to make the soil in two layers. The first layer - peat and sand are poured for drainage with the addition of humus, and everything is covered with sand on top. Spill with a manganese solution. For fast rooting, seedlings are treated with heteroauxin or sodium 2 g per liter of water for 8-10 hours, washed, and transferred to the soil.

Wide-necked dishes are used for rooting shoots. Pour water, immerse the twigs so that only the ends are 1 cm submerged in the liquid. The container is placed in a dark place. As the water evaporates, it is topped up to the previous level. When the rhizome is 4-5 cm, the shoot is planted in a greenhouse.
Bottle
Resourceful gardeners have come up with a way of rooting flowers using plastic two-liter bottles. This saves space, the cuttings take root faster.
The bottle is cut in half. An earthen mixture is poured into its lower part, the seedling is deepened, watered on top, and covered with the second part of the bottle. The docking point is connected with tape, the cork is closed. A mini greenhouse is buried in the ground to the level of the ground in a bottle. After a couple of weeks, the greenhouse is ventilated - the plug is unscrewed for half an hour a day. When shoots appear, the bottle is left open, drainage holes are made.
In addition to bottles and cups, plastic bags, pots, containers are used. Basically, these containers are located in flower beds or greenhouses.
Rooting conditions for cuttings in the substrate
In clematis blooming on last year's branches, cuttings begin before flowering in May or in July after flowering. In the middle of summer, green petioles are planted in pots, boxes, or directly into the open ground. At the end of August, vines are cut and healthy shoots are rooted only in greenhouses.
Prepared shoots can be immediately planted in fertile soil:
- Individually - cups, bottles, pots.
- Planting in a common cuttings - in this case, you will not be able to follow the rooting process. The soil is made in two layers: first, the substrate is 20-25 cm, then 5 cm perlite or sand. The earth is leveled, compacted and moistened.
Flower care rules
Young plants need to be pinched periodically to build root mass and branching. It is important to regularly add soil in the area of the root collar as the seedling grows. The basic rules for caring for young clematis are regular watering and timely fertilization.
At first, urea is best suited for feeding, then mullein (every 2 weeks) and mineral mixtures (1.5-2 teaspoons per 8-10 liters of water).
Since large seeds are desirable prey for various rodents, in the event that the boxes with seedlings are located outside, it is recommended to provide them with protection from pieces of glass or metal mesh.