How to store tulip bulbs correctly in winter
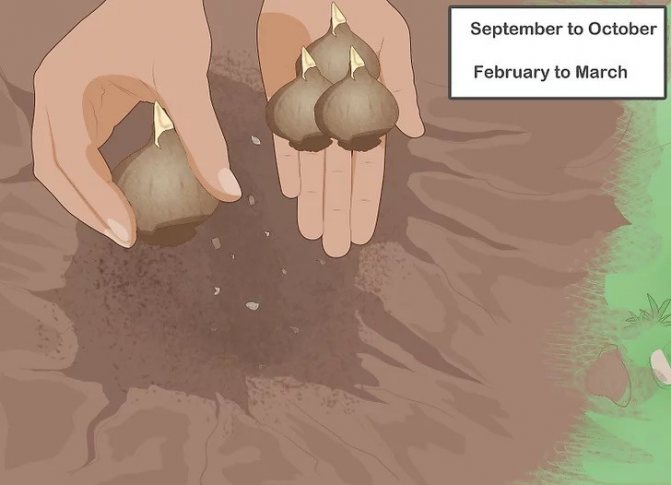
The first thing to focus on is the scheduled planting time for tulips. You can plant them at the onset of spring, or at the beginning of autumn (in September). The second option promotes early germination and flowering. But there is a danger that the autumn planting material will undergo severe frosts and die.
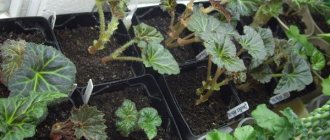
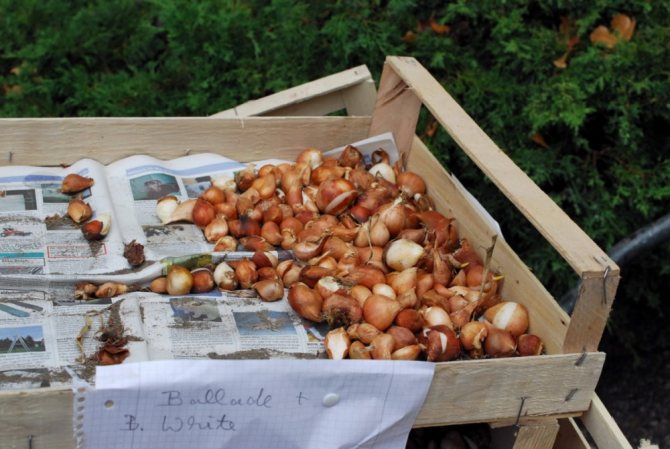
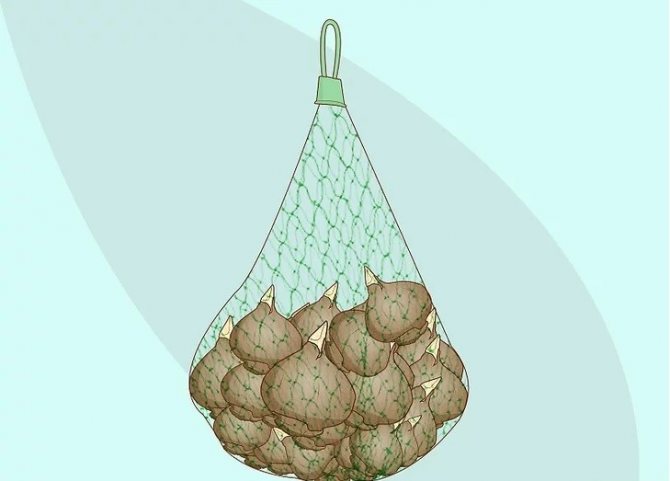
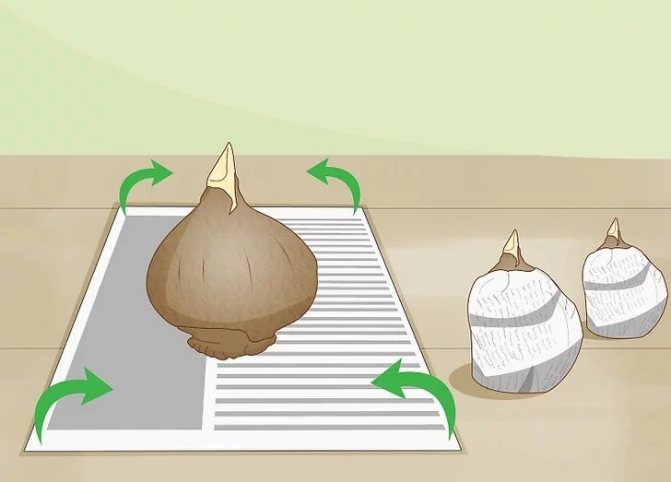
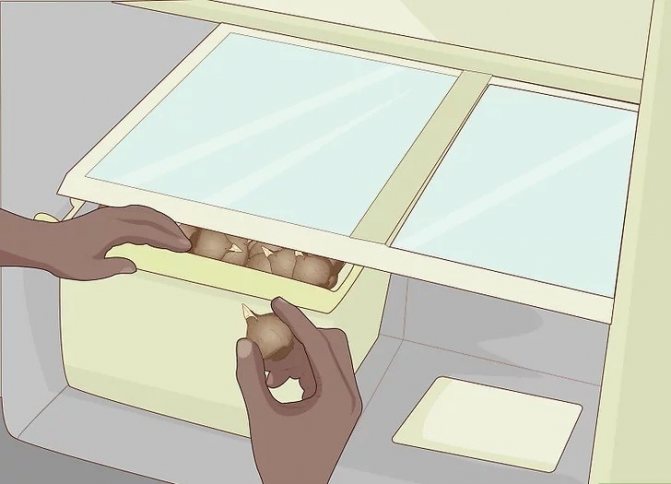
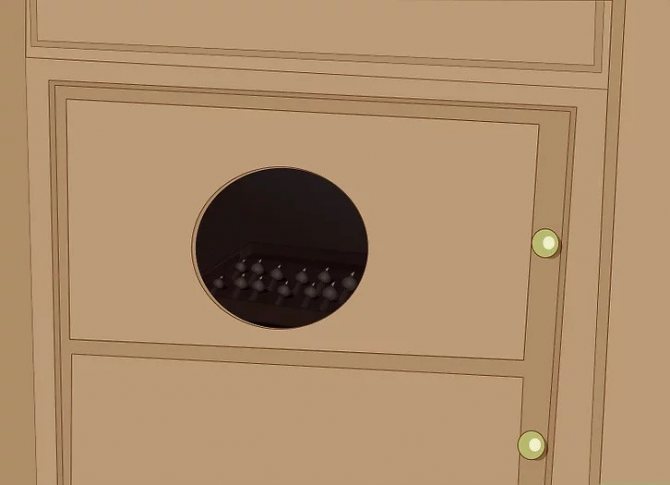
For good preservation, various wintering methods are used, the main point of which is that the place of winter storage of underground shoots should be ventilated, and the bulbs themselves should be dry... Therefore, various crates with slots, boxes and other similar containers are used. The bulbs can be wrapped individually in the newspaper.
Important! Conveniently store planting material in pressed paper egg cassettes.
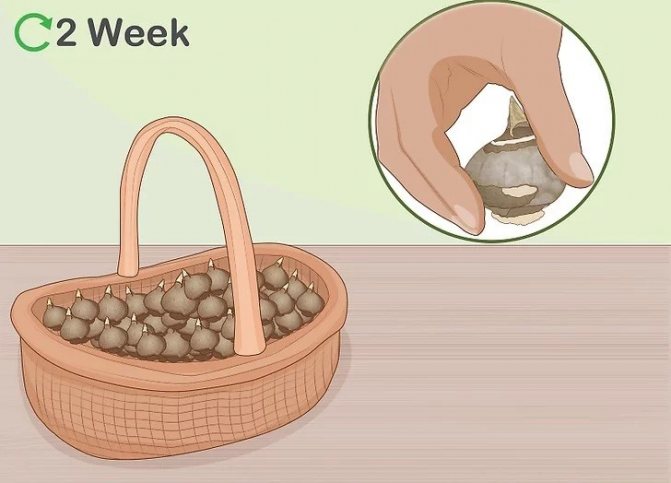
Bulbs should be checked periodically, if rotten or damaged bulbs are found - they are thrown away. BUT in the refrigerator, tulip planting material is stored at + 5 ° C on a separate shelf... It also needs to be inspected periodically and kept as far away from fruits and vegetables as possible.
There is also such a way - wintering in peat boxes... The bottom of the container should be lined with perforated polyethylene, covered with a layer of peat (10 cm high). Then place the onions and sprinkle in the same way. Cover the box, put it away for storage. It is equally important to inspect the planting material.
Preparing storage space for flower bulbs
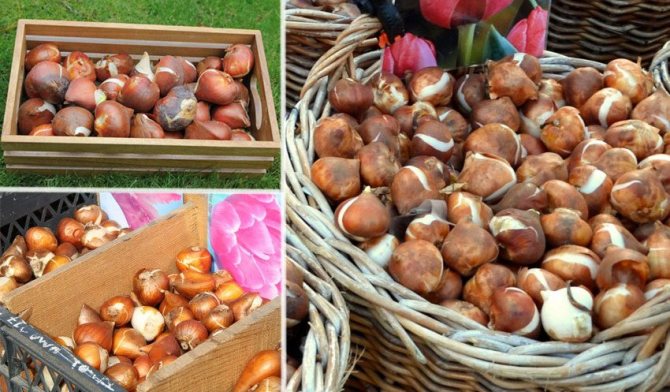
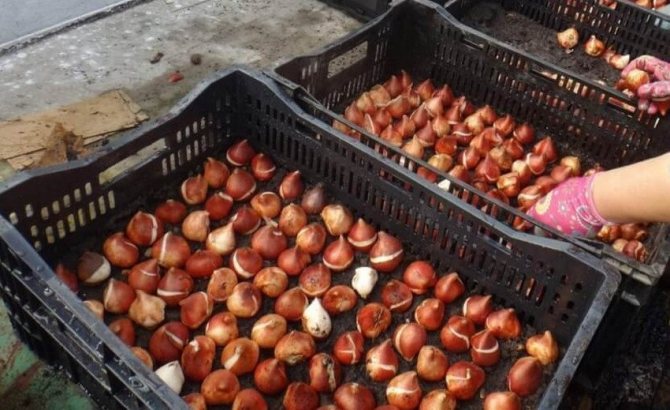
After digging up the tubers, you need to decide where and how to store the tulips. This requires only a few components that are affordable in cost and prevalence. First, the container is prepared:
- The best option would be a wooden box with low sides.
- Lay a mesh fabric on the bottom, which organizes normal air exchange.
- An alternative is a cardboard box lined with gauze.
- Lay the roots in one layer and sprinkle with sawdust.
- Small specimens can be stacked in 2-3 layers. But during storage, they need to be turned over periodically.

You can choose a different container for storing tubers. The main thing is that the container is strong and well ventilated. A final alternative would be a plastic seedling box. If the crop will be stored in a place where rodents can be, then a stocking or sock will be an ideal storage container. You need to hang a vertical container under the ceiling on a nail. The layers can be sprinkled with sawdust.
Processing after digging
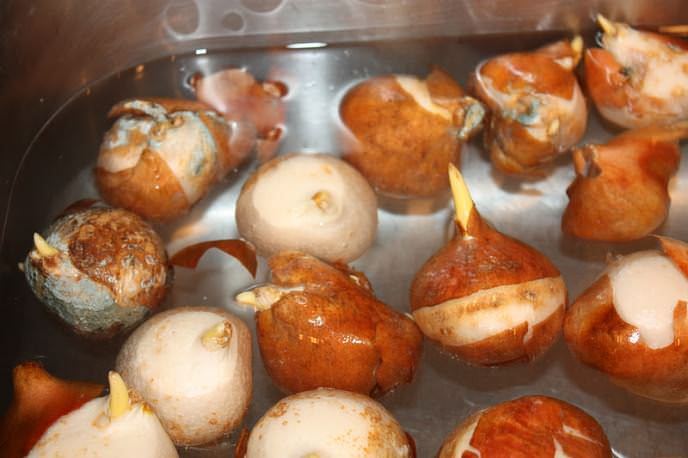
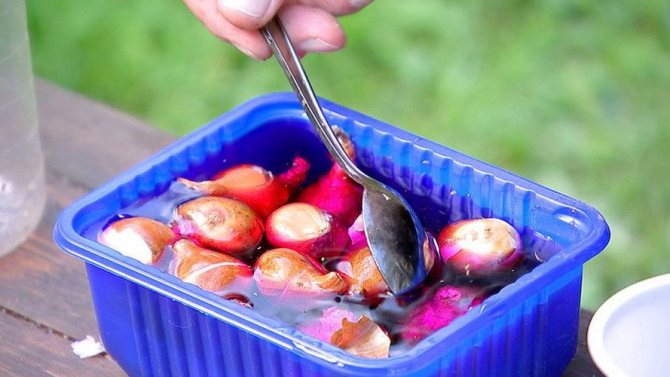
When gardeners are digging out the bulbs, they take special care - it is important not to damage the underground part of the tulips, because the affected areas can be subject to various diseases. They are sorted, cleared from the ground, washed and disinfected... For disinfection, it is customary to use a weak (pink) solution of potassium permanganate, in which underground shoots should be kept for about 40 minutes.
Did you know? Tulips got their name due to the shape of the flower: "toliban" in Persian means "turban", "turban".
Further actions are drying and additional inspection. Best dry in a well-ventilated area (no drafts) for 7 days.
When re-examining, the following is carried out:
- removal of the remains of stems and embryos;
- rejection of damaged material.
Then you can leave the selected for preservation copies to dry.
Video: How to dig up and store tulips
When to dig tulips, and should you do it at all
The main thing is to decide when to dig up the tulips. It is important to take into account not only specific terms and additional conditions. First, you need to highlight the following nuances:
- The timing is precisely determined by the variety of the flower. The early ones are removed from the soil earlier, and the rest much later.
- You can harvest tulips in early July or late June. These are approximate terms - you need to focus on the condition of the plant and the timing of cutting the leaves.
- You need to choose a day when the weather is sunny and precipitation is not expected.
Considering all the factors, you can easily determine the timing. The latest digging dates are early or late August.
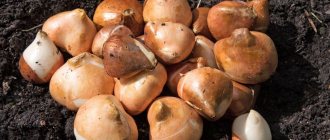
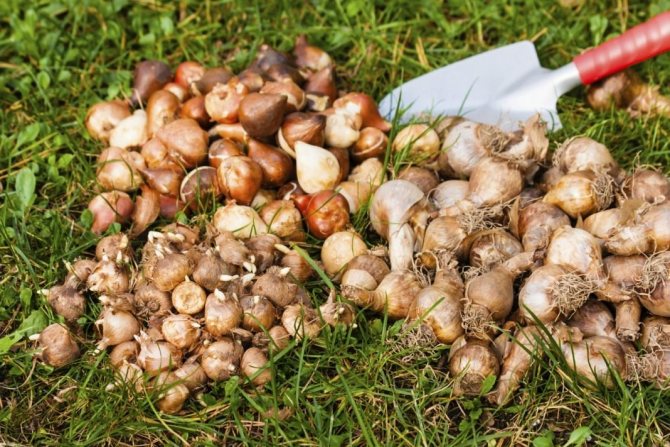
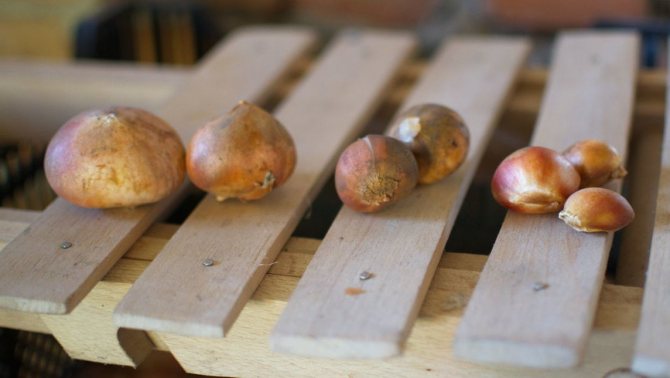
Sorting after processing
Sorting after digging is to divide the planting material like this:
- to size - keep large bulbs properly separate from small ones;
- by varieties - they can be signed, marked, which is convenient when planting to form a flower bed pattern.
We recommend that you find out if the tulips need to be dug up after flowering every year.
And after sorting, you should pay attention to the following points:
- the presence of covering scales and stem remnants;
- non-standard forms;
- damage;
- disease.
All unnecessary is removed, only whole and healthy planting material is left, which must be preserved. It is the large high-quality specimens that will bloom well and delight the gardener.
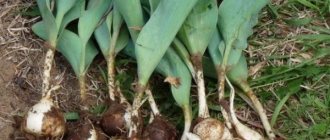
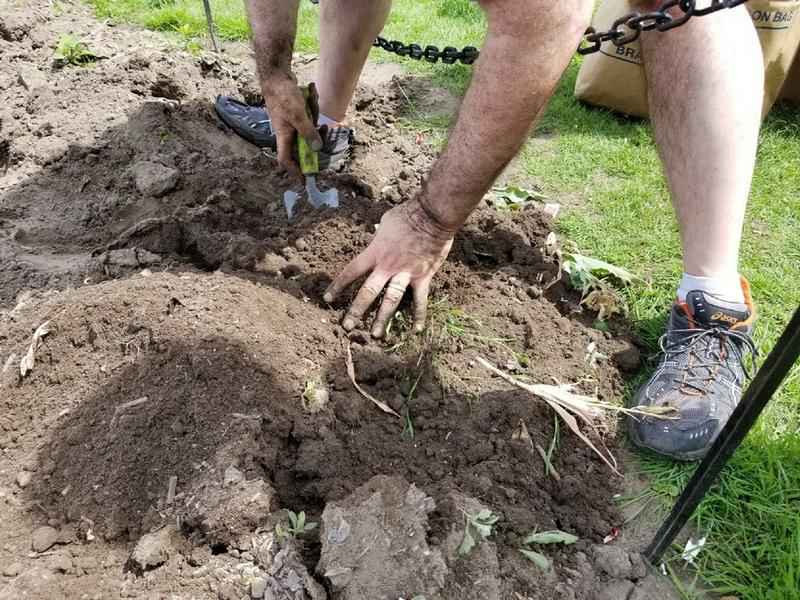
Rules for digging tulip tubers from the ground
After the gardener has already decided when to dig up tulips, it is worth inquiring about the technique for performing this procedure:
- You need to lightly water the soil around the plant to make the soil softer and more pliable.
- It is necessary to retreat 15-20 centimeters from the base of the stem. If the bush is large, then the distance may be even greater.
- It is necessary to drive a shovel to the very base so as not to damage the branches of the roots from the base of the bulb.
- Try to turn out as much soil as possible in which the tuber is located.
- Carefully remove the soil from the roots and revise them for damage and disease. If present, these bulbs should be disposed of immediately.
- Cut thin roots so that their length from bulb to end is no more than 2-3 cm.
- Dip each element in a 5% manganese solution. Soak in liquid for about 3 minutes.
- Place the treated bulbs on a cloth and place outside to dry the roots.
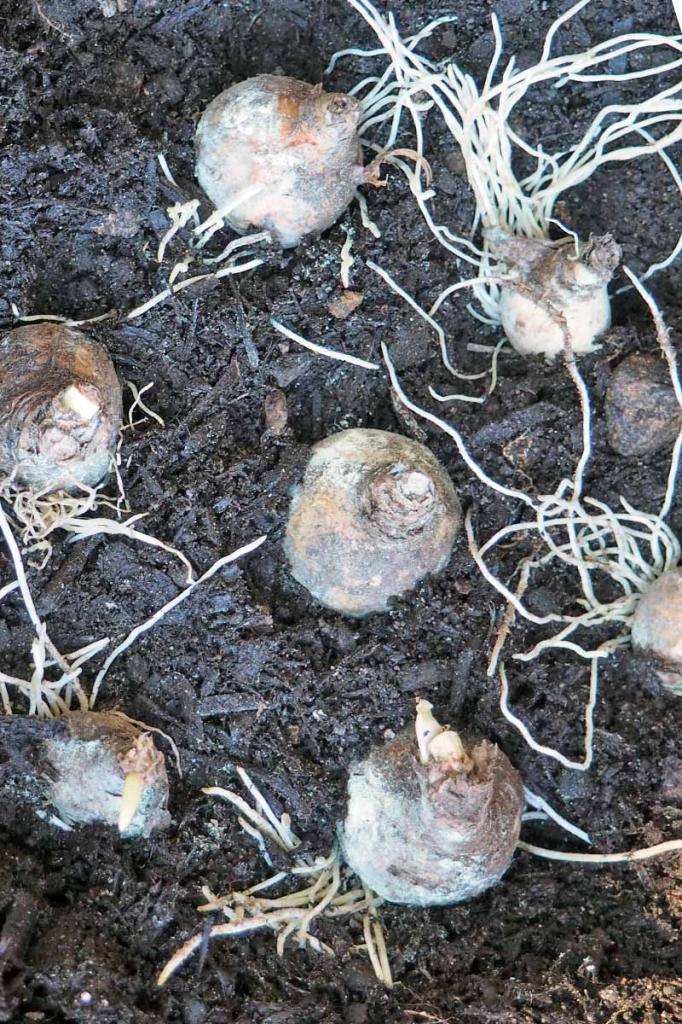
After complete drying, you need to re-examine all the bulbs. The surface should be brown with pronounced scales. The roots should be as developed as possible. The fine hairs on the bulb can cause rotting and disease. Instances that do not fit this description should be removed.
Storage conditions
The optimal conditions for storing tulips are as follows:
- the temperature is not higher than + 15 ° С, which should be reduced gradually;
- correct sorting;
- laying out for storage in one layer;
- humidity not higher than 70%;
- lack of light;
- airing the wintering place;
- sprinkling with sawdust, using newspaper, paper;
- periodic inspection.
Did you know? According to one Uzbek legend, a blue tulip grows in an unknown place in the mountains, and whoever finds it will be happy all his life.
If the storage conditions are not observed, the following problems may arise:
- Rot or mold in high humidity... Rotten specimens are thrown away, the mold is wiped off with a dry soft cloth. If such complications are detected, processing (a solution of "Fundazol" or potassium permanganate) and drying are required for further savings.
- Germination at elevated temperatures... A gardener may not despair and simply plant sprouted tulips at home in boxes. As a result, flowers will begin to appear and bloom ahead of schedule.
- Drying out at low humidity... Dried bulbs, of course, cannot be saved.

Storing tubers in the first period after digging
Tulip bulbs, in comparison with other flowers, are not very whimsical in terms of storage. The autumn period is important, because at this moment the flowers are laid for the next year. It is important to consider several nuances of autumn storage:
- After being removed from the ground, the tubers should be stored at a temperature of at least 24 degrees for the first 3 weeks.
- After the allotted time, the temperature drops to 17 degrees so that germination does not occur.
- Install the boxes in the barn or on the veranda - it is not yet necessary to remove the container with the harvest far away. You can install the container on hay.

Tulip bulbs are especially whimsical in autumn and require special attention. The surface quality of the bulbs should be checked periodically. Periodic sorting can save all specimens from death and damage.
How to prepare bulbs for spring planting
Tulips preserved over the winter should be prepared for this process before planting. For what a number of simple actions are performed:
- peeling of dense peel;
- inspection (detection of damage);
- soaking before planting.
Important! Store-bought bulbs can be hardened before planting - refrigerated overnight.
The first activity helps to inspect and promote better bulb nutrition during growth. The second is needed to reject unsuitable planting material. The third is very important: for its implementation, a solution of potassium permanganate is used (such as when processing in the fall). Shoots should be soaked just before planting for half an hour.
The fairly simple activities for collecting, sorting and drying tulips are very useful. Further storage is also not difficult - you need to observe the temperature regime, the humidity indicator of the place where the planting material is stored and the basic rules necessary to preserve the bulbs in winter. When all the simple requirements for wintering tulips are fulfilled, gardeners, as a result of their actions, get an excellent result - beautiful bulbous plantings in the garden.
How to create a microclimate for storing tulip tubers
It is important to know how to store tulips, namely, what microclimate to create for installing containers with roots. Conditions for saving tubers:
- Air humidity should be no more than 70%.
- The sun must not fall on the boxes. Lighting should be generally diffused or absent altogether.
- The room should be periodically ventilated.
- Avoid places where the crop is threatened by mechanical stress.
Temperature conditions change during each storage period, so it is worth choosing a place where this can be regulated.
Care rules
In order for the tulips to bloom profusely, and the inflorescences to be large, the bushes need to be looked after. First of all, you need to remember to water the flowerbed in time, while not overmoistening and not allowing the soil to dry out. And you can't do without regular feeding.
Watering
Tulips do not like excessive waterlogging of the soil. In hot weather, you need to water the beds every evening. If it rains, irrigation can be postponed until the soil is dry. Use warm water for humidification. Irrigation with cold water contributes to the development of diseases.
Video
In the following videos, an experienced florist talks about the rules for digging and storing bulbs of different varieties of tulips:
A journalist by training, author of short stories. Loves mountains, grows garden and indoor flowers, collects hyacinths. A special pride is a small "plantation" of coffee trees.He is fond of landscape and interior design, tries to bring his favorite ideas to life.
Found a bug? Select the text with the mouse and click:
Oklahoma farmer Carl Burns has developed an unusual variety of colorful corn called Rainbow Corn. The grains on each ear are of different colors and shades: brown, pink, purple, blue, green, etc. This result was achieved through many years of selection of the most colored common varieties and their crossing.
The homeland of pepper is America, but the main breeding work on the development of sweet varieties was carried out, in particular, by Ferenc Horvat (Hungary) in the 20s. XX century in Europe, mainly in the Balkans. Pepper came to Russia from Bulgaria, therefore it got its usual name - "Bulgarian".
One of the most convenient methods to prepare a grown crop of vegetables, fruits and berries is freezing. Some people believe that freezing leads to a loss of the nutritional and beneficial properties of plant foods. As a result of the research, scientists have found that there is practically no decrease in nutritional value when frozen.
Natural toxins are found in many plants; those that are grown in gardens and orchards are no exception. So, in the seeds of apples, apricots, peaches there is hydrocyanic (hydrocyanic) acid, and in the tops and peel of unripe nightshades (potatoes, eggplants, tomatoes) - solanine. But do not be afraid: their number is too small.
Compost - rotted organic residues of various origins. How to do it? Everything is stacked in a heap, a hole or a large box: kitchen leftovers, tops of garden crops, weeds mown before flowering, thin twigs. All this is interlayered with phosphate rock, sometimes with straw, earth or peat. (Some summer residents add special composting accelerators.) Cover with foil. In the process of reheating, the pile is periodically ted up or pierced for the flow of fresh air. Usually compost “matures” for 2 years, but with modern additives it can be ready in one summer season.
Both humus and compost are rightfully the basis of organic farming. Their presence in the soil significantly increases the yield and improves the taste of vegetables and fruits. They are very similar in properties and appearance, but they should not be confused. Humus - rotted manure or bird droppings. Compost - rotted organic residues of various origins (spoiled food from the kitchen, tops, weeds, thin twigs). Humus is considered a better fertilizer, compost is more readily available.
Tomatoes have no natural protection against late blight. If late blight attacks, any tomatoes (and potatoes too) die, no matter what is said in the description of varieties ("varieties resistant to late blight" is just a marketing ploy).
"Frost-resistant" varieties of garden strawberries (more often simply - "strawberries") also need shelter, as well as ordinary varieties (especially in those regions where there are snowless winters or frosts alternating with thaws). All strawberries have shallow roots. This means that without shelter, they freeze out. Assurances of sellers that strawberries are "frost-hardy", "winter-hardy", "tolerate frosts down to -35 ℃", etc., is a deception. Gardeners should remember that the root system of strawberries has never been changed.
From varietal tomatoes you can get "your" seeds for sowing next year (if you really like the variety). And it is useless to do it with hybrid ones: the seeds will work out, but they will carry the hereditary material not of the plant from which they were taken, but of its numerous “ancestors”.
Stage one: landing
Plant the bulbs in pots or, if there are a lot of bulbs, boxes 15 cm deep, filling them with light, always fresh soil with a high content of peat and sand and a neutral reaction (pH 6-6.5), for example, a growing substrate.It is good if your bulbs are large and healthy. Then you have a guarantee of getting full flowers.
Plant tulips and daffodils so that the tops of the bulbs are at the level of the surface of the substrate, the distance between the bulbs is 1-1.5 cm. Peel the tulips first. It is convenient to plant one variety in one pot for simultaneous flowering. Plant hyacinth bulbs one at a time in pots with a diameter of 12 cm, or several in pots or boxes so that the top is at the level of the edges of the container.
All three flower crops after planting need to maintain a relatively low positive temperature - 8-10 ° C and high humidity - 75-80%. Indeed, it is in such conditions that they take root when planting in the ground in the fall, it takes from two to five months and depends on the properties of the culture and variety.
When the bulbs are well rooted, which can be determined by the appearance of roots in the holes of the pots or cracks in the boxes, and the sprouts reach a height of 5-7 cm for tulips, 10 cm for daffodils and 8-10 cm for hyacinths, a bud will be felt in their lower part, and then it will be possible to deal directly with forcing.
Place tulips for 3-4 days in a dark room with an air temperature of 15 ° C, and then expose to light, raise the temperature to 20 ° C. The same is done with hyacinths, but the temperature should be 22 ° C. After the dark period, expose pots or boxes to light, but shade from direct sun for the first five days.
To prevent the plants from stretching, the leaves are bright green, and the flowers have rich colors, arrange the backlight with 80 W fluorescent lamps per window. Fix the bulbs at a height of 10 cm from the plants and lift as the plants grow. The length of daylight hours is 12 hours. Tulips and daffodils will begin to bloom 3-4 weeks after being brought into a warm room, hyacinths - in 2-3 weeks. To prolong flowering, at the beginning, lower the temperature to 15 ° C.
After flowering, pinch off the flowers, and keep the pots with green stems and leaves in the light and continue to water for another two weeks. Then, when the leaves begin to turn yellow, reduce watering, and when they begin to dry out, stop altogether. With this care, you can count on getting full-fledged bulbs.
Tulips are very beautiful flowers that come in many colors. However, in order for them to constantly delight the gardener with their flowering, you need to know how to properly care for them, in particular, when to dig up and what to do with tulip bulbs after digging.
The substrate for planting bulbs can be any moisture-absorbing and breathable material with a neutral reaction. It can be pure river sand (Dutch flower growers use it), a mixture of sand and peat, pure peat, vermiculite, perlite, or a mixture of sand with garden soil. Even sawdust can be used as a substrate for forcing, but they do not retain moisture well, so frequent watering will be required during the rooting period.
In addition, the substrate for forcing must have a neutral reaction (pH 6.5-7), so sawdust and peat must be lime. It is also not advisable to use garden soil in its pure form, without any baking powder, since it becomes very compacted during watering.
The substrate of the following composition is optimal for forcing: 2 parts of garden soil, 1 part of well-rotted manure or compost and 1 part of river sand. It is useful to add wood ash to this mixture. It is better not to use the land from greenhouses, greenhouses, as well as poorly rotted manure - this is a favorable environment for the development of pathogens.
The prepared substrate is poured 2/3 into containers (pots, boxes, bowls) and slightly compacted.The bulbs are laid out on the soil surface at a distance of 0.5-1 cm from each other, while slightly pressing their bottoms into the soil. Then the bulbs are covered to the very top with prepared substrate or clean sand to the edges of the container. It is important that a homogeneous planting material is planted in one container - to ensure its simultaneous flowering.
After planting, the bulbs are watered abundantly. It is advisable to pour them with a solution of 0.2% calcium nitrate (20 g per 10 l of water). If, after watering, the tops of the bulbs are exposed and the soil has settled, the substrate must be filled up. It is important that there is a small layer of soil above the bulbs, otherwise bulbs may bulge out of the ground during rooting.
In tents near the station
Since March 6, tents filled with bouquets of tulips have been on the Railway Station Square. Of course, these are not French or even Polish - the flowers grew in Belarus, but from Dutch bulbs.
Everyone has the same price - 2 rubles apiece. But there are also "exclusive" multi-colored options for 2.5 rubles.
If it is too expensive, you can go to Nemiga: on both sides of the Nemiga 3 shopping center there are young people with balloons and bouquets: a tulip for 1.8 rubles.

Propagating plants by seeds in a home flower garden
For sowing seeds on their territory, boxes will be needed, they ripen by the second decade of August. They should be allowed to mature in warm and dry conditions. By the first days of October, on a selected piece of land, it is required to dig up the soil. Fortunately, if it turns out to be light loam, add humus there as well. On the sides, the ridge is advised to be planked. We will place a sandy layer of three centimeters on top. After a week, we will sow the seeds on the ridge relatively densely. Cover the top with earth and sand. And so we will leave until the spring days.
Description and features
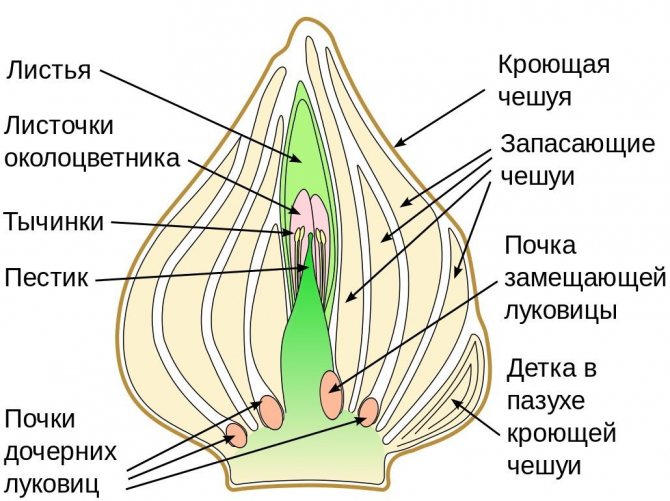
Tulips are perennial bulbous crops. The characteristics of the inflorescences and the appearance of plants depend on the variety. Leaves are lanceolate, elongated, on one stem there can be from 2 to 6 pieces. The surface of the leaf is smooth, wrinkled in some varieties. A bush plant, a large number of baby bulbs can grow from one mother bulb.
Stems are short, from 6 to 60 cm long, depending on the variety. There is only one flower on each plant. Inflorescences are ordinary or terry. Some hybrids have jagged edges of the petals. Tulips bloom in May-June.
What problems can arise?
High humidity can cause mold or rot. At the first detection of these signs, it is necessary to remove the damaged bulbs from the rest. With a small amount of mold, you can simply wipe the bulbs with a rag.
If suddenly a rotten smell appears in the room, you need to eliminate its source and for a short time be sure to triple the ventilation of the room.
Note! As temperatures rise, it may happen that the plants begin to germinate. Nothing can be done about it. Then you can plant the plants in a box or immediately on the garden bed.
Many people do not know that the process of forming a new flower begins from the very moment the plant is excavated. Therefore, it is important to observe the temperature regime and maintain the required air humidity, since these 2 parameters greatly affect the health, as well as the beauty of future flowers. Keeping your bulbs carefully monitored annually will help ensure your home garden has healthy, beautiful flowers for years to come.
Gardeners who want to decorate their garden with beautifully flowering spring plants should worry about planting material in advance and buy tulip bulbs wholesale at a low price in the Flowers of Moscow online store. To purchase, you must comply with the following conditions:
- The minimum order for one type of bulb is 1 box. There are 500 pieces in a box if we are talking about 12 or more parsing bulbs, or 750 pieces for 11/12 parsing.
- The minimum order quantity is 5000 bulbs.
If tulip bulbs are needed for landscaping small areas or for forcing, then the conditions for the acquisition will be as follows:
- The minimum for a piece order is at least 300 units.
- The minimum for tulips of one variety is from 100 units.
All detailed information on the terms of delivery and the amount of tulip planting material is contained.
What needs to be done immediately after receiving the order
First of all, you need to check the compliance of the ordered material with the received one. Make sure you receive the correct number of bulbs for each variety by comparing the item you have with the item on the invoice.
The next step is to check the safety of the bulbs. Since most of this type of planting material comes from abroad, from the Netherlands, the transportation time can be quite long. Plus, you need to take into account the storage period, as well as the possible downtime of transport at the border when passing through customs control, quarantine, and so on, and even the time that the bulbs spent in the store. During this period, the conditions in which the tulip bulbs stayed could change several times.
It is necessary to open the packages with packages and literally check each onion, since the presence of at least one sick or injured during transportation or storage can lead to infection of the entire batch. It is especially important to perform this operation if you have decided to buy tulip bulbs in bulk.
What you need to pay attention to when examining
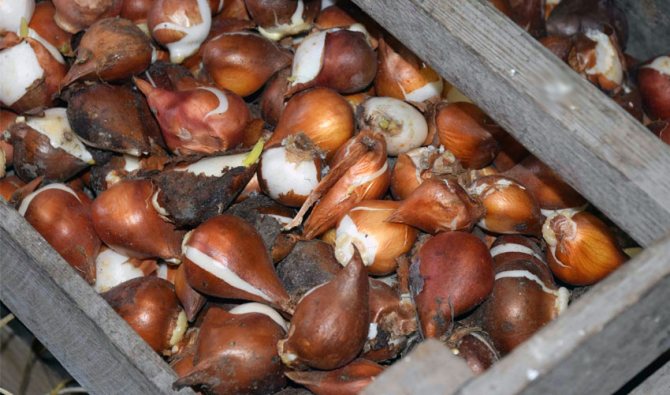
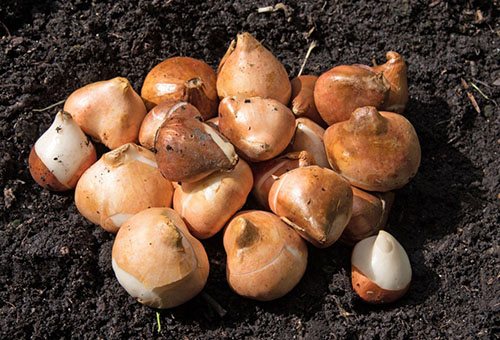
Revision of the acquisition status will not take much time or energy if you know what to look for first:
- Bulb consistency. It should be tight to the touch. Soft means sick or rotten.
- There are no spots, dents, signs of rot or damage on the surface of the bulbs. If defects are found, the affected bulb must be set aside in order to try to save it. When examining several varieties at once, sign the bulbs, so you will avoid overgrading.
- The bottom of the bulb should be clean, without traces of mold, not rotten, with outlined root buds in the form of tubercles. A depressed, blackened, unpleasant-smelling bottom is a sign of a sick or rotten bulb. Such planting material is discarded.
If you happened to buy tulip bulbs long before the optimal planting time, then the question of storing the purchase arises. The result obtained and the safety and viability of the entire batch depend on how correctly everything is done. You can see the terms of delivery.
Storing the bulbs before planting
After the inspection, the tulips must be stored until disembarkation. These plants bloom in spring, so autumn is considered the optimal time to plant them. The time is calculated in such a way that the bulb, having fallen into the ground, has time to acclimatize and take root, but at the same time it does not start growing. This ensures its survival in winter and early vegetation in the spring.
Read more: Blockage and inflammation of the goiter in chickens symptoms treatment of the disease
Since planting is planned in the fall, the bulk distribution of the bulbs often begins in the second half of the summer, but sometimes the bulbs can be purchased earlier. To keep them viable before planting, you need the right storage conditions:
- All planting material must be placed in "breathable" packaging - paper or linen bags, cardboard boxes, lattice plastic containers. It is especially important to do this in cases where the bulbs arrived packed in plastic, and storage will be long enough. Bulbs are living organisms, they breathe and release moisture and metabolic products. In plastic, they can stifle, suffocate, mold, in a word, simply die. When opening branded packages, you must remember to keep the grade.
- The prepared planting material should be placed in a cool, shaded, well-ventilated area, protected from the penetration of rodents, who would not mind eating a juicy crispy onion.
- It is necessary to monitor the temperature and humidity of the air in the storage. At high temperatures and dryness, the bulbs can begin to dry out, and at low temperatures and high humidity, they can rot. You can improve the condition of the planting material by placing them in a special inert substrate, sawdust (not coniferous wood), even in ordinary river sand.
- From time to time, damaged and diseased bulbs must be examined and discarded.
Using such a simple instruction, you can not only buy tulip bulbs, but also successfully save them until planting.
The employees of the online store will help you choose the best parsing of bulbs for your purposes and calculate the required number, taking into account the areas you have.
Here you buy products of the highest quality, from the best manufacturers and in a wide range. Delivery takes minimum time, because we strive to always have in our store the largest possible selection of different varieties of tulips.
We carry out delivery in Moscow and in the Moscow region. The cost of transportation in the city is 500 rubles, in the region - according to contractual conditions. We can arrange shipment within the country by transport companies at their rates and rates.
For all questions, contact the managers by phone or leave a request using the site.
Tulips slowly fade and the gardener has a question: "What to do with tulip bulbs after flowering?" After reading today's article, you will learn if you need to dig the bulbs out of the soil, how to store and care for tulips after flowering.
After flowering, tulips lose more nutrients. It is necessary to ensure the normal storage of this bulbous plant in order to obtain planting material by the next planting season.

What to do with tulips:
- In the southern regions, tulips are left in the soil.
- In regions with cold, temperate climates, tulips are dug up.
In July, after the tulip shoots die off, the plant bulbs are dug up.
Technology for extracting tulip bulbs from soil
Tulips slowly fade, shedding inflorescences, leaves, after which the peduncle also dies off. The gardener needs to wait until the surface part of the tulip has completely died away, then dig out the bulb and send it to storage.
When to dig up tulip bulbs? There are three stages of digging tulip bulbs, which vary depending on the condition of the plant or weather conditions.
Stages of digging tulip bulbs:
- Early digging - immediately after flowering.
- Normal digging is from July to the end of August.
- Late digging - autumn.
In northern regions, it is necessary to remove tulip bulbs from the potting mix much faster due to the rapidly changing weather conditions. In the southern regions, the process of digging tulips can be delayed until the end of summer - early autumn in the presence of positive temperatures and the absence of heavy rainfall.
How to store tulip bulbs after flowering?
In the open field, the gardener marks the location of the tulip bulbs. A week before the necessary digging, watering and fertilization stop - the plant slowly dies off.
What not to do:
- pick off leaves;
- remove inflorescences;
- cut the peduncles;
What you can do:
- mark the bulbs in the soil;
- remove a completely dried peduncle from the ground;
- dig up the onion;
Why can't you cut the peduncles or its elements yourself after the tulip blooms? With the help of leaves and peduncles, tulip bulbs accumulate nutrients necessary for the next flowering season.Cutting them off, the storage process will also be cut off.
After removing from the soil, store tulip bulbs in a dry, cool, dark place. It is necessary to arrange tulip bulbs according to varieties and dates of excavation from the soil. Bulbs are stored in wooden boxes with notes near each section.
Enemies of tulip bulbs during storage are moisture and drafts. The air temperature is always at the same mark - 20 ° C. The hit of sunlight on the tulip bulbs before the month of planting will initiate germination, the development of shoots, after which they will become unsuitable for storage, respectively, planting in the future.
If this happens, immediately plant the tulip bulbs in open ground and keep them in the conditions necessary for this plant.
(1 rated rating: 8,00
out of 10)
There is probably no other flower that would be as strongly associated with the arrival of spring as tulips. After all, it is these bulbous plants that it is customary to give to all llamas on March 8th. Tulips have even become a symbol of this holiday. Therefore, many gardeners on the eve of International Women's Day are forcing tulips by March 8, so that they bloom faster than usual. But how to preserve the tulip bulbs after distillation by March 8, so that the plant will continue to grow?
Secrets of proper storage that will preserve the flower "harvest"
Often a good "flower yield" is reduced several times by spring, even with good conditions and care. To understand how to store tulip tubers before planting, it is worth knowing some of the nuances. During the preservation period, you need:
- Sort the tubers once a week and dispose of spoiled specimens.
- Mold or white deposits can form on the surface of the flakes, which can occur due to high humidity or poor ventilation. Mold or plaque can be easily removed with a paper towel - just wipe down the surface.
- If incomprehensible stains occur, you need to remove the copy from the box and soak the bulb in a manganese solution. Then dry and put back in the container.
- If the surface layers with a small lesion area began to rot, then the zone must be cut off and treated with brilliant green.
To keep the "harvest" of bulbs as intact as possible, you need to ventilate the room well, monitor the humidity and temperature.
When to remove the bulbs
The bulb ripens within one month after the tulip blooms. The aboveground parts of the plant at this time begin to die off, from which there is an outflow of useful substances. The scales of the bulb darken, acquiring a brownish tint.
Tulips can be removed when ⅔ of their leaves wilted, and the stem itself softens and turns yellow. For the middle zone of the Russian Federation, this period corresponds to the last decade of July. Tulips can be considered ready to be pulled out of the ground if their stem can be wrapped around a finger.
Don't dig up tulips ahead of time. In this case, the replacement bulbs will not have time to form a protective shell and fully mature, as a result of which they become smaller and are exposed to fungal diseases. Most of such inferior material will not survive to be planted in the ground, and one should not expect good flowering from those that have survived.
It is also undesirable to delay the extraction of the bulbs until the aerial part of the plant is completely dry. In this case, it is sometimes impossible to determine their exact location, and the nests of the bulbs are destroyed, which leads to the loss of a large amount of material.
Unique storage of bulbs in a cellar or basement
If there are special premises such as a basement or a cellar, then a natural question arises - how to store tulips here without damage. Creating conditions for saving flower tubers:
- Prepare the soil. The base should consist of special garden soil, peat and vermiculite.
- For half an hour, warm up the soil in a water bath to finally kill pathogenic bacteria and microorganisms.
- Plant tulip bulbs in prepared soil. The bulbs will eventually take root into the soil.
- Place the boxes with the planted tubers on the shelves so that rodents cannot reach them.
It is necessary to monitor the temperature in the room - it should not be lower than 17, but not exceed 24 degrees. During such storage, the planting cannot be watered or sprayed.