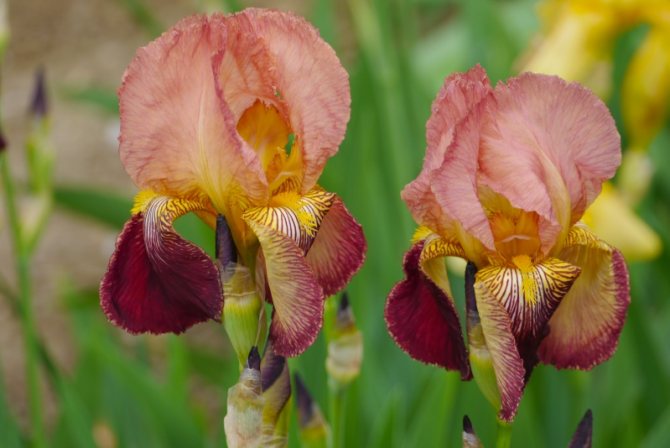
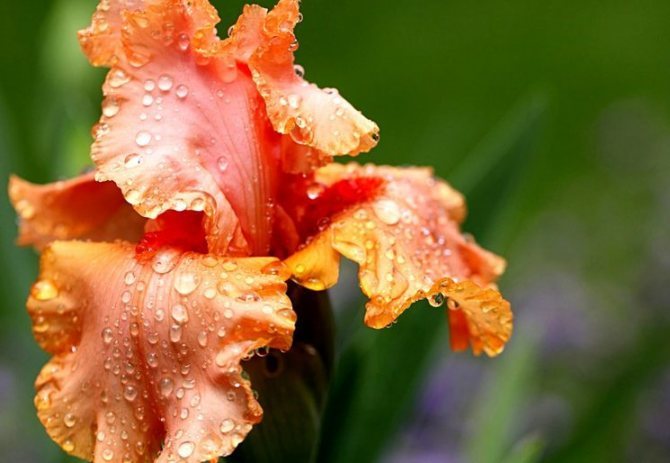

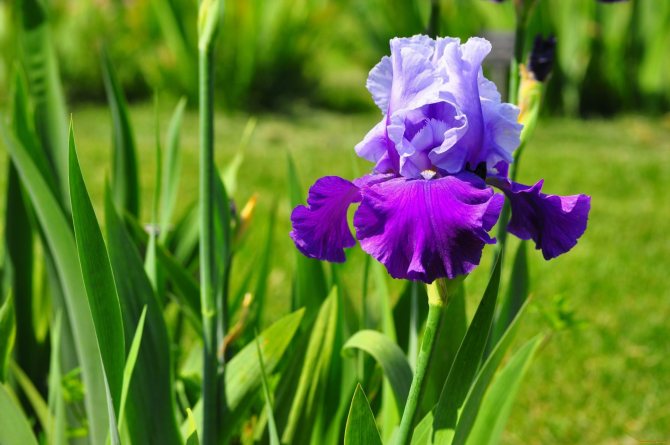
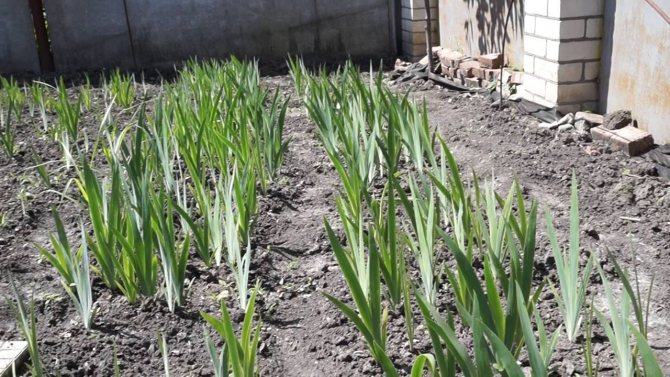
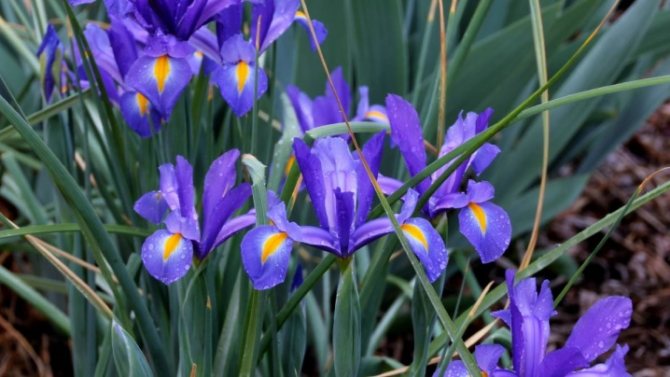
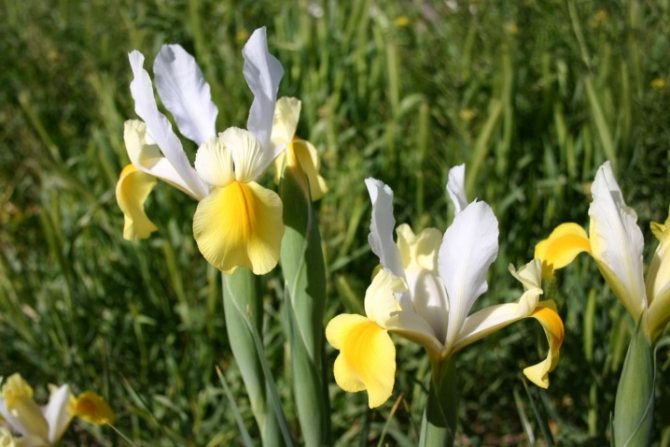
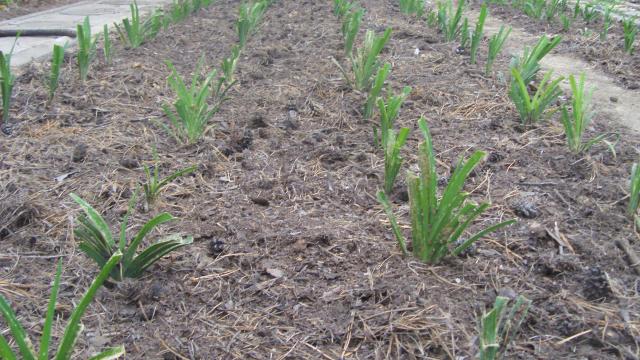
The huge genus of irises is more than 800 species, the color and shape of the flower are very diverse. You can meet a plant in nature on all continents, more often in a temperate climatic zone, but there are also sissies living in the subtropics. Most modern varieties and hybrids grow and bloom with minimal care, but people from warm regions, which are increasingly found in flower gardens in the middle lane, require special care. They have to be protected from frost. In leaving, they are more capricious. And without thorough preparation for winter, they can simply freeze out. Many growers do not know whether it is necessary to cut irises in August-September. The answer to this question largely depends on what kind of species we are talking about. This procedure has other nuances as well.
The nuances of care and cultivation of irises in the open field
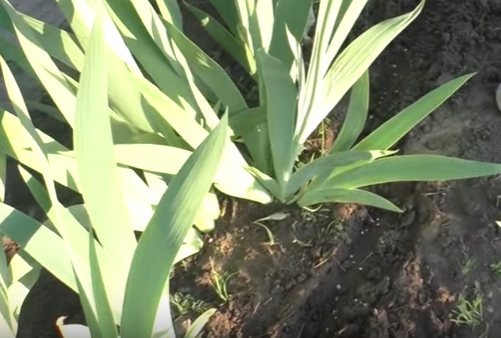
This plant cannot be called capricious. But for healthy growth and beautiful flowering, it still needs several conditions. In addition, it should be borne in mind that they are different in bearded, beardless and bulbous species.
Boarding time
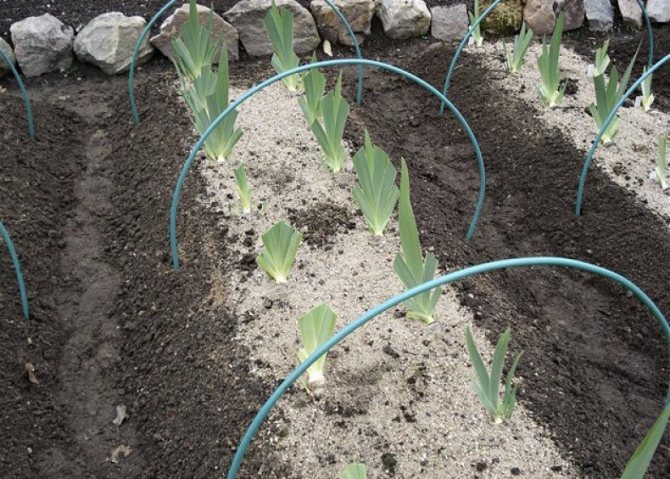
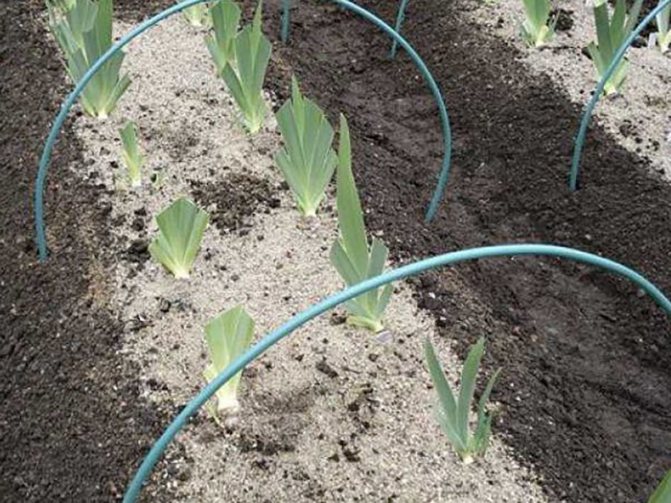
In the spring, from March to May, as soon as the ground warms up, the planting material already acquired during the winter period is planted in the open ground, regardless of its type. That is, both rhizome and bulbous varieties. If properly planted, the iris will bloom in early summer.
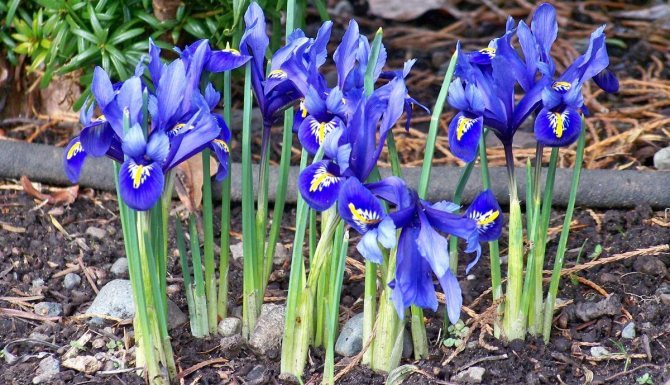
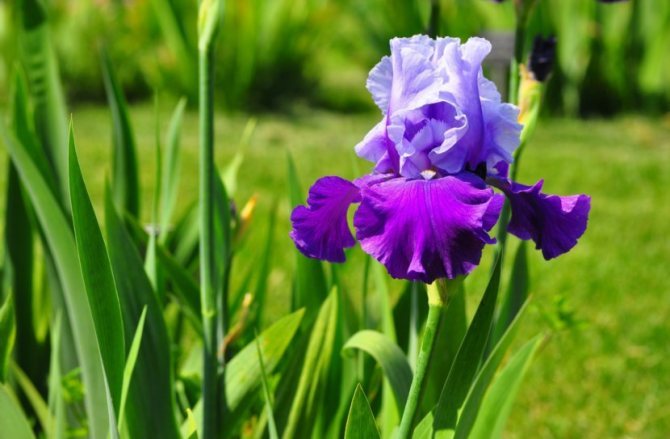
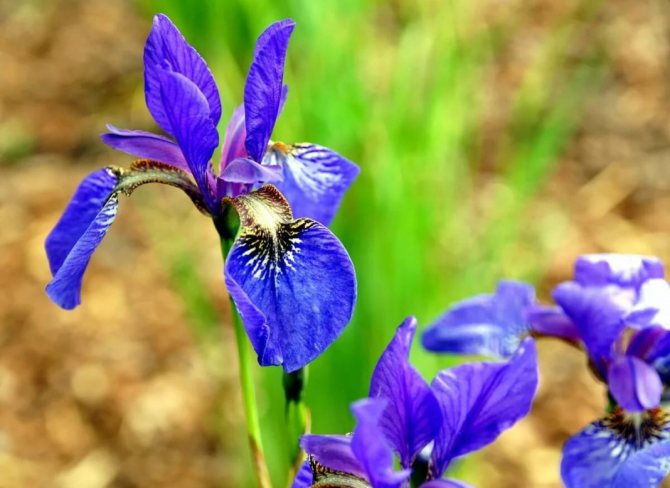
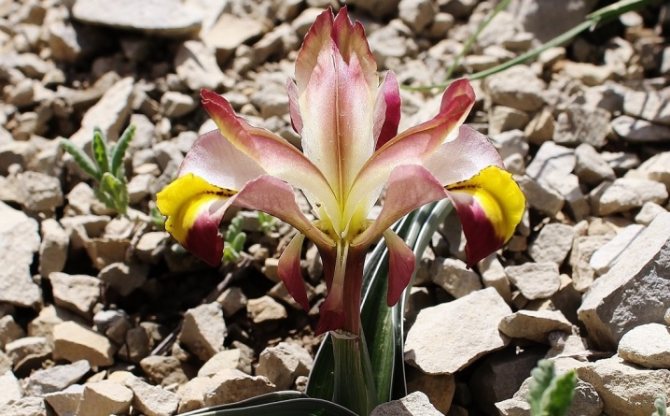
Irises
Important! A crop grown from a bulb in the spring is highly likely to bloom only next year.
June - July is the best suited for breeding. Iris shoots are rooted in a greenhouse, but can also be grown outdoors by creating a small greenhouse above the sprout. However, the most successful way of dividing is still rhizome. The plant must have time to take root in order to endure the winter cold.
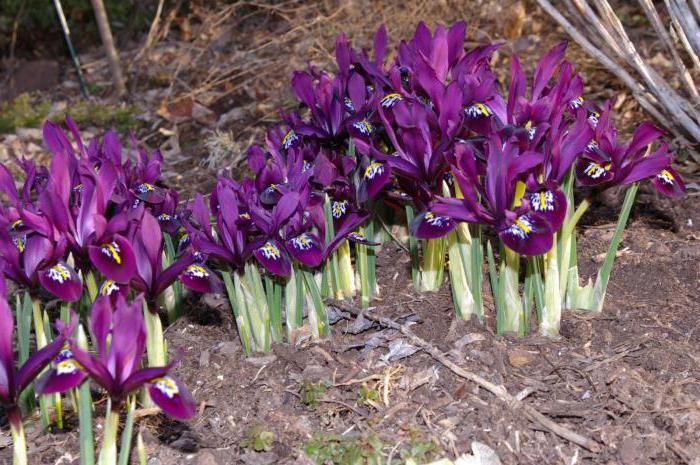
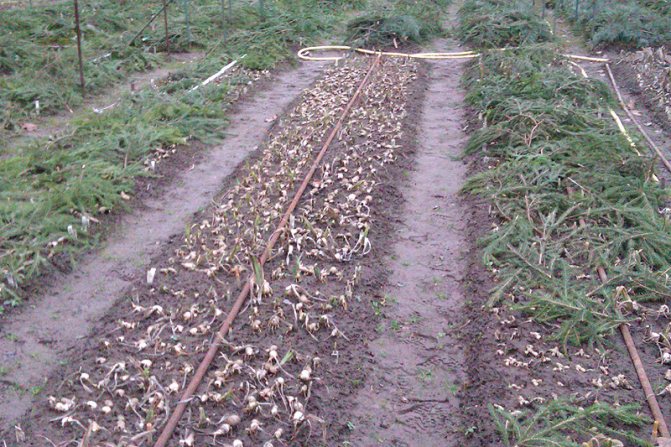
At the end of August, it is time to plant the bulbous iris species. They will delight with their flowering in early spring.
In the fall, a month before the onset of cold weather, all transplants in the open field should be completed. At the same time, you can sow iris seeds in pots for breeding at home.
Place for planting in open ground
Contrary to the misconception, iris for the most part does not like shady places and excess moisture. Grown with a lack of light, on moist soils, it loses its decorative effect and blooms for a short period. This does not apply to swamp varieties. But they also cannot stand water stagnation in the ground. When planting a plant in the garden, it is recommended to choose a place protected from strong winds. Otherwise, it will have to be additionally strengthened with supports.
Planting irises
Requirements for the composition of the soil
The crop maintains abundant flowering and healthy growth in fertile, loamy soil with a neutral to slightly acidic reaction. Large doses of nitrogen in the ground cause various diseases of irises. Acidic soils will keep crops from blooming.
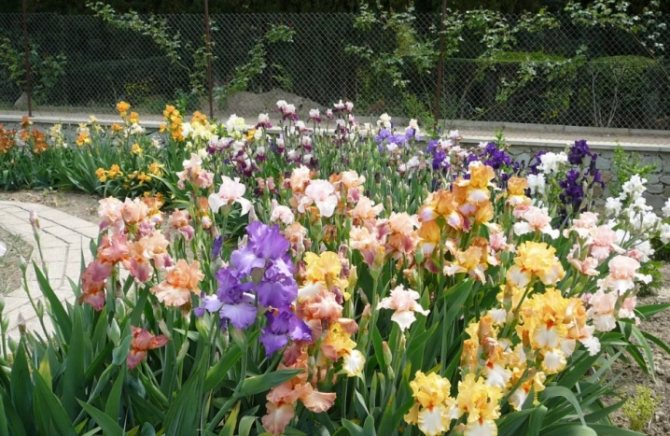
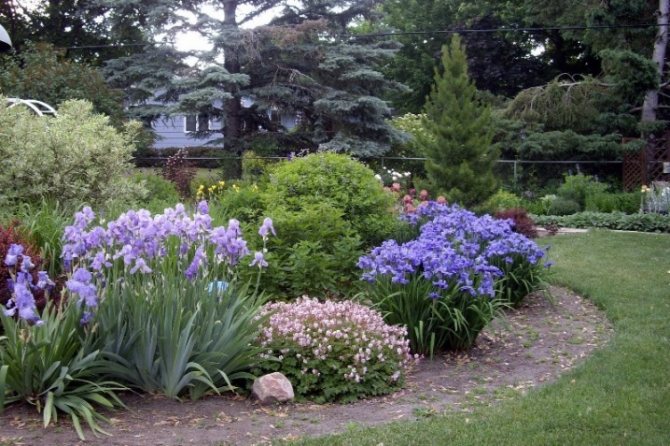
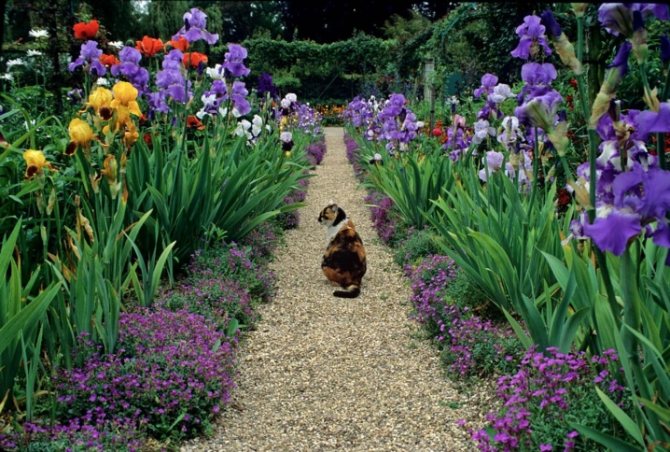
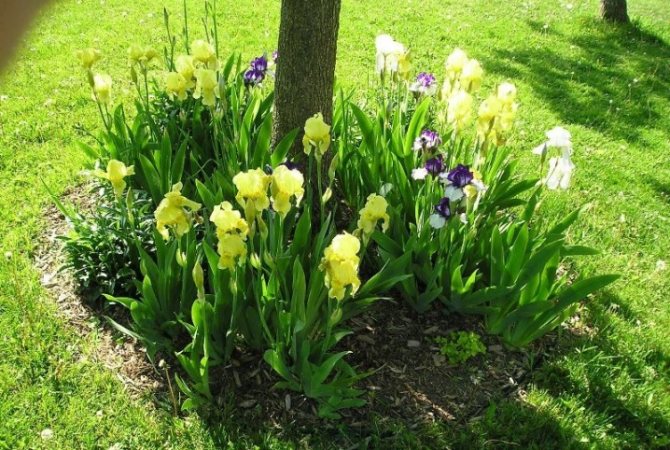
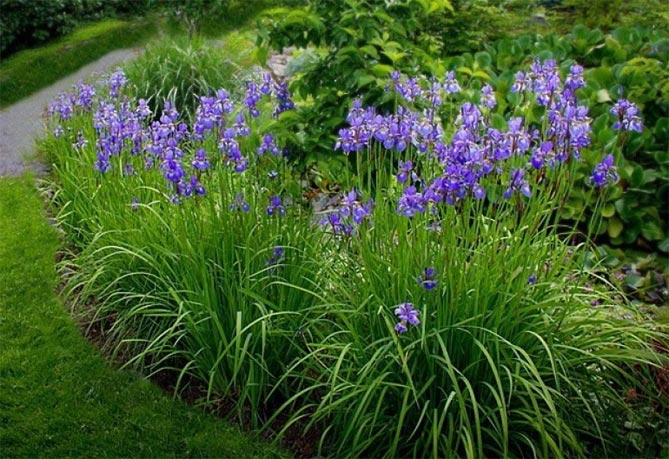
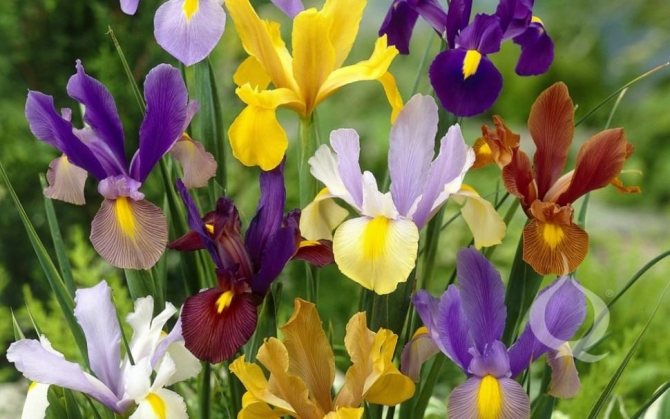
Examples in landscape design
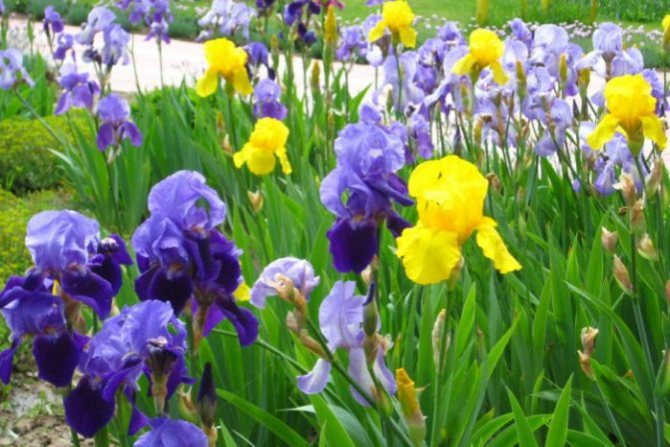
The combination of yellow irises with any blue flowers always looks very impressive.
The combination of different varieties of irises in one flowerbed looks luxurious.
This plant looks great in a company with any flowers and shrubs.
Irises are great not only for flower beds, but also for planting along paths.
Flowers fit organically into the composition, surrounding the tree trunks.
For information on how to properly plant bulbous iris, see the next video.
Planting and caring for bulbous irises is carried out according to special rules. In order for the selected variety of your favorite flowers to please with its lush flowering, you need to know about the timing of planting, the secrets of preparing the bulbs and soil. Care is standard and involves the establishment of an irrigation regime, feeding, pruning and some other activities. There are three groups of bulbous irises, each with different characteristics.
Pruning irises after flowering and in autumn
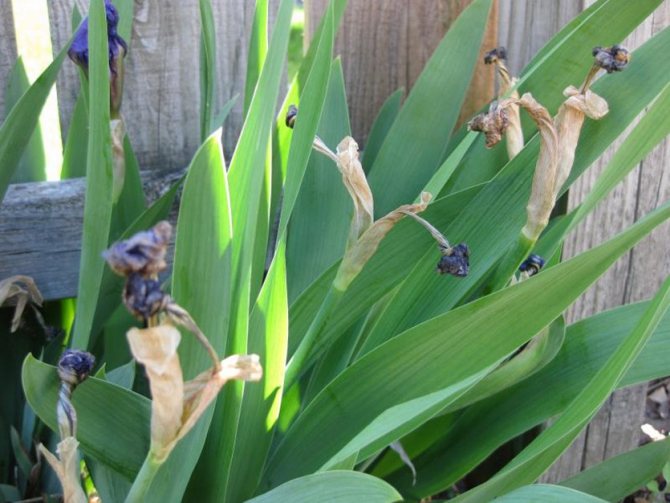
When the irises begin to fade, many growers ask themselves a completely logical question: "Is it necessary and how to properly cut the irises after flowering?"
The short answer is yes, irises need pruning after flowering.
Pruning peduncles after flowering
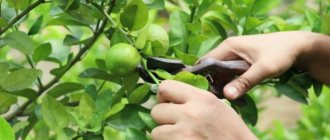
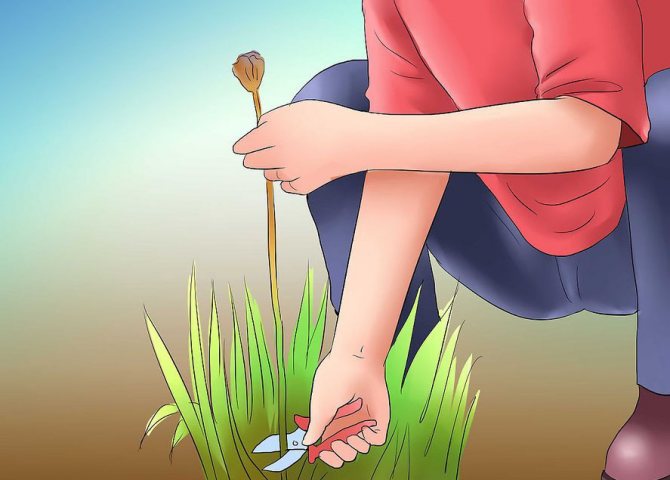
Firstly, it is necessary to remove, or rather break off, all peduncles at the optimal time (i.e., timely).
Another popular question: “How long after flowering need to break out flower stalks of irises? "
Answer: As soon as all flowers will wither... If you have chosen a suitable period and the peduncle is fully ripe, then it will come off quite easily (it will break off with a bang). And if it bends and does not break, then it is too early (the peduncle has not matured).
If you do not do this on time, then seed pods are formed, in other words, the plant will spend a lot of extra energy on reproduction.
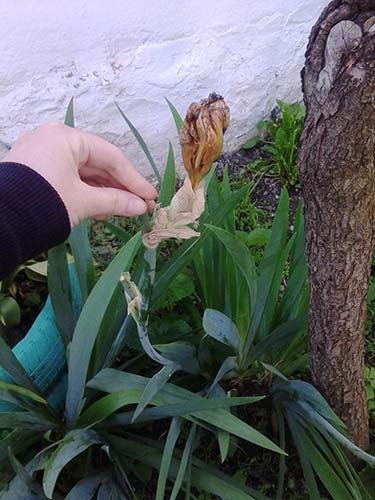
- The most favorable moment (weather) for breaking the peduncles is windy, dry and sunny fine day... In such conditions all wounds will dry out very quickly, chapped and covered with a protective crust, which means that they will not be afraid of any rot.
The biggest danger is that the junction (attachment) of the peduncle and the iris tuber is very susceptible to decay... In other words, if you do not carry out the operation to timely remove (break out) the peduncles, then the plant may rot.
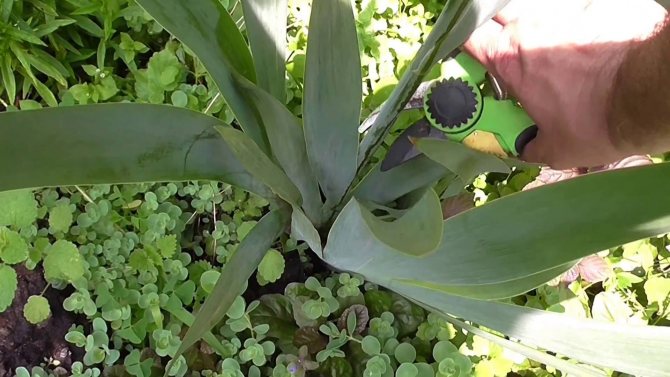
- Peduncles it is better not to cut with pruners, but exactly break out by hand.
Why is it better with your hands, and not with garden tools?
The fact is that, using the tools, you can easily transfer pathogens and various infections from infected to healthy plants.
When to prune irises
A perennial flower bed with irises will delight with flowering, if you follow the cultivation technology. The main point is pruning, it has its own subtleties and is carried out at different times:
- after flowering;
- with yellowing / mottling of foliage;
- to prepare for winter;
- when transplanting / reproducing;
- due to varietal characteristics.
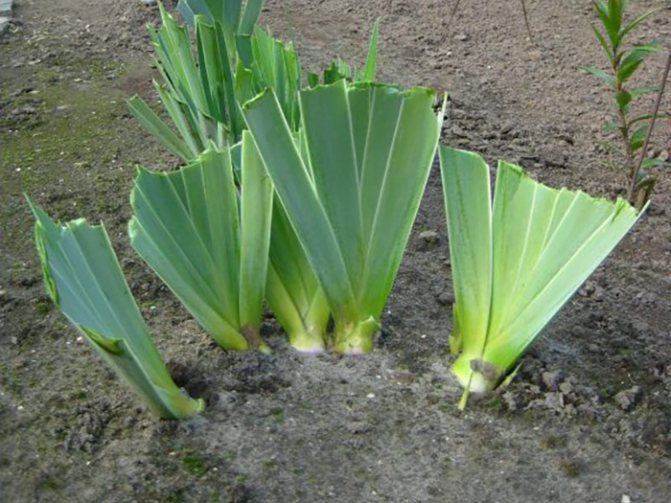
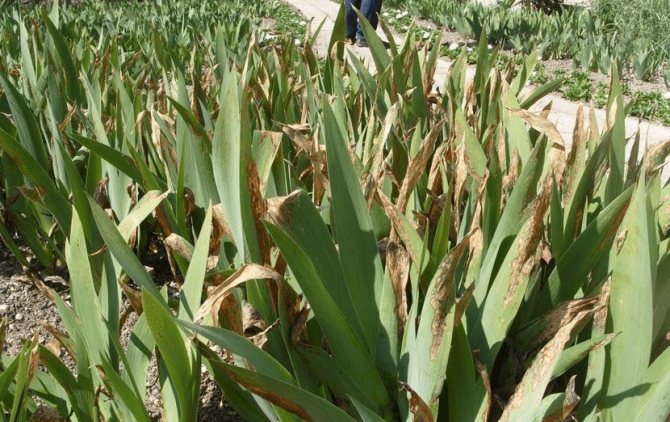
Bulbous species are pruned almost to the ground. Photo: wiki-
Why cut off the aerial part
Stopping the aerial part helps fight infections, improves the quality of future bud formation, and stimulates root formation. Pruning depends on the type of irises, subdivided into bulbous and rhizomatous.
Let's consider each group separately:
| Bulbous varieties They are considered more demanding in terms of conditions of detention. Many of them are compact and short. Grown in pots like houseplants. In the garden, they are used in rock gardens, in the foreground of flower beds, in the form of borders. All bulbs are classified into 3 types:
Popular varieties - Harmony; Royal Blue; Katharine Hodkin; Joyce; Alida; Claret and others. |
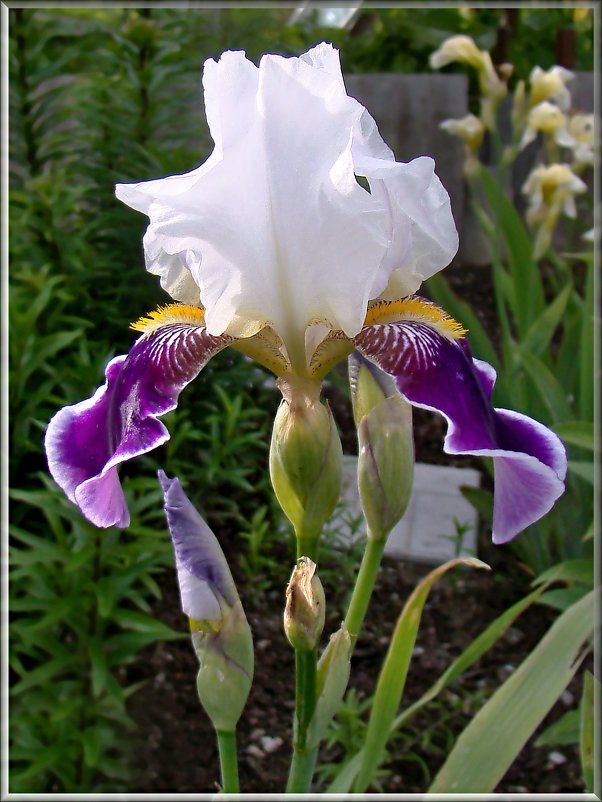
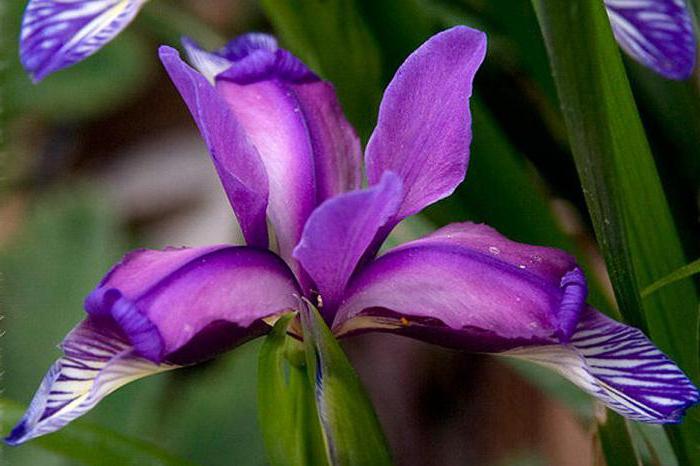
| Rhizome irises Tall and unpretentious. They hibernate and reproduce well. Recognized as the most beautiful iridescent whales: buds are two-tricolor, with interesting shapes, double edges and mottling. They differ in the large size of the buds. In some varieties, the peduncle contains more than 8 inflorescences and reaches 100 cm. The diameter of the flower in mini and dwarf ones is 6–8 cm, in full lengths - 12–20 cm, in the intermediate - 7–12 cm. All rhizome irises are divided into 2 categories:
Popular varieties: Harmony; Broadway Star; Symphony; Swahili and others. Bearded with repeated flowering: Bluebeard; Made Point |
Bulbous irises, overwintering in the ground, quickly grow, forming a bush. They look untidy without cropping
When to trim
A haircut event depends on the purpose and is carried out one or more times during the growing season, I will name the main ones:
- Immediately after the last buds have wilted, the arrows of the peduncles are removed (June-July).
- The foliage is cut at different times, it depends on the reason: the bush is falling apart, shading neighboring plants, etc.
- Seasonal haircuts are done in late summer or autumn.
- The leaf is truncated during transplantation.
- The green mass is cut off when signs of illness appear.
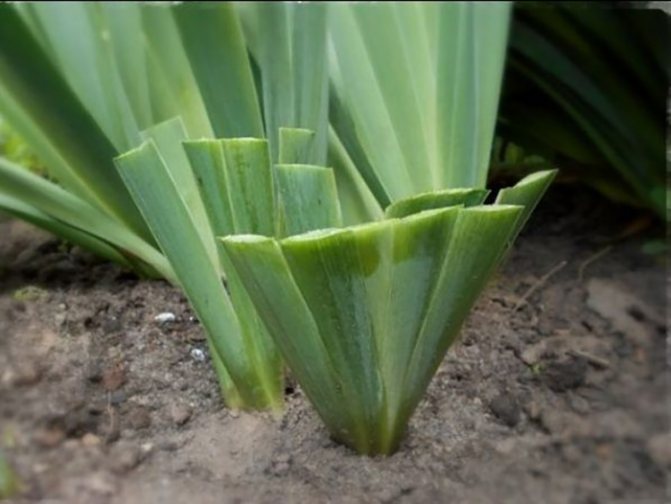
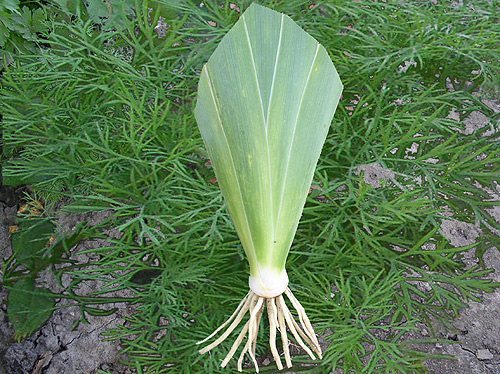
Preparation for transplant / propagation involves cutting the leaf. Photo: The haircut is divided into two periods:
- Summer. An obligatory moment in the cultivation of double flowering varieties. They should not be allowed to form seed pods. Immediately after the last bud wilts, the flower-bearing arrow is cut off. This procedure stimulates the formation of new buds. These varieties include Buckwit, Jennifer, Rosalie Fiji, Immortality.
- Autumn... The standard procedure for irises is autumn pruning. When removing / truncating the aerial part, the rhizome tolerates frost better. The event has been held since September and ends before the onset of the first frost.
Pruning features
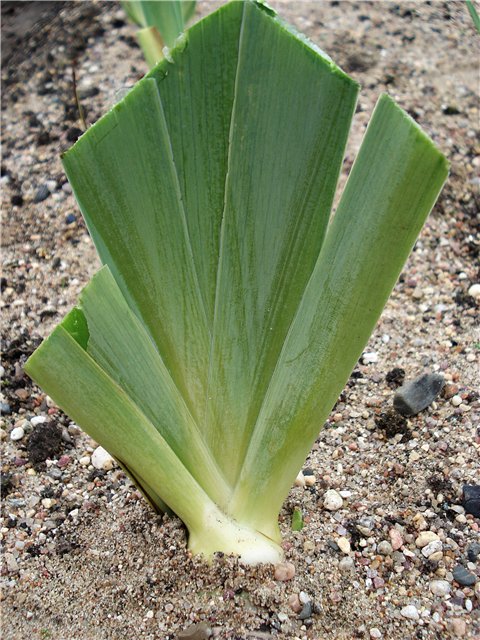
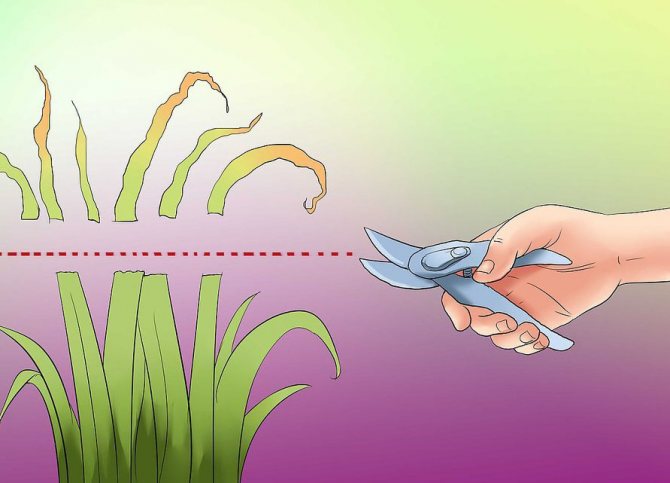
In the rhizome species, foliage can be omitted. In the presence of yellowed, dry feathers, signs of illness, the fan is shortened by about half. The leaf is not completely removed, at least 20 cm of the fan is left, this is about a third of the entire length.
Bulbous irises are more demanding in their care - a haircut is an indispensable component of growing. After flowering, peduncles are removed, and at the end of July - all foliage. Bulbs are dug out of many varieties.
The video shows how to trim the leaves and prepare for transplanting
Large flowers appear with timely pruning of peduncles. Photo: i2.
There are varieties of irises that reproduce by self-seeding. Seed pods should not be left with them - this will lead to "clogging" of the local area with unwanted plants.
Soil requirements
Iris grows on non-acidic and loose soil (sand, loam, sandy loam). You can achieve lush flowering on any soil by adding additional substances. For example, if the soil is acidic, then lime, wood ash or chalk must be added to it, and if clayey - sand or peat.
Since this culture is thermophilic, it must be planted in a well-lit area protected from gusty winds (an ideal place is at a wooden fence, on flower beds, in a garden or garden). It is important to ensure that weeds do not grow in the area where the irises are planted.
Advice! Every 5-6 years, irises must be transplanted to another place in order to prevent the oppression of their growth and flowering.

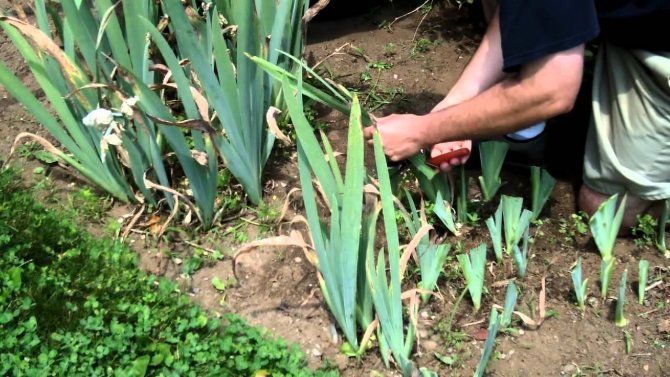
Features of cutting different types of irises
The procedure is carried out with sharp garden tools:
- Dried flowers can be pinched by hand.
- Peduncles are cut to the very base.
- The stem is cut off, leaving a height of 3.5 cm.
- Dried foliage should protrude 14 cm above the soil surface.
Irises are divided into two main types, each of which requires a different approach during care.
Rhizome
Rhizome varieties of irises are undemanding to care. Yellowed and dried leaves are removed as needed. If there are no special reasons, then the autumn pruning may not be carried out.
Bulbous
Bulb varieties of irises require more attention. They are distinguished by the presence of a rhizome in the form of a bulb. After the flowering stage is over, the stems and leaves are cut, and then the bulb is dug out. The procedure is carried out carefully so as not to damage the roots.
In the future, the bulbs are dried and removed to a cool place, and in the fall they are planted again in flower beds. In the northern regions, it is better to plant the bulb in the spring so that it does not freeze over the winter.
Autumn feeding of irises
If you think that the potential of irises cannot be revealed due to the fact that your soil is too poor, then 2-3 weeks after flowering or already in the fall, you should feed them phosphoric-potassium fertilizer (for example, superphosphate + potassium sulfate or just monophosphate).
By the way! If you are a supporter of organic farming, although this usually does not apply to fertilizing flowers and other ornamental plants, then you can take wood ash, bone meal, compost, humus. Only do not use fresh manure (only rotted).
Forcing bulbous irises at home
Forcing is the intentional acceleration of the growth of flowers for the plant to quickly gain green mass and the appearance of the first flowers. In the case of onion irises, the procedure begins with the preparation of the bulbs themselves. After digging them up, they are stored at a special temperature:
- During the first month 30-35 degrees.
- The next 1.5 months - 15-20 degrees.
- Then, within 2-3 weeks, the temperature is reduced to 10 degrees.
The bulbs should be planted 2-2.5 months before the desired flowering period. They begin to grow in a greenhouse at a comfortable temperature of 10-12 degrees. Then it is gradually increased to 18 degrees. Constantly illuminated with a phytolamp so that the duration of daylight hours is at least 14 hours. To accelerate growth (if necessary), the indicator is increased to 16-18 hours.
Pruning when seeds are ripe
When the flowers have faded, seeds form in the green receptacle. Any variety can be propagated by seed, some varieties are propagated only in this way. If you want to get a flower from seeds, then you should leave only one flower, removing only the dried leaves.
Some iris varieties have very beautiful seeds. In such varieties, it is better not to cut the flower, but to remove only dry buds.
For example, these are the following varieties of irises:
- Iris is smelly. After flowering, orange seeds can be seen.
- Belamkanda. After flowering, black seeds open.
Transfer
Correctly transplanted plants are the key to beautiful flowering. It is best to replant irises in late July and early September, when the active growth of the plant ends. In September, the flowers are easier to master in a new area and it is easier for them to endure the winter cold. For transplantation, processes that have already separated from the parent bush, have a developed root system and formed flower buds are suitable.
For the winter, for additional protection from frost, as well as to create favorable conditions for rooting, the plant is covered with:
- fallen leaves;
- spruce branches.
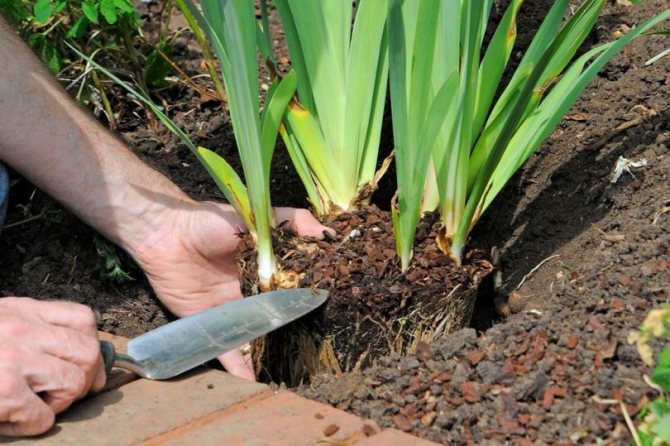
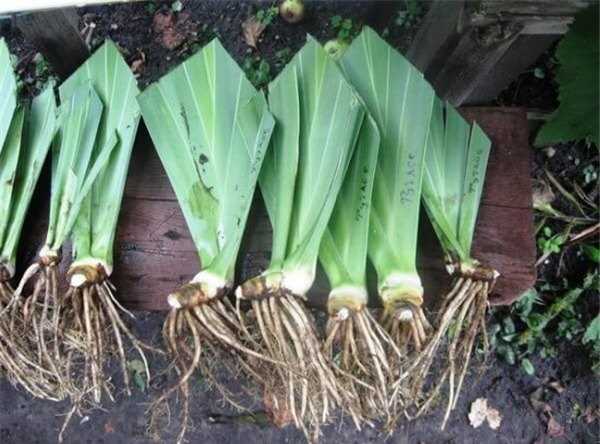
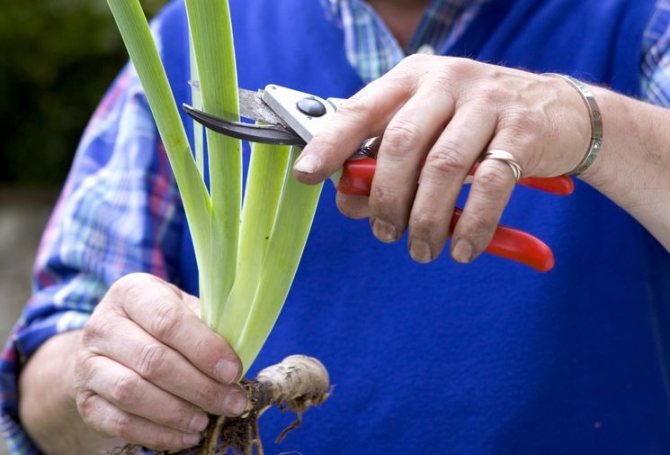
Plants selected for transplanting are cut at an angle to half the length of the foliage. If dark spots are visible, all greens are cut off, the plant is washed with a solution of copper sulfate and planted separately.
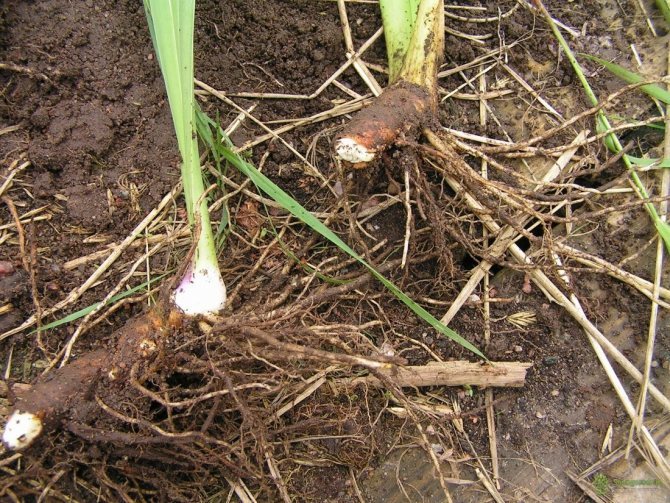
The tubers are dug up, all the soil is removed, you can wash them. Remove all bad leaves. If there are rotten bulbs or rhizomes, it is better to hold them in the Hom solution for about 20 minutes. After that, they must be dried for at least 12 hours. The dug roots are divided so that each one has 2-3 nodes with buds. You can cut the roots only with a sharp knife. It is best to sprinkle the slices with ash or activated carbon mixed with sulfur. All unnecessary roots must be cut off.
Before planting, the seedlings should be briefly dipped in a solution of potassium permanganate, then dried in the sun, constantly turning over. It is possible to transplant irises after feeding only after 2 weeks.
The transplant can be performed in several ways:
- Transplant the entire plant if it is less than 4 years old. The foliage is cut to 10 cm, the roots up to 3 cm, the seedling is allowed to rest for 2 days, then buried.
- Dig a little and take some of the layers.But if damage is caused to the rhizome during selection, it is transplanted as a whole.
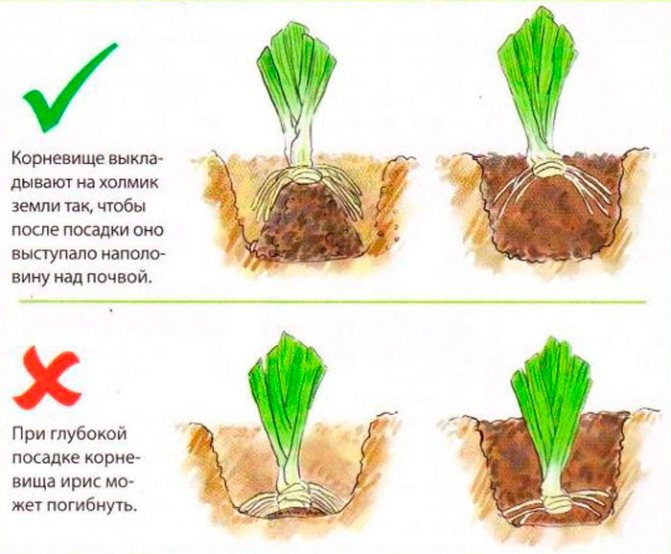
They dig their own hole for each bulb or rhizome, depending on their size. Fertilizer mixed with soil is added to the bottom of the hole. A tubercle is made, a seedling is placed at its top, pressing it a little into the ground. Buried to a depth of about 2 cm from the kidneys. The planting is watered with plenty of water and darkened for a while.
Transplanting and dividing old irises
Irises in one place feel good for 4–5 years, and then they grow old and stop blooming. In addition, over the years, the land under them is depleted, diseases accumulate, it is necessary to replant. The best time for this is 2–4 weeks after flowering, but no later than late August or early September. The seedlings should have time to take root before the cold weather, then they will bloom next spring.
Stages of dividing the bush and planting:
- Dig up an old bush.
- Shorten the leaves one third of their height. This will reduce evaporation, it will be easier for the injured root to recover, it will begin to feed the aerial part faster.
- Divide (cut, break) the bush into divisions, each should have a piece of root and 1-3 rosettes (shoots).
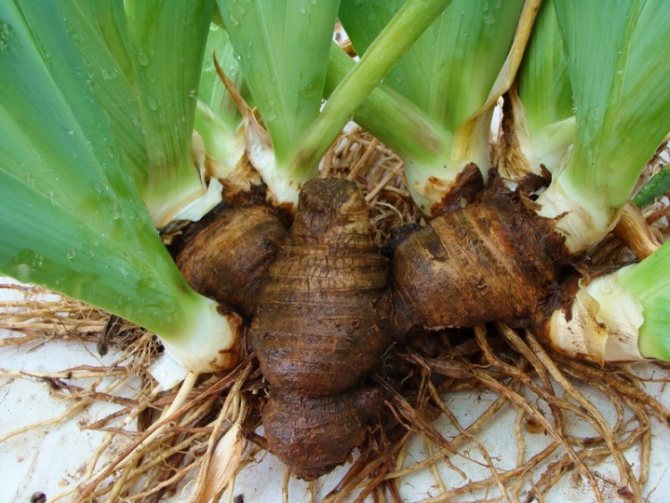
There are thin bridges on the rhizome of the iris, along which they break or cut into divisions
- Plant the cuttings 25-50 cm apart, depending on their size. The embedment depth is the same as in the previous location. The soil should be filled with humus (6 kg / m2) and wood ash (200 g / m2).
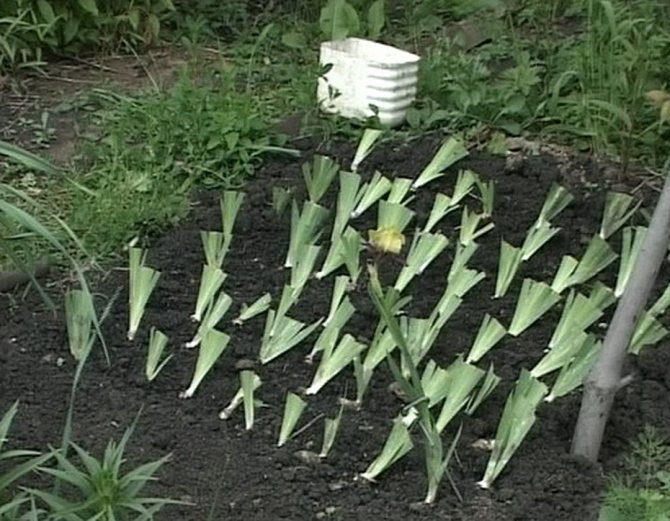
We did everything right: the bush was divided, the leaves were shortened, planted according to the scheme
This planting method is suitable for irises with dense bushes (Siberian, bristly, cereal, etc.), and varieties from the bearded group (garden, hybrid, dwarf) are not immediately planted in the ground. After dividing, their slices are first dried in the sun for at least 2 hours, and then planted.
Interestingly, the dug out and divided rhizomes of bearded irises can be stored for several days in the open air, without digging, and in the shade or in a ventilated barn - up to two weeks.
Video: dividing and planting a bearded iris
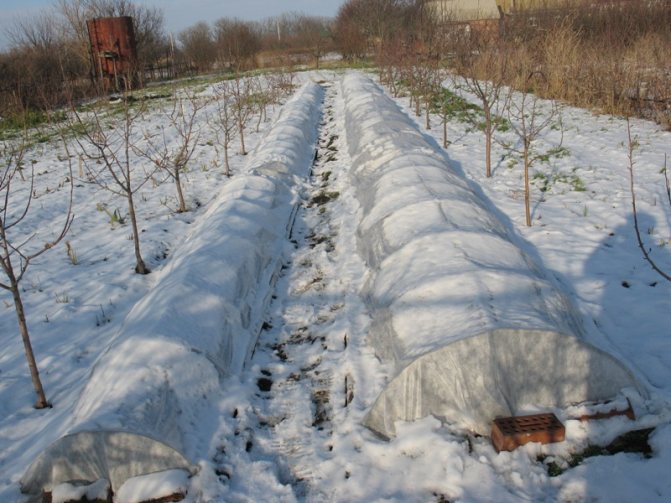
Shelter of irises for the winter
Irises hibernate very well just under the snow, in almost any conditions, and never need shelter for the winter.
Opinion: “Northern Urals, winters down to -45 degrees. I never cover irises! The secret is that when planting, the top layer of soil is sprinkled with sand 5 cm, but the backs of the irises are still on the surface. Everything will overwinter under the snow. "
However, if you have very severe frosts, then you can cover it slightly (by 2-3 cm) with dry peat, humus, needles, foliage or agrotextile (spunbond), but in no case with a film, otherwise it will be wiped out. Moreover, this must be done in October-November, when stable frosts begin.
It is worth understanding! In some sources, you can find recommendations that irises should be mulched for the winter with a layer as much as 8-10 cm, however, this does not make any sense: they are even more likely to rot under your mulch than completely naked potatoes will freeze.
If it is worth covering irises for the winter, then only in order to protect them from excess and stagnant moisture in the early spring period, when the snow begins to melt. In other words, irises are afraid of waterlogging and dampness, because of which they can simply rot.
So that the iris bulbs do not get wet and rot from excessive moisture, they should be something cover, eg, roofing material or slate, having previously made a frame of boards or bricks.
Video: how and what to cover irises for the winter

Features of autumn irises care
Caring for irises in autumn consists of the following activities:
- pruning;
- top dressing;
- preventive treatment;
- shelter for the winter.
In the fall, irises must be well prepared for wintering.
Pruning irises before wintering
The faded flower stalks of irises are removed almost immediately after the end of flowering. It is not recommended to cut the foliage until it wilts itself. In the green ground part, the processes of photosynthesis continue, contributing to the accumulation of nutrients in the rhizomes, so it cannot be removed.
The flower stalks must be cut out immediately after the end of flowering so that the seed box does not form.
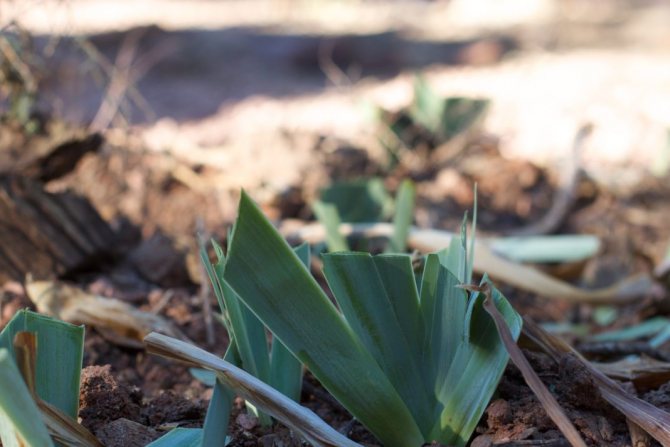
The yellowed leaves are pruned in September or October, depending on the local climate. A fan of leaf plates is shortened to a height of 12–15 cm from ground level, trying to give it the shape of the roof of a house so that moisture can flow down better and not linger on the cuts.
The leaves of irises are cut off after they dry out and turn a little yellow.
All cut foliage must be burned, since various harmful insects and pathogens of fungal infections settle in it for the winter.
Iris leaves are cut at an angle
Video: trim irises correctly
Autumn feeding of irises
Like most horticultural crops, irises in the autumn period are fed with fertilizers of the phosphorus-potassium group. It is best to do this after pruning, about 2-3 weeks before the first stable frost.

Wood ash is scattered on the bed between the plants
Irises respond well to application (per 1 m2):
- Phosphate fertilizers: superphosphate - 45-60 g;
- phosphate rock - 150-200 g (no more than 1 development every 4-5 years).
- potassium salt - 25-30 g;
- potassium monophosphate - 45-50 g;
Dry fertilizers are evenly distributed over the previously well-moistened soil under the iris bushes, and then the soil is slightly loosened and granules are embedded in it to a depth of 2-3 cm.
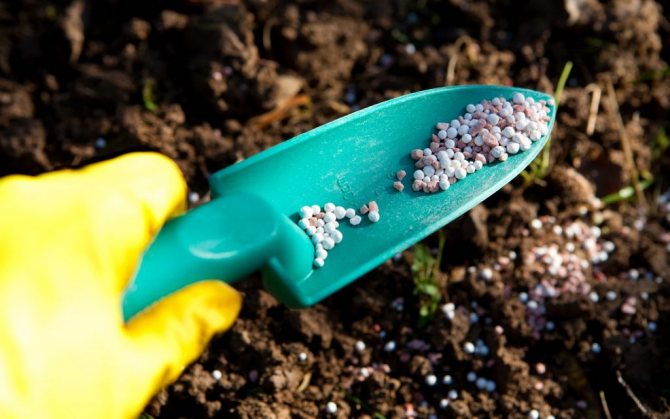
Granules of mineral fertilizers are scattered under irises and embedded in the soil to a depth of 2-3 cm
In autumn, during bedtime, irises should not be fertilized with mineral nitrogen-containing fertilizers, as well as organic matter (manure, fresh unripe compost, chicken droppings), so as not to provoke untimely growth of the ground part. Excess nutrition can cause rhizome decay.
Photo gallery: feeding for irises in autumn

Gera Floral Universal - mixed fertilizer for the main application and feeding on all types of soils of annual and perennial flowering plants, as well as decorative flowering shrubs

Potassium salt has long been used as a fertilizer, this agent is a mixture of potassium chloride, sylvinite and kainite

Wood ash is a good potash and phosphate fertilizer for acidic or neutral soils

Phosphorite flour is a long-lasting fertilizer, it can be applied once every 4-5 years in high doses, without fear of harmful effects on plants

Potassium Monophosphate is a mineral fertilizer containing the nutrients needed for proper growth

Fertilizer Autumn universal Terrasol - a mixed mineral fertilizer with trace elements for feeding in the autumn for fruit and berry, bulbous and flower-ornamental crops

Fasco Autumn is used at the very end of the growing season

Fertika Autumn is a complex mineral fertilizer for feeding all types of plants in the late summer and autumn seasons

Phosphate-potassium fertilizer does not contain nitrogen

Liquid complex fertilizer Bona Forte Autumn is intended for feeding ornamental shrubs and perennial plants

Fertilizer Pure leaf for flower beds and rockeries is a concentrated mineral fertilizer containing all the elements necessary for plant nutrition in accessible forms
Preventive treatment of irises from diseases and pests
On withered and decaying foliage, fungal spores persist for a long time, and insect pests can be found on them, which have settled down for the winter. For the purpose of prevention, irises are sprayed:
- Fungicides: Tsineb - 45-50 g per bucket;
- Fundazol - 30–35 g per bucket;
- Bordeaux liquid (1%), etc.
- Malathion (Karbofos) - 60 g per 8 liters;
Preventive treatments with chemicals are carried out after the autumn pruning of irises.

For the purpose of prevention, irises are sprayed against pests and diseases.
Opponents of chemistry can pollinate plants with tobacco dust or wood ash powder. It will scare away unwanted tenants and infusion of onion peels (0.2 kg pour 10 liters of hot water for 4-5 days).
Photo gallery: preparations for the treatment of irises

Aktara drug - a strong systemic insecticide of fast action

Actellik is used for processing garden, agricultural and ornamental plants

Bordeaux mixture is a drug that is used against pests and many fungal diseases of plants.

Malathion - broad spectrum insecticide and acaricide
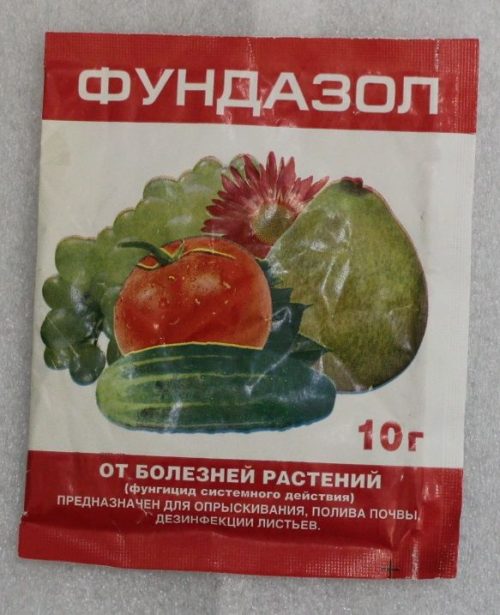
Fundazole is a broad-spectrum fungicide (antifungal agent) for plant protection

Tsineb - fungicide of protective action, prevents the development and spread of various diseases
Shelter of irises for the winter
Many varieties of this flower culture have sufficient frost resistance to successfully survive the cold outdoors without additional insulation. Therefore, in the southern regions with a mild climate for the winter, they are not sheltered. In the northern regions, where the climatic conditions are much more severe, it is imperative to protect the plants.
In warm climates, irises hibernate without shelter.
Quite often, during the growing season, the roots of irises are exposed and part of the rhizome is exposed. In the fall, you need to carefully examine all the plants and, if necessary, sprinkle the bare parts with garden soil. Young and recently transplanted specimens are subject to compulsory shelter.
Rhizomes that are above the ground need to be covered with earth
Protect iris beds by laying a mulch layer (5–20 cm) of the following materials:
- rotted manure or compost;
- peat crumb;
- mixtures of sand with earth (1: 1);
- sawdust.
It is imperative that the mulch is dry. I try not to use fallen leaves, hay or straw, which easily rot when wet and are a source of mold and various fungal diseases. Rhizomes, in contact with wet covering material, can rot and rot.

For the winter, irises are mulched with peat, sawdust, shavings, pieces of bark, etc.
To ensure better snow retention, flower beds with irises are covered with branches, spruce branches or even tops.
In the northernmost regions, irises are covered over mulch with a dense non-woven material or covered with boxes (boxes).
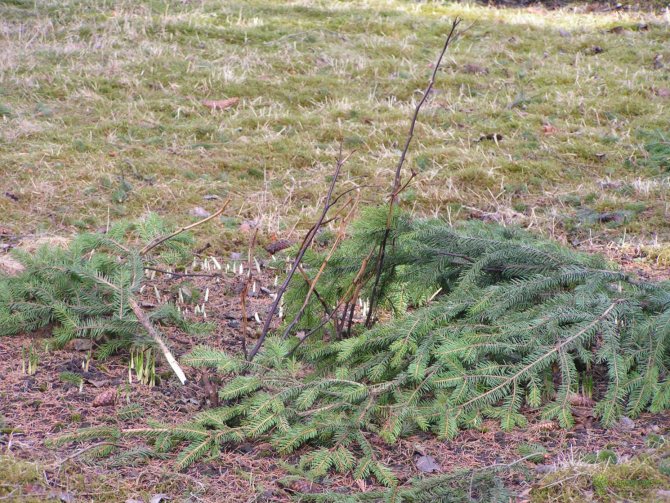
Additionally, irises are covered with spruce branches
Video: rules for a successful wintering of irises
Video: the intricacies of pre-winter iris preparation
Strong and competently prepared for wintering irises will easily survive the cold season, start growing early in spring and subsequently release powerful flower stalks with large buds.
Growing irises is not as difficult as it might seem to beginner growers. Moreover, it will not be difficult to properly prepare irises for winter, of course, if you know all the nuances of caring for a plant after flowering. Actually, this is why you are reading these lines, trying to find an answer to one of the following questions about growing irises:
- Do I need to cut the peduncles after flowering, why and how to do it?
- Do you need to prune the leaves after flowering?
- When and how to prune irises in the fall?
- Do they need shelter and what kind?
Answers to all these questions regarding how to properly care for irises after flowering, as well as in the fall while preparing the bushes for winter, will be given below.
What to do in an emergency
If the autumn transplant is still missed, the seedling must be cleared of soil, treated with pests and diseases, and dried. Prepared plants are wrapped in paper and placed in a box or box, covered with peat, shavings or ash and left for the winter in a cool and dry place.
Recommendation! Plant irises for the winter in a pot or bucket, lightly sprinkle it with earth, and transplant it into the garden in the spring.
Here are some tips on how to prepare irises for winter:
- Without damaging the roots, loosen the ground between the plants, spray the cut bushes with a pest repellent.
- The flower can be fed with products containing minerals with the addition of nitrogen. The plant treats manure very badly, its components freeze in the frost and ruin the flower. Two-year-old compost or humus works very well, as well as ash. Potassium will save the plant from temperature changes, and phosphorus will help the proper development of roots.
- In the presence of lush greenery and the absence of flowers, once every 2-3 years, the earth is fertilized with phosphorus flour.
- The place for transplanting irises is chosen dry, sunny and well-ventilated, but without drafts. The soil should not be very wet, the water should not stagnate, it is best to choose a place on a hill and perform good drainage.
Preparing irises for winter is not difficult, the main thing is to do everything on time. But even if we were late with the preparations, this is also not a big deal. In the suburbs, the Leningrad region, the Central region, Siberia and the Urals, irises are prepared for winter in the same way.
Fight disease
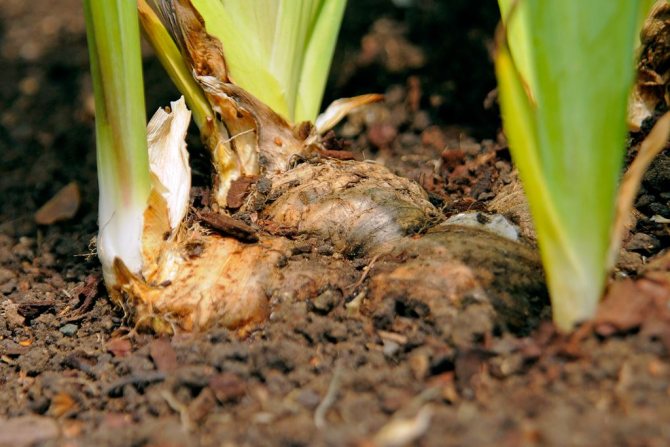
The iris root is located superficially, carefully examine it, especially in the places of old cuts and wounds. Rotten areas may appear under the dried scales. With a sharp knife, cut them to a healthy place and treat the wounds with brilliant green.
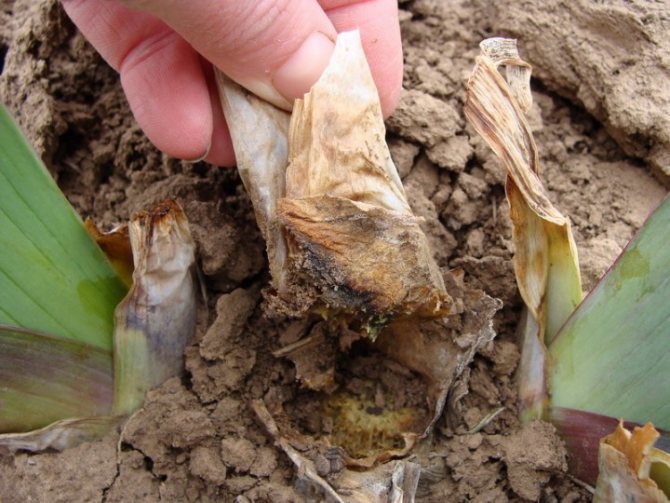
Rotten areas can be hidden under dry scales.
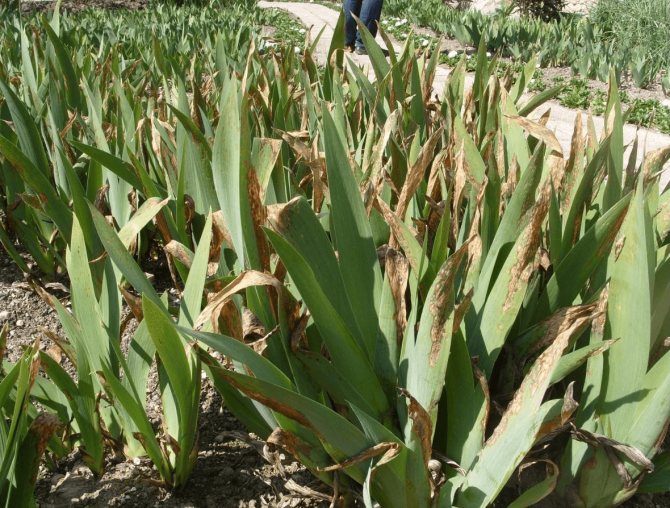
After examining the rhizome, pay attention to the leaves. Spots on them and shrunken tips in the middle of summer are signs of disease. Cut off affected leaves or shoots entirely close to the ground.
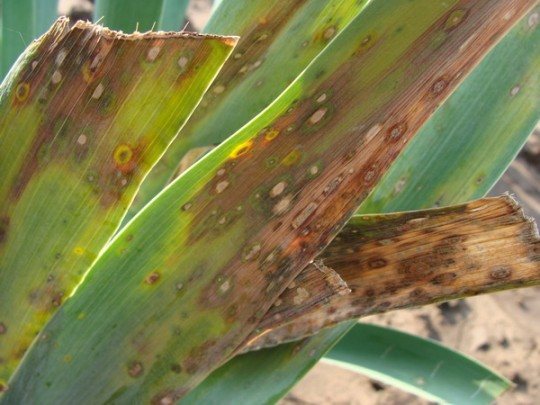
Such leaves must be cut off at the very ground and removed from the site.
Even if everything is fine on the flower bed, you did not find signs of rot and other fungal diseases, then still, for prevention, spray the bushes with any fungicide: Skor (2 ml per 10 l), Horus (2 g per 5-6 l), HOM (40 g per 10 l), etc. It will at least disinfect fresh wounds left after the removal of peduncles, and will not allow pathogenic fungi to settle and develop in them.
Pruning rules
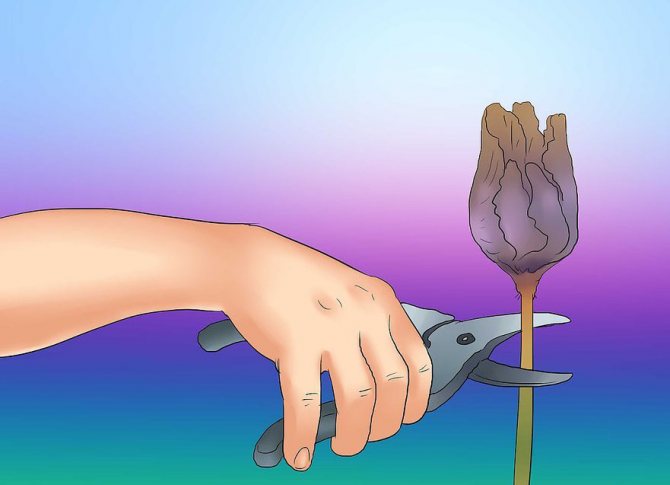
The first rule of cropping flowers is to use a sharp and sanitized tool, which can be done with sharpened garden shears. For the first time, they cut off a wilted bud and a small section of a peduncle (up to 5 cm), and the rest of it must be cut off after it has been lifted at a height of about two centimeters from the ground line.
Important! Pruning should be done only before the temperature drops. If the temperature is close to zero or minus values are already relevant, the plants should not be touched, otherwise successful wintering will become a problematic task for them.
There are some peculiarities in the case of cutting leaves, in preparing a culture for the winter season, but each type of culture has its own:
- for rhizome irises, cutting of withered and dried leaf plates is performed only when absolutely necessary;
- exotic species allow half the foliage to be removed, but only in late August or early September;
- in bulbous irises, before wintering, you can completely cut off the leaves, moreover, together with the stem (tops).
Prevention of diseases and pests
In autumn, plants are treated against infectious diseases and pests. This helps protect the irises from retaining pathogens and larvae.
Treatments for infection are carried out with fungicides:
- Fundazole (35 g / 10 L of water);
- Bordeaux liquid with a concentration of 1%;
- Qinebom (550 g / 10 l of water).
Protection against harmful insects is provided with insecticidal preparations:
- Karbofos (60 g / 8 l of water);
- Actellik (2 ml / 2 l of water);
- Aktara (10 g / 10 l of water).
In addition to chemicals, they use folk recipes that enhance the effect of insecticides and fungicides and have deterrent properties for pests - infusions with tobacco, wood ash, onion husks.
Spraying is carried out after pruning the iris bushes.
Features of growing bulbous irises
In order for the bushes to please with bright and lush inflorescences, you should properly care for the plant. Knowledge about the rules of watering, the timing of top dressing and other growing secrets will definitely come in handy.
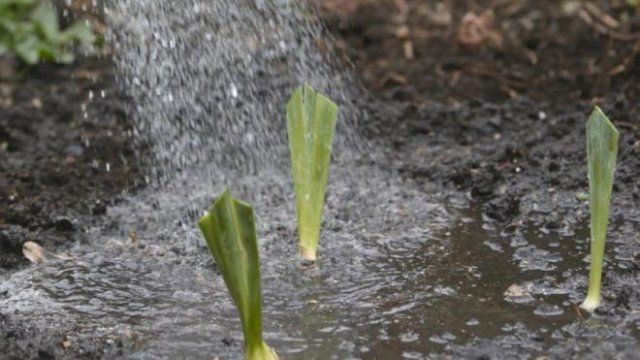
Watering
Bulbous irises need moderate watering. In dry, hot weather, as well as at the time of bud formation and active flowering, the soil is moistened more often. After the end of the flowering period, watering is completely stopped.
After irrigation, the soil should be loosened to prevent the formation of a dry crust. As a result, air and nutrients will better penetrate to the root branches of the plant.
Fertilization and feeding
Several dressings should be carried out over the entire season:
- The first fertilization is carried out immediately after the snow melts. Nitrogen fertilizers are introduced, which contribute to the development of greenery. The composition may contain a small amount of phosphorus and potassium.
- When buds are formed, it is recommended to add compositions based on potassium-phosphorus components. A small amount of nitrogen can be added.
- After the end of the flowering period, only potassium and phosphorus are added.
Fertilizers are last applied in the last days of September. Formulations with a high content of potassium and phosphorus are useful. They will allow you to form kidneys and fully relax in the winter.
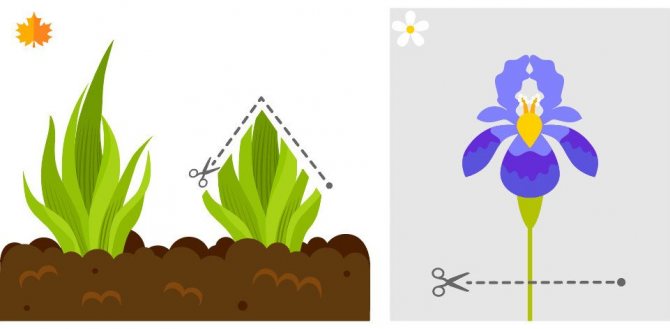
Trimming and shaping
When the flower begins to dry out, the peduncle is pruned. Do this carefully, trying not to damage the buds that have not yet opened.
Planting bulbous irises in spring and autumn: step by step instructions
So that planting flowers does not cause problems, you need to perform a number of sequential activities:
- on the dug up land plot, recesses are made (11 cm deep);
- river sand is poured onto the bottom of the holes made;
- the depth of the onion is approximately 5 cm;
- the gap between the bulbs is about 9 cm, but you can plant it closer;
- the bulbs are laid out in the holes and slightly pressed into the ground;
- covered with a layer of fertile soil;
- watered with a little water.
After planting, it is advisable to mulch with peat or compost.
Preparing the bulbs for planting
Plant bulbs must be disinfected before planting. For this purpose, the bulbs are immersed in a composition based on potassium permanganate or drugs such as Fundazol, Benlat for 23 minutes. Then the bulbs must be dried thoroughly.
How to prepare the soil
The area where the flowers are supposed to be planted must receive sunlight without obstacles. The place must be protected from drafts. If groundwater passes close, then a hill is made.
For growing bulbous flowers, choose a fertile, light soil with a neutral level of acidity, good water and air permeability. Previously, the land plot is dug up and organic components are introduced (except for fresh manure).
Planting irises
Processed bulbs should be planted in a pre-prepared area:
- At a distance of 11 cm, pits are made with a depth of 14 cm.
- A layer of river sand is covered.
- The onion is deepened by 23 mm.
- There is a layer of sand again.
- At the last stage, the hole is closed with ordinary earth.
If the bulbs have sprouted, then it is better to make not holes, but a trench 18 cm deep.This will allow the roots to appear correctly and without damage.
Leaving immediately after planting
Flower care is simple and does not take much time. After planting, the soil should not be moistened, especially if the weather is humid and there is dew in the morning.If other flowers grow nearby that need frequent watering, then the irises are covered with polyethylene.
It is advisable to add mineral nutrients 8 days before flowering.
Pruning leaves
On this issue, opinions again differ. Some gardeners believe that the leaves need to be shortened immediately after flowering, others in the fall, and still others treat irises as weeds, do not prune them at all, and they bloom beautifully every year. If you listen to the opinion of an expert, then others do the right thing.
You don't pick off the leaves from the trees in summer, do you? Why? That's right, photosynthesis, chlorophyll. All plants receive solar energy through foliage. We prune the iris fan in the summer when we propagate and transplant the flower. Since the root system is disturbed and reduced - for balance and we reduce the fan of leaves, all the same, if you do not cut it off, the tips will dry out. If the plant has not been transplanted, the leaves are not cut off. You can cut the leaves of the iris just before the very frosts, and that is not necessary, and in the early spring to collect the already dry leaves.
O. Kitsenko, iris grower
Newspaper "SADOVOD" No. 3, 2012
Such a cut at an angle is called a fan, it is done so that the drops of moisture on the wounds do not linger, but quickly flow down
Shelter before frost
Often from novice gardeners you can hear the question whether it is necessary to cover the irises for the winter. Let's figure out how to properly cover irises in order to achieve abundant flowering next year.
The technology for sheltering irises for the winter depends on the varietal characteristics of the culture being grown. Most of the domestic varieties are adapted to the harsh and sometimes very changeable climate of Russia. Siberian, yellow, bristly, marsh and eastern irises winter best. The most delicate, fragile and unstable are tall varieties of bearded iris, Dutch, Spanish and Japanese bulbous crops. Nameless, comb and lake irises require more careful shelter for the winter, as they are characterized by weak indicators of frost resistance.
Most of the domestically bred irises do an excellent job with heavy snowfalls and harsh winters. The period of climate change or a sharp warming in the middle of winter is considered more dangerous. Young seedlings and plants transplanted in summer or autumn must be covered for the winter. Flowers weakened after illness or insect infestations also need additional insulation. Old irises, in which the rhizomes have grown so much that they can be seen almost on the very surface of the earth, need to be mulched with peat, dry sand, tree bark, spruce twigs and fallen leaves. For mulching flowering crops, you should take material that does not absorb moisture.
According to the reviews of experienced gardeners, it keeps heat well, does not absorb excess moisture and promotes air circulation, the seared oak foliage. The mulch layer should be no more than 10 cm. Otherwise, the root system will rot.
Iris varieties that are not resistant to frost and sudden temperature changes are covered with pine spruce branches or any non-woven material. Make sure that moisture does not accumulate inside, and the plants can "breathe".
Professional advice
There is an opinion among flower growers that manure is the best fertilizer for most ornamental crops. However, it is absolutely not suitable for irises, since it can greatly inhibit growth and provoke rotting of the root system. After fertilization with manure, irises get sick, dry and throw off the foliage, and flowering becomes short and rare. Such feeding attracts various pests, therefore it is not recommended to use it. Experienced gardeners give the following tips for fertilizing irises:
- Use organic substances with great care, diluting them with water in a ratio of 1:20.
- It is preferable to apply dry dressing, ensuring the flowers are thoroughly watered.
- When feeding with compost from foliage, scatter it around the roots, followed by loosening the soil.
If flowering is delayed, but there is abundant growth of green mass, the problem may be in the excessive acidification of the garden area. In this case, it is necessary in the spring, even before flowering, to feed the irises with phosphate rock, which will increase the pH of the soil to an optimal state.
Pruning features
Irises, which are affectionately known by the people as irises or cockerels, attract attention with a variety of shapes and colors. In nature, there are more than 700 varieties of this decorative culture. Irises quickly and easily adapt to different climatic zones if they are properly cared for.
Autumn care for a flowering crop includes moisture recharge irrigation. Moistening the soil is necessary if the weather is dry and hot. With an abundance of precipitation in the fall, it is recommended to abandon soil moisture. Excess moisture in the soil can lead to rotting of the rhizome of the garden culture.
An important role in the care of irises is played by pruning the shrub. Pruning means removing a wilted or withered bud from a flowering plant. Failure to comply with the technology and timing of this procedure can lead to a weakening of the flower, including a decrease in its winter hardiness.
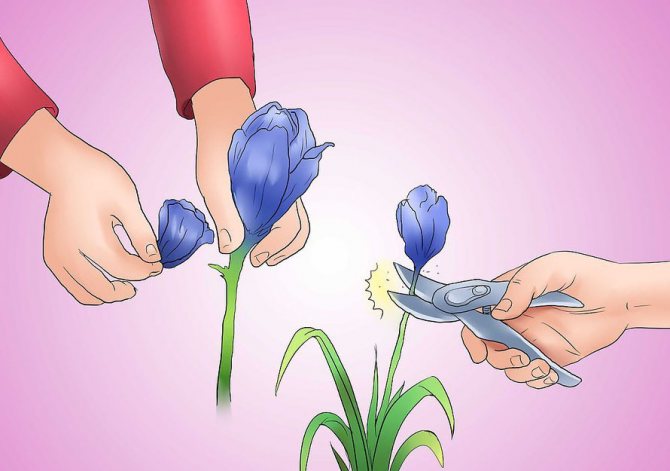
Pruning of irises is carried out at the end of the peak flowering. This procedure consists of several stages:
- At the end of flowering, you need to pinch off with your fingers or cut off the upper part of the flower, which is located immediately behind the bud, with a garden pruner. Please note that you should remove not only the wilting / drying part of the peduncle, but also the green receptacle. Improper pruning will result in a new ovule replacing the green receptacle.
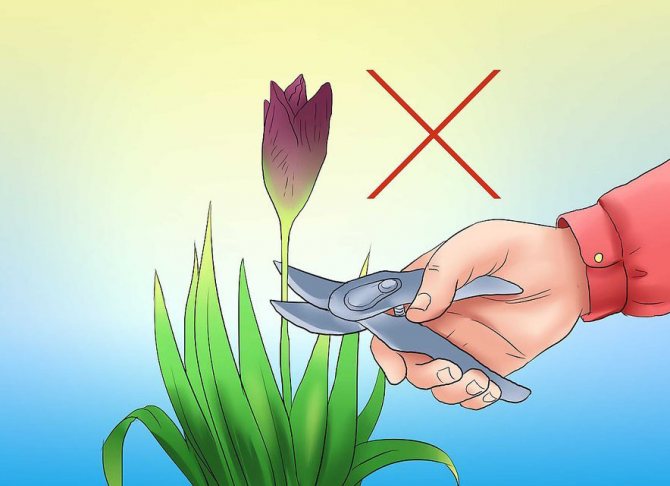
- Check the bud opening every day. Flowers that have not yet had time to fully open or are in the active stage of flowering are not removed.
- After flowering, all flower stems must be cut off. The stem is cut almost at the very base - at a distance of 2–2.5 cm from the rhizome. Do not remove peduncles and stems from plants that bloom several times per season. For example, a bearded iris throws buds twice.
- Iris uses the leaves to fuel the root system, so don't rush to prune them. Dried and withered leaf tips are cut off in mid-autumn.
Pruning and preparing irises for winter depends on the varietal characteristics of the plant and the climate of the growing region.
Video: "Preparing the iris for winter"
In this video, you will learn how to prepare flowering crops for the upcoming frost.
Follow-up care
After 10-14 days after pruning the peduncles, the garden plants are fed. According to experienced flower growers, iris does not tolerate organic soil fertilization. Therefore, it is better to use superphosphates and any potassium salts to feed this ornamental culture. If winter is expected to be early, long and very harsh, it is best to feed ornamental crops before pruning. Plants take time to heal and recover.
Landmark for geography
The approach to warming flowering garden plants depends on the climatic characteristics of the growing region. The southern strip of Russia, where winters are mild and warm, is considered the most favorable region for the cultivation of delicate and fragile ornamental plants. Irises growing in the Krasnodar Territory, in the Kuban and in the Crimea are not insulated for the winter. For successful wintering, it is recommended to mulch the soil with peat, dry sand and fallen leaves.
Despite the absence of severe frosts in winter, the Moscow region is characterized by frequent temperature changes. To protect flowering plants, protective frame structures are erected in the garden. As for the wintering of irises in the Urals and in the Siberian region, it is worth taking care of more reliable warming of plants.Flowers are mulched, covered with a "breathing" non-woven cloth and pine branches. With the arrival of spring, do not rush to open the irises.
Planting and transplanting
Autumn planting and transplanting of iris helps to improve the development and flowering of the culture. When choosing a planting site, it is recommended to take a closer look at the areas of the garden that are open to the sun. This flower culture is afraid of drafts and excess moisture.
You need to repot the bulbs in dry and sunny weather. If autumn turned out to be cold and damp, it is better not to risk it and postpone planting until spring. The bulbs planted in open ground must have time to take root and adapt to new growing conditions before the first frost. In the Leningrad region and in the regions of central Russia, one should be guided by the weather forecast, since there are often sudden changes in air temperature.
How to properly feed irises
If the irises have not been sheltered for the winter, fertilizer granules are scattered over the snow cover before it melts. Top dressing in dry soil is not practiced as this can burn the root system. Spread the compost just under the foliage in a thin layer. For even distribution of nutrients, irises are watered. Wood ash is a good top dressing for irises to bloom in spring. Three tablespoons of ash per bush is enough to significantly reduce the likelihood of diseases and stabilize the acidity of the soil.
When to cut
Usually, the removal or shortening of individual parts of the irises is performed before transplanting or reproducing the flower, with almost complete cutting of the leaf plates (only 1/3 of their length remains). Such a measure helps to retain water in the roots and promotes better plant survival in a new place, but if possible, it is better to prune in the evening hours, when the sun is no longer baking so much.
You may find it helpful to learn how to plant irises in summer.
It is customary to do pruning of iris leaves 2-3 days before the intended transplant, but touching them during the flowering period is strongly discouraged. It will be possible to remove all unnecessary parts no earlier than 21 days after the iris recovers.
Tips and tricks from experienced florists and gardeners
This is a very common plant with many species, so each grower has his own secrets in caring for him. Here are some tips for flower care:
- So that after flowering the leaves do not turn yellow, the planting material is pre-soaked in copper sulfate. This procedure keeps the plant green until the very frost;
- Only purchased varieties are planted during the period of their acquisition, and already existing bushes are planted in early August. In this case, the planting material is dried for a couple of days and embedded in the ground with a rhizome to the south;
- In order to multiply the desired variety as soon as possible, they take the rhizome and cut it in two places to a depth of about 1 cm. Then they dry it a little and plant it. Such a plant produces about 6-7 children. It is important to prepare the planting site, fertilize and moisturize it well. The babies are separated from the main bush with a small part of the mother liquor - this way the young plants will have more nutrients.
By following these recommendations, you can further facilitate plant care. A healthy plant is a beautiful decoration for a garden and a summer cottage!