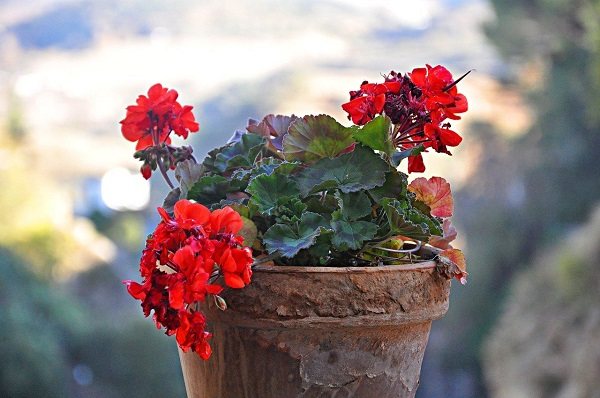

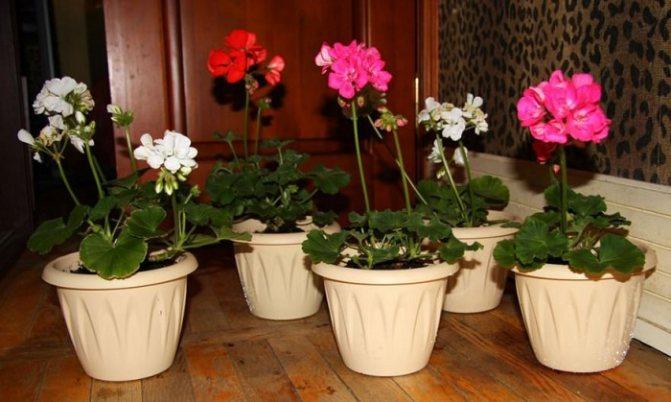
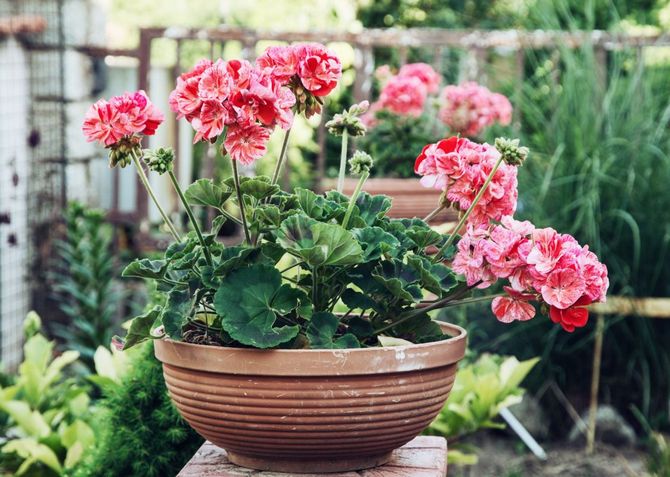
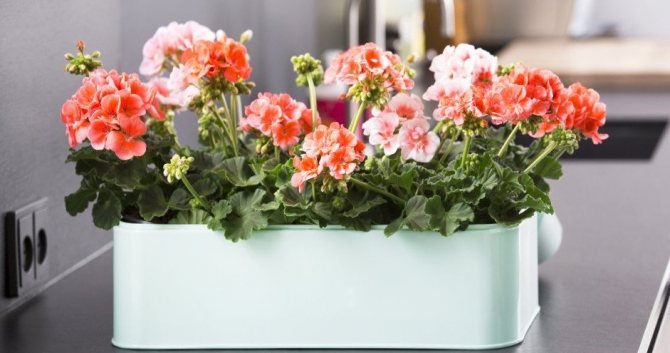
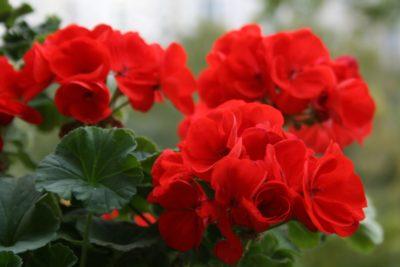
In summer, geraniums pleases with abundant flowering in the garden. Pelargonium, or geranium, is native to South America. The flower does not tolerate low temperatures, so it is taken into the house for the winter. What are the subtleties of transplanting geraniums in the fall from the garden, we will tell in this article.
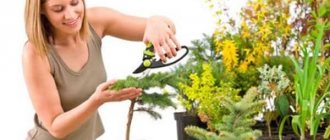
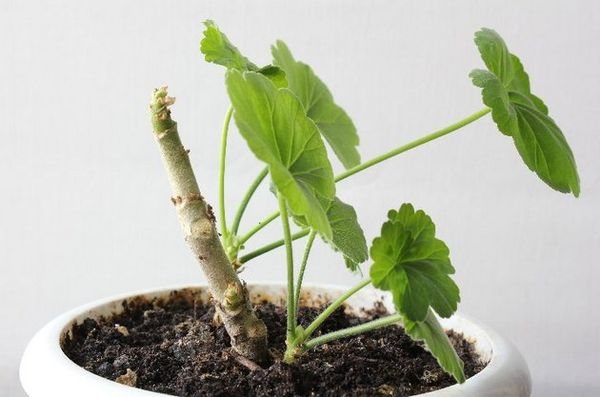
Pelargonium should be transplanted before the thermometer drops below 10C. For central Russia at the end of August - mid-September. Before transplanting, the plant must be prepared. Pedicels and dry leaves are cut off. Young shoots are suitable for transplanting, so it is advisable to remove the old part of the plant. The pot is chosen such that the root system is free, but do not use too large a container, otherwise the geranium will not bloom.
If you plan to plant indoor geranium outside during the warm season, then you need to know when and how best to transplant the geranium back from the soil into the pot.
Features of geranium transplant
Pelargonium should be transplanted before the thermometer drops below 100C. For central Russia at the end of August - mid-September. Before transplanting, the plant must be prepared. Pedicels and dry leaves are cut off. Young shoots are suitable for transplanting, so it is advisable to remove the old part of the plant. The pot is chosen such that the root system is free, but do not use too large a container, otherwise the geranium will not bloom.
Soil preparation for pelargonium
You can buy soil for pelargonium ready-made or mix humus for 2 hours, sand for 1 hour and peat for 1 hour. The root system of a plant can become moldy if you take heavy and stale soil. The plant loves nutritious and loose soil. After transplanting, the earth is not rammed; once a month, the top layer is additionally loosened. Geraniums need a high sod layer (at least 2 cm).
Pelargonium bait after transplant
The plant accepts fertilizing with mineral compositions well. At the end of winter, they begin to feed with potash and phosphorus compounds. On the other hand, nitrogenous ones are reduced. This promotes abundant flowering in spring. Top dressing is carried out once a month (in winter and autumn) and once a week (from early spring to late summer). Two weeks before transplanting into the house, the bait is stopped.
Lighting and temperature
Geranium should overwinter at a temperature of 8–10 ° C, but it tolerates an ordinary room one well. Do not put a flower on the south windows. Although the plant loves light, the afternoon sun is unacceptable. Twilight will have a detrimental effect on flowering. In the spring, geraniums can be transferred to the loggia before disembarking in the garden.
Humidity and watering
Geranium is moisture-loving. Watering abundantly should be done daily. Water for irrigation should be at room temperature.
The humidity in the room is allowed at least 20%. In apartments with a central heating system, the leaves are treated with a spray bottle every two days.
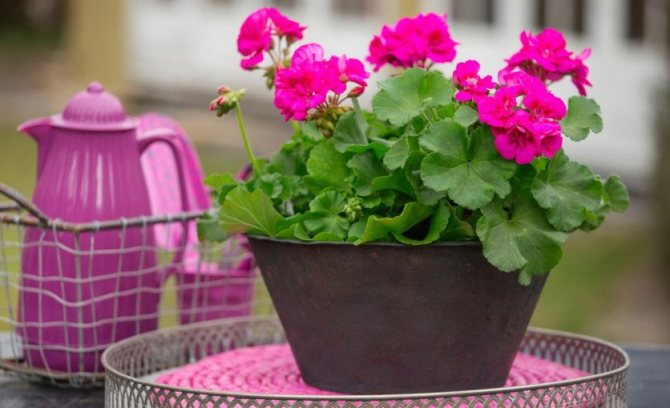
Geranium in the garden
In the open air, this delicate plant feels great. Of course, at first after transplanting into the ground, it will "hurt" a little - some of its leaves may turn yellow and fall off. But then it will acclimatize and please with abundant flowering. Geranium is very fond of the open air.
Geranium bushes grow very well outdoors, which is impossible in pots. Geranium tolerates any temperature well, but prefers not too hot summers and partial shade. It is better to plant geraniums in places where there is no stagnant water, otherwise it can lead to the development of dangerous diseases, for example, "black leg".

On the street, it can grow before the onset of cold weather. Until the temperature drops to + 2-5 ° C, you don't have to worry about geraniums. But then it needs to be transplanted into pots. You can hibernate her by cutting and placing it in a cool room, or simply putting it in the house. Upon returning to the house, the geranium will be very ill again.
In general, geranium does not tolerate transplants, this should be done in extreme cases - if the pot is small or you want to propagate it. And to the question of whether it is possible to transplant flowering geraniums, the answer is rather negative. This can lead, if not to the complete cessation of flowering, then to its significant decrease.
Possible mistakes
The Pelargonium plant is unfriendly, but if you make mistakes when leaving, it will get sick and may die. Let's take a look at some of the most common mistakes:
- Overflowing. The leaves are willing and falling off. It is necessary to let the soil in the pot dry out, then loosen the top layer.
- The temperature is too low. The edges of the leaves turn red. Delivery of the flower to a warmer room.
- The soil is heavy. The leaf desires and falls, the root system began to rot. It is necessary to change the soil.
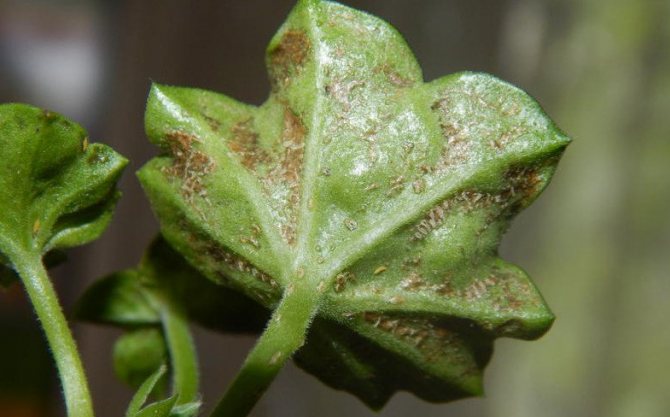
- The plant is infected with microorganisms. Gray spots appear on the leaves, the trunk dries. It is necessary to work with fungicides, change or sterilize the soil, remove the affected leaves.

Transplanting geraniums from a garden to a pot in the fall is a simple process. The most important thing is to follow the exact rules of the recommendation.


Indications
If you nevertheless decide to transplant during the flowering period, there must be objective reasons for this:
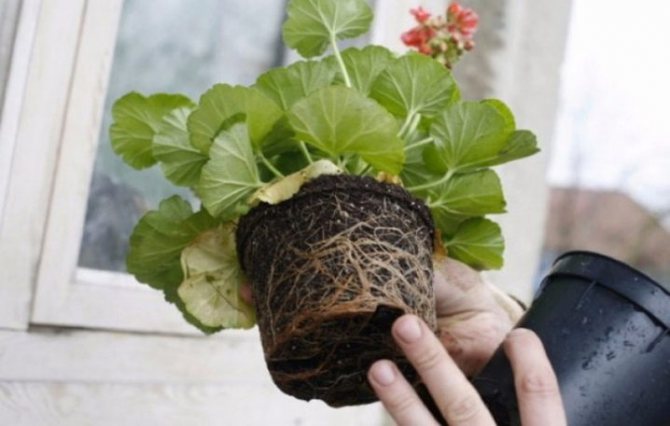
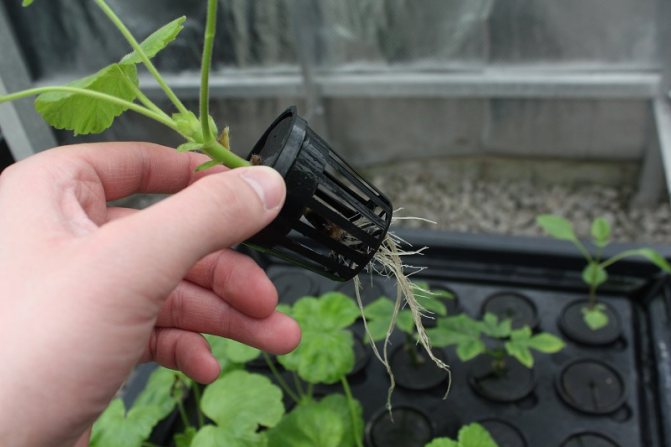
- The roots took up the whole pot, there was practically no soil left. You can see the roots sticking out of the holes in the bottom of the container. In this case, the plant with a lump is easily removed.
- For some reason, the flower was flooded with water, and this threatens its life.
- The flower does not grow, blooms poorly, has a weakened appearance, few leaves in the lower part of the stem, despite care and feeding.
- The plant has undergone some kind of disease that infects the soil.
A common mistake of novice florists is transplanting into too large a container. Until the plant has mastered this space, it will not begin to bloom fully. It is worth replanting only when the roots have occupied the entire volume of the earthen coma... In a container with a diameter of a couple of centimeters larger.
When can and should you transplant?
All indoor flowers need to be transplanted periodically, when the plant grows out of the previous pot, and the soil loses its beneficial properties. In the case of geraniums, this operation must be carried out every 2-3 years. But there are always times when the transplant needs to be performed off-schedule:
- if the roots become cramped in the pot (the roots are visible on the surface of the substrate and in the drainage holes);
- if the plant turns yellow and withers, the earth does not dry out completely and there is a suspicion of root rot;
- if, despite proper care, geranium does not grow and does not bloom. One of the possible reasons is unsuitable soil (which soil is suitable for indoor geraniums?);
- if at the beginning of autumn it is necessary to transfer the plant from open ground back to the room.
Is it allowed to do this with a flowering plant?
Transplanting the plant during the flowering period is strongly discouraged, because he simply does not have the strength to successfully cope with such stress. it is necessary to wait until the geranium has faded, otherwise, with a high probability, the buds will fall off, the leaves will begin to turn yellow and the flower may even die.
If a transplant is needed urgently and there is no way to wait for the end of flowering, it must be done very carefully, by transshipment. It is better to cut off all peduncles beforehand. This will allow the plant to focus on restoring the root system without wasting energy on further flowering and seed formation.
Briefly about the plant
ATTENTION: The name of this plant comes from the Greek language, in translation - crane. It came from the similarity of geranium fruits with the beak of this bird. The plant received similar names in other languages, for example, the crane in Russia. The plant is very diverse, but we are familiar with it as an indoor or garden flower.
Geranium acquired a beautiful appearance through the efforts of the English breeder George Tradescan... Even then, its healing properties were known: an ointment with geranium juice got rid of lice, and nose drops helped to cope with a cold. Even Peter the Great himself cured an ingrown nail, which caused him a lot of suffering, with the help of this plant.
For a long time, geranium has been pleasing with its lush flowering flower growers. It is quite undemanding to care for (for more details on how to care for geraniums in order to avoid various problems in growing, we wrote here). In addition, it cleans the air, thanks to the special substances phytoncides.
Suitable periods
The best time to transplant geraniums is the end of winter and the beginning of spring. (approximately February to April). A plant emerging from a dormant state will best survive this traumatic operation.
Is it permissible to carry out the procedure in the summer?
Can you transplant in the summer? During the period of active growth, you can safely carry out the procedure, the main thing is that it does not coincide with the flowering stage.
What about autumn?
With the end of the warm season, geraniums grown in the open field must be transferred back to the house (read about growing geraniums in the open field here). In this case, a transplant is simply necessary and the plant will transfer it without much loss (if the procedure is performed according to all the rules).
Can I do this after purchase?
Can you transplant after purchase? As a person familiar with store flowers firsthand, I can tell you unequivocally - no. The plant was transplanted in a nursery, then it survived, possibly, several transports, a stay at transshipment bases and warehouses. The penultimate step was the store where you bought it. And finally, your home.
Geraniums, usually also blooming, have received a huge dose of stress. Transplanting a flower immediately after purchase would be an unforgivable mistake... A period of rest is required, during which geraniums adapt to new conditions.
Very often, flowers bought in a store die after flowering. During this period, a very careful attitude towards them is required: you need to monitor the temperature, humidity of the air and soil, protect to the maximum from any external influences.
Stages
Pot selection
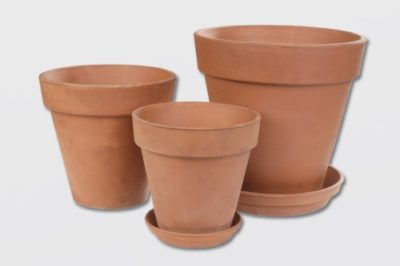
A large volume of geranium substrate is not needed, for the first planting, a pot 10-12 cm in diameter is quite suitable. With each subsequent transplant, the container must be selected 2-3 cm larger than the previous one. A pot that significantly exceeds the size of the root system will sooner or later lead to waterlogging of the soil, which can cause the death of the plant.
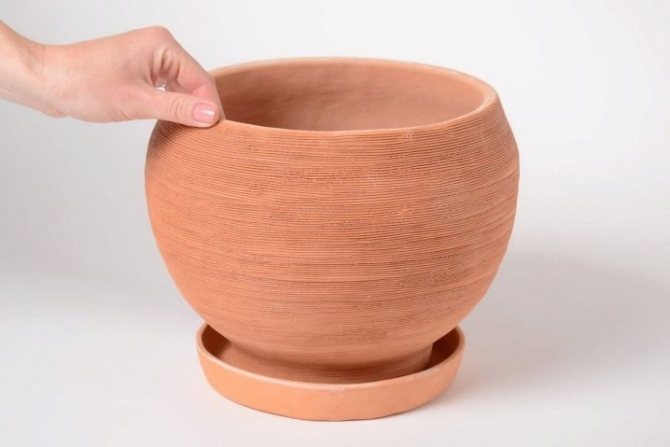
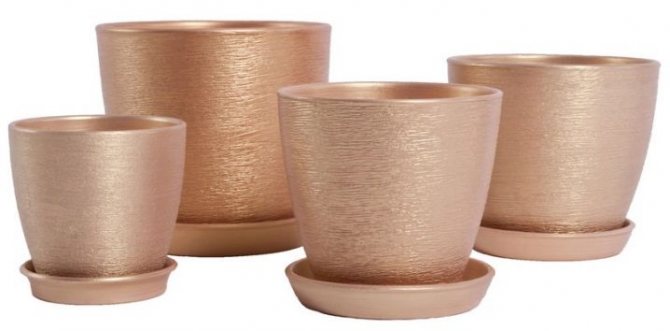
In a ceramic pot, geranium will feel better than in a plastic one. Clay is able to remove excess moisture and salts from the soil, which will best affect the growth of the plant.
Substrate making
Geranium is one of the most unpretentious plants when it comes to the quality of the soil, it can grow in both ordinary garden soil and in a universal substrate for flowering plants. There are also special mixtures, here are several compositions:
- humus, sod land, river sand in a ratio of 2: 2: 1;
- garden soil, peat, sand in equal proportions;
- turf land, leaf land, peat, sand in equal proportions.
Before transplanting a plant into a new substrate, it must be sterilized. This will help avoid various diseases and pests.
Plant preparation
There are no specific ways to facilitate geranium transplantation. The main thing is to choose the right time (you cannot transplant in winter and at the time of flowering). On the eve, the plant must be watered abundantly so that the substrate is completely saturated with moisture - this will help to more easily remove the flower from the pot. You can also use growth stimulants as an additional guarantee that the geranium will recover successfully.
Tank size
In addition to the questions listed above, many will have a question about what size of container is needed for geranium?
First of all, the size and shape of the container depends onwhat kind is your flower, since not all roots, flowers, stems are the same size. But, for example, geraniums usually grow lush and beautiful in small pots.
If you have decided on the size, then now you are faced with the question of what should the container be made of? Gardening experts advise purchasing containers made of natural natural materials... Such, for example, is fired clay. Plastic containers can also be used, but be aware that the soil in plastic pots will take longer to dry than in clay pots. And this, as we know, leads to rotting of the plant roots.
A diameter for a pot in which one bush, from 12 to 14 cm, and a height from 10 to 15 cm, will be considered ideal. You can summarize: the smaller in volume we buy a pot, the better our small plant will "sit" in it and the more and thicker the flowers will bloom.
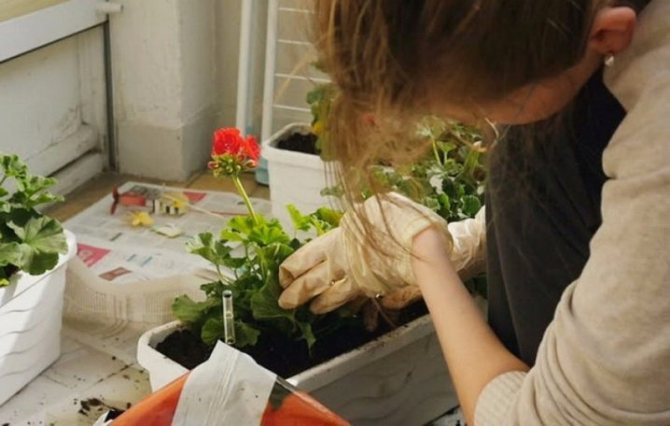
Step-by-step instructions for transplanting
We will tell you how to properly transplant geraniums at home and on the street.
At home
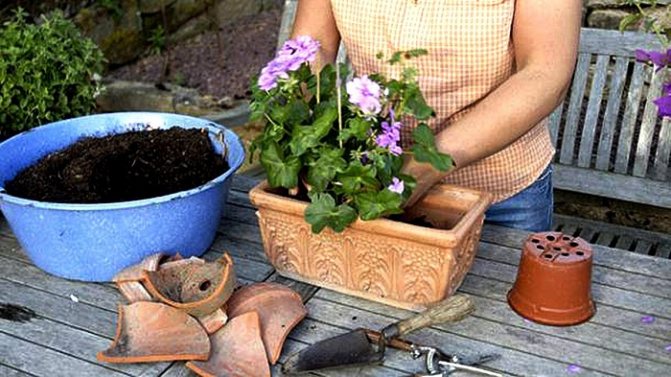
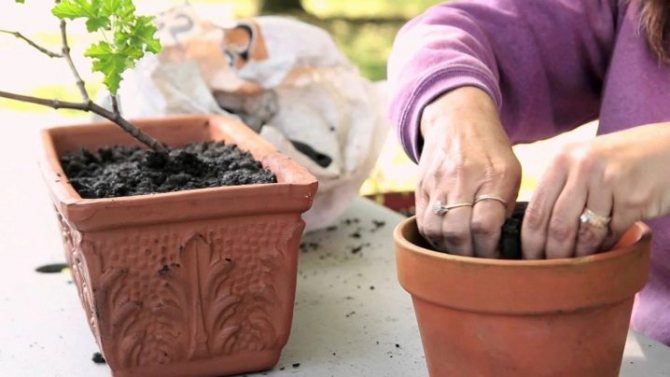
Before proceeding with the transplant, it is necessary to prepare a new pot, soil, drainage, a sharp knife or scissors, and water for irrigation. Further, the procedure is simple:
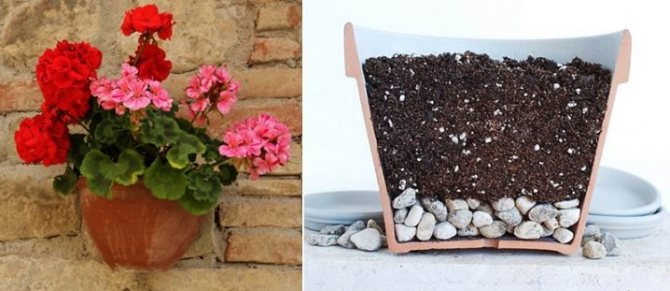
Place drainage (for example, expanded clay or broken brick) on the bottom of the new pot.- Cover the drainage layer with earth.
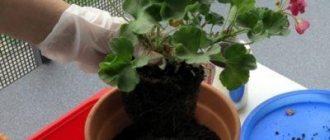
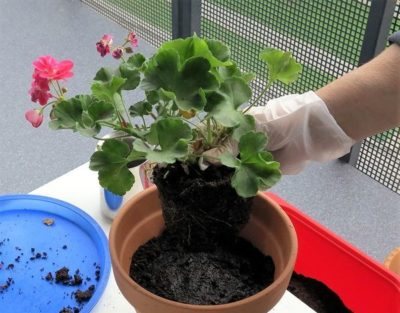
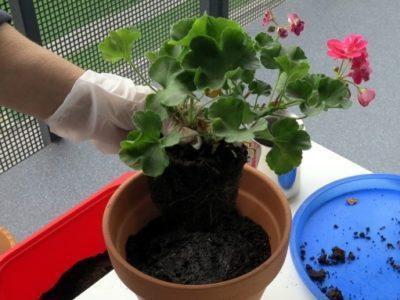
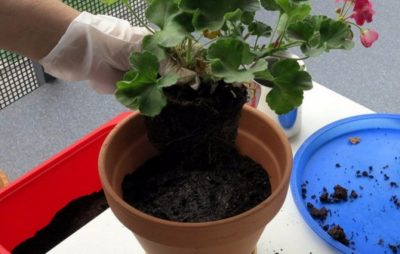
- Remove the plant from the old pot. To do this, it is best to firmly take the geranium by the base, turn it over, and then gently pull the pot up.
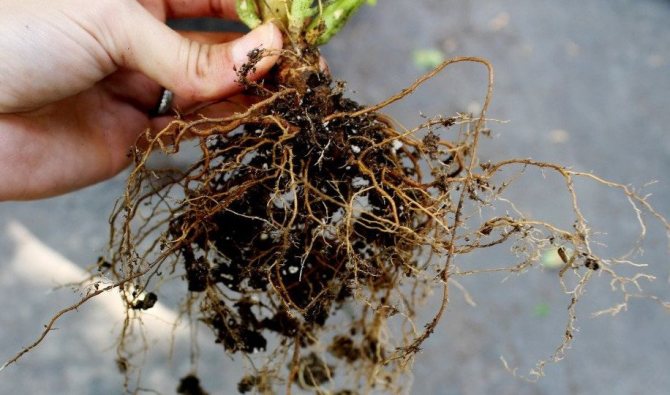
- Examine the root system carefully and use a knife or scissors to remove any dry or rotten areas. If the damage is not visible, it is better not to disturb the earthen lump.
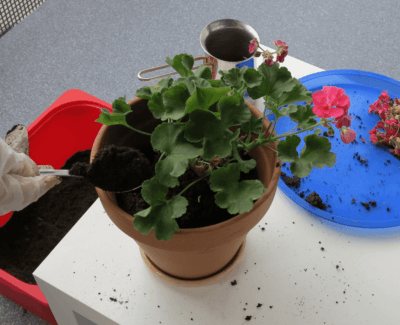
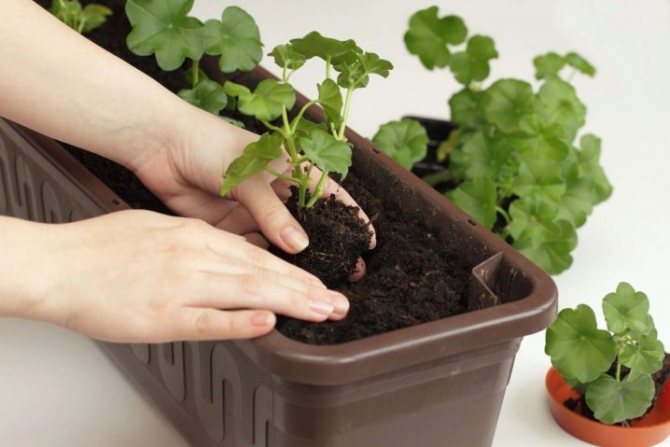
- Place the geraniums in the center of a new pot and gently sprinkle with earth in a circle without tamping.
- Water abundantly so that the soil is completely saturated with water.
In open ground
For transplanting a flower to the street, it is very important to choose a moment when the temperature stabilizes and frosts will not threaten the plant. The very end of spring or the beginning of summer is best suited.
The disembarkation process proceeds as follows:
- The soil must be thoroughly loosened (approximately 35 cm deep).
- Dig a hole the size of which can fully accommodate the root system of the planted geranium.
- Put a layer of soil mixture on the bottom of the pit (purchased soil or one of the options described above is suitable).
- Carefully remove the plant from the pot so that the roots are not damaged and place in the center of the hole.
- Next, you need to sprinkle it in a circle with earth, so that the roots are completely closed.
- Sprinkle with water in moderation.
Geranium planted in the garden can delight with its flowering until autumn, some species are even able to successfully winter, but it is better to transfer the plant back to the apartment with the onset of a cold snap. Read about the intricacies of care for geraniums in winter here.
We offer you to watch a video about transplanting geraniums into open ground:

How to transplant geraniums into another pot
If you have already transplanted indoor geranium from one pot to another, then transplanting it from the street is no different from this procedure, which takes place in several stages:
- we prepare a container, soil and water for transplanting (it must be settled and at room temperature);
- the container for one geranium bush should be small - it is a pot 10‒15 cm high with a diameter of 15 cm. It is in small pots that the most intense flowering of the plant is noted;
- the soil can be purchased at a flower shop - this is an earthen mixture for growing geraniums, or prepared independently, consisting of 8 parts of sod land, 2 parts of humus and 1 part of sand;
- put drainage on the bottom of the pot, which can be crushed brick, expanded clay or river pebbles;
- we take a geranium bush, previously extracted from open ground, or from another pot, and examine the roots - we cut off those that are rotten or affected by pests;
- we lower the plant into a pot and pour in the substrate. We carefully compact the earth surrounding the roots, and fill up all the voids between the roots and the walls of the pot. Moreover, the ground for laying in a pot must be pre-moistened;
- water the transplanted plant and put it in a dark place for a week;
- after seven days, we place the flower in a well-lit place, where it should be constantly;
- 2 months after transplanting, you can feed the plant.
Many are interested in how often to transplant geraniums? Usually, the first transplant should be carried out in the spring 2 years after planting a young plant, and then as needed, based on the reasons mentioned above, but not more often than once a year.
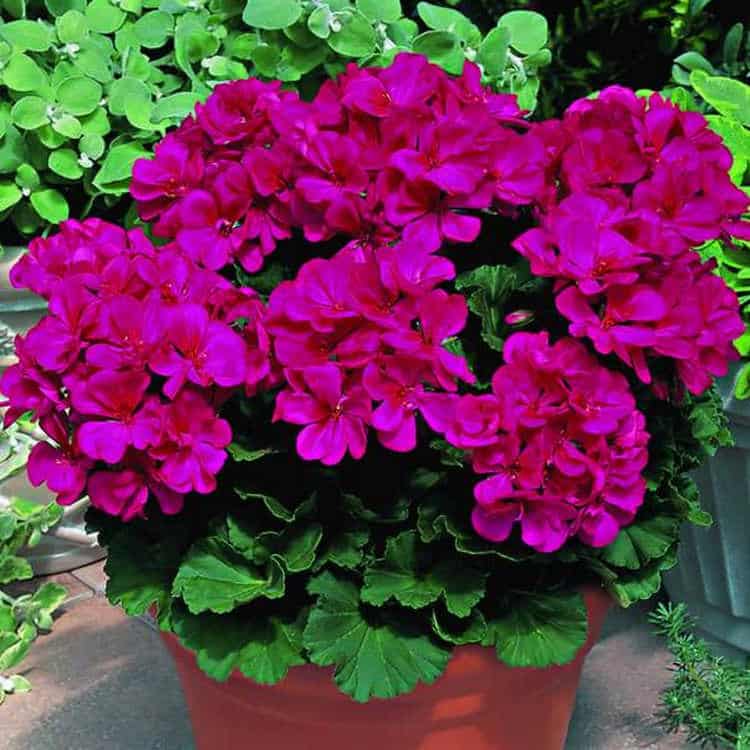
For many decades, geranium has been such a frequent inhabitant of Soviet window sills that many have managed to set their teeth on edge. But neglect of this plant is not entirely justified, because today's geraniums only vaguely resemble those stunted bushes that can still be found in some institutions. Lush greenery, a huge number of shades of petals and patterns on the leaves have successfully won their small army of fans, which only grows from year to year.
Geranium is a completely unpretentious houseplant. One of the few things that can significantly harm her is a transplant. In the article, we will tell you step by step when and how you can transplant geraniums at home after buying it or in other situations, show a photo of the plant after transplanting.
How to return a flower from the street home?
It is worth replanting geraniums back to the pot in early September. before the onset of the first cold weather (read more about growing geraniums at home in this material).
The procedure in this case will be as follows:
- Water abundantly so that the entire root system is saturated with moisture.
- Pour the drainage layer and a small amount of the substrate into the prepared pot.
- Gently dig up the plant along with the clod of earth surrounding the roots.
- Remove excess soil and carefully examine the root system. If the roots are too wide, they can be pruned, as well as all dry and damaged areas.
- Place the geraniums with the rest of the earth in a pot and sprinkle with earth in a circle. There should be at least 1 cm to the top of the pot.
- Water in moderation so that the soil is saturated with moisture.
If something went wrong
Suddenly, after the flower was in a new place, the leaves wither, the flowers fall off, and the plant generally withers. What to do? Most likely, these are the consequences of stress. Either your pet was too sensitive, or you did something wrong. Therefore, you need to give the plant time to recover. but geraniums should be carefully examined for infection with diseases and pests.
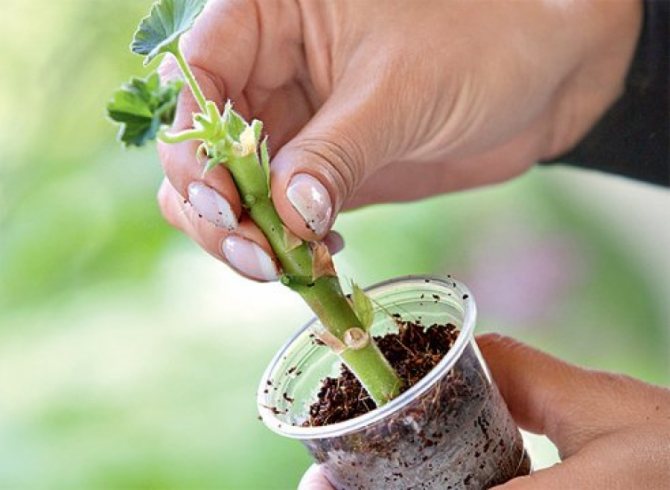
TIP: In any case, you can play it safe and root a geranium stalk. It is best to do this during the transplant.Cuttings root easily in light, moist soil, but you can put them in water before roots appear. Then you will have a healthy young geranium plant in stock.
Find out more nuances about why geraniums do not bloom, as well as what to do in this case, in our article.
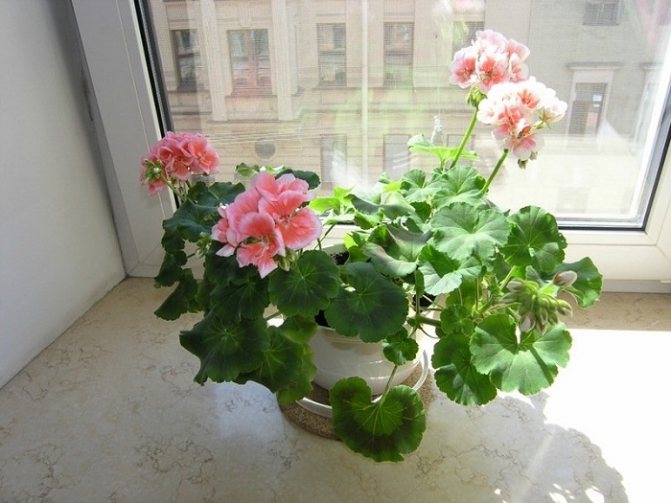
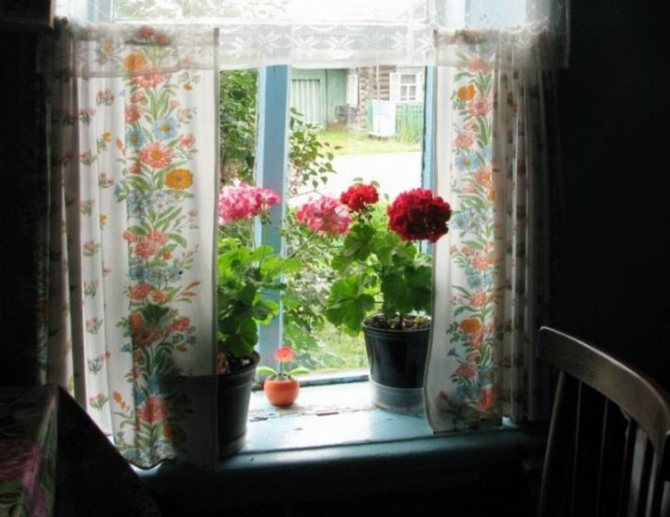
Photo
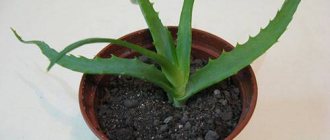
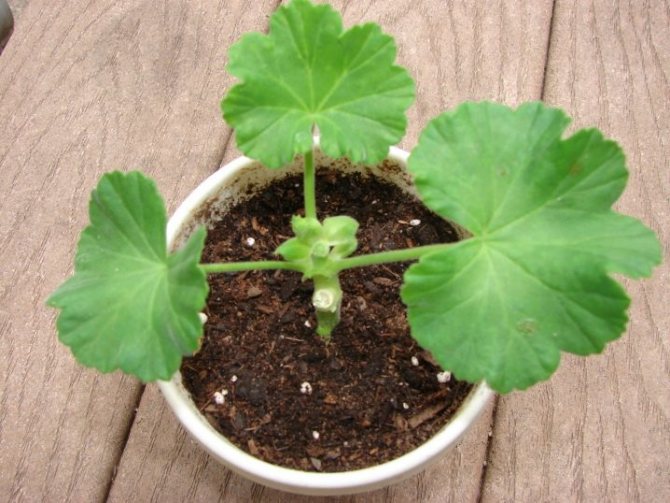
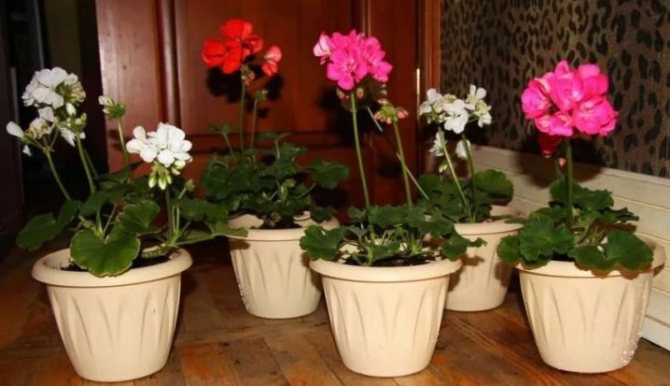
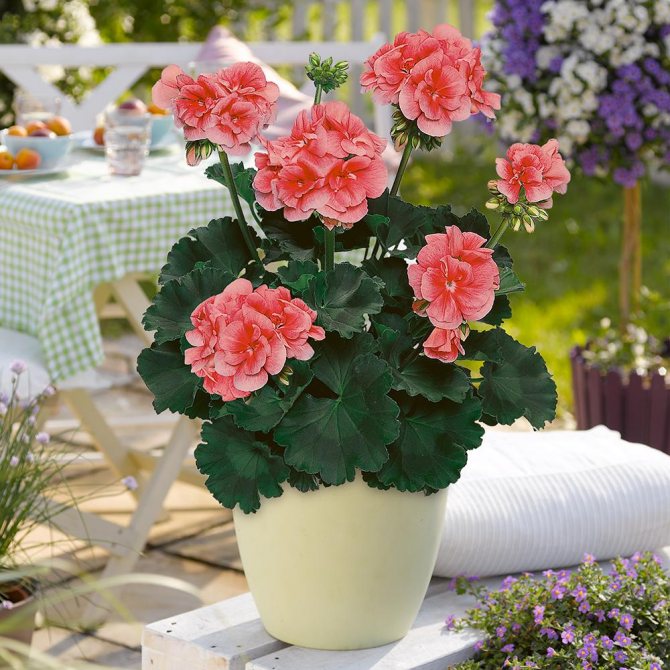
In the photo below you can see what the geranium looks like after transplanting, on the street and at home in a pot:
What is this plant?
Already in the 19th century, pelargonium was a popular plant. It was used to decorate windows in the mansions of influential gentlemen and ordinary peasant houses. Today she is the favorite of mothers and grandmothers, a real retro flower. They loved her because she blooms brightly and magnificently.
If you do not put the pot with it on the windowsill and keep it in the shade in the garden, geranium will bloom with bright buds and protect gardeners from nasty mosquitoes and other insect pests, as they thin the nasty smell. Many growers propagate the plant by cuttings or by dividing the bush so that there are more “protectors” from insects. The type and variety of geraniums affects the transplantation procedure.
Important! Zonal geranium gives roots in a glass of water, but royal geranium does not.
Follow-up care
Due to the fact that geranium is very sensitive to the transplanting process, it needs special attention during this period. Despite the fact that at normal times this plant thrives on a southern or southeastern windowsill in bright sunlight, it is better to place the transplanted flower in a shaded place for about a week.
Watering should be done in moderation, carefully monitoring how the soil dries up. Geranium does not need much moisture, she is accustomed to the arid climate. As a result, waterlogging can be detrimental to her, especially when the plant is weakened after transplantation.
It is not necessary to fertilize the flower for 2-3 months after transplantation, all the elements necessary for growth are contained in sufficient quantities in the renewed soil. In the future, feeding can be done once a month, special means for geraniums, or universal fertilizers for flowering indoor plants are suitable. At the first feeding, it is important to reduce the dosage by 2-3 times in order to avoid damage to the roots, then apply fertilizer according to the instructions. Find out how and what to feed a plant at home or at a summer cottage here, and in this material read about how to prepare and use iodine dressing.
Our grandmothers also proved that geraniums can grow and even bloom in spite of any conditions: in a simple land, not rich in nutrients, under the scorching rays of the sun or far from them, on a balcony, where even in summer the temperature can drop below +10.
Geranium can withstand almost everything, except for an incorrectly made transplant and a constant excess of moisture. But this does not mean that extreme conditions are familiar to this plant, like other indoor flowers, geraniums need care, and then it will reciprocate.
Related Videos
We suggest watching a video on how and when to transplant geraniums correctly:
If you find an error, please select a piece of text and press Ctrl + Enter.
-Quotebook
Recipes for the growth of bones on the legs, spurs and for joints Recipes for the growth of bones on the legs, w.
Shawls, scarves, hats with knitting needles 61 Click on the picture.
Wicker hammock for giving in macrame technique Wicker hammock using macrame technique - from.
Pink salmon baked in pita bread.
To the question of the internal use of essential oils To the question of the internal use of essential oils.
—Labels
—Applications
- Chip flights
Favorable prices, easy search, no commission, 24 hours. Book now - pay later! - I'm a photographer
Plugin for posting photos in the user's diary. Minimum system requirements: Internet Explorer 6, Fire Fox 1.5, Opera 9.5, Safari 3.1.1 with JavaScript enabled.Maybe it will work - Interpretation of dreams
Find out what the secret of your dream is - is it worth preparing for something bad, or, conversely, it is necessary for the dream to come true. You will certainly find the interpretation of your dream, because the database already contains 47 - Postcards
Reborn catalog of postcards for all occasions - Always at hand
no analogues ^ _ ^ Allows to insert a panel with arbitrary Html-code into the profile. You can place banners, counters, etc. there
—Links
—Photo album
—Always close at hand
—Search by diary
—Subscribe by email
-Friends
- Regular readers
- Communities
Transplant rules
To transplant geraniums from the garden in the fall to be painless for the plant, the work must be done in the following sequence:
- Preparing the pot... Small holes are made on the bottom plane, drainage and a small layer of prepared substrate are poured inside.
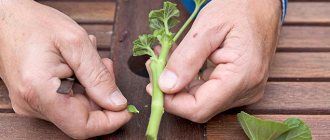
- Extracting a flower from the ground... Before planting, you need to remove dry or rotten parts of the root, leaves. A stem that is too tall can be trimmed, leaving a stem up to 10 cm high.
- Landing... The plant is fixed, slightly moistened soil is carefully poured along the perimeter of the container. After filling the space, it is advisable to compact the earth a little.
- After completion of work the pot should be placed in a dark place for a week. This makes the plant easier to transplant. Over time, the container can be rearranged to a permanent place.
Preparation
Before proceeding directly to the procedure itself, you should pay attention to the main points of preparation.
Pot
Choosing the right pot size is difficult for beginners. You should not buy a very large pot, because the plant does not need a lot of soil for normal development. If the flower is transplanted for the first time, then a container of 10-12 cm in diameter will be the best choice. The next transplant will be carried out into another pot, while its diameter should be 2-3 cm larger than that of the previous one. If the container is too large for a flower, then over time the soil will become waterlogged, which will lead to rotting of the root system. If we consider the various materials from which the pots are made, then ceramic models are more suitable than plastic pots. Many gardeners use clay containers, because this material perfectly removes residual moisture and salts, as a result, the plant grows and develops well.
Priming
Geranium feels great in various soil mixtures. You can use both purchased substrates for flowering plants and garden soil. If you need land for transplanting geraniums, you can do one of the following:
- sod land, river sand and humus mix in proportions 2: 1: 2;
- sand, peat and garden soil should be taken in a 1: 1: 1 ratio;
- peat, sand, leaf and sod land should be used in equal parts.
Before transplanting pelargonium, it is imperative to sterilize the ground, since this procedure will clear the ground of possible pests and diseases.
Plant preparation
There are no special means that can soften the effect of transplanting on a plant. The main thing is to find the optimal time. As mentioned above, in the winter, as well as at the time of flowering, transplanting for pelargonium is taboo. Initially, the day before the procedure, it is necessary to water the flower vigorously, since the soil should become quite moist, thus, it will be much easier to get the flower with roots. Some gardeners advise using growth stimulants that will provide geraniums with the fastest recovery after changing their "place of residence".
Read also: How to seal the cracks in a house from a bar
How to water properly?
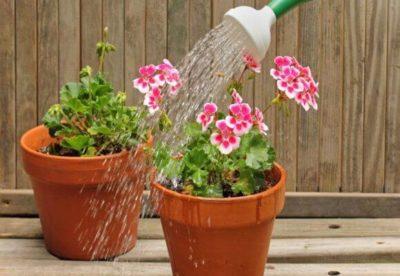
In summer, it is recommended to water the plant abundantly, but make sure that the ground dries out completely between watering cycles.It is quite simple to check the dryness of the soil, for this you need to immerse your finger in the ground 1-2 phalanges, your sensations will be enough to determine the moisture content.
If you still have doubts, just follow the rule: in geranium irrigation, it is better to underfill water than to pour it... The fact is that geranium comes from arid Africa, its roots and leaves are adapted for the accumulation of excess moisture and its rational consumption during periods of drought. Constant dampness will lead to decay of the roots, and fungi that are detrimental to the plant can form in the ground.
By autumn, the amount of watering should be reduced, but do not allow the soil to dry out excessively.
Growing conditions and rules for caring for geraniums for lush flowering
If the windows of the room are on the south side, and the sun "lives" on the windowsill during the whole daylight hours, then these are ideal conditions for geraniums. The flower bed in the garden should be on a hill so that no other plants or architectural forms can cast a shadow on the flower. The plant is not afraid of the rays of the scorching sun, it tolerates dry weather well, the temperature drops to 10-15 degrees.
Optimum growing temperature: for lush flowering, the air must be warmed up to 18-22 ºС, but in winter before flowering, it is enough to maintain 15 ºС above zero (this temperature is kept on a window or in an office space). If the flower does not take breaks between flowering, then its strength will quickly dry out, which will lead to disease or death. 3-4 weeks of rest is enough for a lush flowering to be long.
Lighting: if the sun leaves the geranium growth zone in the garden early or there is not enough light in the room, you should urgently find a sunnier place for the flower, daylight hours at least 12 hours.
Watering and spraying: the leaf plate does not tolerate getting wet, therefore, the plant has a negative attitude to the spray gun and wiping. The accumulated dust from the leaves can be collected with a dry or slightly damp brush or brush. Watering is carried out daily during the flowering period in summer or 2 times a week in winter, when the plant is at rest. When you are away from home in summer, daily watering can be replaced with a cotton cloth, abundantly moistened with water.
Soil mixture: Whether it is a pot for a houseplant or a flower bed in the garden, it is important to remember: geranium roots do not tolerate compacted soil. Therefore, the earth is prepared from sand, peat, black soil in equal quantities. For air exchange, it is often necessary to loosen the soil, so the roots will receive oxygen, and the leaves, thanks to photosynthesis, will be brighter and more luxuriant.
Feeding geraniums with iodine for lush flowering on video:
Fertilizing: everything in moderation. Geranium responds negatively to organic fertilizers and takes mineral fertilizers with pleasure. Now on sale there are special fertilizer complexes for geraniums, which greatly simplifies the life of the grower, the main thing is to dilute the solutions according to the instructions and not increase the concentration. During flowering, phosphorus and potassium will not be superfluous, and after that nitrogen, which will give strength for a new flowering.
Moving to a new location: perfectly tolerates a change of scenery while continuing to bloom. The beauty lives well in clay and plastic pots, the main thing is that drainage is provided in the bottom. Remember: a spacious container will enhance green mass production and reduce flowering. If the pot is larger, then you can plant several bushes at once, forming a bouquet arrangement. Garden geraniums are taken indoors for the winter, otherwise death cannot be avoided.
Pot selection
Many containers for indoor plants are sold in stores now. But not all are suitable for geraniums, since each type of pot has its own pros and cons. To plant geraniums, which pot should you choose? First you need to decide on the material of the container:
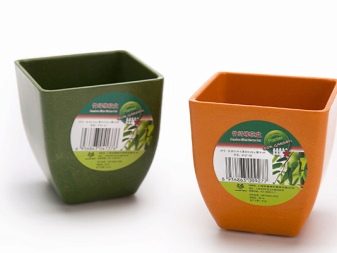
- Plastic products are durable, lightweight and cheap.Due to the peculiarities of production, they are made in different shapes and colors, so these pots look better in the interior.
- Clay pots meet the flower's requirements. The moisture in them is able to evaporate faster, which protects against root rot, and the clay is able to wash out harmful salts from the soil. But gradually the container turns black. Clay products have a porous structure, which provides additional aeration, which allows the roots to breathe.

Material
Planting geraniums also requires drainage in the pot. Accordingly, the container must be made of materials that are strong enough to withstand such loads. Home flower pots are:
- glass;
- plastic;
- ceramic;
- clay;
- clay coated (made of special glaze);
- metal;
- bamboo.
Glass pots for geraniums are rarely used, as they are more suitable for plants that need high humidity: they often do not have a hole to drain excess water. The exceptions are cases when such flowerpots are important for creating the interior design of a room. At the same time, geraniums need to be watered less often, and the earth should be loosened more often. Plastic products are quite practical and inexpensive. They are lightweight and have a wide variety of colors, so they are perfect for installation on a windowsill. Ceramic pots are also good for a flower, but are heavier and more fragile. The choice can be stopped on this type only if there is no likelihood of the flowerpot falling from a height.
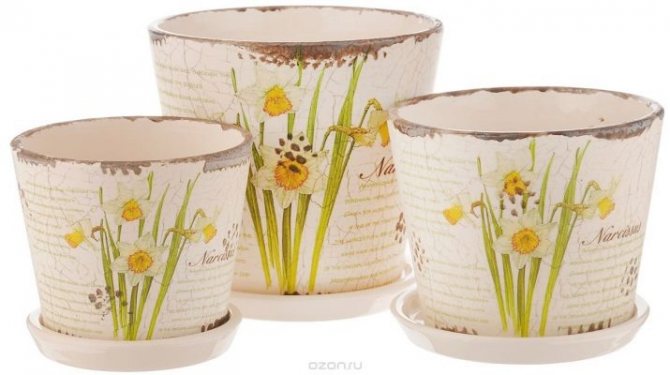
The clay pot is ideal for planting geraniums, as the material has pores that allow additional ventilation of the rhizome. This eliminates excess moisture and rotting of the root system. And also, upon contact with clay, salts begin to wash out from the soil, which contributes to the better development of the flower. If such a pot is covered with glaze, it will lose the ability to ventilate, which will adversely affect the plant. Therefore, it is better not to use glazed flowerpots for growing geraniums.
Metal containers are strong enough. In addition, they can become a unique interior detail. But this is where its advantages end. Such a product has not only a high price, but also a tendency to corrosion. Also, metal pots are not ventilated and retain water. Bamboo flowerpots have appeared relatively recently, but have already established themselves as environmentally friendly. They are well ventilated and look good. With their help, you can add coziness even to an office space. However, bamboo tends to decompose over time, which indicates the fragility of the product.
When purchasing these pots, it is necessary to take into account the need for more frequent replanting. And this can have a bad effect on the flowering of the plant.
How is it different from a pots?
Their main difference is in their purpose, they perform different functions.
A cache-pot refers to a decorative type of vessel, without a pallet and holes. Most often, a simple pot with a plant is placed inside the planter. Alternatively, this accessory usually hides the lost attractiveness of the pot over time.
The pot is used as a container for planting plants. There are a wide variety of shapes and sizes, and there are drainage holes. The pots are ideal for both home furnishings and open spaces.
Classification of varieties
There are a large number of varieties of geranium (pelargonium) bred by breeders, the most popular of which are:
- Fragrant - a small plant with small and thin leaves, emitting a pleasant aroma, reminiscent of citrus fruits. The inflorescences are bright and luxuriant.
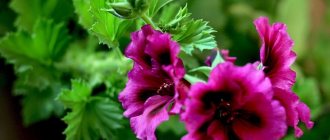
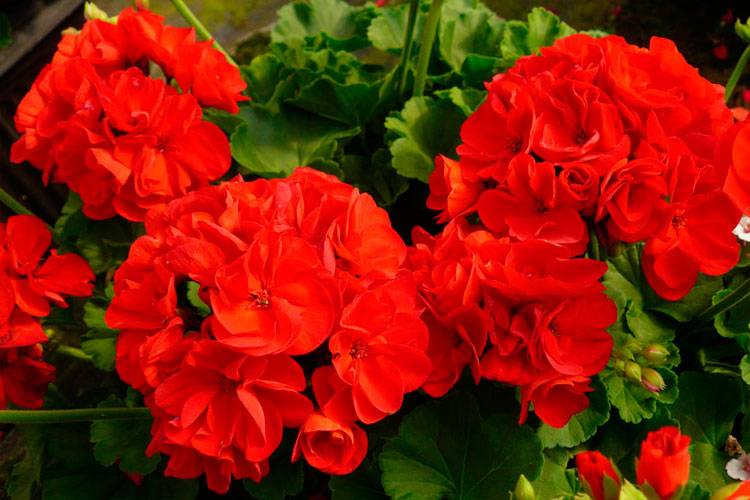
- Royal - has low stems and carved leaves. The flowering period is short.Beautiful large flowers are collected in small inflorescences, forming a ball shape.
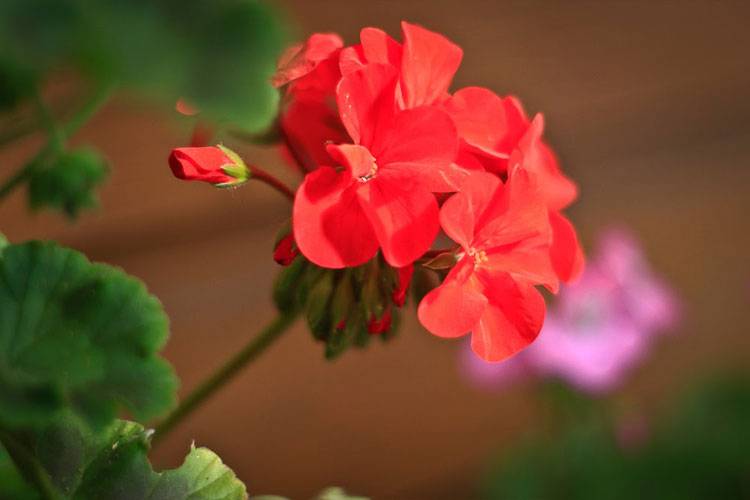
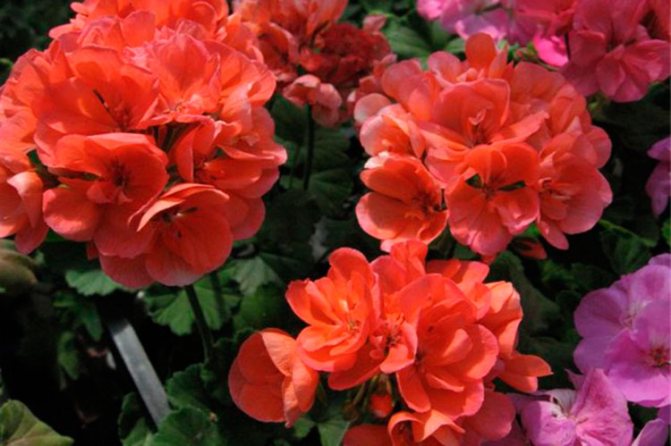
- Zonal - on light leaves there is a dark zone in the form of a circle. The inflorescence of a plant can consist of both simple and double flowers. Shades of predominantly red and pink tones predominate.
As mentioned above, in order to rejuvenate and give a beautiful look, geraniums need to be periodically updated, so all owners of various varieties of this plant need knowledge on how to plant geraniums so that it always looks well-groomed.
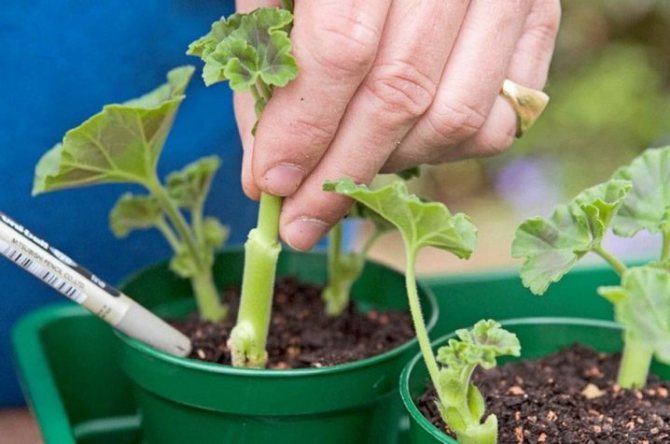
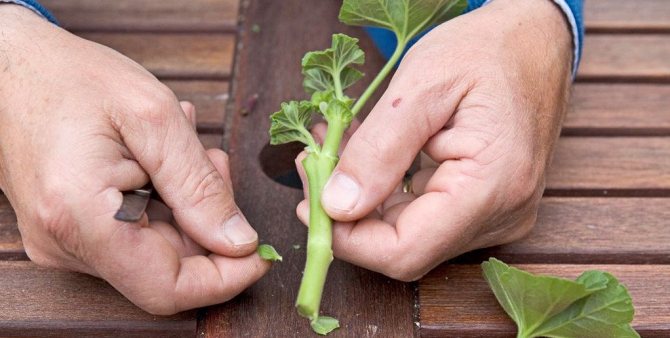
Harvesting cuttings
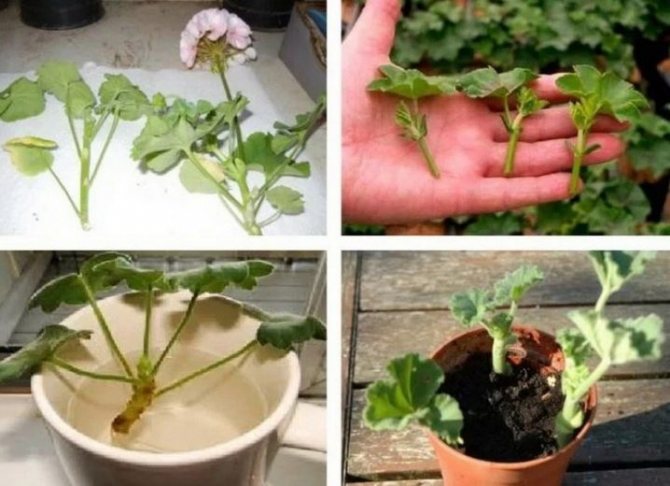
How to plant geraniums by cuttings? For this, cuttings are cut with a sharp clean knife, its blade is treated with alcohol or other disinfectant liquid. Previously, the buds collected with geraniums are cut along with the peduncles. The apical part of the plant is most often used, the length of the shoots for the cutting does not exceed 7-8 cm.
The cut part should have two to three leaves or internodes. Before the cut shoot is placed in water or buried in the ground, it is kept in the open air. To do this, place it on a paper towel in a place where direct sunlight does not fall.
Pelargonium from seeds at home
In general, it is very easy to grow pelargonium from seeds, such a responsive and problem-free plant, it literally grows before our eyes and begins to bloom five months after sowing. Seeds can be found in any gardening store, you can also buy soil there, but if you have the opportunity and desire. you can cook it yourself.
How to sow geranium at home
You can sow pelargonium at any time, but it is still better at the end of winter, so that the seedlings can see the spring sun. And then the grown plants in the spring can be planted in the ground in the garden.
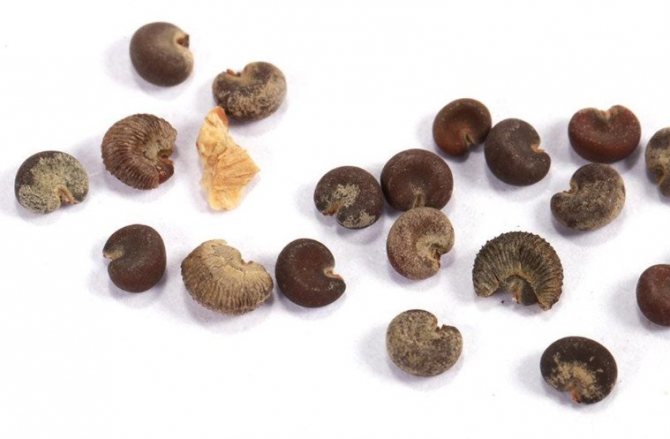
Who has not seen, the seeds of geraniums are large enough and covered with a strong shell. Many sow seeds directly into the ground, but still, in order to sprout as soon as possible, it is better to scarify, break the shell by rubbing the seeds with fine sandpaper.
The soil
For growing seedlings, soil needs a very light and moisture-absorbing soil with a slightly acidic reaction. If you use store-bought soil, then make sure that it is not pure peat, it will be too acidic for pelargonium. Best of all, mix it with regular garden soil, or prepare your own soil mixture:
- Part of garden soil
- Part of peat
- Part of perlite
- Part of the turf soil
The soil will need to be disinfected, it is enough to spill it with a weak solution of potassium permanganate. You can choose a shallow container, a height of 5 cm will be enough.
Sowing
It is better to distribute the seeds at a distance into the grooves, I do 2x4 cm, so then it is more convenient to dive the plants. After sowing, sprinkle them to a depth of no more than 1 cm and cover them with a film on top. It remains to wait a week, during which time seedlings usually appear. only you will need to monitor the humidity, ventilate the greenhouse several times a day and watch that the temperature does not drop below +22 and does not rise above +25, this is the optimal temperature for seedlings.
Be sure to control the humidity while you wait for seedlings. With too much dampness, which even adult pelargonium does not tolerate, the seeds will quickly rot, and you will still wait for the shoots.
Seedling care
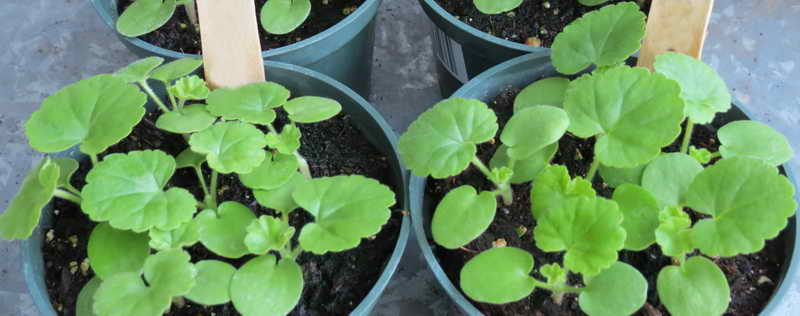
As soon as you notice the first loops of sprouts, you need to immediately remove the shelter, lower the temperature to +20 degrees and put the tray in the sunniest place. Without good lighting, pelargonium seedlings stretch out strongly and begin to lodge.
At this time, it is also important to monitor the humidity. With this plant, it is better to underfill than to pour, the seedlings are very afraid of dampness.
Picking
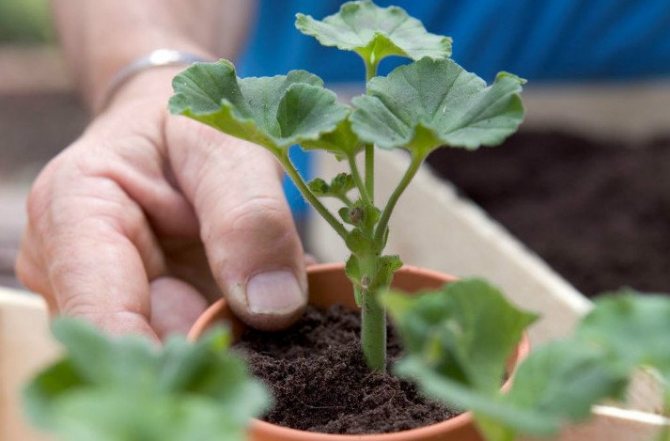
Plants should be dived in separate pots only when the first true leaf grows.
We prepare small pots, up to 10 cm in diameter. The soil can be used the same as for growing seedlings.
We pour the soil not to the edges of the pot, 1-2 cm, make a small depression in the middle and, if the seedlings are planted freely, it will be convenient to transfer the plants. After transshipment, you need to water the soil a little and put the pots in the sun.
Top dressing
Small plants will need their first feeding only two weeks after picking. To do this, you can use any fertilizer for flowering indoor plants, in liquid form. We feed strictly following the instructions.
How to transplant pelargonium outdoors
If you have the opportunity and desire, then transplant your little geraniums into the front garden. They will make a wonderful rabatka. They will also look good in a common flower bed.
You can transplant geraniums at the end of May, choose a light partial shade, then the flowers will be larger, and too hot the sun can harm the plant. In the heat, the leaves of pelargonium usually begin to turn yellow and dry. You need to plant plants every 20-30 cm from each other.
The soil for pelargonium should be nutritious, you can add leaf humus, in a well-rotted form. Just do not get too carried away with organic matter, otherwise geranium will "fatten", then flowers will not wait.
With watering in the open field, you also need to be more careful, water as needed and feed it with a complex fertilizer for flowers every two weeks, you can use Agricola.
Well-groomed geraniums continue to bloom until autumn, but when cold spells come, the flower should still be dug up and transferred to the house.
Again, we prepare the pots, this time they can be slightly larger in diameter, because the root system develops well in freedom. Dig up the plant with a large clod of earth and place it in pots.
In indoor conditions, geraniums can bloom for some time, but after flowering, the plant must definitely take a break. To do this, you need to remove all old peduncles, cut off the overgrown shoots, by the way, they can also propagate pelargonium, and put the plant in a cool, but bright place.
In winter, we usually halve watering, and remove the top dressing altogether. So pelargonium grown from seeds will wait for next spring.
Growing pelargonium from seeds, video
Foreword
Breeding pelargonium with seeds is very simple. However, before starting work, it is worthwhile to study its features. Having learned about such important things as temperature, humidity and care rules, you can start growing a plant without fear of losing the grown seedlings.
Pelargonium is one of the most common indoor plants. Its flowers can be semi-double, double and simple. The plant is grown not only for its beauty, but also for its beneficial properties. It quickly relieves severe headaches, resists poisons, and a decoction of flowers is recommended for people with stomach problems. The leaves of these plants are able to quickly stop bleeding, remove purulent accumulations and heal cuts. Often, the leaves are used for a decoction taken by hypertensive patients. Such a remedy helps to cure disorders of the nervous system. In addition, pelargonium bushes filter the air well.
Pelargonium seedlings
All of these properties push connoisseurs of the beautiful and useful to sowing this plant. As a rule, people who plant flowers for the first time begin the event with the selection and purchase of seeds. At the same time, great attention should be paid to its appearance and the variety that you wish to propagate. In most cases, plant seeds are marketed already peeled and ready for sowing. At the same time, if you have previously bred plants at home and use the collected seeds for further reproduction, then before planting they should be carefully sanded with sandpaper. This will remove the hard skin that would interfere with the germination of the seedlings.
In addition to seed preparation, there are several important factors to consider. These include:
- seed planting period;
- suitable soil for this;
- the conditions in which the seedlings will germinate;
- features of care;
- seedling germination time;
- picking seedlings.
Each of these factors is important in its own way. Without adhering to even one rule, you risk losing your plants.
Video: A new way of planting pelargonium
Most florists claim that there is no definitive best period for sowing a plant. At the same time, in practice, the senses, planted from seeds in November-April, germinate best of all. It is during these five months that you should start planting flowers. For sowing, you will need to prepare the necessary equipment. You will need turf, peat and sand in a 2: 1: 1 ratio, sand and peat in a 1: 1 ratio, or perlite and peat in the same proportion. There are plenty of soil combinations, however, you must choose the one that suits you best. In any case, to grow flowers, you need to stick to everyone.
Pelargonium seeds
Immediately before sowing, the planting material must be prepared. For this, the seeds are soaked in Zircon
at room temperature for 2 hours. It is recommended to sow seeds at a distance of 4 cm. After that, sprinkle the seeds with a small amount of soil and moisten them with water settled in the room. It is very important that the soil layer above the seeds is not thicker than 5 mm. Make sure that during the germination of seedlings, the soil is abundantly moistened with warm water. After planting, cover the soil with seeds with transparent film or glass.
To help seedlings hatch quickly, keep the temperature at 18–22 ° C. The container with seedlings should be in a well-lit room, where direct sunlight does not fall.
If you adhere to all these rules, the germination period of the seedlings will take no more than 40 days, and the first seedlings will hatch within two weeks after planting. As soon as the first 2-3 leaves appear on the plants, it is worth transplanting them into larger vessels. 3 months after that, the first flowers can be seen on the bushes.
Planting and breeding pelargonium seeds requires proper care from the first days. Indoor varieties of this plant are unpretentious in care, but there are several nuances that are worth remembering. First, the plants must be provided with sunlight. The bushes are not afraid of direct sunlight, but you should not allow the long stay of seedlings under the influence of ultraviolet radiation. This can lead to the death of the leaves.
Seedling flowers
Secondly, you do not need to water the grown seedlings very often. However, hydrate the plants generously. It is best to do this whenever you find dry soil around the bush. Water the flowers less often in the winter. Third, maintain optimal temperature conditions for growing pelargonium. In summer, the ideal temperature is 22 ° C, and in winter, at least 15 ° C.
To keep the plant blooming for as long as possible, take care of good drainage in the container. With it, the water will not stagnate on the bottom, and the roots of pelargonium will not start to rot. Expanded clay is suitable as drainage, which must be laid out at the bottom of the vessel. To ensure the health of the root and aboveground systems of the plant, it must be fed. This can be done no more than 3 times a month. Any store-bought organic fertilizer is suitable for bait. Do not forget to cut off the faded inflorescences. This will increase the flowering period of the plants.
Finding out that you are not taking good care of your plants is easy enough. There are a number of symptoms for this. If you notice that the edges of the leaves are reddened, then you need to raise the temperature in the room. If the leaves turn yellow, then watering will need to be increased. If the leaves have darkened, most likely you have watered the bush too often. You will need to remove it immediately.Another sign of waterlogging is the appearance of gray mold on the leaves. Also, if you notice that the lower leaves are falling from the plants, then they do not have enough light.
One of the mandatory stages of self-growing a plant is picking seedlings. It is necessary to transplant it upon acquiring at least 2 fully formed leaves. It is best to immediately dive the plants into separate containers. To do this, you need to carefully take one of the bushes and carefully divide its roots into 2-3 independent seedlings. The most important thing in this case is not to "miss" the right moment for transplantation, otherwise it will be very difficult to untangle the roots later. For picking, select containers with a diameter of at least 12 cm.
Plant picking
Video: How to wash pelargonium
Hello dear friends!
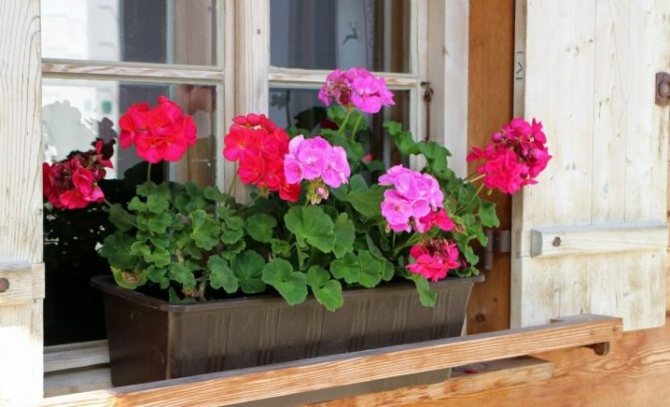
Despite the fact that most of us consider pelargonium (geranium) as an indoor plant, it nevertheless grows and develops well in flower beds. It can be planted in window boxes, decorate a balcony or veranda with it. Before I tell you about growing pelargonium from seeds, let's take a closer look at this plant.
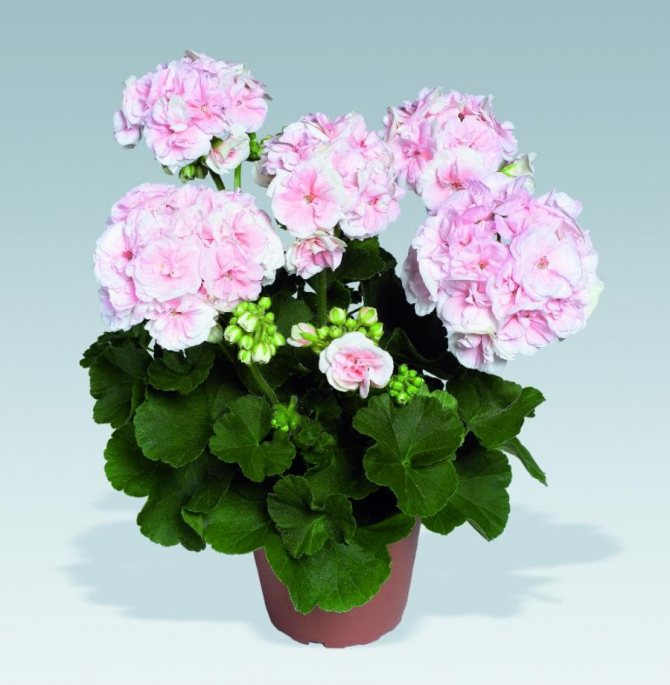
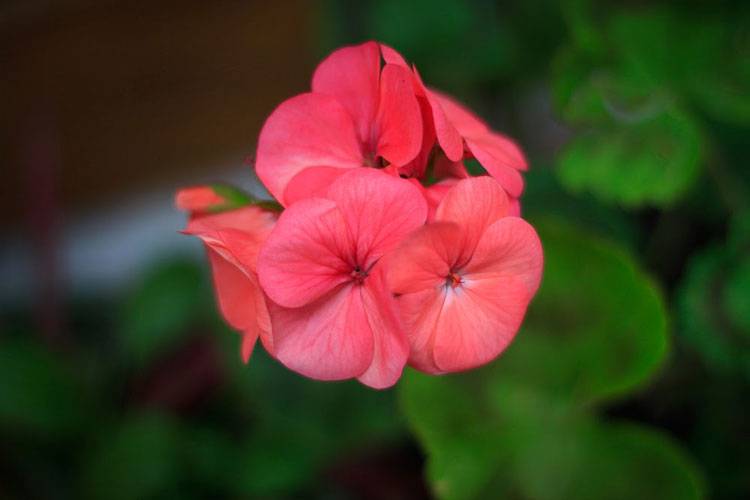
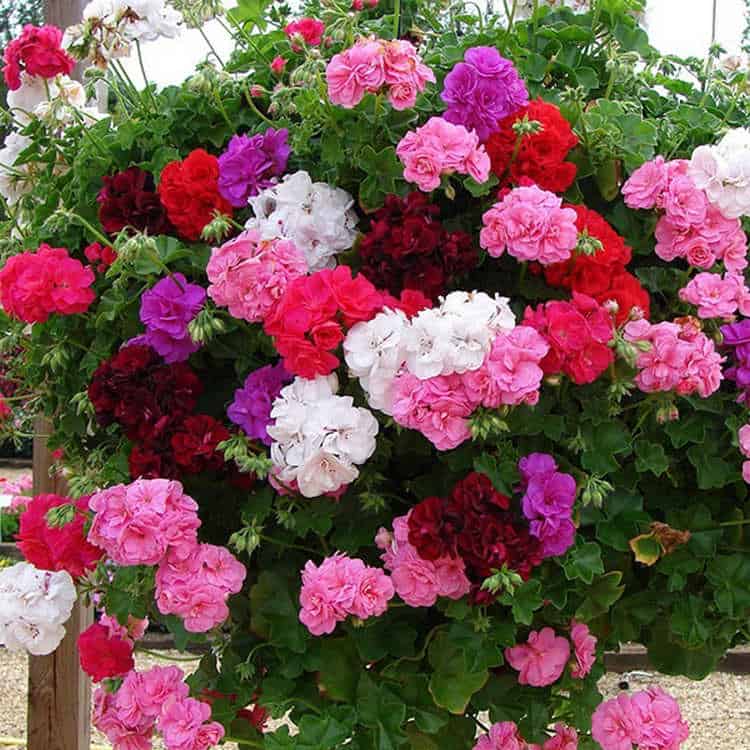
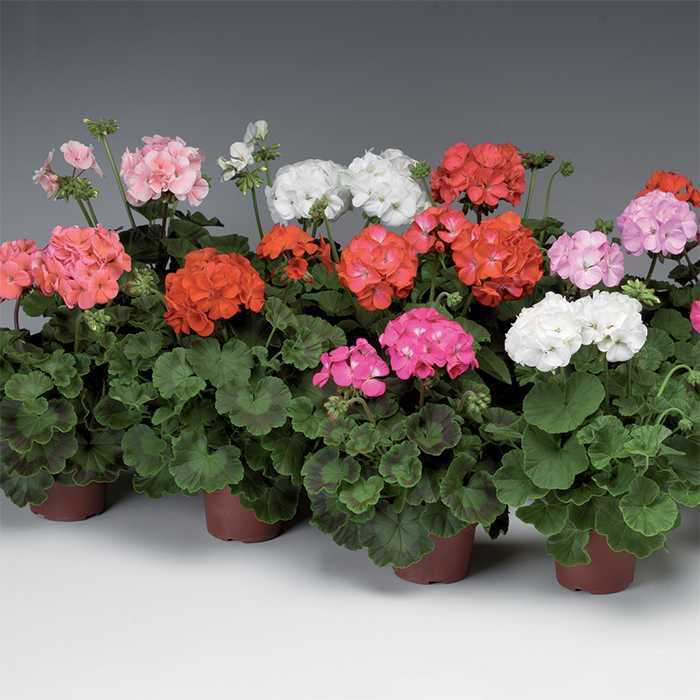
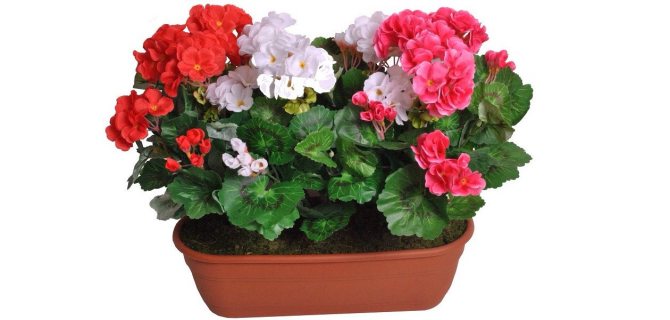
The most common is garden pelargonium, or zonal. Her bush is upright, from 15 to 50 centimeters high, the leaves are round, small, dark or light green, may have a dark ring along the edge or without a ring. Flowers can be simple, as well as double or semi-double, collected in spherical inflorescences. The color of flowers can be very diverse: pink with different shades, carmine, red, salmon, white. Pelargonium flowers look very elegant, having two different colors - white with red or pink. Outdoors, in flower beds and flower beds, pelargonium blooms from May to September. For the winter, the plant must be dug up and stored in a bright, cool place.
Pelargonium growing technology
In January - February, in room conditions, they sow pelargonium seeds for seedlings. The soil mixture should easily pass water and at least six. Your best bet is to buy a ready-made nutritious potting mix.
In the soil, you need to make shallow grooves, evenly place the seeds in them and sprinkle them a little with earth. It is necessary to water crops as the soil dries up, trying to avoid excess moisture. With an excess of moisture, the seeds rot, and the seedlings quickly die from various root rot.
In room conditions, the crops should be covered with foil or glass to maintain the necessary humidity and a favorable microclimate for germination. The boxes must be placed in a bright place in the room, where the air temperature is 22 - 24 degrees. Under these conditions, the seeds germinate after 3 - 6 days. When the cotyledons appear, the film or glass can be removed and the temperature reduced to 18 - 20 degrees. The place for the growth of seedlings must be very well lit, otherwise, they will quickly stretch out and may die.
When two true leaves appear on the seedlings, the seedlings must be cut into small pots (8 - 10 centimeters in diameter). If, due to a lack of light, the seedlings of pelargonium are slightly elongated, it is better to bury them in the soil by 1 - 2 centimeters. In this case, additional lateral roots will grow and the seedlings will get stronger.
Pelargonium is fed 14 days after the pick. First you need to give organic liquid fertilizers, for example, "Agricola-Fantasy" (for half a liter of water, 1 teaspoon). Further, every 8 - 10 days, you need to repeat fertilizing using fertilizers "Effecton for flowers" and "Agricola for flowering plants", according to the instructions.
Pelargonium loves a dry climate more than dampness, so it should not be planted in damp places. This plant blooms well in partial shade, where its flowers are larger. True, flowering is less abundant than in the sun.
Pelargonium seedlings are planted in open ground in the second and third decade of May.Seedlings can be placed on a loggia or on a balcony early, while providing protection from frost. In order for pelargonium to grow and bloom well, it needs nutritious and loose soil. Certainly better than a ready-made special soil mixture for pelargonium, it is difficult to come up with anything. If it is not possible to purchase such a mixture, then before planting it is necessary to apply a complex complete fertilizer to the ground, for example, nitrophoska or granulated Agricola for flowering plants, following the instructions.
In flower beds, pelargonium is planted according to the scheme of 20x20 or 15x15 centimeters. In small containers, the plants are planted even closer to each other and 2 to 3 centimeters deeper than they grew in seedling pots. This is again done for the plant to form additional roots.
In autumn, pelargonium blooms for a long time, tolerates cold snaps to minus 3 degrees. If you want to prolong the flowering of your pelargonium, you need to dig up your favorite plant and plant it in a pot. If the earthen lump with roots is quite large, then the flowering of such a plant practically does not stop. On a light window, under suitable conditions, pelargonium will bloom for another two to three months.
If you decide to cultivate pelargonium from seeds, then of course you need to try to choose the right seeds of these plants and choose the right varieties.
Favorite varieties of pelargonium
Varieties and hybrids of seed pelargonium are divided into 2 groups:
- Grandiflera - the plants of this group are taller, they do not bloom too abundantly, but their flowers and inflorescences are large.
- Multiflera - pelargoniums of this group are compact, low, blooming profusely.
Group "grandiflera"
- Hybrid F1 Horizon - plant height from 35 to 45 centimeters. It has large inflorescences with a wide variety of colors: coral, orange, cream, salmon, red, white; three types of colors with stripes and strokes; five types of colors with a bright beautiful edge on a white background; seven different shades of pink.
- Hybrid F1 Maverick - plant height from 35 to 45 centimeters. It has large inflorescences with flowers 4 centimeters in diameter. Color spectrum: pink, light pink, white with a pink eye, purple, red, salmon, coral, white.
Multiflera group
- Hybrid F1 Early Universal - plants with a height of 25 - 30 centimeters, this series of pelargoniums includes a mixture of colors.
- Hybrid F1 Black Velvet - plants 25 - 30 centimeters high. It has dark brown leaves with a green border, medium-sized inflorescences with salmon, red, light pink or pink flowers.
- Hybrid F1 Multibloom - plant height 25 - 30 centimeters, begins to bloom early. The flowers are about 3 centimeters in diameter. The color is red with white, salmon, coral, red, white, and there are also four shades of pink.
- Hybrid F1 Avanti - plants with a height of 30 - 40 centimeters, begins to bloom 10 - 14 days earlier than other series of pelargoniums. Flowers can be four shades of pink, light purple, red, white, salmon.
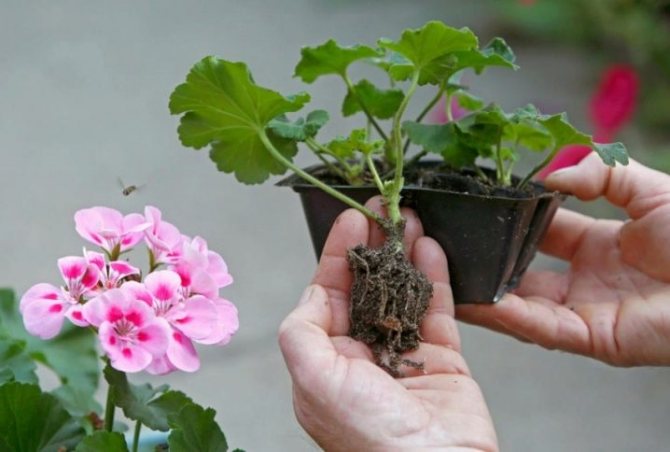
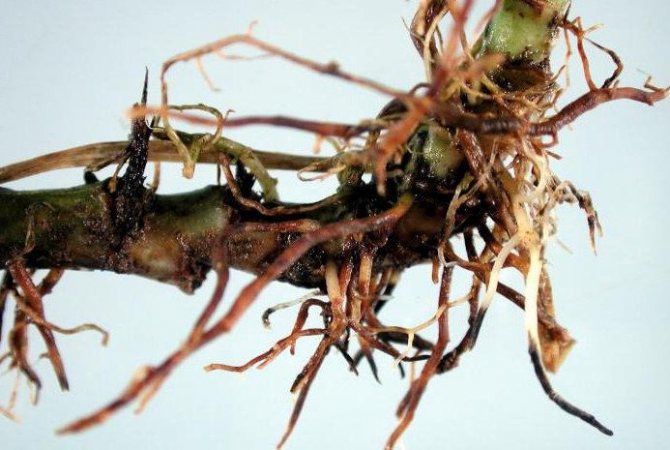
Features of the root system
Geranium grows in almost all corners of the planet, it can be found even in the tropical zone and on the mountains. Such a wide distribution, the plant has received due to its good adaptability to different types of soil. What is provided by developed roots.
Most geranium species have a branched root system.... There are special thickenings at the tips of the roots that serve as an additional compartment to contain excess moisture. During periods of drought, the plant draws water from them, which allows geraniums to maintain life for a long time in the absence of regular rains.
Certain types of geraniums, such as bearded iris, have chosen a different way of forming the nutritional system.Their rhizomes are compacted and located closer to the soil surface, they are stretched at a considerable distance from the plant, which allows them to adapt to a variety of growing conditions. Such a root system will not rot with excessive waterlogging and will perfectly tolerate short-term drought, evenly distributing moisture throughout the entire root network.
There are also species whose roots, if necessary, form small tubers that actively absorb moisture, and with it useful substances. Nodules perform two useful functions at once; during periods of lack of water, they feed the plant from their own reserves, at the same time serving as reproductive organs. If the mother plant, unable to withstand the harsh external conditions, dies, its tubers retain vital processes and a new geranium can grow from them.
Geranium plants found in mountainous areas have a taproot with minimal branching... With the external similarity of this family, we see how different ways they evolved, such differences directly depend on the habitat of flowers.
Why transplant
Transplanting (transshipment) of compact plants is carried out when the flower has become cramped in the old pot. This is evidenced by the roots that begin to crawl out of the ground. Due to the overgrown root system, pelargonium lacks nutrients in the soil, which may lead to its death in the future.
In addition, the transplant should be performed in the following situations:
- due to negligence, a lot of water was poured into the container with the flower. High soil moisture provokes root rot;
- despite full and balanced care (watering, feeding), geranium grows poorly and does not bloom;
- the shoot was exposed from below;
- soil contamination with parasites and pathogens is observed. In this case, the transshipment is of a preventive nature in order to prevent the development of the disease after geranium treatment;
- damage to the pot. It can be damaged due to physical impact (falling from the windowsill) or due to prolonged exposure to sunlight;
- depletion of the soil, which is not removed by applying top dressing. Periodically, you need to add new soil to the pot in order to naturally replenish its nutritional composition and prevent the appearance of pests;
- the need for plant propagation by dividing the rhizome.
As you can see, there are many reasons for transplanting geraniums.
The birthplace of the plant and the history of distribution
Pelargonium is a thermophilic, light-loving, drought-resistant flower. The homeland of many species of geraniums is in South Africa. The homeland of others is in India and Australia. It is interesting that earlier India, Australia and South Africa were connected by a single continent. Most likely, the original homeland of the domestic geranium was on this disappeared mainland. The sunny savanna is always hot, rocky and sandy land contains almost no water. In a thick stem, the plant has adapted to accumulate water reserves in order to survive in a dry period.
The flower, exotic for that time, appeared in Europe from the 16th century, brought by travelers by sea. At first, aristocrats began to grow it. They planted pelargonium in greenhouses and at home, noble ladies decorated dresses and hairstyles with beautiful overseas flowers. Later, ordinary townspeople began to plant the plant at home, who fell in love with it for its unpretentiousness and modest charm.
Getting rid of pests
If a geranium flower is planted, home care is to eliminate pests that can infect the plant. The following diseases usually appear:
- Gray rot. In this case, the leaves are removed, and the bush is treated with antifungal agents.
- Root rot. Appears due to frequent watering. The flower must be transplanted by removing the rotten roots.
- Whitefly.With this ailment, the leaves turn yellow. You need a tool like Actellik. Multiple processing may be required.
- Powdery mildew. The leaves have a whitish bloom. This is a fungal disease, treatment is performed by Topsin-M or Topaz.
- Aphid. You can notice it on the lower sides of the leaves. There are many drugs in stores that eliminate pests.
- Rust. This is a fungal disease that fungicides are used to treat.
Geraniums may stop blooming. This happens when the conditions of detention are violated. For example, there is a lack of light or the soil is very moist. Subject to the rules of care, the plant will develop well, delighting its owners.
Geranium flower is a wonderful decoration for home furnishings. It is enough to properly care for it, and then it will delight with its appearance and aroma all year round.
Disease and pest control methods
Geranium is extremely rarely exposed to invasions of pests or diseases, but if this still happened, then the reason was, most likely, mistakes in caring for the plant.
Such dangerous diseases as black or root rot, most often turn out to be fatal for a flower and they are destroyed, and the substrate in which the diseased plant grew is necessarily sterilized or replaced with a new one. In order to prevent such an outcome of events, you should carefully monitor the moisture content of the soil and in no case flood the flower, since excess moisture is in most cases the focus of the emergence and development of bacteria. You can try to save the plant by removing the moldy leaves and spraying the flower with an antifungal agent, then exposing it to the sun.
As for pests, most often pelargonium is susceptible to damage from insects such as whitefly, aphids and ticks.... The first two pests settle on the leaves of the flower, sucking the juices out of them, multiply instantly and are able to destroy the plant in the shortest possible time. Effectively eliminates insects with an infusion of chamomile or tobacco, which need to thoroughly wash the leaves of the plant, especially their underside, and then rinse it off with plain water after a few hours. Of the chemicals, you can also use "Aktellik", "Fufanon" and "Bison", periodically alternating them, since it will not be possible to eliminate pests with one tool.
Geranium is loved and appreciated by all growers for their unpretentious content and stunning appearance. After proper planting, caring for a plant involves a minimum waste of time and effort, and pelargonium will delight you with its fabulous color and smell of flowers all year round, creating incredible comfort and decorativeness.
When is the best time to propagate geraniums
The choice of time directly depends on the choice of the breeding method. When grafting and dividing a bush, it is recommended to choose March or November. In March, the plant departs from hibernation and begins an active growing season. This will greatly contribute to the early displacement of the roots and the further development of the plant. Cuttings planted in March will turn into lush flowering plants in the summer. If the end of autumn was chosen for reproduction, geraniums may bloom already in the spring, but not all of the seedlings planted in winter may take root.
If the method of propagation by seeds is chosen, then January is most suitable. While the seed swells, its rooting takes place and the first sprout is expelled, the spring season of active vegetation is just beginning.
The form
When choosing a form, usually housewives who are not professionally engaged in floriculture are guided only by compatibility with the interior. This is not quite the right approach. Since the flowers do not tolerate excess moisture, the shape of the bottom of the flowerpot should be round. This ensures that excess water flows out. Square pots tend to retain it in the corner pieces. The shape of the saucer under the flowerpot is also important.Its sides should be high enough, as excess water will drain into the saucer rather quickly. From low plates, it will overflow onto the windowsill. This threatens the formation of red spots that are difficult to clean.
Homemade
Floral DIY pots give the interior of the house individuality.
- Original appearance.
- They can be made from any materials at hand.
- Saving money.
- The disadvantage of plastic pots can be small size, and sometimes moldy soil.
- The fragility of the materials used for the pot.
- Lengthy creation process.
These pots are no less attractive than store pots. In addition, the same materials can be used.