Why sprout beans
Bean seeds contain harmful phytic acid. It acts as an inhibitor of food enzymes. As a result of germination, this substance loses its properties. Then the seeds are freed from this useless element, and the human body assimilates more fully the valuable substances hidden in them.
When bean seeds germinate, complex plant proteins are quickly converted into amino acids with a simple structure. As a result of the use of such a product, the digestion process is faster and easier. The body does not feel heaviness in the stomach, gases do not form in the intestines.
If seedlings of legumes are germinated for further growing of plants, their vitamin content increases. The product is enriched with rutin, tocopherol, vitamins K and D. The concentration of vitamins from group B also increases, while the content of vitamin E increases by almost 10 times. Also, seed germination provokes the growth of enzymes. According to some studies, their number increases 100 times. Therefore, this preliminary preparation of the seeds facilitates the digestion of food.
Sprouted beans have a different nutritional value. Compared to seeds that have not been pretreated, the amount of protein in seedlings increases by a third and the content of carbohydrates decreases by 15%.
On a note! Seed germination is often done for interesting experiments at school.
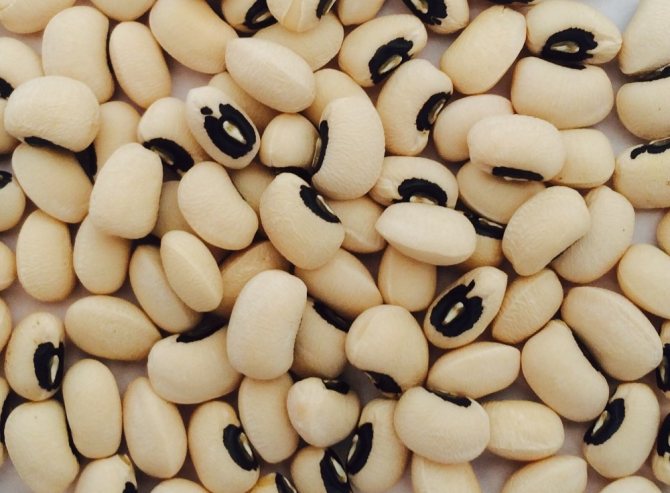
Not all varieties are suitable for eating bean sprouts.
It may be interesting What is Vigna: cultivation, reviews, photos Sprouted beans: description, benefits and harms How to eliminate the smell in a country toilet: effective and popular ways
Some of them contain toxic substances that can cause poisoning. They are destroyed only during heat treatment.
It is allowed to eat sprouts from the following varieties of beans:
- black;
- adzuki;
- pinto;
- mung;
- mung.
When buying bean sprouts in a store or market, you cannot eat them raw. Such sprouts are necessarily subjected to heat treatment. The seeds are germinated in a warm and humid environment, which is favorable for the development of dangerous microflora.
Part II: Preparation
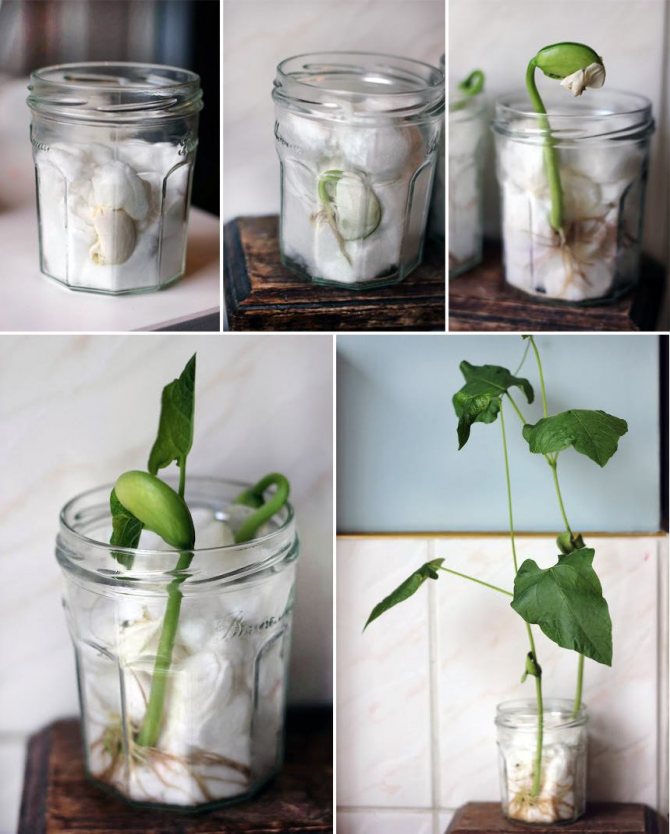
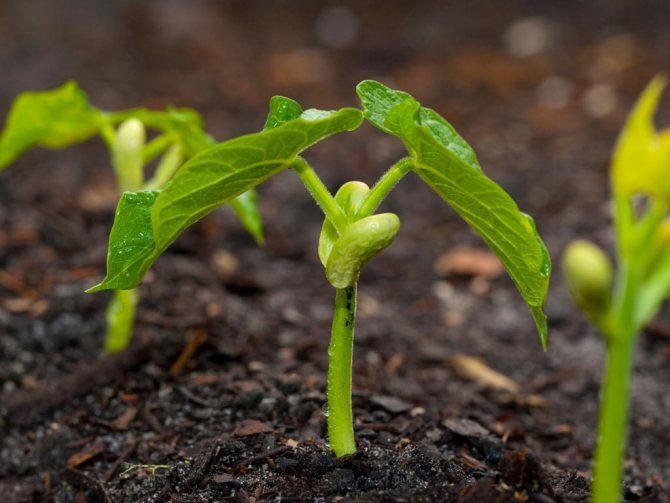
Our experiment doesn't end there. Now we have to find out what conditions are necessary for a young sprout to turn into a full-fledged plant. For this, we selected sprouted beans from the third sample. We divided them into three groups. The first group, together with the largest sprout, we placed in a glass jar, so as to observe the growth of the root through the side wall. We will put this sample in a warm and bright place. Place the second group next to the first, but cover it with a lid, i.e. deprive the sun's rays of access. Place the third group in a sunny place, but on a cold windowsill, i.e. in a place where the heat is less than that of the first and second samples. We will observe which of the groups of seeds will develop better.
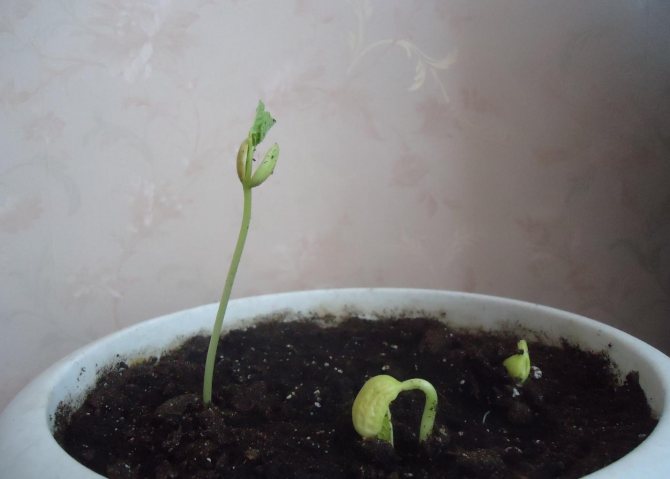
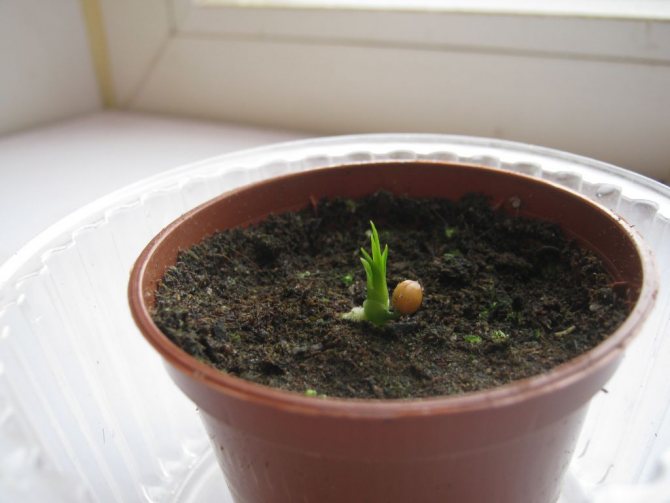
One day has passed since the sprouted beans were planted in the ground. There are no big changes yet. We have planted the beans shallow, so it is possible that the beans are slightly exposed as a result of heavy watering.
Yesterday, when we photographed the first sample, a tiny edge of a bean was visible to the honey with lumps of earth.And tonight a sprout 8 cm high has grown on this place! This is amazing! Such progress in just one daylight! The first pair of leaves is well formed and ready to open. The cotyledons began to shrink. In the second and third samples, the beans barely emerged from the ground. The development of shoots is lagging behind.
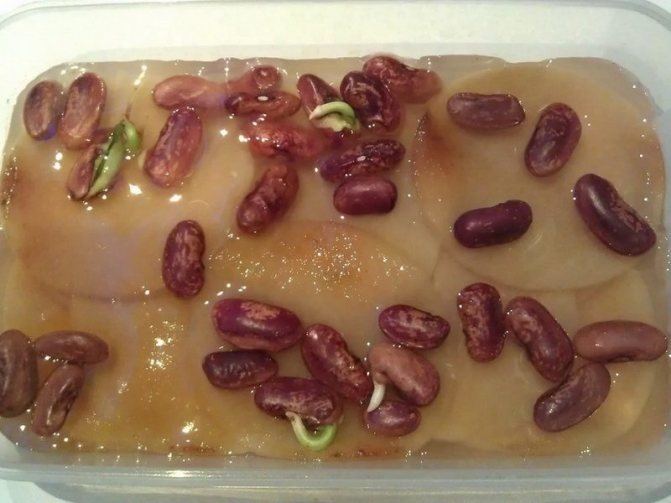
Basic germination methods
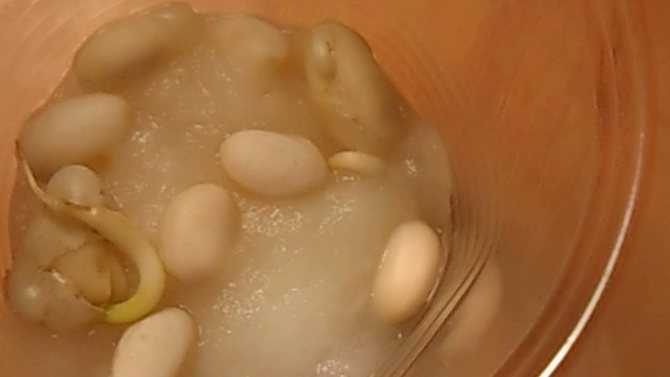
To germinate beans at home, the seeds are prepared first. For this, the seed is sorted. All dried and shriveled grains are removed. Beans with signs of spoilage and rot are thrown away. You can then sprout the beans quickly at home for food or for growing on your plot.
How to germinate seeds for food
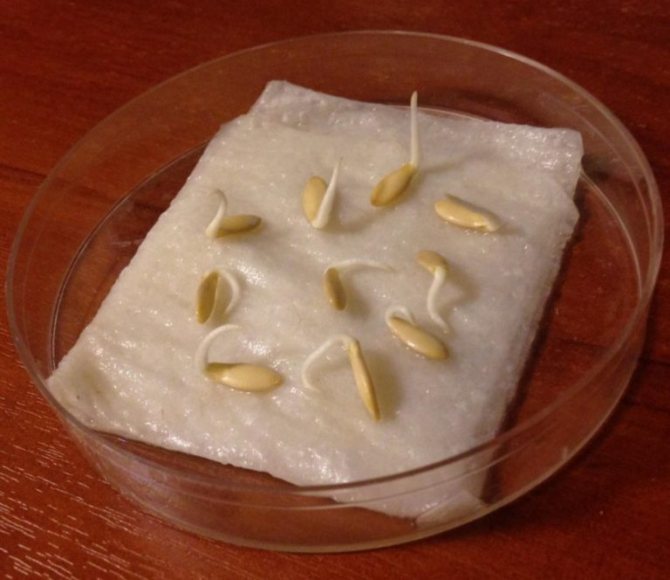
The easiest way to get seedlings is to grow them in a flat glass dish. Step by step, this process looks like this:
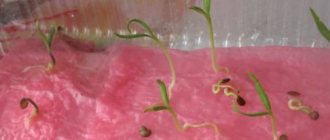
- Selected seeds are spread in one layer on a flat glass dish.
- Then they are covered with damp gauze and the dishes are left in a dark place.
- The gauze is regularly moistened without letting it dry out.
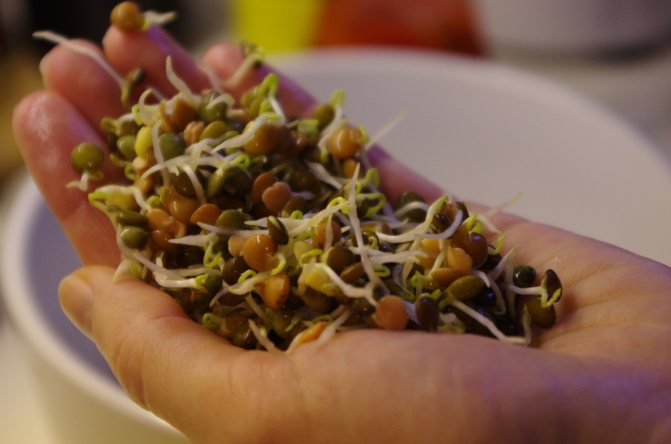
Already on the second or third day, small sprouts appear, and after 5-7 days they can be eaten. But many raw foodists eat such sprouts already on the second day after the start of germination.
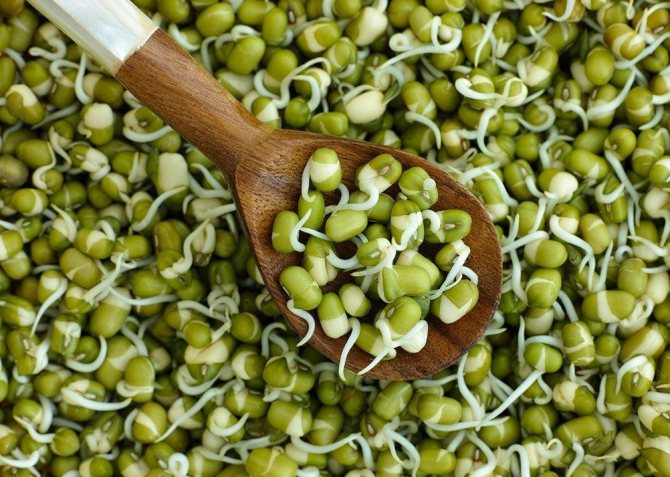
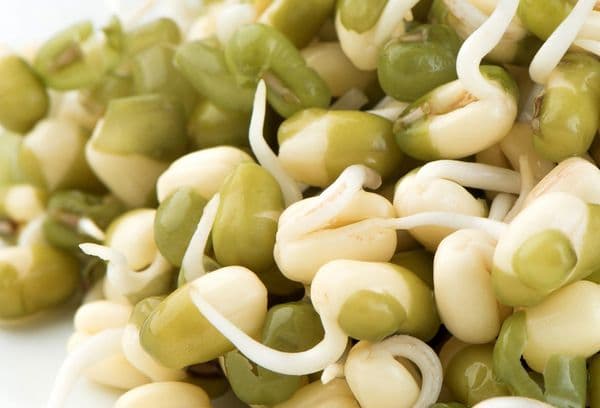
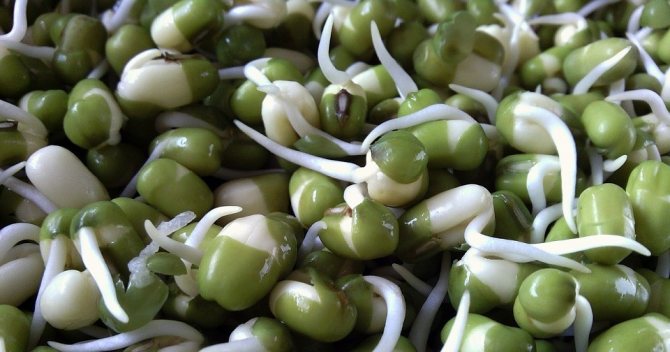
How to sprout mung beans
Small green beans are called mashes. The sprouts of this legume culture are used as a main dish, added to salads, used as an ingredient for stews or cutlets. Mung beans are sprouted using the same method as regular beans.
Important!
To obtain sprouts from mung bean, only a fresh crop is used. Otherwise, the resulting seedlings will contain very little useful substances.
The mung bean is preliminarily dipped into cold water for soaking. After 10 hours, the grains are removed, washed and discarded on a sieve. As a result of this soaking, the grains swell and soften. This treatment accelerates the emergence of sprouts.
For germination of mung bean, use a small plastic bucket or container with holes made in the bottom. They will get rid of excess liquid in the container. This greatly reduces the likelihood of mold formation.
The bottom of the container is covered with dry gauze. Pre-soaked grains are spread on it in a thin layer. They are sprayed with water and covered with a clean cloth. The container is left for a day in a darkened room. The moisture gradually evaporates. Therefore, every 3 hours the mung bean is again sprayed with water. The first shoots appear in a day. They can be eaten immediately or you can wait another 2-3 days.
How to germinate bean seeds in 1 day
For a quick release of sprouts, they provide constant moisture to the tissue in which the beans are located. For some varieties, pre-soaking is used. It also speeds up germination. To germinate seeds overnight, growth stimulants are added to the water. The next day sprouts will hatch and the seeds can be planted.
The easiest way to quickly germinate grains for food is by placing them in a damp cloth. Then the sprouts hatch the very next day or every other day. After that, they can be eaten.
How to germinate beans for planting
In this case, the roll growing method is used. You will need thick plastic and toilet paper for it. From a piece of polyethylene, cut a tape equal to the width of the toilet paper. It is laid out on the table and moistened with water. Toilet paper is applied on top along the entire length. Selected seeds are laid out in a row, 2 cm back from the top edge. Then cover with still another layer of toilet paper and sprinkle everything with water from a spray bottle.
The whole structure is rolled up and secured with an elastic band for money so that it does not fall apart. Then a little water is poured into a wide container and the roll with the free end is lowered into the liquid.
After a few days, seedlings appear, but they are not yet strong enough for planting in the soil. They are grown on a roll for another 10 days before transplanting into the ground.
Important!
Bean seeds cannot be germinated in the soil. In this case, they are immediately planted for growing plants.
Sprouting on cotton balls
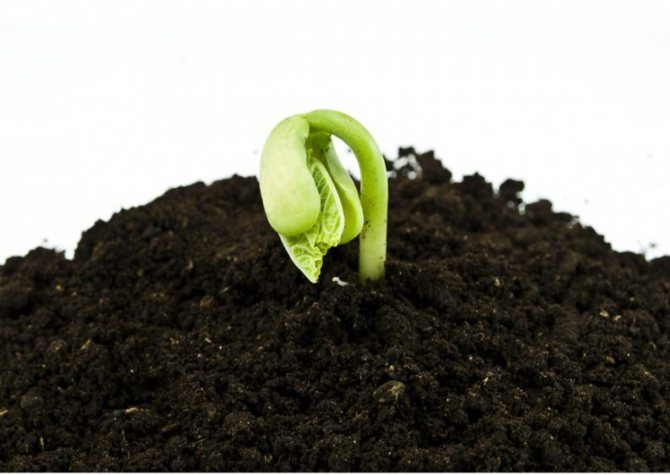
This method is often used in school experiments to observe the development of a plant. Any healthy beans from the store will work for this sprouting. A cotton wool pillow is placed in a low glass container and healthy beans are placed on it. The cotton wool is moistened with water and the container is left in the light in a warm place. After a few hours, the germination process begins and the first shoots hatch. Then you can watch how the beans sprout, take a photo or shoot the process on video.

Germination, how to determine
A useful procedure when preparing seeds for sowing is calibration. It allows you to separate quality from barren flowers. To discard barren flowers, it is customary to dilute salt in water, throw seeds there, leave them for a while (from half an hour to 2 hours). Those that come up should be thrown away.
There is no 100% germination, but you can find out what percentage will rise in advance.
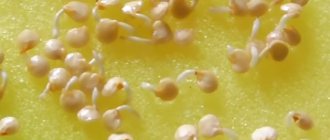
Determining seed germination is easy. We need to create favorable conditions for their growth. We take seeds of any culture and place them between two layers of gauze.
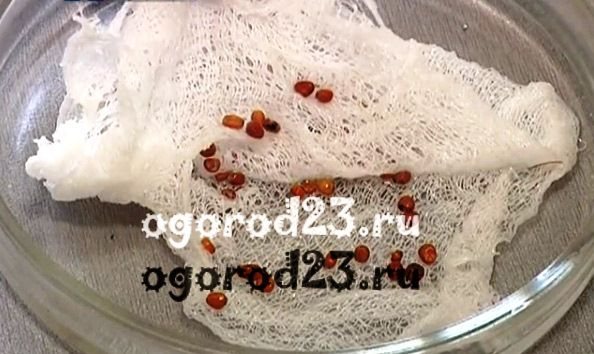
You don't need to take a lot to check the germination. Enough 8-10 pieces. Cover the moistened seeds in gauze on top with a film or a saucer and put where it is warm. Ventilate periodically, at least once a day, so that mold does not appear, check if they have germinated.
Seeds are considered germinated if they have roots or sprouts.

Each culture has its own term through which they germinate (see table above). If the radish, for example, has not sprouted after 7 days, and the zucchini - after 10 days, then do not even try to sow such seeds. If they have not sprouted at home, then they will definitely not sprout in the garden.
Growing beans after germination
This garden crop loves warmth and does not tolerate a drop in air temperature. Therefore, it is planted in open ground only after the final establishment of warm weather. This usually happens in May, depending on the climate and weather conditions.
For planting, choose an open area where the plants will have enough sunlight. The soil in the chosen place should be light and loose, without the proximity of groundwater. Before planting plants, the soil is loosened.
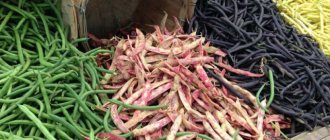
Selection of a variety of beans for the home
Beans can be curly and bush. At the same time, each species is divided into asparagus, peeling and decorative. The choice of a particular variety is influenced by the characteristics of the climatic zone and the place where the plant will be located.
Peeling varieties are also called cereals. They use only the grains themselves for food. The pod leaves of these varieties are too tough for human consumption. Such varieties love warmth, ripen for a very long time. For this reason, they are grown only in the southern regions.
Asparagus beans do not contain tough fibers. Therefore, they can be eaten. Fruiting of these varieties begins two months after germination. At the same time, the harvest ripens gradually. It is collected in batches before the arrival of cold weather.
Ornamental varieties are needed to improve the quality of the soil and decorate the garden. Such beans enrich the soil with nitrogen extracted by plants from the air. This element is essential for the rapid growth of Solanaceae and other plants.
On a note!
If you plant beans next to it, the plants will suffer less from late blight.
Bush varieties can be grown as indoor plants. Their root system does not exceed 20 cm in length, and the height of the shoots is up to 50 cm. Therefore, the plants do not take up much space and are placed in a standard flower pot.You do not need to tie them up and build a support for the whips. In addition, such beans ripen very quickly.
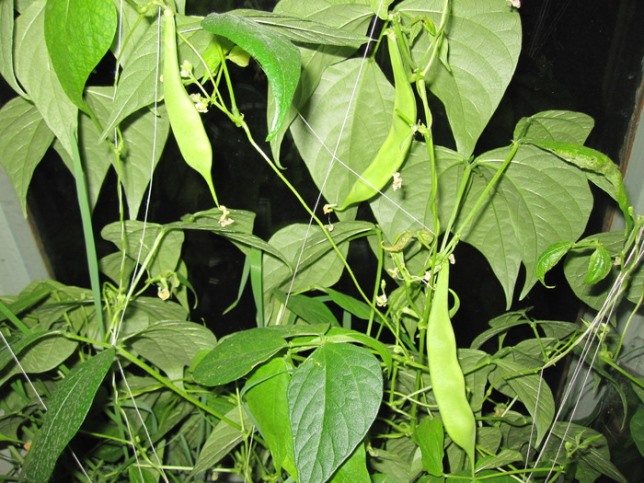
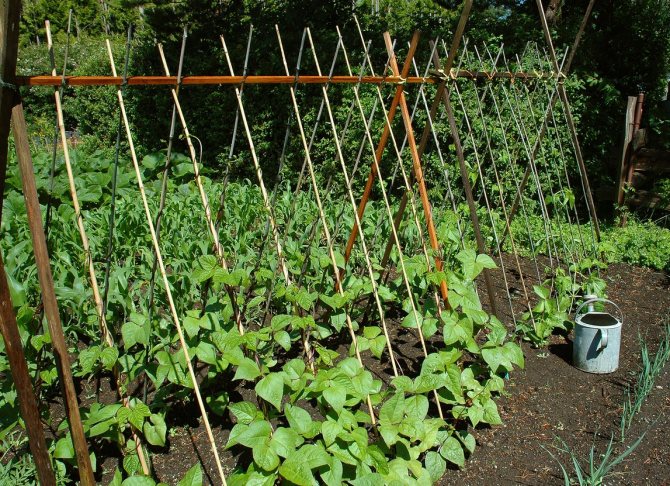
Climbing varieties are usually used for growing outdoors. They have a long root system, developed lashes. These beans bear fruit abundantly. It is often used to decorate gazebos, arches and other decorative structures.
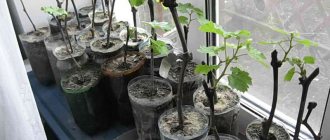
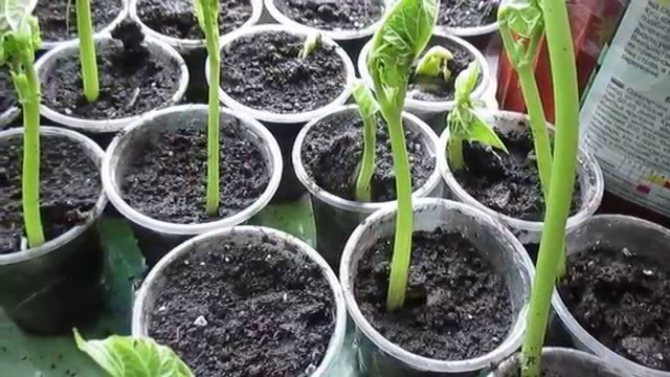
How to plant beans in a pot
For seedlings, the grains are planted in small containers filled with a nutritious soil mixture consisting of peat and humus. A deepening is made in the center of the container and grain is placed in it in a dry or germinated form to a depth of 3-4 cm. Prepared pots with seeds are placed on a lighted windowsill, where the temperature exceeds +20 degrees. After 2-3 weeks, the seedlings will grow up enough for transplanting in an open area.
Outdoor planting and care
After preparing the site, holes are made on the garden bed and prepared shoots are placed in them to a depth of 5 cm. Shrub varieties are planted at a distance of 15 cm, for others, the optimal interval will be 10 cm. Compost is placed at the bottom of the planting pit to provide the plant with useful substances.
Before planting the germinated seeds, the bed is spilled with warm water. The beans are placed horizontally, covered with earth and watered with a small amount of water.
Plant care consists in regular irrigation, clearing weeds and loosening the soil. This culture needs air supply to the roots. Therefore, between waterings, the ground must be loosened to a shallow depth so as not to disturb the root system of the plant. Watering should be moderate, too abundant watering causes root decay. If there is not enough moisture, ovaries and flowers fall off.
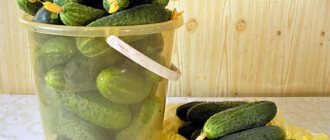
Harvesting
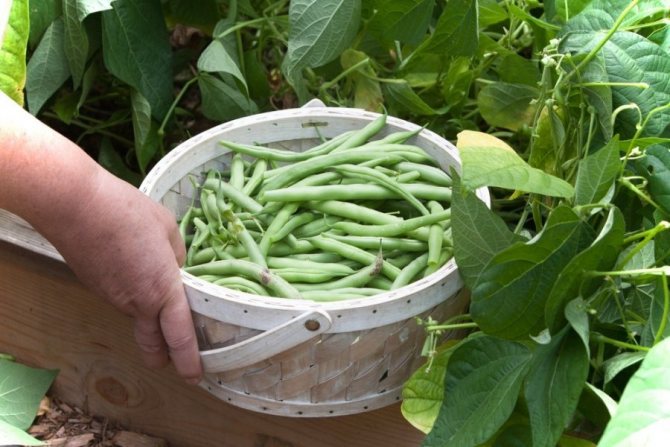
When to pluck ripe beans, they decide, focusing on its variety. Asparagus varieties are picked twice a week. Rarer harvesting causes the fruit to overripe. Ripe pods are cut with scissors so as not to damage the stem.
Peeling varieties are torn off after full ripening. Green leaves on the plant to ripen. The ripeness of the pod is determined by breaking it. On the break, the edges of the halves will be smooth, without traces of fibers.
Important!
Once removed, the beans are removed from the pod. You cannot keep them unhulled for a long time. The casing builds up moisture and the grains can become moldy.
Before being sent for storage, the beans are dried in the sun. For storage, the harvested beans are placed in linen bags or laid in sealed jars.
Day three
The first sample exceeded all our expectations. During the night, it rose another 5 centimeters, and in the afternoon the first pair of leaves unfolded, the leaves became larger, the color was darker. A sprout was outlined between the first pair of leaves for further growth. Through the glass of the jar, the elongated roots of the white plant are visible. In the second sample, the beans barely rose in the ground. Compared to the first sample, the lag is two days. The third sample has not changed.
In the first sample, the first pair of leaves increased. The cotyledons gradually dry up and are about to fall off. The root system has grown and filled the empty space in the jar. The sprout in the second sample was never able to rise above the ground. In the third sample, growth has completely stopped.
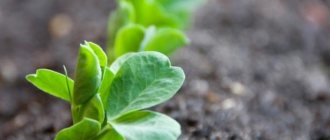
For plant growth, it is very important that there is a lot of sunlight, warmth and moisture. When all three conditions are met, the sprout is very quickly consolidated in the soil and opens its leaves in a matter of hours. From this moment, the plant can independently extract nutrients and water through the root system and receive energy through photosynthesis in the leaves.
Take a quick look at how our sprout grew. First, it grew roots for itself, absorbed moisture and nutrients from the soil, and then quickly developed a strong stem with the first pair of leaves.
Testimonials
Marina, 25 years old:
I sprout beans for food. They help you feel full and prevent you from gaining extra pounds. With their help, I have already lost 3 kg without any effort.
Elena 35 years old:
At school, my daughter was asked to do a bean sprouting experiment. We germinated it in a jar with moistened cotton wool, and then recorded all the changes with beans in the photo. It turned out very exciting.
Obtaining sprouts from beans accelerates the ripening of the crop, allows you to get friendly shoots of plants. Sprouted beans are especially useful as a diet food. They provide a lot of protein, promote weight loss and improve the condition of certain diseases.
How to increase seed germination
It also happens that the test showed good germination. You sowed them in a bowl for seedlings, but they do not germinate in any way. What to do?
There is a very simple way to prepare seeds - to "force" the seedlings to emerge faster from the ground. True, it is more suitable for a small amount of seed. Place your bowl of sown seeds inside a plastic bag, breathe into it. Then quickly tie the bag, put in the same place. The carbon dioxide you breathe out, its concentration inside the bag, will have a beneficial effect on the seedlings. You will see the first shoots soon.
You can increase germination by warming up. To do this, place the seeds in a thermos with water at a temperature of 40-50 ° C. Soak them there for at least 6 hours.
This method is contraindicated for tomato seeds!
It is better to subject them to a hardening procedure. Seeds calibrated in salt water, rinse. It is advisable to disinfect them with a solution of manganese or colloidal silver. After all this, place the bowl with seeds in a plastic bag and refrigerate where you store vegetables for 10-12 hours. Repeat this procedure every day for a week. That is, the seeds are at room temperature for 12 hours. And the remaining 12 hours are in the refrigerator.
- the main
- Section List
- The world
- Growing beans
School project
Legumes grow very easily and quickly, so they are often recommended to students for an experiment. The purpose of this research work is to find out what conditions are necessary for the growth and good development of a bean or pea seed.
Beans are germinated in just 4 stages:
- In any clean container: saucer, bowl, plate, plastic container, nylon lid, - put a layer of "soil". Cotton wool, bandage, gauze, cotton pads or even a synthetic winterizer are suitable as a soil.
- Moisten the soil liberally with water, creating the moist environment that beans need.
- Create greenhouse conditions. Close the container with the contents with a piece of cling film or cellophane, so that the film does not touch the beans and is stretched over it. Secure with regular clerical elastic or thread. Make some small holes in the foil for air circulation.
- Put an impromptu "greenhouse" in a dark, warm place and monitor the amount of water in the "soil".
After a week, the sprouts can be planted in the ground and the beans can be grown at home on the windowsill while continuing to observe its development.
In any school project, students are given more detailed instructions and it is worth sticking to them in their project.
Sprouting beans at home is very simple and interesting. As a school project, it will help develop neatness and attentiveness without unnecessary effort, and as an addition to the diet, it will help improve the condition of the skin and hair, eyes and digestive tract. Bean sprouts are not only rich in vitamins and minerals, but also contain all substances in a form that is easily absorbed by the body.
Many gardeners germinate their seeds before planting beans. This procedure accelerates the germination and ripening of the crop. Sprouts of legumes are used in food by adherents of a healthy diet. Sprouts are rich in protein and a living source of vitamins.Depending on the purpose of further use, different methods are used for germinating beans. Knowing the basic rules of germination, you can quickly get strong shoots and grow hardy plants from them.
Planting germinated material in the ground
The seeds should not be allowed to outgrow, otherwise the roots will begin to intertwine with each other. When separating, fragile seedlings can break, which will affect the germination of the seeds. Beans are planted in the second half of spring. By this time, the earth is warming up, and the threat of return frosts will pass. This is important for the reason that the legume culture is not frost-resistant; even minor frosts can destroy it. A place for planting beans is chosen well-lit, with loose, breathable soil. The grains are planted in the ground sideways so as not to damage the roots.
Pits 5-6 centimeters deep are dug, watered, seeds are laid in them, and covered with earth. The distance between plantings is 20-30 centimeters. If the grains are planted in dry soil, they do not need to be germinated.
Additional Information. According to popular beliefs, beans can be planted after the chestnuts begin to bloom.
Bean care
As soon as the beans germinate, the garden is watered, then the soil is loosened. The procedure is carried out carefully so as not to damage fragile seedlings. In the future, loosening is combined with weeding. Water the beans so that the soil is moist but not wet. Moisture is especially needed during the period of pod formation. In 25-30 days after seed germination, young plants are fed with complex mineral fertilizer. The next top dressing is in 20 days.
So that the plantings are not affected by fungal diseases, it is necessary to observe crop rotation, disinfect seeds, and burn infected bushes.
Pests in the form of snails and slugs are collected by hand. Climbing beans must be tied to supports so that they do not break from the wind.
Note! Before fertilizing the planting, it is spilled with plain water, otherwise the delicate roots can burn the salts.
Harvesting the first harvest
The ripening time of the crop depends on the temperature regime (in a cool microclimate, ripening occurs later) and on the variety. The first mature pods will appear 1.5-2 months after germination. The readiness of the pods can be determined by the yellowing lower leaves, the appearance of the fruit. The flaps will open easily. The asparagus beans are harvested in the juicy green pod phase. Overripe fruits will be tough and unsuitable for food. The crop is removed as it ripens.