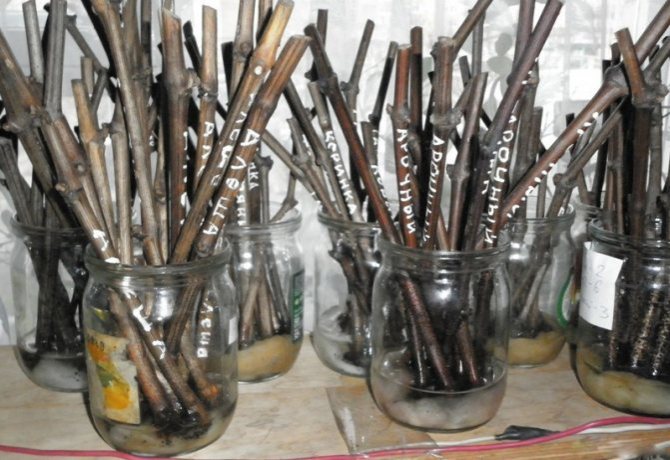
Germinating grape cuttings at home is a simple task, with a minimum of effort, even an inexperienced gardener can handle it. Cutting has many advantages, therefore it remains the most common method for propagating grapes.
There are several ways to germinate shanks, having learned about the features of each of them, you can select the ideal option for yourself.
Pruning cuttings at home
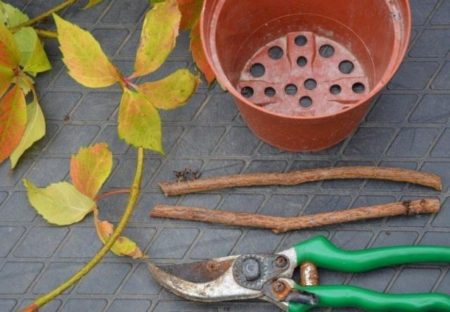
Cuttings for planting and germination are cut in the fall. At this time, only healthy branches remain on the bush, and all the weakened ones die off. You will need a pruner and a solution of copper sulfate. Cuttings are dipped into it after cutting. Vines with the largest bunches of grapes are the best planting material.
Cuttings are germinated and planted according to a clear algorithm:
- The cuttings are cut when there is no foliage left on the bush.
- Choose a vine as straight as possible, 0.7-1.2 cm in diameter.
- Choose a branch of medium length, unnecessary bends are not welcome. Each should have 2-3 buds. The cut is made at an angle of 45 ° at a distance of 3 cm from the first kidney.
- Cuttings are cut at positive temperatures. If frosts have begun, cuttings should be postponed until next year.
How to prepare and how to germinate grape cuttings

For the correct calculation of the start date for preparing cuttings for rooting, rely on the period of planting the grapes in a permanent place. The disembarkation is carried out when the return frosts have passed. Most often, rooting takes 20 days, so storage in winter and germination in spring is the best option. For some varieties, rooting takes about 6 weeks. How to prepare cuttings:
Storing grape cuttings at home
The main task is to keep moisture inside the shanks and avoid buds and shoots germination ahead of time.
Before starting storage, special processing is performed:
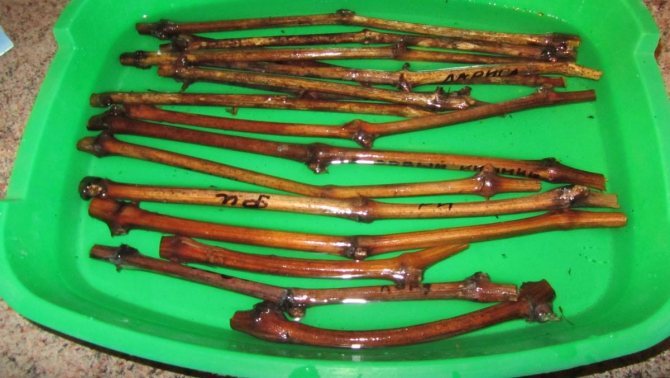
- the shanks are left in water for a couple of days, changing it regularly;
- after - for 20 sec. dipped in a solution of copper sulfate: this will prevent possible infection;
- planting material is dried by wiping with a paper towel or cloth;
- the sections are covered with wax or plasticine: this helps to retain moisture inside the cutting.
The storage of the shanks must be careful. Careful about the choice of location:
- In a refrigerator. This method is suitable for storing small quantities of harvested material. The cuttings are wrapped in wet paper, and then in cling film, holes are made for air circulation. Place the bundle in the coolest compartment of the refrigerator.
- In the cellar. This option will be of interest to summer residents in the middle lane. The cuttings are wrapped in a bag, sprinkled with sand on top. The low temperature in the cellar will prevent them from germinating prematurely.
- In the ground. To do this, they choose a place in the summer cottage and dig a hole 40-50 cm deep. Cuttings are placed in it, the earth is covered back. Low soil temperatures in winter will prevent the kidneys from swelling.
Check their condition periodically. If the cut is dry, it is soaked in water for a while, after which it is dried and again left for storage. The resulting mold helps to remove the potassium permanganate solution.
Storage of shanks

The key to healthy growth and successful rooting of the vine is the right storage conditions.It is important to provide zero temperature and moderate humidity - then the cuttings will not lose too much water and trace elements. If stored improperly, cuttings will lose up to half of their nutrients and will not be able to take root.
Place the shanks in a plastic bag or wrap with plastic wrap. Store your workpieces in your basement or cellar. Every month during the entire shelf life, open the bag and check the blanks. If dried stems are found, they should be soaked in water. If the cuttings are infected with mold, treat them with a solution of copper or ferrous sulfate (25 grams per liter of water).
You can store the cuttings in the sand. Moisten the cuttings before placing them in the sand. Place the container with pitch and cuttings in the cellar until spring.
If you live in a city apartment, you can store the shanks in the refrigerator. The main thing is that the temperature on the shelf is close to zero. Wrap the cuttings in a damp cloth and place in a plastic bag. Although many gardeners refuse to wrap with a cloth, considering it unnecessary. Remove the shanks every month and inspect for dry spots and mold.
Another way to store the shanks is in the ground. Bury the cuttings 30 cm or more without wrapping them in plastic to prevent suffocation. Choose a location that is protected from stagnant water.
If there are a lot of blanks, store them in a wooden barrel. Wrap the cuttings in burlap and lower them into a barrel. Place the lid on the barrel and bury it in the ground. If there is severe frost in winter, you can cover the area above the barrel with straw.
Preparing for germination
Before germinating, grape cuttings need to be prepared. The prepared shanks are taken out in the spring, when the temperature is above zero on the thermometer. First, they are sorted out and the unusable ones are removed. To do this, make a transverse incision and examine it. If the cut site remains dry, the cutting has dried up and will no longer be able to grow and take root - it is thrown away. If moisture has appeared at the site of the incision, the next step will be to inspect the color: it should be rich green, without blotches.
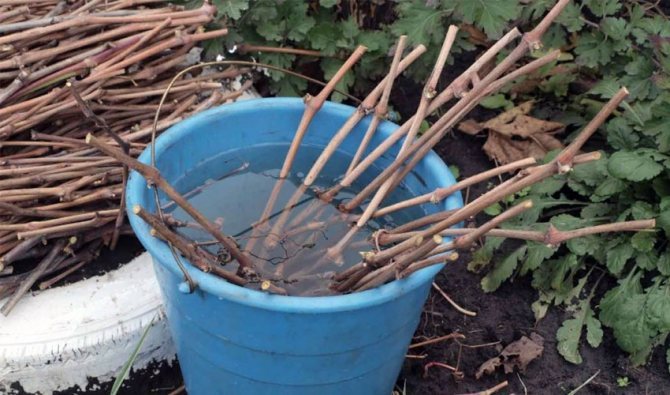
Before germination begins, the cuttings are processed. They are dipped in a solution of potassium permanganate to remove bacteria, then washed in clean water, a straight cut is made at the bottom and an oblique cut at the top of the shank. After that, they are placed in a bucket of warm water for two days. On the third day, the shanks are soaked in a root growth stimulator.
In the process of germinating cuttings, not a single step must be missed. It is important to follow all of these steps, because well-done preparation is the key to success.
Processing shafts after storage
When exactly to get the shanks, the gardener determines individually. In addition to the region, it is worth considering the grape variety and weather conditions. It also matters whether the grapes will be planted by cuttings in the ground or by vegetative cuttings.
After winter storage, the cuttings should be soaked in water for two days with the addition of heteroauxin (dilute the drug according to the instructions). Use settled or thawed water. Heteroauxin can be replaced with regular honey - a teaspoon in a bucket of water.
You can additionally use stimulants - Epin, Zircon, Kornevin, Fumar. Use stimulants according to the manufacturer's instructions, but not all at once - stop at one thing. If you overdo it, the cuttings may not root at all.
Use the pruning shears to update the slices. At the bottom, leave 1-2 cm from the lower kidney, at the top - 2-3 cm from the uppermost kidney. Squeeze the stem lightly - a small amount of liquid should come out of the cut.
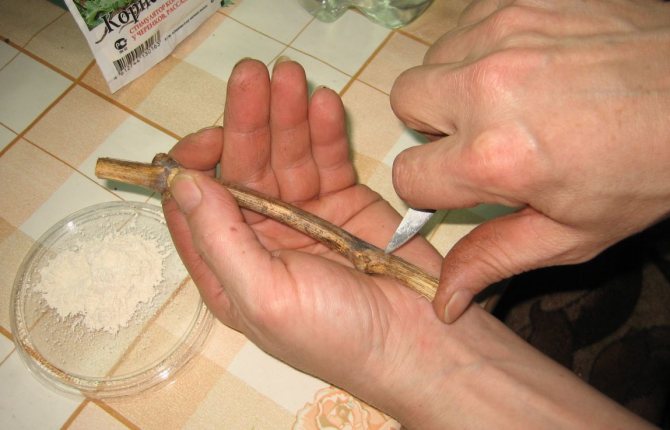
The cut itself should have a greenish tint. Then the stalk can be considered viable and healthy. On the bottom cut, make 3-4 shallow vertical cuts, 1-3 cm long.This process is called furrowing and promotes the activation of cellular processes - the cutting will take root faster.
Germination methods
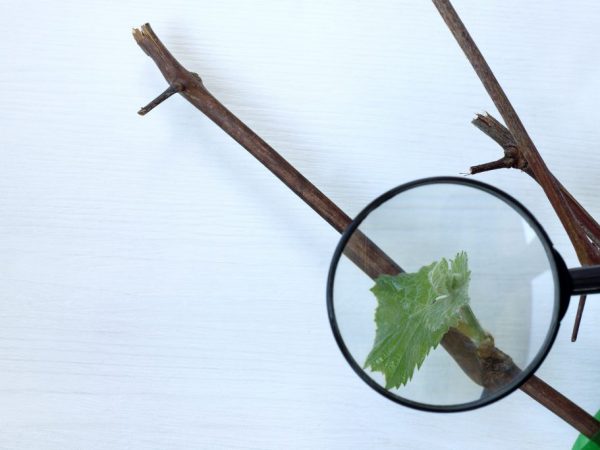

Germinating cuttings is easy
Germination of cuttings at home is carried out in several ways.
Germination in water
It is better to germinate grapes according to the method of R.P. Radchevsky. He carried out the germination of grape cuttings in water.
Water is poured into a plastic or glass bottle 2-3 cm long, up to 10 branches are placed in a container. To retain moisture, the top of the vessel is closed with a bag. The container is placed on a windowsill that faces the south or southwest side. Shoot growth is observed after 2 weeks, roots also begin to grow at this time.
This method of germinating grape cuttings is especially effective.
Rooting in the ground
By rooting in the ground, cuttings are planted by novice gardeners. The essence of the planting method is that the shanks are immediately placed in a separate container with soil. There is no guarantee that each cutting will be rooted when using this method. The main thing is to monitor the proper level of moisture in the soil.
Germination in tissue
This method was invented by N.L. Puzenko. He carried out the germination of cuttings by wrapping them in a wet cloth. The tops remained outside, and a film was wound around the fabric itself. Then they were placed on top of a cabinet or refrigerator so that the open part remained in the light. If the fabric dried out, it was sprayed to maintain the proper moisture level. The roots appeared after 2-3 weeks.
Sprouting in sawdust
Preparation of cuttings for germination should take place in advance. Sawdust is poured with boiling water, wait for them to cool and squeeze out excess water. Then they are poured into the pot, forming a layer of 2-3 cm. The shafts are planted in the pot, the second layer is poured, then it is covered with a film. The sawdust is periodically moistened. Roots appear after 2 weeks.
Recently, the cultivation of seedlings on peat tablets is popular. Chubuki is placed in a container and filled with warm water for 10-20 minutes. Holes are made in the middle of the tablets, cuttings are inserted there. They are placed in a plastic cup or pallet, at the bottom of which there will be wet sand or prepared sawdust.
The room temperature should be 20 ° C-24 ° C. Make sure that the moisture content of the peat tablets remains unchanged.
How to germinate grape cuttings at home? The process is not too complicated, although it requires some effort and knowledge. But after proper germination, you can plant the vine in open ground with the confidence that it will take root there and will soon yield a harvest. For germination to be successful, you need to properly prepare and store the cuttings. At the end of winter, rooting is carried out, and at the beginning of May, the vine is transferred to open ground.


Germinating grape cuttings at home
Rooting shoots
When laying the shanks in the fall, several conditions must be observed that will allow you to get strong shoots ready for rooting and growth in the spring. It is very important to create the necessary thermal regime for the cuttings: not lower than 0 degrees and not higher than 4. When the temperature drops to negative, it can freeze, and a higher one threatens that the buds will begin to swell and roots grow. Or the stalk will become moldy and simply rot.
The next important point is to ensure the necessary humidity (the best option is 60%) so that the shank does not dry out, and regular ventilation of the room.
If the cuttings are stored in the basement, they are threatened by rodents, for which they will turn into excellent food.
It is better to use the chamber for fruits and vegetables, since the temperature there is the most favorable for the shank. In its absence, it is possible to provide winter storage of cuttings (of course, in small quantities) on the lower shelf of the refrigerator.To establish the required humidity level, experienced people advise to wrap the lower part of the shanks with a cloth soaked in water and wrung out, then place them in a plastic bag and tie them well with a rope.
The only caveat is that you cannot wrap the seedling completely, as this will lead to its rotting. Next, it remains to check the condition of the cuttings on a monthly basis and, if necessary, carry out their processing: wipe the place where mold appears with a cotton swab dipped in a pink solution of potassium permanganate. Before placing the stem back in the refrigerator, it will need to be dried.
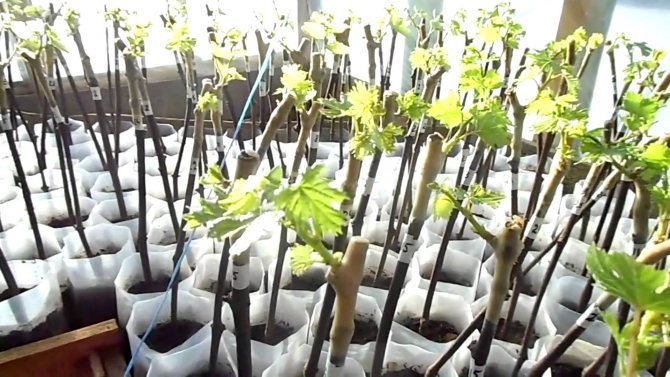
Overwintered shanks begin to prepare for planting in February. The best option is to put foam rubber soaked in water in a bag, install cuttings on it, wrap it well and put it away in a dark place. After ten days, check them for the appearance of root primordia. "Revived" cuttings should be planted in a glass from under a plastic bottle, filled with a mixture of soil and humus, covered with the top of the bottle without a lid and placed on a windowsill or in another lighted place. When the roots fill the bottle and 4-5 leaves appear, the bottle can be removed.
Compliance with simple recommendations on how to prepare cuttings (shanks) of grapes in the fall and preserve them in winter will help to get a strong, well-developed vine in the near future.
You need to start preparing grape cuttings for planting in mid or late February. They need to be carefully examined, first of all, to check the sections. If liquid oozes from them, the shoots will most likely not germinate, as well as completely dry branches. Only those cuttings with a green cut, without blackness and mold, on which moisture appears after pressing, are suitable for further germination.
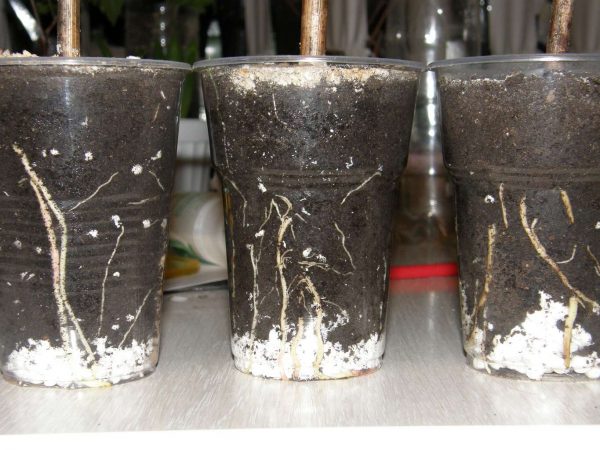

Rooted cuttings grow and develop better
To speed up the emergence of roots and the development of seedlings, they need to be rooted in one of the available ways, having previously kept them in warm water for two days, changing the water daily. You can add aloe juice, honey or a special growth-activating drug to it. Some experienced growers argue that without this procedure, the chubuki may not germinate at all, so it is not recommended to ignore it.
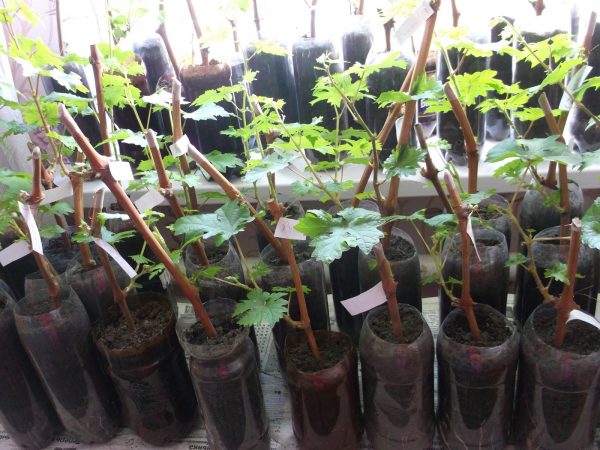

With the correct procedure, the roots appear after two weeks.
Table 1. Methods for rooting grape cuttings.
| Rooting method | Description |
| In the water (watering) | Put a layer of cotton wool 2 cm thick in glass jars, pour a little light pink solution of potassium permanganate or water with a slice of charcoal. Put the shanks in the container, and on top create a greenhouse effect using a plastic bag and place them so that the lower part of the can is warm, and the upper, on the contrary, is cool. At home, such a microclimate is obtained using bottles filled with water of different temperatures. The advantage of this method is that it activates the development of roots, and the formation of buds, on the contrary, slows down |
| In the soil | Pour drainage on the bottom of liter containers, lay on top a substrate of humus, clean river sand (you can replace it with perlite or vermiculite) and garden soil, previously steamed. Place the shoots in the bottom layer in the ground and water well |
| In peat tablets | Moisten the peat tablets well, place the cuttings there with the lower part, and wrap the upper part in a moist natural cloth and wrap with cellophane |
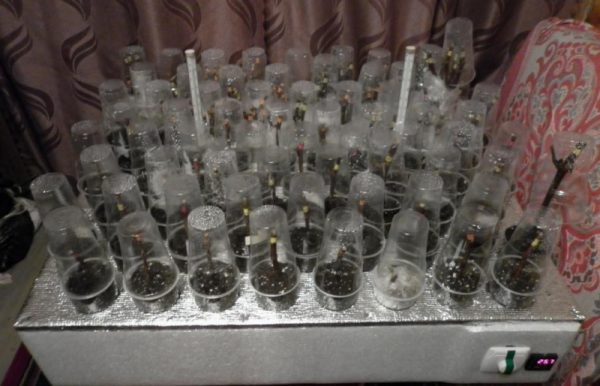

Kilchevaniye is not an easy but very effective way of rooting cuttings.
Grape cuttings should be placed in a place with good lighting and make sure that the bottom is constantly moist. After about two weeks, the shoots need to be examined - growths should appear on them, from which roots will subsequently appear. If there are no changes, the cuttings should be left for another 2, for a maximum of 3 weeks.


The best varieties for Central Russia
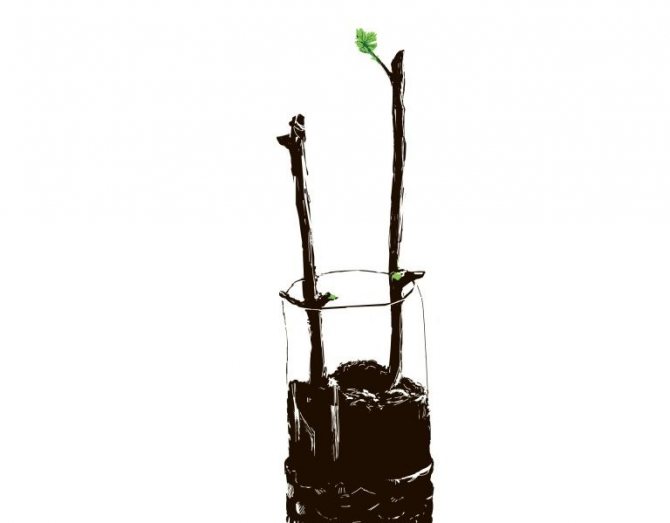

Cuttings or shanks should be harvested in the fall.First you need to decide on the grape variety. Be sure to consider the weather conditions in your area. The farther north, the more frost and disease resistant varieties should be. It is also worth paying attention to the color of the grapes, the size of the berries, their taste, and the ripening period.
Harvesting grape cuttings
Cuttings or shanks should be harvested in the fall. First you need to decide on the grape variety. Be sure to consider the weather conditions in your area. The farther north, the more frost and disease resistant varieties should be. It is also worth paying attention to the color of the grapes, the size of the berries, their taste, and the ripening period. It is important to know that the taste of this fruit largely depends on the ripening temperature, the number of sunny days in a particular area. In the south, the grapes can be large and sweet, and in the northern latitudes, the berries of the same variety are smaller and sour.
Choose a cutting from the top of a healthy bush that bears fruit well. Cut with a sharp oblique knife, always clean, so as not to infect. The correct stalk should look like this:
- The shank color is green with a brown tint, without signs of disease, mold and rot.
- The shape of the vine is correct, even, without knots or curvatures.
- Length - 20-40 centimeters (too short take root with difficulty, and long ones are poorly stored).
- The number of buds on the handle is 4-8 pieces.
- Thickness 0.7-1 cm (optimal - 0.8 cm).
What are the benefits of growing grapes from cuttings
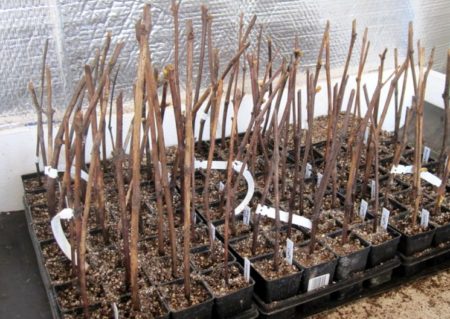

Are you familiar with the situation when your neighbors grow incredibly tasty, fruitful grapes, which you would love to plant at your place, but neither you nor the owner of the vineyard know the name? And what to do when the name of the variety is known, but you cannot find it in the nurseries of your city, and are afraid to order from catalogs? There is nothing easier than asking friends to share the shoot, the grapes will not suffer from this, and you will save time and money!
Kilchevanie and methods of germinating cuttings
Germination of young shanks begins in February or March. First, they need to be transferred to a warm room. The twigs are disinfected for half an hour in a solution of potassium permanganate of a weak pink color, washed under running water. Then make a straight cut of the lower tip, 2-3 centimeters below the extreme kidney. The upper part is refreshed with an oblique cut.
To stimulate the growth of the vine at home, it is soaked in stimulants. It can be honey, aloe juice, sodium humate (a tablespoon in a bucket of water). In the lower part, near the kidney, longitudinal shallow cuts are made. This manipulation improves root formation. In the area of the grooves, after a while, a callus or root callus is formed, from which real roots will grow.
Kilchevanie
Buds on cuttings often bloom faster than roots can grow. This depletes the shanks, they may soon die. Therefore, it is recommended to carry out their kilchevanie. The bottom of the vine should be placed in a warm environment and the top in a cool one. They do it in different ways. The easiest way is to put the stalk in water, and the container on the battery near the window. Then the water will be constantly heated, and the upper part of the branch will be cooled from the window.
Heating devices are used for this purpose to maintain the temperature in the root area. You can put the cuttings in a box, wrap the lower part with a rag dipped in warm water. The top is simply wrapped in a film. On top they put a bottle of ice, and on the bottom - with warm water (about 30 degrees). The set temperature is constantly maintained. Kilchevaya continues until a root callus appears in the lower part.
Germination of cuttings
How to germinate grape cuttings correctly? There are several ways, you can choose the most convenient one.The following methods are used for rooting cuttings:
- In the water, according to Radchensky
- "On the closet" - Pusenko's technique
- In peat tablets
- In sawdust or other filler
- In aquarium
- In a pit (Moldovan way)
After the roots appear, the cuttings are transferred to containers with soil. You can plant the vine without germinating grape cuttings. They do this no earlier than at the beginning of June. He resorts to this method in cases where the shanks were obtained in April or May, there is no longer time for rooting at home. But the technique is not very reliable, especially for a temperate climatic zone, cold summer.
Planting seedlings in the ground
When roots with a length of 1.5-2 cm appear at the bottom of the cuttings, you can plant them in the ground. Its composition must also be fertile. Before planting, the seedlings must be hardened. To do this, for 5 days, it is kept under the sun until lunchtime, and then carried away into the shade. After 5 pm, they are taken out again under ultraviolet light.
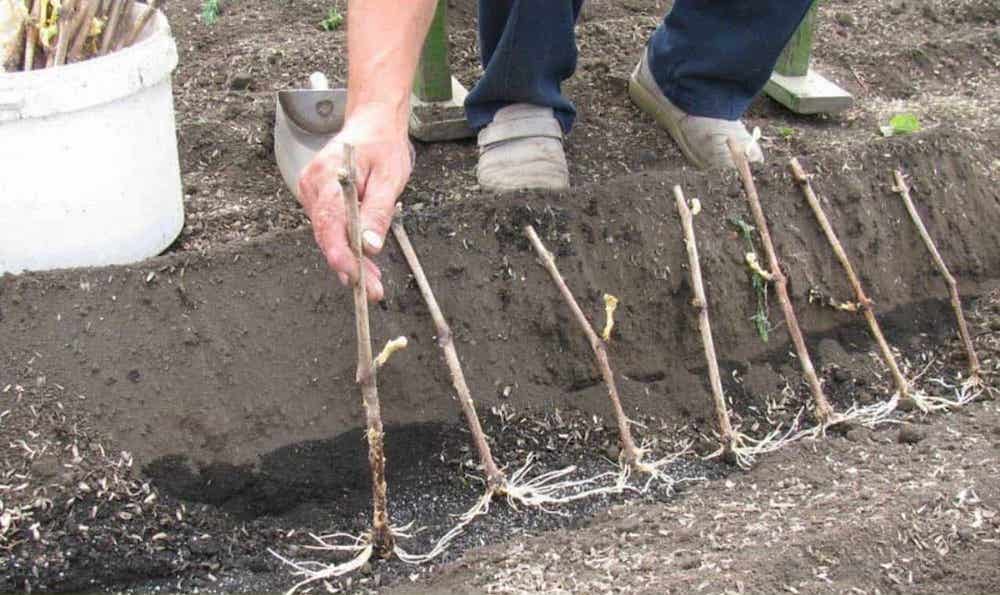

Planting grape seedlings in the ground
Transplanting cuttings into the ground is carried out in May, when there are already several leaves on the seedling. The process is carried out as follows:
- choose a well-lit and ventilated place;
- the soil on the site is deeply dug up and fertilizers are applied from humus, sand and nitroammofoska;
- dig holes so deep that it exceeds the length of the cutting by 20 cm;
- 10 cm of sand is poured at the bottom of the pit and twigs are planted;
- each stalk is dug in so that the upper peephole looks out at least 7 cm above the ground.
You can play it safe and put two shoots in one hole.
After planting grape cuttings, they begin to properly care for them. Plants will need a lot of water. Each seedling takes almost 20 liters of water. The place around the trunk is mulched with a 15 cm layer.
A week after transplanting young grapes, it must be fertilized. Potassium or wood ash is added to the ground at the rate of 35 g per seedling. It is worth noting that nitrogen-containing fertilizers are not used for grape cuttings at an early stage of cultivation.
Germinating cuttings in water
Before germinating young grape cuttings in water, they are prepared according to the above method. In order for them to take root better, the grooves can be treated with Kornevin. A suitable container is prepared, preferably transparent, so that it is easier to follow the germination process. The further algorithm of actions is as follows:
- Cotton wool or a small layer of sawdust is placed on the bottom of the container.
- Water is poured on top (boiled, settled, thawed or rain).
- The water layer should be no more than 3-4 centimeters.
- Cuttings are placed, no more than 10 pieces.
- The water temperature is maintained within 25 degrees.
The rooting process in water takes 3-4 weeks. You can cover the top of the container with a plastic bag to maintain constant humidity. Several crystals of potassium permanganate are added to the water, until a faint pink color is obtained, to protect the cuttings from decay. Also, some growers advise adding Heteroacustin, pieces of charcoal. When more than two shoots appear on a branch, the strongest is removed. It will take strength from the cutting and slow down the rooting process.
You can accelerate root growth by placing the container on a battery or heater. It is important to ensure that the water does not dry out and is not too cold. You need to add cuttings daily. The water layer should not be higher than the first bud, otherwise the plant will suffocate. If spots appear on a branch, signs of rot, mold, it is wiped with a solution of potassium permanganate.
Aquarium owners can use them to germinate grape cuttings in water. To do this, a polystyrene side is made at the edge of the aquarium. Prepared cuttings are inserted there so that their tips are submerged in water by 2-3 centimeters, and the kidneys remain in the air. Constant aeration, fish waste products improve rooting.To prevent the inhabitants of the aquarium from gnawing the roots, the rooting site is fenced off with a glass or partition with small holes.
Rooting in filler
You can germinate grape cuttings directly in the ground or filler. Sawdust is most often used. They are pre-scalded with boiling water to kill molds and bacteria. Then allow to cool and squeeze out excess water. A layer of sawdust is poured into a container or any other container. Chubuki is inserted into sawdust, sprinkled on top with a second layer. The kidneys should remain outside. Once every 2-3 days, the sawdust is moistened with warm water. After two weeks, they check if roots have appeared on the cuttings. Such twigs are grown in the ground.
You can plant the vine directly into the ground. The soil is made from a mixture of sand, peat, turf. Cut the stalk along an oblique line, so it is easier to stick it into the ground. Pots with cuttings are added every 2-3 days. When rooting occurs, green leaves and shoots will appear on the branches. The seedlings can be transferred directly into the open ground. This method is easier than rooting in water. But not all shanks take root at the same time, the waste of material is quite large. To reduce rejects, you need to treat the branches well with stimulants like Kornevin. Under its action, the roots germinate better.
Growing shanks
Growing grape cuttings after germination at home is a troublesome process. In order not to damage the roots during transplantation, pay attention to their length: it should not be more than 2 cm. The container for germinated cuttings is filled with loose soil, which consists of garden soil, sand and humus. Drainage holes are made at the bottom.
Watering is carried out regularly, their frequency depends on the soil and the air temperature in the room. Light soil is moistened more often because moisture evaporates from it faster. If the house is warm, water is added to the ground once a week, if it is cool enough - once every 2-3 weeks.
Pusenko's technique and germination in peat tablets
If it is not possible to allocate enough space for germinating cuttings at home, you can root them on a cabinet. For this, the lower part of the seedlings is treated as for normal rooting. Several grooves are made, smeared with Kornevin. Then wrap the base with a damp cloth and lay the shanks on top of each other. You can keep them on a cabinet, on a shelf, or on a refrigerator. The tops must necessarily be turned towards the light source. After about 2-3 weeks, when the length of the roots is about three millimeters, they are transplanted for further germination into the ground.
A more perfect way is to sprout grape shanks in peat tablets. In this case, the roots are very strong, there is no need to moisten the tablets. This is what this technique for growing grape cuttings at home consists of:
- The cuttings are soaked and treated with copper sulfate or manganese.
- Peat tablets are poured with water until they swell.
- The shafts are inserted into a tablet.
- Seedlings with peat are wrapped in plastic wrap.
- Spread out on a cabinet or elsewhere, wrapping the top to the window.
- It is desirable to cover the tops with paraffin.
After three weeks, the rooted branches can be planted in the ground. For this, cuts are carefully made in the film. You do not need to pull out the stalk from the peat tablet. With this germination, the crown is not formed, the root system is stronger.
Testimonials
Anatoly
We do not grow anything in purchased land and do not advise others, make seedling mixtures yourself. During rooting, the cuttings should not be rearranged from one place to another and drafts in the room should not be allowed. Hardening before planting grapes must be carried out without fail, a sharp change in the situation can lead to the death of the seedling. I cut the cuttings in the fall, store the preparation for germination on the glassed-in balcony, germinate at the end of January.
Margarita
I took a sprig of grapes from neighbors, kept the cuttings in the refrigerator. When it came to rooting, I prepared the branches, but did not soak them in a growth stimulator, the cuttings did not give roots. The next year, during preparation, I put the shanks in a nutrient solution for a day (1/4 teaspoon of honey per liter of water). After 3 weeks after planting, roots appeared in the peat tablets, this spring I planted 2 bushes in the garden, now I'm going to cover them for the winter.
Absolutely everyone can germinate grape cuttings at home. To avoid unpleasant surprises, harvest several branches at once, then a positive result will be guaranteed. Plant new varieties of grapes taken from your neighbors, update old bushes from your garden using the cuttings method following our recommendations, you will definitely succeed.
The need for germination
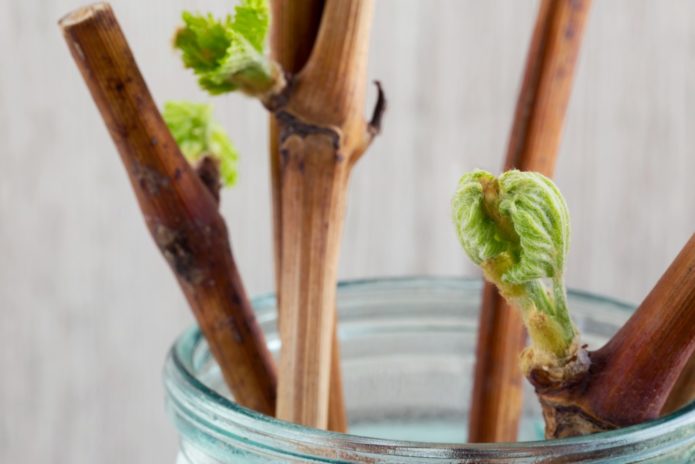

For the propagation of grape bushes, germination of seeds, rooting of cuttings or cuttings, planting of ready-made seedlings are used. The seed method of growing is very rarely used. It takes a lot of time to get the finished plant. At the same time, many young plants die or do not retain varietal characteristics. Ready-made seedlings are good because they allow you to immediately get a ready-made young plant. But the purchase of seedlings always turns out to be significant costs.
Most often, cuttings or rooting of grapes by layering are used for home breeding of the varieties you like. In this case, the use of a particular option is determined by the weather and climatic conditions of the region where the plants are grown. If warm weather sets in early and is not limited to one summer month, cuttings rooting are used. In all other cases, cultivation by cuttings or shanks is recommended.
Cuttings are the preferred method of growing grapes in northern regions with short summers, few sunny days and a high risk of recurrent frost.
Benefits of growing grape vines by cuttings:
- A young fruiting vine is used for cutting cuttings.
- Any varieties are suitable for grafting.
- To obtain a high-class planting material, the cut planting material is prepared in a certain way. Rooting is carried out so that the cuttings give roots by the time of transplantation to a permanent site.
- Transplanting a planting material adapted to the conditions of the site is faster than rooting of cuttings.
Before planting in a place of constant growth, the harvested shafts must be germinated. Only then can you get a healthy, strong bush, which will be well accepted in a short time, give foliage and withstand diseases.
Why do you need to germinate cuttings
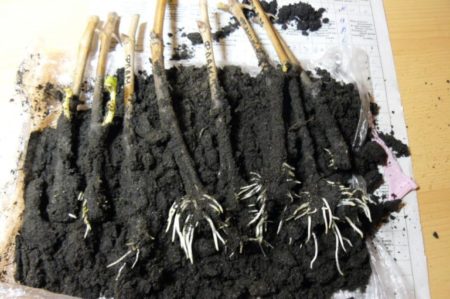

The grapes are propagated by seeds, shanks and layering. The first method is time consuming and does not guarantee a good result. Not all varieties retain varietal characteristics when grown from seed. Digging in a young shoot from a bush for the purpose of rooting is possible only in regions with early spring and warm summer. Cuttings can be used to propagate grapes in areas with a cool climate, where there is a risk of late return frosts and short summers.
The moment of full ripening of the grape vine falls in autumn (during leaf fall), then the growing season ends, the bush "falls asleep" for 2 or 2.5 months. Then the vineyard prepares for the spring awakening. The harvested cuttings take root and begin to grow (buds open) in February, which means that their growing season begins much earlier.
The early germination of stems is an impetus for the development of grapes, while the plant forms very quickly. By the time of planting in open ground, the sprouted branches will be full-fledged, fully prepared seedlings.By autumn, they will have time to get stronger, get used to new conditions, gain strength before wintering, which will be the key to an earlier entry of grapes into the fruiting stage.
Germination time
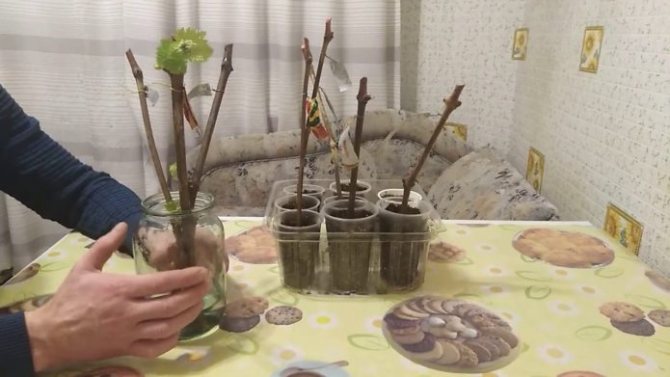

At home, cuttings are taken out and begin to germinate, focusing on the climate of the region. Chubuki with sprouted roots are planted in the soil only after warming it up to +10 degrees. Germination and rooting takes about two months.
Therefore, the cuttings are taken out and germinated in the following terms:
- In the southern part of Russia at the end of January or in the first half of February.
- In the Moscow region or in the middle lane from the last days of February to the first half of March.
- In the Urals or Siberia, the soil gains sufficient temperature only in the last decade of May. Therefore, the germination of cuttings begins in the second half of March.
Until the threat of recurrent frosts has passed, grape cuttings are transplanted to the garden bed, but covered with covering material when the weather worsens.
The spring germination of shanks is difficult, since you have to go early in the spring or even in winter to the dacha for material for cuttings. We have to get the vine of the table varieties from under the snow, since during this period the snow cover has not yet melted. There is a high probability of damage to the kidneys by frost, damping. Therefore, autumn grafting of the vine is preferable.
Benefits of propagating grapes by cuttings in the fall
There are several ways to propagate grapes, for example, by layering (digging in shoots) and even planting seeds, but one of the most popular and best is the cultivation from cuttings.
Actually, this is why many experienced gardeners choose grape propagation in autumn as a grape propagation method:
- After autumn grape pruning you have a lot of good vine left, which will be just excellent material for propagation by cuttings.
Note! Uncovering grape varieties that are pruned in the spring, of course, are cut in the spring.
- It is not known how the vine will survive the frost. Suddenly you got it wrong cover for the winter, and it will partially freeze out.
- Having prepared the shanks in the fall, you can put them on germination in early spring or even at the end of winter (in February-March).
Interesting! It is more correct to call the cuttings of grapes “shanks”.
Features of germination in winter
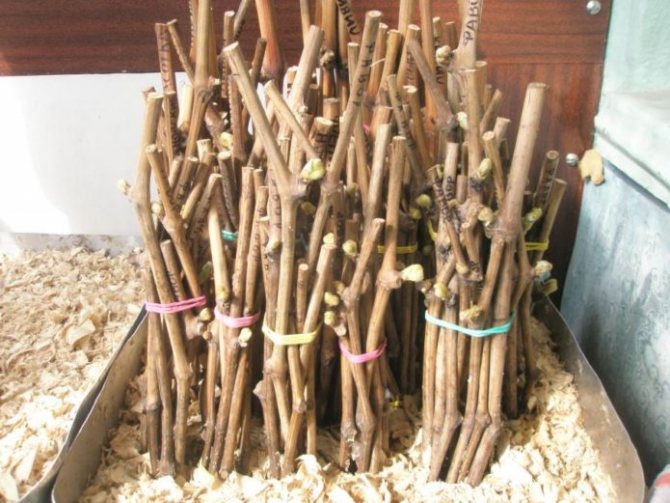

For proper storage and germination of grape cuttings at home, the peculiarities of the development of this plant are taken into account. Like other plants, its annual cycle contains phases of vegetation and dormancy. In the vegetative stage, grapes propagate exclusively in spring by layering. When the state of dormancy occurs, propagation by cuttings is performed. The rest of this culture comes at the end of November and lasts until the third decade of January. At this time, even under favorable conditions, the kidneys are in a dormant state.
In the last days of January, there is a forced rest. At this time, the vine is already ready to wake up, but too low a temperature does not allow the buds to bloom. Therefore, this moment is the most suitable for starting the rooting of the shanks.
Germinating cuttings in winter includes several activities:
- Cuttings are cut in late autumn after the entry of the vine into a dormant state. For this, ripe annual shoots with diameters from 8 mm are used. Cuttings are cut into lengths from 10 to 15 cm with two eyes on each. The workpieces are left in water for a day to soak. Then it is processed in a weak solution of potassium permanganate, tied in bundles and sent to storage.
- The bundles of shanks are kept indoors with stable conditions. The room temperature should be kept below +15 degrees. Otherwise, the cuttings will soon begin to take root on their own.It is best to keep them in the refrigerator, basement, or cellar, tucked into a box of sand.
- Preparation for planting is carried out after wintering. The cuttings are examined and the spoiled ones are discarded. Germination usually takes from 3 weeks to 1.5 months. Focusing on these indicators, they choose the start time of preparation in order to get grape cuttings for germination.
- Germination is carried out according to different methods. In general, they bring the same result.
Preparation
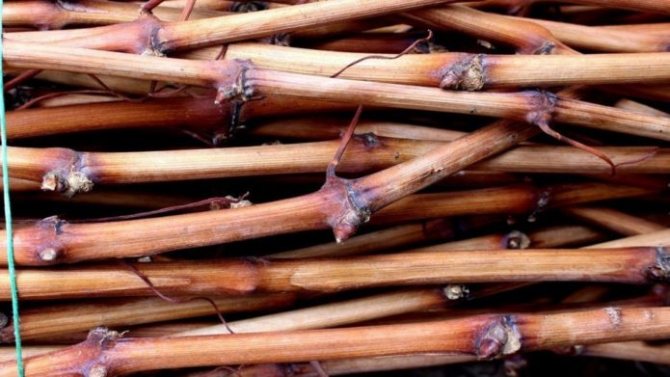

Before germination, the planting material prepared in the fall is removed from the cellar or other storage and inspected. All cuttings with dark spots and traces of mold are discarded. Stems with black or darkened wood should not be rooted.
Disinfection
To improve the result, the material prepared for rooting is disinfected. To do this, potassium permanganate is diluted in a container with water to obtain a saturated pink solution. The rods are placed in it for half an hour, then removed and washed with running water.
Slicing
For short cuttings, this operation consists only of updating the slice. If the vine was kept long, it is cut into 10-15 cm pieces so that each has 2-3 buds. A cut from above is made so that it passes 2 cm above the last eye. It is done at an angle, directing the sharp end towards the kidney. From below, cut straight, with an interval of 1 cm from the bud. The eyes from below are all removed so that the plant does not waste energy on their development.
Soaking
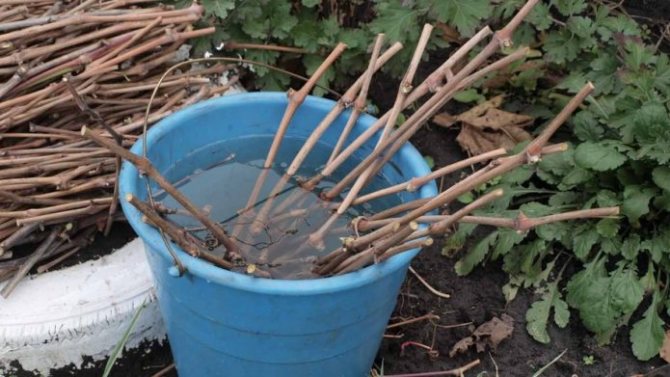

Cut cuttings are placed in settled water for two days. To do this, it is poured into a wide basin and the segments are laid so that they are completely covered with liquid. It is allowed to soak the shanks in a bucket, dipping them into the liquid so that the lower third is closed.
If possible, rainwater is taken for soaking or melted snow is used.
Waxing
This procedure is optional, but recommended to speed up the development of the root system. The paraffin is melted and the upper end of the cutting is dipped into it. Waxing will prevent the kidneys from developing. This will encourage the cutting to devote all its strength to building up roots.
Furrowing
In the lower part of the segment, superficial cuts are made on the bark with a sharp knife, in which roots will appear in the future. Scratches are carried out in the longitudinal direction along the bark. This increases the number of roots formed.
Soaking to stimulate growth
To do this, use special preparations sold in gardening stores. They are designed to enhance growth. They are diluted in water according to the instructions and used to soak the planting material. As a result of soaking, the roots appear faster. But if there is no such drug, the procedure is not necessary.
How to store it correctly
One of the most important stages of such a process as the cultivation of grapes by cuttings is its proper storage. As a rule, before sending the collected material for the winter, it must be packed in an oilcloth.
This process is performed in late autumn or even in the first days of winter. As for the storage of shanks, it is performed in several ways:
- stored in a refrigerator;
- if a lot of shanks are cut, then they are sent to the cellar or basement;
- the cut sprouts are placed in a container, and then the bottle with the handle is buried in the ground.
If you choose one of the first two storage methods, then you need to check the material once a month for mold. And if such are found, immediately carry out the rejection, otherwise you risk that all the shanks will deteriorate.
Germination
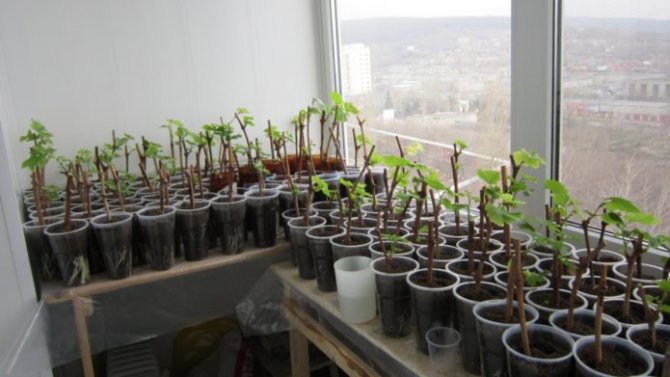

For rooting prepared cuttings, different methods are used. All of them are easy to implement, but require certain conditions to be met. It is recommended to germinate grape cuttings at a water temperature of +24 degrees. If the method of rooting in the soil is used, then its temperature is kept at least +20 degrees.It is recommended to create cool air at the top of the cutting. Its temperature is set in the range from +8 to +13 degrees. The presence of light for the formation of roots on the cuttings is not required.
In water
One easy way to germinate cuttings is in water. The procedure will be as follows:
- Warm water passed through a filter is poured into a 1 liter glass jar so that it fills it by 3 cm.
- The segments are placed in a container in a bundle. A jelly-like mass begins to ooze from the bottom edge. While this is happening, the cuttings are continuously removed and washed. When the edge swells, the juice will stop oozing.
- The containers are placed on the windowsill, while the room is regularly ventilated. This will keep the water warm and the air cold.
- Constantly maintain a given level of water, adding fresh water all the time. To reduce evaporation, cover the jar with foil.
- After 20-30 days, roots will appear from the cut. After their growth by 2-3 cm, the planting material is transplanted into the ground.
Sometimes the buds wake up before the roots appear. In this case, you can leave one of the shoots, but not the strongest and the first. Premature awakening of the roots is harmful for germination, since it draws out all the juices from the cutting.
In the soil
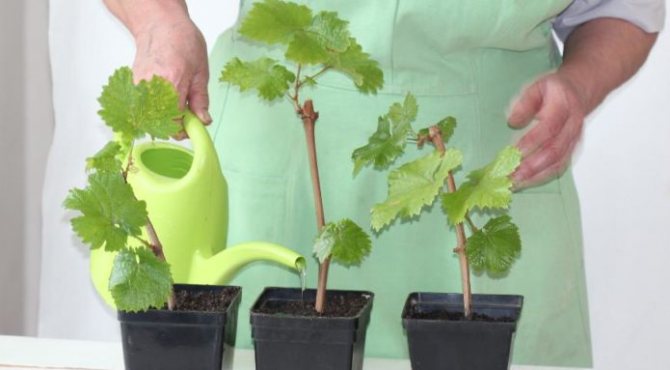

When the roots have grown to a sufficient length, taken out of the water, the shanks are transplanted into a special soil mixture. But for grape cuttings it is not necessary to wait for the roots to appear. Rooting can be carried out directly in the soil mixture. This method is much more convenient than water rooting. In this case, it is not necessary to transplant young plants once again.
Usually, coniferous sawdust is used as a substrate for germination. They are poured into the planting container with a layer 5 cm thick. After moistening, place the cutting and add another 4 cm of sawdust. The sawdust is regularly checked for moisture levels. The soil should not be dry or too wet.
Instead of sawdust, you can use a mixture of equal parts of humus, wood chips, sand and earth. Drainage is laid at the bottom of the planting tank, then soil mixture is poured. After it has been moistened, the cutting is placed and covered with soil so that the kidney is closed. After rooting, the stalk is planted directly on the site.
In peat tablets
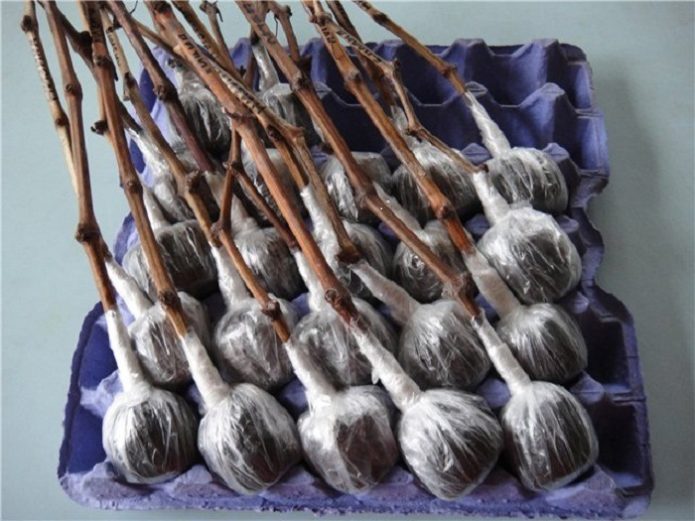

This method requires large peat tablets with a diameter of at least 5 cm. They are placed in a tray and filled with water for half an hour so that they swell. By the time they are ready, they increase in size by 5 times.
The stalk is inserted into the tablet until it stops. Then the structure is completely wrapped with a film, leaving only the upper part of the cutting in the air. The film is fixed with tape. A pallet with cuttings is placed next to the battery. Ventilate the room regularly to provide cold to the top of the cuttings. After three weeks, roots will appear on the cuttings. Then the tablets are transplanted into more spacious containers.
This method of germination is called kilchevanie. Instead of tablets, you can use any suitable items as a kilchevator: sphagnum moss or potatoes, moistened newsprint. You can learn more about this rooting method in the video.
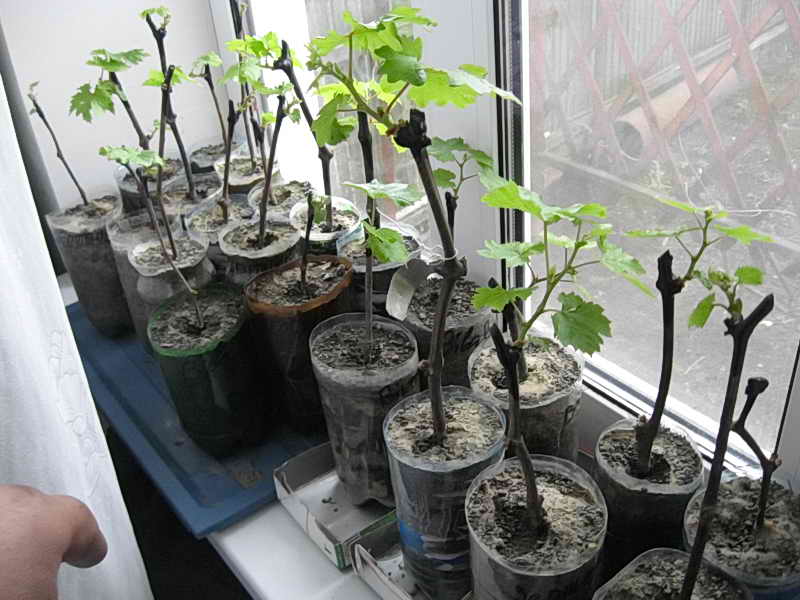
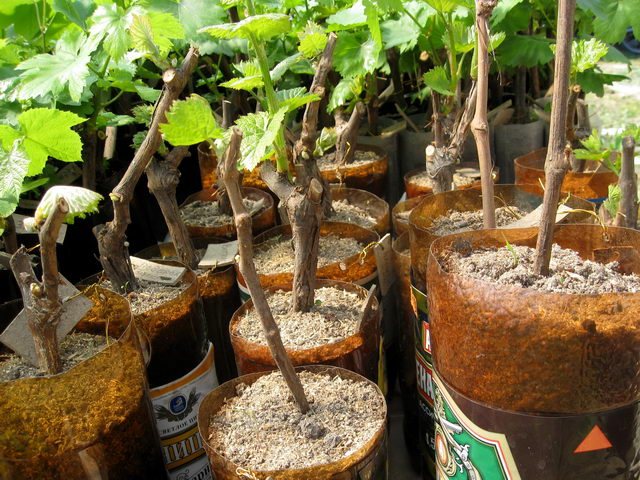
Plastic bottles can be used for rooting. To do this, it is cut off, expanded clay is laid on the bottom and filled with soil mixture. Then the stalk is installed and the soil is filled up. To keep the soil moist, cover the top with a plastic cup.
When the time comes for transplanting, the cutting is removed from the bottle along with an earthen lump. Since the plastic does not decompose, it is impossible to plant the cutting along with the container.
Instead of a plastic bottle, you can root the cuttings in a cardboard cup in the same way. Then, when planting, you do not need to remove the young plant from the container. In the soil, the cardboard will gradually collapse and the plant will be able to grow freely.
About the readiness of seedlings for transplanting into the ground
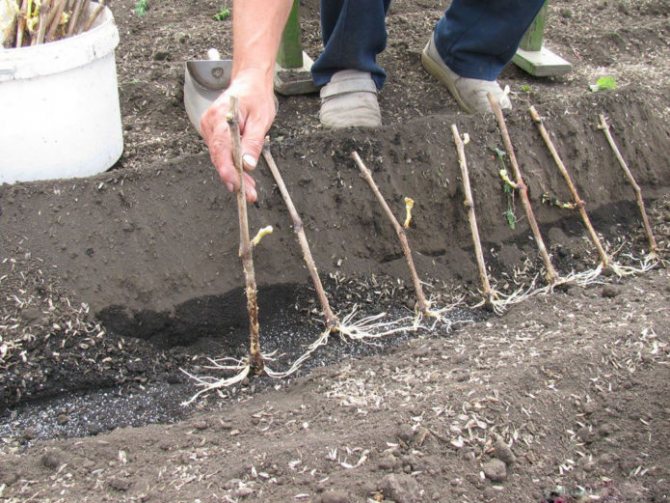

When rooting in water, it is not difficult to understand that the shanks are ready for transplantation. The roots are visible to the naked eye. When their length reaches 3 cm, they need to be transplanted into the ground. They will be well received.
When rooting in soil, the root system cannot be considered. Then, 20 days after the start of the process, the plant is slightly twitched. If resistance is felt, then roots have formed. Now reduce watering and wait for foliage to appear.
Plants can be left in the substrate until transplanted into open ground. Planting of germinated plants is performed in the first half of May, when the weather is finally warm.
How to understand that cuttings are ready for planting in the ground
When the cuttings are germinated in water or by the Pusenko method, it is immediately clear whether they have given roots or not. If the roots have grown to 2 or 3 mm, then the seedling will definitely take root when growing. In the case when rooting took place in the soil or substrate, the roots are not visible, the shank is slightly tugged, if resistance is felt, then the roots of the branch. Usually, after rooting, the buds open and rather large leaves appear. Landing in open ground should be carried out when the weather is stable (at least 19 degrees).
Further cultivation
After the roots germinate, grape cuttings are planted in suitable containers and grown there until full-fledged seedlings are obtained, or immediately placed on a permanent growth site in an open field or greenhouse. In the first case, high capacities are needed. Therefore, cut plastic bottles with a volume of 1.5 liters are used.
At the bottom and in the side walls, holes are made for drainage. If water stagnates inside, the root system will start to rot. A universal soil mixed with perlite is used as a soil mixture. It is pre-calcined in the oven for disinfection.
Transplanting cuttings is performed in the following order:
- The container is filled with soil by a third.
- They put a stalk so that the roots do not break off.
- Cover with soil and press down.
- Sprinkle with water and wait for the soil to settle.
- Add more soil and crush it gently.
- The container is placed in a bright place with a temperature of +20 to +22 degrees for the rapid development of the plant.
If the windowsill faces the north side, it is better to place the plants in a specially equipped place with lighting. For active growth, grapes require at least 12 hours of daylight.
The rest of the care consists in periodic irrigation of the seedlings. In this case, warm water, previously settled, is used. The soil is kept moist at all times, but not overdried. If desired, you can feed the plants with nitrogen fertilizers.
In the southern part of the country, young plants can be transplanted into a greenhouse or an open bed. But this is optional. When the seedlings get stronger, they are allowed to be transferred for a short time to the greenhouse directly in containers.
Planting vegetative seedlings in a permanent place and care
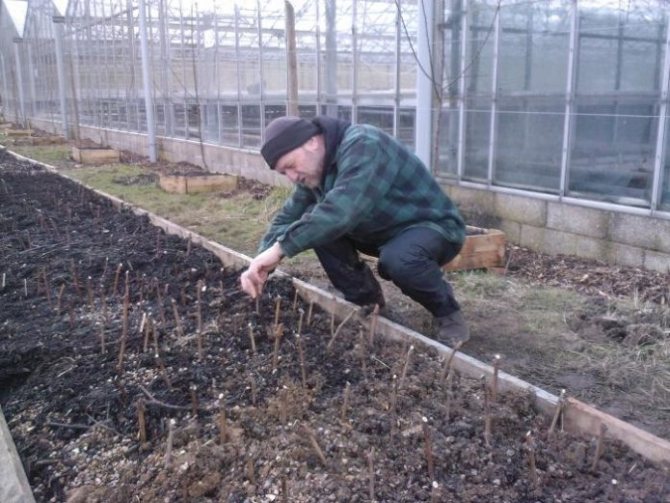

The readiness of vegetative seedlings for transplanting to a permanent place is determined according to the following criteria:
- there must be at least 7 leaves on the bushes;
- green shoots should be 15 cm long or more;
- the root system must be sufficiently developed to completely fill a 1 liter container.
Before planting a young plant on a permanent site, it is hardened for several days. To do this, take out the plant for several minutes a day on the street. The length of time spent on the street is constantly increasing. Within a week, the young seedling fully adapts to the new growth conditions.
Transfer is carried out using the standard transfer method. for this, they make a landing for him, the dimensions of which exceed the dimensions of the earthen coma for the widow. The plant is moved into it along with the soil in which it grew. Then fill the open space with earth.
In the first two weeks, the bush is monitored especially carefully.It is recommended to create a shade for it so that the sun's rays do not burn out the necessary chlorophyll. If frosts are expected, the plants are covered with covering material. In the event of a strong drop in temperature, a more thorough shelter is made.
To protect plants from return frosts, it is recommended to plant them in a permanent place only after the final establishment of warm weather.

