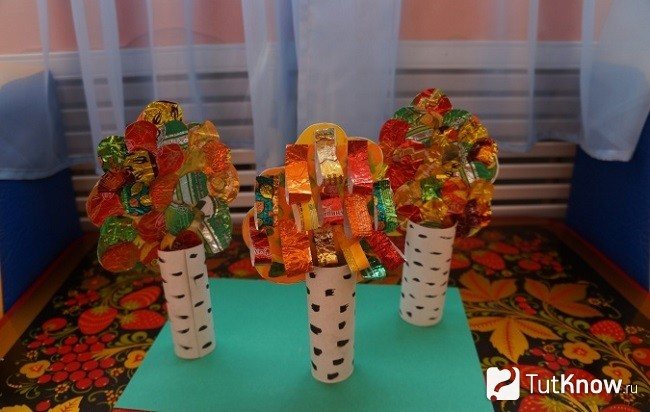
Birch from candy wrappers
This tree is good at any time of the year. In the fall, she puts on a golden outfit. If you want to capture a birch of this period, then teach children to make crafts that reflect the image of this beautiful tree.
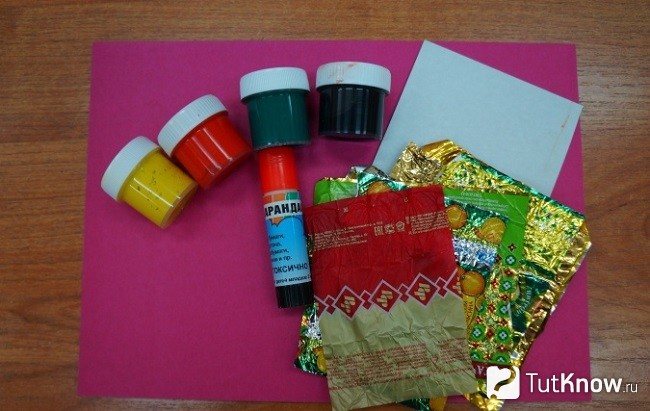
Take:
- cardboard;
- gouache;
- shiny candy wrappers, where there are yellow, green, orange, red colors;
- glue;
- scissors.
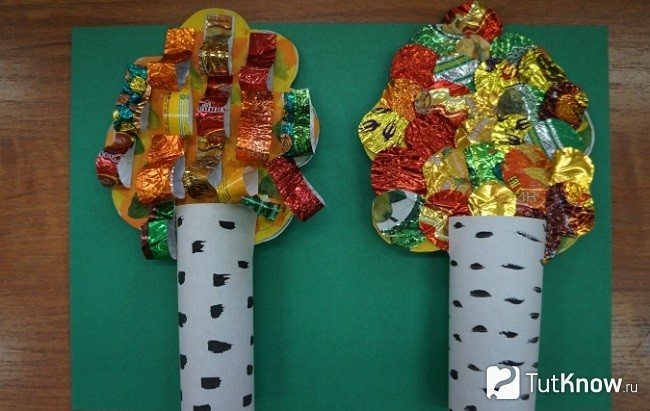
To make a trunk, cut a square with sides of 10 cm from white cardboard. Connect two opposite edges, glue them together to make a trunk. Let the child paint dark blotches on it with a thin brush and black paint.
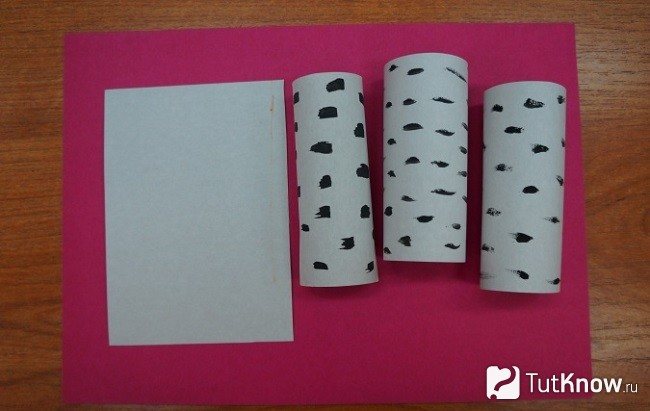
On another piece of cardboard, draw a wavy crown, cut out. The child will decorate it to make the leaves of an autumn tree.
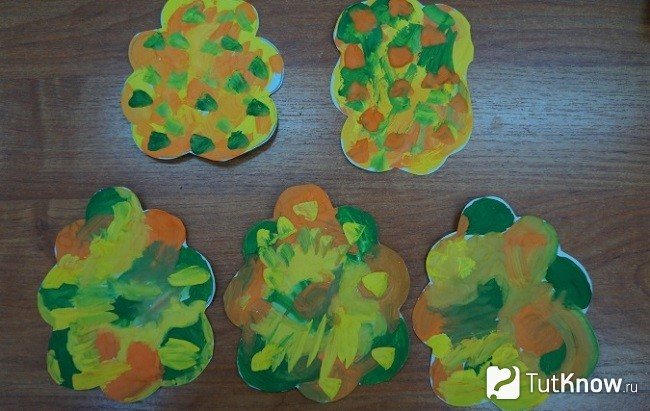
Let the baby glue the blanks from candy wrappers. They can be made round or cut into strips, glued together and attached to the crown.

On both sides at the top of the trunk, make cuts 3 cm deep to insert the crown of the tree there. This is how beautiful Russian birch turned out.
See how else you can turn candy wrappers into white birch.
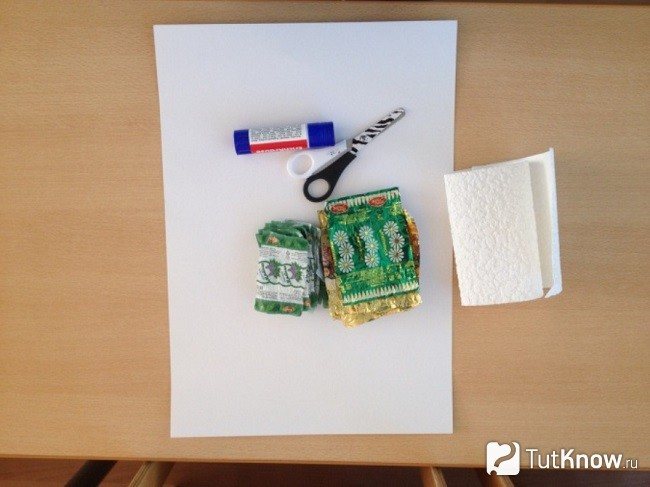
For such a creation you will need:
- white sheet of A3 format;
- colored pencils;
- scissors;
- a fragment of white vinyl wallpaper;
- glue stick;
- candy wrappers.
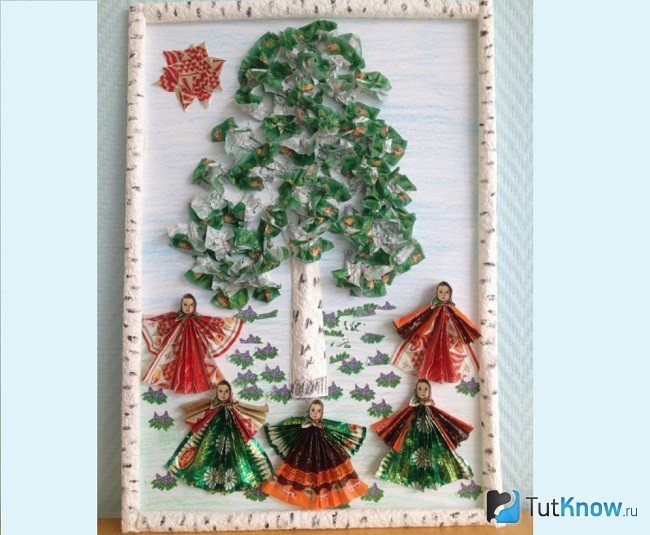
Have the children tint the sheet with blue pencil strokes to create the sky. They will use the green to make the weed. On the back of vinyl wallpaper, you need to draw a tree trunk along with its branches, glue it to the base.
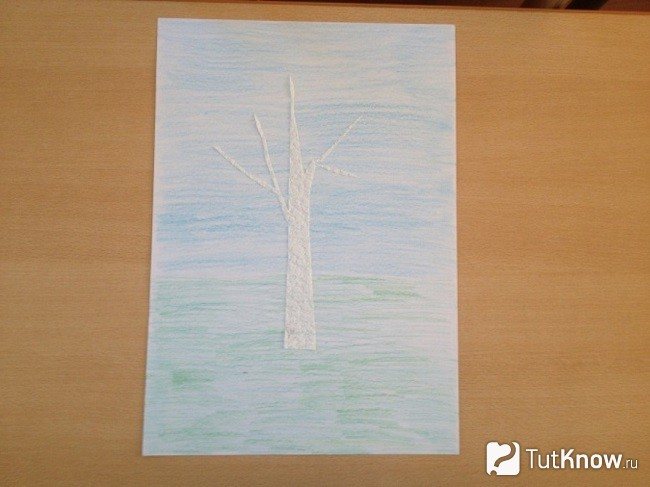
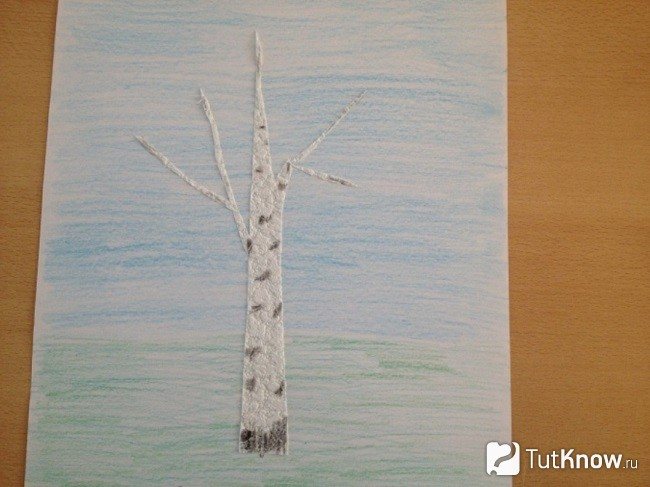
Next, birch lentils are drawn with a black pencil.
Around the branches, you need to glue candy wrappers with a green color, having previously crumpled them to make leaves.
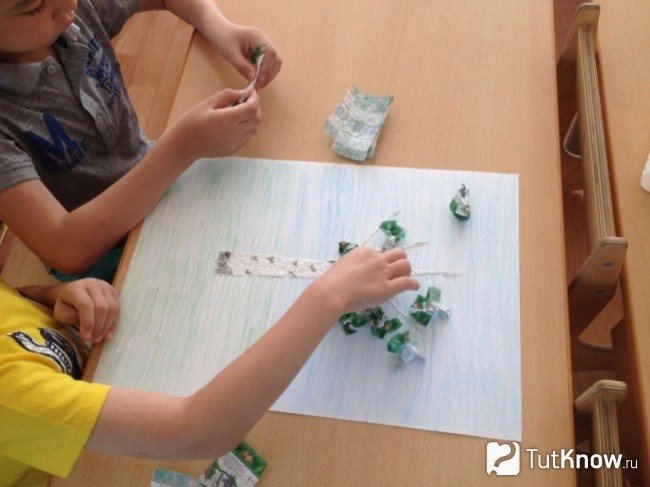
Next to the tree there will be Russian beauties in sundresses, clothes for them will also be helped to make candy wrappers. These elements need to be folded like an accordion, pressed from above to form a triangle. The second workpiece is also first folded in the form of an accordion, then we apply it to the first from above.
Cut out Alenka's face from the wrapper, glue it to the blank to make such a wonderful girl.
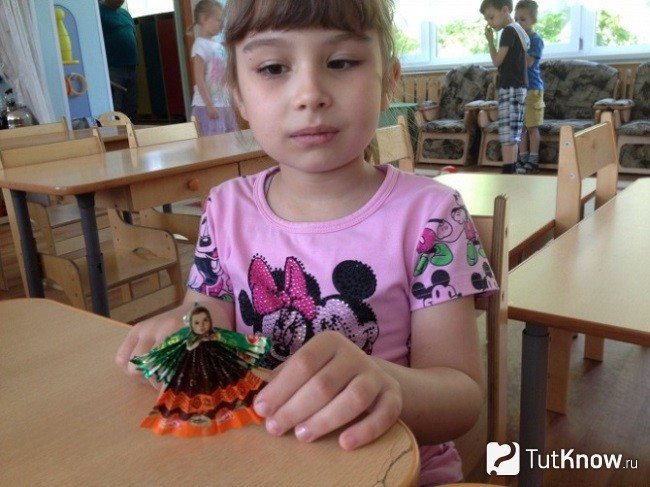
You need to make several figures and glue them to the sheet.
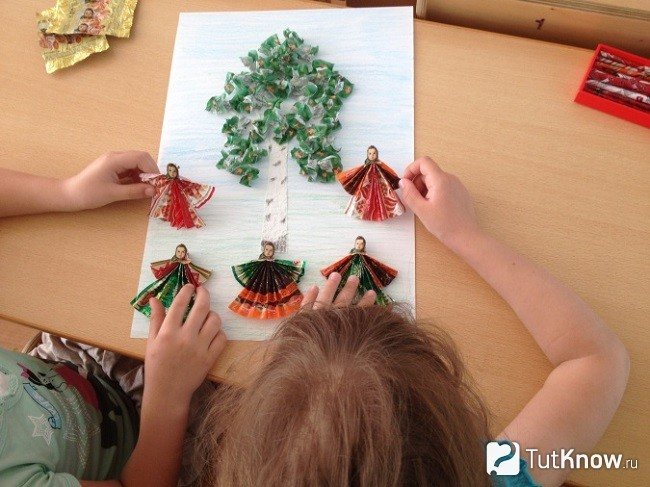
Also, candy wrappers are turned into the sun, grass. Cut out a few strips of vinyl wallpaper, let the child paint them under the trunks of birches with a black pencil, roll them into a tube, and stick them around the perimeter of the picture to get a beautiful frame.
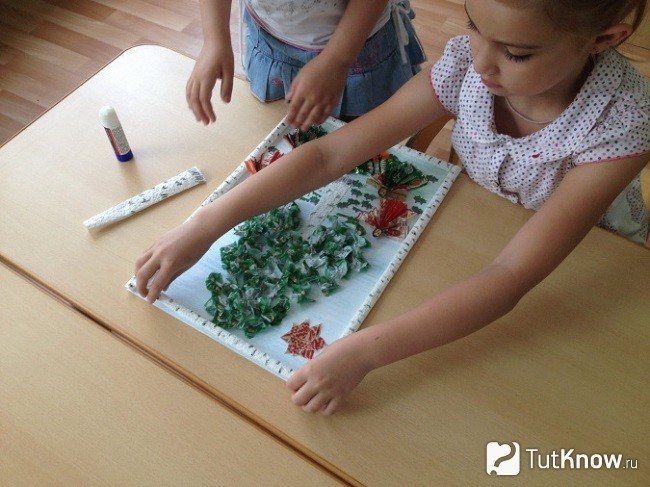
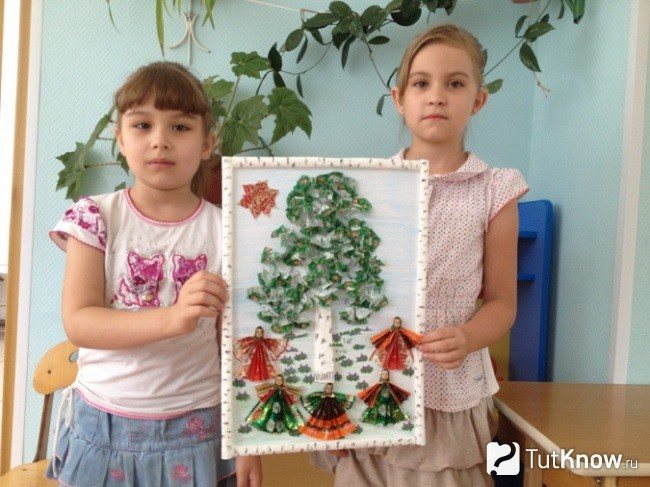
This is how birch is made from candy wrappers, it turned out a wonderful job, which children will be rightfully proud of.
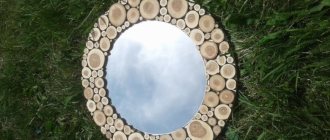
Wood detail as an accent in the interior
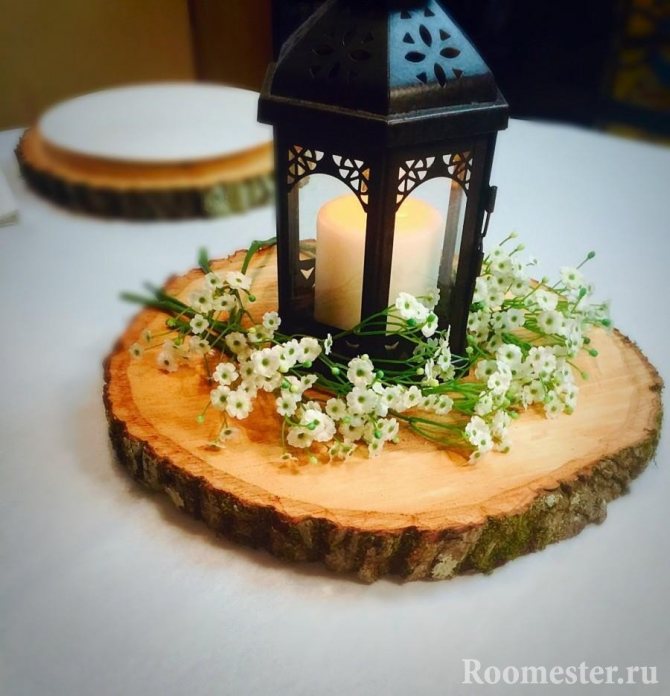
Small splashes of "forest" in a familiar environment will mentally bring you closer to nature. Cuts in the interior are used as decoration and perform certain functions.
How to create whimsical accents with our own hands:
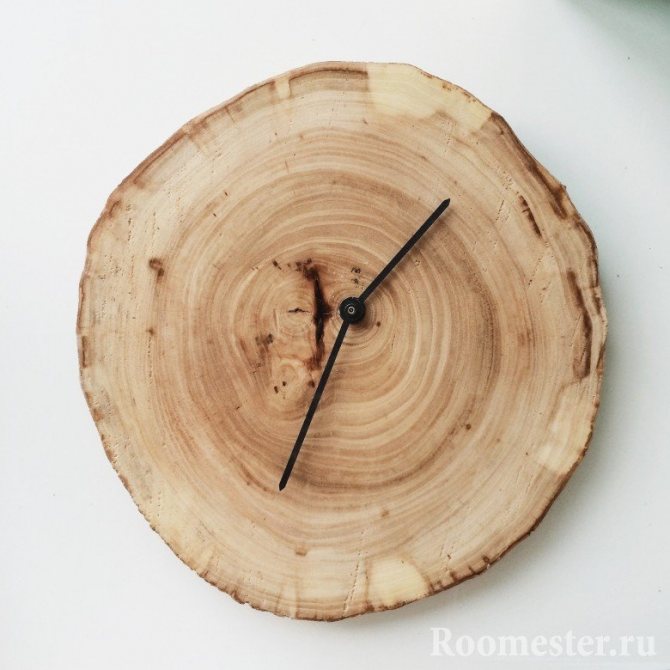
- Clock. The unusual use of a wooden saw cut in any interior looks cute. Especially if it is a circle of uneven shape with bark on the surface. The bark is fixed, because it can deteriorate over time. The more carelessly the wooden "pancake" looks, the more interesting the watch will be.
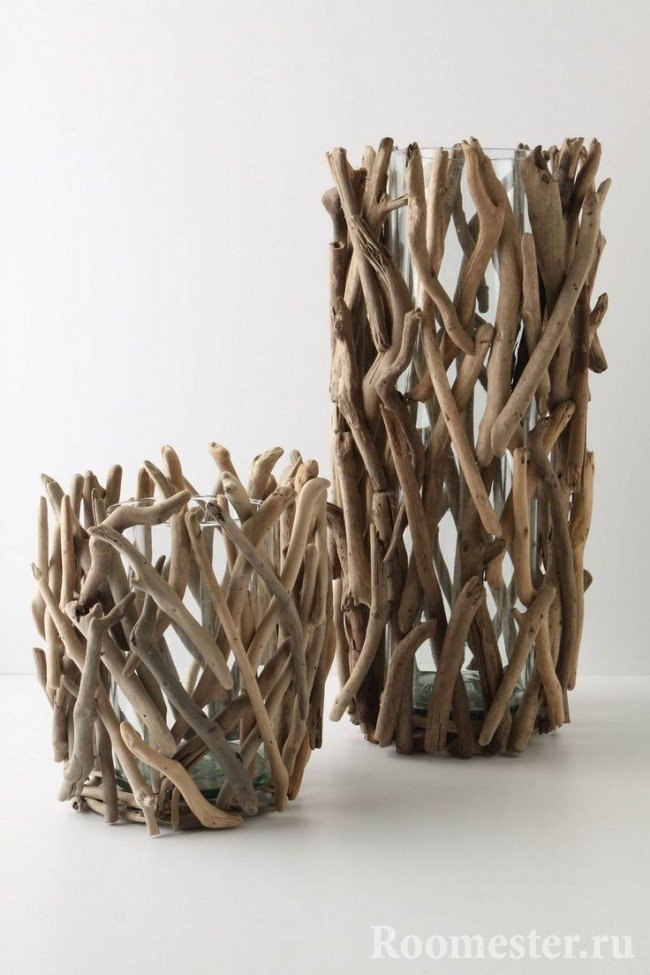
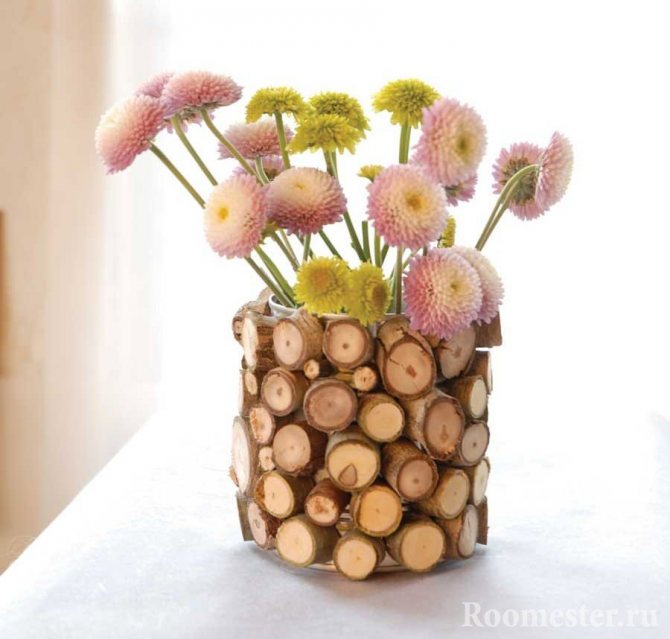
- Flower vases. Unleash your imagination and use different types of branches.The ornament created with your own hand from small twigs looks expensive, and no one will guess that the vase cost you a penny. She will be in harmony with the design, and will find a response in things with a similar decor.
Remember! There should be few things created from the same material in the room. They should overlap with each other, but not look "overkill".
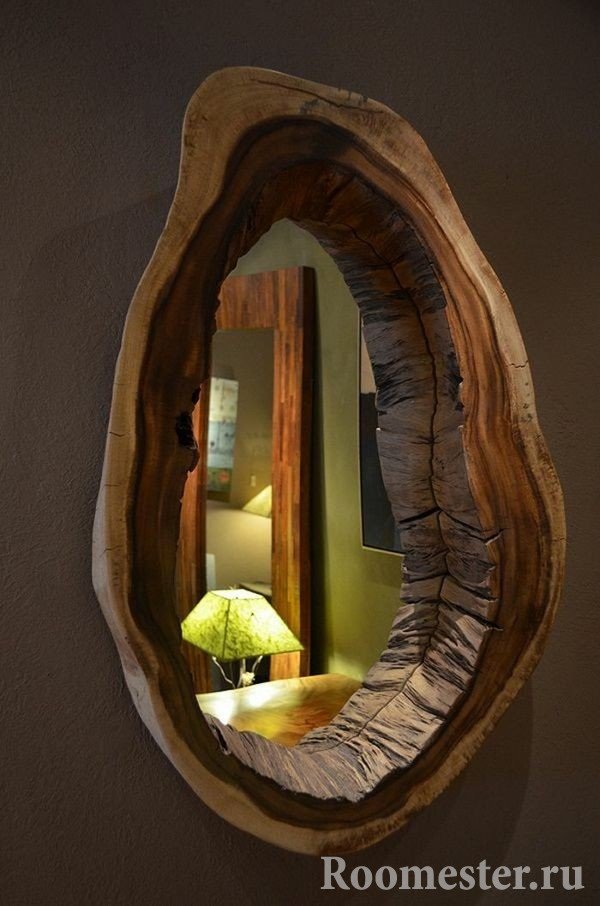
- Frames for mirrors. In creating a product, it is important to adhere to rhythm or metricity, but chaos will be inappropriate. Alternate large cuts with small cuts, or make the entire frame out of roughly sized circles. Any of the options will be correct.
Making a floor from saw cuts with your own hands is quite possible. Not to mention small interior items that are made in a minute using wood, glue and your imagination. Surprise your friends with a tastefully decorated home and make your life more comfortable. It is an environmentally friendly product that will benefit your health. If the product is made from pine needles, then the light pine scent can even help you with the treatment of colds.
If you cope with the floor, then decorating an entire wall with a tree will seem like a matter of five minutes to you. You will need to use your own taste and your knowledge of composition, although most people trust their instincts.
Everything will work out, you just need to "collect" these products and fix them with glue, or just cut out a solid object. Create an image in your head and try to bring it to life. You do not need special knowledge or skills, adhere to the basic rules for choosing materials and processing tools. After all, why spend a lot of money on the work of a designer, if you are able to cope with this task on your own, without spending a penny.
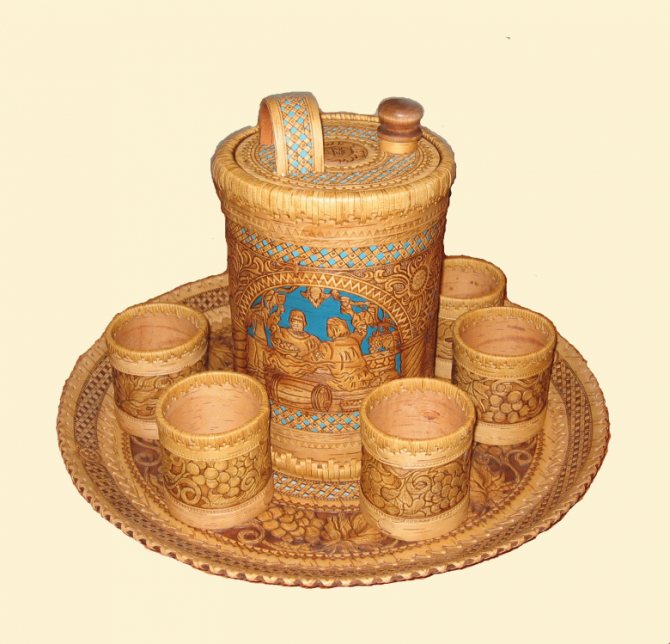
Initially, birch was almost a sacred tree for the Slavs. Even now, it is believed that where a Russian lives, there must be a birch. In addition, the tree has a lot of useful properties. A person uses all of them to the fullest. Found the use of birch wood in construction, as well as in the creation of furniture and the manufacture of various crafts.
Crafts on the theme of birch from paper
And here is another master class that tells how to make a volumetric applique so that white-trunk birches appear on the sheet.
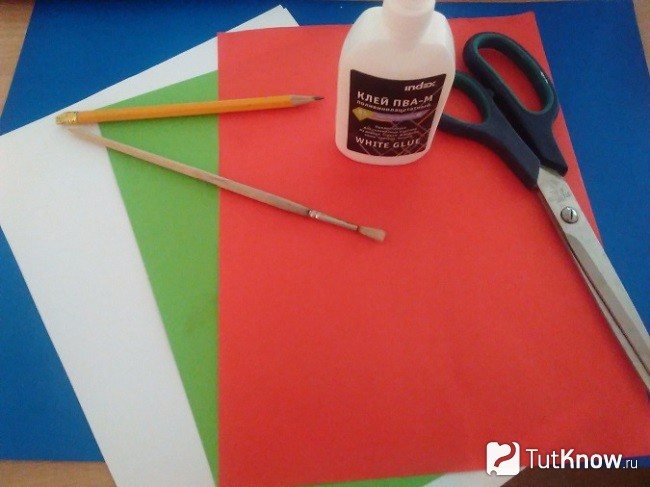
Children will create such a wonderful piece if they take:
- white album sheet;
- PVA;
- silver or blue cardboard;
- scissors;
- pencil;
- green and yellow napkins;
- watercolor paints with a brush;
- sippy jar for water.
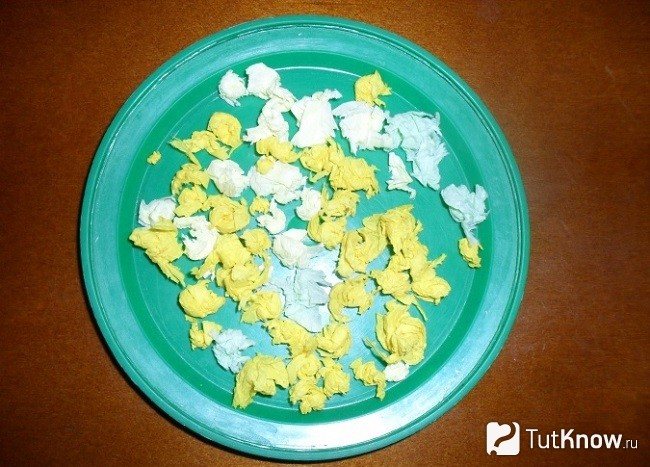
Children will surely like the first stage of work. You need to break the napkins into pieces and roll them into lumps.
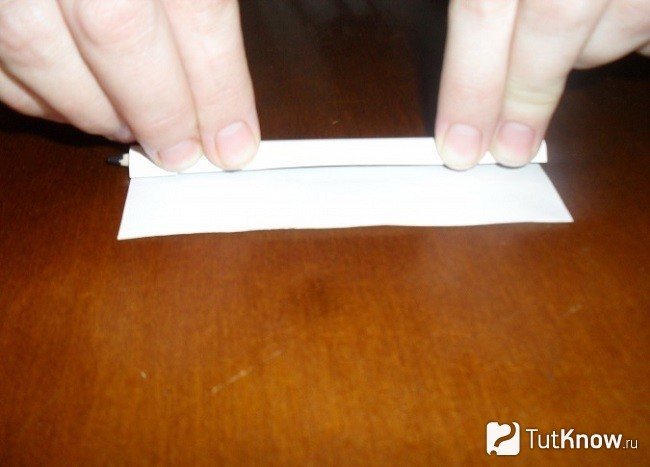
To make a trunk, you need to cut off a rectangle from a white sheet, wind it around a pencil to make a tube. The side is sealed so that the figure does not unwind.
Have a child glue birch trunks vertically onto silver or blue cardboard. Where the crown will be located, it is necessary to coat this area with glue and attach pieces of napkins to it.
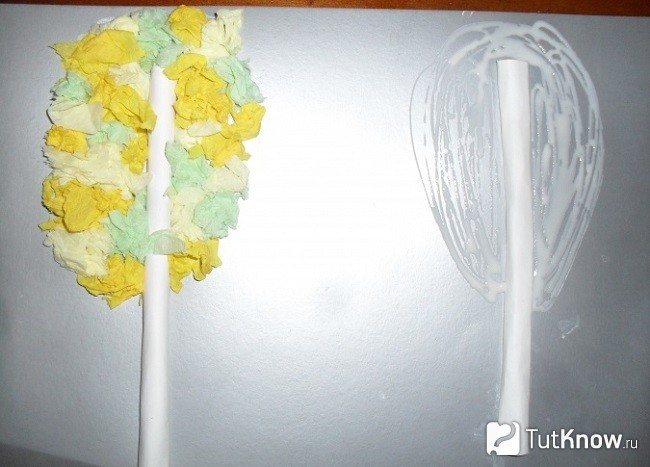
If the child is small, paint thin black strokes on the trunk yourself. If he can handle it, then let him do this responsible job.

Such a craft will probably be appreciated at its true worth at the holiday, which is called I love the Russian birch tree.
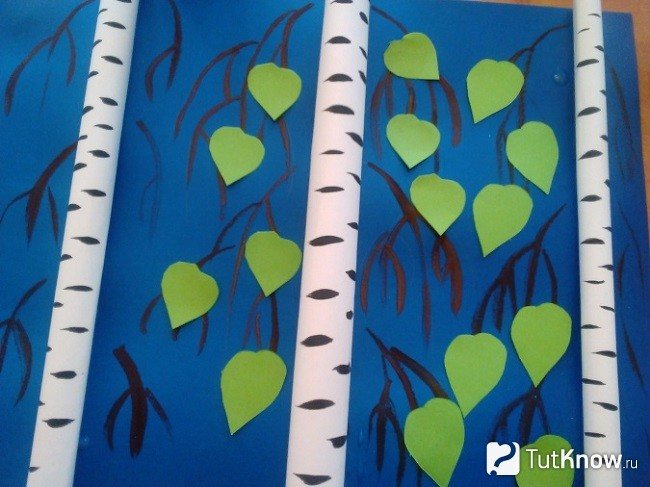
This material also makes a beautiful tree, and not even one, but a whole birch grove. Prepare with your children:
- A3 blue or blue cardboard;
- white, green, red paper;
- glue;
- black paint with a brush.
Have the children roll up tubes of white paper.
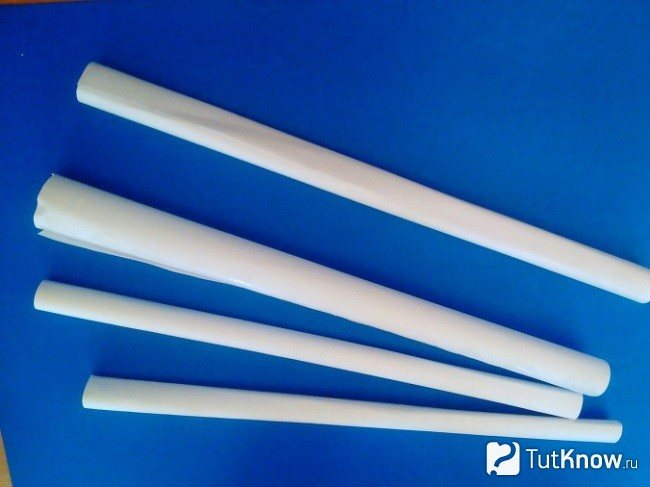
On them you need to paint black lines with paint, and then glue them to the base.
If you do not have blue or blue cardboard, then glue sheets of colored paper of this color to the existing one.
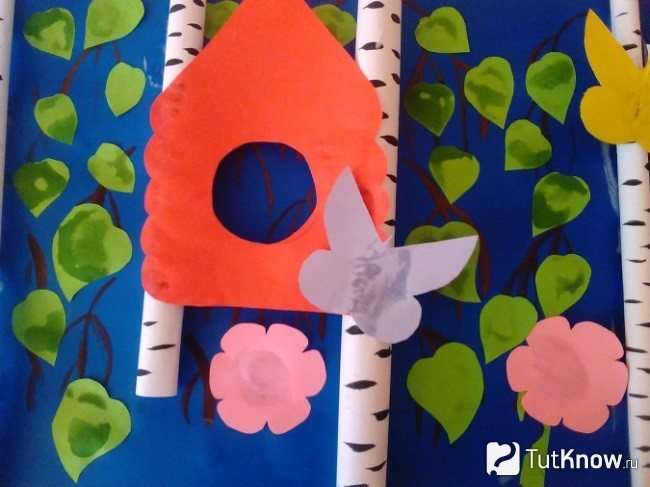
Children will draw twigs near the trunks, glue leaves cut from green paper to them.
Cut a birdhouse out of red cardboard with them, glue it, as well as butterflies from colored paper on the trunks of birches. You can decorate the applique with flowers, after which it will turn out to be so juicy and bright.
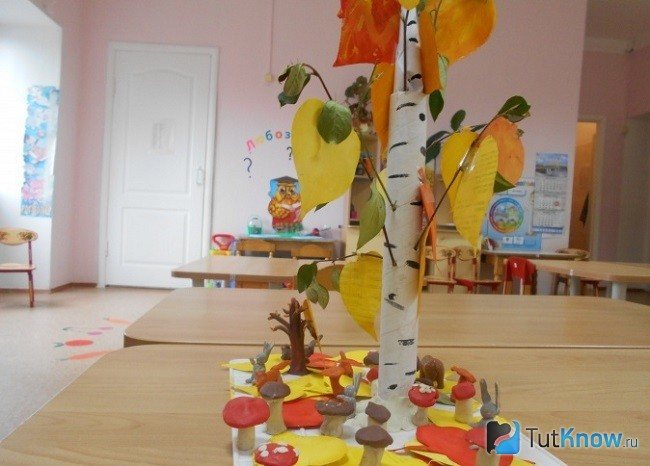
To decorate the hall for a holiday dedicated to this wonderful tree, you need to make a birch tree, put it on the table. If the tree is large, then it is placed on a stand on the floor. Here's what they use in the process:
- White paper;
- cardboard tube;
- gouache and brushes;
- glue stick;
- small twigs of birch;
- scissors;
- awl.
Cut birch leaves out of white paper in advance so the children can paint on them. Since this is an autumn tree, use yellow and red paint.
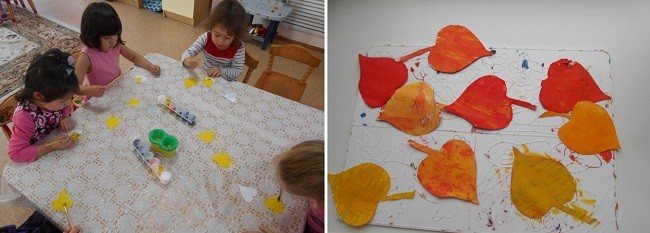
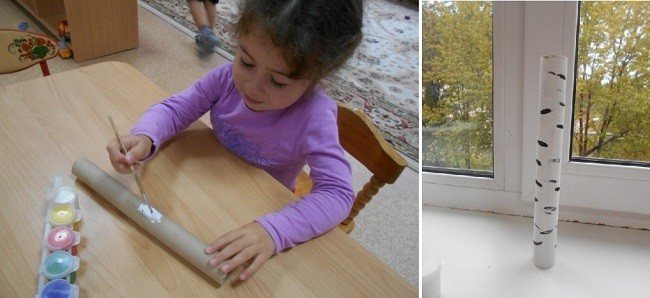
At the same time, someone can paint yellow, and when this blank dries, another person will make red highlights on it. If there is no ready-made cardboard tube, roll it up from thick cardboard or even from two sheets, glue it on the side.
Now this trunk needs to be painted white, when it dries, make black veins.
The next stage of work is done by adults. With the help of an awl, they will make holes in the trunk, stick birch branches here, to which you need to glue the leaves. The trunk is fixed on the board with plasticine, after which you need to put the remaining leaves of paper on the stand, and also put the mushrooms. Their children will be happy to mold themselves.
You can decorate the hall not only with paper wood, but also make birch from plastic bottles. It will turn out to be more durable. Such a tree can be placed not only in a kindergarten for a holiday, but also to decorate a house, a summer cottage with it. From late autumn to early spring, when there are no leaves on the trees, your dacha will be decorated with a picturesque Russian birch tree, which does not care about cold, snow and wind.
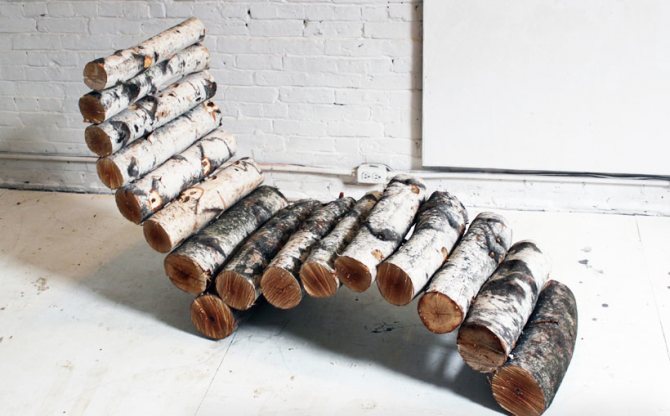
Garden swing
Such a garden swing will be not only a great place to entertain children, but also for adults to relax. This design may well serve as a bench, it is reliable and safe to use. Additional processing of parts, reliable fasteners and ropes will allow using this structure for sports activities with children. And the device next to several ladders and labyrinths will help create a real sports ground.
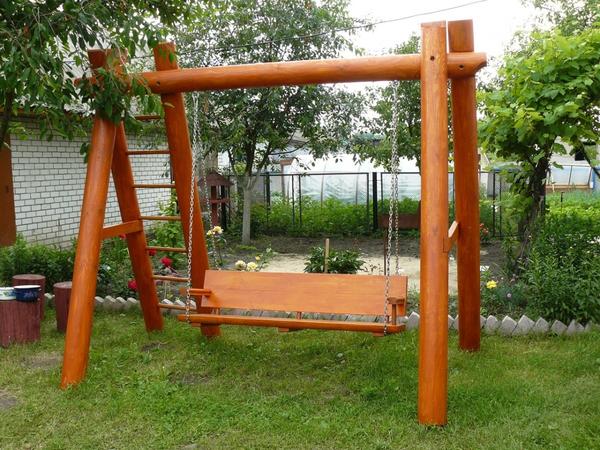
Do-it-yourself garden swing from logs. Photo
We make birch from plastic bottles: photo and description
To do this, you need:
- deep green plastic bottle;
- copper wire;
- pliers;
- awl;
- flame;
- alabaster and a container for dilution with water;
- white and black paint;
- glue;
- green sponge.
Cut a plastic bottle into strips, draw a sheet on one of them, cut out. It's okay, if it doesn't turn out completely flat, you will soon understand why.

Indeed, at the next stage, it will need to be scorched over a flame. In this case, the workpiece will bend slightly, the edges will take the correct shape. Use a hot nail or awl to make a hole in the top of the sheet.
Pass a piece of wire through it, which must be twisted. Attach pieces of wire to other sheets in the same way, twist them with the base.
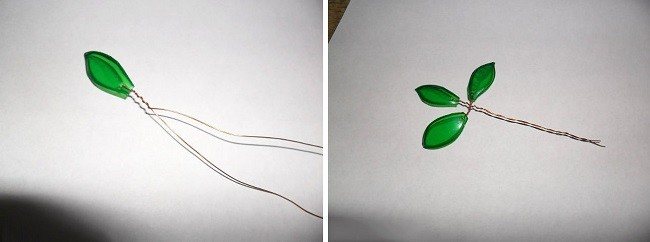
It is necessary to make several of these shamrocks from plastic bottles and wire, then twist three blanks together and connect several similar elements into a single branch.
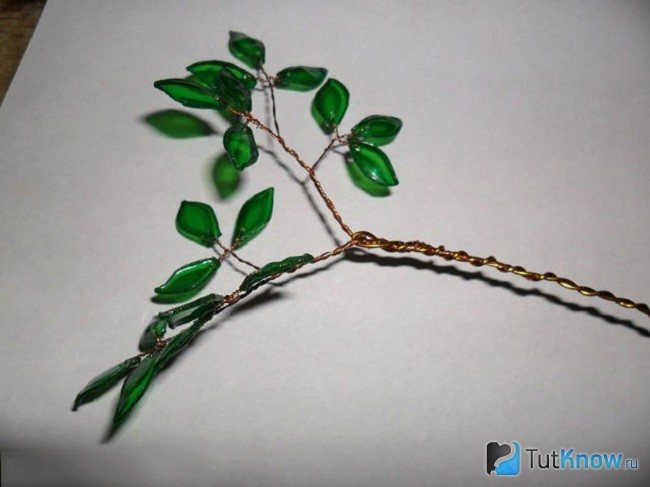
After completing several of these blanks, shape the tree. Dilute the alabaster with water, apply the solution to the branches and trunk. Make a birch stand out of it.
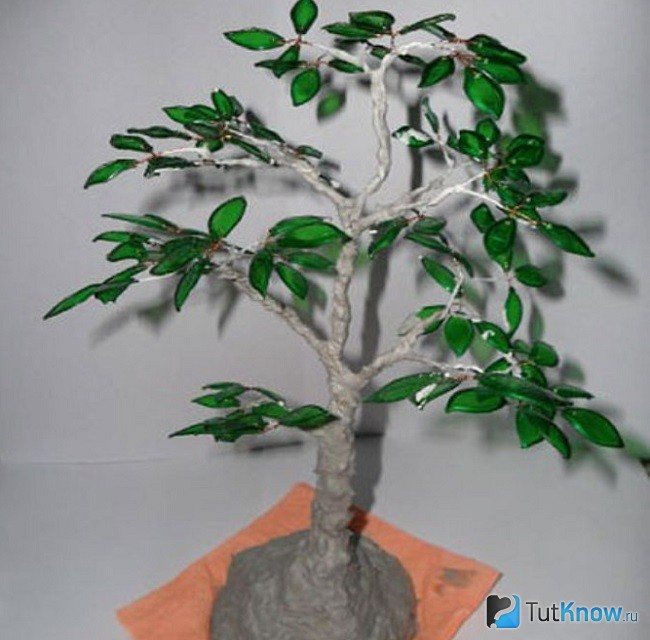
When the alabaster is dry, cover it with white paint, draw black lines.We decorate the stand as follows - glue the cut pieces of a green sponge onto it.
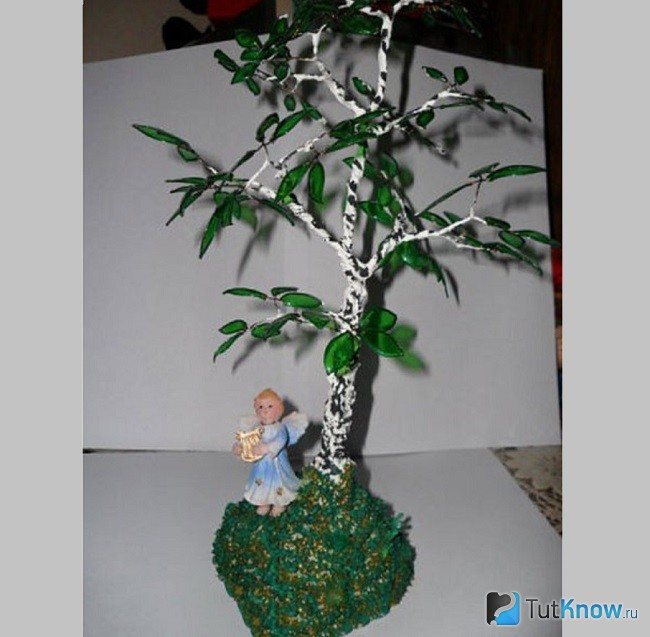
Here's what a wonderful tree came out of plastic bottles, instructions and step-by-step photos probably helped in this.
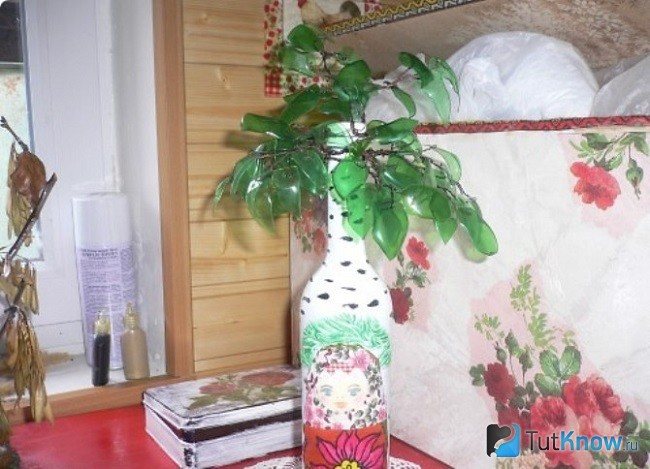
If you don't have alabaster but a glass bottle is available, use it as a base. The surface is covered with white paint, painted with black lines. You can draw a drawing in the center of the composition. Wrap branches from a plastic bottle and wire around the neck, you can put them inside the container. Here is such an original Russian birch tree.
You can make another from a glass bottle. Here are the materials you need:
- glass bottle with a cork;
- White paint;
- glue gun;
- PVA;
- some birch bark;
- black paint and brush;
- yellow or brown beads;
- needle and thread;
- small twigs of birch.
Tools and materials
To make a bench from a log, you should prepare in advance all the necessary materials and tools for carrying out the work:
- chainsaw;
- jigsaw;
- ax;
- grinding machine;
- building level and tape measure;
- welding machine for decorative surface finishing;
- primer for protecting metal elements;
- paintwork for wood;
- wood of the selected type.
After preparing the necessary tools, you should perform the appropriate calculations and start harvesting the required amount of material.
You can learn more about making a bench from a log from the video:
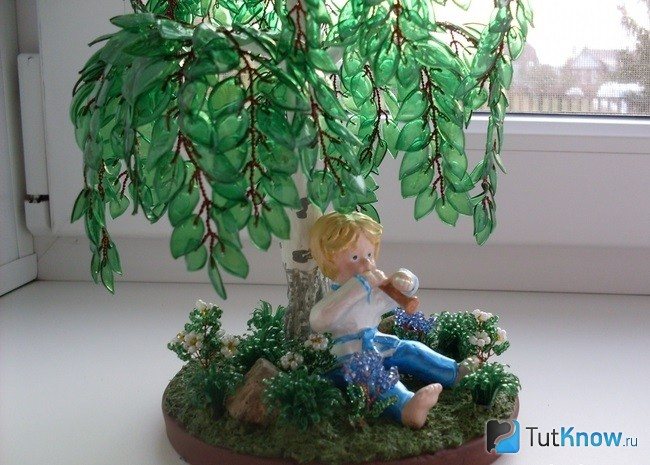
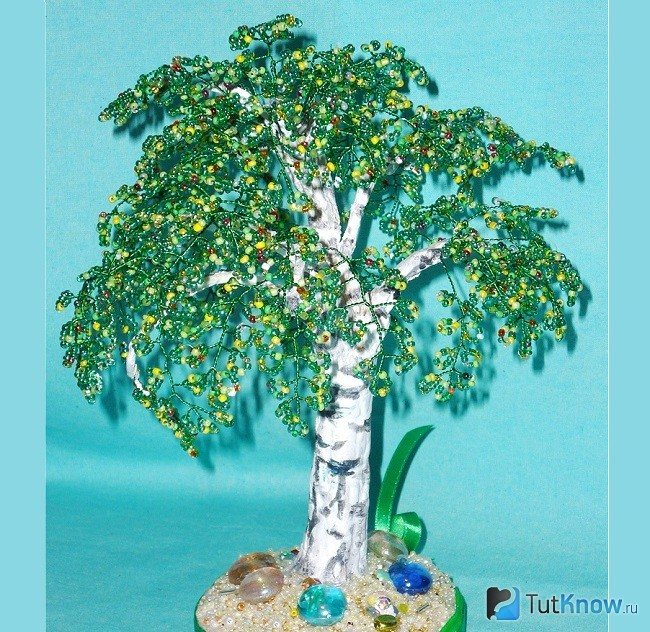
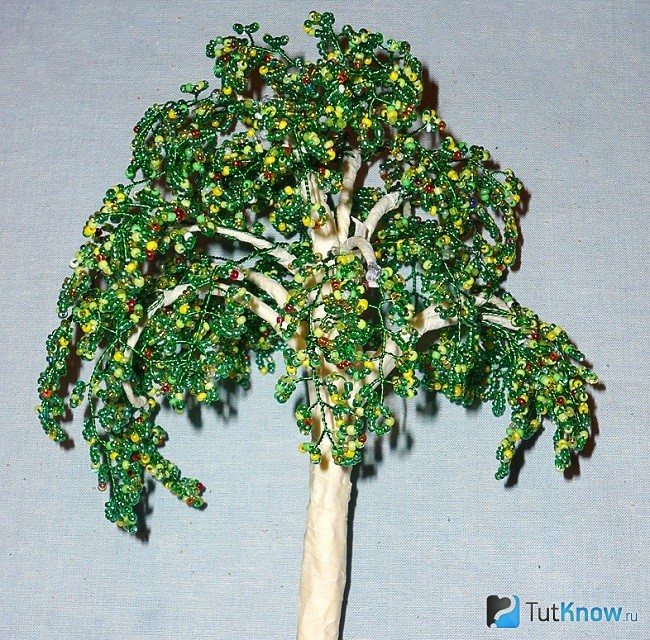
Russian birch from beads
To do this, take:
- beads of green shades;
- glue;
- thin wire for beading with a diameter of 0.4 mm;
- alabaster or gypsum;
- thick wire with a diameter of 1 mm;
- acrylic paint in white and black;
- brushes;
- foil;
- construction tape;
- threads;
- capacity for the stand.
Will tell you how to make a birch from beads master class. To create it, we will use the buttonhole weaving technique. Cut a thin wire, string 9 beads on it. Make them in the form of a loop, twist both turns of the wire together.
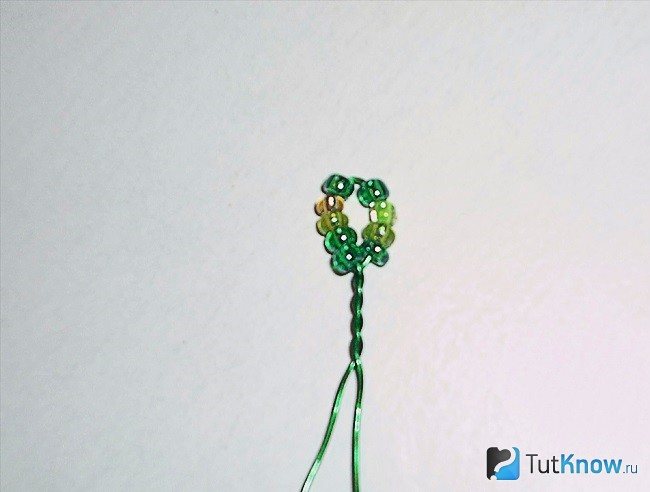
On the first and second ends of the same wire, string another 9 pieces of beads. Twist each of these wire pieces. On each side, make 5 leaf loops in total, the eleventh will be at the top in the middle.
Twist the wire to make a twig.
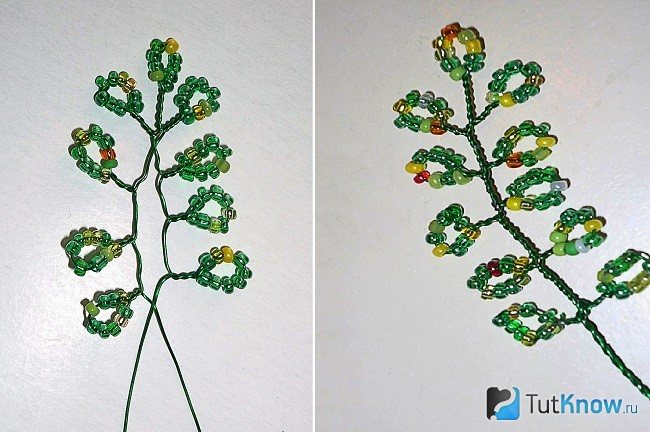
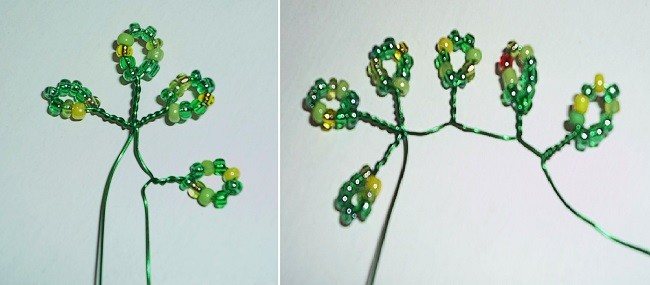
You will need to make 50 of these blanks.
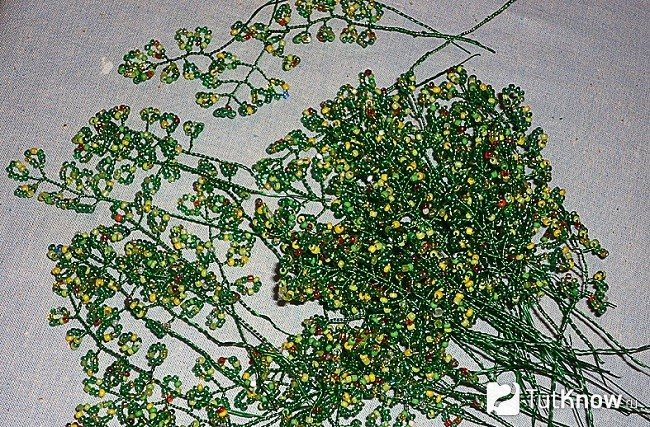
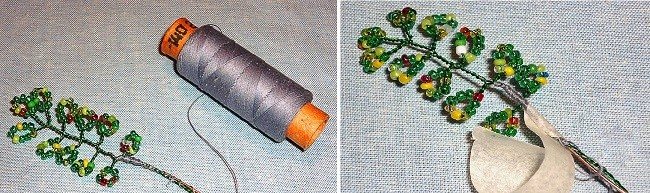
We make one large out of 5-7 such small branches. To do this, cut a 15 cm fragment from a thicker wire with pliers. Using threads, screw the first branch to it, close the junction with tape.
Attach the rest of the small twigs here in the same way.
Next, we make a birch from beads as follows: since it does not have a top, we design the first group, consisting of four branches, so that it becomes the top of a tree. We place the rest of the blanks at different levels.
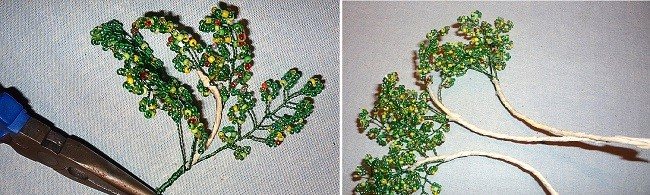
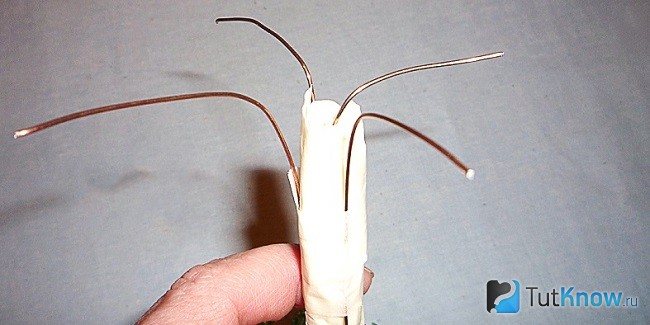
At the bottom of the barrel, secure 4 strong wires with tape, bending them at an angle of 90 degrees.
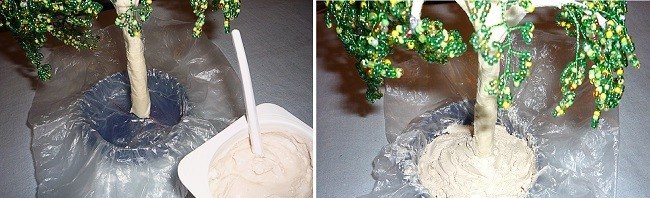
Place cellophane in a container, put a cross-piece of a tree here, fill its lower part with alabaster or gypsum. First, hold the tree yourself, when the solution hardens a little, lean the birch against a vertical support. Leave so that the plaster or alabaster is completely dry.
In order not to stain the beads in the next step, wrap the birch branches with foil. Dilute gypsum with PVA in a 1: 1 ratio. Stir well so that there are no lumps left. Cover the birch branches with this substance with a thin layer and the trunk with a thicker one.
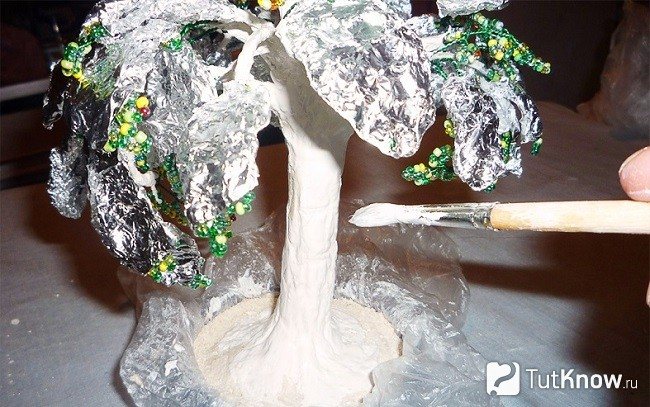
To make the bark of the tree more authentic, use a toothpick to make grooves. When the gypsum glue solution has hardened, paint over with white acrylic. Make black stripes on the trunk and branches.
When the solution is completely dry, remove the base of the tree from the mold, decorate it with pebbles or moss.
This is what a beautiful birch bead turned out.

Using this technique, you can make not only summer, but also autumn birch from beads. To do this, take this material in yellow. Moss is perfect for decorating the trunk circle.
Master class on making feeders
There are bird feeders in any yard, they are usually made from a five-liter bucket: two parts of the middle are cut off along the length, leaving a trough with a canopy so that the grain does not get wet. But such feeders do not look very aesthetically pleasing after the first rain, and only after wintering. But this is in the city. In the country, you can make from other materials, including waste.
Read also: Impregnation against wood decay
For work you will need:
- Liquid Nails;
- A pair of tea - that is, a saucer and a cup;
- Strong twine or thin nylon cord;
- Scissors.
It is necessary to determine the position of the cup. It can be installed on its side, then the grain will be partially inside. Another option is the traditional position of objects, then grain is poured on a saucer around the cup, and water is poured into the cup itself. Glue the cup to the saucer with liquid nails. Wait until it is completely dry. Make a mount.
It is better to decide in advance on the place where the feeder will hang, and measure how much twine is required:
- If the cup lies on its side, then the string is simply tied to the handle.
- If the cup is glued to the bottom of the saucer, then you need to turn the structure over and glue pieces of twine crosswise on liquid nails.
Wait until the glue is completely dry and securely fixed to the saucer. Turn back, at a height of about 10 cm from the cup, tie into one knot. Fix the assembly additionally with a drop of glue. Make a loop. The feeder is ready!
Car tire use
For such a feeder you will need:
- Smallest diameter chamber;
- Stationery knife, bright felt-tip pen for marking;
- Meter tape;
- Paint of any color;
- Reliable adhesive (e.g. liquid nails).
Determine the length of the open top with a meter tape. Mark this distance, retreat at least 5 cm from the sides. Draw a rectangle, mark the middle. It turned out two rectangles, in which you need to round off the edges relative to the center line. Make an incision along the marked centerline, cut out roundings. Make cuts to the marked lines, do not cut off the stripes. They need to be twisted in two arcs, pressing the inner edge to the base. It turned out "pipes". Fix them with glue. Approve the feeder at the selected place. Pour water into the inner part, and pour feed into the pipes. Done!
From a tin can
As easy as shelling pears can be made from a tin can and its lid. A tea can will do. In addition, you will need:
- Hammer and nail;
- Chain with links and connecting rings - 8 small and one large (a ring from a keychain is suitable as a large one);
- Wire and side cutters, small pliers;
- Measuring tape and felt-tip pen.
Mark 4 points along the circumference of the can at an equal distance from each other. Punch holes in these points with a nail and a hammer. Do the same with the lid. Insert connecting rings into the holes, attach chains to them using a special tool. The distance between the jar and the lid should be at least 15-20 cm. Secure the chains in the lid with additional wire. Connect the segments of the chains on one large ring. The feeder is ready!
Cakes in the form of a birch log
If a treat is planned for a children's birch party, bake cakes in a theme. For experienced chefs, the following recipe can be advised.
- It is best to use biscuit dough for cakes, but you can also use shortbread. They should be rectangular. The cakes are sandwiched with cream, moistened with impregnation.
- The decoration is made of mastic. To make the layer of it better fixed on the cake, grease the top of the cake with butter cream, let it freeze in the refrigerator.
- Roll the white mastic into a thin layer.Using a rolling pin, transfer it to the top of the cake, roll it to better attach it and there were no air bubbles.
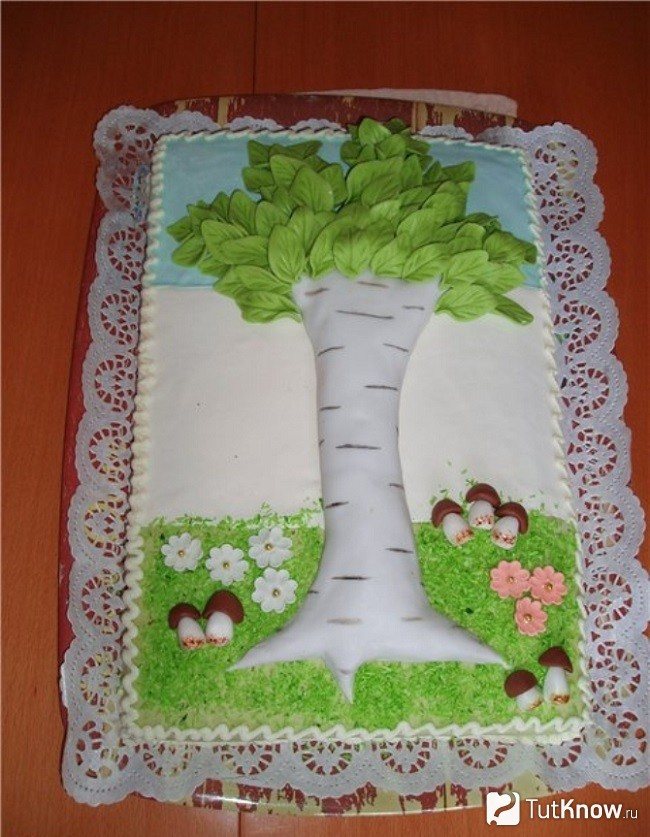
- We make the sky from white mastic with the addition of a small amount of blue food coloring, for grass and leaves we use green. It is better to cut the leaves according to the template, with the help of molds to give texture.
- To make the trunk look voluminous, place the crumbled cake scraps from the sides mixed with cream under it.
- Form mushrooms and flowers, stick them in place.
To make the mastic parts stick better, lubricate the surface on which you will attach them with water.
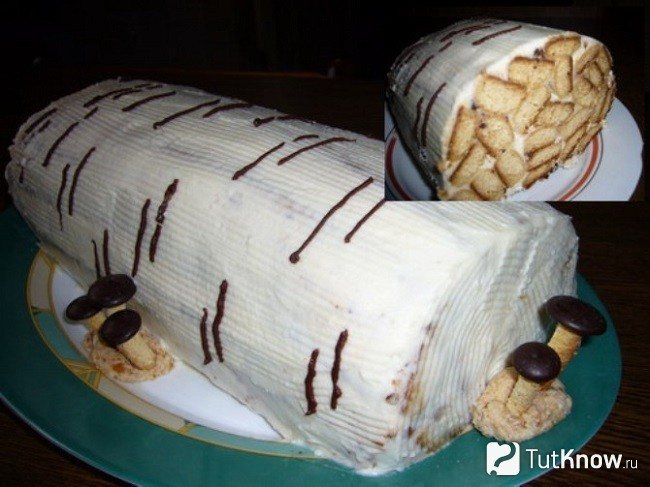
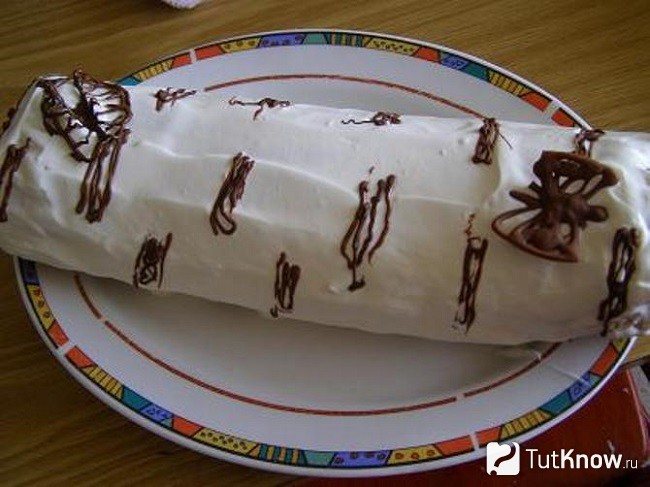
But not everyone is able to create such a masterpiece, it is not necessary. The second turns out to be no less tasty, and baking such a cake resembling a birch log is very simple.
Take for a test:
- 3 eggs;
- 2.5-3 cups flour;
- 2 tbsp. l. honey;
- 2/3 cups sugar;
- 1 tsp soda;
- a few drops of lemon juice.
For the cream:
- 1/4 kg of sweet vanilla curd mass;
- 0.5 kg sour cream;
- 150 g sugar.
Then follow these instructions:
- Use a whisk to create a fluffy mass of eggs and sugar. Add honey, stir. If it is thick, melt in a water bath. Add sifted flour, knead the dough.
- Divide it into 3 parts, each roll out rather thinly to achieve a thickness of 5 mm. Cut the resulting shapes into long strips. Place them on a baking sheet at a distance, bake for a short time - 5-7 minutes. at an oven temperature of 220 °.
- In the meantime, beat the sour cream with sugar, add the curd mass, mix.
- To collect the cake, lay cellophane or foil on a flat dish, put a little cream here, and sticks of dough on it. Cover them with cream. So, alternating it and sticks, form a birch log.
- Wrap it completely in foil or cellophane, put it in the refrigerator overnight, like the rest of the cream.
- In the morning, you will get your creation, remove the foil, spread the cream on top with a wide knife. Melt the chocolate, pour it into a pastry syringe, make black lines on the surface of a birch log.
Here are some delicious treats you can prepare for a holiday enlightened by a birch tree. With such crafts, cakes, he will certainly succeed.
You can see how to make a birch log cake without baking right now.
See how to make a birch from beads.
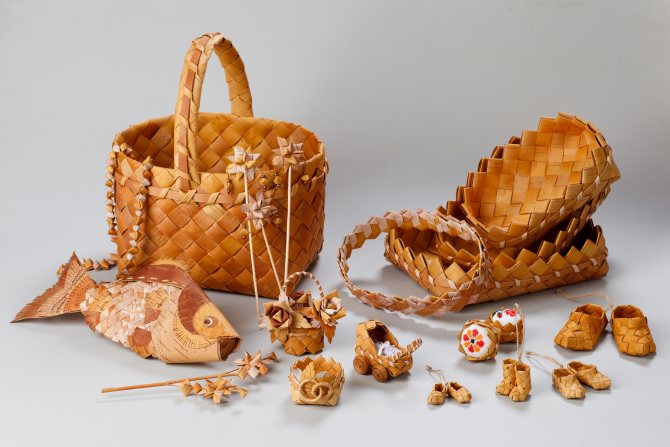
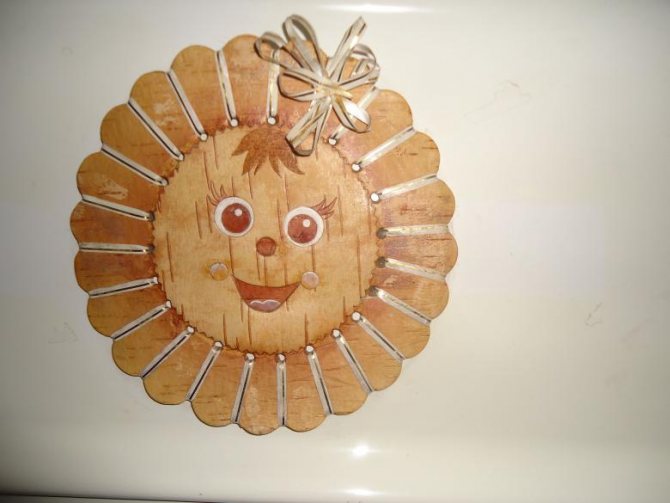
Preparation for work
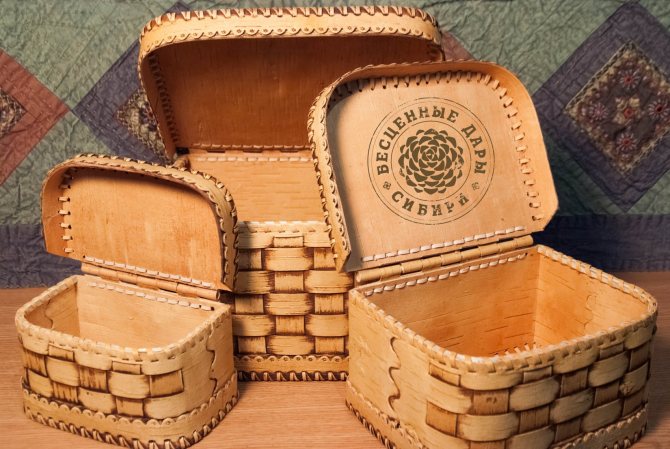
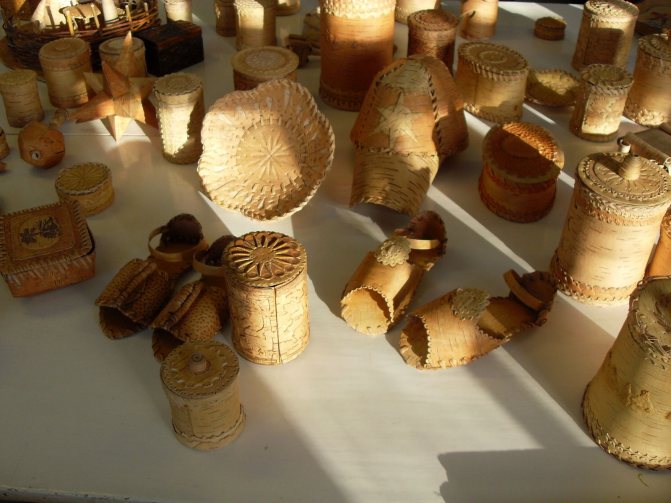
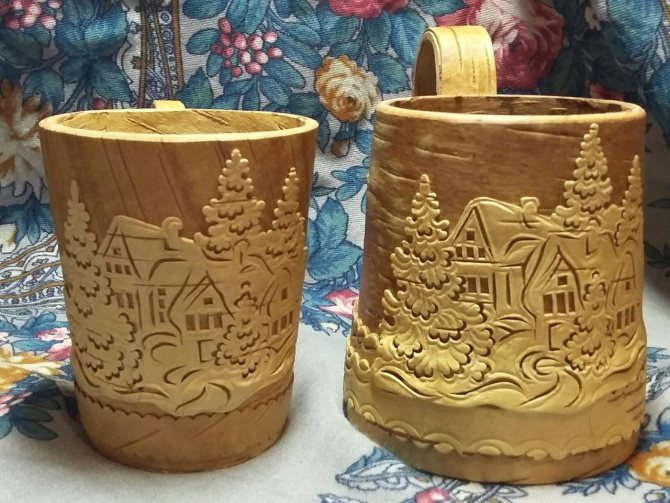
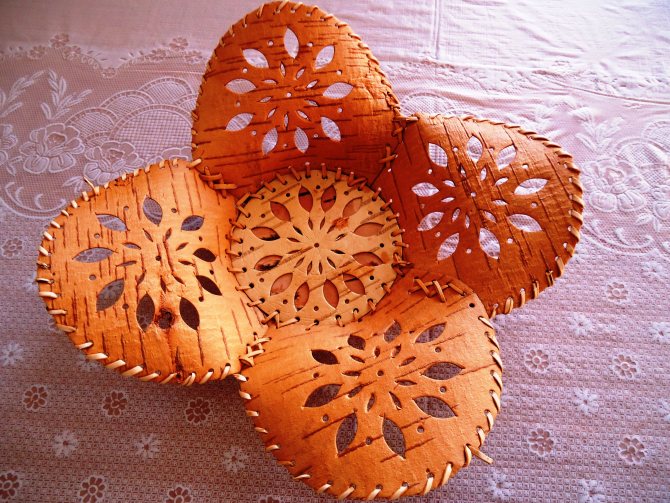
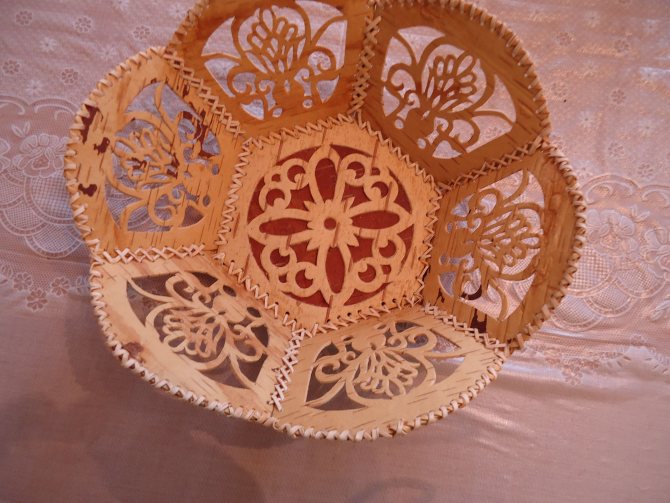
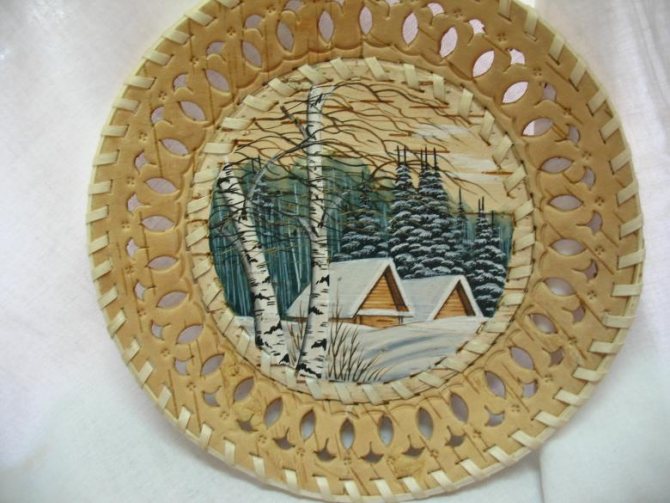
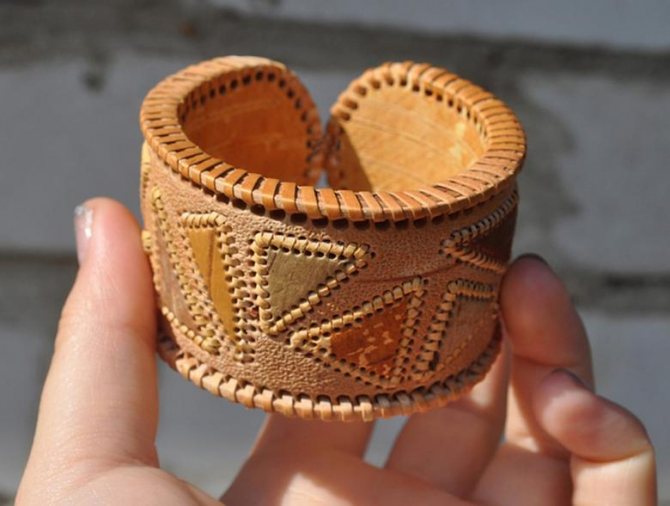
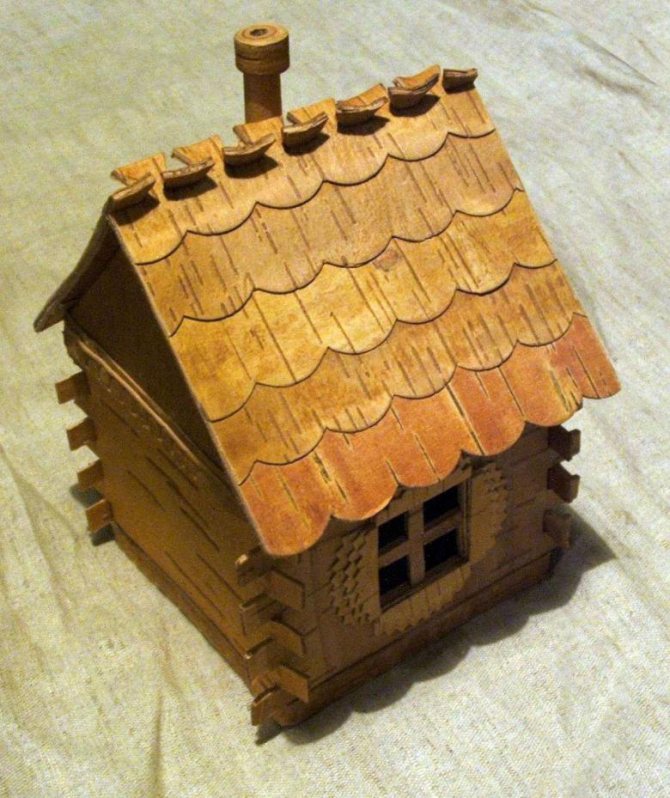
Before making a craft from birch bark, it is necessary to properly prepare the source material. It is on its quality that the attractiveness of the finished product will depend.
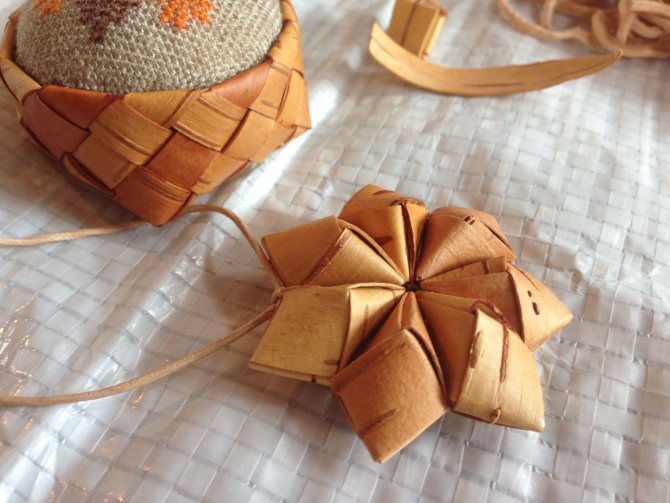
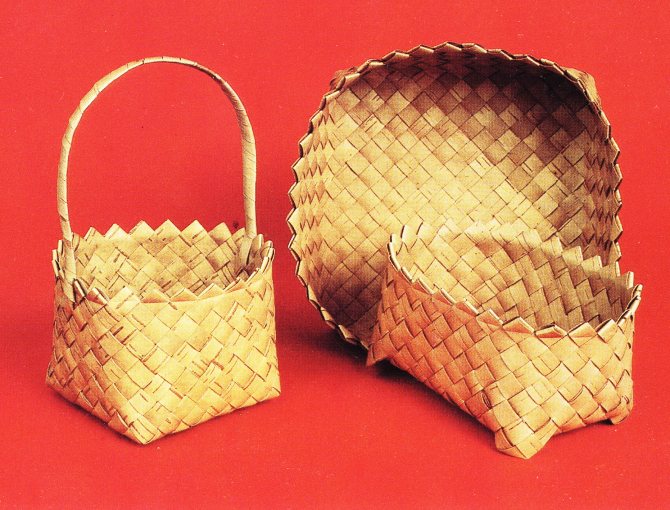
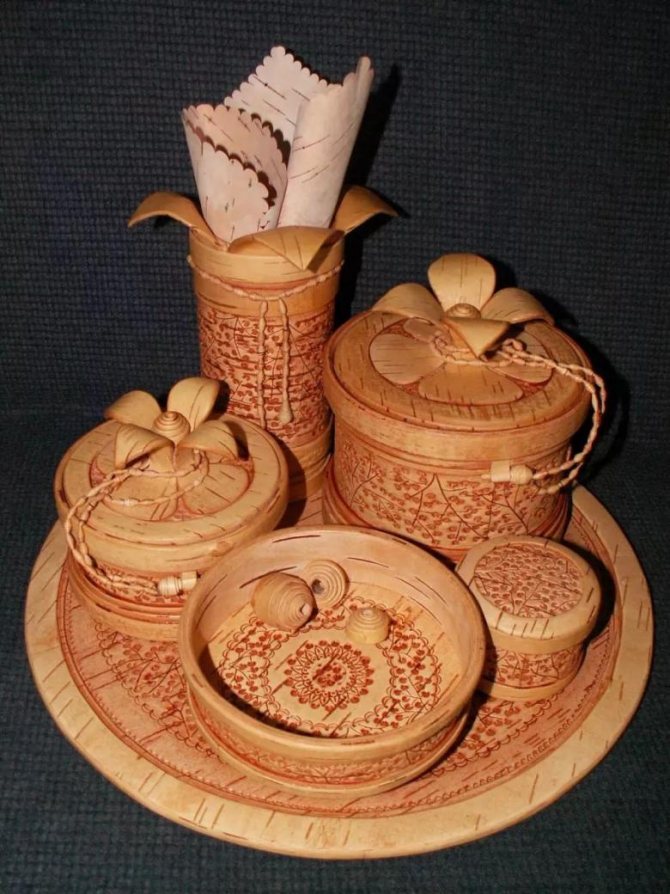
Birch bark can be prepared in several ways. Among them, it is worth noting cylinders, layers and belts. The latter option is the most popular because tapes are much easier to work with. It is he who should be chosen for beginners. DIY crafts from birch bark can be done by first preparing the main material... To do this, follow these steps:
- A suitable birch is selected and a small incision is made on its southern side. Do not cut off too large parts of the bark, as you can seriously harm the tree and put it at risk of disease or death. The choice of the side from which the bark is cut is also not accidental. It is from the southern part that it peels off much easier.
- The detached part of the birch bark is gently pry off with a special wooden spatula or any suitable object.
- The removed layers are collected in a stack. It is necessary to spread it so that the outer and inner sides of the bark alternate.
- Already at home, birch bark is split into thin strips or layers. This should be done as quickly as possible, since the birch bark dries out quickly and becomes less pliable.
- The next day, natural material is subject to mandatory processing.For this, the top layer is processed with fine-grained emery paper. This operation will remove all adhering particles of dust, plant debris and dirt.
- Then the more delicate inner part is wiped with the utmost care with a piece of cloth. It is important not to damage the delicate material during preparation.
- Warm water is poured into a deep container, and a small amount of salt is added.
- The birch bark is placed in the resulting saline solution and kept there for 2 or 3 days. The soaking period depends on the age of the wood and the roughness of the starting material.
- Prepared birch bark is stratified into thin strips.
- Each of them is ironed to remove excess moisture.
- After that, the birch bark is sorted by color and pattern.
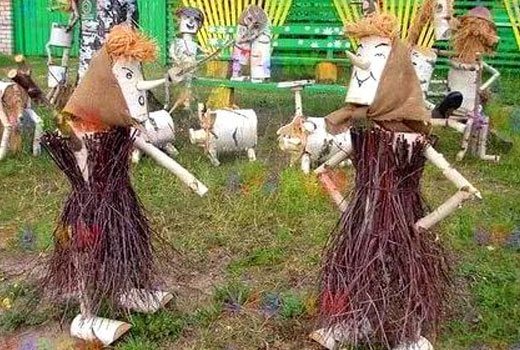
How to make a garden scarecrow
Initially, a scarecrow was placed in the garden to protect the grain crop from winged raiders, that is, from birds. However, the effectiveness of such a device is not very great, because birds are much smarter than people are used to thinking. If the scarecrow stands in the same place, in the same clothes, then very soon the birds will not pay absolutely any attention to it.
It's another matter if a stuffed animal wardrobe changes regularly (here is where to float boring old things) and it changes its location at least once every three days. In addition, it is recommended to improve the scarecrow with a soundtrack in the form of hanging cans or tin cans, which will ring and strum, scaring away birds.
Modern summer residents, installing a scarecrow on the site, seek to scare away not so much birds as people who are not averse to taking advantage of the fruits of other people's labors. Such scarecrows, of course, differ slightly from the previous options, primarily in their naturalness.
Luxurious crafts for the garden and garden can be made literally "out of nothing." Purchased materials are not always required, except as additives. And if you have to buy something, then it will not affect your wallet much. Here are some ideas for these crafts.