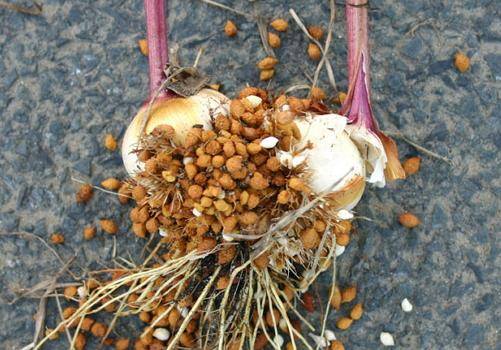
Many lovers of these chic and noble flowers every year act according to a long-familiar scheme: they sprouted corms on the windowsill, planted them in the ground, enjoyed the flowering, dug up the bulbs in the fall, cleaned them of the earth and "everything superfluous" and, after drying, put them in storage. After a while, the corms begin to hurt, be affected by pests, weaken, rot during winter storage and, sooner or later, there is a need to buy new planting material. But true flower growers, first of all, will be interested in the reproduction of any flowers that they are engaged in. And very soon it will become clear that the "superfluous" that every year was simply removed along with the dirt and earth, is a great replacement for old flowers.
After all, one gladiolus corm does not live long, a maximum of about 5 years, and after that it begins to "grow old", which manifests itself in all the above symptoms, which are not at all to the liking of any enthusiastic florist. And the easiest way to find a worthy replacement for her is to grow good planting material from the baby for the next year. After all, gladioli from children, as a rule, grow strong, healthy and beautiful. The article will discuss in detail all the stages of growing chic multi-colored handsome gladioli from children.
What to do with baby gladioli after digging. How to grow a gladiolus from a baby?
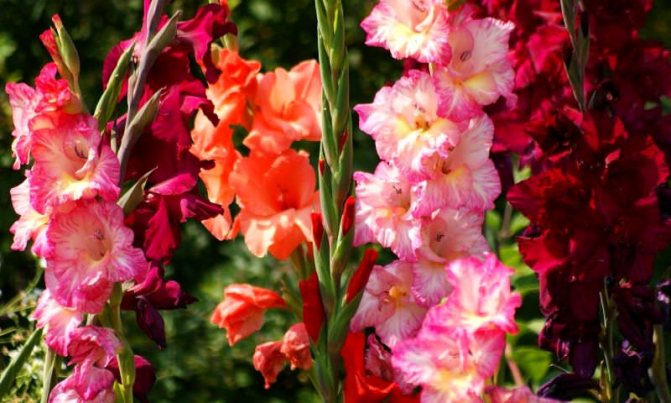
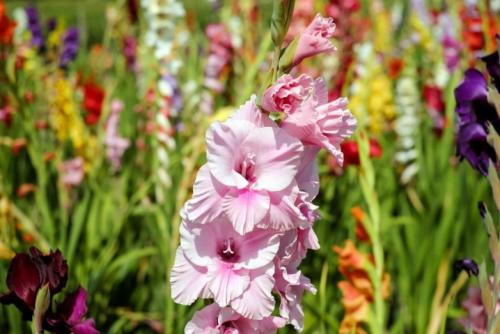
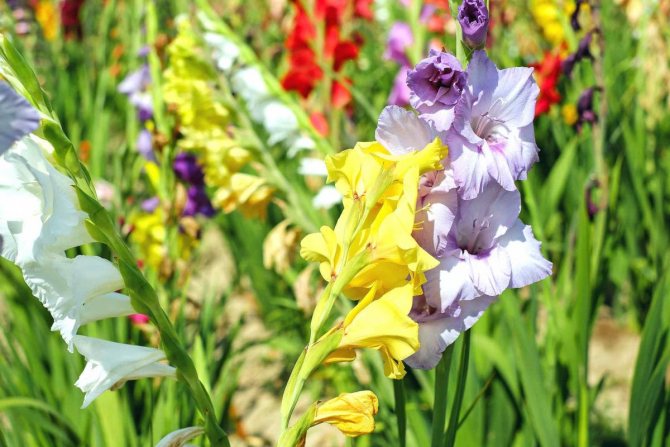
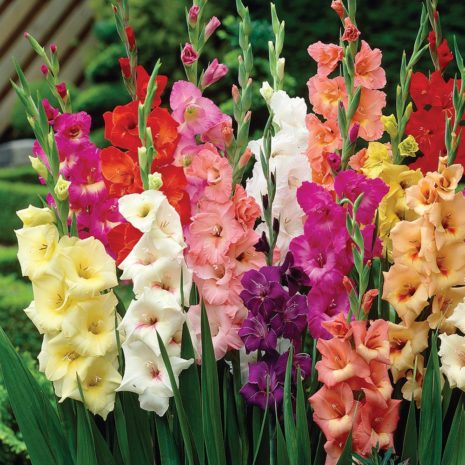
Gladioli are considered noble and proud flowers. They decorate many flower beds and lawns. They make exquisite bouquets. It's a shame that caring for them is a bit of a hassle. Many gardeners are convinced of this. You can plant a bulb and after a few months admire the plant that has grown from it, and next year you will not wait for the long-awaited flowering. And so I want to look at the unusual beauty every season. What to do to make your wish come true? Just learn all the tricks of growing these beautiful flowers.
What it is?
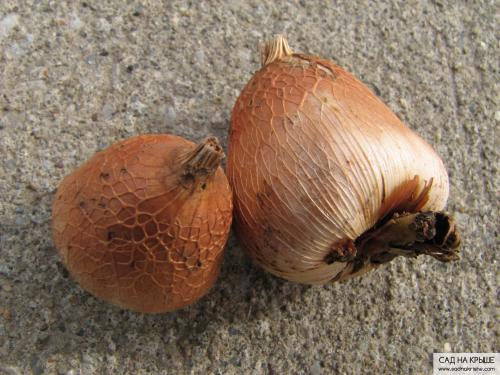
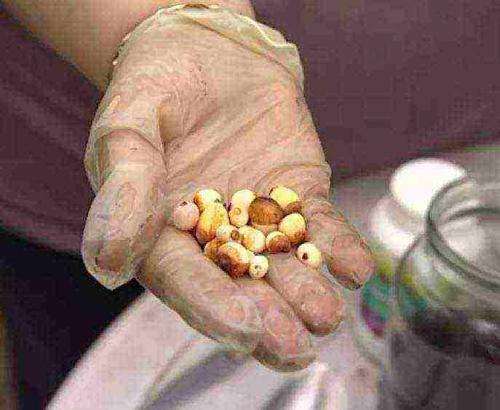
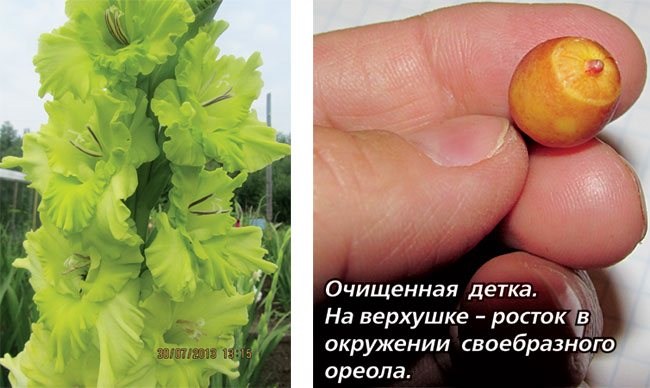
Reproduction of gladioli is not an easy task, but quite feasible. Usually gladioli reproduce with bulbs and so-called babies. What are the latter? The baby looks like a small tuber with a dense and dry shell, which protects the interior of this unit from external factors during rest. Each such unit, similar to small potatoes, has its own specific size. However, it is necessary to start the story about the reproduction of gladioli with corms. And you need to know that its subsequent flowering depends on the parameters of the gladiolus corm. Consider these very sizes and find out how they affect the future beauty and size of the flower.
- Only that corm, which has a diameter of more than 3 centimeters, can give several peduncles at once. The flowers will be large and beautiful, as they will open completely. Their color will surprise you with their richness.
- The same unit, only slightly smaller in size - from 2 to 3 centimeters, is considered a representative of the second grade. From her, you will also wait for a lush flowering.
- Further, the size only decreases. Small specimens ranging in size from 1.5 to 2.5 centimeters are considered a good option. But they begin to bloom much later than the previous ones, about 2-3 weeks. Moreover, the flowers will not open so intensively.
- The units of the fourth analysis are considered to be of the lowest quality. They range in size from 1 to 1.5 centimeters. Such crumbs bloom late and bloom very poorly. But if you show perseverance, then you can get good results from such specimens.
How to prepare tubers for planting
Eternal, novice florists have a question about what to do with children? Before disembarking, it is necessary to carry out a number of activities that will help the children prepare for disembarking in open ground.
Each baby is covered with a dense shell. It is she who protects against various damages during storage. But when planting, this shell can only harm, delaying the germination of children for a month or more. It is recommended to remove it or break it. It is not difficult to remove the shell manually, but it takes a lot of time and effort. If a large amount of planting material needs to be processed, this can be a time consuming process. Due to inexperience, there is a possibility of damage to the delicate tissues of the baby and the future growth point of the flower. Each of us decides for himself whether he will spend time and energy on removing the shell, or will wait several weeks, wondering if the babies will germinate. Experienced gardeners say that cleaned babies not only germinate faster, but also form a larger root bulb.
An effective way is to germinate gladiolus babies before planting. To do this, 25-30 days before planting, the children are taken out of the storage area, placed for 1-2 weeks in a bright and warm place. Placed by size and variety of gladioli in bags with clasps or jars. A little weak solution of potassium permanganate is poured into each container, the containers are closed, but so that there is air access. It is impossible for the children to immerse themselves entirely in the solution, there should be quite a bit of water. Root buds and seedlings appear in 12-14 days. You can place the children on a damp cloth, put them inside the bags, and place them in a cold place, for example, in the refrigerator. Children prepared in this way will give amicable sprouts.
How to grow a gladiolus bulb. GROWING GLADIOLUS - planting, care, storage

Selling gladioli - selling gladioli for landing
Growing gladioli - how to grow gladioli in the open field, details of gladioli agricultural technology
All about growing gladioli
how to grow gladioli
Many gardeners consider gladioli to be beautiful, but difficult to grow flowers. After studying the materials posted in this section, you will understand: it is not difficult to grow gladioli.
The basis for success in growing gladioli is their correct planting and subsequent care. Moreover, planting gladioli and caring for them is not too laborious.
Gladioli - planting, care and cultivation, all the secrets of agricultural technology
Usually gladioli are grown outdoors. Planting gladioli in greenhouses is also possible, but in the open field, caring for these flowers is much easier.
If, while reading the articles, you have any questions - ask them on the forum. And also - send a description of your methods of growing gladioli.
In this section you will find everything about how to grow gladioli:
- Various ways to store gladioli
- How to prepare gladioli for planting
- How to prepare the soil for growing gladioli
- Various methods and schemes for planting gladioli bulbs in open ground. Rules for planting gladioli - in open ground
- How to care for gladioli - planting and caring for gladioli outdoors
- Correct feeding and watering
- How to deal with weeds
- Reproduction of gladioli
- Growing gladiolus bulbs - from babies
- Growing from children - gladiolus seedlings
- There is much more about gladioli agrotechnics. To find the information you need - there is a sitemap
This section is under construction. After all, the topic of growing gladioli is very big. It is simply impossible to tell about everything at once.
New articles, recommendations and tips - I add regularly. So - visit the site more often!
Selling gladioli for planting in the country - in the catalog of varieties.
Planting material
You need to choose the planting material correctly. These can be seeds, bulbs, or seedlings. The seeds of gladioli are small children that are carefully picked from the flower in the fall, separating it from the stem. The timing of harvesting the bulbs depends on the weather conditions, but most often gardeners do it in September.
The collected planting material must first be processed in a solution of potassium permanganate, then dried and sent for storage. From autumn, the seeds are stored until February or March of the next year, since it is usually at this time that the planting of flowers begins. Babies can be left in boxes or crates before planting, however, it is very important to maintain the correct temperature regime. The optimum storage temperature for seeds is 4-7 degrees above zero.
Planting material must be well monitored, regularly inspected and get rid of spoiled seeds. Damaged seeds should also be thrown away as they will most likely not germinate. If the bulbs are wet, they must be removed from the container in which they are stored and dried. Similar manipulations can be done with boxes, especially if they are made of wood.
In the spring, before planting, the bulbs are peeled and soaked in special solutions with growth-stimulating agents. The best options among these drugs are "Heteroauxin" and "Kornevin". You need to leave children in solutions for a long time (4-6 hours). Thanks to this, the root system will develop faster and better. But you should prepare a solution with the correct proportions:
- 0.6 grams of "Heteroauxin" is diluted in one liter of water;
- "Kornevin" in the amount of 1 gram is mixed with one liter of water.
After that, the seeds are planted for seedlings. Special containers and suitable soil are selected.
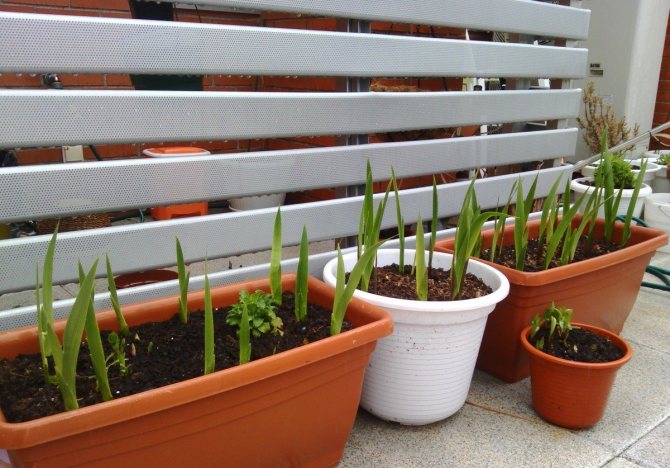
The best soil for planting gladioli is a mixture of turf land with river sand and humus. Children are put in boxes or other containers, moisten the soil and loosen the ground. When it gets warm (late May or early June), containers with seedlings are taken outside.
Small shoots should be protected from direct sunlight. First, the boxes need to be left outside for a short time, and then gradually increase the time. At the beginning of summer, it is better to bring containers into the house, because in the morning the temperature is not high enough for gladioli sprouts outside.
After that, gardeners act in different ways: some leave gladioli in containers, while others are transplanted into open ground or separate pots, flowerpots. It should be noted that a plant grown from seed may not bloom in the first year. That is why it is recommended to grow gladioli from bulbs, which can be purchased in a specialized store.
For planting, it is not necessary to choose a large-sized planting material, because this does not guarantee the germination of a strong flower. It is not recommended to stop the choice on bulbs with a concave bottom with a diameter of 1 centimeter or more. This indicates that the bulb has faded and is therefore not suitable for planting.
The best option is bulbs with a bottom with a diameter of 3-7 millimeters. In this case, the tuber should be 2-4 centimeters. A good bulb is one that does not have a wrinkled surface, but is smooth and shiny. When buying gladioli for landing in April, you should pay attention to the color of the tubercles. They should be formed, as indicated by the color: the tubercles are not brown, but light.
Inspect the bulb carefully before purchasing. There should be no signs of illness on it. A healthy bulb is clean and beautiful, with one but powerful sprout.
It is not recommended to buy bulbs with three sprouts.This indicates that the tuber is not healthy. This plant disease is called "herbaceousness" and is not cured. The disease manifests itself in the form of small deformed green flowers. The presence of red spots and purple powder on the surface of the bulb indicates the presence of thrips. The tuber is not suitable for planting, it must be disposed of before the parasites have moved to healthy bulbs.
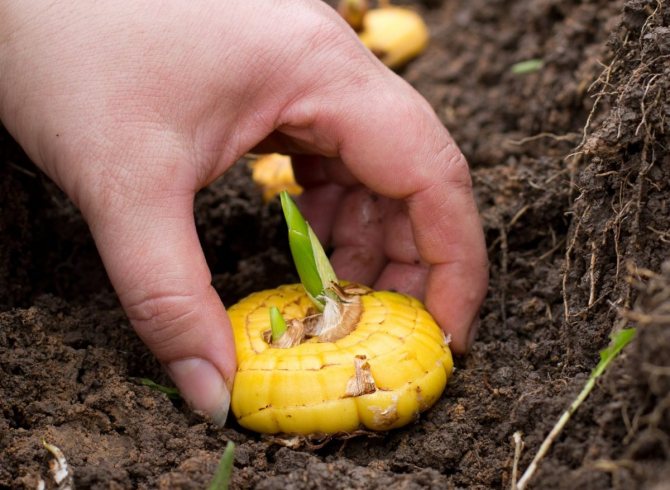
Before planting, the planting material is prepared. If the bulbs are planted, then two to three weeks before planting, scales must be removed from them. In this case, you should not make sudden movements so as not to damage the sprout.
The husk must be removed, since it contains microorganisms that cause various diseases of gladioli and lead to their death. Children need to be cleaned of scales later, just before planting in the soil, so that the onion does not dry out. The peeled tubers are laid out sprouts upwards. Thanks to this, not only flowering will improve, but also the immunity of the plant as a whole. When the material is ready, you can go directly to planting.
What to do with GLADIOLUS tubers. We rejuvenate gladioli in just one season. I share a secret

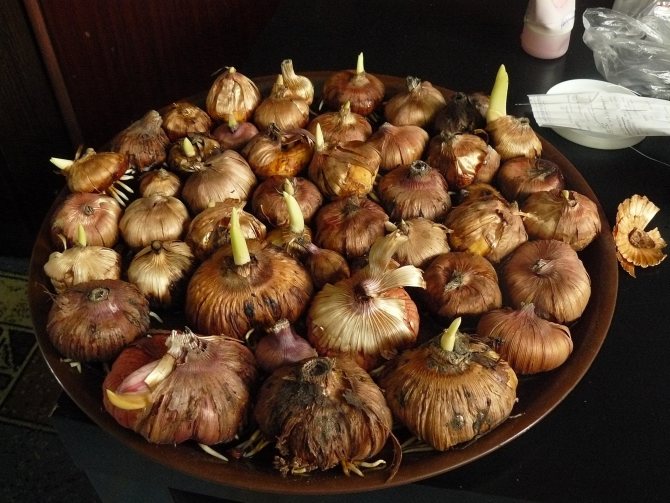
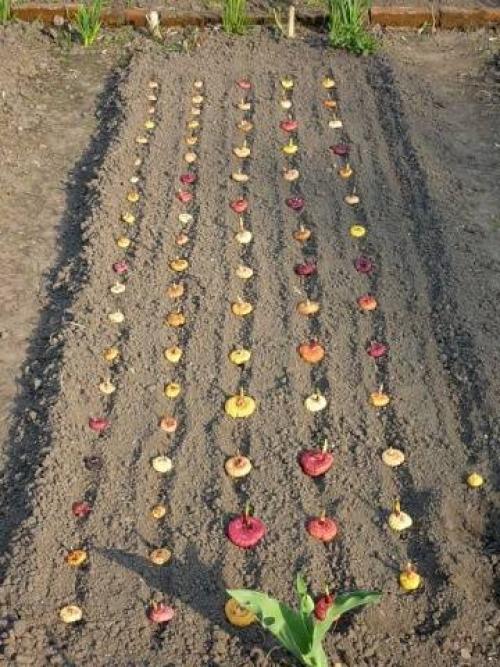
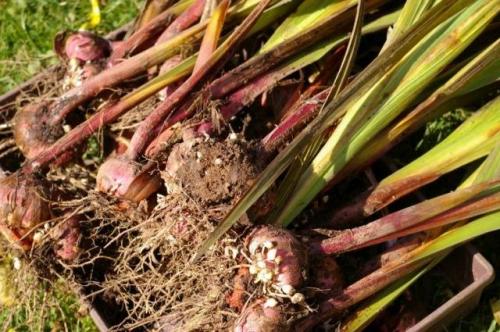
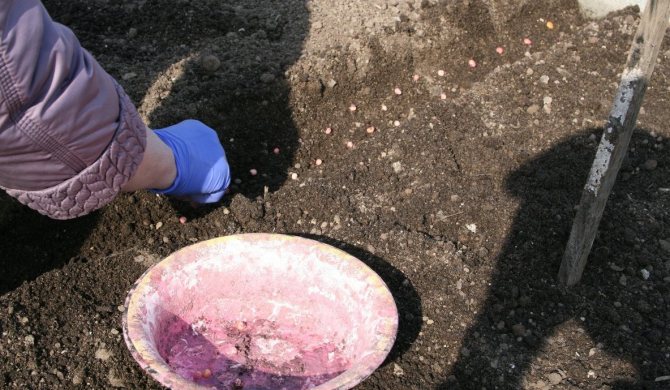
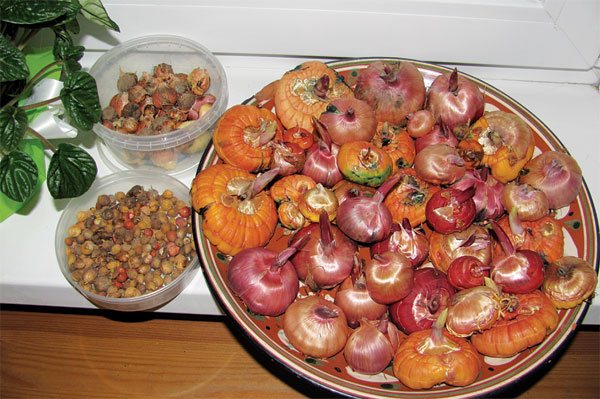
It's time to prepare gladioli for the season - usually this is done a month before landing in the ground. This month can also be used to guarantee the production of high-quality young (juvenile) corms from the so-called babies, more precisely, tubers. Let me remind you that after 4-5 years of flowering, the corms of gladioli must be replaced with new, young ones - in the process of repeated flowering, they age, accumulate diseases, the peduncle is shortened, the color of the flowers becomes less bright. Not very competent flower growers believe that gladioli are "dusty" - no, they are simply old and need to be replaced))) Far from everyone succeeds in growing full-fledged young bulbs from children in 1 season. Of course, those involved in the sale of planting material have long worked out their methods - up to the number of children planted per 1 m²))) The experience described below will be useful to a flower grower - a "six hundred" of central Russia with its 10-15 varieties. So, usually in early April we take out gladioli from the vegetable box of the refrigerator, where they were stored according to their varieties along with the children selected during harvesting.

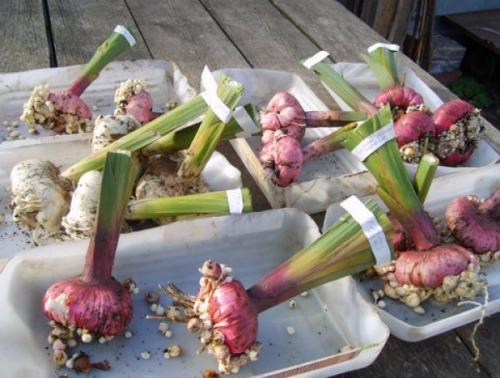
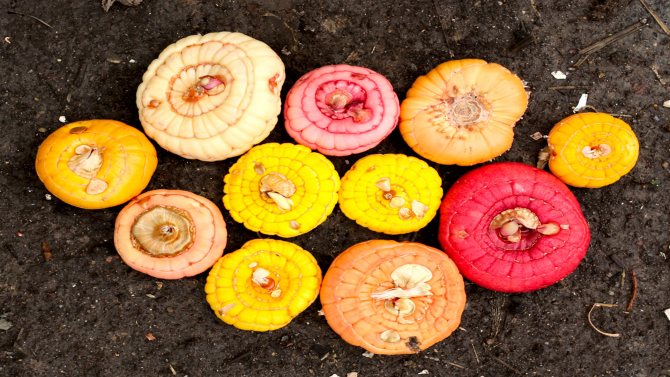
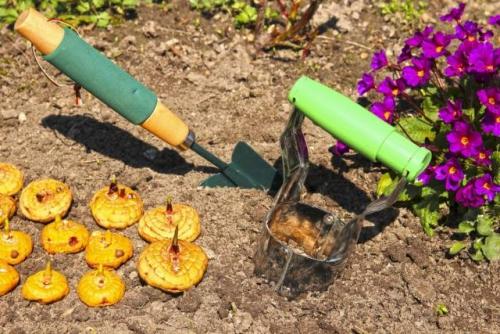
We take out the gladioli from their storage We clean from the scales and lay out in 1 layer for germination

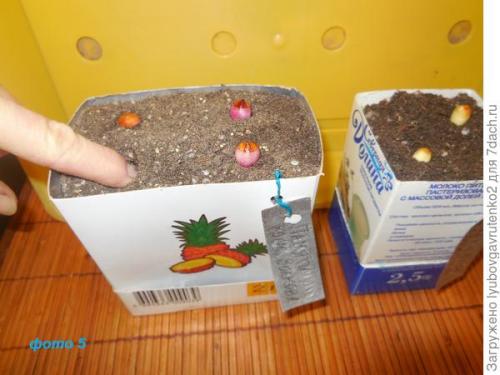
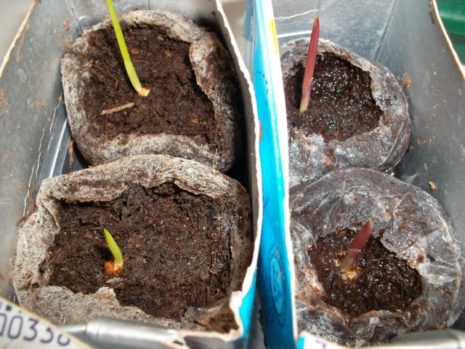
We place them in the diffused light. We also cleanse (“snap”) of dense scales and soak them for 1 day in a solution of humate (better!), Or immunocytophyte, or a soluble complex mineral fertilizer. It is convenient to do this in the bottoms of prepared Tetrapakov bags from juice or dairy products with a capacity of 1-2 liters - how they need to be prepared is clear from photo 3 - the bottom is 3 cm high and the walls are 10 cm. Do not forget to mark the varieties!
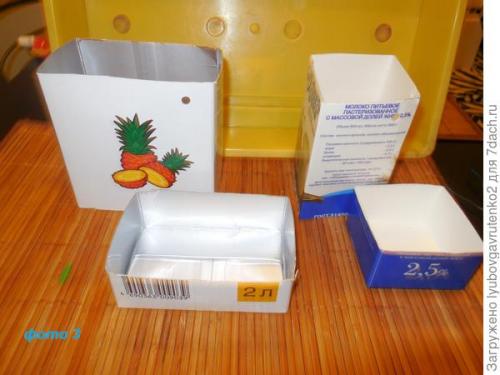
Prepared packages
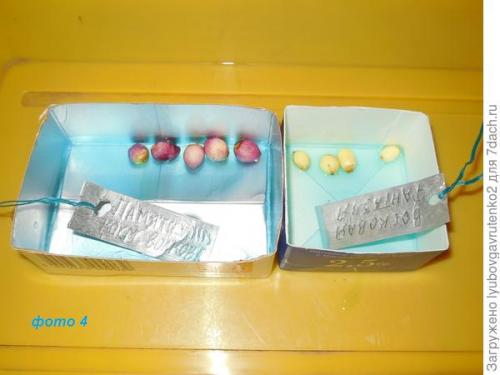
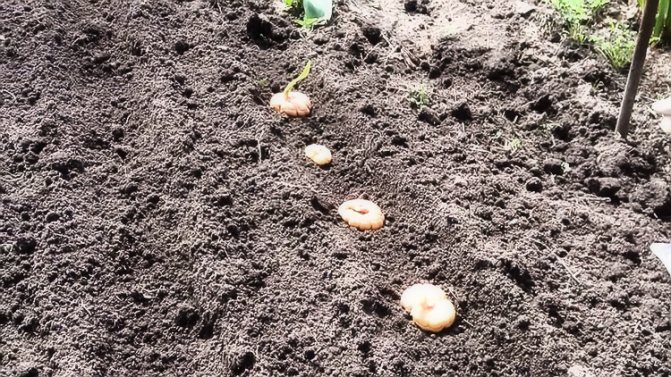
Soaking children After soaking in children, as a rule, it is already possible to understand where the sprout is and where the rudiments of the roots are. If it is still difficult to figure it out, we put the baby sideways in the universal soil - 2-4 pieces each, depending on the size of the package and the needs of the grower
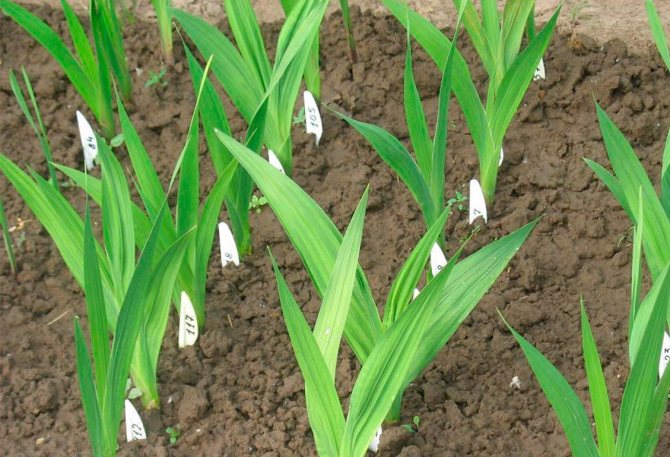
We plant the babies In April, we keep the sprouting babies on the windowsill, balcony or in the greenhouse, plant them in the ground at about the same time as the adult bulbs - right in the bags, removing only the bottoms (this does not injure the roots, excludes re-grading, and facilitates digging). Do not forget to cover the planted seedlings with spunbond for insurance against the cold.
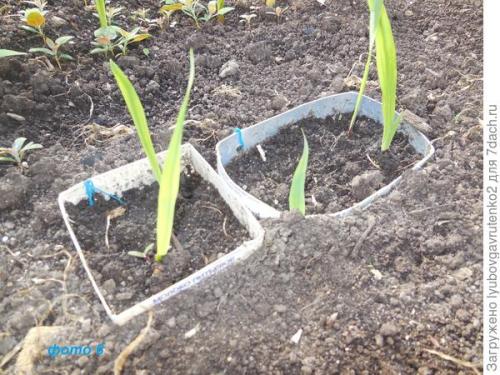
Let's not forget to remove the bottoms! Further care (watering, feeding, treatment from pests) is carried out throughout the gladiolus plot - only in children it is necessary to break off the peduncle at the stage of its advance, so that all the power of the plant goes to the formation of the corm. I dig up all the corms at the same time, disassemble and process them by varieties.A preliminary "race" of 1 month guarantees updated planting material of high quality - as a rule, not lower than the first parsing, ie. with a diameter of at least 3.2 cm (let's not forget - the length of the matchbox is 5 cm).
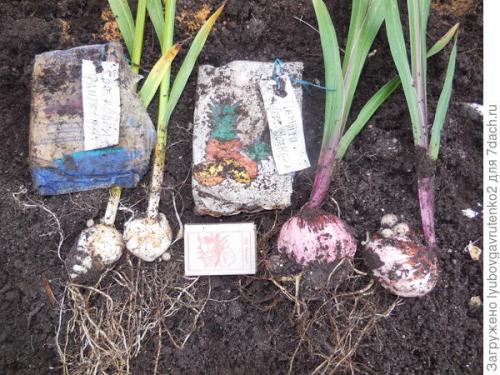
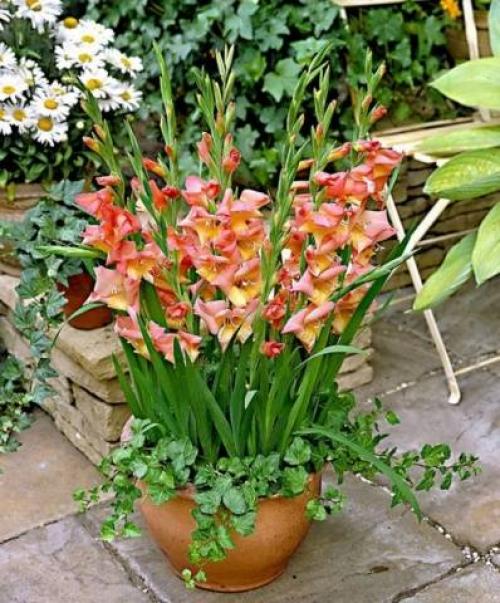
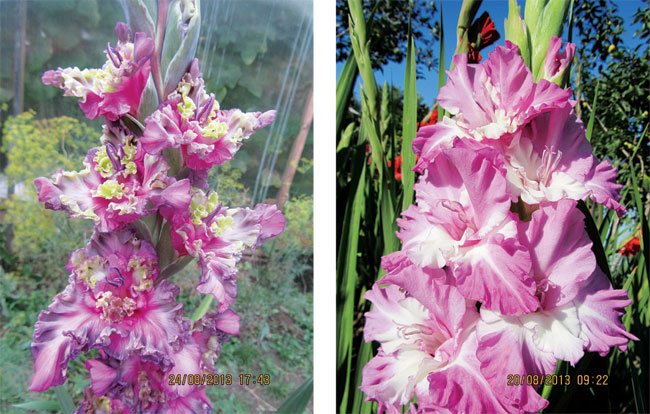
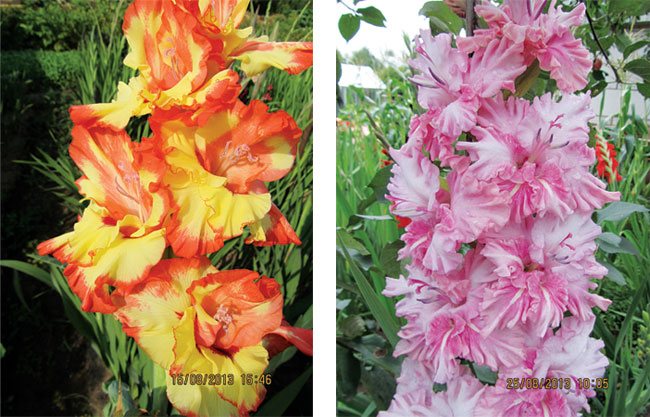
These are the beauties! I admit that many flower growers will smile indulgently at such chores - just as I have no doubt that perfectionist flower growers will be happy with the results. Good luck!
Kindergarten for children
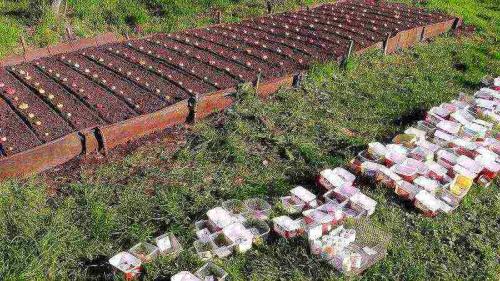
Children of gladioli need to be cleaned of covering scales and disinfected for two hours in a weak solution of potassium permanganate. Next, the treated children are planted on a bed under the film. The soil in the garden bed is dug up in advance with the introduction of humus and a universal complex of fertilizers.
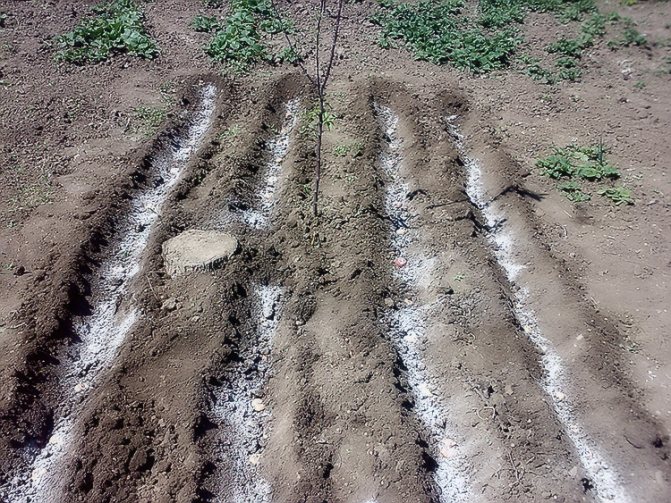
The scheme of planting the children is in grooves to a depth of 5 cm, row spacing 20 cm, a row distance of 10 cm from each other. After planting the children, the grooves are covered with soil and they must be watered with warm water with a universal complex fertilizer.
It is not difficult to take care of the planted children, but all the following procedures must be performed: abundant watering every 5 days with the obligatory loosening of the soil, application with irrigation every 10 days of complex universal fertilizer (from the beginning of August, use only potassium-phosphorus fertilizers as fertilizers), removal of peduncles.
Harvesting of large formed corms is carried out in the third decade of September. In wet weather, you need to monitor the lobes of the corms, preventing the appearance of new roots before harvesting, otherwise storage will be problematic, and, as a result, there will be poor flowering next year.
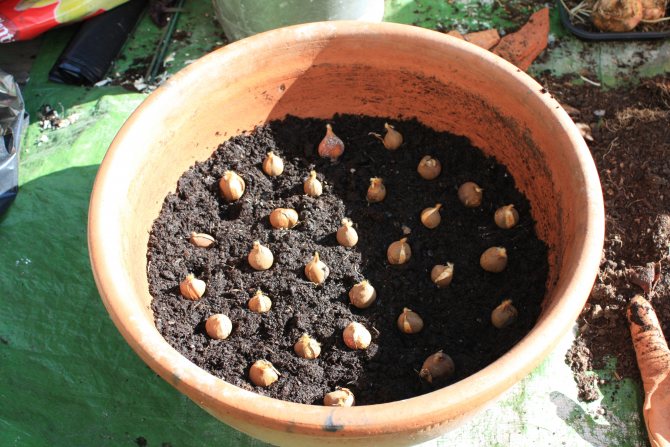
Planting baby gladiolus in boxes.
I have been growing gladioli for five years. And in no way did I manage to grow even small corms from a baby in one summer. What sizes I will plant in the spring, these are the ones I dig out in the fall :(.
Finally, last winter I started looking on the Internet for information on growing baby gladioli, brought everything I found "into a heap", discarded what was unacceptable to me.
But everything, it turns out, is simple: for a child, it is necessary to increase the growing season so that she has time to grow up. A baby planted in the ground in the spring does not germinate for a very long time, even the destruction of the hard shell before planting does not greatly accelerate germination. After studying all the tips I found, in February I poured the baby gladioli into a plastic bag and poured some water into it. Stirred so that the whole baby was wet, and poured out excess water. I carefully tied the bag and put it (for reliability) in another bag. I tied it up too. I put it on the window and left before the end of March. Arriving, I saw that almost all the baby with small white roots. I chose the larger ones and put them in the seedling box. Since I was leaving again for a long time, I put a large plastic bag on the box so that the earth would not dry out.
I returned home on May 14th. Gladioli by that time had risen and grown up. I planted these slender stalks on a far bed with fertile soil. I paid attention to them only in August, when I saw a red flower among the leaves - this is the baby of the gladiolus Oscar blooming. I broke the peduncle. Then on a few more flower stalks with buds appeared - I also removed them.
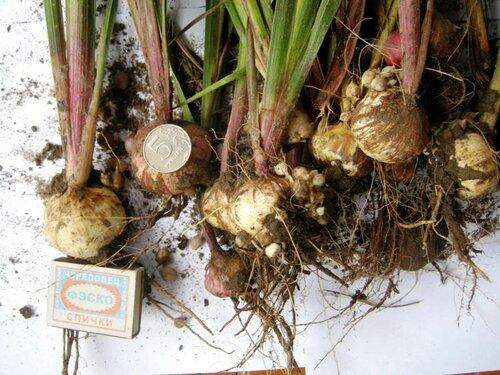
Yesterday I dug them out and was glad: the bulk of the corms is larger than the diameter of a five-ruble coin!
Corms - sunbathing and a good "diet"
It is better to grow gladioli in an open, sunny place. Earth is preferable to weak acidity, but neutral is also suitable. In the process of growth, gladioli develop not only a powerful aboveground part, but also powerful roots, so the soil in the garden should be well and deeply dug up with the introduction of mineral fertilizer nitrophoska at the rate of 30 g per square meter of the area of the garden.
Gladiolus corms need preliminary preparation for planting.A month before planting, it is necessary to clean them of the integumentary scales, to discard the sick and infected. Before planting, you need to process in a solution of potassium permanganate for half an hour.
The soil temperature at the time of planting the corms should be at least 8 ° C. The planting depth varies and depends on the type of soil, if on light soil it is less, then on heavy soil it is more, the optimal depth should be approximately three diameters of the corm.
The distance in a row is at least 20 cm, and preferably more. Shoots appear in 15-18 days. From the moment the shoots appear, it is necessary to regularly water, loosen the soil and, from June, apply fertilizer - nitrophosphate, adding 30 g per 10 liters of water during irrigation.
Dig up corms, like children, at the end of September. After digging, they are washed, soaked for 25 minutes. in a solution of chlorophos, prepared with the addition of 20 g per 10-liter bucket of water, and then for an hour in a solution of potassium permanganate prepared with the addition of 10 g per 10-liter bucket of water. After these pest-killing procedures, the corms are dried for two weeks in a ventilated room at a temperature of 25 ° C. In November, the corms are laid out in boxes and lowered into basements with an air temperature of 5-7 ° C and a humidity of about 60%.
Share this information with your friends on social networks!
Planting GLADIOLUS children before winter. Planting and caring for gladioli outdoors
It is necessary to plant gladioli in the country in the lightest and most protected from the wind area. These powerful and tall flowers require a lot of sun, and their long stems can easily deform or break under constant exposure to strong winds.
Important! It is better to choose the highest place on the site for planting - waterlogging is contraindicated for gladioli, these flowers are susceptible to infection with fungal infections. Therefore, swampy lowlands are not suitable for them.
It is not recommended to grow gladioli in the same place for several seasons in a row - scab and fungi that infect these flowers can remain in the ground for several years.
The depth of the planting groove depends on the size of the bulb. The tubers do not need to be buried too deep, this can cause later flowering. The ground should be well warmed up - it is optimal if the ground temperature is more than 8 degrees at a depth of 10 cm.
To protect the bulbs from scab, sawdust washed with a special solution is poured into the bottom of the groove. It is recommended to mulch the soil from above to prevent the appearance of weeds, slugs and prevent the soil from drying out.
In order for the bulbs to germinate as quickly as possible, they are covered with plastic wrap. You need to remove the shelter immediately after the appearance of greenery. They also protect gladioli from possible frost and heavy rain.
Attention! The soil for these flowers is needed with neutral or weak acidity. Chernozem with a small amount of sand or clay is ideal. You can add rotted humus or peat if the ground is too dense.
The planting of gladioli is over, now it remains to monitor the flowers, respond in a timely manner to their needs.
Feeding gladioli
Tall and powerful flowers need not only water and sun, for normal development, proper formation of flower ovaries, gladioli need to be fertilized regularly.
Fertilization of flowers begins from the moment the first pair of leaves appear on the stems, and continues until the last inflorescence:
- The first feeding of flowers is performed when the bulbs have just germinated and give two leaves. To do this, use nitrogen fertilizers that stimulate growth, which can be both mineral and organic. A weak solution of chicken manure, for example, works well.
- The same fertilizers or other growth stimulants are used at the stage of the third and fourth leaf formation.
- When there are 5-6 leaves on the bushes, you can feed the gladioli with a complex of fertilizers: nitrogen, potash and phosphorus.If the land on the site is rich in itself (black soil, for example), the nitrogen component can be excluded from the complex.
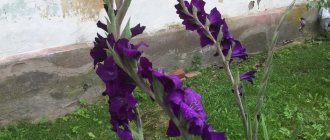
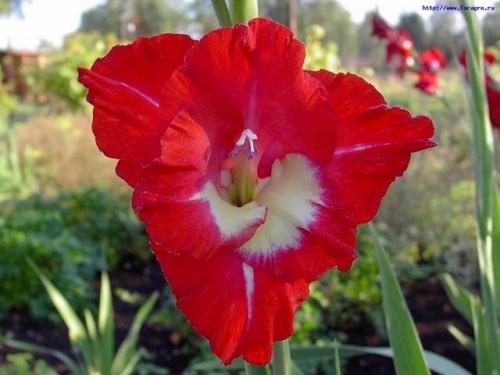
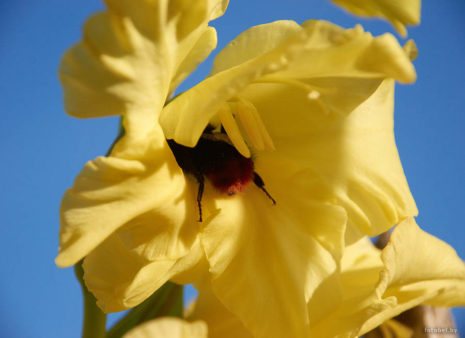
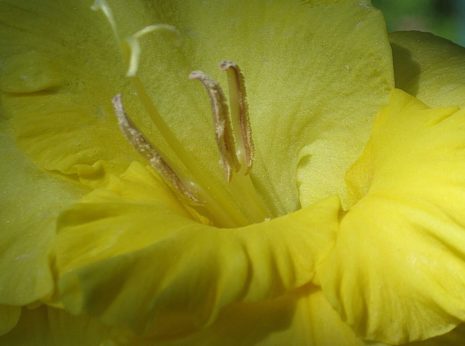
- When inflorescences begin to form, you need to repeat the fertilization with phosphorus and potassium. This stimulates the plants, they will be covered with large and bright flowers (as in this photo).
- In order to prolong flowering, you can add wood ash to the water for irrigation.
- In addition to other fertilizing, experienced gardeners recommend using additional green fertilizer every three weeks.
Fertilizers need to be applied regularly, but it is better to do this in small doses, dissolving nutrients in water for irrigation. High-quality feeding will help gladioli get stronger and please the gardener with abundant flowering.
Advice! Cut off faded gladioli or fresh flowers for bouquets using a sharp knife or pruner. The cutting line should be at an angle of 45 degrees, this is the least traumatic for the plants.
How to grow gladioli healthy and strong
The trouble with bulbous flowers is susceptibility to diseases and frequent damage to tubers by pests. Every year, the bulbs can accumulate bacteria and viruses, which will eventually lead to the death of the flower (the affected bulb is shown in the photo).

To prevent diseases, it is necessary to regularly process the bushes of gladioli. For these purposes, use:
- in the spring, before planting the bulbs in the ground, cut the garlic into small pieces and dig up the beds. After 2-3 days, gladioli can be planted. This will help protect plants from fungal diseases and their pathogens stored in the soil.
- Planting bulbs in sawdust helps against scab. Wood sawdust is pre-soaked in a nitrophene solution (a tablespoon of the substance per 5 liters of water). The joint planting of gladioli and viola, which scares away the causative agents of this ailment, helps well against scab.
- Until the gladioli have bloomed, it is possible to carry out a complex treatment of the bushes with copper oxychloride and karbofos. Copper-soap preparation and foundationazole help well.
- After digging the bulbs in the fall, it is recommended to treat them with a 0.15% solution of potassium permanganate or 0.2% foundation.

Care
Care for gladioli planted in a garden or in a summer cottage is carried out in this way:
- It is necessary to mulch the ground between plants and around the garden. This will keep moisture in the soil longer. Sawdust is a good option. The mulch will help keep weeds from sprouting. The garden bed will be clean and aesthetically pleasing.
- Watering gladioli is carried out every week. The ground should be moist at a depth of 2-3 centimeters.
- It is necessary to immediately protect the plants from the attack of thrips - small parasites, due to which the leaves of gladioli become striped or white, deformed, the flower withers. Plants need to be treated with pesticides that contain carbaryl or malathion. This can be done when the flowers grow 15 centimeters. A preventive measure is a must if you want to grow healthy gladioli.
- The flowers will begin to rise, buds will appear, so it will become difficult for the stem to hold them. So that the gladioli remain straight and the gusts of wind do not bend them, the flowers should be supported. For this, ordinary stakes are suitable. They are deepened into the ground at a short distance from the plant and tied with stakes and gladioli with wire or rope. In this case, both the peg and the flower will remain even.
When two or three flowers open on the plant, you can cut the stem with them. The remaining ones will develop, and the cut flowers (stems with flowers) will continue to bloom in the water in a vase. 4-6 leaves should remain on the plant, because they are the ones that feed the tuber remaining in the ground. In the morning or evening, it is recommended to cut the flowers using a sharp knife and doing it at a diagonal angle. After that, the lower leaves are removed from the cut flower.Gladiolus must first be held in a dark and cool place, and then set in the light to decorate the room.
The bulb itself is dug out of the ground before frost. The tubers are dried in a warm, well-ventilated place. It takes 2-3 weeks to dry the bulbs. Then dry soil is removed from the tubers. After that, it is necessary to sort out all the tubers for damage. If the bulbs are intact, they can be sent for storage. The place must be dark, and the appropriate temperature regime (coolness) must be maintained in it. The bulbs will come in handy for planting new flowers next year.
How long does the baby of gladiolus grow? 2 We plant tubers at home
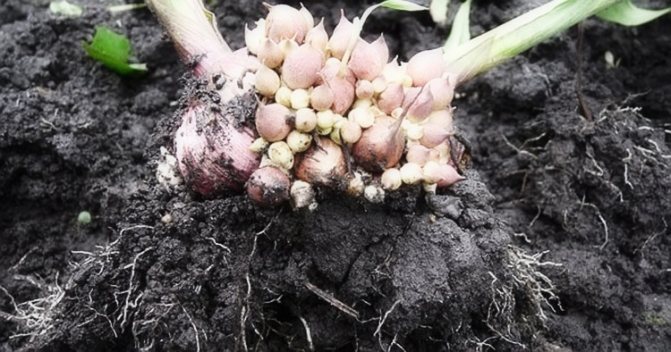
To obtain a good harvest, growers recommend selecting the largest and healthiest bulbs, with a dense and as dry shell as possible. From such children, the crop is obtained already in the first growing season. This does not mean that smaller fruits are not capable of active reproduction, but the first flowers from them will appear no earlier than 2-3 years after planting. The optimal size of tubers for growing gladiolus at home is at least 7-9 millimeters in diameter.
To grow gladioli from children healthy, it is very important to choose not just large fruits, but also pay particular attention to the presence of root tubercles on the kidney, the more their number, the better the final planting material will turn out. It is advisable to store young kidneys at room temperature in a place well protected from excess light; with proper storage, gladiolus babies can retain their properties for several months.
Approximately 15–20 days before planting, pre-selected babies must be thoroughly peeled. Further, for preventive purposes, the bulbs are placed in loose gauze bags, having previously divided them into varieties, after which they are dipped into a solution of warm water and potassium permanganate in a proportion of 5-7 grams. substances per 10 liters. water.
The soil for planting must first be well moistened, then loosened. Sowing gladiolus tubers in the garden can be done in two ways - shallow or deep, depending on the structure and composition of the soil. In heavier or clayey soil types, they are planted to a depth of no more than 3-4 centimeters. In looser and lighter soil, you can plant them deeper, in planting grooves measuring 7-9 centimeters.
The distance between the planted fruits should not be less than 5–7 centimeters, with a distance of 15–20 cm between planting rows, if planting is carried out on previously prepared beds. As for the landing frequency per 1 sq. meter, then it directly depends on the climatic conditions of a particular region and the illumination of the site. To determine which frequency is right for your companion, we recommend that you divide the planting material into several parts and varieties, and plant them at different frequencies, and in the fall, based on the quantity, it will be possible to draw an optimal conclusion.
After planting, it is best to mulch the beds with a small layer of cut grass (1-2 centimeters). Next, you need to carefully water the beds and cover the planting sites with plastic wrap or other material suitable for mulching. This contributes to better tuber preservation and acceleration of the germination process. Subject to the listed sequence of actions and recommendations, the first shoots in a normal season are obtained in 20-25 days.
When to drop off the kids
The specific time of the planting work is directly related to the peculiarities of the region where gladioli are cultivated. In the areas of the middle lane, such actions begin at the end of April or early May, while in the more northern territories of Russia with planting flowers, it is better to wait until the middle or even the end of May.
In order not to be mistaken in your calculations, it is better to focus on the soil temperature: as soon as it rises above + 10 ° C, you can prepare children for disembarkation in an open area. When growing gladioli at home, the choice of planting dates is not so critical, so it all depends on personal preferences and the convenience of the grower.
Quote post Tanya_R Growing gladioli from "children"
Gladiolus bulbs age over time and new bulbs need to be purchased. Another option is to grow young onions from a baby.
1. What are the criteria for selecting children for planting?
- If the variety has a genetic predisposition to a small baby, then the grower has no choice but to take the largest one.
It is necessary to give preference to a child of 5-7 mm in size, without mechanical damage and without signs of disease. If there is a choice between gray and very dark children on one bulb, then it is better to take gray ones (the probability that they are not damaged by diseases).
In relation to children, the rule applies: let the size be smaller, but the roots are larger.
In the fall, when you select a baby, take not 3-5 pieces from your favorite variety that you need,
a 10-12. Put them in a separate container, store in a bag. In the spring, peel and select those that have more root buds, even if these babies are smaller.
2. In what time frame should the children be planted?
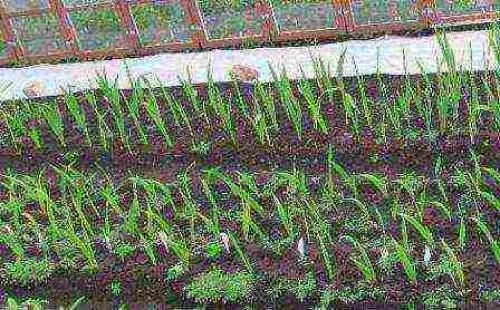
- Children in Central Russia are planted in early May. The soil temperature at a depth of 10 cm should be 10 C. At this time, buds bloom on the birch. This is the planting rule for both children and bulbs. If it was early spring and the soil dried up, then when planting the children, we spill a row with water. For better rooting of the children, we cover the planting with a film before germination. Seedlings appear in 10-15-20 days, even earlier under the film.
After sprouting, replanting must be watered and loosened. Then mulch by 2-3 cm to reduce watering and weeding (reducing the labor intensity in the care).
3. Is it necessary to peel off the skin from the children, or is it enough to just tear it off?
- During my enthusiasm for gladioli, there were different opportunities in relation to "clean - not clean" children. I am convinced from my own experience, and I advise you, be sure to clean the baby.
The first advantage of such an operation is fast germination. Second, you can see if this is a healthy baby or not. The patient is discarded (that is, shrunken, withered, with spots and dark roots). Third, cleaning the babies significantly increases germination. An unpeeled baby has a germination rate of 10-20%, and a cleaned one - 80-85%. Children clean immediately before planting.
4. They say you can make it easier to clean your kids with a baking soda solution. Allegedly, the scales come off on their own. How much soda to put and how long to keep the kids in the solution?
- You can apply a solution of baking soda (1% or 1-2 teaspoons per 1 liter of water). Soak in it for several hours (but not more than a day, otherwise the children of gladioli may suffocate). I have over 200 varieties in my collection and always brush my baby by hand. In this case, all the advantages are visible. It only seems that the operation is long and laborious, one has only to start. If you are going to plant babies from your favorite varieties, take a little time and you will always have excellent planting material.
5. Do I need to apply fertilizer to the soil? If so, which ones?
- When planting children of gladioli, I personally do not apply any fertilizers. Fertilizers and trace elements are needed for gladioli during the growing season. As we grow, we will make them.
6. To what depth and with what distance should the children be planted?
- The baby gladiolus is planted in rows or ribbons (this is one wide, 10 cm, row). The depth of the planting is 5 cm. The distance between neighboring children is at least 5 cm, between the rows or ribbons - 20-25 cm. It is more profitable to plant with a ribbon, since it is possible to place it in a checkerboard pattern.
With a thickened planting, large bulbs from the baby will not grow - there will not be enough nutritional area!
7.We put adult gladiolus bulbs sprouts up, but how to figure out where the kids are up and down?
8. Are there any ways to speed up the growth of babies to get large onions?
If we want to get a race in time, then we do this: clean the kids, put them in a cloth bag, sign (or not). We put twigs, twigs in a glass jar on the bottom, but so that the water poured on the bottom does not reach your bag with the baby. Pour LITTLE of water to the bottom, lower the bags with the baby, close the nylon lid and put in the refrigerator. We check it periodically.
In 2-3 weeks, which is left before planting, they should bite and grow about 2-3 mm of roots. If they grow longer, they may break when planting, but if you can plant it carefully, without damaging the roots, then everything will be fine. Just don't wet the baby bag. The moisture that will circulate in the jar is enough for the roots to germinate.
There is a lot of information on the Internet that a gladiolus baby can be put in peat pots, etc. Please, do not do this. The roots of gladiolus are very fragile, and if they are damaged during planting, the flower will hurt for a long time.
9. How to feed the kids?
- We begin to give fertilizing to the children of gladiolus about a month after germination. In total, you need to feed it 5-6 times, after about 10 days. The first feeding - at the beginning of the development of the second leaf - is nitrogen (10-15 g of urea per 10 liters of water, per 1 sq. M of the garden). It should be remembered that feeding gladioli, like other plants, is carried out only after abundant watering.
The next two dressings are liquid organic fertilizers - bird droppings (1 part of droppings per 10 parts of water), strong diluted potassium permanganate must be added to the water to suppress pathogenic microflora. Then potassium sulfate 30 g + urea 15 g per 10 l of water, per 1 sq. m. This is approximately the phase of development of the 5th leaf and the formation of a flower arrow.
During the flowering period, we give full fertilizer - nitroammofoska (30 g per 10 l of water and per 1 sq. M of area). The flower arrow in children must be cut off, you can leave the two lower flowers to check the variety.
All top dressing should end at the end of August. In addition to root, they give several more foliar dressings with microelements: manganese, boron, zinc, copper.
We also spray gladioli with solutions of potassium permanganate, boron, or preparations of HOM and zinc oxychloride. Together with top dressing, these sprays are the prevention of gladioli diseases.
10. How long does it take for bulbs grown from babies to bloom?
- If you did everything correctly and with love: watered, loosened and fed on time, then most of the large children of modern gladioli bloom in the year of planting. If this did not happen, then next year all small bulbs will definitely bloom, and this will be the answer to your concern.
Read more about gladioli on the website.
Gardeners-flower growers are used to propagating luxurious gladioli with bulbs, but there are other methods of propagation, for example, by seeds. At first it may seem laborious, but those who have already received seeds and grown flowers from them say that there is nothing complicated.
When growing gladioli from seeds, it is important to remember that in most cases the varietal characteristics of the parent plant cannot be preserved. New inflorescences can have the most unexpected colors, shapes, it is no coincidence that the seed method is used in breeding work.
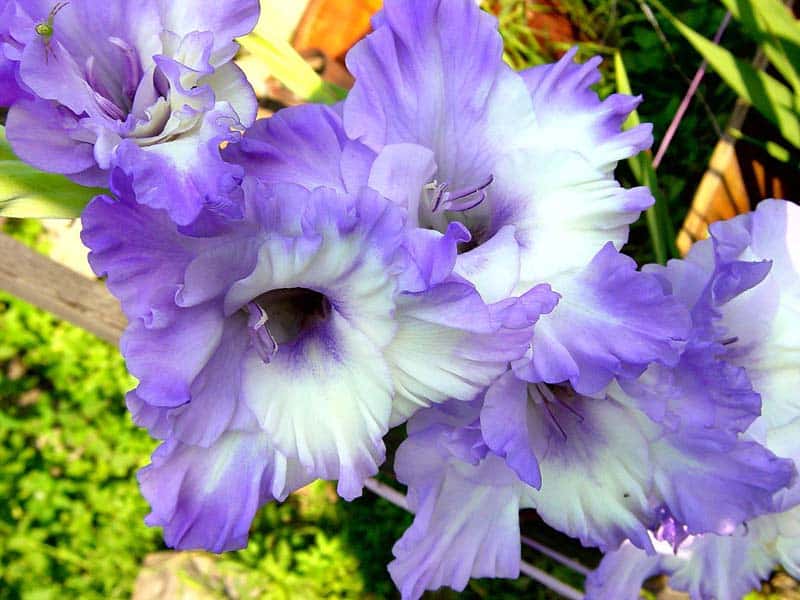
But the florist has the opportunity to grow some special flower on his own, to get a gladiolus with an original color.
Reproduction of gladioli by dividing the bulbs (video)
Many lovers of these chic and noble flowers every year act according to a long-familiar scheme: they sprouted corms on the windowsill, planted them in the ground, enjoyed the flowering, dug up the bulbs in the fall, cleaned them of the earth and "everything superfluous" and, after drying, put them in storage.After a while, the corms begin to hurt, be affected by pests, weaken, rot during winter storage and, sooner or later, there is a need to purchase new planting material. But true flower growers, first of all, will be interested in the reproduction of any flowers that they are engaged in. And very soon it will become clear that the "superfluous" that every year was simply removed along with the dirt and earth, is a great replacement for old flowers.
After all, one gladiolus corm does not live long, a maximum of about 5 years, and after that it begins to "grow old", which manifests itself in all the above symptoms, which are not at all to the liking of any enthusiastic florist. And the easiest way to find a worthy replacement for her is to grow good planting material from the baby for the next year. After all, gladioli from children, as a rule, grow strong, healthy and beautiful. The article will discuss in detail all the stages of growing chic multi-colored handsome gladioli from children.
Growing seedlings
If you have time and desire, you can always grow seedlings from children. What does it do?
- Fast production of a full-fledged bulb in the same season.
- The ability to use all the planting material without the loss of children (even the smallest ones).
Closer to spring, small children may dry out. To avoid this, you can transfer them to storage in the refrigerator, or you can plant them in prepared containers with soil and grow seedlings.
It is recommended to plant the baby in separate cups, pots, cassettes, since the roots of gladioli are fragile, they can be damaged during transplantation. Planting separately helps prevent plant death.
The timing of disembarkation depends on the region, since it is necessary to take into account the time of the possible landing of gladioli on the ridges. Usually, the seedlings should be 30-45 days old, therefore, when disembarking at the end of May, the children are planted for seedlings in mid or late April.
IMPORTANT! Gladiolus seedlings must be provided with an optimal temperature regime (so that the seedlings are not hot), as well as good lighting. The best temperature is + 15 ° C, since in such conditions a powerful root system is formed, and the seedlings do not stretch out.
Watering seedlings is best done through a pallet, so the risk of flooding the plants is eliminated. A week before disembarkation, it is recommended to harden the gladioli, taking the seedlings of the children into the open air. The time spent at first is no more than 30 minutes, then the duration of such "walks" is increased.
How to get gladiolus seeds
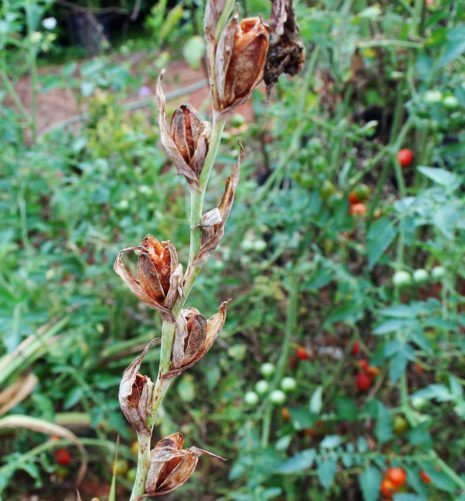
The seeds of gladioli are formed in the seed pods and only after the pollination process has passed. In nature, the process of self-pollination of these flowers is difficult, since there is a difference in the timing of pollen ripening in the stamens of the flowers of male plants and the opening of the pistil in female flowers.
Insects, as well as the wind, can "help", although in these cases it is not necessary to talk about the purity of pollination. Bees and gusts of wind carry pollen through different flowers of gladioli, not really thinking about breeding work. Therefore, to obtain seeds, you will have to carry out pollination, and then wait for the seed capsule to ripen.
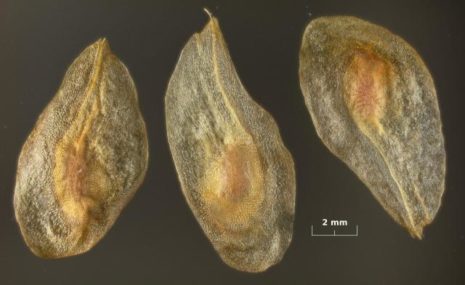
What gladiolus seeds look like
For many people, and even experienced summer residents, the question of what gladiolus seeds look like can be confusing. Indeed, everyone knows about the bulbs of these flowers, their babies, but there is a problem with the seeds. Outwardly, they look like small flat brown plates, no more than 2 mm in size. Upon closer examination, the plate can be seen inside, under the shell, the embryo of the plant.
The number of seeds in a seed capsule reaches 180-200 specimens. After collecting, they are fairly well preserved in room conditions.
ON A NOTE! Do not store gladiolus seeds in a very dry place, as if they dry out, they can lose their germination.
Pollination rules
Manual pollination allows you to cross selected plants with each other. For this, the necessary flowering bushes are selected in advance, while it is desirable that the pairs have more or less uniform shades. Professional breeders know certain crossing rules, the percentage of hybrids obtained according to given characteristics.
It is difficult to obtain gladiolus of certain parameters, since genetics have their own laws and characteristics. In general, it is noted that gladioli most often produce plants with a regular arrangement of inflorescences, with flowers of an overhanging upper lobe (and not open, such as Edel), with a non-crimped edge.
By color: the color of the flowers of the parents will be summed up in the color scheme of the new variety. At the same time, there are dominant colors: purple will surpass the lilac color, crimson - pink, and so on. That is, a more saturated color will "cover" a more delicate one.
To carry out pollination, first the "daddy" plants are selected, from which the anthers are carefully cut off. They are placed in a dry room (on shelves, table) and on clean paper until ripe. As soon as the pollen matures in the anthers, it spills out onto a sheet of paper. It needs to be collected and then used to apply on the stigma of the pistil of the "mother" plant.
Previously, in the inflorescences of those gladioli from which the seeds will be taken, the anthers are removed, and the flower itself is covered with a fabric bag (gauze can be used).
This is done so that pollen from other plants is not accidentally introduced onto the pistil ahead of time.
As soon as the stigma of the pistil opens, the collected pollen is placed on it with a brush. After that, the inflorescence is again covered until a seed capsule is formed.
IMPORTANT! No more than two or three inflorescences can be pollinated on one gladiolus plant.
Usually, after about a week, the flower withers, and the ovary noticeably increases in size. Seeds ripen in capsules for about a month (35-40 days). Externally, the ripe box begins to change color (turns yellow, brown) and even slightly cracks on the sides.
What if the seeds are not ripe, and according to the weather forecast, a cold snap is expected? Peduncles are carefully cut and placed at home in containers of water. The seed pods also ripen successfully at home, then you just need to pick them off and put them in storage.
How to store babies in winter
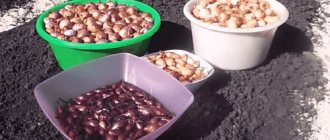
For the safe preservation of children in the winter, they must, first of all, be separated from the mother's bulb. Then they are washed under running water and laid out to dry in a dry and warm place where the sun's rays do not fall. Drying time under such conditions should be at least a month. To make it easier to handle them in the spring, the children are sorted by size before storing them. Quite large children of the first category are considered the most convenient for further work. Small children of gladioli of the second category are used only if it is necessary to get a lot of new plants at once or the total number of children is not enough for certain purposes.
Comment! In addition to the size of the babies of gladioli, they also differ in the number of root tubercles. At the same time, it was noticed that even with the initially small size of the baby, it grows into a much more powerful flower if it has a larger number of tubercles.
The optimal conditions for the preservation of gladiolus babies until spring is a dry place with a temperature not higher than + 15 ° C. If it is possible to maintain the temperature in the range from + 5 ° C to + 10 ° C with a simultaneous low humidity in the room, then the children can be kept in similar conditions for two years.