04/28/2019 461 Tomatoes
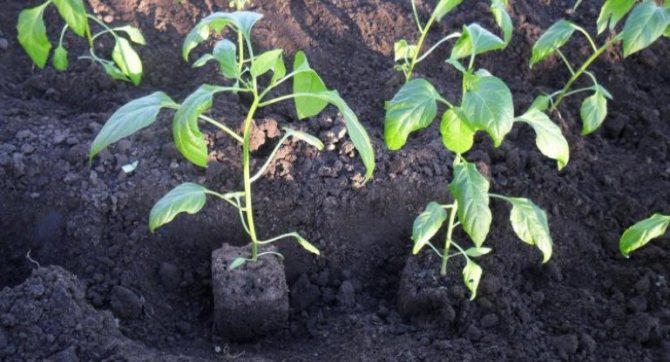
Pepper is a member of the nightshade family. It contains many vitamins necessary for the human body. Bell peppers contain significantly more vitamin C than tangerines, oranges and lemons. It is not difficult to grow it on the site, the main thing is the correct planting of the pepper, temperature conditions and timely watering.
[Hide]
Seed preparation for sowing
Sweet peppers, like other main crops in our country, are grown through seedlings. Usually, sowing pepper seeds for seedlings is carried out in mid-March, so that by the end of May, the bushes are planted in open ground. Of course, the timing of sowing seeds varies slightly depending on the varieties of pepper. If we are talking about early ripening varieties, then sowing is carried out in mid-March, if late varieties are grown, then at the end of February.

Correctly selected and planted seeds are the key to a plentiful future harvest. For this, the seed is carefully selected, leaving only strong, large and beautiful seeds. Next, the seeds are poured with hot water and wait for swelling. After the seeds have grown in size, they are wrapped in a damp cloth and left there for a couple of days until the seeds hatch. Only after all these manipulations are seeds planted in prepared fertile soil. At this point, the seeds are already ready for rapid growth, so the seedlings will appear after 3-5 days.
For planting, not only seeds are prepared, but also the soil itself. The soil mixture should consist of humus, peat and earth. You can also add a little sand to help the moisture penetrate the soil. In order to disinfect the earth, the mixture is abundantly flavored with ash, and then everything is thoroughly mixed and sterilized at a temperature of 45-55 degrees (you can in the oven or microwave).
How to know when to plant pepper in the exhaust gas?
Pepper is extremely thermophilic, and even small frosts can destroy it. If the plant freezes immediately after transplanting into open ground, it may stop growing and become seriously ill. In view of this, experienced gardeners are in no hurry with this event, not wanting to take risks.
It is best to plant peppers in the second or third decade of May. The farmer or gardener should set more specific dates depending on the region and weather conditions of the current season. In the central zone and more northern regions, it is better to focus on the end of the month or even the beginning of summer. The guarantee that the culture will not disappear is provided by the observance of three conditions:
- average air temperature - 15-17 ° С;
- temperature of the upper soil layer - 10-12 ° С;
- the beds are under temporary cover.
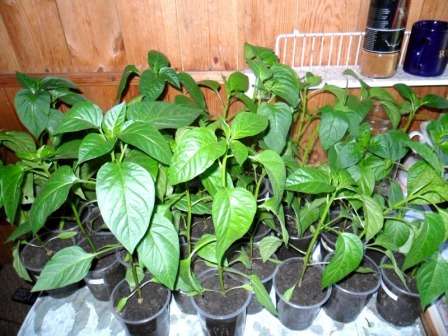

Do not rush to plant pepper in open ground
Gardeners do not recommend delaying planting pepper seedlings. For an immature plant outdoors, the scorching rays of the sun can be too much of a challenge.
Selection and preparation of a site for pepper
Pepper loves warmth and does not tolerate drafts. This should be taken into account when choosing a suitable location. It is better to make the beds high. Like other vegetable crops, pepper should not be planted in one place for two years in a row, as well as where its close relatives grew: tomatoes, eggplants, potatoes. But after beans, cucumbers, cabbage, pumpkin and root crops, it develops very well.
Naturally, the piece of land chosen for the beds must be dug up and enriched with organic fertilizer in the fall. Also, it will not be superfluous to add potash and phosphorus fertilizers. In the spring, gardeners can still add ammonium nitrate. Before planting the pepper, it is advisable to disinfect the soil. For this purpose, a week before that, it is watered with copper sulfate diluted in water (1 tbsp. L / 10 l).
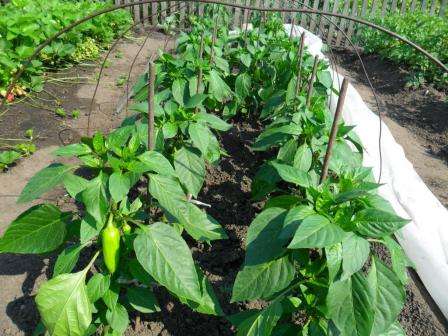

Pepper is thermophilic and does not like drafts.
The introduction of additional substances into the soil should be carried out depending on its condition and structure:
- Rotted sawdust, manure and peat should be added to clay soil. The composition of the clay soil will also improve coarse sand.
- A fertilizer consisting of manure and turf or clay soil is suitable for peat soil.
- Clay soil, peat and sawdust will help to adjust the composition of the sand bed.
Advice! A week before the settlement of the pepper, the fertilized beds should be watered abundantly.
Sowing seeds
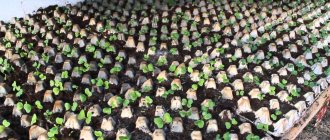
Usually, seeds are planted in seed boxes or special cassettes in rows. However, it is best to use separate peat cups, as the peppers do not tolerate picking very well.
The crops are carefully watered (it is better to choose the sprinkling method), and then covered with foil and placed in a warm, sunny place. If there is not enough light, then it is better to put a fluorescent lamp above the seedlings.
Advice: the optimum temperature for seed germination is 22-24 degrees.
As soon as the first shoots appear, the film is removed from the boxes, and the temperature is increased to 28 degrees. At night, it is better to lower the temperature to + 15-17 degrees.
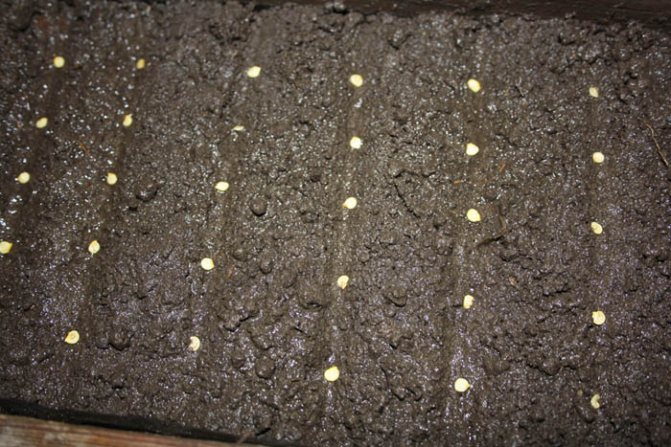

The air humidity should be moderate, since in waterlogged conditions, the seedlings will quickly be hit by a black leg.
Water for irrigation should be warm and settled.
Planting seedlings in the ground
After picking, the peppers begin their intensive development. From the moment of sowing seeds for seedlings to planting grown bushes on a garden bed, an average of 90-100 days pass (depending on the variety).
7-10 days before the solemn moment of planting plants in the garden, you need to start preparing young peppers for a new life on the street. To do this, the seedlings are hardened by taking out boxes with seedlings on the veranda or on warm days outside. Indoors, the temperature is also gradually lowered, gradually accustoming the peppers to the coolness. The duration of the walks is increasing every day. And in the last days, you can leave the seedlings on the veranda for the night.
Fact: at a temperature not lower than + 14-15 degrees, the peppers are perfectly tempered and tolerate transplanting better.
Preparatory stage
Preparation begins 2 weeks before the planned disembarkation. It is necessary to harden the plants by reducing the temperature in the daytime to 20 ° С, at night - to 16-18 ° С. In sunny weather, it is recommended to take them out into the open air. In the first 2-3 days, the seedlings are hidden from direct sunlight, exposing them to a sheltered and slightly shaded place (deep shadow is also undesirable). The time spent in the air is increased every day, the conditions are brought closer to natural.
A couple of days before planting, it is advisable to remove 1-2 lower leaves, this will help the plants quickly take root in a new place. A few hours before planting in the ground, seedlings should be watered abundantly with warm water.
Seedlings of pepper, grown correctly and in good conditions, should have a height of 20 to 30 cm, a dense stem, from 7 to 11 developed leaves, single buds.
Age from 55 to 60 days.
Crop rotation is very important when choosing a place for seedlings of peppers. Early kale, cucumbers, courgettes, onions, legumes, and greens are good precursors. The bad ones are potatoes, peppers, eggplants, tomatoes, physalis.
Seat selection
It is important to find the right spot for the pepper bed. Bell pepper is a thermophilic culture, and therefore sun is vital for it.The place should be protected from northerly winds, and also be away from tall shrubs and fruit trees. It is best to plant on the south side of the site.
Pepper shade is destructive. If the plant does not receive a lot of light, then it will stretch out into growth, the flow of nutrients to it will decrease and very little ovaries will form.
The best precursors for peppers are squash, pumpkin, cucumber, melon, cabbage, legumes, and perennials. But in places where nightshade crops previously grew, they do not recommend planting peppers, since after them harmful microbes can remain in the soil, which immediately attack pepper bushes.
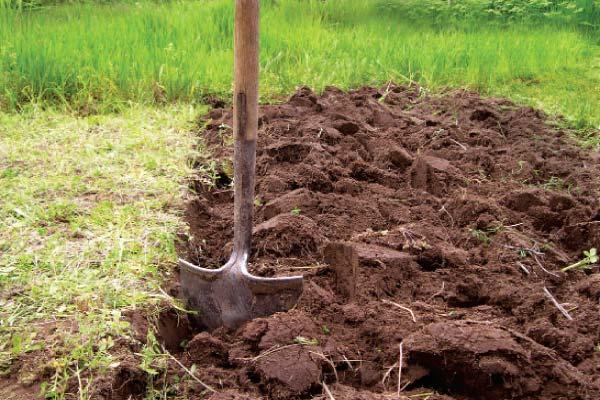

Advice: If bell peppers are planted next to hot peppers, cross-pollination can occur and the bell peppers will taste bitter.
Pepper beds are set up on fertile light soil with a neutral pH. If the groundwater passes close to the surface, then the peppers will grow poorly, so you need to play it safe and make a bed at a height.
Choosing a site for growing pepper
When choosing a plot for pepper in your garden, please note that pepper cannot be planted in the place where it grew in the previous year, as well as where potatoes, tomatoes, eggplants, physalis, and tobacco used to grow. It is better to opt for the site where cucumbers, cabbage, legumes, pumpkin crops, root crops, greens grew last year.
The area for pepper should be well lit, protected from the wind, free of weeds, the soil on it should be fertile enough, well drained and retain moisture.
Soil preparation
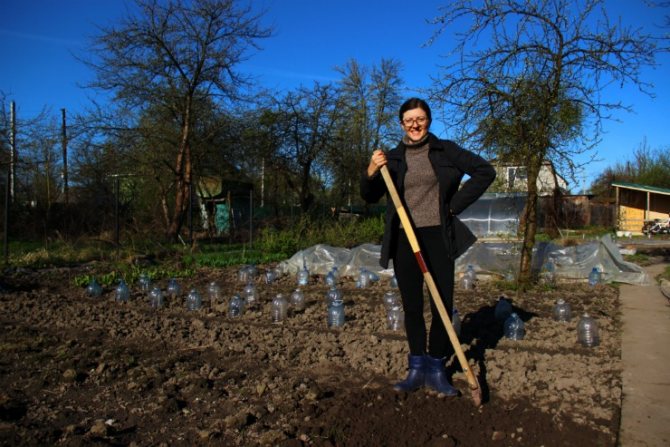
The harvest of garden crops largely depends on the cultivation and preparation of the soil for sowing. If they begin to prepare the ground in the fall, then initially everything is cleaned of weeds. Autumn digging should be deep so that all pest larvae are outside and die in winter.
If the soil is clay, then organic matter (manure, compost or peat) is introduced into it, as well as sand and ash per liter per square. During deep plowing, you do not need to break up large lumps of soil, so the earth will better retain moisture after the snow melts.
Advice: Peppers are not planted immediately after adding organic substances, otherwise the furnaces will "burn".
In the spring, they also dig the site, only this time the lumps are broken, and the earth is leveled. This time, mineral fertilizers such as nitrogen, potassium and phosphorus are added to the soil.
By the time the seedlings are planted, the soil should "ripen", that is, dry well after winter. You can learn about the maturity of the earth by taking a handful of earth from a depth of 10 centimeters and throwing it from a height of one meter. If the lump has fallen apart, it means that the earth is dry and ready for work. In waterlogged soil, seedlings will grow unevenly.
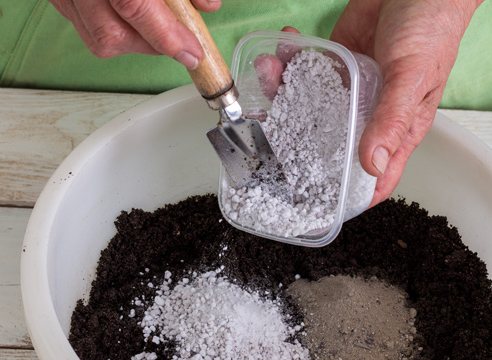

If the soil was not cultivated in the fall, then for sure there were harmful microorganisms in its pores. Therefore, before planting seedlings, it is necessary to decontaminate the beds with a solution of copper sulfate.
Preparatory work for landing
Any plant in the garden requires nutritious soil, it must contain a sufficient amount of humus. How to understand whether home soil is suitable in the garden and where to plant? You need to take the land from the garden in your hand. If it is loose and crumbly, then the plant will be comfortable. Preparatory work includes the following steps:
- It is necessary loosen the soil well, loot, remove grass and debris.
- Mark the place of the future garden. Measure the required distance between the rows.
- Water abundantly trays with seedlings at night before planting, so it will be easier to separate them from containers.
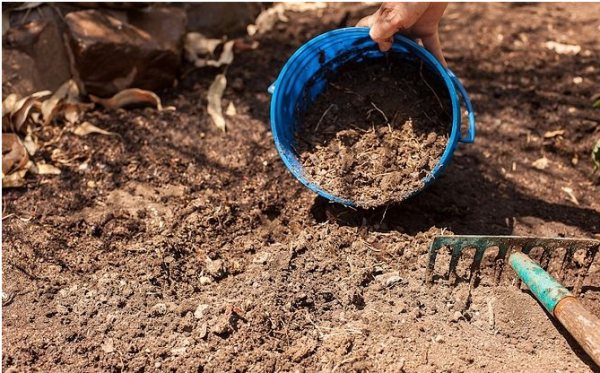

When preparing beds for planting pepper, manure is added to the ground, dug up
What to put in the hole
In order for the plant to feed from the root, it is best to put a vegetable mixture inside each hole.It is prepared from ash, sawdust and organic fertilizers (manure, bird droppings). The manure is taken in the autumn. It is necessary that he was lying down and frozen several times. If you take fresh fertilizer, it can burn the seedlings. It is enough to add one vegetable mixture inside the hole.
Some simply add ammonium nitrate to the root. Experienced gardeners, to scare away the bear from the root, they lay broken eggs. In addition to the protective function, the shell nourishes the bushes with calcium. So that the roots do not rot, if the soil is not loose, peat or humus is poured.
Landing dates
Each crop has its own planting dates. Pepper, of course, is no exception. Pepper seedlings in open ground begin to be planted at the end of May, when the weather outside is warm and dry, and the air temperature is at least 17 degrees.
The maturity and full readiness of the pepper for a new life on the street can be judged by the strong stems, 7-8 fully opened leaves, as well as the beginning of the formation of the first flower ovaries. You need to try to prevent overgrowth of seedlings, that is, at the time of planting, the bushes should not bloom, otherwise the plants will not survive the transplant well.
By this time, the earth usually warms up to 8-10 degrees, beneficial microorganisms come to life in it, thanks to which the seedlings will quickly get stronger and grow. For the first month, the bushes protect from night cold weather with film shelters and remove the mobile greenhouse only by the end of June.
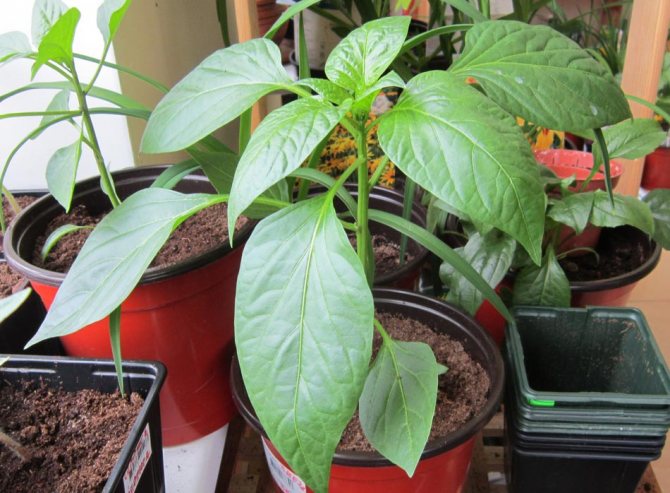

Important: pepper seedlings are planted in the greenhouse already in April.
Advice: planting pepper too early can cause a delay in plant growth, and frost will completely destroy the planting.
Growing features
When planting and growing peppers, you must follow some rules.
- The optimal planting time is early to mid-May. Pepper seedlings are planted when the seedlings reach a height of 25 cm, have 12-14 true leaves and are 60 days old.
- Planting of plants is carried out in fertile and light soil, with preliminary application of complex fertilizers, peat and humus.
- The depth of the hole - up to 15 cm, allows the plant to deepen to the first pair of leaves, making it possible for the development of a strong root system.
- It is recommended to transplant seedlings in the evening.
- As tall varieties of peppers grow, it is recommended to tie the bushes to stakes dug into the ground, up to 60 cm high.This technique will protect the plants from breaking off under the weight of ripening fruits.
- When growing peppers, the bushes should be molded by pinching weak shoots.
- Compliance with the main agricultural practices - the frequency of watering and fertilizing, loosening and removing weeds, observing the temperature regime and mulching the plantings will allow you to get bountiful harvests of peppers.
- To increase the number of ovaries on the bushes, when cultivated in a greenhouse, it is recommended to tap the peppers from time to time, improving their pollination. It is worth considering that the joint planting of hot and sweet varieties of peppers leads to over-pollination of varieties and a low-quality crop. Therefore, these types of peppers should only be grown in separate greenhouses.
- In case of detection of pests, only preparations of biological origin should be used to control them.
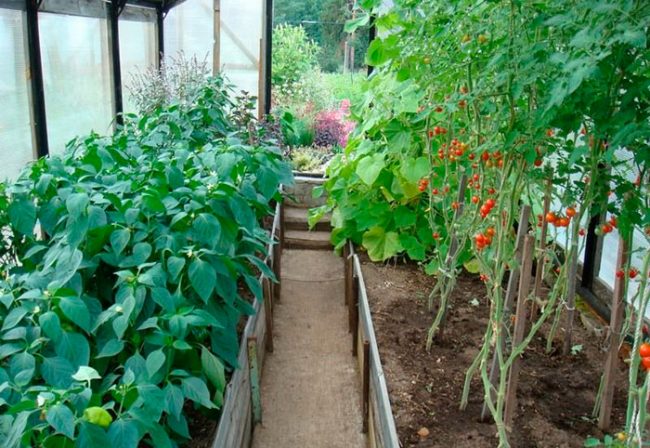

Advice! When growing peppers in a greenhouse, it is recommended to choose large-fruited and high-yielding varieties and hybrids: Rubik's Cube, Latino, Dennis, Earley, Monterro and others, as well as take into account the recommendations for choosing zoned varieties.
By choosing the optimal planting scheme and creating the necessary agrotechnical conditions for the peppers, you can be sure of the quality and abundance of the future harvest.
Landing plan
As already mentioned, peppers love heat very much, which is why it is so important to provide the bushes with uniform lighting.The denser the plants are planted, the less each of them will receive light (and other nutrients), and accordingly the fruits will appear later and there will be relatively fewer of them.
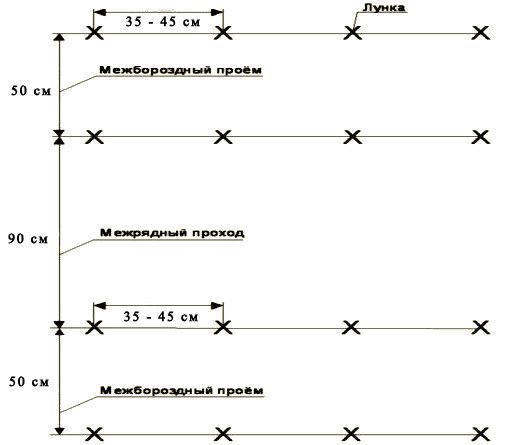
Pepper seedlings are planted in separate holes at a considerable distance from each other. Early maturing varieties are placed at a distance of 25-30 centimeters, leaving at least 45-50 centimeters in the aisle. Rows of mid-season peppers are separated from each other by 60-70 centimeters. Late sweet peppers need more spacious conditions, so they are placed about 35 centimeters apart, and the aisles are widened up to 70 centimeters.
Several important nuances of growing peppers
Pepper came to our territory from Mexico, which explains the needs of this vegetables:
- A short one hour day (no more than 8 hours).
- Moderate watering.
- The need for increased use of potash fertilizers.
- High soil requirements - peppers need fertile and light soil.

Planting strong pepper seedlings
This is a rather whimsical and capricious culture. For example, some varieties can only be grown in a greenhouse; when growing plants in the northern regions, you should choose early-maturing varieties that differ in small fruit sizes.
Let's take a closer look at all the nuances of planting this plant.
Planting seedlings
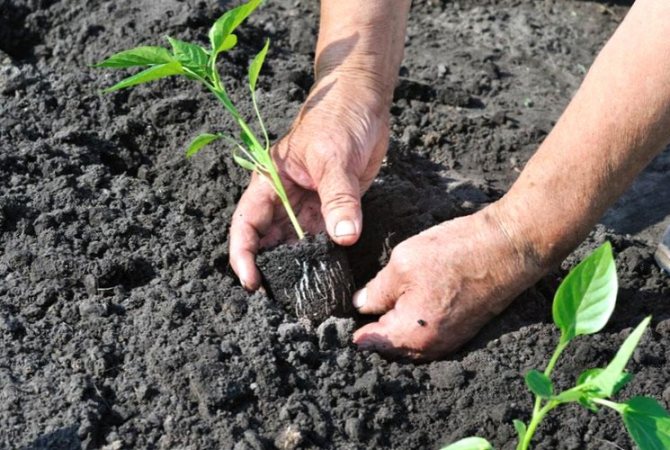
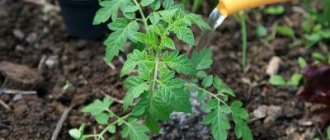
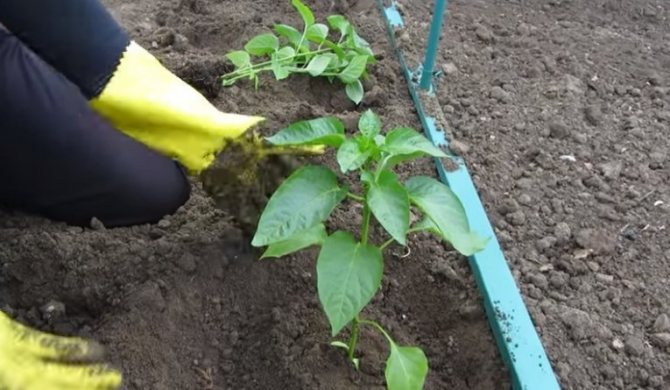
Seedlings are planted on the garden bed immediately in peat cups, or they are carefully pulled out of a regular container by the transfer method (that is, leaving a clod of earth on the roots) and deepened into the prepared hole. Before this, up to two liters of water are poured into the holes and a handful of wood ash and minerals are added.

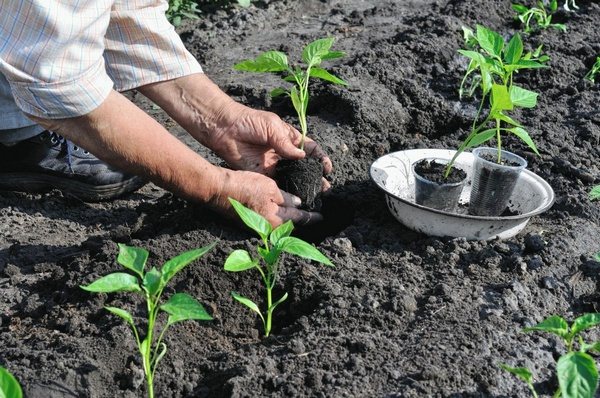
Advice: the root system of sweet pepper is very fragile, so when transplanting, you need to moisten the soil well so that it is easier to remove the bush from the glass.
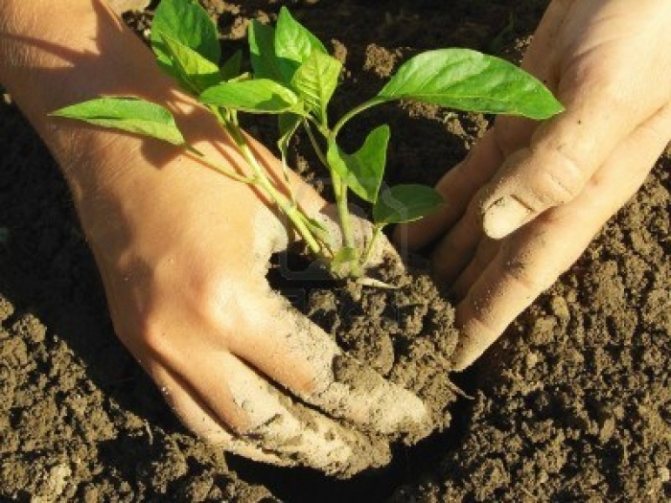
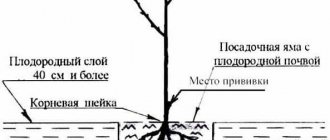
You need to plant the plants at the same depth as the peppers grew in the seedling container. Depth is the junction of the stem and root system. The root collar should not remain deep underground, but it also does not need to be on the surface. After the bush is laid in the hole, it is sprinkled with earth, slightly crushing it (but not tamping it) and watered with warm, settled water. When filling the hole with earth, you should not allow the formation of an earthen slide, otherwise the moisture will spread in different directions.
Note: some gardeners practice deepening the plant up to the first cotyledon leaves. At the same time, additional shoots are formed on the roots, which additionally collect moisture and nutrition from the soil.
Care after landing
Timely caring for the planting of pepper will bring results in the form of a large harvest of delicious quality fruits. Bell peppers need warmth, light and water.
Initially, once the peppers are planted in the beds, the bushes are still weak enough to overcome the nighttime cold snaps. Therefore, for the first month (and during cold summer and the entire growing period), the bed must be kept under a film cover. It is better to use a woven fabric that will keep the heat inside and prevent the greenhouse effect.
Pepper bushes need a constant supply of sunlight. Any shadow can provoke a slowdown in the growth process. To avoid this, it is necessary to carry out regular pinching and removal of the lower leaves.
Tall peppers require a garter. Since there are varieties that can grow up to a meter or more in height, such plants cannot cope with their weight and the weight of the fruits. Therefore, a strong stake is placed to each bush, to which the plant is tied up according to the degree of its growth.
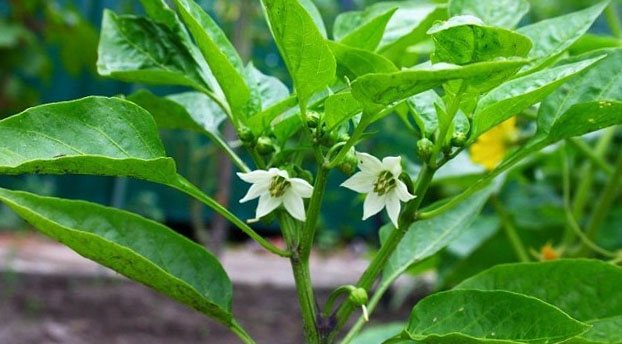

You should also regularly weed the weed bed from the pepper bed, if necessary, spud the bushes.
Peppers are self-pollinating plants. But to help them get the job done, it is helpful to involve pollinating insects in the process.To do this, you can spray the plants with a sugar solution.
Conditions of pepper content and care features
From the moment of planting, careful care is required, when the bushes take root, it will be easier. If a bear eats up the bushes, you need to fight it. Plant new ones in place of the missing bushes. In the future, leaving consists of the following points:
- the soil should not dry out;
- to provide regular loosening;
- once every 2 weeks feed;
- water in the morning or in the evening;
- plant loves sprinkling, but not in the heat;
- if their illnesses are noticed, need to be treated;
- pluck the peppers from the bush carefully, so as not to damage it;
- large bushes and with an abundance of crops better to tie up.
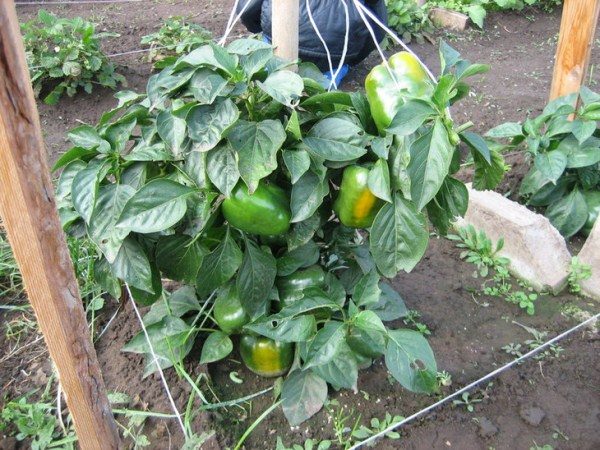

Tied peppers bush with fruits
The basic care and maintenance of the garden requires a certain skill that comes over the years. Studying useful recommendations, even a novice gardener can grow this crop from seed and collect a good harvest from the garden.
A good result depends on planting seedlings, if everything is done correctly, there will be no problems with growing.
Without considering the importance of the distance between rows and plants, it is impossible to achieve rich yields. Do not plant too close. The densely planted bushes will stretch upward. Sparsely planted peppers, both hot and sweet, are adversely affected by drought. In everything, the planting distances existing among gardeners must be respected.
Watering the pepper
Pepper seedlings take root rather slowly in new conditions. Most often, you can see that the bushes have wilted and look sick. However, at this time, the main thing is not to overdo it with watering, since many summer residents are in a hurry in this way to help the plants return to normal and thereby fill in the young peppers.
However, it should be borne in mind that wilting of leaves after planting is a natural process. Therefore, for the first weeks, the bushes should be watered 3 times a week with warm, settled water. Watering is necessary at the root so as not to hurt the leaves. During the period of fruit formation, the frequency of watering is increased - now the bushes need up to 4-5 liters per day. Based on this, it is better to water a little more often.
If there is sultry clear weather outside, the flowers may fall off, and the formation of ovaries may stop. The pollen becomes sterile. Therefore, it is so important to maintain the water balance and during such periods switch to daily irrigation by sprinkling.
Fact: lack of moisture leads to a weakening of the entire plant organism, which is fraught with a decrease in yield.
Trying to protect peppers from drought, many gardeners go to the other extreme - waterlogging of the earth. This can provoke the formation of fungus in the pores of the soil and infection of the underground part of the bushes with rot or mold.
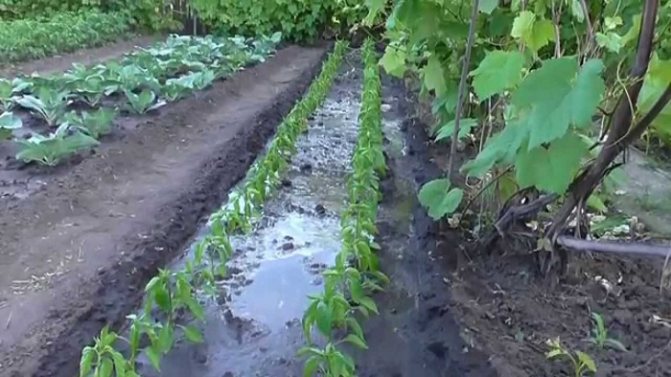

To maintain the golden mean, experienced vegetable growers mulch the ground under the bushes. Mulch in the form of sawdust or dried grass can keep the soil moist for a long time and protect the roots from overheating.
How to dive peppers - step by step instructions
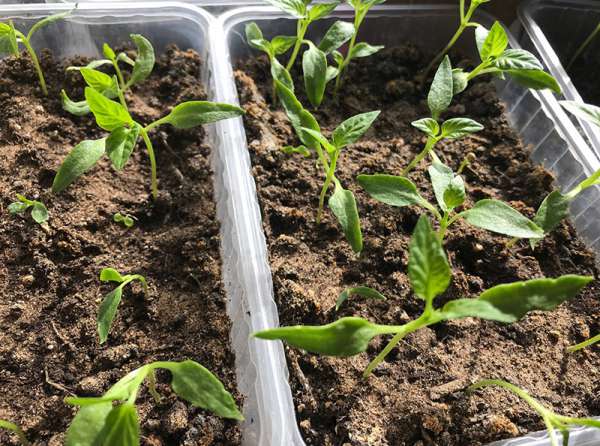

When deciding how to dive peppers and when, novice gardeners often overlook the need for careful preparation for this procedure. Before starting a dive, you need to prepare a stock of soil, containers, study the technology of how to dive peppers for seedlings.
Before diving the peppers into cups, it is important to prepare a nutritious loose mixture, one third consisting of organic matter - humus, compost, peat. Garden soil (two-thirds of the total volume) and sand (a liter jar per bucket of mixture) are added to the base. Add 1.5 tablespoons of superphosphate to a bucket of prepared soil, a tablespoon of ammonium nitrate and potassium sulfate each. Prepared in advance and equipped with drainage pots with a capacity of 200 ml are filled with soil.
Pepper picking is carried out using the following technology:
- The seedling is carefully removed from the seedling container with a clod of earth; it is recommended to use a spoon or stick.
- In the pot where the sprout will be transplanted, a recess is made, its walls are compacted with a finger or a stick.
- Water is poured into the recess.
- The seedling is placed in a hole and gently squeezed the soil at the base of the stem, the roots should not bend up! It is not worth deepening the plant. Peppers do not form adventitious roots; when deepened, the stem rots.
- At the end, the seedlings are watered at the root, if necessary, soil is poured into the cups to eliminate the formed pits.
If the basic rules on how to dive peppers and when it is better to do it have been followed, the seedlings will recover in a week and fresh green leaves will indicate that the roots have begun to grow.
Loosening
Loosening is another important agricultural technique in the care of a crop such as pepper. This procedure creates a favorable background for moisture penetration into the soil and air flow to the roots.
Loosening allows you to beat the earth so that a dry crust does not form on it, blocking the pores through which the life-giving forces of water and oxygen flow to the plant.
For the first time, loosening is carried out 5-6 days after planting seedlings in the garden. It is better to loosen the ground with a small hoe, slightly lifting the top layer of the soil. The first times they loosen only superficially, since the roots of the pepper are unusually fragile and any movement can damage them.
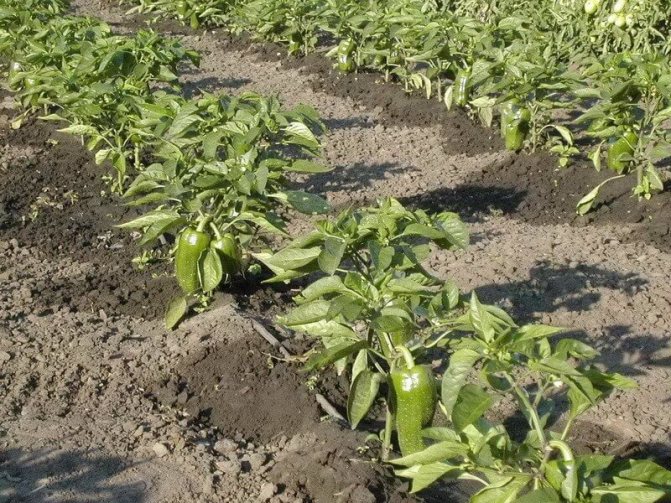

Loosening benefits:
- air exchange improves;
- the plant grows faster, and the root becomes stronger;
- the functioning of beneficial microorganisms is stimulated;
- weeds are destroyed.
If the soil on the site is heavy, lumpy, then it is necessary to loosen the soil more often so that water does not stagnate in it and the fungus does not develop. Loose earth will be better ventilated.
Advice: it is necessary to loosen the soil after each watering, when the soil dries slightly, but the crust will not have time to form on it.
Tips for planting peppers in the garden
It is better to plant peppers on a cloudy day. The holes should be made so deep that the plants are immersed in them to the same depth as before. The distance between them in a row depends on the selected variety:
- undersized - 40 cm;
- tall - 60 cm;
- bitter - 25 cm.
You can place two shoots in one hole at once. In this case, the planting pattern should be 60x60 cm.If you plan to plant several varieties of pepper in open ground, break the beds for each separately and plant tall tomatoes or a sunflower between them. This will prevent over-pollination, which the culture is extremely susceptible to. This is especially important in cases where sweet and hot peppers are placed in the same area.
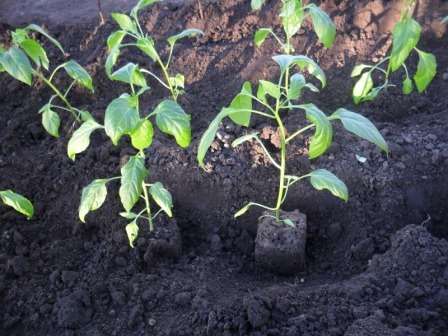

The distance between the holes when planting pepper in open ground is 40-60 cm
Planting process in detail
If you grew the seedlings yourself, water them well before moving to open ground, so that you can then take out a whole earthen lump. It is useful to sprinkle the pepper before planting it with a solution of the drug "Arrow" - this will save you from aphids in the future.
In a sufficiently nutritious soil, simply water the hole and dip the pepper root into it. Otherwise, first add some rotted compost, ash and superphosphate, and only then water. Then cross over the lump or place the root of the sprout (if purchased) in the hole and carefully cover it with earth. After that, mulch the ground.
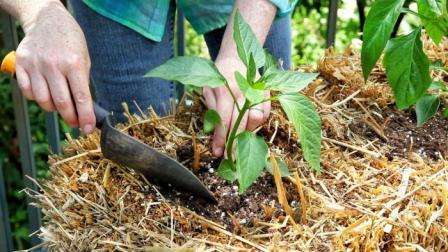

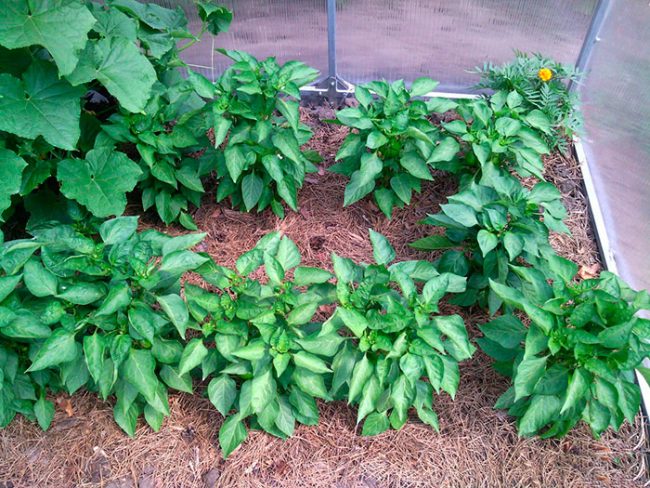
Mulching the soil after planting the pepper helps to retain moisture and warmth in the ground
When planting varieties that require tying, place the peg immediately after planting. After completing the procedure, set the arcs and throw in the covering material. Until the weather has completely returned to normal, it is better not to remove it.
Outdoor Pepper Care
The first days after planting, the seedlings will look like they are sick. This is normal, because its root system has been disturbed and the growth conditions have been completely changed.It is very important to monitor watering at this time, since an abundance of water can easily cause root rot. For the first week, it is better to water a little bit every day.
Pepper seedlings adapt more quickly to new conditions if you regularly slightly loosen the soil at the roots. This will allow more oxygen to flow to them, which will help them settle down. Properly made dressings will also strengthen the plant. According to the observations of gardeners, pepper is especially responsive to these types of fertilizers:
- watering with a solution of chicken manure;
- spraying with nitrophoska solution.
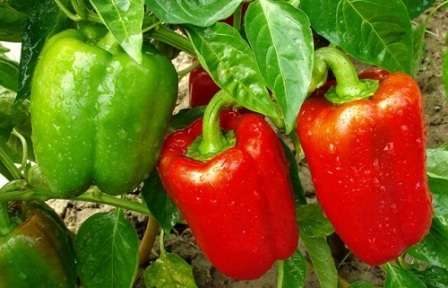

Pepper loves loosening and feeding
Gardeners advise pinching pepper bushes in warm, humid weather. When it's hot and dry outside, the extra leaves will create good shade, protecting the ground from drying out. Removing the flower at the first branch is believed to increase yields. Peppers can be protected from many pests by spraying the bushes with an ash solution. You can also use whey for aphids.
Podkrmki
First stage
The most important factor in the fertility of bell peppers is the timely application of fertilizers. Peppers growing in the open field definitely need nutrition, moreover, regular and varied in composition. The first top dressing is applied during the seedling period, when 2-3 leaves appear on the bushes. A composition of water and ammonium nitrate is used as fertilizers. It is also imperative to feed the plant with potassium fertilizer and superphosphate.
The second feeding is carried out two weeks after the first fertilization. Fertilize with minerals as well. Top dressing of pepper bushes with a special mixture of water and nettle is effective.
The last feeding of the seedlings is carried out a few days before planting the seedlings on the garden bed, increasing the potassium element in the fertilizer.

Second phase
As soon as the peppers are planted in the open ground, the second stage of feeding begins. During this period, not only mineral fertilizers are used, but also organic ones. Chicken droppings or humus are best suited in this regard.
At first, plants need to build up their vegetative mass, for which root feeding with nitrogen is arranged. Peppers also need potassium and phosphorus from minerals.
The first feeding is carried out 10-14 days after planting seedlings in open ground. The main nutrients include nitrophoska, bird droppings and water. This mixture is poured under the root of the plants.
When the peppers bloom, it's time for the second feeding. For plants to have the strength and powerful resources for the formation of fruits, they need potassium. There is a lot of it in wood ash, so you can sprinkle pepper bushes with ash. You can also fertilize the bushes with a mixture of urea, humus, droppings, and water.
Attention! It is strictly forbidden to feed peppers with chemical agents, since the poison penetrates into the fruits.
The last dressing is carried out to stimulate fruit growth. Potassium salt and superphosphate contribute best to pouring fruits. This composition should be sprayed on the bushes.
Advice: nitrogen in large quantities should be used only in the first month, otherwise the plants will "fatten", that is, the tops will grow to the detriment of the formation of bud ovaries and subsequently fruits.
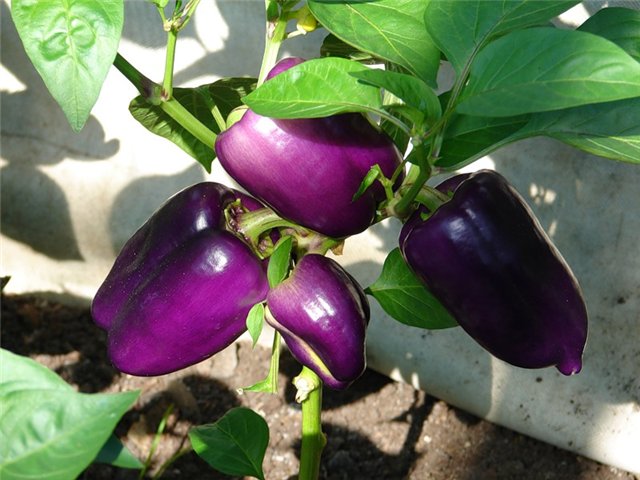

Advice: Root dressing should be done in moist soil.
Forming peppers
All peppers need bush shaping. This procedure is excellent for better ventilation and illumination of plants.
The method of forming is chosen depending on the variety: if the plant is tall, then you need to cut off and remove excess shoots, and pinch the top to stop growth; in low-growing species of pepper, the lower shoots are cut off, as well as non-fruiting branches.
Important: dwarf pepper varieties are not pruned
.
Pepper bush formation rules:
- When the plant reaches the period when fruiting branches begin to grow on it, the first crown bud blooms in the internodes.It needs to be removed so that the process of branch development is more intensive.
- For better growth of the bush, 2-3 main shoots are left on it (formation in three stems). These main shoots are the strongest and most developed branches that will produce the main crop. The rest of the stepsons pinch, leaving one bottom sheet. Tip: Remove excess shoots so that they do not take nutrients from the main stems.
- The buds formed in the internodes are removed.
- The lower leaves are removed from the bush, which interfere with normal ventilation.
- During the development of the plant, it must be periodically inspected and barren shoots identified. They are removed immediately. These processes originate below the branching point of the main stem.
- All yellowed or damaged leaves must be removed, since they can affect the entire plant with some kind of disease. Advice: if you do not remove excess leaves, then at the place of flowering, the fruits will not be tied.
- Often the plant will form many more ovaries than it can handle. However, many gardeners think that the more buds, the higher the yield will be. But more often it happens the other way around: the plant is wasting energy. It is worth taking into account the fact that 17-19 flowers will be optimal for one bush, the rest must be urgently removed. If flowers appear in a later period, they also need to be removed, since they only weaken the plant and do not in any way increase the number of fruits. Therefore, it is so important to pinch all the newly emerging buds after a sufficient number of flowers have already formed.


Planting pepper in the garden
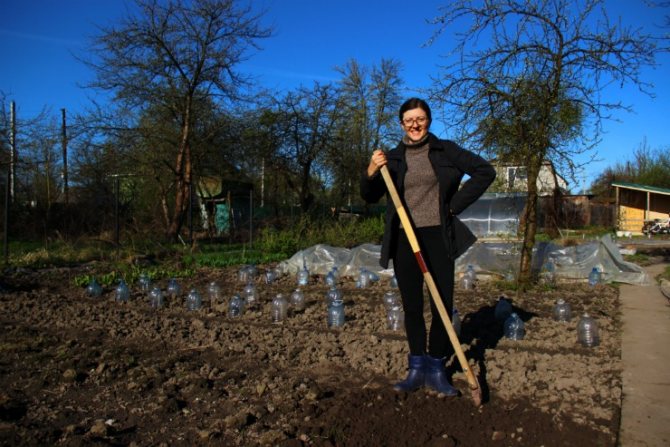

Spring soil preparation for planting pepper is in full swing)
In central Russia, peppers are planted in open ground not earlier than the last decade of May, and with a prolonged spring, this work is better to postpone to the beginning of summer.
By the time of planting, pepper seedlings should have 7-9 well-developed leaves, as well as short, strong internodes and several formed flowers. Early maturing varieties are allowed to be planted even with an ovary.
On the eve of planting in a permanent place, hardened pepper bushes are watered abundantly so that they are not lethargic. Otherwise, they will lag behind in growth and throw off the first buds.
Planting sweet peppers in open ground is carried out in 9 simple steps:
- The soil in the garden bed is carefully loosened and leveled. When growing peppers in two rows, its width should be 90-100 meters, and with a three-row planting, the width of the beds is increased to 120 centimeters. It is also highly desirable that the bed be extended in the direction from north to south.
- A distance of 50 to 60 centimeters is left between the rows, 40-45 centimeters between the individual planting pits. The pits are best staggered. A thicker planting according to the scheme of 20-25 x 50 centimeters leads to a decrease in the size of the fruits, but increases their number.
- The wells are filled with 200-300 grams of vermicompost (humus, compost), 1 tablespoon of ash and the same amount of crushed eggshells are added, and 1-2 liters of light pink solution of potassium permanganate are poured in.
- Arcs are installed above the bed, and so that the film does not sag, twine is pulled between the arcs on both sides.
- Seedlings are planted in the afternoon or in cloudy weather at any time of the day.
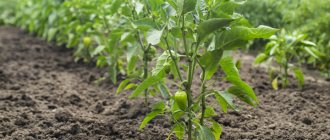
- Pepper bushes are planted at the same level at which they grew in pots (the permissible depth is no more than two centimeters). In this case, tall varieties are placed in the central row, and undersized and dwarf ones - along the edge of the garden.
- When planting, pegs with a height of 50-60 centimeters are attached to each plant for further garter. After that, the roots of the plants are covered with hands and squeezed around the stems for better contact with the ground.
- The soil in the bed with the planted seedlings is mulched with peat or dry soil. This is an optional but highly desirable technique.
- Throw a film over the arcs. If the weather is cool, then the plantings are additionally insulated with lutrasil or any other non-woven fabric.
You can reduce the need for watering, weeding and loosening by planting pepper seedlings directly into a black film or non-woven covering material. To do this, the soil in the garden bed is fertilized, moistened, mulched with peat and covered with a film or non-woven cloth. Pepper plants are planted 40-45 x 50-60 centimeters in cross-shaped holes made in the selected material.
Protection against diseases and pests
Plants growing in open ground are more likely to suffer from diseases than those that are reliably hidden from ailments in greenhouses. Unfortunately, peppers often get sick. They are especially sensitive to improper care. If you do not follow the rules of agricultural technology, then most likely the bushes will get sick.
Fact: hybrid varieties get sick much less often.
Frequent diseases of pepper:
- Late blight is a fungal infection of pepper fruits. Dark spots appear on vegetables. It is necessary to treat the disease with such drugs as Oksikhom, Zaslon, Barrier. It is reasonable to use these means only at the beginning of the flowering of the bushes.
- Fusarium is another fungal disease that manifests itself in the yellowing of pepper leaves. The affected bushes are immediately removed, and healthy specimens are carefully looked after, carrying out all agricultural practices on time and avoiding waterlogging and weediness of the site. Advice: in the area where sick peppers grew, it is better not to grow this culture anymore.
- Bronze or spotted wilting - a fungal disease manifests itself on the leaves, which are strewn with dark spots with a purple tint. In the course of the development of the disease, the top of the plant trunk dies, and the fruits are also affected by spotting. The fungus is killed with the drug Fundazol. Healthy fruits are removed from the bush before processing.
- Top rot is a disease in which large black spots appear on the fruits. There can be several reasons for the onset of the disease - this is a lack of moisture in the soil, and an excess of nitrogen and calcium. Sick bushes are eliminated, and healthy seedlings are treated with calcium nitrate.
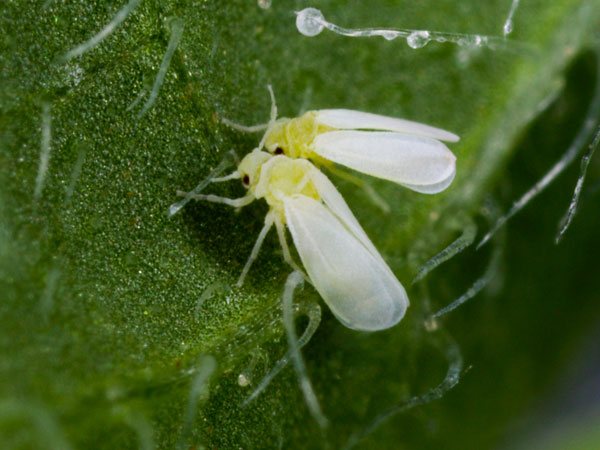
- Stolbur or Phytoplasmosis is a complete defeat of the plant. The roots of the plant decay, the bushes stop growing, the fruits are formed small and ugly, lose their taste, the leaves turn yellow, curl up. Often the cause of the occurrence is the leafhoppers, which carry this disease. To protect the peppers from this terrible disease, the peppers are treated with Akara immediately after planting and before the first flowers appear.
- Blackleg is a disease that affects the stem at the root. As a result, the stem degenerates and breaks off. A disease arises due to the density of plantings, as a result of which the plants are poorly ventilated and thus fungal spores gradually appear on them. Prevention of this disease is carried out with special preparations that can be used only before flowering begins. If the soil is too wet, it should be sprinkled with ash. Unfortunately, this disease is practically not treated, so the affected bushes will have to be removed from the garden.
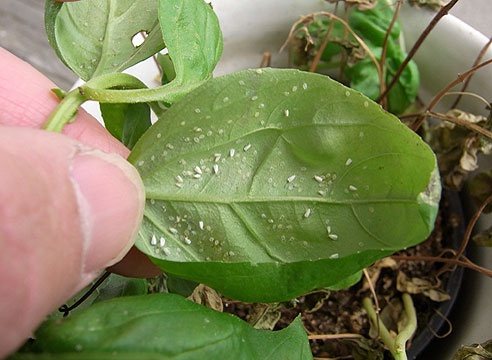

Pests also annoy pepper plantings, sometimes causing significant damage to the crop.
The most dangerous insects for pepper are parasites:
- aphid;
- spider mite;
- wireworm;
- slugs.
Each of these pests affects pepper bushes in their own way. This is how the wireworm gnaws at the roots of plants. You can get rid of it by digging up the ground in a timely manner and placing baits in the form of sweet fruits, to which these insects will slide. Thus, they can be collected and destroyed.
To forget about slugs will help a nutshell scattered over the site, ground pepper. Pests will also start hunting for food, and all you have to do is collect heaps of slugs and remove them from the garden.

Fighting with the bear, just before planting, a little onion infusion is poured into the holes, which will scare off the pest from the pepper roots that are sweet for her.
A solution of whey and water helps with aphids.
Spider mites settle on the inside of leaves and suck sap from them.You can get rid of it using chemistry or resorting to folk methods: mix liquid soap with chopped onions or garlic and dandelion leaves. Pepper bushes are sprayed with this solution.
Recommended landing patterns, their benefits and impact
When cultivating pepper in a greenhouse, several planting schemes are used.
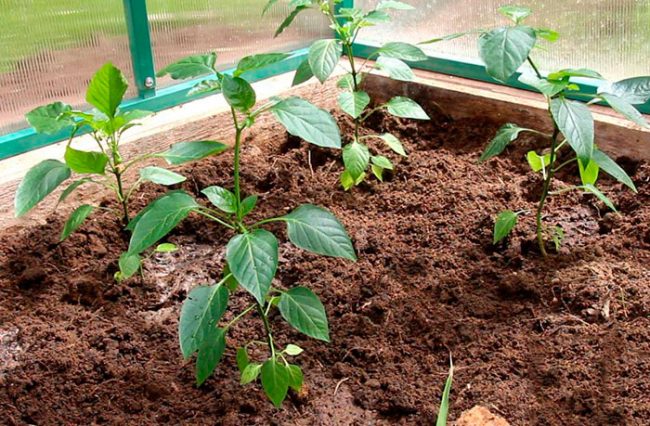

1. The traditional planting scheme involves the creation of beds with a width of 1 m, and a distance for aisles of at least 0.5 m. The line scheme involves planting peppers in 2 rows, with a row spacing of up to 60 cm.
When cultivating peppers in polycarbonate greenhouses, the distance between bushes of low-growing varieties should be 15 cm, medium-sized varieties - about 25 cm, tall ones - about 40 cm.
Attention! Planting density depends on the type of cultivar being grown. Low-growing peppers are planted at a frequency of 7 plants per 1 m², tall peppers - 5 plants per 1 m².
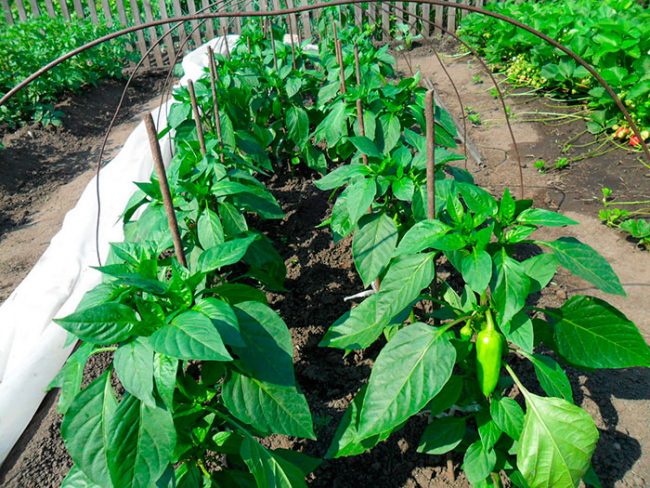

2. The square-nested planting scheme involves planting 2-3 pepper bushes in holes 60-60 cm in size. It is recommended to pour ash into the hole before planting. We recommend this method in the southern regions, where the sunny day is long and hot. Co-growing bushes will shade each other a little, protecting from sunburn.
3. Another variant of the popular method of planting peppers is in a checkerboard pattern, observing the 30x30 cm or 30x50 cm scheme. Such a scheme allows you to save space and create comfortable conditions for growing peppers.
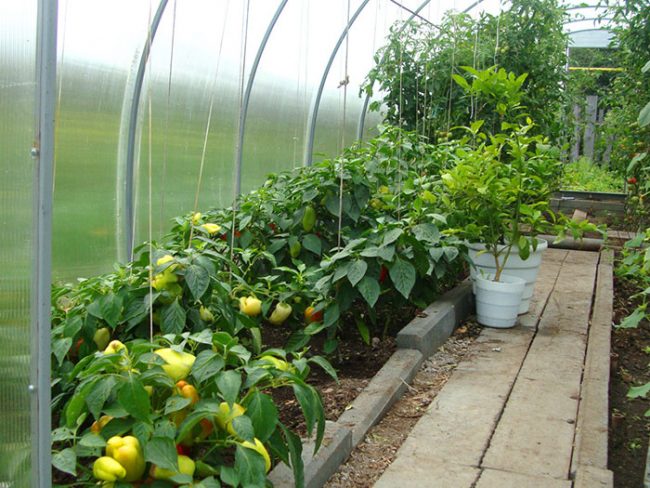

The limited area in the greenhouse forces gardeners to use more dense plantings of peppers - the distance between the bushes is 10 cm, between the rows - 25 cm.With this planting scheme, the ripening of peppers slows down due to a lack of nutrients in the soil and a lack of lighting, but ripening fruits have larger sizes. The introduction of fertilizers into it will help to solve the problem of increasing the nutritional value of the soil. At the same time, it is important to understand that compacted plantings make it difficult to care for plants.
