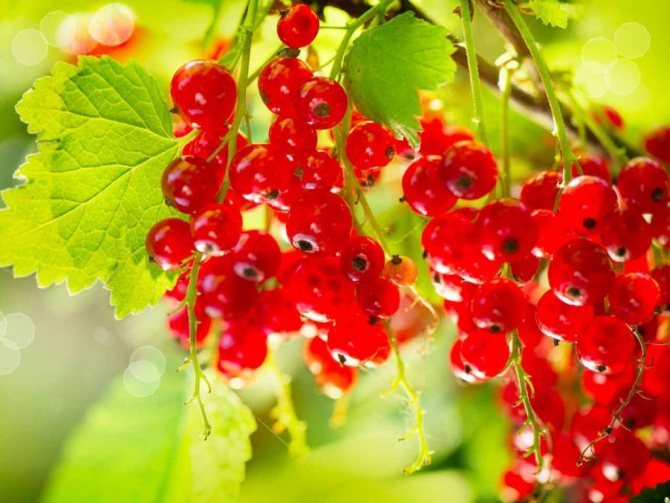
Fruits and berries »Currant
0
238
Article rating
Transplanting currants to a new place in the fall can be unexpectedly difficult if you do not know a few gardeners' secrets. In order for the bushes to grow luxuriantly and give a large harvest of delicious berries, it is necessary not only to correctly move the plant, but also to take care of it after the procedure.
Autumn currant transplant - technique and features
When planting currants needs a transplant
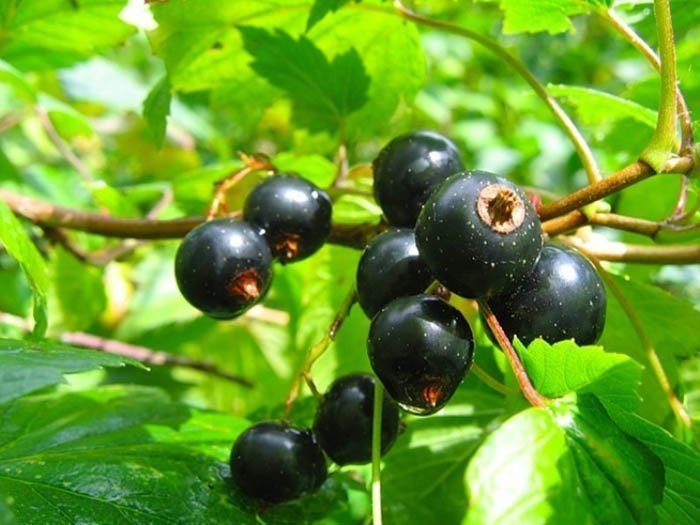
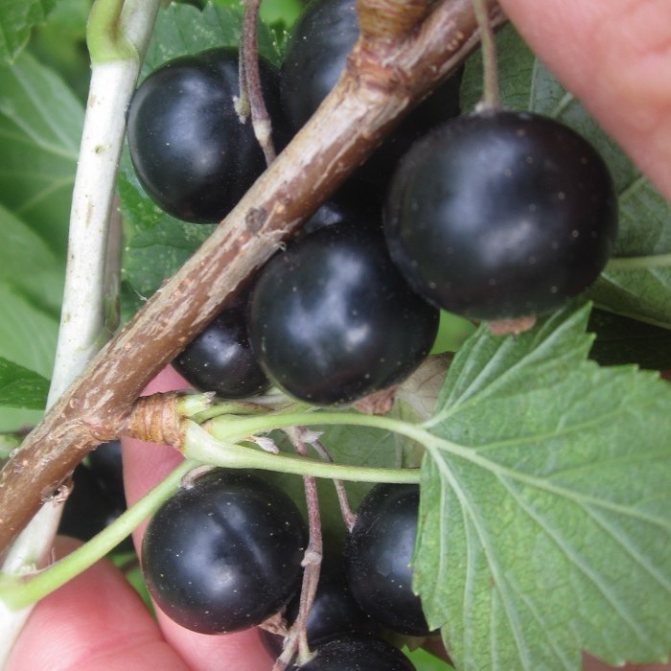
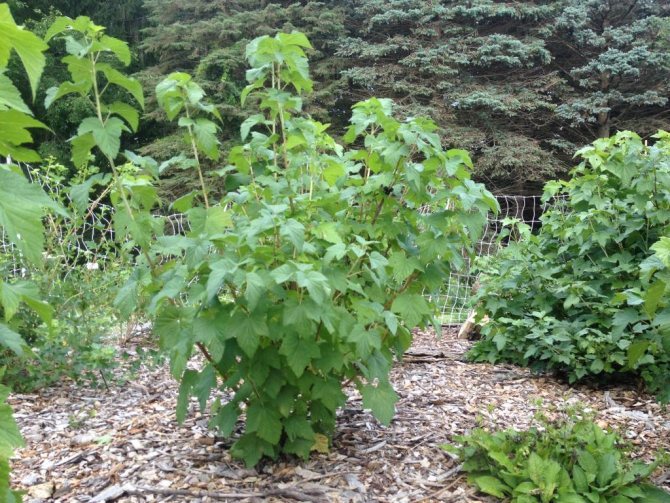
The shrub itself can speak of the need to transplant a plant, or rather its external state. There are fewer new shoots, the berries are smaller, and the yield itself is decreasing. Leaves turning yellow and falling during the summer, drying branches - all this indicates that there is not enough nutrients in the soil or the content of toxins in the soil has increased, which means that the shrub cannot develop further. The poor development of the shrub already from the first year of planting indicates that the allocated area or the quality of the soil on it was not suitable for a particular variety of currants or for planting in principle. Learn about the characteristics of the Raisin currant bush at this link.

A transplant is carried out if the next year after the first full fruiting, the inflorescences began to fall off, and the volume and quality of the crop worsened.
When propagating your favorite currant variety, it is also recommended to transplant the shrub to a new place. The effectiveness of the further development of currants largely depends on the correctness of the process and compliance with all the requirements of agricultural technology.
How to choose the right place
The place for planting currants must be chosen very carefully. If you choose the wrong place and have to repot the bush again, you will have to wait a very long time for the harvest.
Currant bushes prefer open, moist areas without excessive water stagnation. Lowlands are completely unsuitable for them, since cold air can stagnate in them and excess water often accumulates. The combination of these factors can lead to rot and fungal diseases of the plant.
It is also not worth planting currants on hills - such places are strongly blown out, moisture from the roots will evaporate too quickly, and in winter it is always a little colder on the slides.
You should not choose too shaded areas for transplanting - this will inevitably cause a decrease in the yield of the bush. This is especially true for red currants, which are very light-requiring. It is advisable to place plants on the south or southwest side of the site, away from large trees that may provide shade.
In addition, do not forget that the currant grows very much, therefore it is not recommended to plant it close to paths, fences, walls of buildings. Such placement may subsequently make it difficult to access the currant bush for berry picking. For the same reason, it is necessary to maintain some distance from other trees and shrubs.
How to properly transplant
There are several options for the procedure. Some allow you to keep the mother plant in the same place, separating a couple of shoots for further cultivation.If the bush is not very branched, then it can be transferred completely or divided into several small bushes.
Site and soil selection
The place for future plantings should be chosen based on the recommendations for a particular variety. You can also use the general recommendations of agricultural technology.
The shrub is somewhat capricious in this respect. It is not recommended to choose an excessively high landing site. Otherwise, it will be difficult for its rhizomes to obtain moisture, which will affect the growth, development and quality of the crop.
In the lowland, the bush will also feel uncomfortable due to the proximity of groundwater and the accumulation of excess moisture, which will lead to decay of the root system. The latter is manifested in the yellowness of the leaves, the fall of the peduncles, and the berries will be watery.
Basic requirements for choosing a landing site:
- It should be under the sun, partial shade is permissible only at lunchtime - this will accelerate the ripening of berries.
- The surface is desirable flat, without slopes and depressions, if necessary, it should be leveled.
- The land should be free of weeds, especially destructive are those whose rhizomes are located close to the surface and intertwine with currant roots.
- Plantings should not be closely adjacent to other fruiting plants.
A number of requirements are also imposed on the quality of the soil:
- Soils should be chosen slightly acidic or neutral. These include loam.
- If there is none in the garden, then you can resort to drainage, mulching and fertilization.
- Deoxidize by adding lime, chalk, dolomite flour, as well as wood ash.
Preparing a shrub for transplanting to a new location
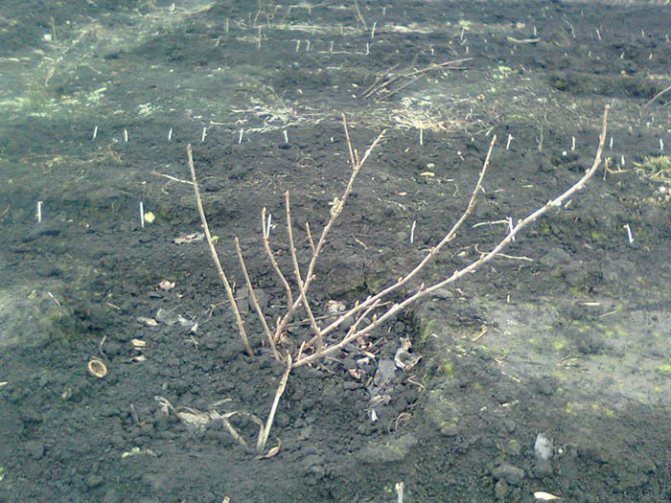
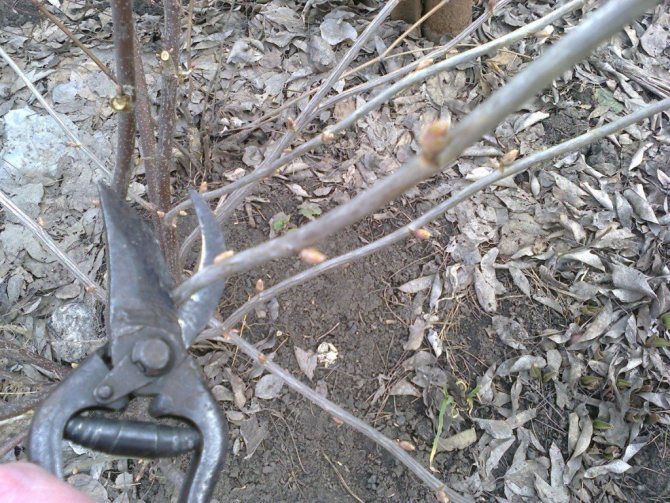
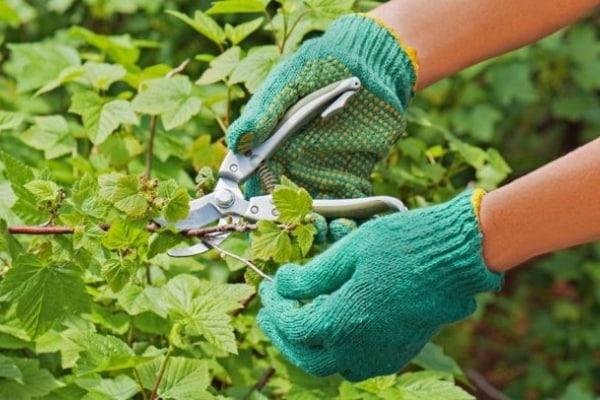
It is necessary to prepare for the transplant in advance. In 3 weeks they are pruned, leaving only a few branches for fruiting, while simultaneously removing old and dried out growth. The main branches must be shortened by at least one third.
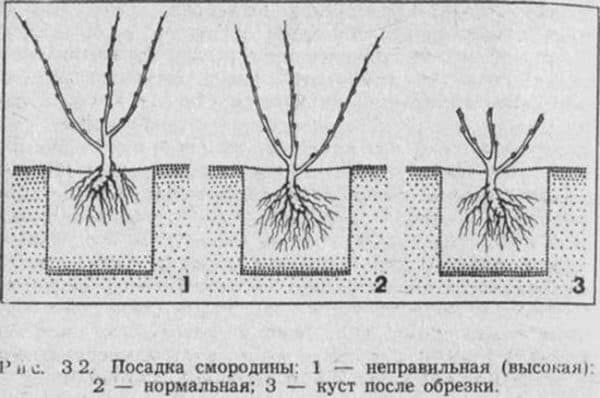
It is not allowed to prune the shrub just before the process. Otherwise, he simply will not take root in a new place. The height of the shrub ready for transplanting should be 45-50 cm. And the number of branches left is at least three. Read about the best varieties of currants for the middle lane here.
After pruning, the bushes must be fed and watered well.
Transplant methods
Depending on the state of the main shrub, methods are also selected. So, the poor condition of the currant or its great age makes it necessary to resort to such a method as propagation by layering. If the shrub is young, but has grown very much, then it is better to use such an option as dividing the bush.
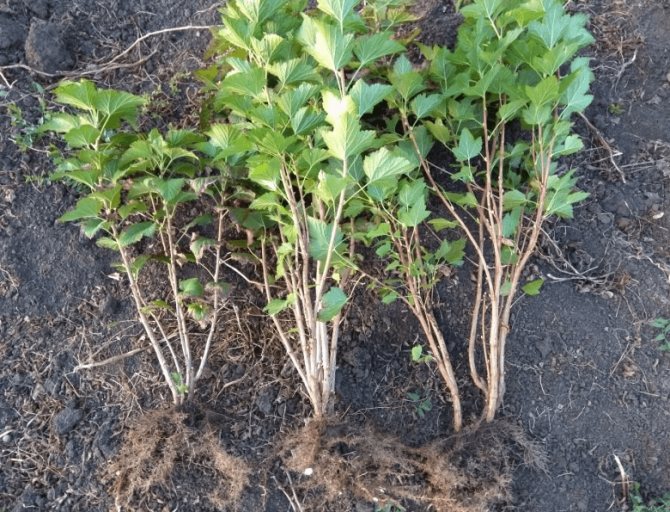
By dividing the bush
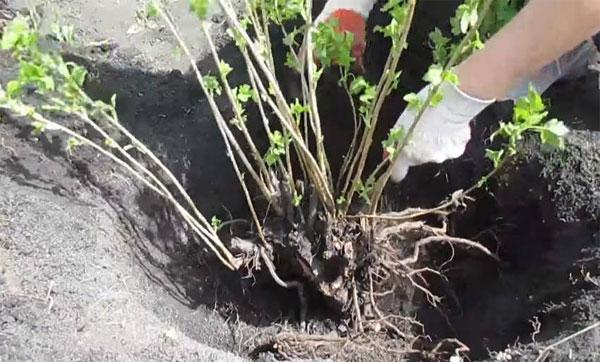
Division allows you to get from one, even an old bush, several young ones. Having prepared the shrub for transplantation, it must be properly dug up and divided into several small ones. The shrub is dug up, the root system is carefully, if possible not completely, freed from the ground, then it is divided with a garden saw or ax into several new bushes.
Layers
Layers are usually subdivided into horizontal and arc. Horizontal propagation is done before the leaves appear. To do this, the annual branch is bent to the ground, carefully placing it in a prepared furrow, pinned with a wire. During the season, it is necessary to water not only the furrow, but also the mother bush. In September, several small seedlings are cut and divided, after which they are planted in another place for growing.
The arc method differs from the previous one in that the branch is bent down with an arc, pinning only its end in the pit. Only one seedling can be obtained in this way.
How to properly divide the bush
During the transplantation of black currants in the fall, the old bush is dug up and its root is divided with a pruner or saw into 3-4 parts.
Recent Entries
Ingenious tricks for growing tomato seedlings from experienced summer residents 6 ideas on how to use cut branches in the country and at home What to put in the ground when planting cucumbers for seedlings so that powerful vines are formed by the summer season
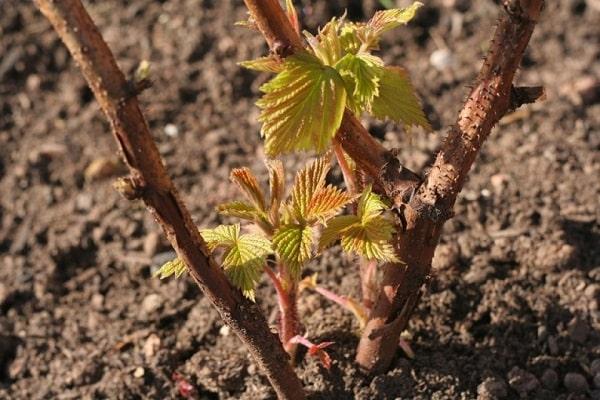
If there is a need to increase the amount of planting material, in the spring, annual shoots are buried in earth so that they take root. In the fall, such layers are also dug up and divided into several parts before planting.
Timing
Spring or autumn repotting is recommended. There are no special differences between them, although there are some requirements. They mainly relate to the growing region. For northern latitudes, the spring period is preferable, since it is more protracted here, and in the fall the cold comes quite early. This material will tell you about the characteristics and features of the Altai currant bush.
But in the regions located south of the middle latitudes, preference is given to autumn transplantation. After all, spring is early here and sap flow begins earlier. And you can simply not make it before the end of the "sleeping" mode, while autumn is long and warm. The plantings will have time to take root and will not die in winter.
In the spring
The transfer begins only after setting a constant temperature of 0-1 degrees after warming up the earth.
At the bush, the buds should not yet swell.
This requirement keeps the good time to a minimum. But the bush gets time before winter to strengthen. So that the root system does not experience stress, they dig it out with a large earthy clod. They do not shake it from the roots. Do not forget about abundant watering, the water should be at room temperature.
For spring transfer, it is recommended to use bushes that have formed from cuttings. Bushes from rooted cuttings also showed excellent survival rate.
Is it possible to transplant in the fall
The transfer begins after the end of the active growth of the plant, the slowing down of sap flow and the release of foliage. The stress experienced will be minimized.
In the fall, you need to choose the right translation term. It takes about three weeks for complete rooting. This is exactly how much should remain until the onset of stable cold weather, when the constant temperature drops below 0.
Plant earlier, there is a high probability of bud germination after rooting. And this will inevitably lead to his death. If you plant it later, then the bush simply will not have time to harden before winter and, again, will die.
For middle latitudes, the optimal time is late October - early November. For northern latitudes, the specified period occurs a couple of weeks earlier.
For the winter, the bush needs to be covered; for this, several buckets of compost (humus) are used.
As a heater, it is not recommended to use loose covering material such as tops, grass or branches. Rodents can settle in them and can be harmful in winter.
Is it possible to transplant an old bush in the summer
This procedure is highly undesirable. But in some situations it is acceptable:
- sale of a plot, and the plant is varietal;
- the germination site is infected.
The bush needs to be dug out with an earthen clod on the roots and the more clod there is, the better. In addition, you will need very abundant watering, especially if the weather is dry, hot.
Care after landing
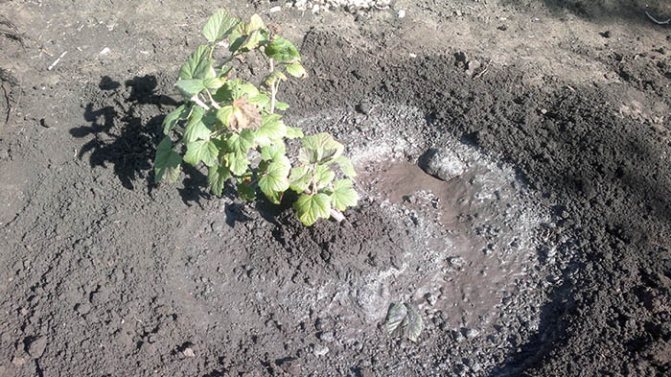
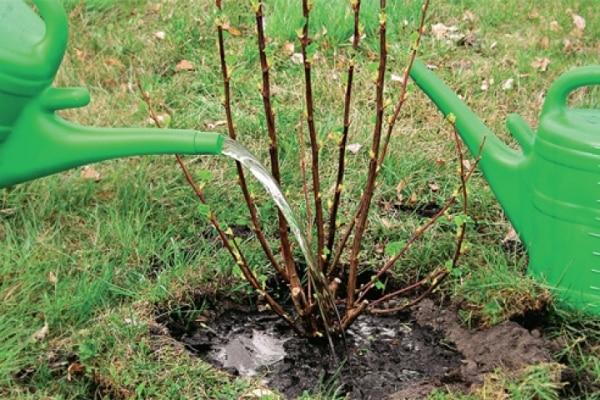
After the roots of the transplanted bush are covered with fertilized soil, you need to water the plant abundantly (about 5 liters per bush) and after that fill the hole to the top. From the ground, you need to form a side around the bush and water it again.
For mulching currants, they take humus or compost, but if they are not there, you can simply sprinkle it with dry soil. The layer of mulch is about 10 cm. If there is no rain, after 3 days the transplanted bushes are watered.
In the northern regions, the roots need to be well covered for the winter, especially if the forecasts promise little snow. For this, wood mulch and other natural shelters are suitable, with a guarantee that they are free of harmful microorganisms and pests.
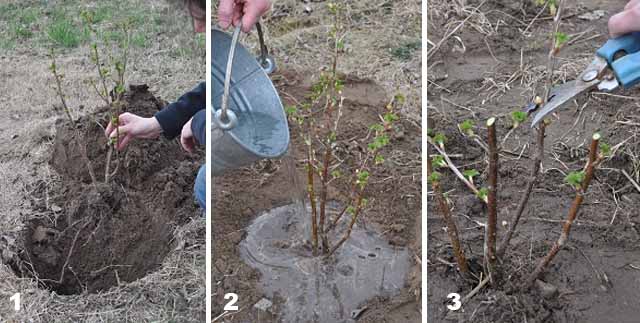
After planting, it is recommended to prune up to 2-3 buds.
When can you transplant bushes: during flowering, a bush with berries
At the point above, we figured out the optimal timing of the transplant. It remains to solve the following issues:
- Is it possible to transplant a bush with berries?
- Can you transplant during flowering?
It is necessary to transplant a flowering bush completely with a root system, while there will be no harvest.
The answers to both questions are negative, with the exceptions - the sale of the plot and the bushes must be taken with you to a new place, or the soil has become infected with a pest. And be prepared that you will only see the harvest next season.
Transplanted currant care
After transplanting, the bushes need to be given close attention. Be sure to keep the soil loose around the trunk. This will saturate the roots with oxygen and allow the moisture necessary for rooting to penetrate unhindered. Near the bush itself, the soil is loosened to a depth of 7-10 cm, and closer to the irrigation hole - a little deeper, by 15-18 cm.
Errors in the implementation of the procedure
All procedures for transplanting currants must be carried out adhering to the necessary conditions. A prerequisite is the requirement to comply with the rules of agricultural technology. For example, for the red varieties Marmeladnitsa, Roland and Rovada, the best time to transplant is spring. And for black species Dobrynya, Dachnitsa, a systematic transplant - at least once every 6-7 years - allows you to get higher yields. For red, this period is 10-12 years. If the required conditions are not observed, then the yield decreases, the berries sharply decrease in size, and the number of formed ovaries decreases.
In addition, gardeners make other mistakes:
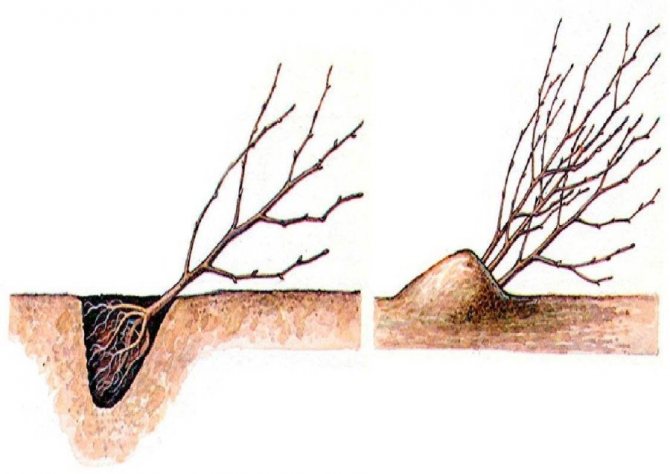
- Planting bushes in a new place in pits of the same depth as in the previous place. It is recommended to dig planting holes in a new place 5-7 cm deeper.
- Gardeners pay little attention to watering the plant. In order for the plant to recover better and faster and bring further large harvests, it will need a large amount of water. Of course, you should not keep the plant in a puddle, but the ground under it should be constantly moist.
- Some gardeners apply a large amount of fertilizer when transplanting under bushes, counting on faster growth and a large harvest in the future. This is mistake. After all, excess fertilizers in the soil, on the contrary, will cause severe damage to the plant.
- Combination of transplantation with plant pruning. These procedures are already difficult for the plant, and their combination can lead to the death of the bush.
Step-by-step Transplant Guide
To transplant black currants you need:
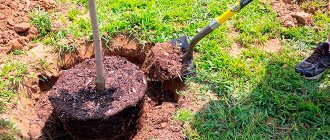
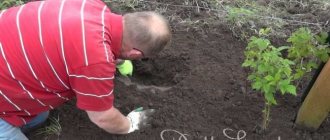
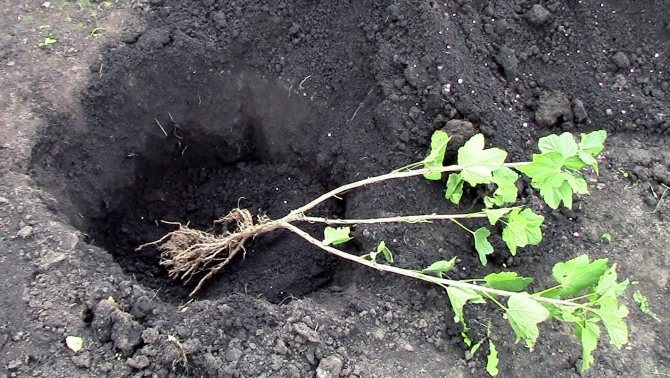
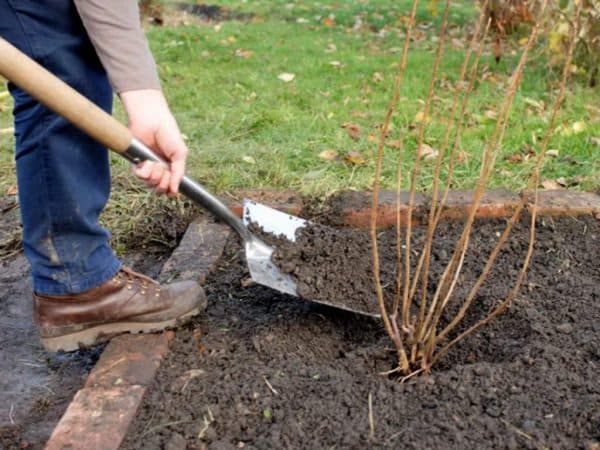
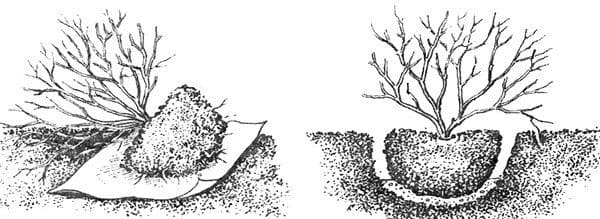
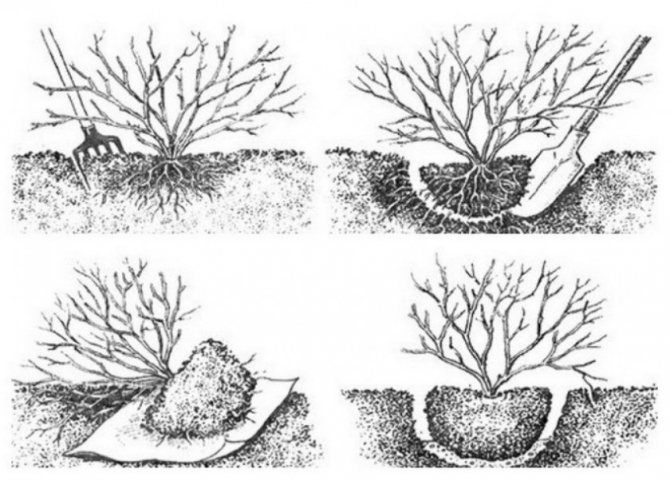
- Dig out the bush from its original place: at a distance of 0.4 m from its center, dig a groove around a circle about 0.3 m deep. Take it by the base of the branches and pull it up. It is important to try to injure the roots as little as possible and dig up a plant with a large clod of earth.
- Inspect the visible areas of the roots, cut off the damaged, drying ones.
- Move the bush to a new location. Sometimes it's hard for one person to do this, so you have to work together.
- Pour water over the pit (at least 15 liters), you can add a little potassium permanganate to it. After absorbing, place the bush in the center.
- Spread the roots.
- Sprinkle the plant with soil 5 cm above the root collar. Make sure that voids do not form near the roots, for which the soil must be compacted.
- Dig a watering trench, mulch the soil near the plants with mulch from any available material used for this purpose.
The transplant process is over.
Features of transplanting different types of currants
According to statistics, most often in our gardens you can find red, black and white currants. Despite belonging to the same species, each variety has its own transplant requirements.They are associated with the vegetative period of the variety, the structural features of the bushes and the root system. In addition, the varieties differ among themselves in the peculiarities of care, planting and, of course, reproduction.
Red
Gardeners love the red currant variety for its undemanding soil and planting requirements. And although it will almost always please with a good harvest, there are still small subtleties that must be observed when transplanting.
Since when transplanting red, there are no special problems with root engraftment, most often the procedure is carried out in the fall. Don't forget to fertilize and feed. Experienced gardeners are advised to put organic matter in the planting hole in advance.
Transplanting the red varieties Schedraia and Natalie, like most others, can be combined with pruning the bushes, just do not get carried away with the process. In the end, do not forget to water abundantly. For better engraftment, red currant roots can be dipped in a special mixture. It is prepared as follows - stir the same amount of clay and mullein in water. The consistency of the finished mixture should resemble liquid sour cream. It will allow the rhizomes to quickly take root in a new place.
The place of planting red currants must be in a sunny place. She does not tolerate even a hint of a shadow. Experts recommend a scheduled red transplant every 12 years.
Black
With regard to the black variety of currant, it is recommended to transfer it either in early spring or in late autumn, after the foliage has been dropped and preparation for wintering. In this case, in the fall, it is necessary to have time before the soil has time to freeze. Otherwise, you will not see success. The landing site should be warm, as black is quite sensitive to it. If this condition is met, the guarantee for a high yield will be at least 70%. This article will tell you about the description of the sugar variety of black currant.
A distinctive feature of black currant from red in a shorter root system, in this case, it is more a plus than a minus. After all, this allows you to quickly and easily saturate the roots with the necessary trace elements, minerals and other organic components.
Transplanting a black one involves abundant watering. At the same time, some gardeners are afraid that a puddle of water forms under the plant. But for black people this is the norm, so there is no need to be afraid.
White
All the actions used when transplanting a red one are also applicable to a white currant variety. Read about the features of caring for the White Fairy currant here.
Suitable location and preparation for transplant
Determining a new location for the currant is critical. It depends on how your berry will bear fruit in the future. Therefore, take into account the requirements that the plant imposes on illumination, soil composition, moisture content and relief:
- The currant loves the sun, it will be best for it in the southern part of the infield in an open sunny space. If a slight shading is permissible for black currant, then its red and white congeners do not react well to the shade. A large amount of sunlight supports the plant's immunity, it is less susceptible to infection with fungal diseases.
- A low-lying place is not suitable for currants, it does not tolerate stagnant moisture. The hill is also not the best option, there are possible drafts, which the berry can not stand. The best option is a flat, non-swampy place.
- Bushes should be at least 4–5 meters away from garden trees and other shrubs, so you will protect currants sensitive to infections from diseases.
- The soil should be loose and fertile, with low acidity.
If you are replanting several bushes or placing a bush next to other berry bushes, keep a distance between them so that you do not have to plant thickened plantings again later.A distance of one meter is usually made between black currant bushes, up to one and a half meters between red or white.
An ideal place for a currant bush - flat, sunny and calm
And when choosing a place, it is important to consider which cultures grew on it before. It's good if it was potatoes, beans, green manure cereals. Avoid places where gooseberries or other currant bush grew before, and old bushes were uprooted. Neighborhood with other garden "inhabitants" also matters. Good neighbors for currants are onions, garlic, strawberries, honeysuckle, and herbs. It is better to plant black currants away from red and white ones.
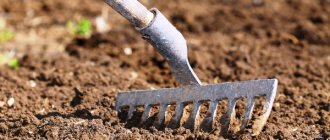
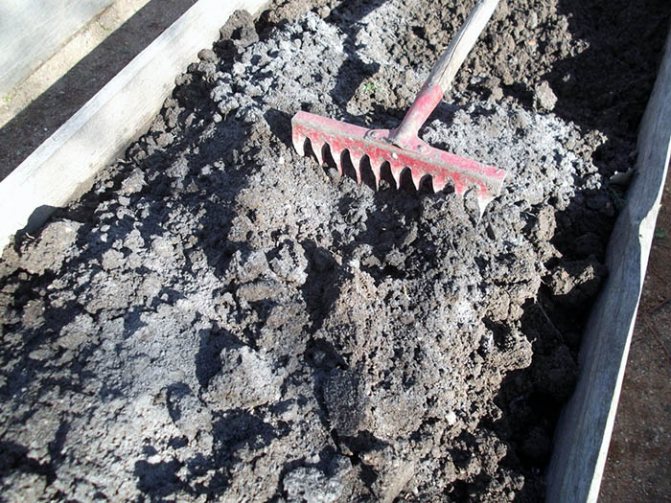
How to prepare a place
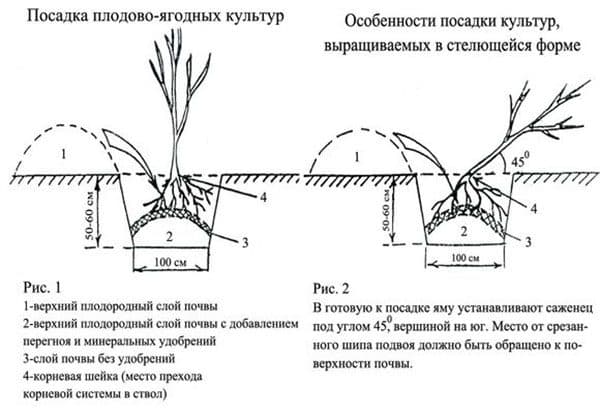
Prepare the planting pit for currants correctly about 10-14 days before transplanting. The selected area is cleared and dug up to remove all weeds and roots. In a pit 60x60x40 cm in size (when transplanting with a lump, the size is slightly increased):
- the upper fertile layer of the earth;
- on top - a prepared substrate of humus and compost (8 kg each), 300 g of wood ash or 30 g of potassium sulfate and 40 g of superphosphate.
If the place is wet, drainage from rubble or broken bricks is first laid on the bottom of the pit. The contents of the pit should not be trampled down; loose soil prefers currants.
How to prepare a bush
The preparation of a young bush also begins in advance. He has to go through a haircut - 2-3 weeks before moving, all branches are cut to a height of 50 cm. This is done for better survival - the roots will be able to feed the shortened branches even in changed conditions. Old bushes are pruned after transplanting.
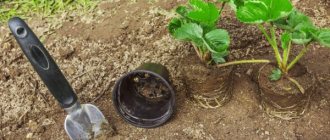
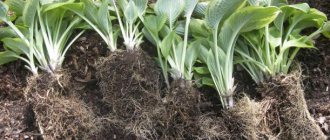
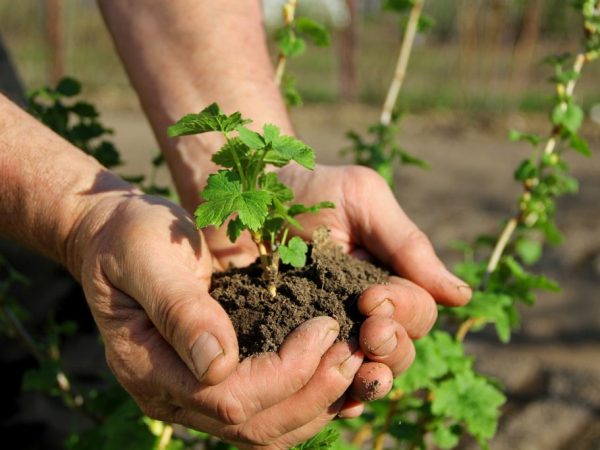
Before the transplant itself, the bush is examined for diseases. Then they pass in a circle with a pitchfork to pry off an earthen lump. They dig in the bush with a sharp shovel to cut the roots. Then they carefully remove it together with an earthen lump. If you see areas of rotten roots, then the earthen lump is destroyed, diseased roots are removed, and the bush is sent for treatment. The root system is immersed in a bucket with 1% potassium permanganate solution for 15–20 minutes.
If a lump of earth with roots is well dug, the shrub will be easily removed
Preparatory stages
In order for the transplant to go well, you need to choose the right place, choose the right soil and prepare the planting material itself.
Transplant technology
In the case of a shrub transplant procedure in accordance with all the rules, adaptation to a new place will take place quickly, and immunity will not suffer.
Choosing the perfect place for the bush
Growing a plant in the right place will bring little hassle, and the harvest will be of high quality and abundant. For planting fruit shrubs, choose a light, flat area, preferably from the southern or southwestern side. In these places, the earth is warmed up faster by the sun, the soil is air permeable and water does not accumulate.
For currants, areas where potatoes, buckwheat, legumes, beets, and corn used to grow are well suited.
It is undesirable to plant in a place where many weeds grow or the roots of perennial plants are intertwined. You cannot plant currants in a lowland where water accumulates. This unfavorable factor contributes to the development of fungal diseases and rot. Too high, too, cannot be planted, since cold winds blow on a hill, and water quickly evaporates from the surface of the earth.
Preparing the soil and planting pit
The site chosen for transplanting in early spring is dug up to a depth of 38 cm and a complex of fertilizers is applied, consisting of compost, superphosphate and potassium chloride. Light, nutritious soil with good aeration and neutral acidity is suitable for planting currants. The ideal option is a loamy soil composition.
In August, they begin to dig the planting hole. Its depth should be approximately 42 cm, and its width - 62 cm. For tall varieties of currants, the size of the pit is made larger.The upper part of the soil removed from the pit is mixed with a small part of rotted manure, wood ash and superphosphate. The resulting fertile substrate is poured into the bottom of the pit and watered with warm water.
Bush preparation
Before planting, they prepare not only the soil, but also the bush itself. Preparatory work begins several weeks before transfer work. All old and damaged stems are cut out, and young shoots are shortened.
Pruning before the procedure
During transplantation, the area of the root system is significantly reduced, as a result, less nutrients will be supplied to the upper part of the shrub. Therefore, 2.5 weeks before transplanting, it is necessary to prune secondary branches that are not involved in fruiting. At the same time, the plant is rejuvenated.
Strong branches grow at the base of the shrub; already at a height of 35 cm, the fruiting zone begins. Weak branching is noted here, shoots are short, but flower buds are located on them.
The upper part of the shrub also forms a large number of fruit buds, but they are weaker, and the berries are small. Therefore, the third part of the main branches is cut off, while the total height of the shrub should be 47 cm. It is impossible to combine plant transplantation with pruning of branches. This creates additional stress for the culture, therefore, the indices of adaptation of the immune system decrease.
See also
Description and characteristics of the Golubka currant variety, planting and careRead
Landing
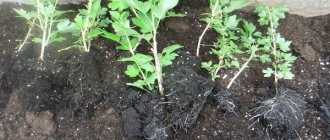
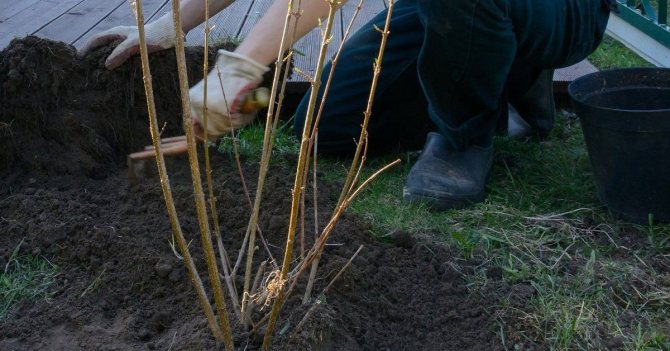
First, you need to dig out the shrub from the old place. To do this, a ditch 32 cm deep is dug around the near-trunk zone at a distance of 40 cm. Then the plant should be pulled at the base. The roots that hold the shrub in the ground are trimmed with a shovel.
Advice. In order not to damage the plant during work and transportation, the branches are tied with a rope.
The dug out shrub is placed on a large canvas and delivered to the intended landing site:
- The roots of the plant are preliminarily examined. Dried, damaged branches are removed. Then the roots are placed for disinfection in a solution of potassium permanganate for 16 minutes.
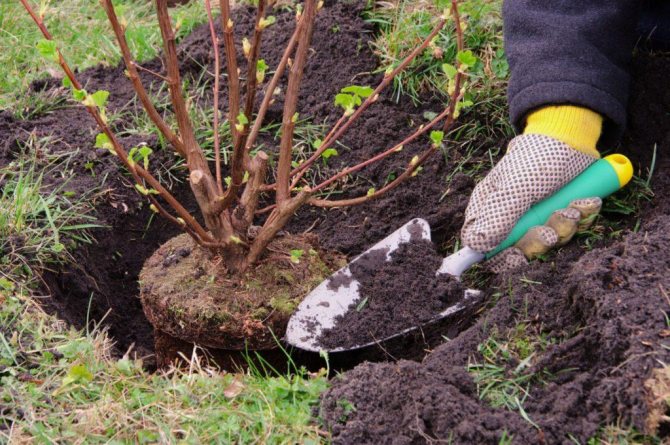
- A shrub is placed in the prepared hole in the center, root branches are distributed and covered with earth. Make sure that the root collar is 5 cm above the ground.
- When filling the pit with earth, it is important that voids do not form. They increase the risk of developing rot. In order to prevent the formation of voids, the plant is periodically shaken.
- The soil around the trunk is lightly compacted and an irrigation groove is formed. For the first watering, take two buckets of warm, settled water. Water is poured into the well slowly, waiting for complete absorption.
The last measure is mulching the near-trunk soil with peat, humus or sod land.
Care requirements
All care for the bushes after transplantation is simple and does not differ much from the characteristics of the maintenance of adult shrubs.
In the first 2-3 weeks at lunchtime, the bushes are shaded from the sun so that they do not wither and dry out. Use burlap or agrofiber. Plants growing in a shaded area do not need such protection.
Watering
The success of rooting bushes in a new place depends on it:
- the first 3 weeks are watered every second day at the rate of a bucket per plant;
- further moisten as the earth dries up to a depth of 5-6 cm, taking into account seasonal precipitation.
Additionally, you can sprinkle shoots in the evening. The water will saturate the stems and leaves with moisture, stimulate the growth of green mass and protect against the invasion of harmful insects.
Loosening and mulching
The soil is loosened after each moistening to maintain its lightness and good penetration of moisture and oxygen to the roots. They also weed the aisles, remove weeds, add mulch from peat or last year's manure.Such a layer protects the ground from rapid drying out and prevents the growth of unnecessary vegetation.
Top dressing
To increase winter hardiness, the bushes can be fertilized a month before the onset of cold weather. In the south, this is done in October, in the northern zone, in the Urals and in Siberia - at the end of September.
Usually, mineral dressings are used - superphosphate and potassium sulfate, 15 g per bucket of water. Consumption for one bush - 5 liters. After fertilization, watering is carried out, then mulching.
Transplanting currants to a new place in the fall is usually in demand if a redevelopment of the yard is planned. Another necessity is soil depletion or contamination. Moving an adult plant is very stressful. If the technology is violated, the currants may not take root or freeze out in winter.