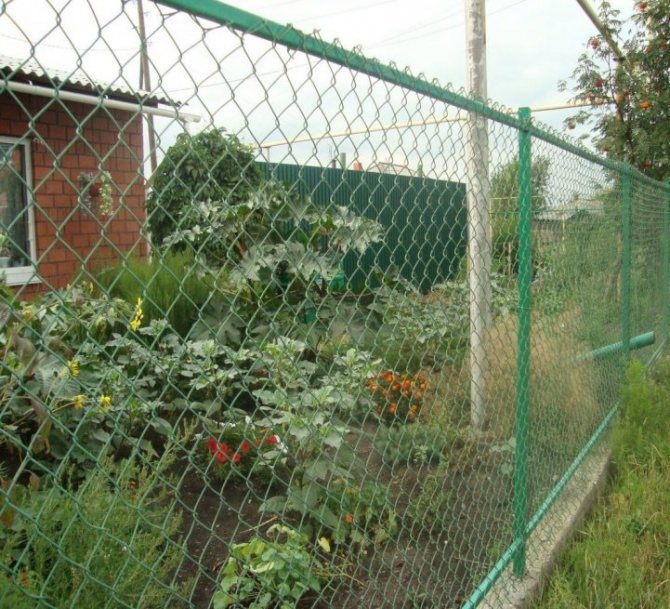
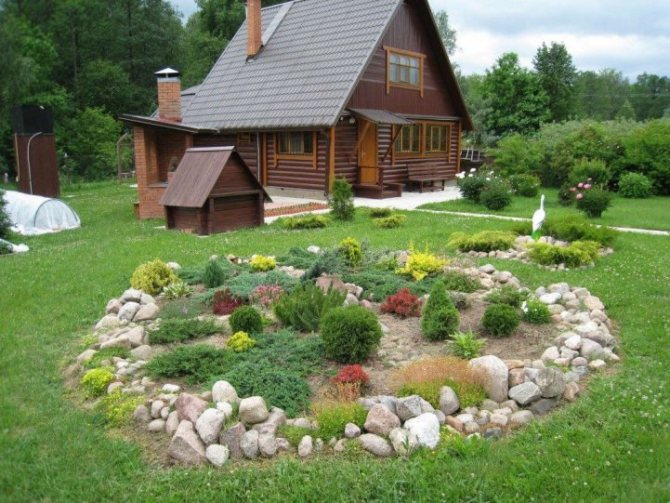
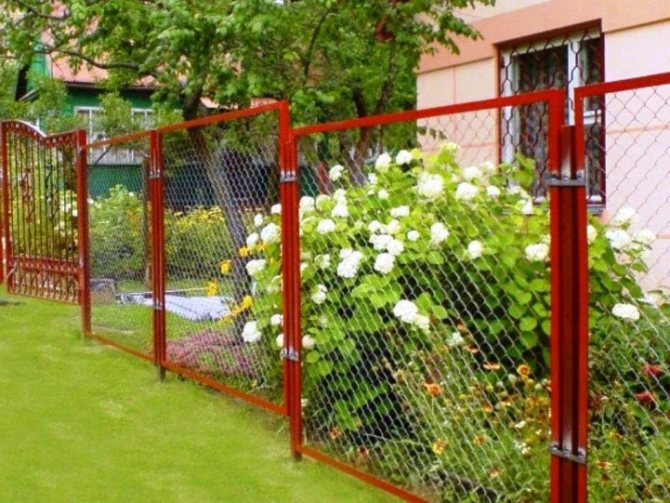
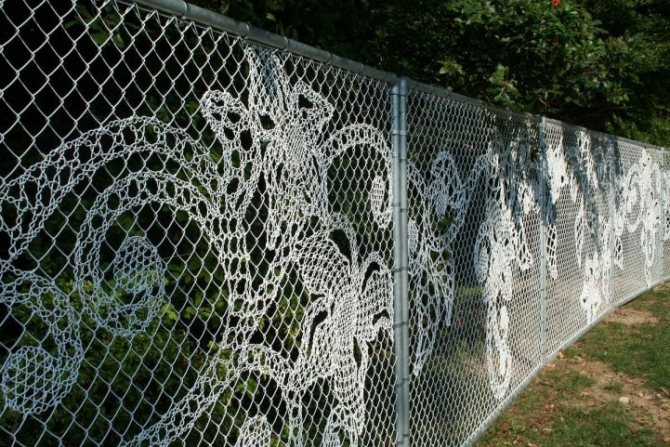
An inexpensive fence made of a chain-link mesh between neighbors fulfills the main task, but the appearance seems unpresentable to many. The hedge is embarrassing with its transparency, especially on only built-up plots where there are still no places for rest, intra-house buildings and plantings. There are many options than closing a chain-link fence from neighbors.
Closing the fence between neighbors
Advantages of the netting mesh
The fence mesh has several advantages:
- minimum costs. The chain-link mesh is the cheapest option for making a fence, and you can mount it yourself;
- high strength and long service life. The mesh serves for at least 20 years, and with additional processing for more than half a century;
- undemanding care. The material does not need to be periodically processed and repaired;
- a wide range of. Models available with different mesh sizes and different wire thicknesses;
- insignificant weight;
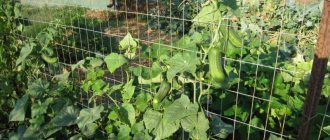
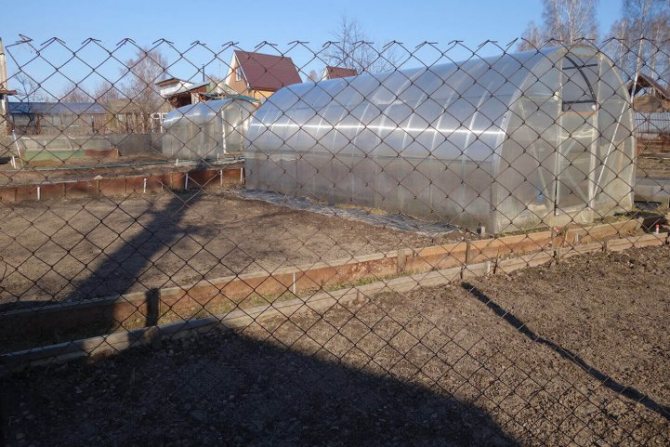
- light transmission, making the mesh ideal for agricultural purposes;
- ease of installation.
Types of chain-link

Types of chain-link
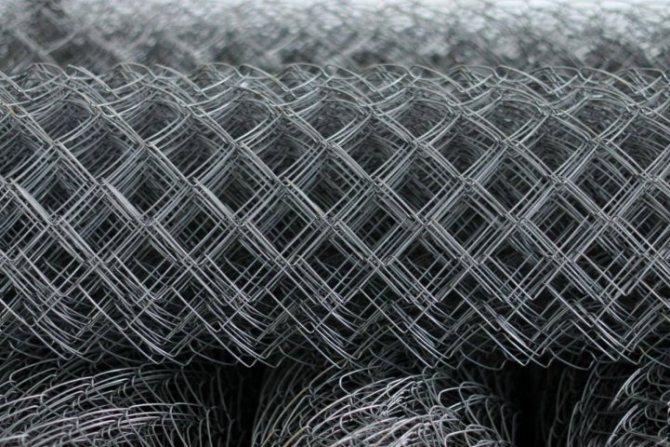
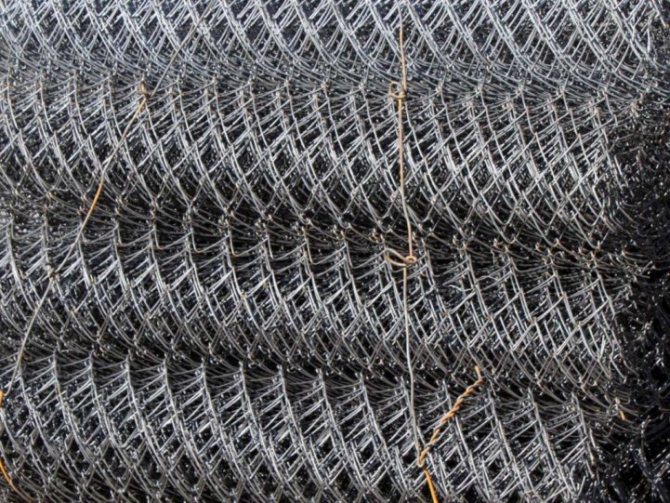
The mesh is made of black and galvanized wire, so the quality of the chain-link is different. Black wire mesh is the cheapest and most short-lived. It becomes covered with rust after the first fog or rain, and after 3-4 years it becomes completely unusable. You can extend the service life of a non-galvanized chain-link using paint or liquid rubber, which should be applied to the mesh before installing it, and then periodically renew the protective layer.
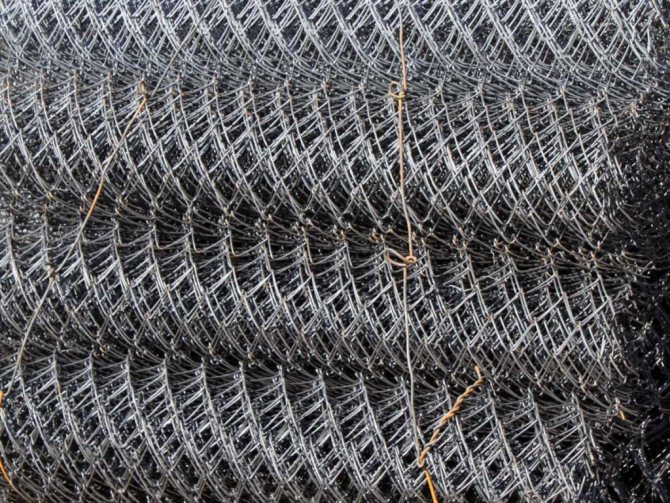
Plain black wire chain-link
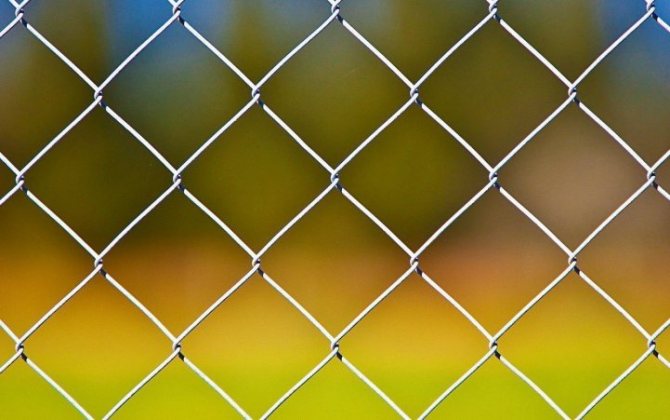
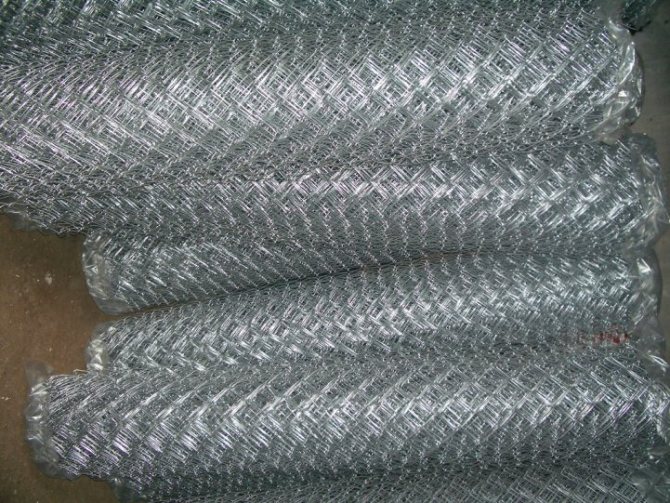
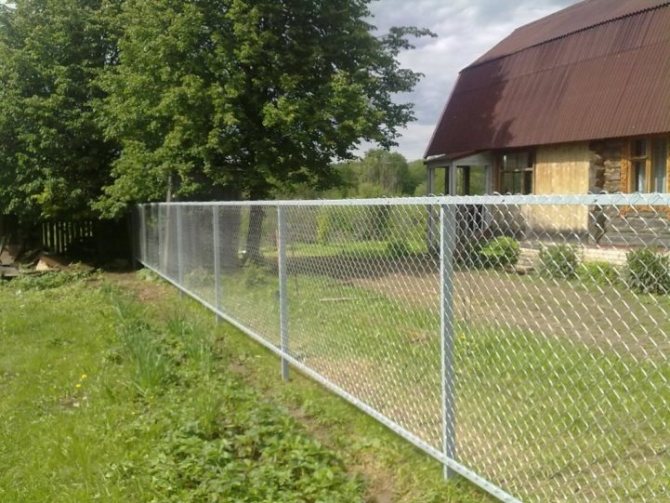
The galvanized wire mesh is not afraid of corrosion, and therefore lasts longer. It costs a little more than black, but it does not need a protective treatment at all. Galvanized chain-link fences look neat and attractive.
Galvanized mesh netting
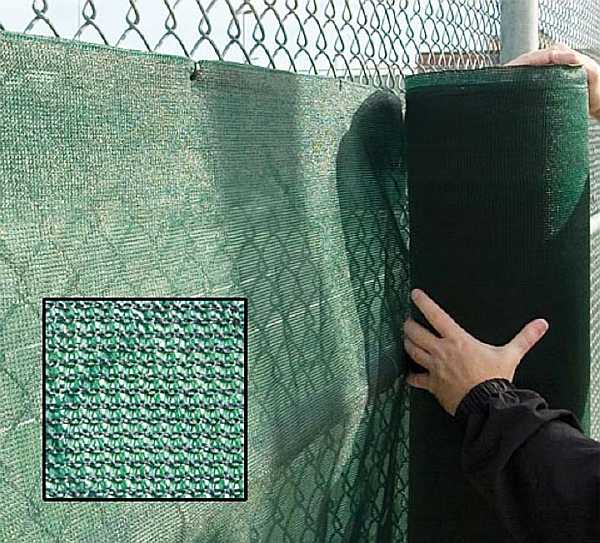
The plasticized chain-link is becoming more and more popular. This metal mesh is covered with a dense layer of anti-corrosive polymer, due to which it has increased resistance to weathering. In addition, the polymer is colored, the mesh looks very attractive and aesthetically pleasing. And although such a chain-link is quite expensive, the demand for it is constantly growing.
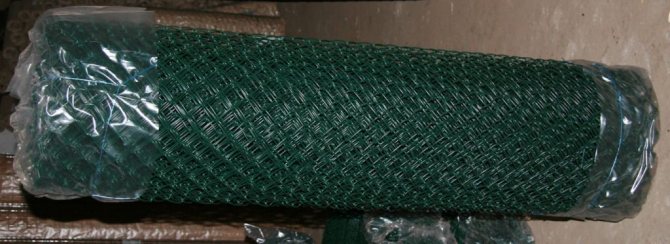
Grid Chain-link with polymer coating
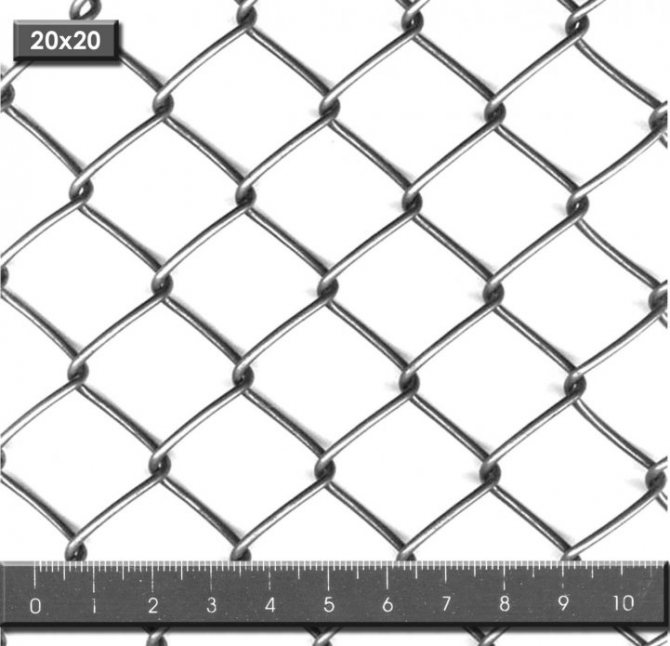
In addition to quality, the netting is distinguished by the size of the cells, the thickness of the wire and the height of the roll. Cells can have dimensions from 10 to 65 mm, wire diameter 1-5 mm. The roll height is from 0.8 to 2 m, but the most popular is 1.5 m. The standard length of the mesh in a roll is 10 m, rolls of 20 m are made to order. The smaller the mesh, the more expensive the mesh cost, because this increases the material consumption ...
| Chain-link mesh view | Wire diameter, mm | Mesh width, mm | Live section of the mesh,% | Estimated weight of 1m2 mesh, kg |
| braided mesh with rhombic mesh | 1,20 | 1000 | 55,0 | 4,52 |
| braided mesh with rhombic mesh | 1,20 | 1000 | 61,0 | 33,73 |
| braided mesh with rhombic mesh | 1,20 | 1000 | 69,8 | 2,78 |
| braided mesh with rhombic mesh | 1,40 | 1000 | 65,5 | 3,8 |
| braided mesh with a rhombic or square mesh | 1,20 | 1000,1500 | 75,3 (78,9) | 2,20 (1,94) |
| braided mesh with a rhombic or square mesh | 1,40 | 1000,1500 | 71,5 (76,2) | 3,00 (2,57) |
| braided mesh with a rhombic or square mesh | 1,40 | 1000,1500 | 76,3 (77,0) | 3,24 (2,74) |
| braided mesh with a rhombic or square mesh | 1,60 | 1000,1500 | 73,3 (77,0) | 3,24 (2,74) |
| braided mesh with a rhombic or square mesh | 1,80 | 1000,1500 | 76,0 (78,9) | 3,25 (2,75) |
| braided mesh with a rhombic or square mesh | 1,60 | 1000,1500 | 77,5 (80,9) | 2,57 (2,17) |
| wicker mesh for fencing | 1,4 | 1000-2000 | 83,6 | 1,77 |
| wicker mesh for fencing | 1,4 | 1000-2000 | 87,0 | 1,33 |
| wicker mesh for fencing | 1,6 | 1000-2000 | 85,7 | 1,74 |
| wicker mesh for fencing | 1,6 | 1000-2000 | 88,0 | 1,39 |
| wicker mesh for fencing | 1,8 | 1000-2000 | 87,0 | 1,76 |
| wicker mesh for fencing | 1,8 | 1000-2000 | 89 | 1,46 |
| wicker mesh for fencing | 2,0 | 1000-2000 | 87,9 | 1,81 |
| wicker mesh for fencing | 1,8 | 1000-2000 | 91 | 1,1 |
| wicker mesh for fencing | 2,0 | 1000-2000 | 90,7 | 1,36 |
| wicker mesh for fencing | 2,0 | 1000-2000 | 91,7 | 1,23 |
| wicker mesh for fencing | 2,5 | 1000-2000 | 90,7 | 1,70 |
| wicker mesh for fencing | 3,0 | 1000-2000 | 89 | 2,44 |
| wicker mesh for fencing | 2,5 | 1000-2000 | 92 | 1,41 |
| wicker mesh for fencing | 3,0 | 1000-2000 | 92 | 1,74 |
| wicker mesh for fencing | 2,5 | 1000-2000 | 94 | 1,10 |
| wicker mesh for fencing | 3,0 | 1000-2000 | 93 | 1,53 |
Prices for mesh netting
Rabitz
Varieties of mesh
A chain-link fence can be made from different types of material. Based on the material of manufacture, the mesh is:
- made of low-carbon steel (characterized by increased ductility);
- made of stainless steel (does not rust, but is more rigid).
The mesh can be zinc coated. Zinc coated welded mesh fence is more durable. This mesh does not need to be painted.

Non-galvanized mesh must be painted to prevent corrosion.
There is also a polymer mesh, it is thicker, looks aesthetically pleasing, but less durable and requires processing to protect it from external factors.

Construction of houses
29 votes
+
Voice for!
—
Against!
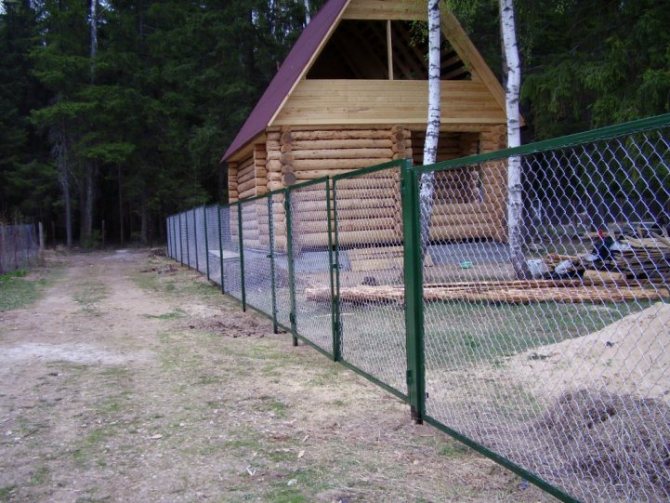
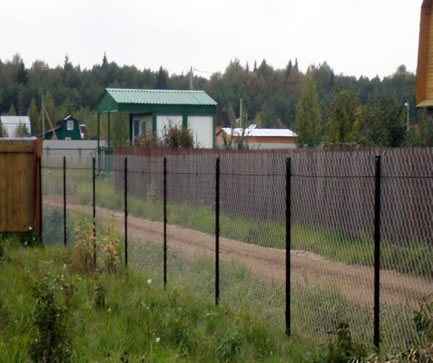
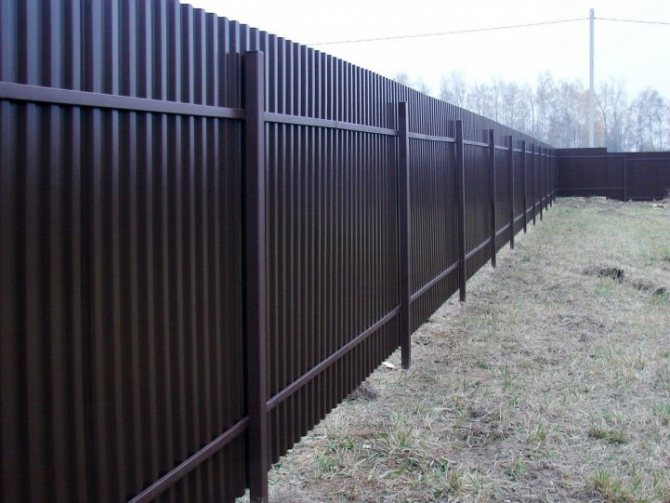
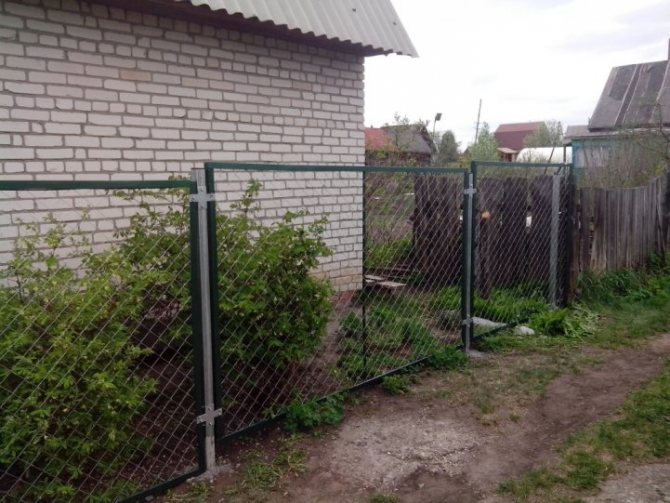
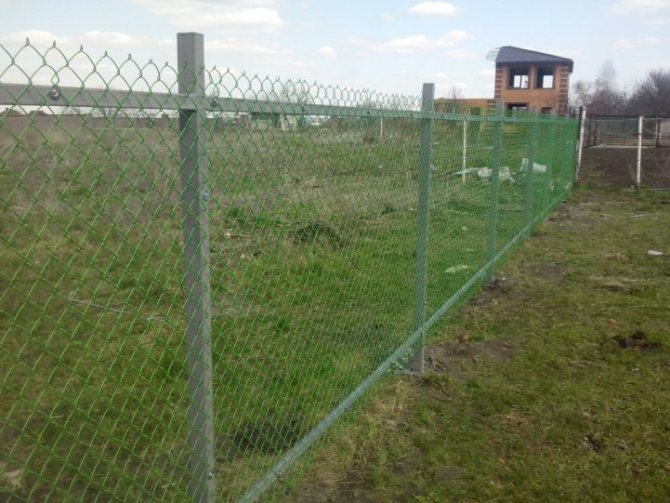
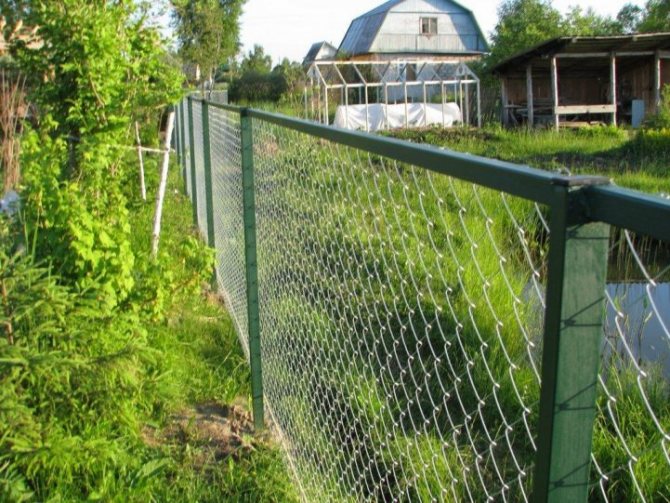
Did you know that the installation of a stone, slate or metal profile fence between neighboring summer cottages is prohibited? The fact is that deaf high fences shade a lot of space, preventing the penetration of light. Considering the size of summer cottages, 6 - 8 acres, where every meter counts, all plants planted along such fences will ache and wither. Therefore, complaints from neighbors are inevitable. What to do? A good option is to equip a fence from a chain-link mesh. It will not interfere with the penetration of sunlight and the movement of air masses. Such fences are popular not only among summer residents, but are also used to fence technical areas, sports grounds, lakes and other bodies of water, chicken coops and other objects.
- Types of mesh Chain-link
- How can you make a fence from a chain-link mesh
- Fence posts from the chain-link mesh
- Do-it-yourself tension fence made of mesh Chain-link
- Marking the territory for the fence
- Installation of pillars
- Stretching the netting the chain-link and fastening on the posts
- Do-it-yourself sectional fence made of chain-link mesh
- How to make a fence from a chain-link mesh: video - instructions
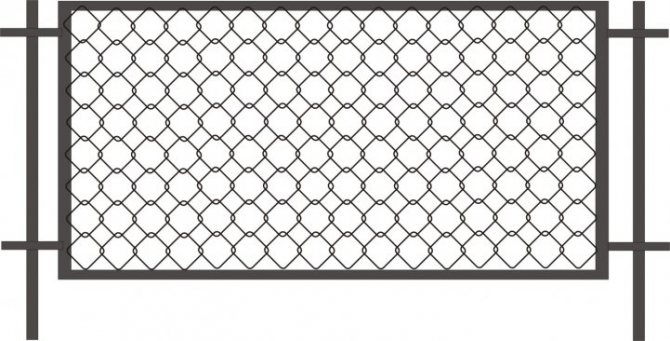
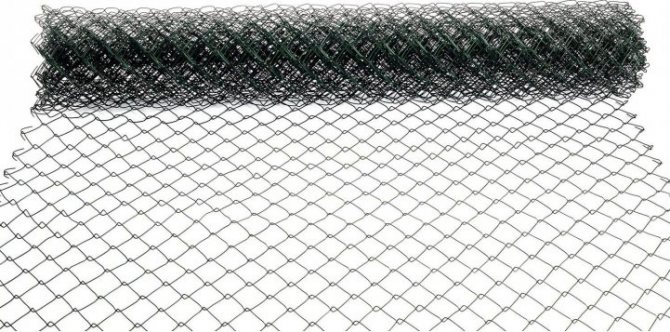
Rabitz got its name in honor of the bricklayer Karl Rabitz, who filed a patent for her invention at the end of the 19th century. True, then it was used for plastering walls. The Rabitz mesh is a low-carbon steel wire, which is woven into a kind of cloth. Wire spirals are screwed into each other with a special machine, which not only "knits" the mesh, but also immediately rolls it into rolls.
The price for a chain-link fence is much lower than for fences made of other materials, which is an indisputable advantage. Any summer resident or villager can freely purchase a mesh in any construction supermarket, store or market; in addition, he will need posts to secure the mesh and reinforcing rods, a cable or thick wire 4-6 mm in diameter.
Types of mesh Chain-link
To date, there are three types of chain-link mesh on the market, which differ in the material of manufacture:
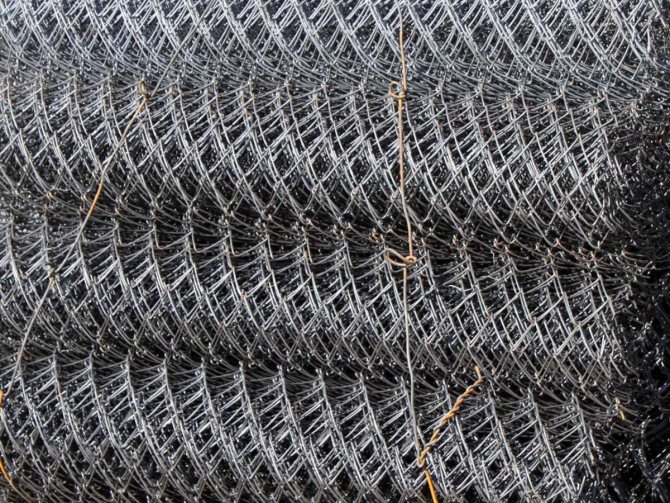
- Non-galvanized made of black wire. Unpainted mesh The chain-link made of ferrous metal will not last long, no more than 3 years. In this case, already three to four days after its installation, rust will begin to appear. As a temporary option, such a mesh can be purchased with the expectation that later a fence from a different material will be installed instead of it or completely removed. Otherwise, the black metal mesh must be painted and the paint layer renewed every 4 - 5 years.

- Galvanized The chain-link mesh does not corrode.Moreover, it is not much more expensive than its ferrous metal counterpart. That is why it is popular everywhere.
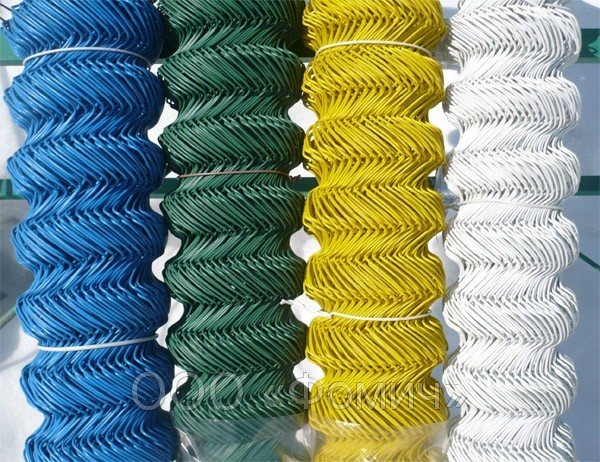
- Plasticized... This is a metal wire mesh covered with a protective anti-corrosion polymer on top. It looks somewhat more aesthetically pleasing than the previous types and is not afraid of moisture. In our market, such nets have appeared relatively recently and have already begun to conquer the summer cottages of our compatriots.
In addition to the material of manufacture, the chain-link mesh may differ in the shape of the cells and their size. The shape, rectangular, diamond-shaped or other, does not really matter. But the cell size is extremely important. It can be from 25 mm to 60 mm. The smaller it is, the less the mesh transmits light, the more durable and monolithic, but also expensive. The 60mm mesh is not suitable for fencing a chicken coop as the mesh is large enough for chicks to crawl through. Therefore, it is necessary to choose the Rabitz mesh from the calculation, for which it will be used. For fencing a summer cottage, so that large animals and people cannot penetrate, they use a grid with cells of 40 - 50 mm. This is quite enough.
The cost of a fence from a chain-link mesh depends on several parameters: the material of the mesh, the size of the mesh, the thickness of the wire in the mesh and the method of its fastening.
Non-galvanized mesh Chain-link with dimensions 50 * 2.0 * 10 costs about 28 cu. per roll 10 m. In these sizes 50 - mesh size, 2.0 - wire thickness. By the way, it can be from 1.0 to 2.0 mm. Accordingly, the thinner, the cheaper and lighter the mesh, but less strong and durable.
Galvanized mesh Chain-link 50 * 2.0 * 10 costs $ 32. for 10 m. Agree, the difference is not so great.
Plasticized mesh Chain-link 50 * 2.0 * 10 costs $ 48. for 10 m. This is somewhat more expensive than the previous options, it will be expensive for a temporary fence, and just right for a permanent one.
How can you make a fence from a chain-link mesh

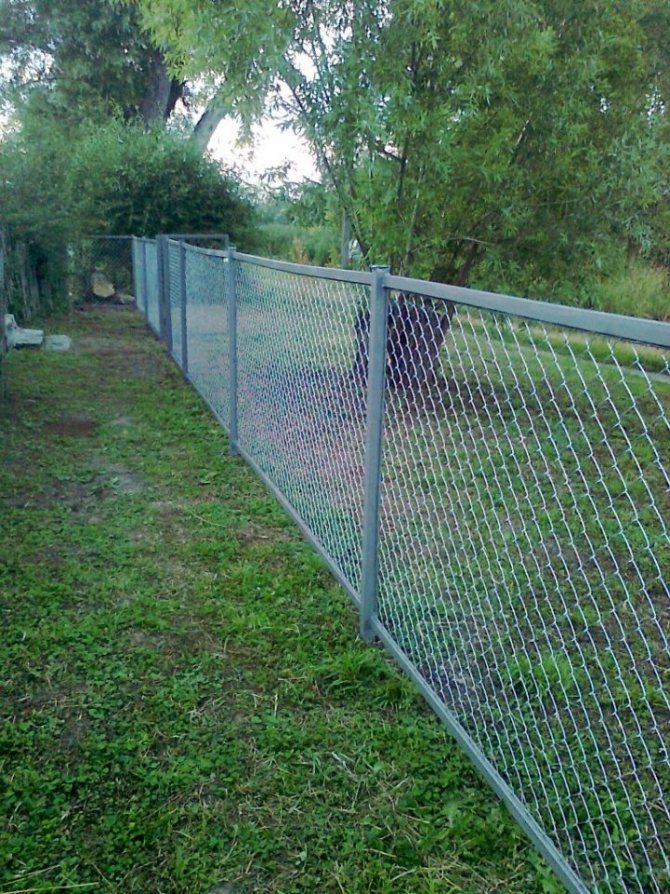
There are two ways of arranging a fence from a chain-link mesh:
- Stretch between the pillars;
- Make sections from the corner, into which to fix the mesh fragments.
The first method is much easier and cheaper, but less aesthetic and somewhat practical.
For the manufacture of sections, additional considerable costs will be required for a metal corner, the cost of which can exceed the cost of the mesh. A sectional fence will be more beautiful, stronger, you can dry something on it or just hang it up.
For both methods, you will need pillars to which the mesh will be attached.
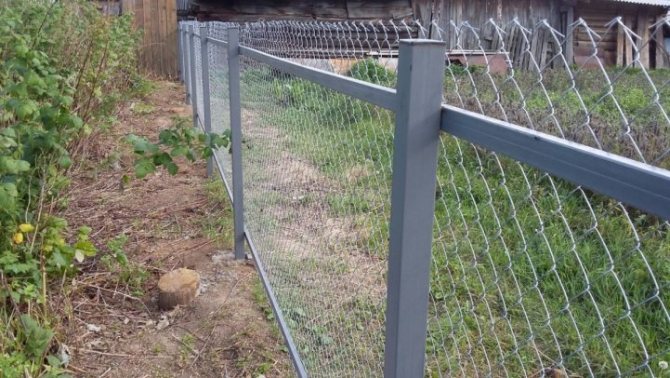
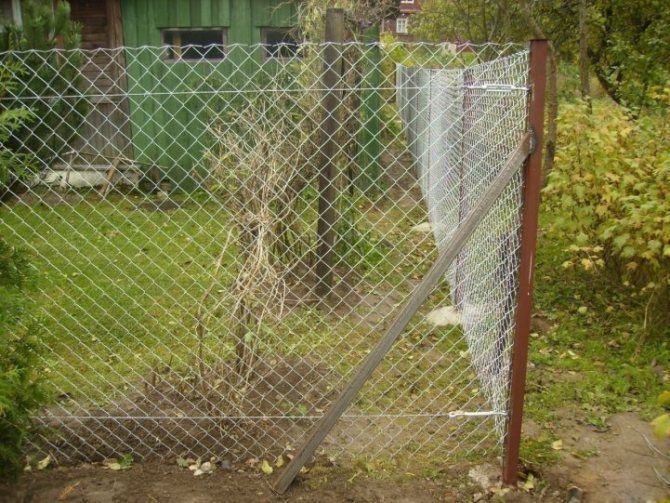
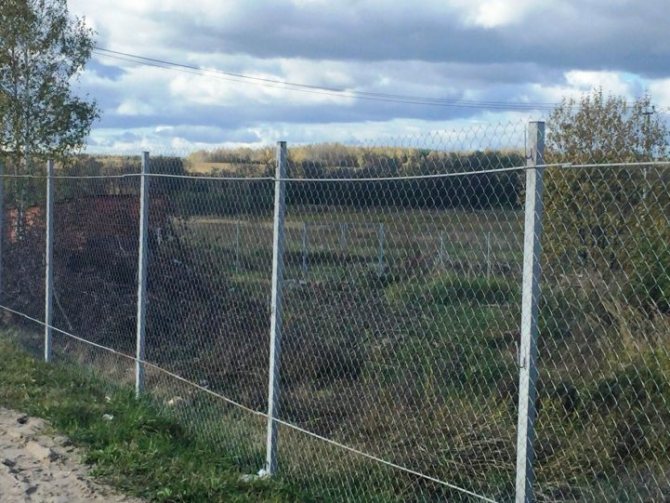
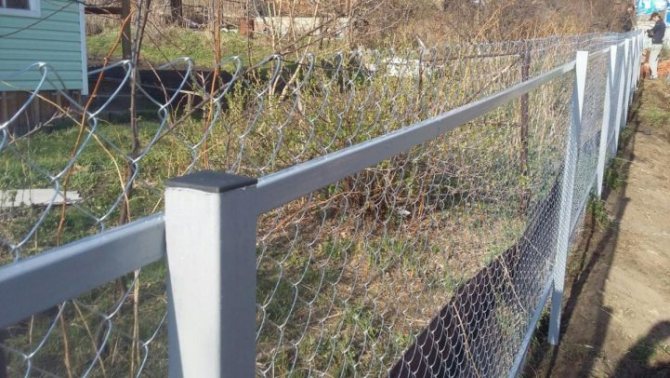
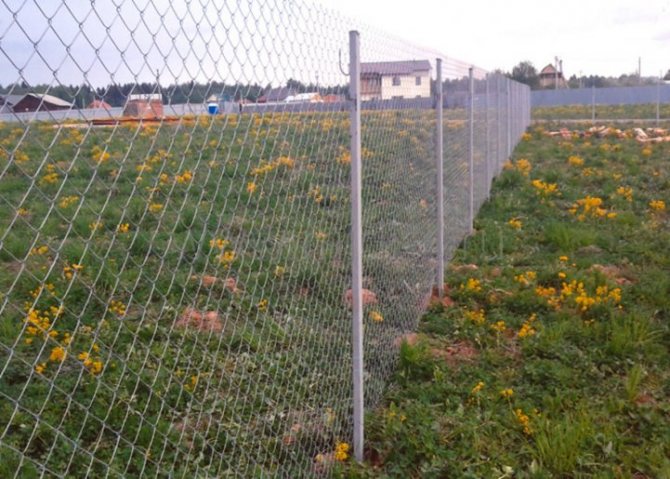
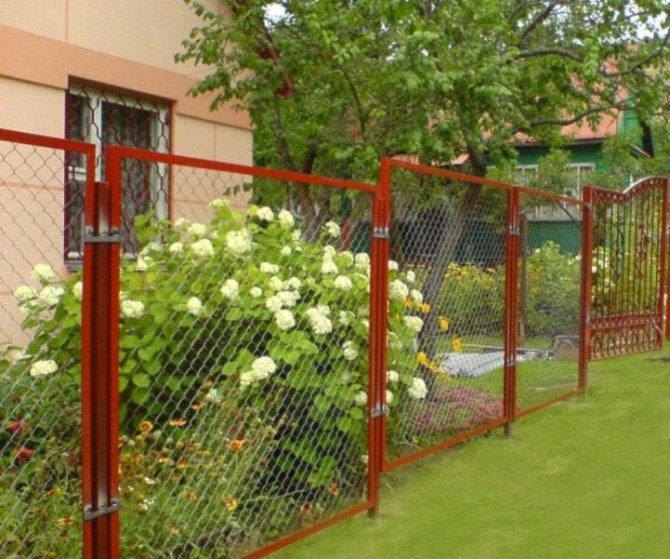
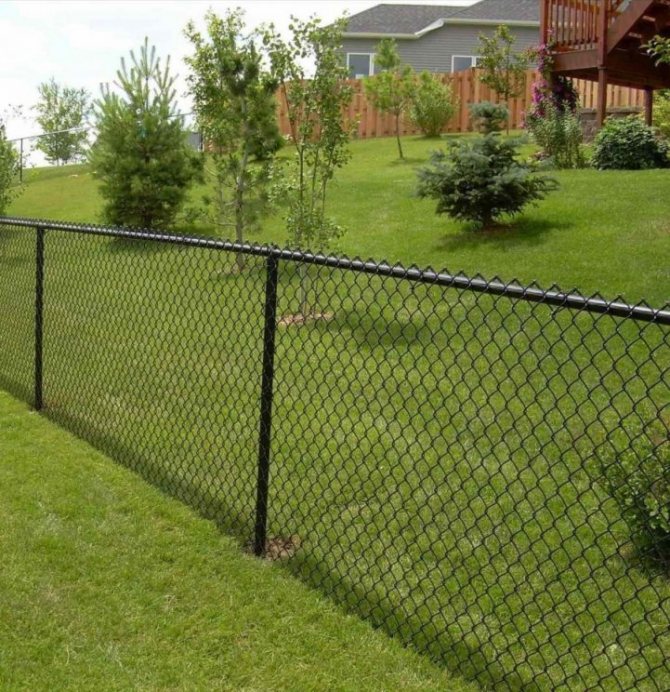
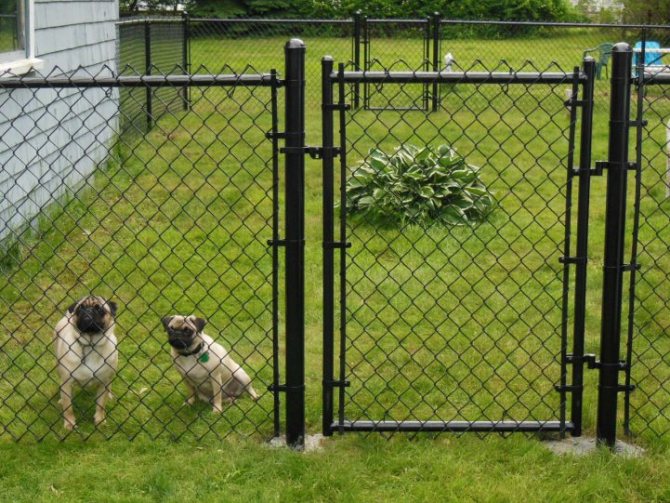
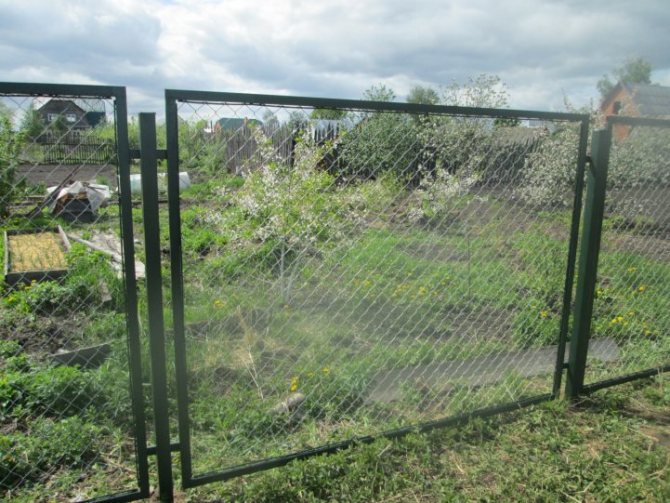
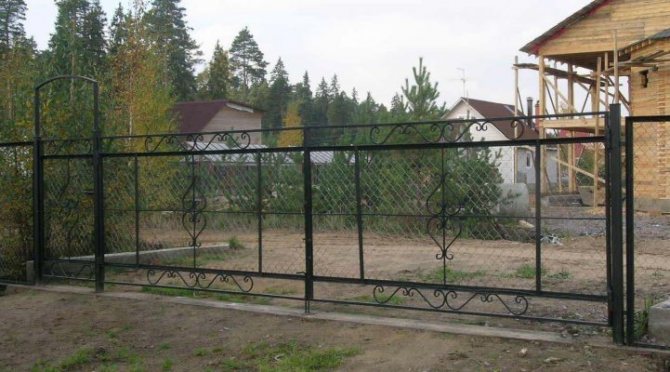
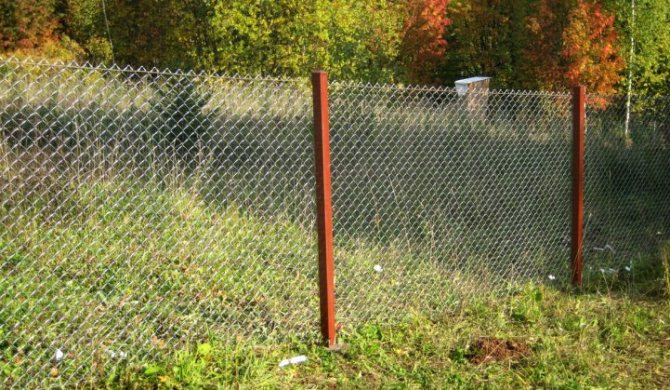
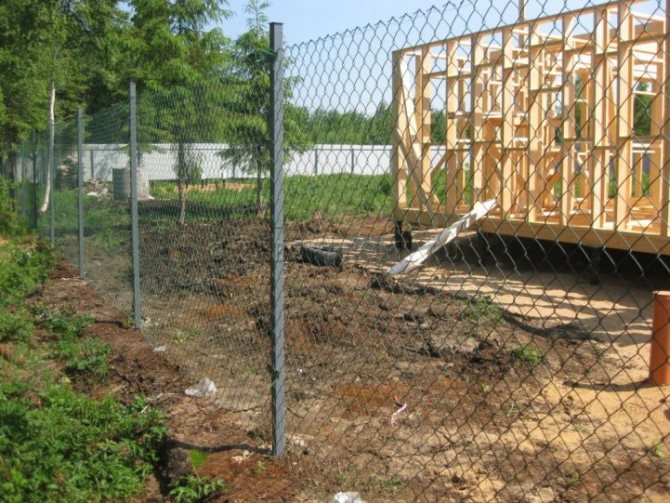
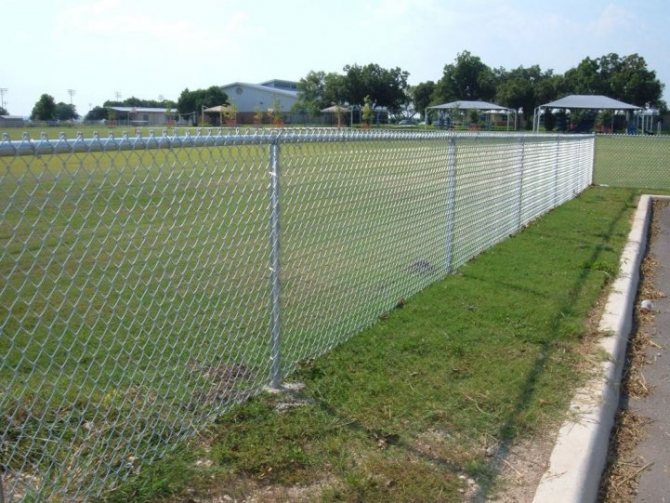
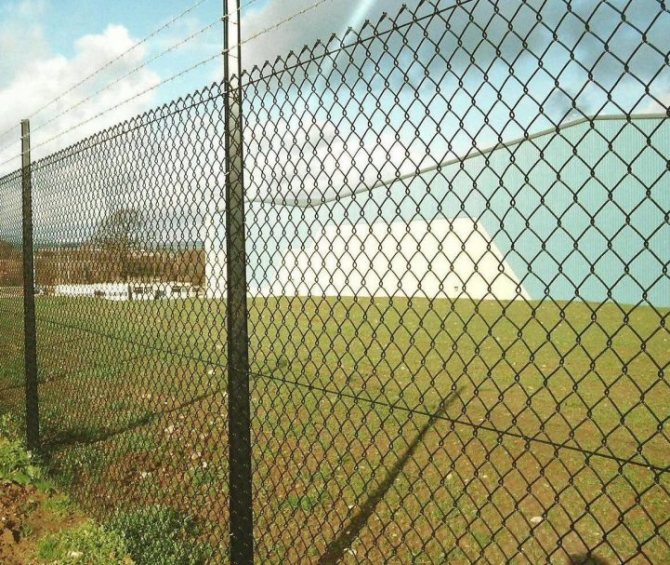
What are the chain-link fences: photos - examples
Fence posts from the chain-link mesh
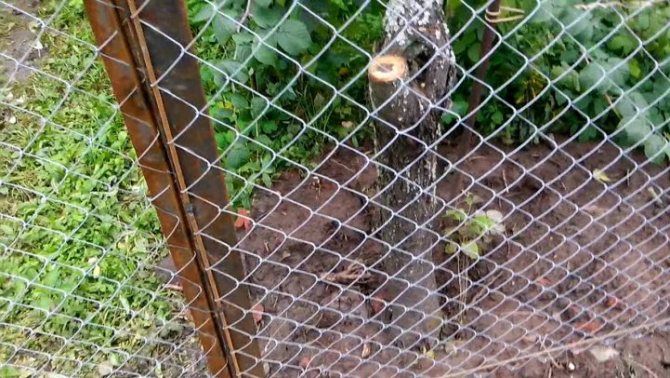
Wooden pillars - lightweight material available in wooded areas, but short-lived. It makes sense to purchase wooden poles or beams only if they are much cheaper than metal ones, or if you are installing a temporary fence. There are situations when a wooden building material remains after the construction of a house, for example, a roof. I do not want to endure unnecessary costs if there is orphan material.
To equip the posts under the fence, wooden beams must be cleaned of bark. Then they are trimmed to the required length. Most often, deepening is performed 10-15 cm below the level of soil freezing. So it turns out that the length of the timber will be about 3 m. The entire underground part of the tree must be treated with waterproofing mastic. Fortunately, now the market offers many options for mastics that do not need to be heated or somehow prepared, just smeared and that's it. The rest of the beams must be painted, otherwise they will rot after six months - a year after installation. The fastening of the chain-link mesh to the tree is carried out with the help of nails. Clamps can be offered from modern materials, but they will not fit too organically into the overall look.
Metal pillars more preferable, as they are more durable and more reliable.Most often, pipes of round or square cross-section with a diameter of 60 - 120 mm are used. The section thickness must be at least 2 mm. To reduce the cost of building a fence from a chain-link mesh, pipes can be purchased at the nearest scrap metal purchase. Sometimes there you can pick up a good version of water pipes that have lost their tightness, but are not affected by rust. They can no longer be used for the water supply, and their tightness does not matter for the fence. Recently, poles have appeared on the market, already ready to use for the construction of a fence. They are painted and with welded hooks. Such pipes will cost a little more, but many associated worries disappear.
You can also use concrete or asbestos-cement pillars, if they are available, but you can attach the mesh to them only with clamps or using a cable, weaving it into the mesh and braiding the post.
Do-it-yourself tension fence made of mesh Chain-link
One of the main advantages of mesh fences is the ease of installation, which can be successfully performed together without serious construction skills. As an example, consider the construction of a tension fence from a chain-link mesh using metal posts. Net width - 2 m.
Marking the territory for the fence
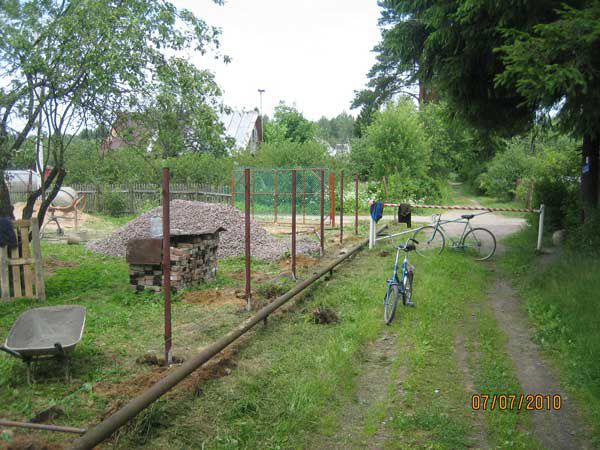
First of all, in the corners of the site, we install temporary pegs and pull a construction thread or cord between them. We measure the length of the cord - this will be the length of the chain-link mesh, which should be purchased with a margin of 1 - 2 meters, just in case.
Now it is necessary to mark the places for the installation of the pillars. The most optimal distance between the posts is 2 - 2.5 m, no more, since the Rabitz mesh is a sagging material.
To calculate the number of pillars required, divide the length of each side of the section by 2.5. For example, the length is 47 m. This value is not evenly divisible by 2 or 2.5. When divided by 2.5, we get 18.8. We have two ways. The first is to install 19 pillars at an equal distance from each other, 47/19 = 2.47 m. But it is almost impossible to calculate the location of the pillar with such accuracy. The second way is to install 18 pillars at a distance of 2.5 m, and make the distance a little less between the latter. In total, we need to purchase 19 metal pipes.
On a stretched line, we make marks at a distance of 2.5 m from each other. We constantly make sure that they are on a straight line.
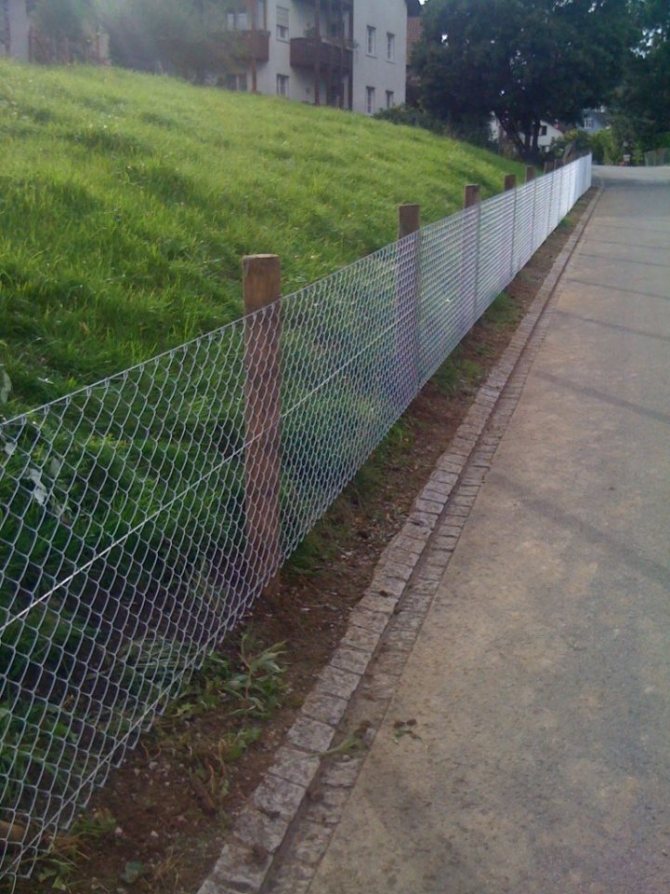
Important! If the site has a significant slope, it will not work to build a fence from the chain-link mesh, since it is poorly attached in an inclined position. The only way out of the situation is to terraced the site. In the place of the height difference, install a more powerful and long post, to which a section of the grid will be attached on one side at one level, and on the other side on the other. To do this, the mesh canvas will have to be divided. The second option is to equip a sectional fence.
Installation of pillars
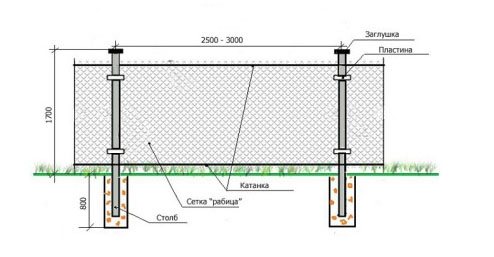
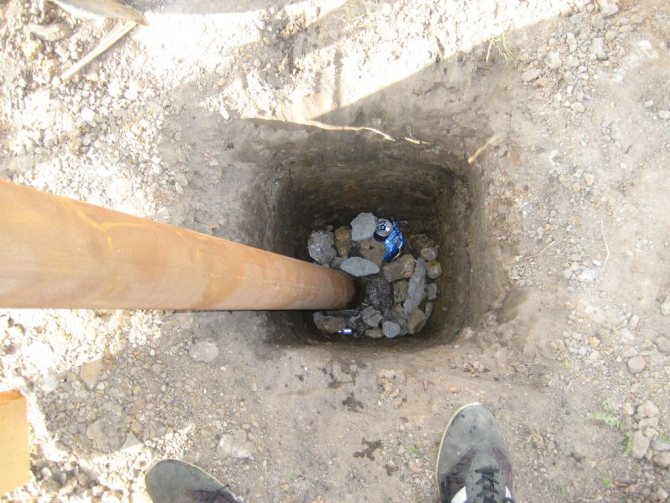
In the places marked under the pillars, we drill wells with a drill or dig with a shovel. The depth is 1.2 - 1.5 m. To prevent the pillars from moving during the spring heaving of the soil, they must be installed 15 - 20 cm below the freezing depth of the soil, i.e. to a depth of 0.8 - 1.2 m.
We will be the first to install the corner posts, since they will have the greatest pressure, and even uneven. We fill in a layer of rubble at the bottom of the well and carefully tamp it. Then a layer of sand and also tamp.
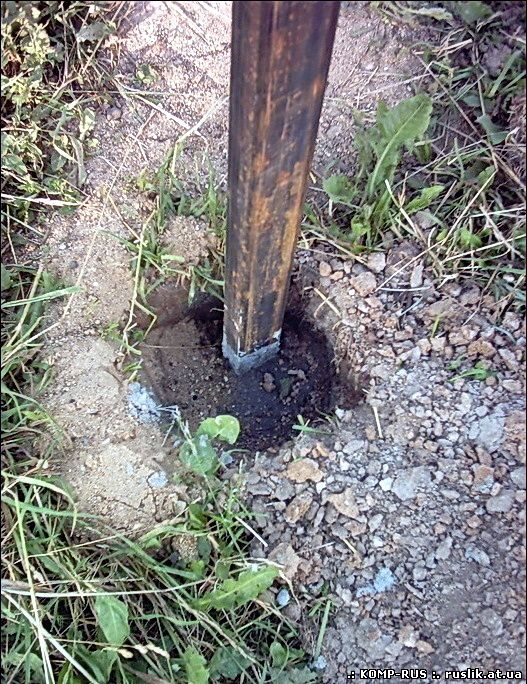
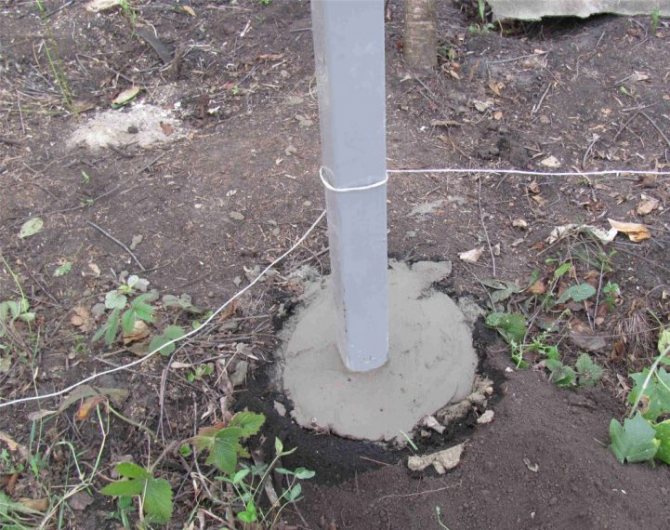
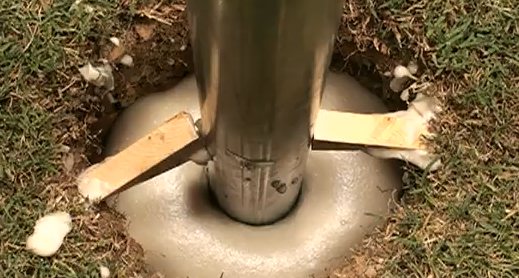
Then we install the pipe, having previously treated the underground part with anti-corrosion mastic. We prepare a cement mortar from one part of sand and two parts of cement. Stir, then add two parts of crushed stone and mix again, fill with water and mix again. It is important to check that the solution is not too thin. Then pour the solution into the hole around the pipe.
Important! Be sure to control the vertical position of the pillar with the help of a plumb line.
We pierce concrete with a bayonet shovel, shaking and compacting it. The second in a row is the corner post on the opposite side.Then all the other pillars according to the described technology, be sure to control the evenness of their location relative to each other. To do this, we have a stretched thread - we check it along it.
Further work can be continued only after complete hardening of the concrete, i.e. in a week.
Sometimes metal pillars are not concreted, but simply a layer of rubble stone or a savage is poured into the empty space of the pit, thoroughly rammed, then a layer of soil is poured, also rammed, and on top there is again a rubble stone. This method of fastening is also good, the pillars are firmly fixed in adjacent planes. A little concrete can be added to the last layer of stone, this will increase the strength of the structure.
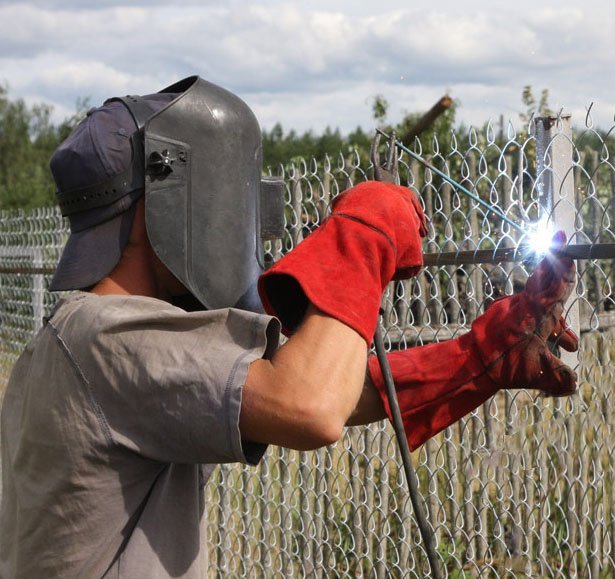
Stretching the netting the chain-link and fastening on the posts
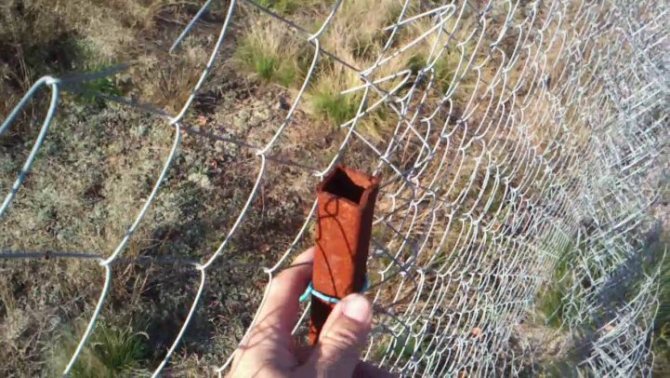
When the concrete is dry, we weld hooks onto the posts, onto which we will attach the Rabitz mesh. To do this, you can use nails, screws, thick wire, pieces of a rod, or other available material that can be bent into a hook.
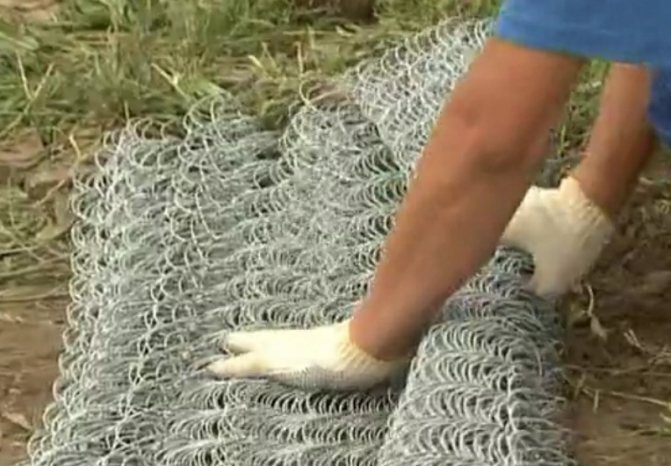
The next stage in making a fence from a chain-link mesh is stretching the mesh. The first step is to straighten the roll. Then we install it near the first corner post. We fix the mesh by hanging it on hooks. For greater strength, we thread a thick wire or reinforcing bar with a cross section of 3 - 4 mm into the first row of mesh cells (in a vertical position). After we have hung the mesh on the hooks, we weld this rod to the pipe. This will prevent the mesh from sagging and sagging.
We rewind the net one span to the nearest post. A little further than the junction of the mesh with the post, we pass a rod into it in a vertical position. Holding on to it, we will stretch the mesh. If we just pull it with our hands, the tension will be uneven. Together, one closer to the top edge, the other to the bottom, we stretch the mesh. For convenience, you can invite a third participant in the process, who will put the net on the hooks at this time.
Then we pass the rods, cable or wire into the mesh in a horizontal plane at a distance of 5 - 20 cm from the upper edge and also from the lower one. Sometimes it is advised to use 5 rods at an equal distance from each other. We weld them to the post. These rods will support the mesh so that it does not sag over time.
We repeat the procedure for all other pillars, acting according to the same algorithm: tighten, fix, stretch the rod, weld on.
Important! Do not go around the corner posts with a net. It is better to fix it on the pillar, separate it, fix the cells of the second part of the canvas and continue to stretch the mesh with a separate canvas. This is necessary in order to reduce the load on the posts.
One roll of mesh may not be enough to cover all the spans between the posts. It may be such a situation that a meter of mesh remains, and up to the next column 2.5 m. In this case, we take out the wire from the extreme row of the mesh, apply the ending canvas to a new roll and weave the wire between them. As a result, you should get a continuous mesh without seams.
When the entire area is fenced off, bend the hooks on all the pillars. If there is a piece of the unnecessary mesh left, take out the wire, separating the mesh, retreating one cell after fixing it on the post.
The final touch - the pillars must be painted so that they do not corrode. If you do not plan to use welding, but fix the mesh with clamps or wire, then you can paint the pillars even before starting work on stretching the mesh.
We twist the upper antennae of the wire from which the mesh is made by one or two turns and wrap it down so that they do not injure anyone. Sometimes a cable or wire is threaded into the upper row of cells and a wire mustache is twisted around it. On this our fence from the chain-link mesh is ready.
Do-it-yourself sectional fence made of chain-link mesh

A similar fence device from the netting The chain-link differs from the tension one by the presence of a frame of the sections into which the net is mounted.
The first stages of work: marking and installing pillars are no different from arranging a tension fence. The pillars should be slightly stronger, as they will have to carry a much greater load.
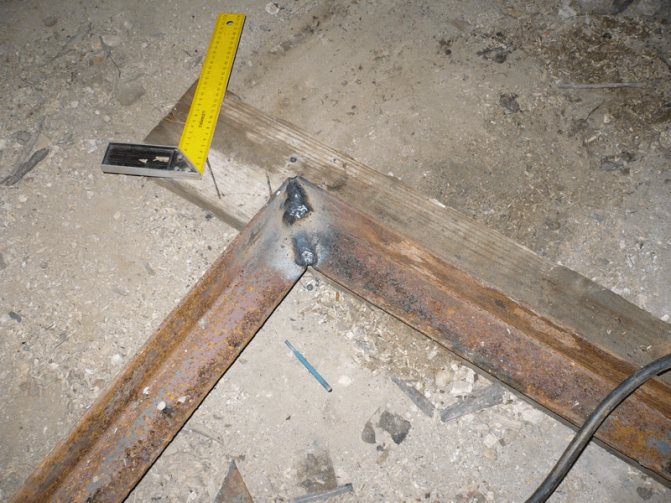
We purchase a corner of 30 * 4 or 40 * 5 mm. From it we weld the frame for the fence sections. To do this, we subtract 10 - 20 cm from the distance between the posts, this will be the length of the frame. We also subtract 10 - 15 cm from the height of the post above the ground level, this will be the width of the frame. We weld the corners in the form of a rectangle.
Then we unwind the roll of the netting Rabitz. If necessary, we reduce its height dimensions to the required ones, cutting off the excess with a grinder. The second option is to make the section size - 2 m (along the width of the net) and unfold the net roll in a vertical position, separating the excess from below.
In the extreme row we pass a rod with a section of 4 - 5 mm. We weld it to the vertical rack of the frame from the corners. Then we thread the rods into the upper and lower row of the mesh, carefully stretch it and also weld the rods to the horizontal corners of the frame. We do the same with the last upright. As a result, we should have a section welded from a corner, inside which a chain-link mesh is welded onto rods.
We weld metal strips 15 - 30 cm long, 5 cm wide and 5 mm horizontal to the posts. We retreat 20 - 30 cm from the upper and lower edges of the pillar. Install the section between the pillars and weld it to the strips.
After all welding work, the fence must be painted - everything is ready.
As you can see, making a fence from a chain-link mesh is not so difficult. It will take patience, two or three people and a good mood. And if you do not understand the description in words of the fence installation technology, we suggest watching a visual video.
How to make a fence from a chain-link mesh: video - instructions
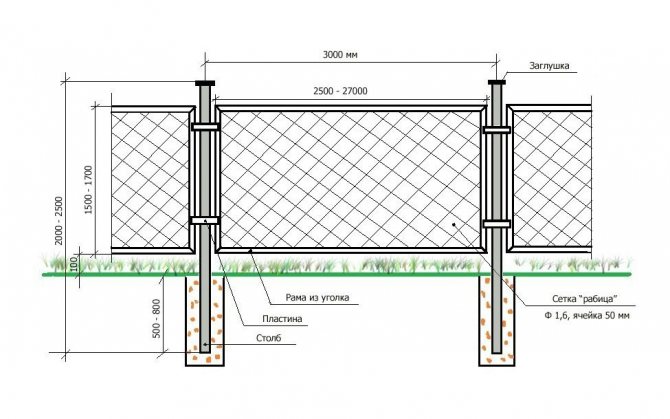
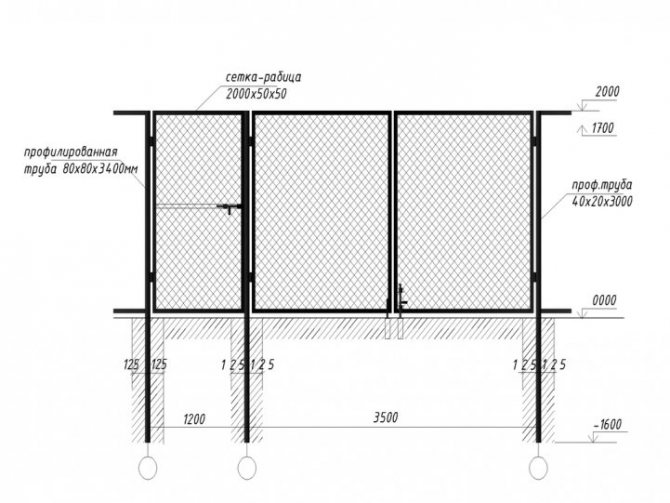
Blueprints
In the photo of the mesh fence on the site, you can visually familiarize yourself with the schematic of the installation of the fence.
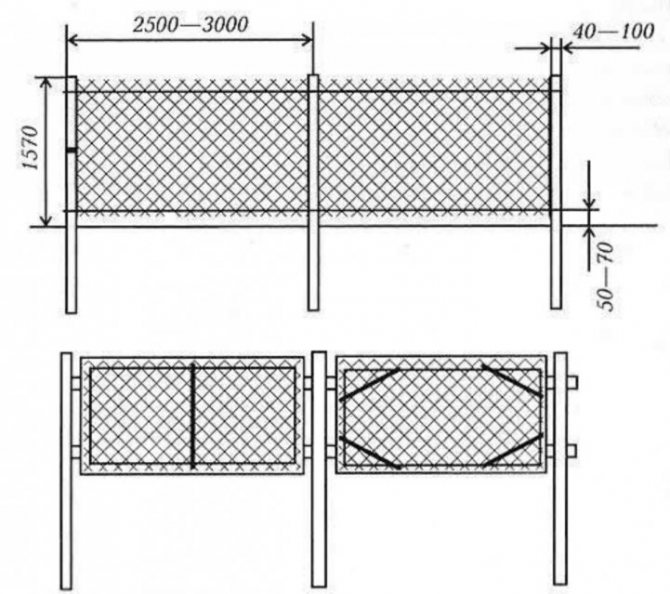
It is highly recommended to first draw up a drawing that includes the following parameters:
- perimeter mounting mesh. It is necessary to take into account entrances, trees, buildings, etc .;
- the specificity of the relief. Grades and inclines may require trimming or higher mesh heights;
- length of the fence;
- place and features of mounting supports.
We recommend reading:
The best options for planning the site: modern ideas, the best solutions and beautiful schemes of arrangement and design (125 photos + video)- How to make drainage on the site: device, types, design and masking (110 photo ideas)
Do-it-yourself sliding gates: projects, structures, drawings, photo and video description of the building (135 photos)
The nuances of calculating the fence
Installation of pillars
The basis for the correct calculation is considered to be a distance equal to the perimeter of the site. Usually the netting is supplied to the market in the form of rolls of 10 meters in length. Depending on the material used and the cell diameter, the price per square meter of such a product ranges from 50 to 220 rubles.
Another important design parameter, the length of the wire for installing the tension fence will be equal to two or three lengths of the fence perimeter. It depends on the number of additional fasteners per section. With a structure height of 1.5 meters, 2-3 segments are sufficient. When installing a sectional fence, the length of a metal corner or a thin pipe is equal to two perimeters.
The basis for counting the number of pillars is the perimeter of the site, usually supports are installed every 2.5 meters. Let's consider a specific example for an area with dimensions of 40 * 60 meters. Based on the specified data, the perimeter of such a site will be 40 + 40 + 60 + 60 = 200 meters.
The fence requires 20 rolls of mesh, 40 posts and 600 meters of thick wire for bundling.
Classification of fences from a chain-link mesh
Making a good fence with your own hands from a chain-link mesh is not difficult. However, based on the needs and specifics of the site, you should decide on the type of fence.
There are three main types of fences:
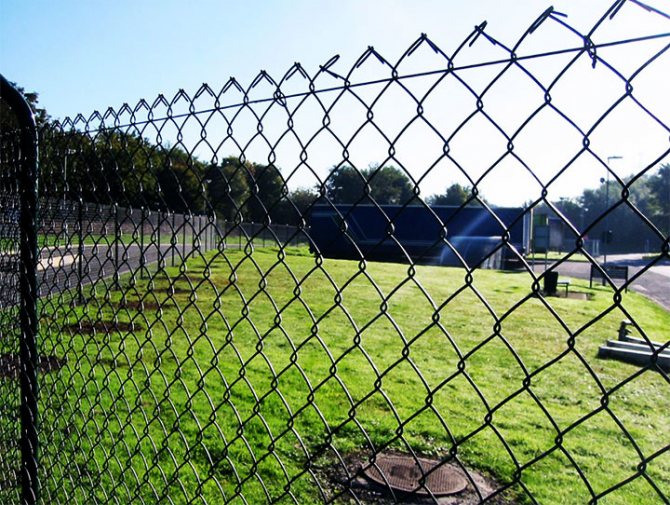
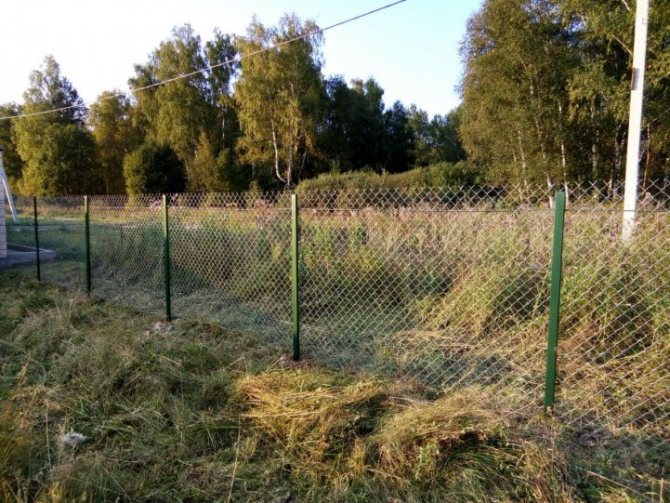
Stretch. The easiest option in terms of installation. The mesh is stretched between the supports. The key disadvantage is the gradual sagging of the mesh.
Tension with a broach. The material is also stretched between the supports, but an additional wire is pulled to prevent sagging.
Sectional. Installation of a mesh fence involves the construction of a separate section of supports for each section of the fence.
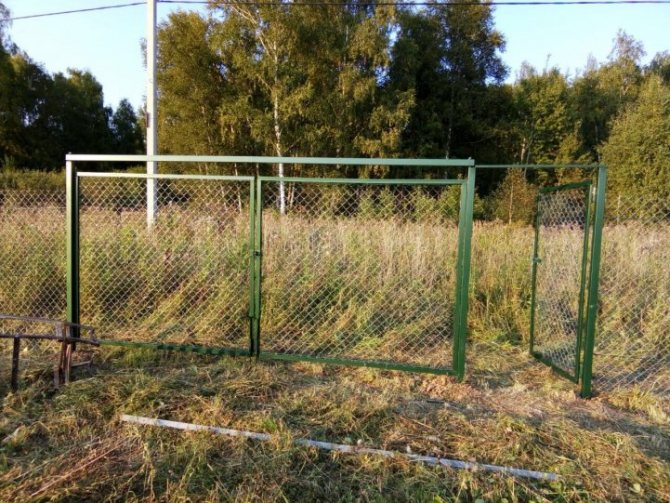
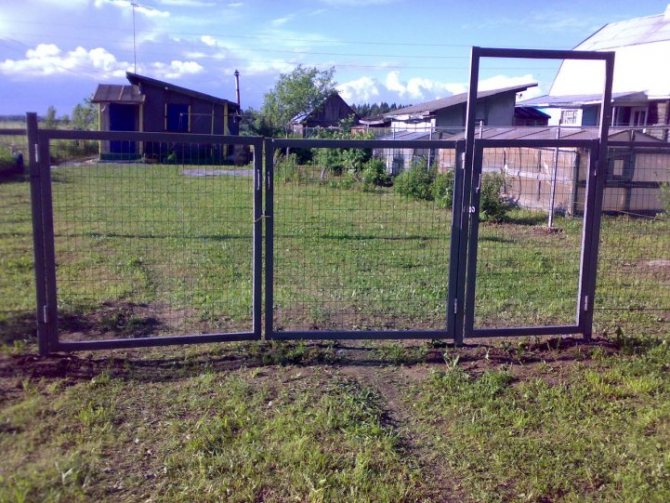
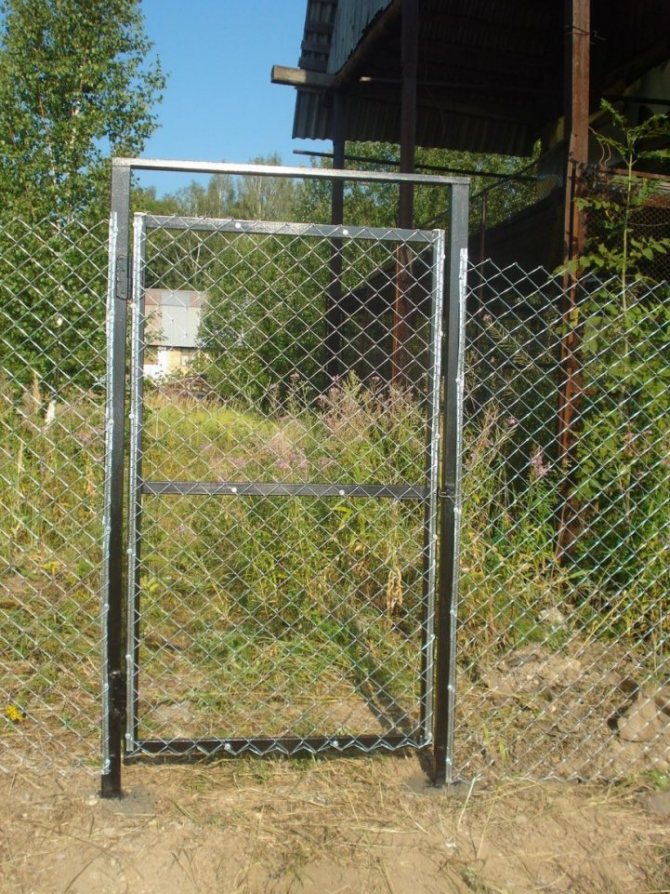
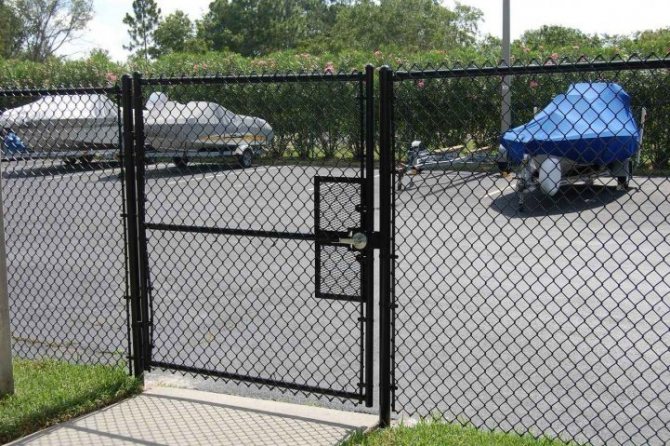
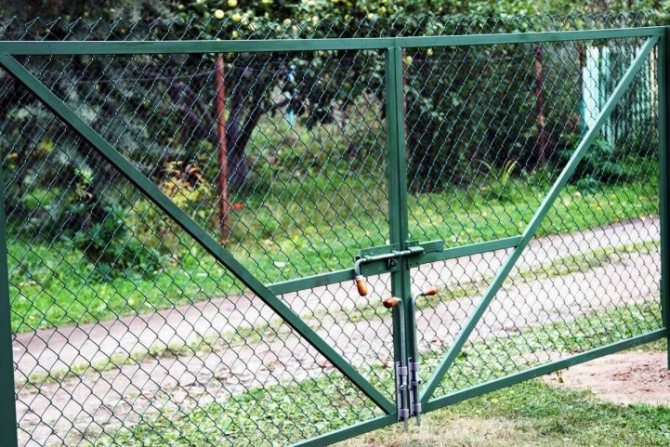
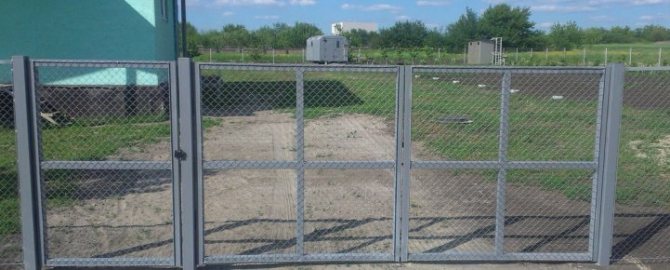
In this case, more supports are required, but the likelihood of sagging is eliminated. With sectional mounting, you can make a gate or wicket.
We recommend reading:
How to make a swing gate with your own hands - step-by-step manufacturing instructions. 115 photos of options for the construction of various types of gates
Construction of a fence made of corrugated board: the best ideas for a summer cottage, garden or house (130 photos and videos)
- Recreation area in the country: beautiful ideas, application and arrangement in landscape design (125 photos and videos)
Methods for mounting the chain-link
Having determined where the fence will stand, it is necessary to schematically depict the future structure and draw up a cost estimate.
We recommend taking metal pipes as pillars, having previously applied an anti-corrosion agent to them.
The building plot is cleared of debris and vegetation. Marking is carried out using pegs and a stretched rope.
Further creation of the fence depends on the selected type of mesh fastener. Let's consider each of them in more detail.
Tension
Differs in ease of installation and low cost. One edge of the chain-link is fixed to the post, the other is tightly stretched. The recommended distance between the supports is no more than 2.5 m.
To achieve good mesh tension, the following intermediate fasteners can be used:
- clamps;
- cable;
- lanyard;
- hook with long thread.
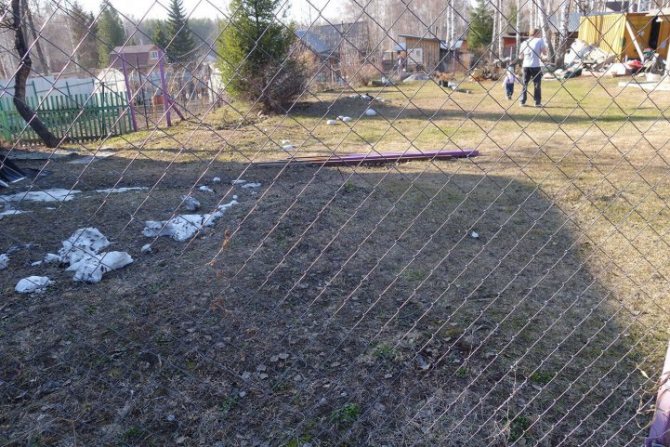
The disadvantage of this method of fixing is that the chain-link will begin to sag, so it is better to use it to create small temporary fences.
Sectional
A good fence option for areas that are on a slope, on sandy, moving soils.
It is recommended to install the pillars at a depth below the freezing point of the soil. The supports are fastened in any way, except for concreting.
It is better to choose metal as the material for the racks. For brick supports, you will have to mount mortgages in advance.
The sectional design will cost more than other types, but it will also last much longer. To make a frame, you need to have the skills of a welder or invite a specialist.
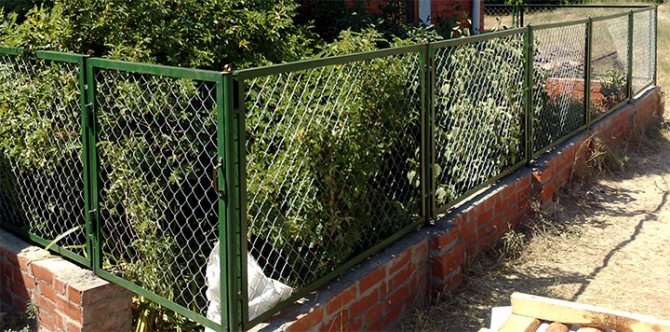
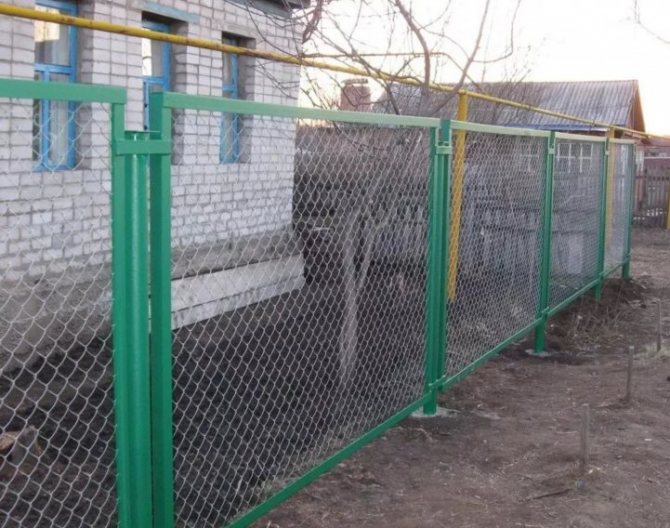
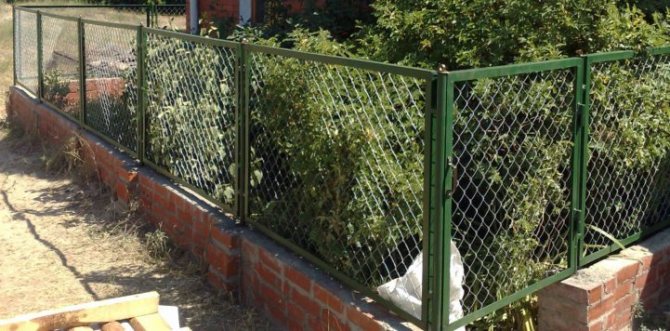
Photo: sectional fence made of a metal corner and chain-link
An alternative is to buy sections in the store.
The order of work is as follows:
- Steel plates 5 mm thick, 5 cm wide, 15-30 cm long are welded to the posts. They are fixed at a distance of 20 cm from the top and bottom of the supports.
- The frame is cooked from a metal corner with dimensions of 30 * 40, 40 * 50 mm. A corresponding piece of mesh fabric is welded inside the frame. Reinforcement bars are inserted along the edges and fixed by spot welding.
- An alternative solution is to weld long hooks with a thickness of 3 mm, bend inward and attach a chain-link to them. After tightening the mesh, it is better to weld the ends of the hooks so that the mesh does not slip over time.
Finished frames are cleaned, coated with an anti-corrosion agent and painted in a suitable color.
With guide
A kind of tension. It is mounted in the same way, but 2-3 metal logs are welded between the posts or wooden logs are fixed.
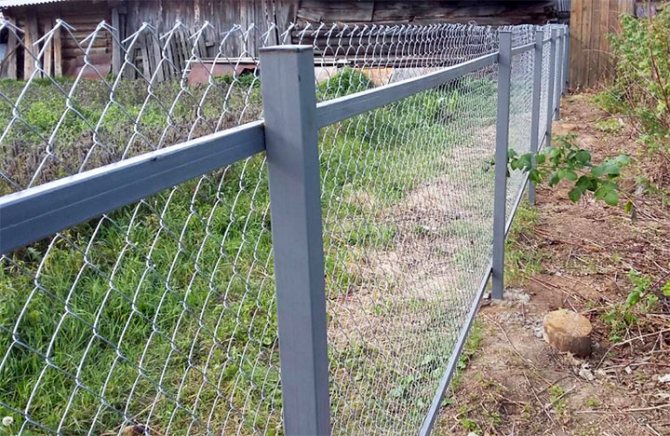
If you need to fix a large amount of mesh to install the fence, then the use of guide beams will be an excellent reinforcement of the structure.
On heaving soils, it is not worth concreting the pillars, it is better to install them below the freezing point of the soil, to muddle them up.
With metal bar
This is a tension-type fence, which is reinforced by pulling a strong wire through the mesh. Fasten it along the upper and lower row of the chain-link so that the canvas does not begin to sag over time.
The easiest way is to make a loop out of the wire, throw it over the post, tighten it, thread it through the cells to the next post and repeat the procedure.
You can weld plates with hooks to the supports and hook a metal bar to them. There is an option to buy special wire tensioners, but they will cost a lot, and when installing a budget structure from a chain-link, it is unprofitable.
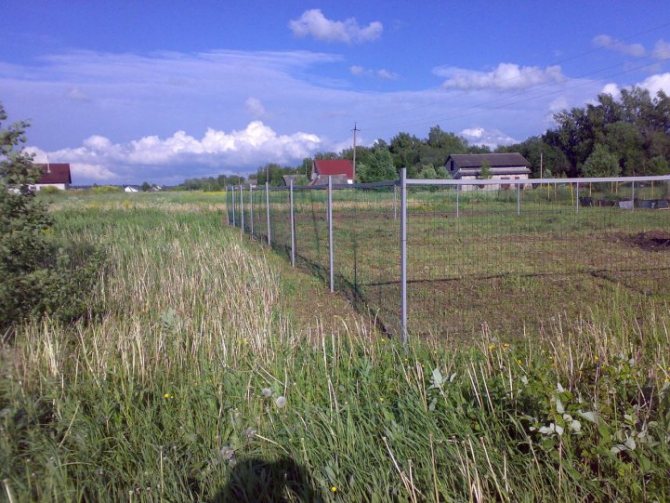
It is convenient to use a mesh fabric as a sectional material for a fence in summer cottages, when, in conditions of limited finances, it is necessary to outline the boundaries of the estate, while not shading the plants growing nearby. For another purpose, it is worth using a chain-link to create a temporary fence.
Necessary materials
The galvanized fence mesh is installed on the supports.
The latter can be iron, concrete or wood. In addition to the mesh itself, the following materials will be required:
- support pillars (steel pipes, concrete or wooden pillars are suitable);
- corners (when constructing a sectional fence). Designed for the construction of the frame of each section;
- wire. Stretches between supports to support the mesh;
- paint or other paints and varnishes for processing mesh in order to protect against corrosion.
A polymer mesh fence benefits from durability. This mesh does not rust and does not require additional processing. But, you need to be more careful with such a mesh.
Plastic can break from shock, including during the installation process. Polymer mesh is easier to install, because it is lightweight.
Step-by-step instructions for making a fence with your own hands
Area markings
We clean the place for the construction of the fence from debris, plants and other possible obstacles. We determine the points where the pillars will be located and begin to mark the territory. To do this, you need to hammer the pegs into the extreme places of the fence and pull a nylon cord between them.
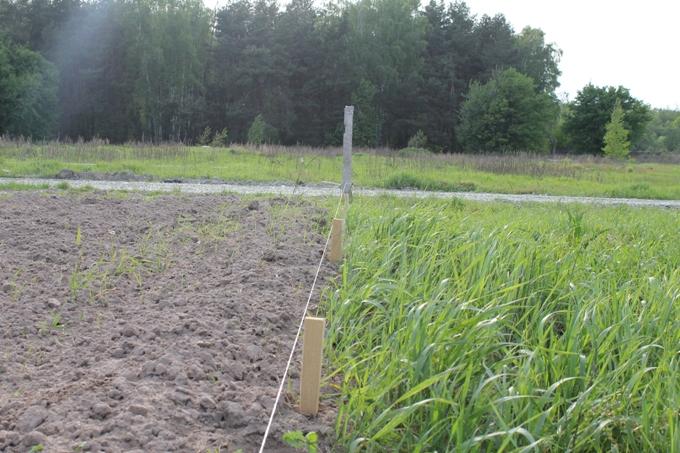
Pulling on the cord
You need to pull the cord so that it does not sag or dangle from the wind. Make sure that the taut thread does not catch on possible obstacles. Consider the cross-section of the support pillars, taking into account that they will be located inside the site, and the grid from the side of the street or neighboring territory.
The stretched nylon cord acts as a beacon not only during the marking of the area, but also throughout the entire construction site. It will provide linearity and control of the fence height around the entire perimeter. After that, we mark the places for the intermediate pillars, the distance between them should be within 2.5-3 m.
Installation of posts
After all the materials, tools have been prepared and the area is marked, they begin to install the pillars. According to pre-made marks, with the help of a shovel or a drill, pits are made with a depth of 80 to 120 cm. The softer the soil, the deeper the holes should be and vice versa.

Drilling holes with a drill
Since we will use metal pipes as pillars, before installation they need to be cleaned of rust and oil deposits, and then sanded with sandpaper. Using a welding machine, weld the hooks for attaching the mesh, clean the welding places with a grinder and prime the entire surface of the post with an anti-corrosion primer.
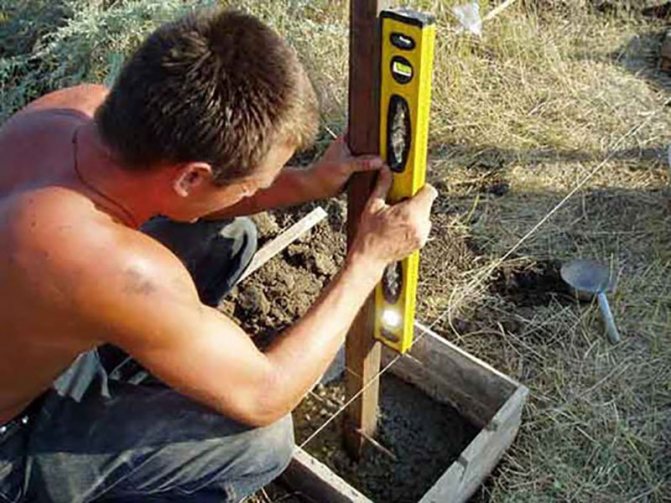
Aligning the Support Pillars with a Level
Next, we install the supports in the pits, level them and fasten them in this position with spacers. Make sure all posts are at the same height and in a straight line. If this is not the case, then by adjusting the depth and width of the holes, achieve the desired result. After that, you can safely pour concrete mortar into the pits. It is recommended to start installing the mesh no earlier than 48 hours after the concrete mixture has completely solidified.
Mesh installation
Attaching the net to prepared hooks
For installation, do not completely unwind the net; it will be much more convenient to attach a whole roll to the corner post in a vertical position and hook the edges of the net to the prepared hooks.
When attaching the blade, raise it above the ground by 10-15 cm. This is necessary in order to avoid entanglement of grass, branches and other debris in the net in the future.
Welding steel rods
Next, we unwind the roll, stretch the mesh well and attach it in the same way to the adjacent pillar. The work is best done with a partner: one can pull the canvas, and the other can fasten it with hooks. Follow this procedure around the entire perimeter of the fence. To prevent the mesh from sagging over time, pass a steel bar or reinforcement into the upper cells at a distance of 5–7 cm from the edge along the entire length of the fence and weld it to each post. Do the same from the bottom, just step back from the bottom edge of the net by 20 cm.
Sectional fence manufacturing
Mark the area and install the pillars in the same way as in the previous case, only instead of hooks, metal plates are welded onto the pillars, retreating from the upper and lower edges by 20 cm. To make a section, you need to measure the distance between adjacent supports and subtract 15–20 from it cm, so we know the width of the frame. The height will be the same as the width of the mesh minus 20 cm. Next, cut the workpieces from the corner of the required length and weld a rectangle from them. With the help of a grinder, they clean the welding places and grind the inner and outer sides of the frame with an emery cloth.
Making a frame for a mesh
After that, the roll is unwound and the required length of the mesh is cut off with a grinder (the distance between the supports is minus 15 cm). Further, along the entire perimeter of the cut sheet, reinforcement with a thickness of 5–7 mm is threaded into the extreme cells. The welded frame is placed on a flat surface with the inner side up and a prepared mesh with reinforcement is placed in it, then the upper rod is welded to the upper corner of the frame. Next, the lower side is pulled and the reinforcement is fixed to the corner by welding. The sides are installed in the same way.
Pulling the netting of the chain-link onto a metal frame
After that, the finished section is placed between the supports and attached to the previously prepared metal plates by welding.
Installation diagram of a fence from sections
When further installing the remaining sections, pay attention to the edges of the adjacent frames, they should be at the same level. For convenience, use a level or taut cord. After installation is complete, all frames must be primed and painted.
Installation of a chain-link mesh
The installation of the fence must begin with the preparation of the site. If the mesh is installed directly on the ground, the supports must be dug to a sufficient depth - at least 50 cm. You can also make a foundation. This option is usually used for flower beds. In vegetable gardens, the grid is usually placed without a foundation.
If wooden pillars are used as supports, they should first be treated with an antiseptic. Used engine oil can be used if available.
Metal poles should first be primed and then painted.
We recommend reading:
- Do-it-yourself gate for summer cottages: modern models and unusual options for using gates (110 photos)
Options for arranging the courtyard of a private house - the best design ideas, preparation options and tips for creating a beautiful home plot (90 photos)
A plot of 6 acres - examples of design, effective development and examples of landscape design (135 photos)
If there is rust, be sure to remove it. The holes in the metal posts must be closed at the top to prevent the metal from rotting due to water ingress.
The mesh is usually screwed to the supports with wire. During installation, ensure the maximum tension of the mesh.After a while, the mesh will sag in any case, so you need to pull it as tightly as possible.
Support pillars can additionally be concreted. But, in the northern regions, concreting is not recommended, since concrete can be squeezed out due to temperature fluctuations. If there is no possibility of concreting, the holes for the supports should be filled with crushed stone.

Installation of fence posts
Installation of the support post
For both sectional and tension fence, marking, preparation and installation of pillars is carried out using the same technology, but only in the first case, the pillars must be stronger. This is due to the additional load from the metal sections; if the supports are too thin, the fence is bound to tilt.
To work you will need:
- roulette;
- wooden pegs;
- a coil of thin rope;
- building level;
- hand drill;
- crushed stone and sand;
- concrete solution;
- scrap;
- shaped pipes 60x40 mm;
- Bulgarian;
- primer.
Step 1. Installing corner posts
The area allotted for the fence is cleared of vegetation, if necessary, leveled, the location of the extreme pillars is determined. Experienced builders recommend making corner posts from pipes of a larger section than intermediate ones, and digging them in deeper. For example, if a 40x40 mm profile pipe is taken for intermediate supports, then for corner supports it is better to take 60x40 mm and 15-20 cm longer.
Proceeding to the installation of pillars:
- pipes are cleaned of scale and oil stains, primed, laid out to dry;
- with the help of a hand drill, holes are made in the ground with a depth of 1.5 m; Drilling
- a layer of sand is poured onto the bottom, tamped well;
- profile pipes are inserted into the pits;
- put them on a level and strengthen them with bars or bricks;
- fill the space in the pits with crushed stone mixed with soil to 2/3 of the depth, ram;
Filling the hole with rubble - pour the remaining space with concrete;
Supports concreting - once again check the vertical of the pillars, level them if necessary.
When the solution hardens a little, you can remove the spacers and start marking under the intermediate posts.
Step 2. Markup
A rope is pulled tightly between the corner supports at a height of 15 cm from the ground - this will be the fence line. The line must be divided into equal segments corresponding to the width of the span. The optimal span width for a chain-link fence is 2-2.5 m; if you increase it, the mesh will sag. They retreat from the extreme pillar to the desired distance and drive a peg into the ground, and so on to the opposite corner. All pegs should be in contact with the taut rope and be equidistant from each other.
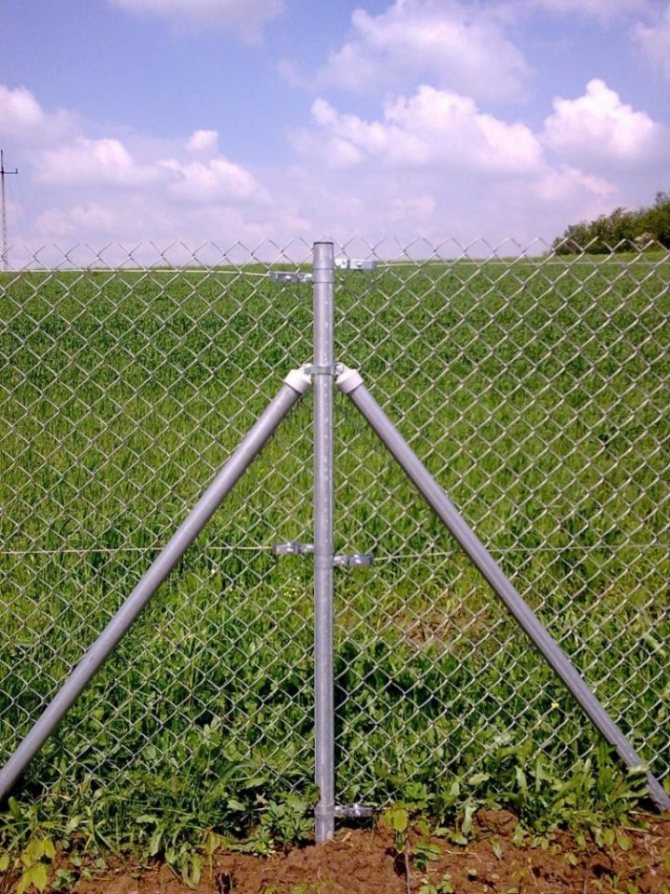
Video - A new way to install support pillars
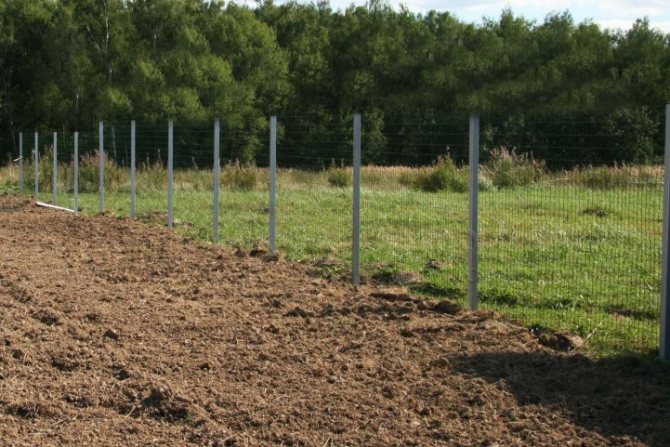
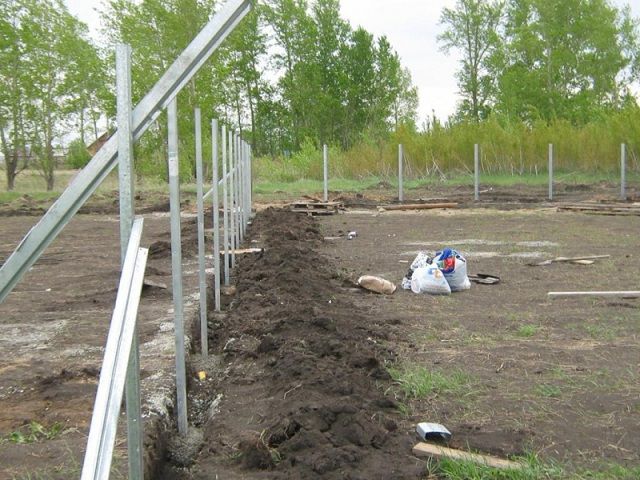
Step 3. Installation of intermediate supports

Installation of intermediate pillars
In place of the pegs, holes are drilled for the posts and the bottom is covered with sand. To make it more convenient to control the height of the supports, another rope is pulled along the upper edge of the corner posts. Now pipes are inserted into the pits, leveled in height and vertical, sprinkled with rubble and soil and tamped tightly with crowbar. Concrete is poured on top and the surface is leveled.

Concreting
If it is planned to install a tension fence, and the soil on the site is dense enough, the intermediate supports can simply be driven into the ground and not concreted. For this, holes are drilled half the required depth, pipes are inserted there and hammered with a sledgehammer. To protect the upper edge of the posts from deformation, take a larger piece of pipe, weld a steel plate on one side and put it on top of the post. After driving the supports, the pits are covered with crushed stone and sand, spilled with water for better compaction and thoroughly rammed.
Installation of intermediate pillars
Metal fence posts
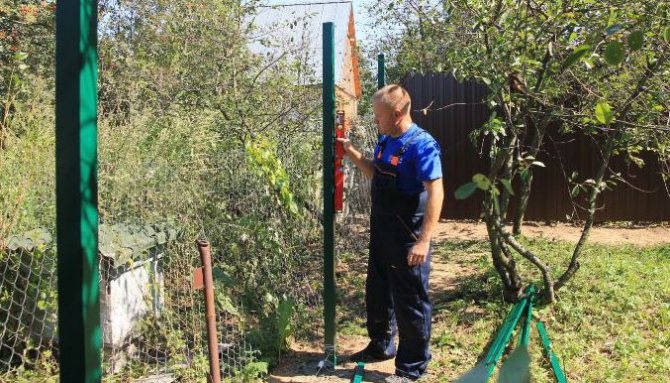
Step 4. Welding hooks
Checking the evenness of the pillars
After about a week, when the concrete has hardened sufficiently, you can continue with the installation. You can fasten the net to the posts with wire or clamps, but it is more convenient to attach it to hooks.There are profile pipes with hooks already welded on sale, but if you have a welding machine, it is cheaper to make them yourself. For this, pieces of steel rod, screws, nails, even thick wire are suitable - everything that can be welded to the pipe and bent. On a pole 2 m high, it is enough to make 3 hooks: at a distance of 15 cm from the ground, 10 cm from the top of the pipe and in the middle.
Video - Do-it-yourself fence from a chain-link
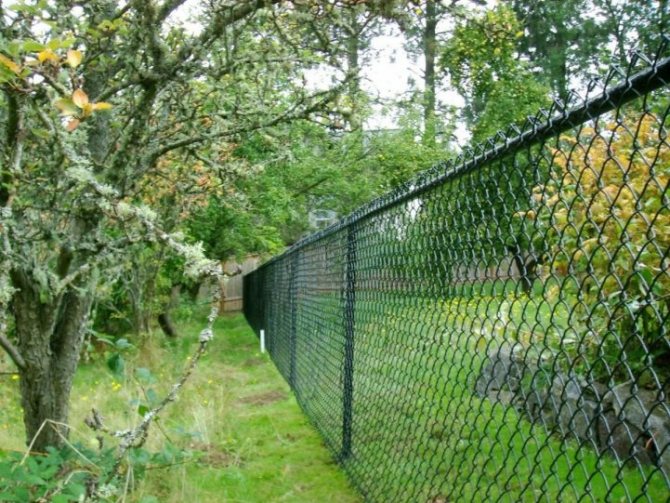
Do-it-yourself photo of fences from a chain-link mesh


Read here Designing a small plot: 135 photos and tips for choosing the best simple and stylish design options
Did you like the article?
0
Fencing cost
The cost of the fence will depend on the amount and type of raw materials used, the prices for them we indicated above. Let's calculate a 10-meter structure with a height of 1.5 meters, provided that it is made of metal supports and stainless wire. According to the initial data, such a fence requires 5 supports and a roll of mesh, as well as 30 meters of wire.
According to the previously cited data, a running meter of such material costs 75 rubles (for a product, 750 rubles), each column for 160 rubles or 900 rubles for the total amount and another 200 rubles for the wire. As a result, the price of 10 meters of the fence is 1,850 rubles.
As we can see, everyone, even an inexperienced builder, can make a cheap chain-link fence. See this video for more details.