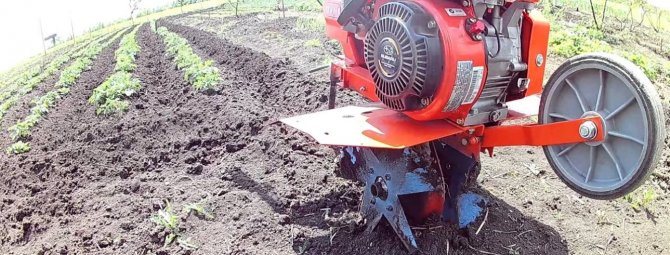
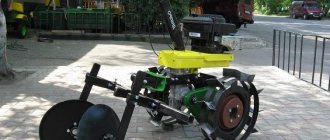
Undoubtedly, the most demanded food product is potatoes. Without this root vegetable, it is impossible to imagine the diet of a modern person. Growing potatoes without mechanical aids is a difficult process. For this reason, many farmers use motoblocks for hilling on their plots.
The hillers themselves for a walk-behind tractor can be different: single-row, double-row, disc. Each of these types has its own nuances in operation. In order to know how to properly huddle potatoes using mechanical devices, you need to familiarize yourself with the intricacies of the operation of each type.

Site preparation for planting
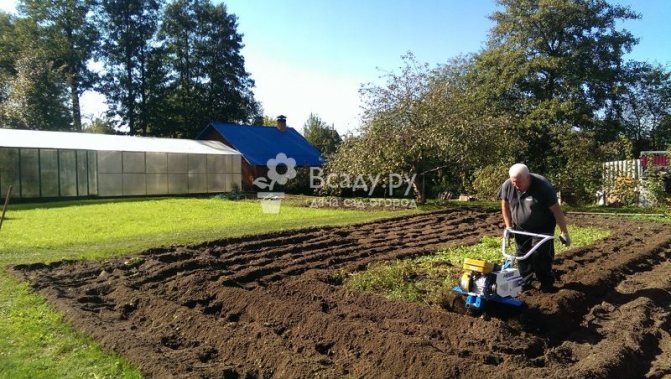
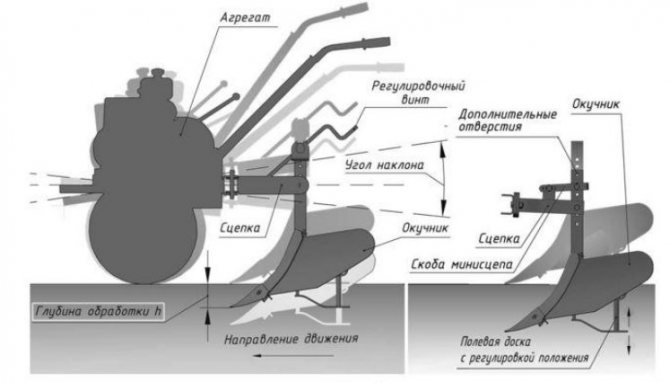
The use of a walk-behind tractor at the preparatory stage will save you from time-consuming manual work. To dig a site, a plow with cutters is installed on the unit. It is very important to correctly adjust the settings before starting work:
- the plowing depth should be equal to the length of the shovel bayonet (10–12 cm);
- passage width - no more than 50 - 60 cm;
- when processing solid soil, the depth of the furrow is recommended to be increased to 20-25 cm.
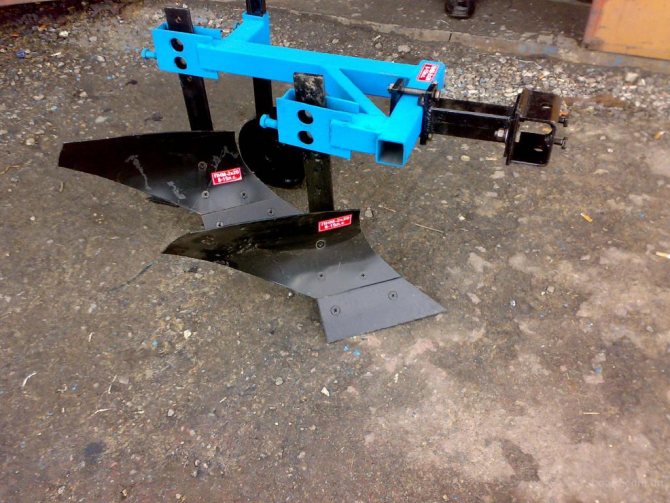

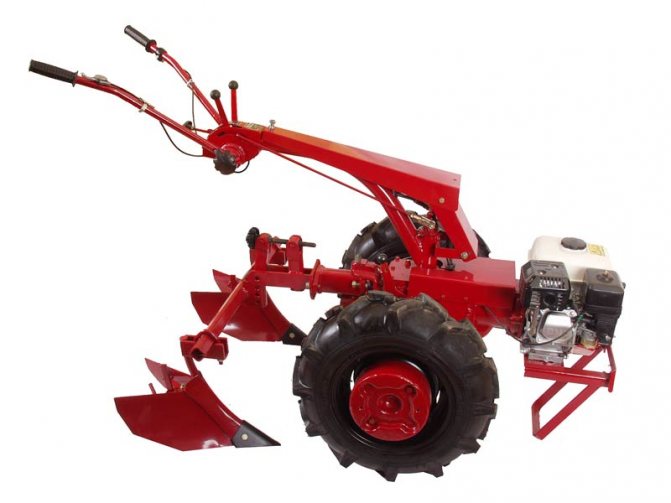
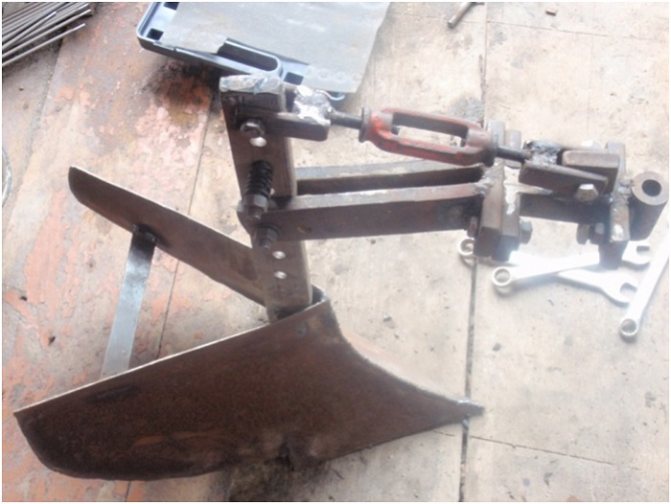
A two-body plow for a walk-behind tractor with cutters is most often used for plowing
Basic rules for soil cultivation
- It is necessary to ensure that one of the cutters is in the already plowed furrow - this improves the quality of work.
- To reduce the number of turns, it is recommended to plow the area along its long side.
- In places where the walk-behind tractor is turned, the ground must be leveled with a rake.
In order to prevent over time the displacement of fertile soil layers outside the site, it is recommended to change the direction of movement every year when plowing the land.
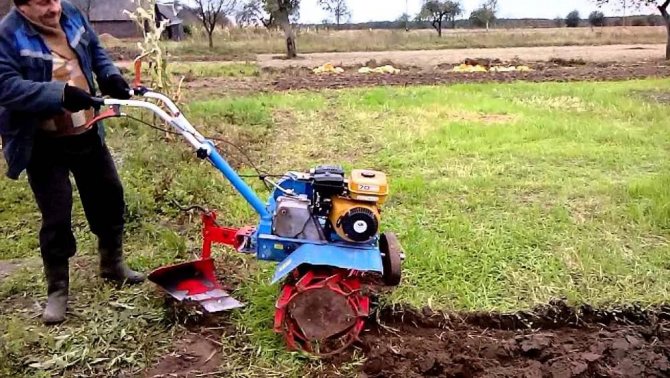

With the help of a plow with cutters installed on a walk-behind tractor, you can even dig up virgin soil
Some models of walk-behind tractors (for example, MTZ brands) make it possible to perform circular plowing of the soil. The movement is carried out in a spiral, starting from the center of the field. Convenience lies in the fact that the operator can walk on the side of the walk-behind tractor on unplowed land.
Lister, fixed and adjustable angle
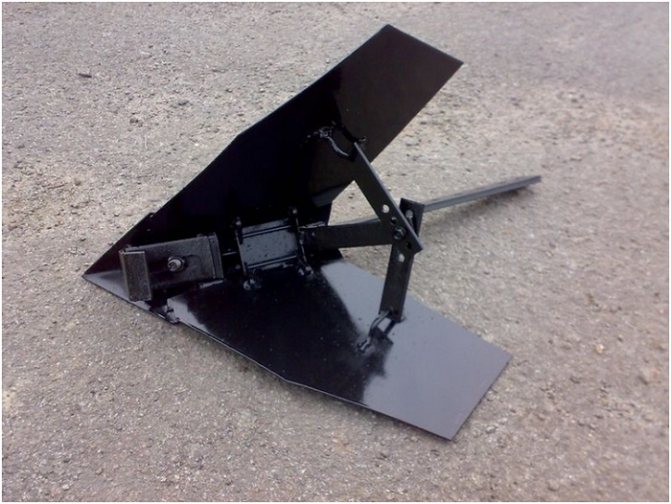
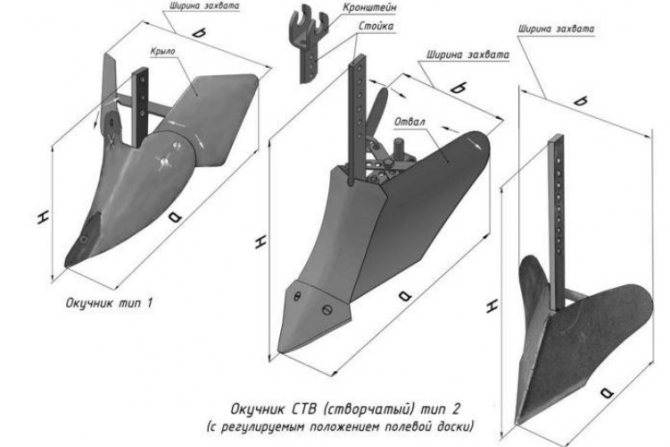
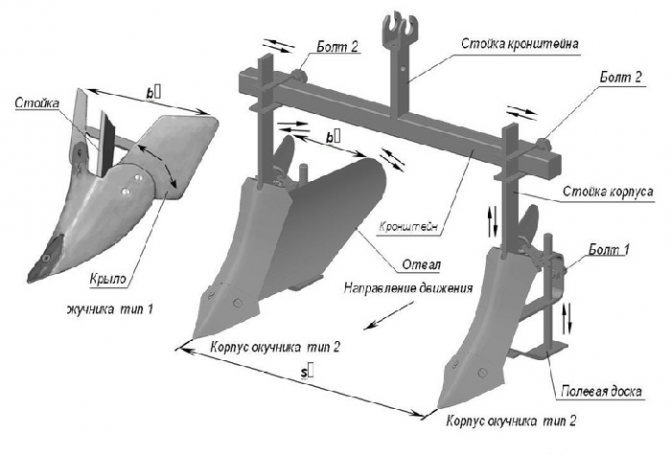
The easiest way is to make a fixed lister hiller. These are 2 bent sheets of metal connected and fixed to each other. Below are step-by-step instructions for working and drawings of this hiller.
- Weld the base from a sheet of metal with a thickness of more than 3 mm.
- To make a bracket from steel 4 mm thick, after forming it is recommended to harden the part.
- Make a spring from steel 5 mm thick - first "release", and then harden.
- Make a rack, steel thickness - from 8 mm.
- Wings - steel thickness approx. 2 mm. The desired bend can be given using any template.
- Weld in 2 passes, on each side of the joint.
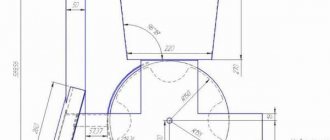
Be guided by the drawings shown: they contain all the information about the parts.
The lister hiller, in which the angle can be adjusted, can be made according to the same scheme as indicated above, you just need to change the attachments of the wings and the bar. The wings must be hinged to the base. The rods needed to adjust the angle are located at the back of the hiller.
Methods for planting potatoes with a walk-behind tractor
When the site is prepared, you can proceed directly to planting potatoes.With the help of a walk-behind tractor, you can plant a crop in different ways:
- Semi-automated method. A hiller is installed on the walk-behind tractor, which allows you to form and then sprinkle the furrow with a layer of soil. The seed potatoes are stacked by hand.
- Automated method. All processes are carried out by a walk-behind tractor using a special mounted potato planter.
- Planting potatoes with a walk-behind tractor under the plow.
The choice of the method depends on the equipment supplied with the walk-behind tractor and the area of the treated area. To understand the difference, let's take a closer look at the features of each of these methods.
Planting potatoes with a walk-behind tractor with a hiller
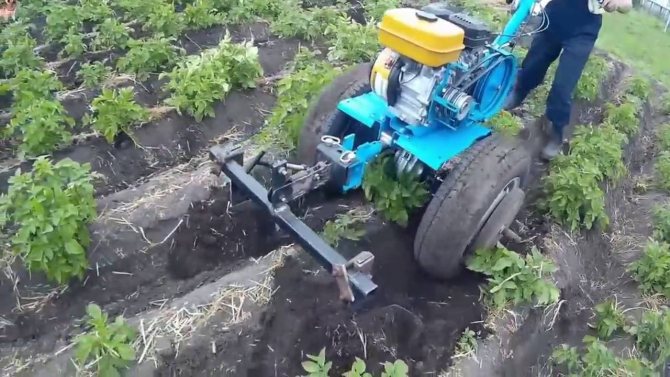
If potatoes are planted in a small area, then a hiller is most often used, which is attached to a walk-behind tractor. The purpose of this device is to raise the ground by creating a furrow and forming ridges on either side of the walkway.
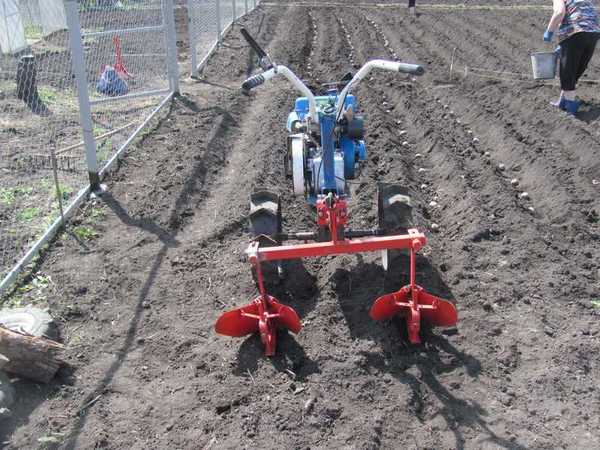

With the help of a walk-behind tractor, furrows are formed for planting potatoes
There are several types of hillers:
- normal, with a fixed width of capture (lister);
- normal, with adjustable width of capture;
- disk.
The first two are very similar in appearance and resemble a knife of two curved wings joined together at the front and spread apart at the back. The difference lies in their functional features.
Fixed width hiller
This hiller is rather primitive and does not allow adjusting the row spacing. It is not very suitable for planting potatoes, since the working grip of such a device is only 20-30 cm. It is more appropriate to use it for planting vegetables that do not require a significant distance between the rows.
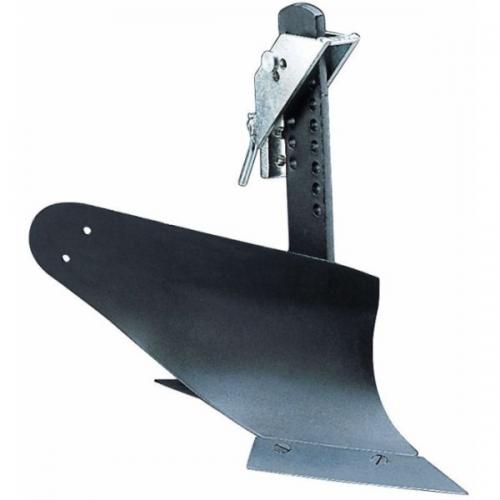

The non-adjustable hiller is more suitable for marking beds with narrow row spacings
Hiller with adjustable working width
The second version of the hiller is the most popular among gardeners. The design of this attachment allows you to adjust the working width of the soil. Therefore, it is possible to set the desired row spacing. However, an adjustable hiller also has a number of disadvantages:
- To use it, you need a more powerful and heavier walk-behind tractor (with a capacity of at least 4 liters. From. And weighing more than 30 kg).
- The performance of this equipment is slightly lower, since when working with it, part of the soil from the ridges can crumble back into the furrow.
- With an increase in the distance between the dumps, the load on the walk-behind tractor increases and the fuel consumption increases.
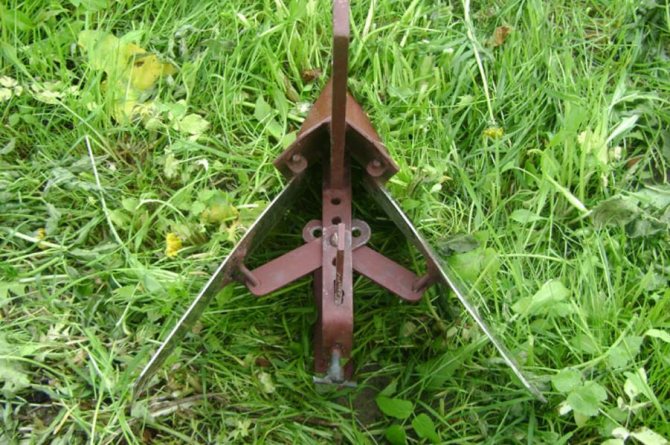

Adjustment of the furrow width of the hiller allows you to change the row spacing
Disc hiller
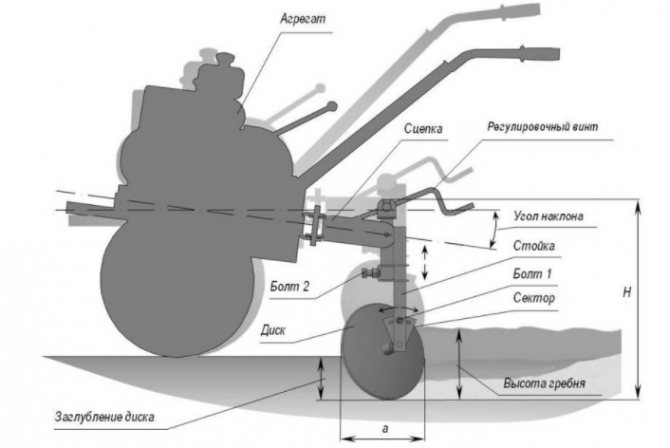
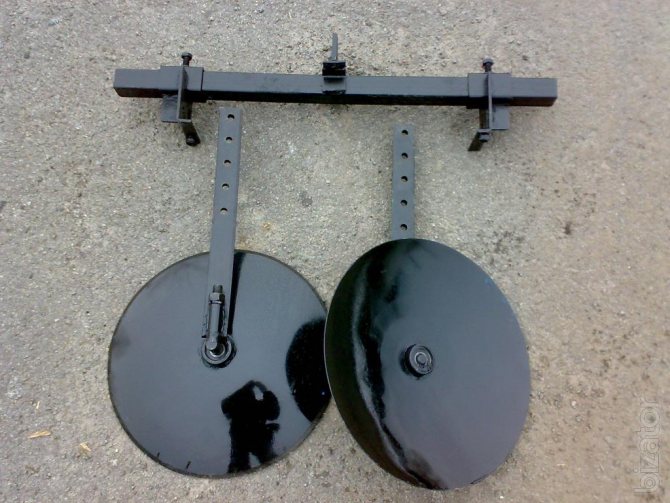
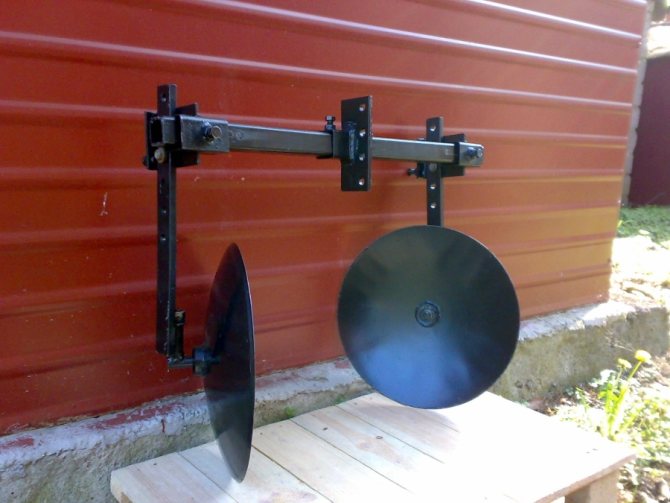
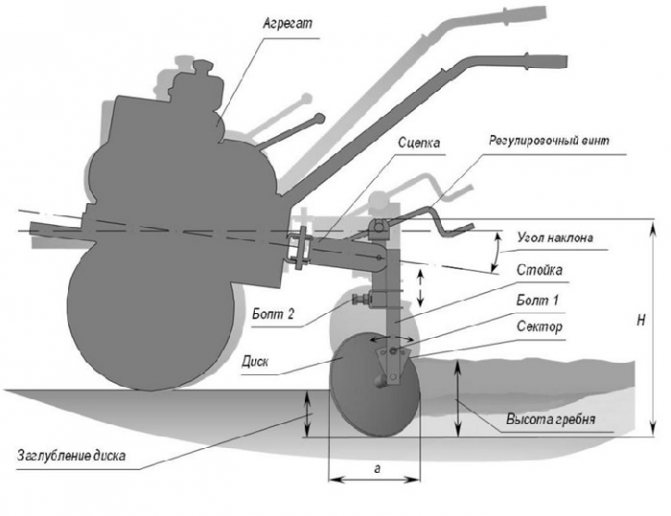
This device is more productive than the previous ones, but also several times higher than their cost. Disk The hiller is a platform with two discs attached to it, which rotate when moving. There is a possibility of adjusting the space between the discs and their angle of inclination. Among the advantages of such a hiller, the following should be highlighted:
- is less energy consuming and more convenient to work with;
- creates smoother and higher ridges;
- the discs rotate while driving, crushing and loosening the soil at the same time.
It is recommended to use a disc hiller with units that have at least two gears for moving forward. Driving at the lowest speed ensures optimal use of the power of the walk-behind tractor.
Experienced farmers consider a disc hiller for a walk-behind tractor to be the most effective.
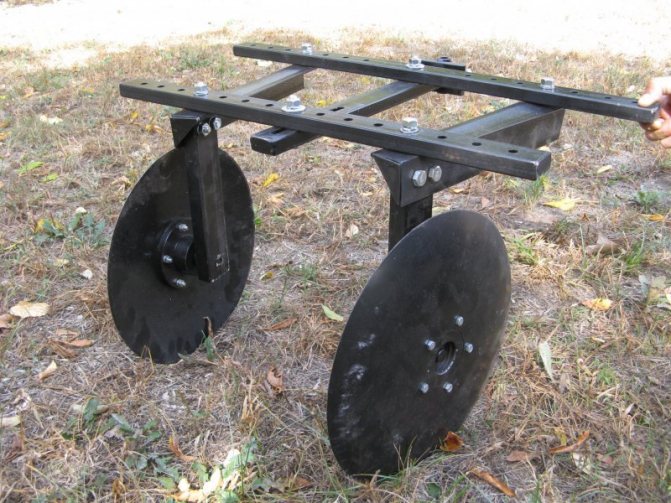

You can improve the performance of the hiller by setting the angle of rotation and the width between the discs
Regardless of the type of hiller, potatoes are planted as follows:
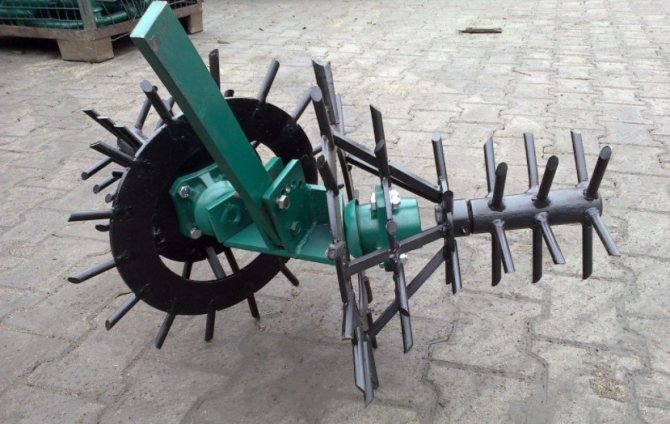
- An attachment is attached to the walk-behind tractor and the minimum width of the soil is adjusted, the unit is equipped with lug wheels.
- With the help of a walk-behind tractor, furrows are formed.
- Seed potatoes are manually placed in the rows obtained at the same distance.
- The wheels of the walk-behind tractor are replaced with ordinary rubber ones, the width of the hiller's wings is changed to the maximum.
- Furrows with potatoes laid in them are covered with earth using a walk-behind tractor.
Thus, when planting using a hiller, you need to make at least two passes with a walk-behind tractor along the site. To lay the planting material in the ground, you will need an assistant.
Video: planting potatoes with a walk-behind tractor with conventional and disc hillers
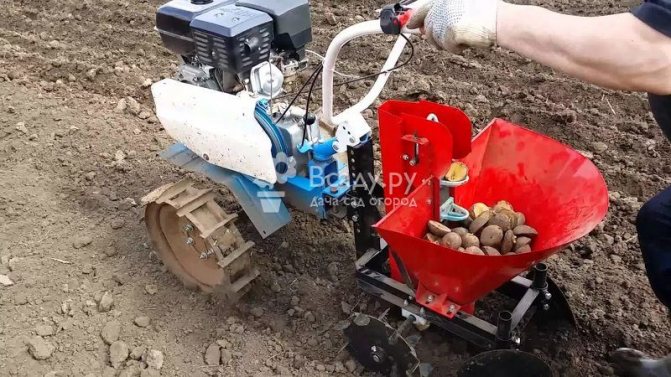
Planting potatoes with a walk-behind tractor with a mounted potato planter
If the planting area is significant, then a mounted potato planter can be used. In its standard form, it consists of the following elements:
- a groove that forms a groove in the ground;
- a bunker in which potatoes are laid for planting;
- mechanism for laying tubers;
- disc hiller for subsequent backfilling of the furrow.
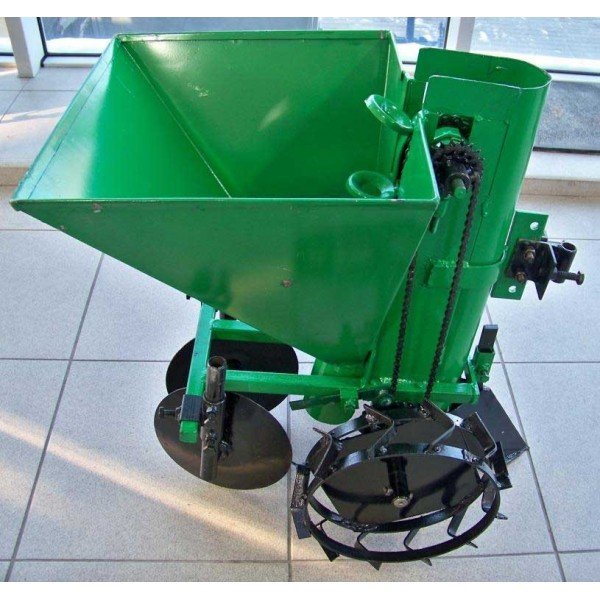

The parameters of a mounted potato planter can be different, they are selected for a specific model of a walk-behind tractor
The potato planter allows you to complete the entire potato planting process in just one pass. This results in significant savings in time, fuel and effort. Before using this device, it is necessary to adjust the parameters:
- the depth of the furrow being formed;
- row spacing;
- set the settings for the tuber stacking mechanism.
A potato planter is a rather expensive device and, as a rule, an ordinary summer resident simply cannot afford it. It is used most often in farms.
Video: testing a walk-behind tractor with a potato planter
Easy planting under the plow
If it is not possible to purchase the described devices, you can use the so-called summer cottage option for planting potatoes - a walk-behind tractor under a plow. This method is as follows:
- Grousers and a plow with cutters are installed on the walk-behind tractor.
- A furrow is formed, where the potatoes are immediately laid.
- When turning, the unit forms a new ridge, at the same time filling the previous one with earth.
In this case, the operator of the walk-behind tractor also needs the help of a second person who will lay the planting material into the recesses. In addition, the method is more time consuming.
Video: planting potatoes under a plow
Disc hiller
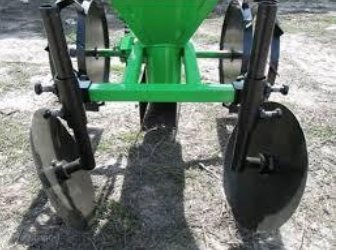

The most popular type of equipment among users. It has become widespread for its simplicity of design and operation, does not require special efforts during operation, it is convenient to set up and repair.
It also has two subspecies:
- without the possibility of adjustment - designed for light motoblocks with low power. The grip width is usually about 30 cm;
- with a changeable working width - a universal view, since the width can be increased up to 70 cm. With its help you can huddle any crops - from beans to potatoes.
Potato planting technology using a walk-behind tractor
The planting scheme largely depends on the model of the walk-behind tractor and the variety of the potato itself. It is recommended to adhere to the following criteria:
- row spacing - from 55 to 65 cm;
- planting depth - from 10 to 12 cm;
- the interval between tubers is from 25 to 35 cm.
It is important to ensure that the furrows are even and the row spacing is the same. This will facilitate subsequent work on the site, especially if the walk-behind tractor is also used in the future.
For convenience, you can mark the area with ropes stretched at the required distance, or use a homemade marker for marking.
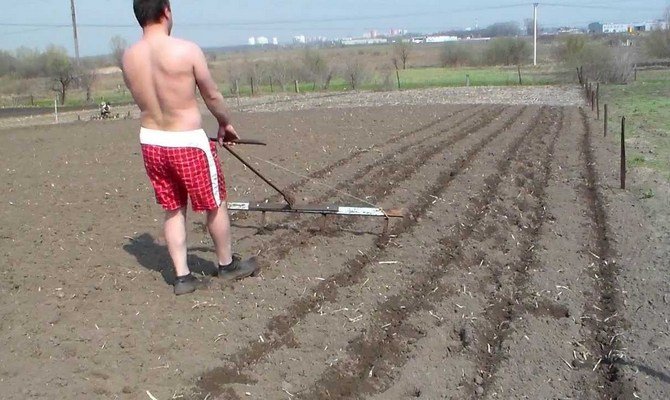

Using a marker, you can mark the rows for planting potatoes
It is advisable that the soil is slightly damp before planting. Processing dry and hard soil will require additional physical effort and will lead to excessive fuel consumption, and the wheels of the walk-behind tractor will simply get stuck in the mud.
Let's consider the features of each of them.
They have a fixed width of soil execution and are used on very light motor-cultivators with a power of up to 4 horsepower. They are able to cultivate beds measuring 25-30 centimeters in width, equipped with two side wings and a thin stand. The stand protects the equipment from overloading and mechanical damage.
This implement can only be used on dry soils, as the adhering soil will interfere with the movement of the moving parts. Lister attachments are available with adjustable soil working width. They are installed on motor vehicles of greater power - from 4 horsepower. Similar aggregates can be used fearlessly on wet ground.
Propeller
The principle of operation lies in the activity of the propeller parts. Under their action, first of all, the soil is dug up and weeds are removed, and after that the beds are loosened. These modifications are mainly practiced for two-speed front-wheel drive cultivators. This is due to the fact that at the second speed the power increases to 180 rpm.
Double (2-row)
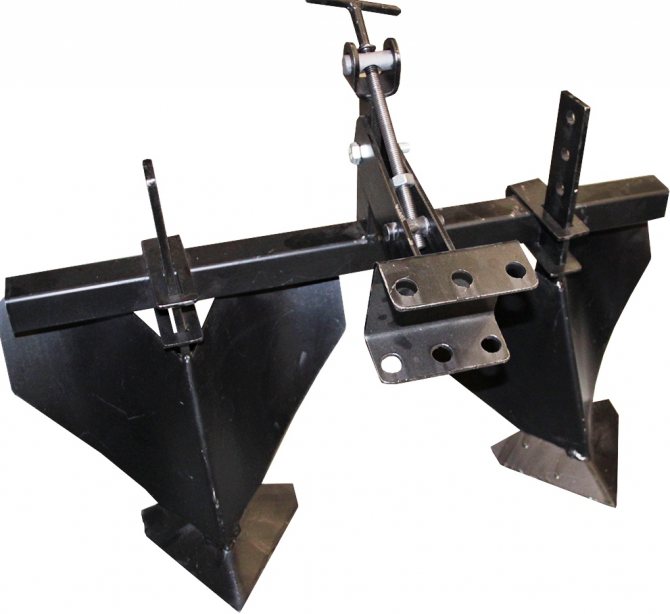
Carries out cutting of two furrows before planting crops, and is also used for hilling and loosening the soil. Includes a frame on which 2 hillers are fixed. When cultivating the land, it significantly saves time, since it has two working elements. It is mounted on a walk-behind tractor by means of a hitch. Due to the fact that such a device requires great resistance to operate, it is used in conjunction with lugs.
Rotary active
Instead of wheels, this tool is equipped with rotors with helical teeth. Demonstrates high productivity when creating, loosening and hilling potatoes. Suitable for use with 3-speed units (two forward and one reverse). In the first gear, the tool spills the landings, and in the second gear it also throws the soil out of the space between the rows of landings.
Single row
The most common type. Applies to operation with light soil types. Ditching is carried out after the completion of the preparatory loosening of the soil by means of a cultivator.
Mechanized maintenance of potato beds
For better growth of potatoes, it is necessary to huddle it, that is, sprinkle the stems with loose earth. During the season, this procedure is performed 2-3 times:
- The first hilling is carried out when the height of the bush is 15 cm, that is, in the middle - end of May. The height of the comb should not exceed 10 cm.
- The second time the potatoes are hilled when the plant height reaches 20–25 cm, that is, two weeks after the first hilling.
- After 10-14 days, you can repeat the procedure again. Now try to fill the soil as high as possible.
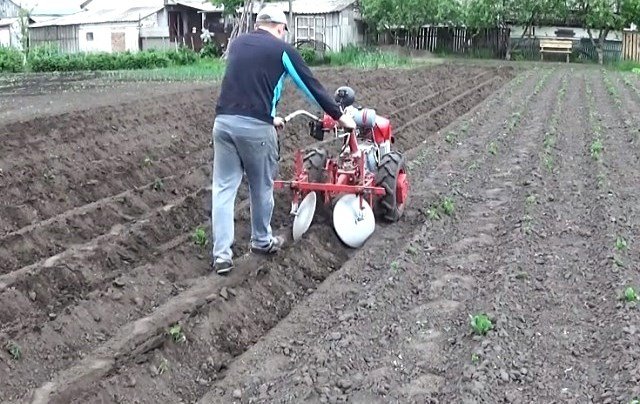

It is most convenient to sprinkle potatoes with a walk-behind tractor with a disc hiller
Experienced gardeners recommend using the walk-behind tractor only for the first hilling. There is a risk of damage to the tubers when re-processing the bushes in a mechanized way.
Hilling potatoes with a walk-behind tractor significantly reduces the amount of time spent on this type of work. They do it as follows:
- A hiller is installed on the walk-behind tractor, the angle of attack (rotation) of the device is adjusted and the depth of its immersion is adjusted.
- Rubber wheels are replaced with lugs.
- The unit is installed exactly in the center of the row spacing.
- The movement is carried out at the lowest speed of the walk-behind tractor.
Video: hilling potatoes with a walk-behind tractor
Creation of a cultivating section
If you could not find / buy / remove a cultivator, you can make it yourself.
Building a basic cultivator is pretty straightforward. In fact, this is the same plow.Two plates are attached near the base, which form an angle directed forward (towards the wheel). During the movement of the hiller, the plates will divide the soil into 2 parts and spud the potato rows with the raised soil.
However, you should adhere to the following requirements for this part:
- the total width of the blades should be 2/3 of the row spacing of potato bushes;
- the cultivator should go 10-15 cm under the ground;
- the angle of the blades should be close to 90 degrees - this way they will perfectly pick up the soil.
After carrying out the full range of work, you should get a full-fledged manual hiller, ideally doing its job in the course of growing potatoes.
To get acquainted with the device in more detail and understand how to properly make such a homemade hiller, you can watch the following video:
Motoblock for harvesting potatoes
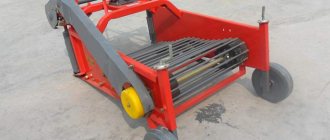
In August, during the harvest, the walk-behind tractor is also an excellent helper. The hiller is not suitable for digging out tubers; special attachments are required here - a potato digger. In appearance, the device resembles an ordinary hiller, but instead of a solid surface, a lattice of rods is welded into it.
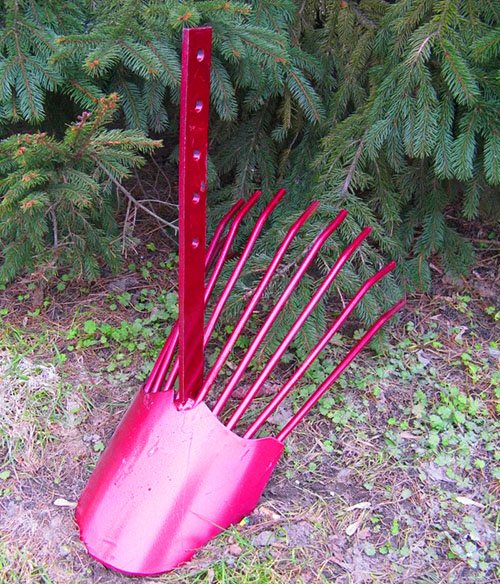

The potato digger is similar in appearance to a hiller, but in it most of the surface is replaced by a lattice of rods
Going deeper into the ground, the digger raises the soil along with the tubers. In this case, the soil wakes up through the rods, and the potatoes remain on the surface and then harvested by hand. In one pass, the digger allows you to collect about 90% of the crop. Therefore, many gardeners make another pass to collect the potatoes that remain in the ground.
When harvesting with a potato digger, special attention should be paid to the depth of its immersion. The device should be lowered into the ground slightly below the level of the tubers. And in order to protect the potatoes from damage by the wheels of the walk-behind tractor, the tubers should be dug through the row.
It is better to harvest potatoes in clear dry weather, then the tubers will remain dry and clean.
How to make a tool with your own hands
To create a hiller for a walk-behind tractor with your own hands, you must follow clear rules and it is advisable to develop or apply ready-made drawings. This will allow you to correctly and quickly mount all the elements, so as not to correct the work in the future. On your own, you can make modifications of the lister (traditional) or disk type. To carry out the work, the following tools and accessories may be required:
- electric arc welding unit;
- an electric drill with a set of strong drills of various diameters;
- grinder and a number of discs and attachments in a set;
- emery machine;
- gas-burner;
- workbench with a vice;
- various files;
- fasteners (rivets, nuts, bolts).
After the diagram has been drawn and the necessary details have been prepared, they begin to assemble a homemade manual hiller.
First of all, attention is paid to the rack. It is made with a fold, the angle of which is 15 degrees. The distance should be 40 cm from the end of the pipe. Steel plates are welded to the finished rack, this will be the tip of the hiller.
The front and rear rods are made from pipes. The forks of each must be the same width. On the front link, the length of the fork handles is made about 55-60 cm, this is the optimal size for the average height of a person who will work the beds.
Some gardeners equip the front traction with a belt that they put on one shoulder to relieve the hands.
Read next: How to make a house for a ferret with your own hands drawings
Duplex plow
To make a double-plow plow, you will need 2 mm thick plates each. These plates are shaped into a semicircle. The prepared plates are welded to the rack, making the seam as even as possible. The plates must be sanded with a grinder.
Undercut knife
After welding the plates, a knife should be cut out of the sheet. The shape of the finished knife should resemble an arrowhead. The knife sharpens well at an angle of 45 degrees. It is sharpening at an angle of 45 degrees that guarantees a long service life.
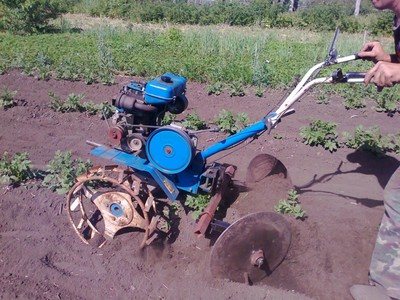

The next step is to weld the tip onto the bottom of the post. The final stage is grinding the seams.
Devices for hilling from improvised means
It should be noted that a homemade hiller can be made without investing in the purchase of iron. This will make it possible to reduce the cost of the tool to a minimum. As a starting material, it is acceptable to use an iron product of a suitable size. For example, an unnecessary lid from an old saucepan.
The main thing, using a similar approach to business, is to remember about the drawings and the required diameter of the disc. It can be at least 400 millimeters. This is due to the nuances of soil cultivation, taking into account the area of the potato roots, planting depth and ground clearance. Basically, the maximum planting depth is 60-80 millimeters, the length of the roots is up to 200 millimeters. The cover is sharpened from all edges, slightly transformed by bending and mounted on a walk-behind tractor.

